|
Click on any image to see a larger version.
With all of the methods, jigs, machines, discussions, and gadgets associated with sharpening, it can be confusing to determine where to
start. I believe one may mistakenly interpret the subject more as an industry than a skill - a set of products one must own to achieve
sharpness. If you are reading this article, I can assume you have come to the understanding that sharp tools are a necessity rather than a
luxury. As with anything, there are myriad debates regarding which method is "best" and how-to videos galore, usually reaching a crescendo
of someone shaving their arm with a chisel to demonstrate the sharpness of their edge measured in varying degrees of "scariness." While I
must admit to testing an edge or two on my arm, I always recall what one of my mentors and teachers - Chris Pye stated regarding
"hair-popping edges." He said - "Well, I'm not carving hair, am I?"
 Sharpening is a skill that is obtained by practice and repetition, utilizing the understanding of a few basic principles. Once you
understand these concepts, and know what you are after, you will realize that it matters little what path you take to get there. The simple
fact remains, that if you are going to work wood - joinery, carpentry, carving, or whatever, you must learn to sharpen your tools.
Sharpening is a skill that is obtained by practice and repetition, utilizing the understanding of a few basic principles. Once you
understand these concepts, and know what you are after, you will realize that it matters little what path you take to get there. The simple
fact remains, that if you are going to work wood - joinery, carpentry, carving, or whatever, you must learn to sharpen your tools.
In terms of learning to sharpen, whether you use gouges, chisels, or both, I would recommend beginning with a bench chisel. The end result
is easier to achieve, and the concept is the same, the skills transferrable. You are laying a solid foundation here, and you can move to
other structures once the base is complete.
Whether you are sharpening a bench chisel or a leaf spring, the point is to use abrasives to remove metal until you arrive at a keen edge.
So what is an edge? An edge is where two surfaces meet. Essentially these surfaces run parallel to one another until you make them meet, by
removing metal from one or both sides to arrange the connection. It is more about knowing how to read the various stages of the edge on its
way to becoming sharp, and then knowing once you've gotten there.
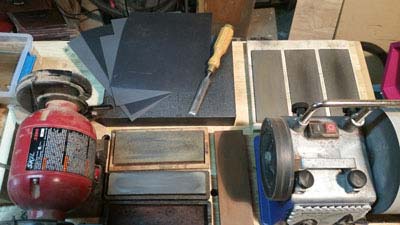
So what is an abrasive? An abrasive is anything that removes metal. This can be a stone, sandpaper, grinding wheel, your driveway, even an
old purse impregnated with honing compound. Abrasives remove metal more or less quickly depending on their grit. The coarser an abrasive,
the faster it removes metal, the finer the abrasive, the slower it removes metal until you get to a very fine abrasive that is doing more
polishing than it is shaping. Similarly, the faster a grinding wheel moves, the more quickly it removes metal and generates heat. The
slower, well... you get the point.
"BUT WHICH METHOD DO I USE? WHICH ONE IS BEST?"
Each method, each material, has its strengths and weaknesses. The objective of this article is to demonstrate different methods for
different stages of completely recommissioning a chisel that is in poor shape. The following scenario aims to demonstrate every aspect of
sharpening a bench chisel. Keep in mind that dayto- day "sharpening" is more about maintaining an edge, or "honing." It is important to
differentiate whether to "sharpen" - or shape and edge, or to simply hone an established edge.
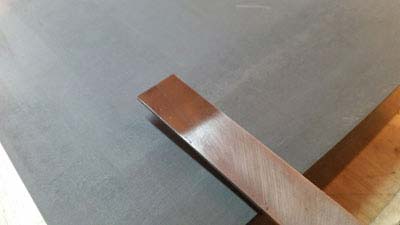
Step 1 - Evaluate
 Here is a well used second hand chisel. This is a fairly common example. Multiple bevels may be observed indicated by the horizontal strata
running parallel to the edge. This is caused by multiple attempts at slightly different angles. Based on the grind marks, it is likely that
a belt sander or bench grinder was used. The previous owner also had established a slight bevel on the back side. This is actually fairly
manageable in terms of sharpening. To demonstrate the entire sharpening process, the chisel will be intentionally damaged.
Here is a well used second hand chisel. This is a fairly common example. Multiple bevels may be observed indicated by the horizontal strata
running parallel to the edge. This is caused by multiple attempts at slightly different angles. Based on the grind marks, it is likely that
a belt sander or bench grinder was used. The previous owner also had established a slight bevel on the back side. This is actually fairly
manageable in terms of sharpening. To demonstrate the entire sharpening process, the chisel will be intentionally damaged.
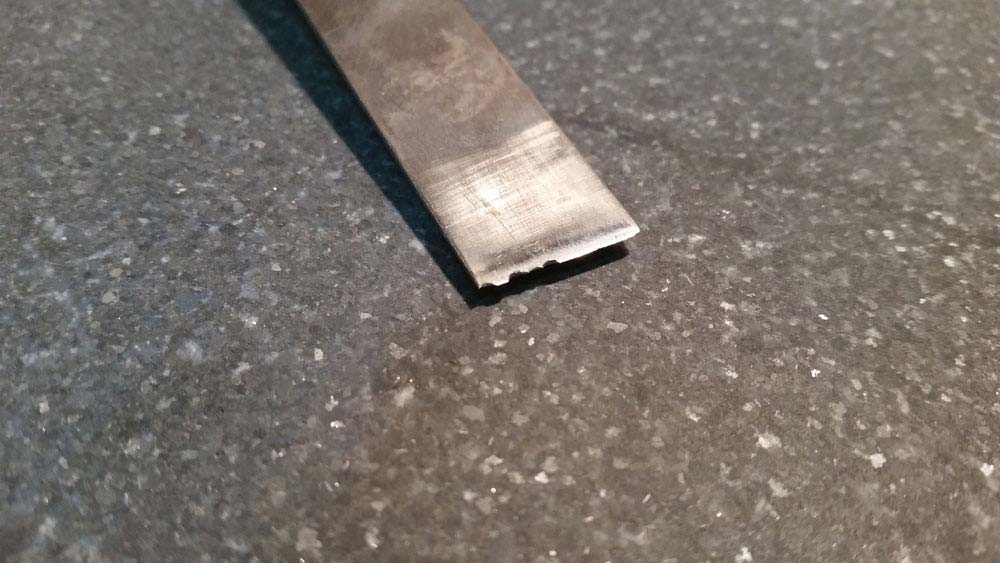
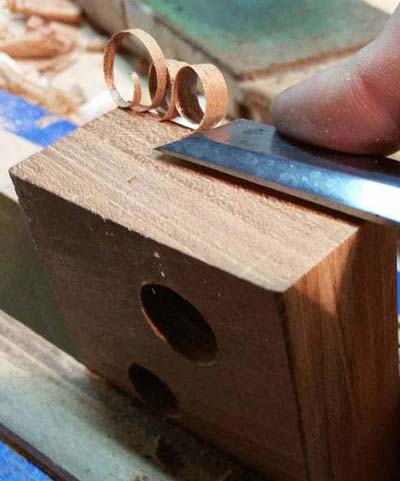
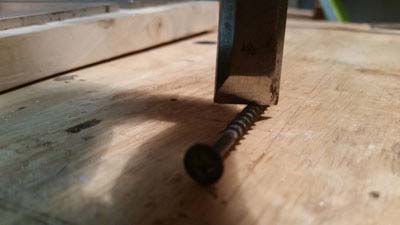
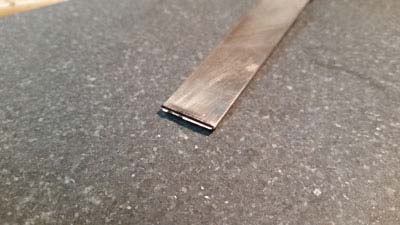
Chips and deformations are added to the edge by hammering it into a screw to provide a realistic scenario from which to work. The bevel on
the back face is observable. There is a reason for the additional bevel, but not one that need be covered in this article. Also notice the
scratches running parallel to the edge. This "before" state of the back of the chisel will be comparable to an "after" in a later step.
|

|
Once you learn these concepts, and the methods to achieve the results you seek, tools in this shape are no longer categorized as "useful" or
"ruined." Rather you will begin to see it for what it is - steel. Steel is a metal that can be shaped.
Step 2 - Square the Edge
Important - this step is unnecessary unless the edge is damaged. In this case it is and it will need to be ground away to expose fresh
steel. Another case for grinding the edge back is if the bevel angle must be radically reshaped to achieve a desired angle. By and large
this step is only for repairing or radically recommissioning a chisel.
Use a square and mark a line using a felt tip marker across the back of the chisel. Metal will be removed to the base of the black line, not
the top. Ensure the base of your line is below all damaged material.
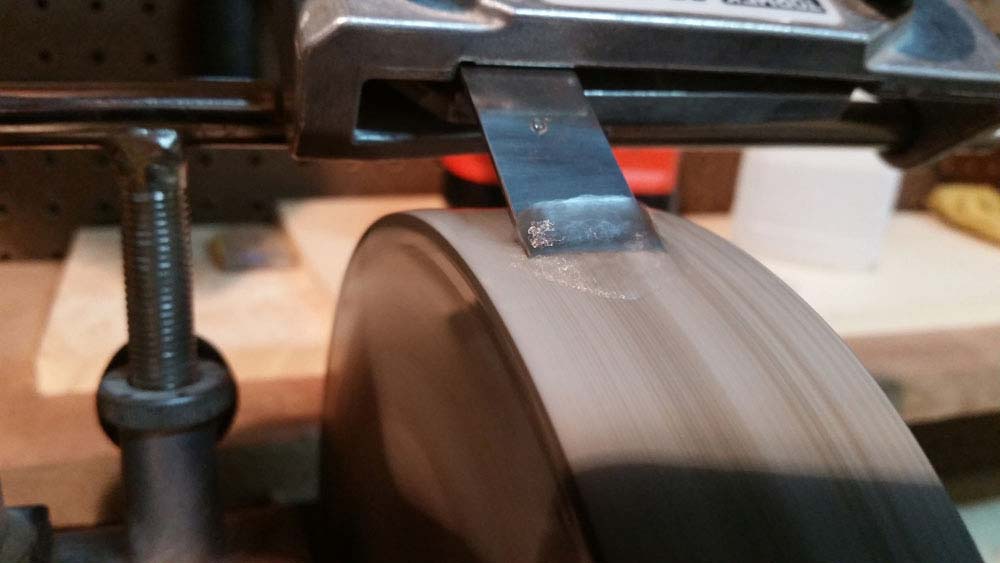
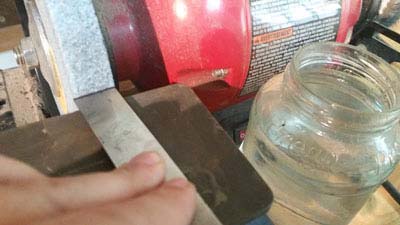
Coarse abrasives are best for this step. Bench grinders remove metal quickly and generate heat as constant friction is applied to the tool.
A cool running aluminum oxide wheel reduces the heat generated, and should be equipped prior to grinding tool steel. Use very light
pressure. This is still fine work, albeit done quickly.
Have a jar of water nearby, and put the tool in it to cool it off frequently. The tool should NEVER become hot, only warm. The steel is
tempered, and heating it too much will remove this heat treatment, and ruin the steel. An edge that has overheated will turn blue,
indicating that it has lost its temper, so to speak. Do not allow this to happen. Once the tool becomes warm to the touch, it should be
dipped in the water to cool it.
 Arrange the tool rest so that the edge meets the wheel at roughly 90 degrees. The objective is to establish a flat edge at this point. Note
the jar of water! That is the most important part of this step.
Arrange the tool rest so that the edge meets the wheel at roughly 90 degrees. The objective is to establish a flat edge at this point. Note
the jar of water! That is the most important part of this step.
Remove metal to the base of the black line so that it is barely visible, and equal in thickness across the back of the tool. This ensures as
close to a square edge as achievable during this phase.
|
|
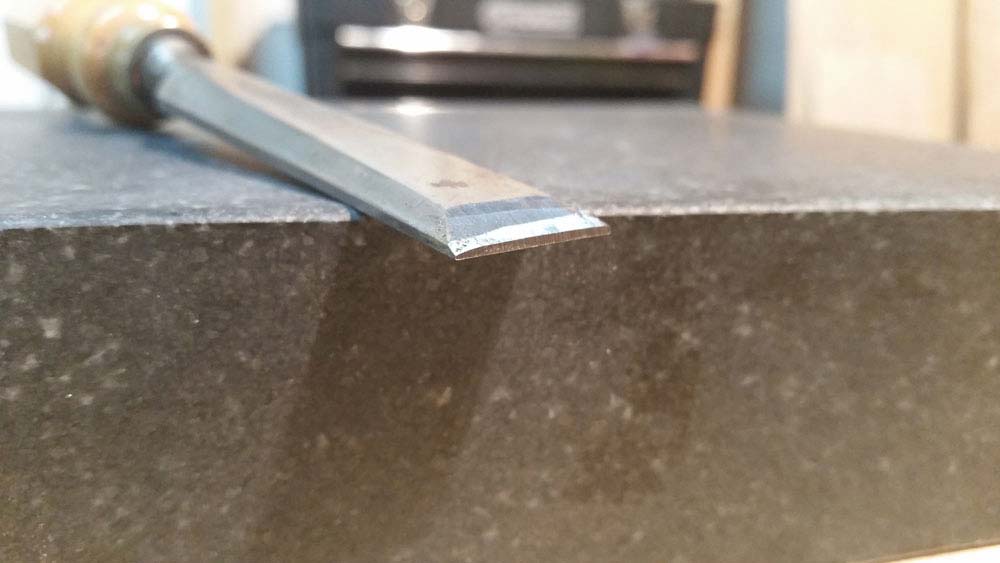
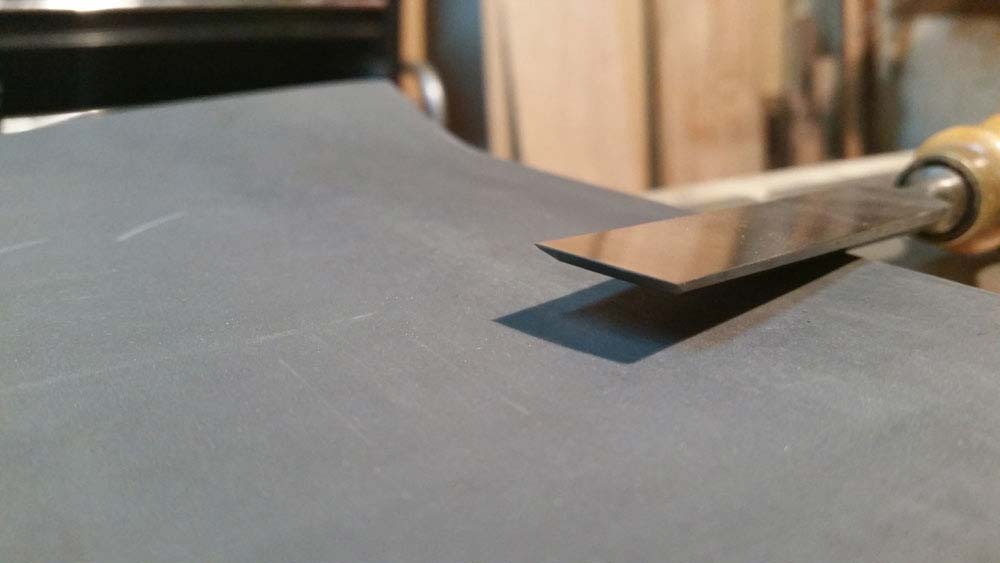
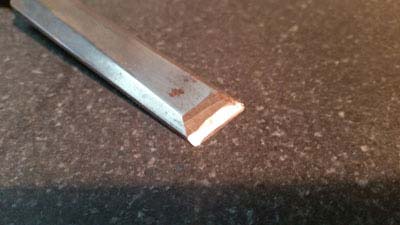
Take note of the edge at this point, specifically two things. First, there is a fairly wide flat area that used to be the "sharp" edge of
the chisel. Think of this as a line that will decrease in thickness as you progress to the final edge. Learning to read this line is how one
determines at which stage to begin the sharpening process. Second, notice that it has scratches from the grinder on it. This will become
your edge, so minimize those scratches as much as possible. Also make sure the edge is square across.
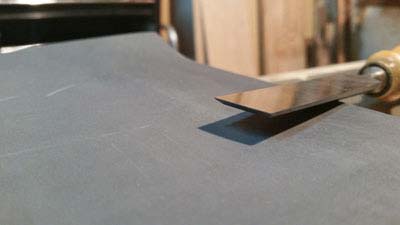
Step 3 - Remove Scratches
The objective of this step is to polish the edge that was just created. A finer abrasive is needed to remove the scratches left from the
grinder. This step involves direct downward pressure on the abrasive. A Novaculite (Arkansas) stone or similar will resist hollowing and
provide a hard surface for this step. Personally, I keep one around for rougher work like this that I would not do on my water stones. Hold
the chisel perpendicular to the stone, and pull it toward your body while maintaining the 90 degree angle. The purpose is to both polish the
edge, and knock down any high spots left from the grinder to get a square edge.
Perform a few strokes and inspect the edge to observe the result. Just keep the objective in mind, remove the scratches and square off the
edge. Hint - this will make a horrific noise, you will find that pulling it in one direction only will minimize the unpleasant sound.

Step 4 - Flatten the Back
Recall the scratches parallel to the edge that were observed in the initial evaluation of the tool. That was an attempt to flatten the back
of the chisel. The flatter the back, the easier it is to achieve a keen edge.
Throughout your woodworking you will find use of for what is called a lapping stone. This is a flat piece of granite and is very useful for
multiple tasks. A piece of glass or even a tile will suffice. Just make sure it is as flat as possible. Diamond plates work great as well,
but for this step I want to demonstrate where the "scary sharp" method has some strength. (I do not recommend it for every day sharpening,
as it is the most expensive method. This has been documented by other writers, and the rationale is easily found online.)
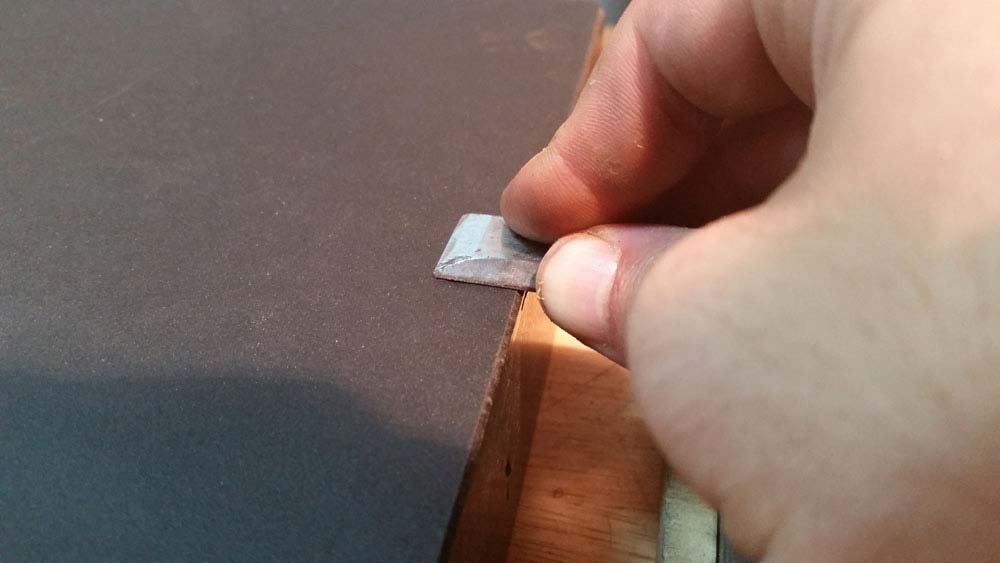
Spray a little water on whatever your flat surface is, and lay a piece of coarse wet-dry paper on it. This will hold it in place. I begin
with 220, then progress to 600, then 800, then 1500. The objective is only to flatten the back. Starting with 220 to quickly flatten it and
progressing to 600 for some polish would suffice. This is the strength of this method. It is not necessary to flatten the entire back of the
chisel, a half-inch or so will be plenty. Lay the back of the chisel flat on the lapping stone, and maintain downward pressure and contact
with the paper. Move it back and forth until the back shines evenly across and all of the existing scratches are removed.
|
|
Step 5 - Establish the Bevel Angle
This stage can be a stumbling block if focus is misplaced. When learning to sharpen, it is easy to get caught up in believing that one must
achieve a perfect angle of exactly 30 degrees, or 25 degrees. Any angle between 25 and 30 is going to work well for bench chisels. It is
more important that the angle is consistent than it is exact. No one is going to come into your shop with a protractor and measure your
bevel angles. A 27.6897 degree bevel angle is fine, as long as it is consistent.
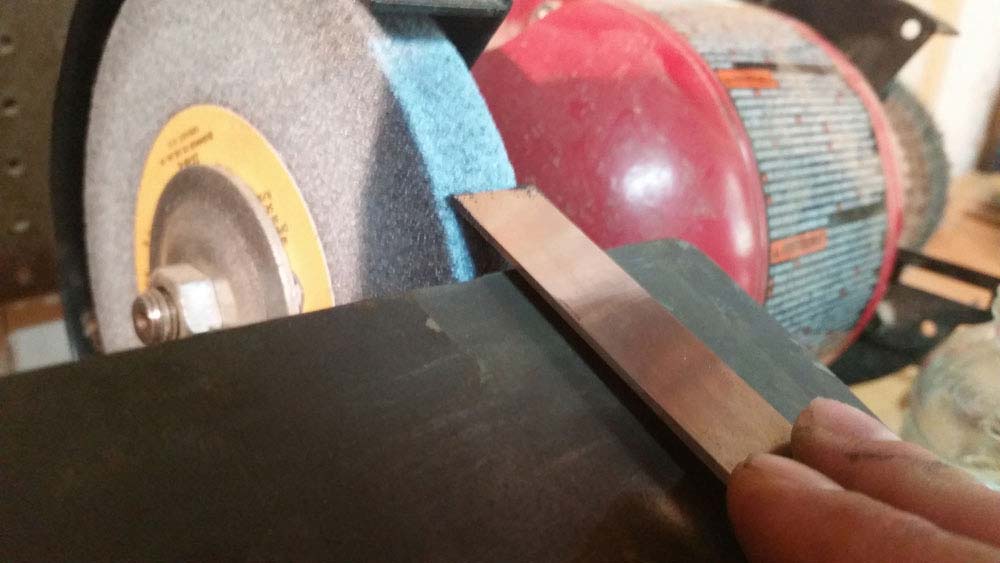
This step involves rough shaping, which calls for fast metal removal. Look to the coarse abrasives. This scenario utilizes a bench grinder
for this step. A coarse stone of your choice would accomplish the objective, but simply take longer. In addition to the fast material
removal the bench grinder's tool rest provides a way to maintain the angle after removing the tool to inspect the line as the bevel is
shaped.
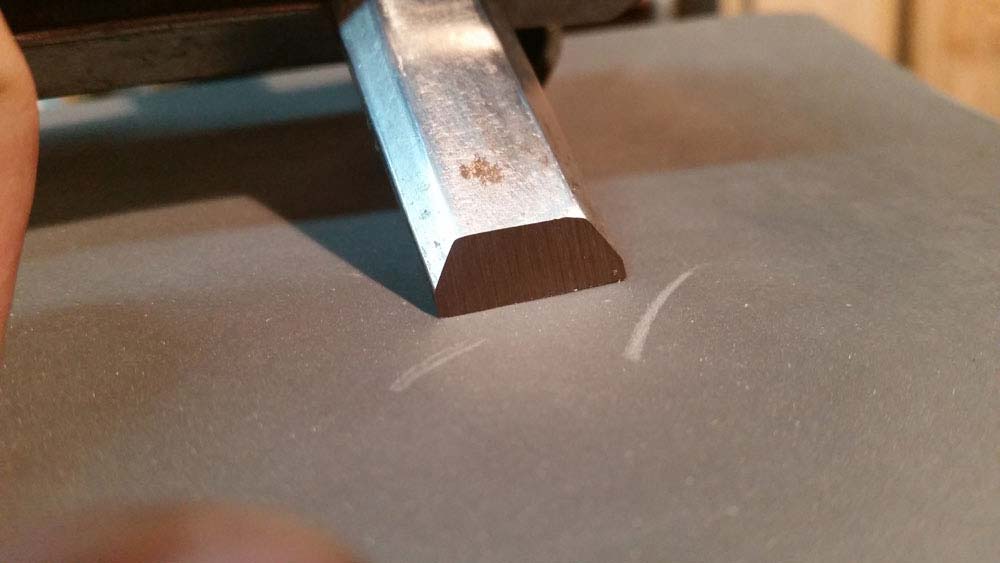
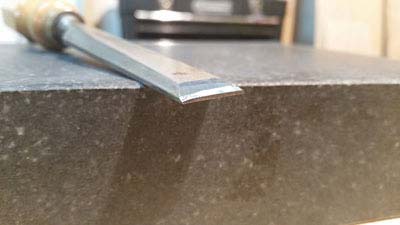
The salient point of this step is as follows - the line on the edge of the chisel is thick. It needs to be reduced in thickness, but NOT
erased. A thin line is needed for reference in the next phase. The line should be reduced to the thickness of a sharp pencil tip or a little
thinner than a fingernail at the conclusion of this step.
READ THAT LINE. As you read it, look to see if one side is thicker than the other. The line should reduce in thickness uniformly. If one
side is thicker, work that side until it is consistent with the rest of the line, then go back to working the whole bevel. Remember these
two things at this stage. 1) The edge will be getting thinner, which means it will overheat faster, so dip it in the water to cool it off
twice as often. 2) This is not your final bevel, do not fret if it is not beautiful. Here the edge has been reduced to a thin line
consistent in thickness across the width.

|
|
Step 6 - Refine the Edge
This phase signals the transition between rough and fine work. What follows is essentially the difference between sharpening and honing.
Everything covered from this point forward is essentially all that is needed to maintain an edge. For an edge that just needs tuning, this
step could be omitted. This is important to understand. It is step 6 in the total process, but step 1 for a non-damaged tool that has a
serviceable bevel angle.
This is where jigs, gadgets, and machines really come into their own. They offer the user the ability to hold the tool at a consistent angle
while the final bevel is applied. This could be a rolling guide that rides along your stone, a Tormek or Worksharp, etc. One should afford
themselves every opportunity to maintain the angle at this stage, as it it crucial to obtain the desired result.
The line will now be erased. It should continue to be read carefully as it diminishes to nothing. Learn to read the line on a bench chisel.
This knowledge is invaluable when sharpening more challenging tools such as gouges. Consistently remove the line, arrive at the edge
simultaneously across the edge. This is the secret, not any given machine or stone. You could rub your chisel on the driveway and obtain a
good edge with this knowledge.
The grinder has been utilized for its efficiency throughout this scenario. One should understand a phenomenon known as the "hollow grind"
and how it applies to different tools. The wheel of the grinder produces a slight concavity to the bevel as it impresses the inverse of its
shape upon the steel. For plane irons and chisels, this is fine - if not desirable as it reduces the amount of steel to be polished to
simply the heel and toe of the bevel. In the case of plane irons and chisels, only the very edge of the tool passes through the material. A
carving gouge rocks upon its bevel throughout a properly executed cut, thus passing the entire bevel through the material. Carving tools are
expected to leave a polished facet and to do so, require a flat and consistent polish to the bevel. Therefore, hollow grinds should be
avoided for carving tools.
A Tormek is used at this stage for its efficiency in maintaining an angle. A wheel guide and a coarse stone would afford the same result
fairly quickly, because the amount of metal to be removed is small. Tormek machines do NOT excel at removing metal in bulk quickly. They are
slow speed, water-cooled honing machines.
Here the bevel has been set to 25 degrees using the Tormek square-edge jig and the angle finder. The bevel is worked until a slight burr can
be detected across the entire width of the back of the chisel.

|

|
It can be observed that the bevel is consistent, and exactly at the angle that was specified. Machines and jigs accomplish this consistent
bevel wonderfully. In order to get it truly sharp, manual abrasives should be employed.
Manual abrasives can be Carborundum, Novaculite (Arkansas), Diamond, Sandpaper, Ceramic, or Water stones. I have not used Carborundum.
Arkansas stones are good and hard, and will not dish out very easily. They leave a fine edge, and prefer an oil lubricant such as 3 in 1.
Water stones are very efficient, and are designed to wear down so that a constantly fresh abrasive surface is available. They come in
multiple grits, and the higher grits really put an incomparable polish on the edge. Diamond stones seem to be a good balance. They are dead
flat, and stay that way. They don't put quite the polish that water stones do, but you could always finish your edge on a water stone, and
do the rest on diamond plates or otherwise. This is what I do. I have 3 diamond plates, Coarse, Medium, and extra-fine as well as a very
high grit water stone which provides a pristine polish.
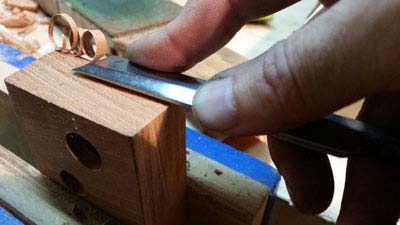
On to the Diamond Stones with this edge. Recall that this bevel has been hollow ground. So only the heel and toe of the bevel will be in
contact with the stone because it is slightly concave. Establishing a consistent bevel is the secret to doing well with stones in my
opinion. If the bevel is consistent, it is very easy to feel it contact the stone. Another tip is to only pull the tool toward your body at
first. In other words, trail the edge. Keep your fingers on the tool near the edge and feel that positive contact with the stone. Establish
this connection each time before moving the tool. Go slow at first, speed will develop over time.
After a few strokes, you will see the wire edge, or "burr" forming on the edge of the tool. You can see it in the picture to the right. This
burr should form consistently and serves as proof that the edge has been achieved. Move up through whatever grits you have until the bevel
is sufficiently polished, then turn the tool over and take a few passes on the face to move that burr to the bevel side, and repeat on the
finest stone until it snaps off, or you can strop it off. Do not lift the handle while working the back, keep that back flat.
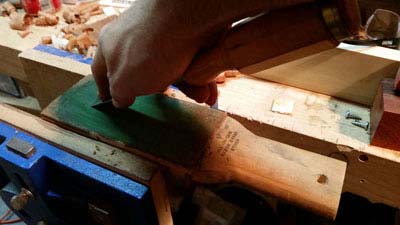
Step 7 - Strop
Stropping is the final polishing of the edge, and if you're going to carve hair with it, this is how you make it ready to do so. Stropping
compound is normally chromium-oxide. It is the big green crayon available at pretty much any hardware store.

|
|
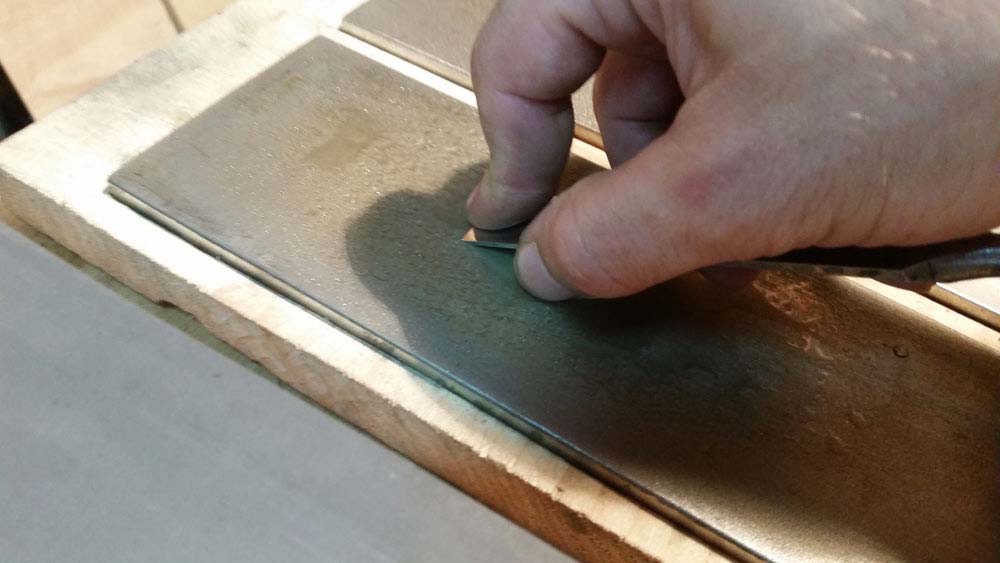
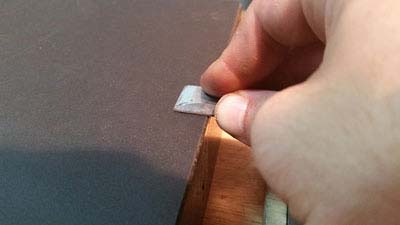
Attach a piece of leather, suede side up, to a flat piece of wood, and apply the stropping compound. Hold the bevel on its angle against the
leather, and pull back. You will always only trail the edge when stropping. Pushing it forward will dig in. Maintain the angle as you strop.
40-50 passes on the strop will be sufficient. Once the bevel is stropped, flip it over and hold the back flat on the leather and give it a
couple pf passes just to make sure the burr is off. Don't strop the back too much, one or two times is plenty. The burr will break off when
you cut wood with it anyway.
You may notice that only the heel and the toe of the bevel are polished. This is fine, and is all you need. This is the result of the hollow
grind from the bench grinder and Tormek. If a stone is employed after the grinder, it is likely that the entire bevel will be polished as a
stone does not hollow grind as you work to the final edge, because it is flat.
Summary
This method of sharpening applies to everything. You are trying to accomplish the same outcome whether you are sharpening a chisel or a
parakeet. Sharpening is a skill that can only be achieved through practice, and practice is nothing more than a series of diminishing
failures. Additionally, learning to read the line on the edge is more important than whatever you use to remove it.
You will establish your own sharpening system, and it will work for you based on what you like. All you need is a way to remove metal
quickly, a way to remove metal accurately, and a way to polish the metal. Hopefully you understand that your edge will be in different
stages of use and require different stages of sharpening. Sometimes you may only need to strop, or give it a few strokes on the stones to
maintain your edge. Other times you must to start over as demonstrated in this scenario. The objective was to demonstrate the entire process.
You can reach Justin by email at
justinmoon79@gmail.com
and you can also visit his website
oldlinecraft.com
|