Shop Made Cauls
by P. Michael Henderson
Tustin, California
Cauls are found in almost every
experienced woodworker's shop. They were used by our woodworking ancestors
hundreds of years ago, and maybe even thousands of years ago. They're so common that when we talk about
woodworking techniques we usually forget to mention cauls - they're just there,
like the air we breathe. But for new woodworkers, cauls can be a mystery -
"What are they used for?" and then, "How are they made?
Let me first give a short discussion about the use of cauls
so you'll know where we're going when we start making them. Cauls are used
when clamping a panel or a project for glue up. They provide pressure in
places beyond the reach of standard clamps, or reduce the number of clamps
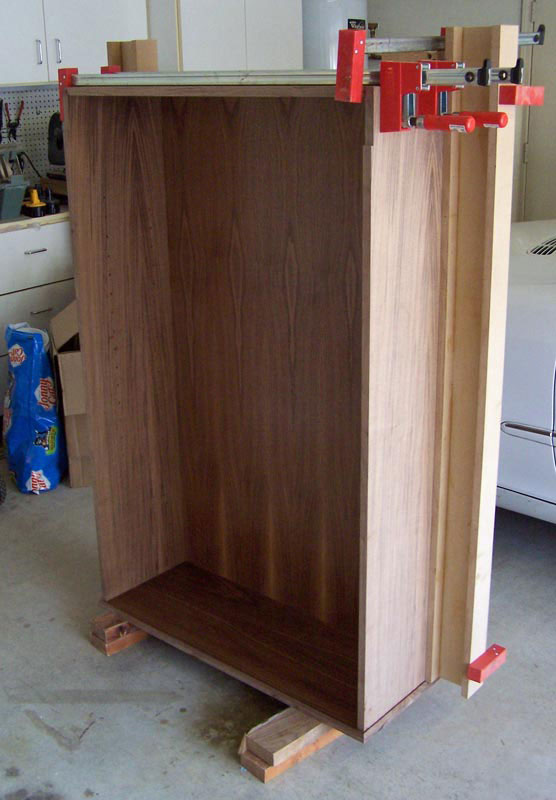
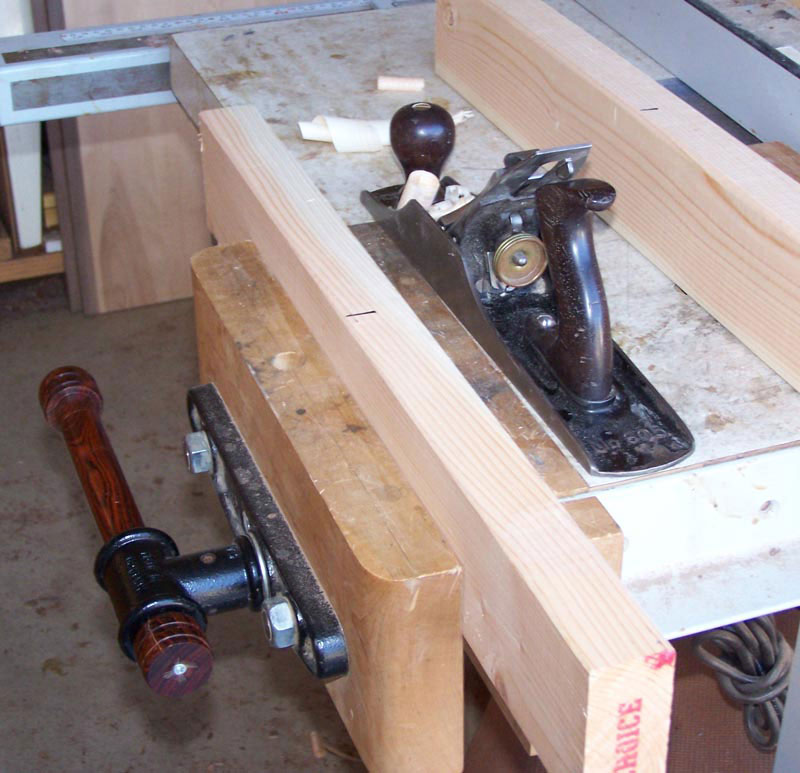
required. For example, in the picture below, I'm using some special cauls
to make sure the sides of this cabinet are straight. I put glue in the
groove that the back fits into and I wanted to make sure the sides were not
bulging outward.
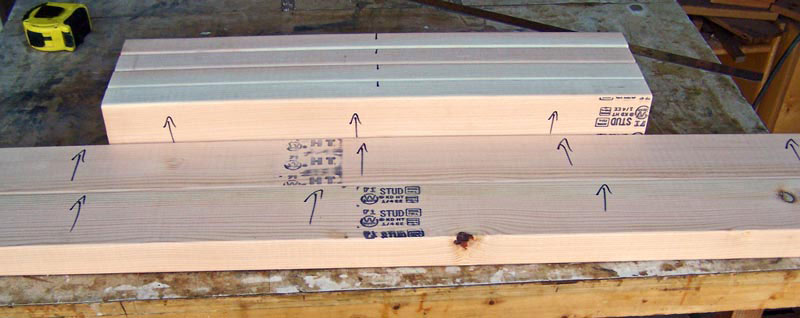
A more common use of cauls is during a panel glue up – the
cauls are used to keep the boards aligned during glue up.
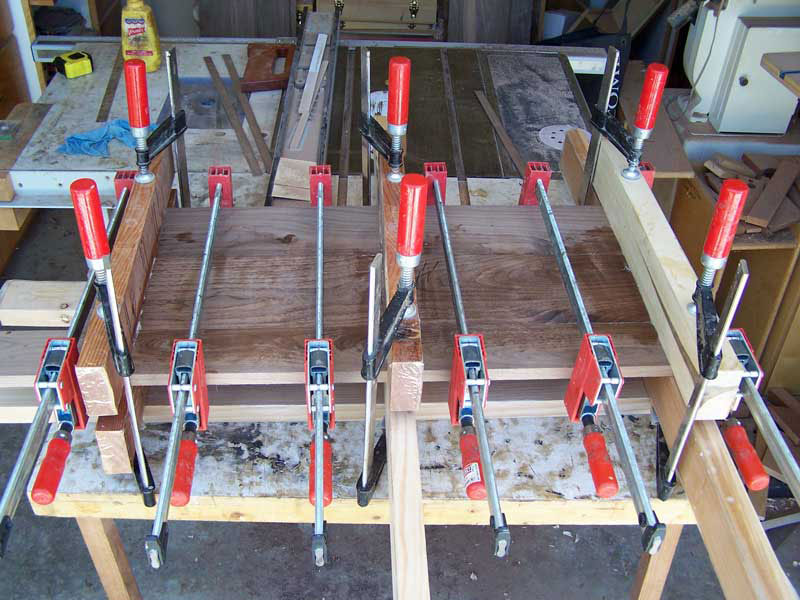
In this glue up, six cauls are used to keep the boards of
the panel aligned. The cauls also keep the panel flat during glue up and
minimize the amount of work (and lost wood) to get it flat later.
 I'll demonstrate the use of cauls in a panel glue up later,
but now, let's talk about how to make the cauls.
I'll demonstrate the use of cauls in a panel glue up later,
but now, let's talk about how to make the cauls.
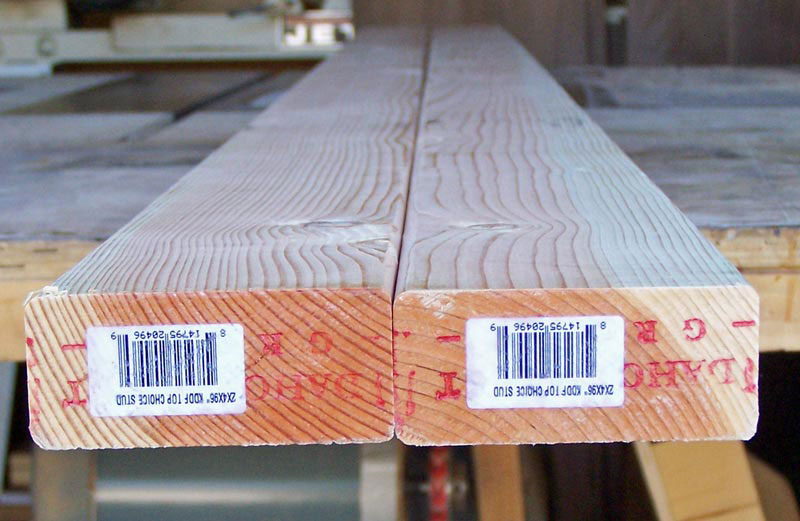
The first issue is the material the cauls are made from.
You can use almost any kind of wood, but many people use a good grade of
construction lumber. Here, I'm using eight foot 2 by 4s.
The reason for selecting 2 by 4s is cost. The ones I
show here were less than $3 each. When you go to select your 2 by 's for
cauls, don't buy the cheap 2 by 4's. Good ones are not expensive, you
don't need a lot of them, and you'll have them for many years. Go to the
stack marked "premium" (or some name like that) 2 by 4's. Make
sure they're marked "KD" (klin dried). Most cheap 2 by 4s are "green" and still have a lot of water
in them. If you select those, you'll have to let them dry out before
using them - which could take a year and they might warp in the process.
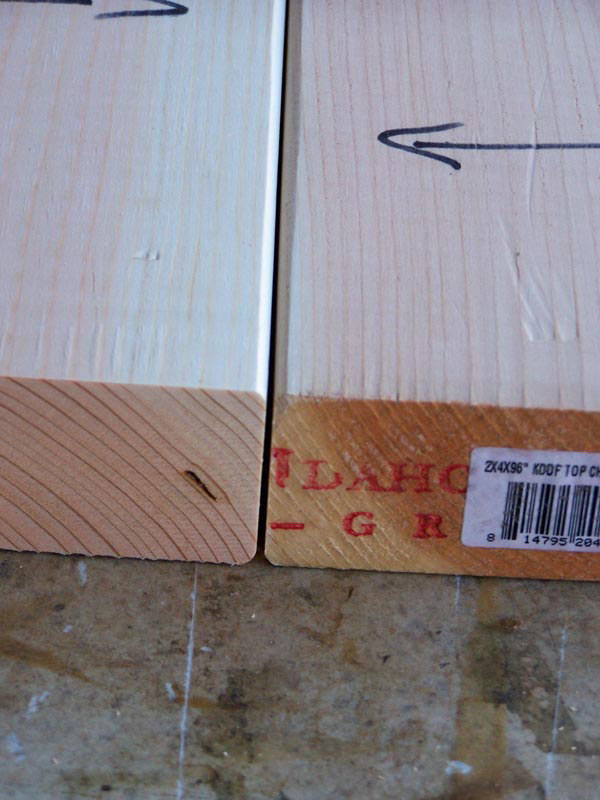
In selecting your 2 by 4s, try to find those with the
minimum of knots, or at least only small knots. Also look for straight
grain. Examine the end to make sure this 2 by 4 didn't come from the
center of the tree (you'll see the grain in a circle around the center pith of
the tree). Premium 2 by 4's sometimes have the end grain sealed with wax.
As Martha Stewart would say, "That's a good thing." Make sure there's no
splits in the end of the boards.
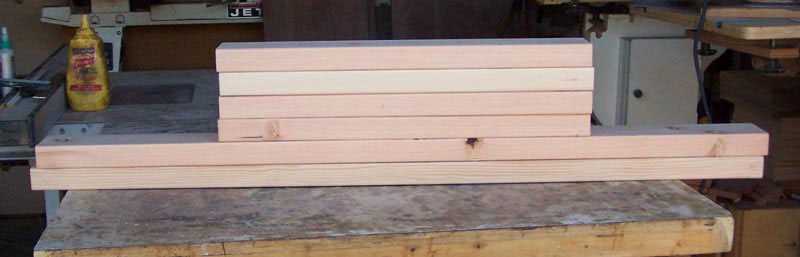
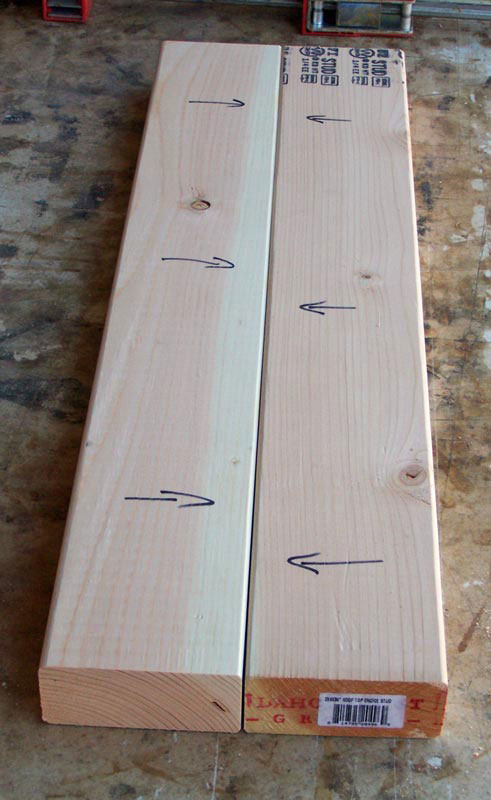
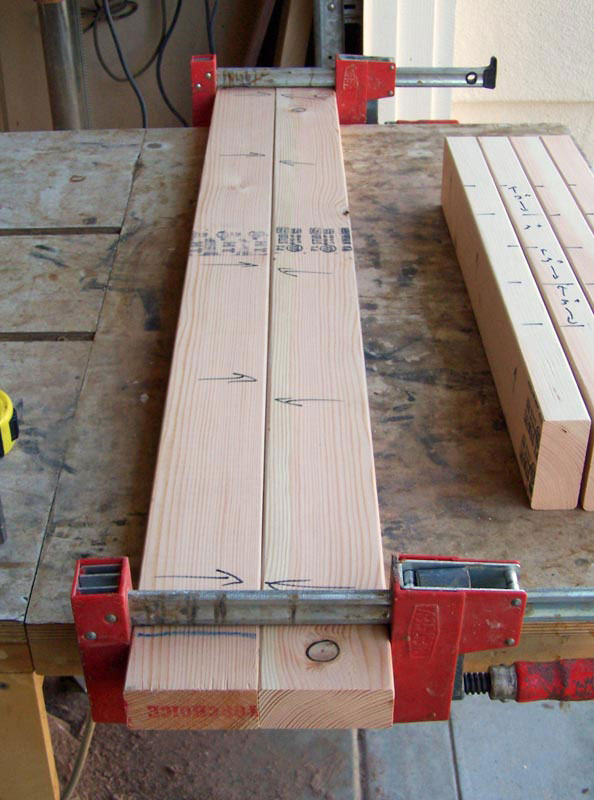
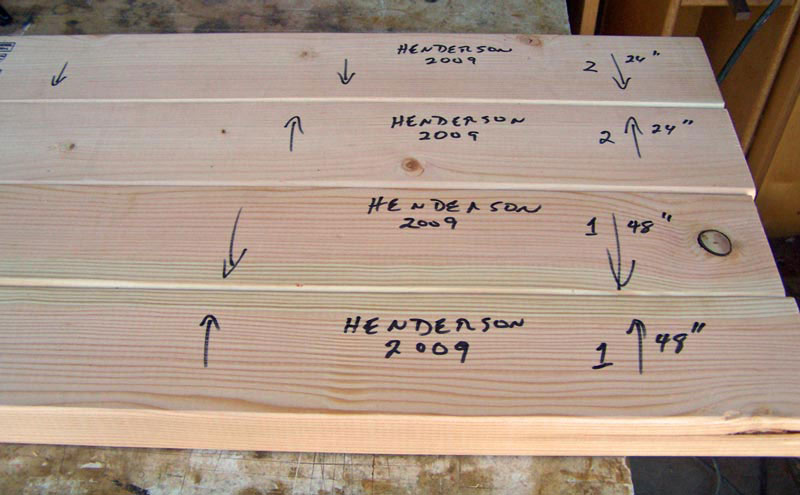
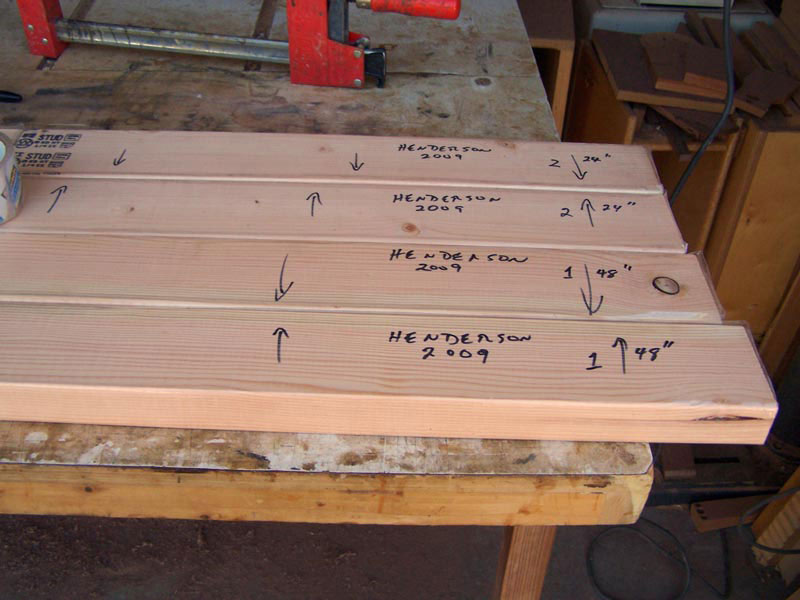
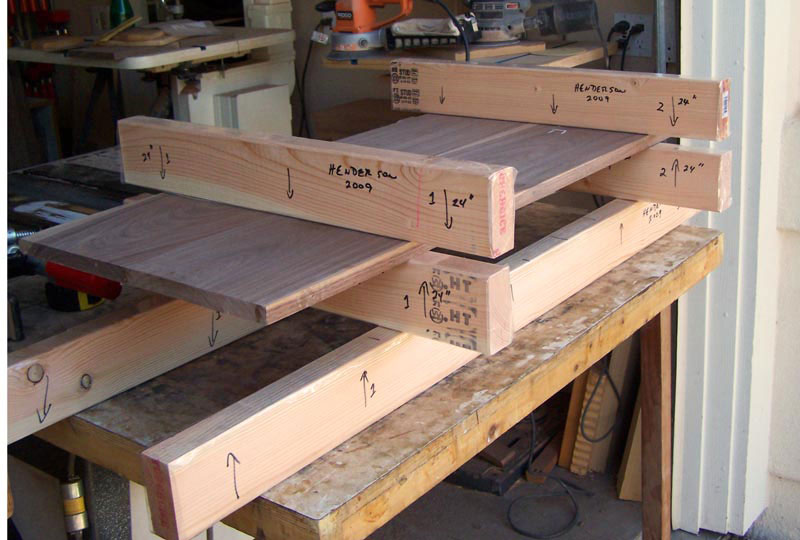
Using these two 2 by 4s, I'm going to make two sets of 24"
cauls (four cauls) and one set of 48" cauls (two cauls). So my first task
is to cut the 2 by 4s to length.
Next, select one edge of each caul as the working edge.
I mark that edge with arrows on the side, pointing to it. Since I'm going
to work that edge with a hand plane, I select the edge with the minimum number
of exposed knots.
If you have a jointer, now is a good time to run the
working edge through the jointer. It will give you a straight edge to work
with. Mark the center of the working edge of each caul. You can see
a black tic mark on the 24" cauls marking the mid point of the edge.
Mount the caul in your vise, and take a swipe with a hand
plane from the center to each end.
You can do this faster, but I'm going to show some
intermediate steps here. After you've done both cauls of a set, take them
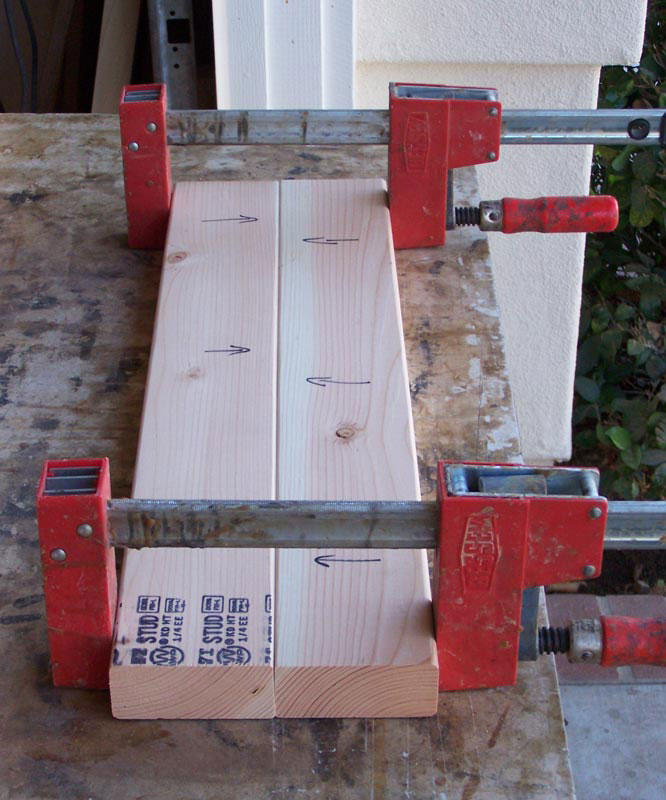
and lay them with the working edges together.
You'll see that the cauls mostly still fit together -
there's only a small gap on one end when the other end is pressed together.
If we put a clamp on each end, we can pull the cauls
together easily - too easily. The amount of force you feel on the clamp is
essentially the force in the center of the cauls. So we need more
curvature on the cauls.
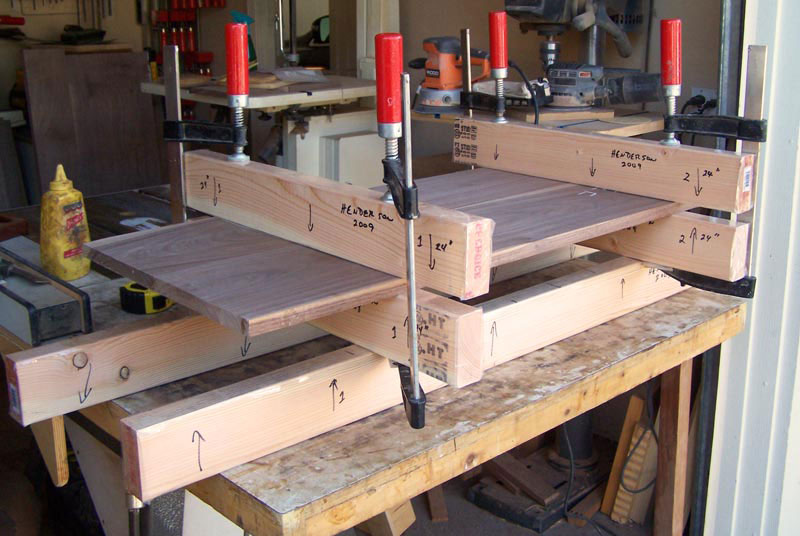
Take the cauls back to the vise and make a mark 3 inches
from the center on each side.
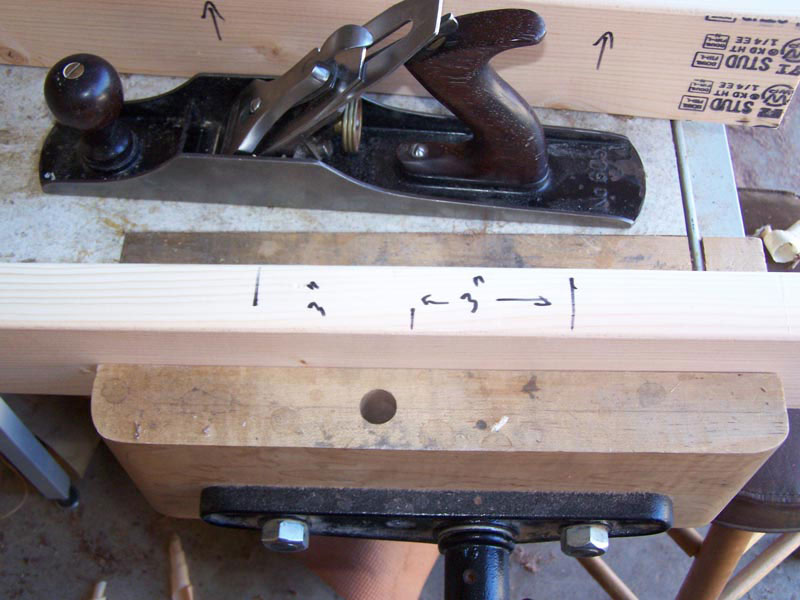
On short cauls like the 24", I use 3" from the center.
On the 48" cauls, I use 4". Now, take another swipe with your plane from
these three inch marks to each end.
Then, measure three inches away from your previous marks,
and make two more marks. Take a swipe with your plane from those marks to the
ends of the boards.

When you put the two cauls together now, there will be a
larger gap on one end because of your additional swipes with the plane.
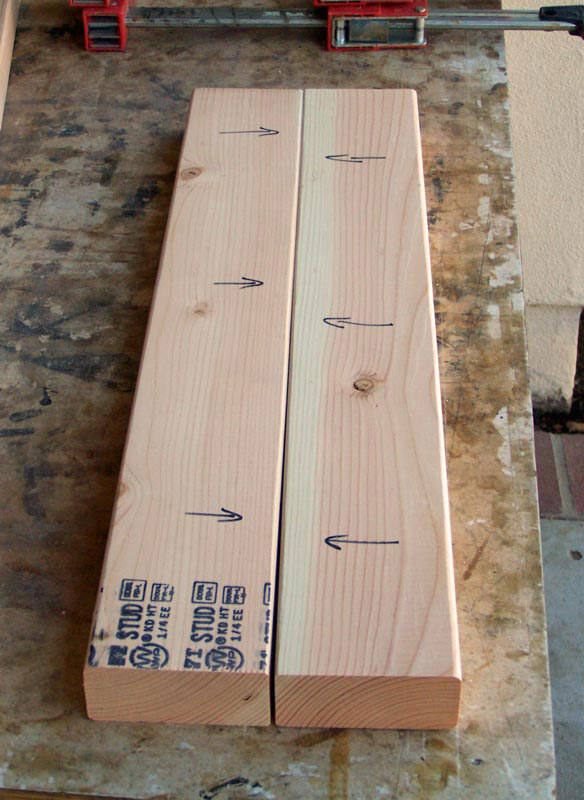
Now when I put a clamp on both ends, I'm satisfied with the
clamp force, and I check to make sure I have contact all along where the two
working faces meet.
The 48" cauls are worked the same way, except that I put
the marks 4" apart. When doing this in your shop, the best way to do this
is to put the marks on the side of the caul so that you don't plane them away.
Take your first swipe from the center marks, then your second from the next mark
to the ends, etc. You do not need to do the trial fits as I showed with
the 24" cauls. Just take a swipe from each mark to the end. Then do
your trial fit.
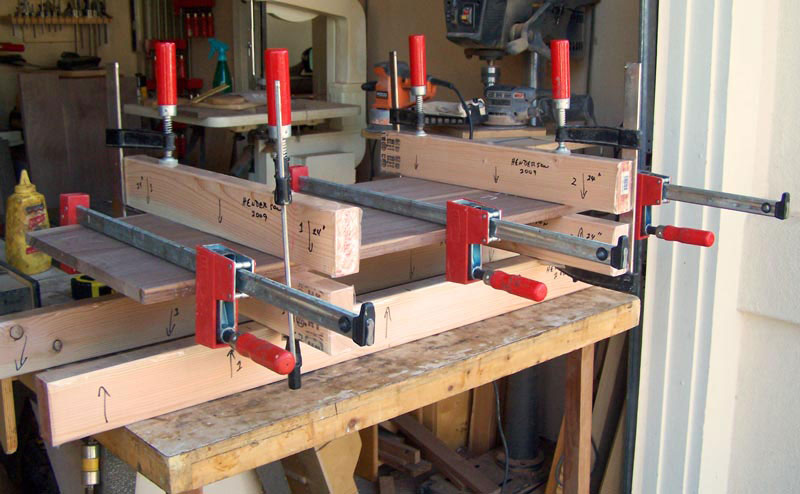
Because the 48" cauls are longer, the gap at the end must
be wider to get the same clamping force. You can see what I wound up with
on my 48" cauls, below.

But when clamped together, the 48" cauls pull in just like
the 24" cauls. When you do this test clamp, examine the line where the two
working faces meet. There should be no gaps - the two cauls should have
good contact all along the faces.
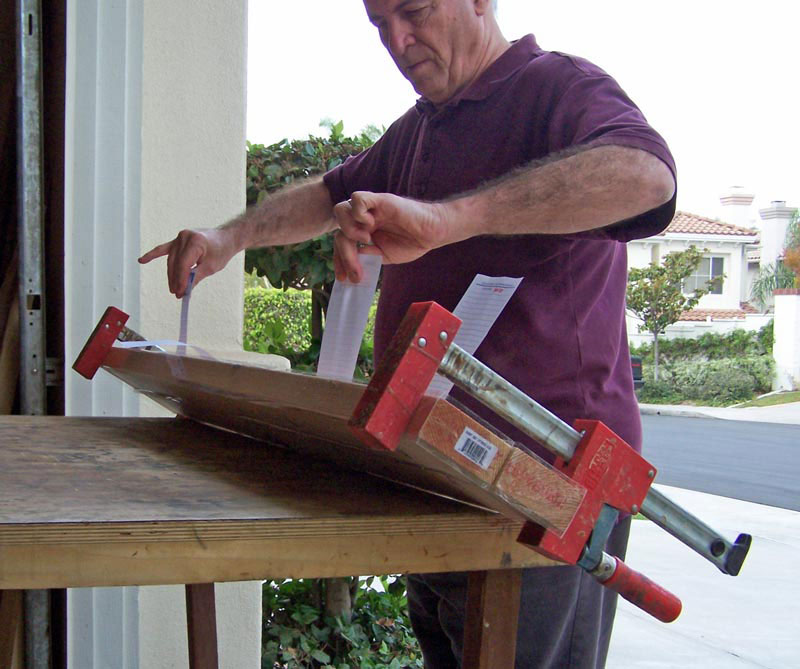
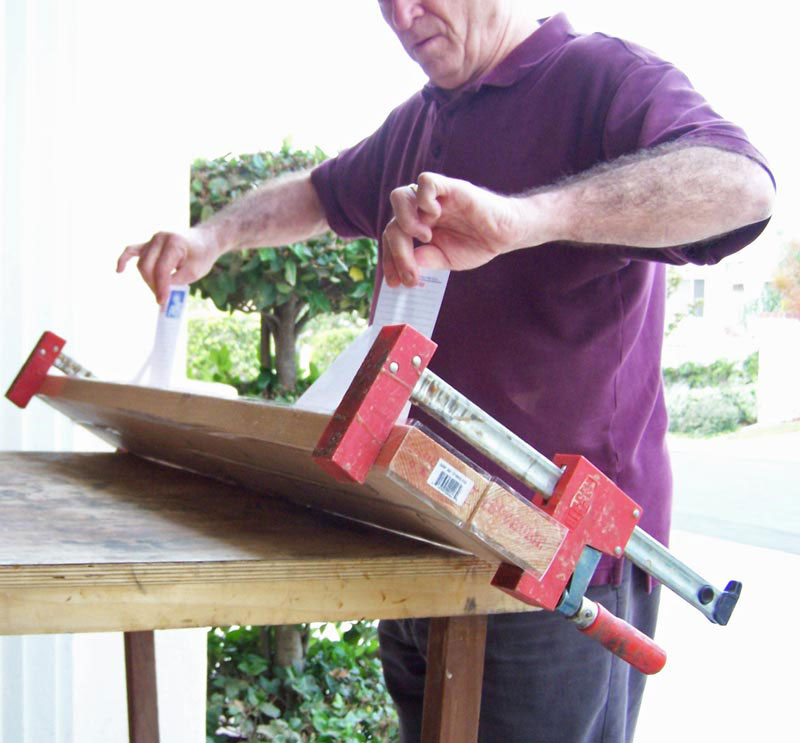
If you want to test how well the two cauls fit together,
you can do the following. Put pieces of paper along the joint. Those
tablets you get from the realtors work well.
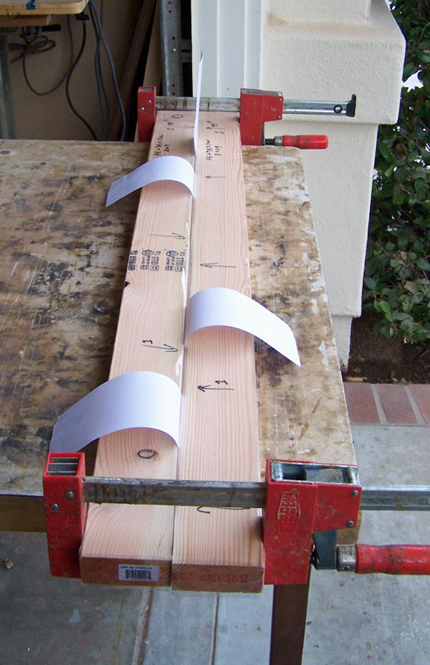
You should not be able to pull the paper out without
significant effort. You can see in the pictures below that I can lift the
cauls holding on to two of the papers.
I keep my cauls in pairs and mark them so that when I use
them in pairs, I always put them together the same way.
Cauls are usually used in a glue up so you need to make
sure the cauls do not get glued to the project by the glue squeeze out. I
use packing tape and wrap it around each caul. If you want, you can just
put the packing tape on the working face.
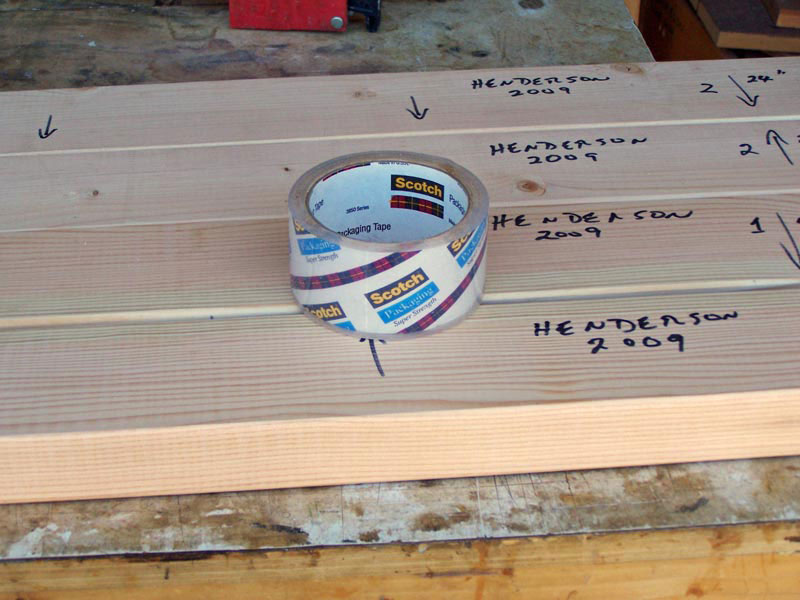
It's a bit hard to see in this next picture, but each caul
has packing tape wrapped around it.
Okay, we've made the cauls, but what do we do with them.
There's quite a few ways to use them when doing a glue up, but let me
demonstrate a common use, in gluing up a panel. I'm going to use the 24"
cauls because my panel is not as wide as that.
I used my 48" cauls as the base for my glue up, but any
spacer could be used. I need to get a clamp under the 24" cauls so I want
to get them off the bench. If your panel is big enough, lay the base cauls
(the 48" ones in this case) down flat so that the stack is more stable. If
your panel is not very wide, you'll have to do as I did in order to fit your
caul clamps under the panel.
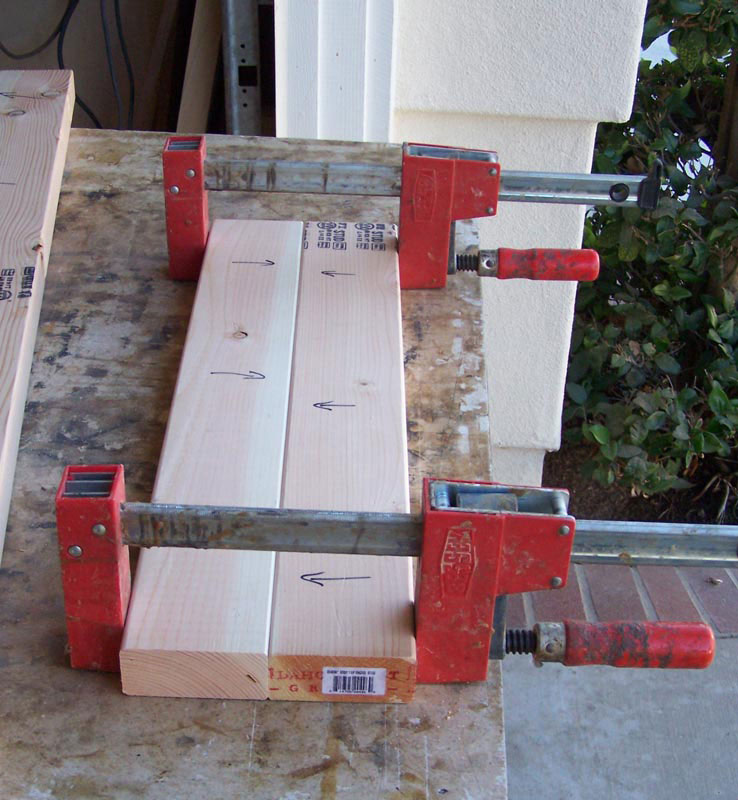
Next, I lay the boards I'm going to glue into a panel
on top of the 24" cauls and apply glue to the edges of those boards. I
didn't have a panel to glue up, so for the picture, I just used a panel I had
already glued up.
Then, since I went to the trouble to mark my cauls, I place
the matching caul on top of the boards, and aligned with the lower caul.
Use some clamps and clamp the cauls together. Hint:
Put your clamps over the boards of the panel, rather than outside the panel.
That way, you can snug one clamp before you put the clamp on the other end.
Finally, take your regular clamps and clamp the panel
together. The regular clamps have sufficient force to bring the boards
together, even if you've clamped the cauls tight.
For many panels, you might use more cauls, perhaps three sets
- one on each end and one in the middle. And you'd certainly use more than
three regular clamps to clamp the panel together - since I was just
demonstrating, I didn't put the full complement of clamps on..
The cauls force the boards into alignment, and hold the
panel flat while the glue sets. I find I can produce much better panels
with cauls than without them.
But cauls have many other uses. Whenever you need to
get downward force beyond the reach of your clamps, you can use cauls.
Their use is only limited by your imagination.
Cauls take a bit of time to fabricate, but you can use them
over and over in your work. A set of cauls will last you for many years.
And while you may need more cauls than I show here, the cost for these three
sets (two 24" sets and one 48" set) was less than $6.
Any questions, please e-mail me at
michael.henderson@cox.net
EDITOR'S NOTE: Since producing this article, CNC technology has helped bring a Caul to the marketplace which is a drastic improvement over shop made cauls.
The author is a retired electrical engineer who worked in communications for most of his career.
He began woodworking about six years ago, taking woodworking classes at Cerritos College. You can
see more of his work at
http://www.mikes-woodwork.com/mikes_projects.htm
, and you can see more about him
at
http://members.cox.net/michael.henderson/


