Splitting Oak for Spindle Turning
by Curtis Turner
Round Rock, TX
Note: click on any picture to see a larger version.
This article will take us back in time to experiment with an ancient method of prepping green wood for spindle turning.
I was fortunate enough to have met Peter Follansbee about a year ago. I had the opportunity to watch him carve, and hear him talk about working with green wood. I was greatly inspired by Peter, his skills and dedication to the craft. This, combined with an interest in hand tools and turning, has led me to experimenting with turning riven stock. I eagerly awaited the release of Peter and coauthor Jennie Alexander’s new book "Making a Joint Stool from a Tree". This book has served as an excellent guide in working with green wood.
This article is not intended to be the definitive writing on splitting wood. There are many more highly-skilled craftsmen archiving this process into written works. My intention with this article is simply to inspire you to learn more about this almost forgotten skill, and perhaps to experiment yourself with using the technique.
What does riven mean?
The word riven means to split apart or to cleave. For our purposes, it refers to splitting along the end grain. This action yields stock that is typically straight-grained, and captures the strength of the wood. The split occurs along a fault line, if you will, thus splitting along the weakest fibers.
Why?
I know this looks like a lot of extra work. It will require more output of labor; however, it is a surprisingly enjoyable experience. The results for your efforts will be stock that is stronger, straight-grained and easier to work. There is also something undeniably rewarding about producing an item using this centuries-old method. (Can you see a spring pole lathe in my future?)
Perhaps you wish to add draw bore pins to a table. Using split wood will yield dowels with straight grain and produce a strong mechanical fastener. Also, using split wood to turn a mallet would result in a stronger, more durable tool. Or perhaps you wish to build a joint stool from a special tree.
Splitting stock is a step up the chain for those who wish to work with hand tools or use period-correct methods. This is a significant consideration for those who perform restoration work for museums or who repair antique furniture.
Where to begin
You will need, ideally, a green log. Red Oak or White Oak are recommended by many as preferred woods because of their ability to split cleanly. One
can
split dry wood, however green (still wet) splits much easier. The experience is similar to turning a green blank. I recommend that you start with a smaller diameter log in the 10-12" range. A good length for practice would be about 10-12". Look for a log that appears to have straight grain. A good indicator would be straight orientation of the bark…although this is not a guarantee. This gives you the best chance of splitting the log easily. Stand on end a log of this recommended size, placing it on a larger stump for a comfortable working height. I have experimented with several heights. I have found that for me, a chopping stump about knee-high works well.
Wedges
Note: not all metal wedges are suited for splitting wood. Yes, I know, how hard can it be to make a usable wedge? One wedge I tried to use had about a 125 degree included angle. I don’t think that wedge could have split a banana! I spent over an hour grinding a steeper bevel in order to make it a functional wedge. It is worth your time to hunt down a well-made wedge, such as the
Gransfors Bruks splitting wedge.
Hammers
I have found two sizes of hammers to be useful for this exercise. First, a small hammer of about 3 lbs is helpful for the initial scoring and driving in of the wedges. Then I use a larger sledge hammer of about 8 lbs - this provides the mass to drive the wedges in quickly. Avoid cheap sledge hammers! I learned the hard way that you will waste more time and money replacing them than you would have spent on the higher quality product to begin with. A sledgehammer prone to breakage is also a safety risk.
Froe & Maul
What a great name for a craft brewed ale that would be. A froe is a simple tool, however, it is rather hard to find. Vintage froes are often in extremely poor condition, with pitted blades, and either lacking the wood handle entirely, or made with one that is ill-fitted and damaged, thus requiring replacement. I have been fortunate enough to test out a new froe being developed by my employer.
This froe was designed by Lie-Nielsen Toolworks in conjunction with Drew Langsner. I will say that I have thoroughly enjoyed using this froe and there is a darned good chance it will find a permanent home in my shop. The model developed by Lie-Nielsen will be available for purchase soon.
You will also need a wood maul which looks like a giant mallet. This can be turned from just about any small diameter log. The maul is used to hammer the froe into the end grain to split the log.
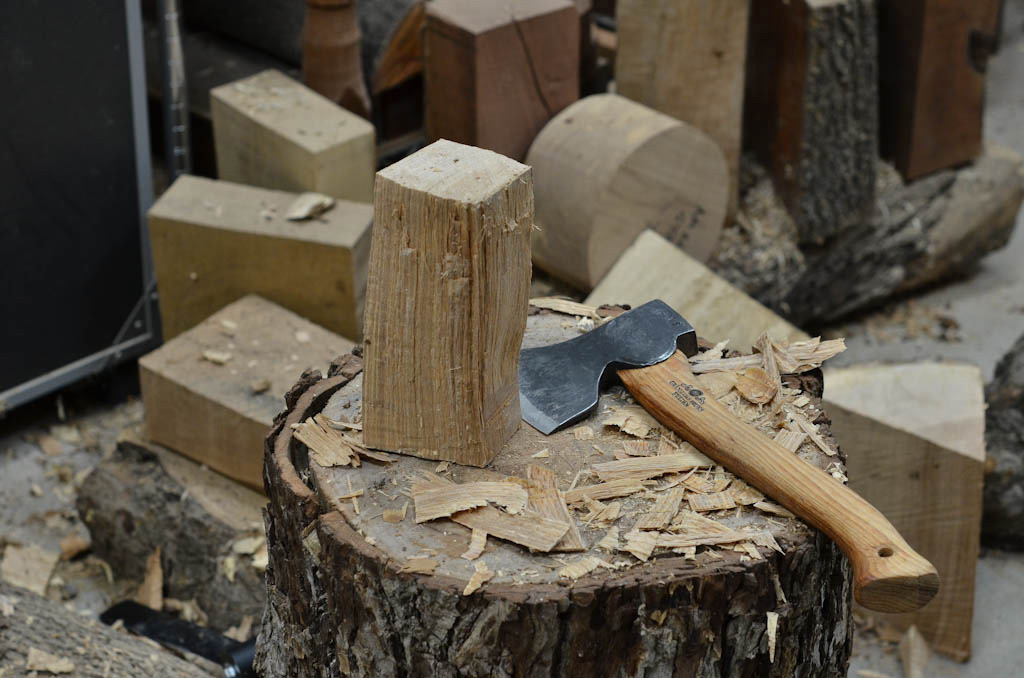
Axe
A small axe or hatchet is used to refine the shape after using the froe. I use two types of small axes for the hewing process: a traditional broad axe that I re-handled, and a
Gransfors Bruks Swedish carving axe. In the beginning, it can be a bit un-nerving using an axe near your hands. I always proceed with caution and I recommend you do the same. Peter recommends several additional safety precautions in "Making a Joint Stool from a Tree".
Let’s start
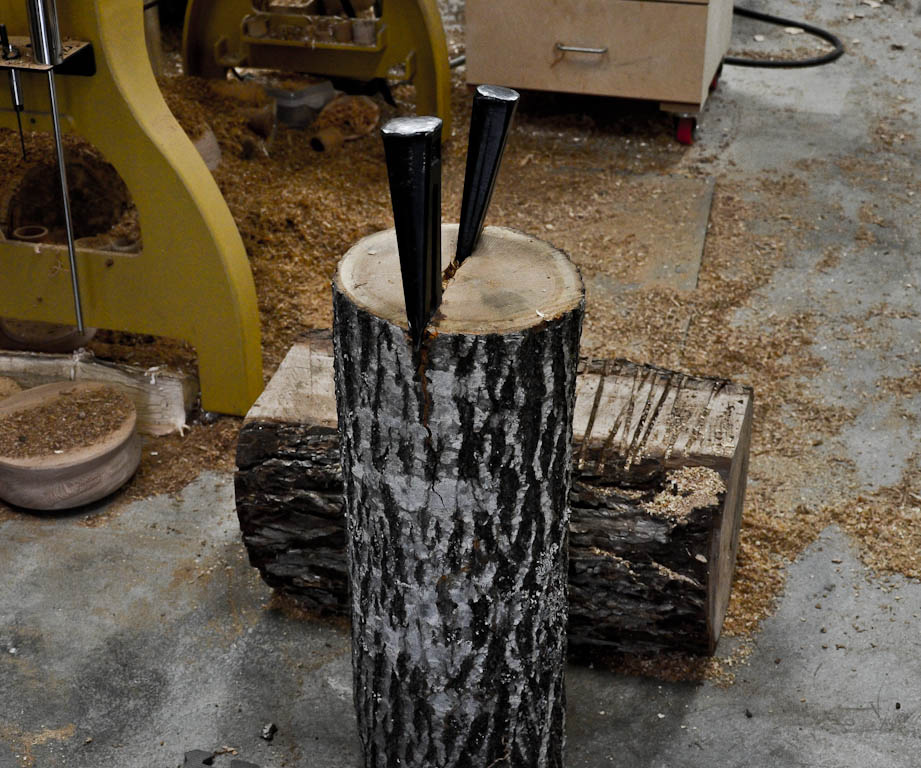
Place the small log standing on the end grain on a chopping stump. Using a wedge, create a score mark across the diameter of the log. If possible, you should align this score across an existing crack that may appear in the end grain. Hammer in the wedge or wedges to introduce the split. I have found working with two wedges helps to speed the process.
I hammer in a ½ inch or so, and then remove the wedge and move it over towards the pith. Repeat the process across the end grain, driving the wedges deeper, until the log starts to split. You can watch the split move down the length of the log. Hopefully, the split will track straight down, and not twist around the log. You will find that, unsurprisingly, logs with twists are much more difficult to split than those with straight grain.
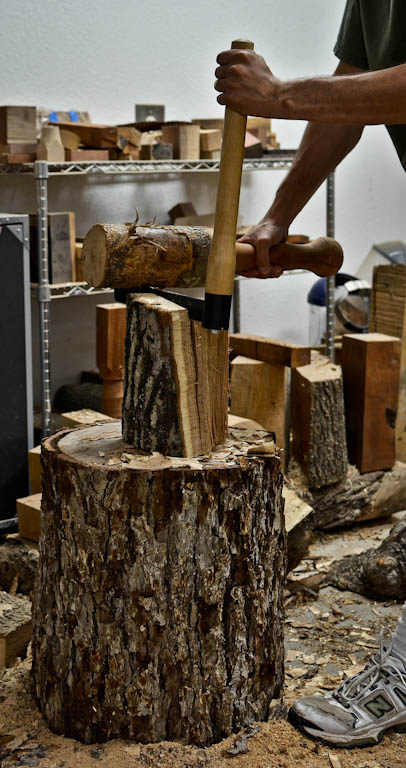
Once the split has started, you can switch to the froe (for smaller logs) to continue the split down the log. The froe is used by moving the handle back and forth forcing the split further down the log. As the split moves down the log the froe is pushed deeper into the split.
For larger logs, I have found that I need to use the wedges down the sides of the log to open up the split. One interesting experience you will encounter is the sound of the wood splitting. It is quite satisfying to hear the splitting sound. Once the log is split in half, the subsequent splits are much easier to accomplish. Peter and Jennie, in most cases, recommend splitting each blank or bolt in half.
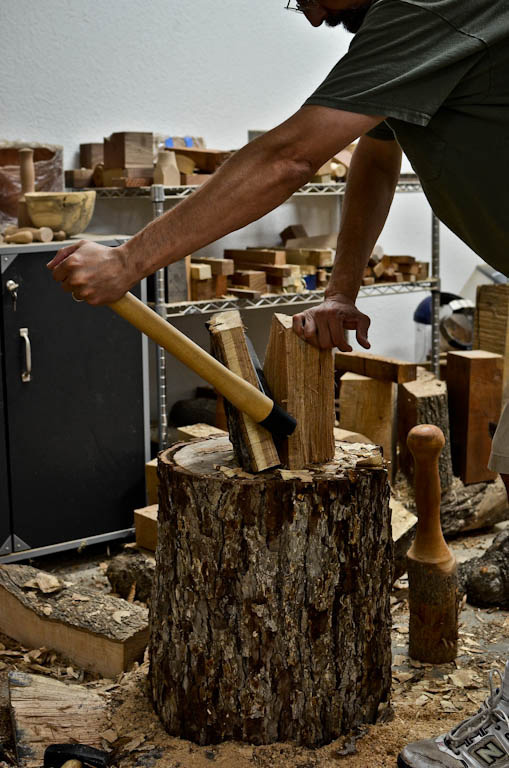
Remember, our goal is to create blanks for spindle turning. As we split the log we need to be looking for a pie shaped wedge that will yield a spindle blank that is larger than the diameter we need.
Next we need to split away the sapwood and pith. The froe makes quick work of this step.
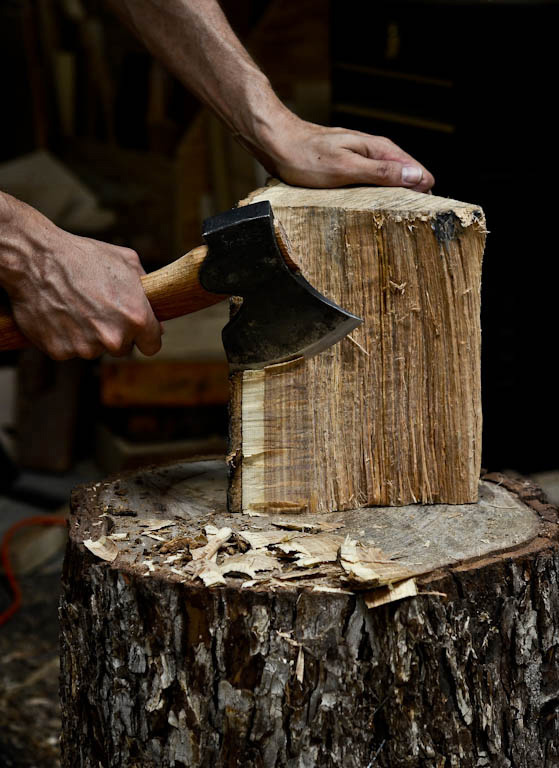
Hewing
Finally, we need to hew the split stock into a blank suitable to mounting on the lathe. It is at this stage one needs to work carefully. Peter recommends that the blank be placed on the rear quadrant of the chopping log - or in other words, farther away from you. If you are right handed, then your right leg should be extended behind you (away from the stump). This combination helps to minimize the chance of a misplaced axe swing from contacting your leg. The axe will more likely contact the front quadrant of the chopping log. Obviously, you should not do this type of work if you are tired or otherwise unable to focus on the task at hand!
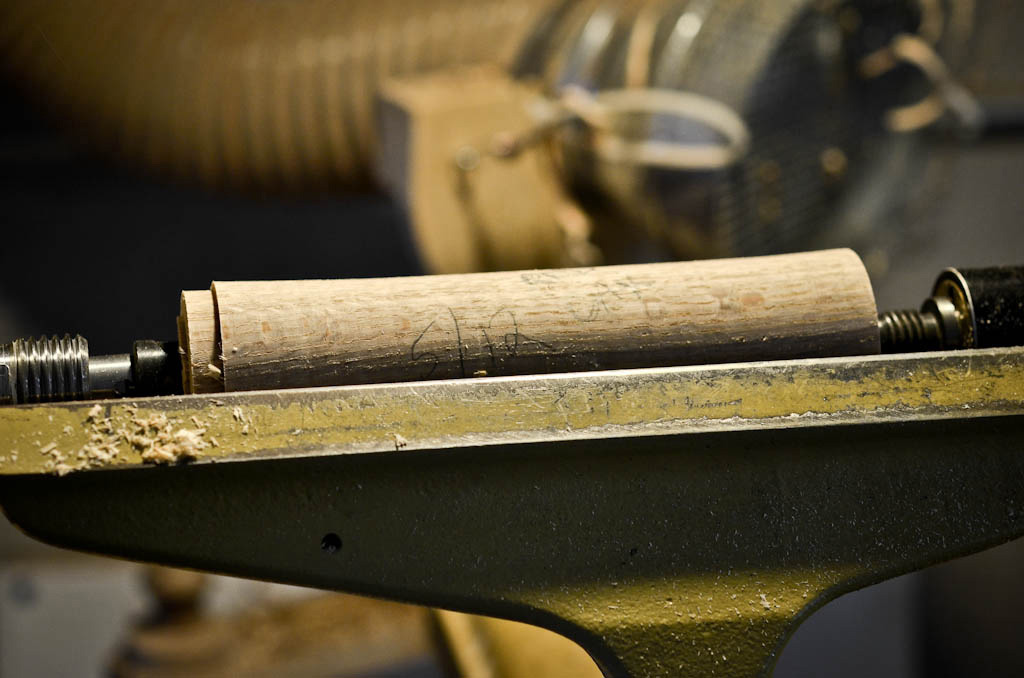
The goal at this stage is to produce material that can be mounted between centers, and turned into a spindle for chair parts or perhaps an end grain lidded box.
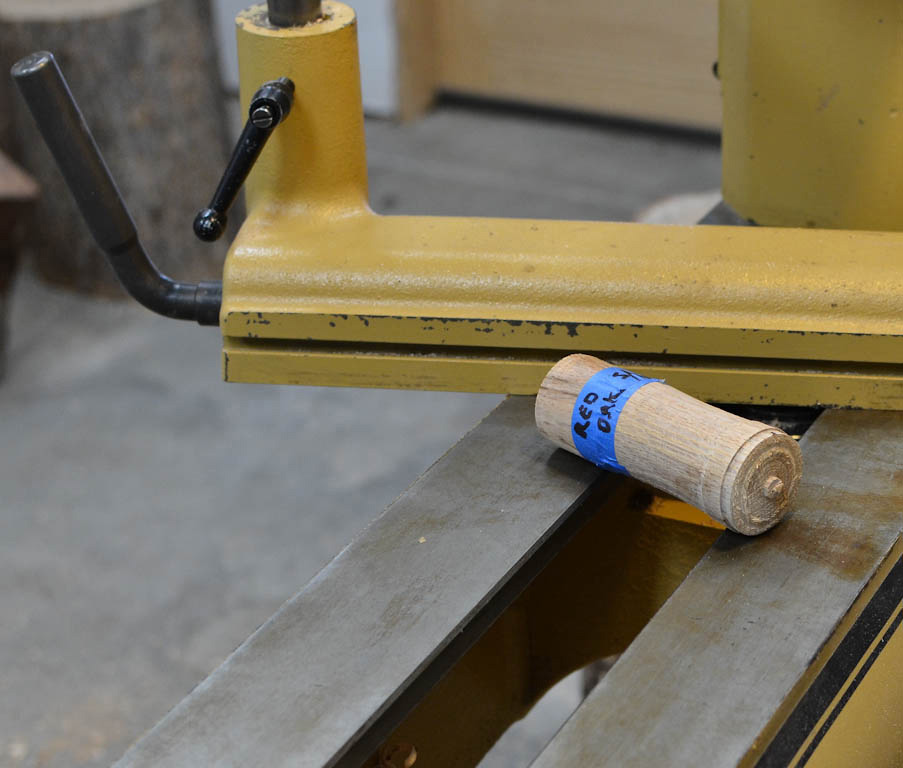
If you are working with green stock, you should rough turn the parts and set them aside to allow the wood to finish drying. On a larger blank, I coat the end grain with
Anchor Seal
and bury it in a stack of wood shavings. The smaller blanks are simply buried in the shavings or placed on a rack to dry. I typically label the rough turning with wood species and the date as it is hard to remember which piece of wood is which when you unbury it from shavings six months later.
I hope you decide to try riving stock for your next project. You may be surprised how much you like it. I also recommend you check out "Making a Joint Stool from a Tree". It is an enjoyable read. I am sure you will learn a few items you can include in your arsenal of skills.
Curtis is a former President of
Central Texas Woodturners, a member of the
American Association of Woodturners, and a member of
Fine Woodworkers of Austin. Curtis teaches and demonstrates nationally for Lie-Nielsen Toolworks. He also teaches for TechShop. He owns a studio where he teaches and works. Curtis lives in Central Texas with his wife and four young children. Take a look at his website at
www.curtisturnerstudio.com or visit his
Instagram: tx_planes.