How I Turn a Bowl
by John Perrella
Note: click on any picture to see a larger version.
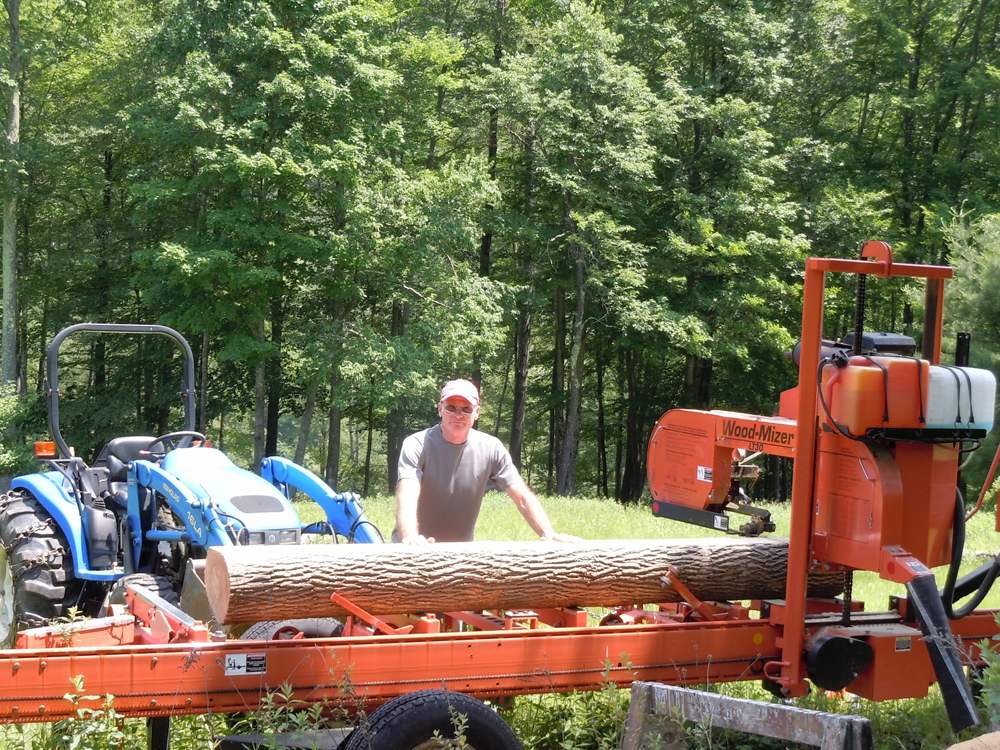
My studio consists of an extensive woodshop where I create hardwood furniture and turn bowls on a lathe. I obtain all the wood for my projects from native hardwood trees here in New York. These are some of the finest hardwoods in the world. Species I like to use are black cherry, red maple, white ash, sugar maple, american beech and black birch. I harvest with a compact tractor fitted with a small winch made in Sweden. This small machine minimizes adverse impact on the environment. My forestland is managed to provide firewood from the culls, wildlife habitat for deer and the myriad of other animals that live here, biological diversity of species, and high quality hardwood lumber from the best trees.
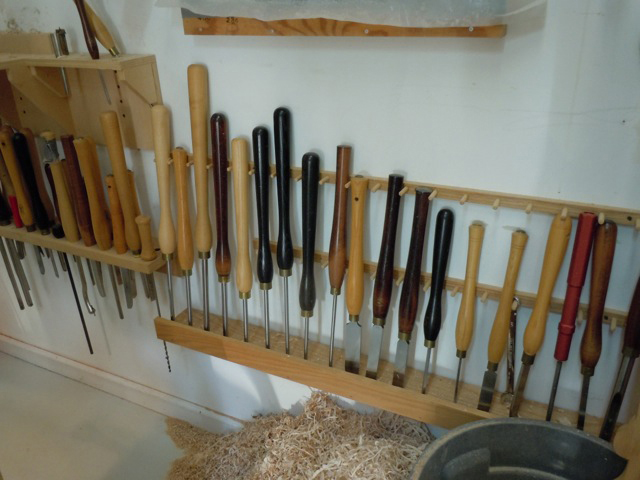
I use a portable sawmill to make boards from the raw logs. These boards are air dried for several years before use. The primary bowl turning tool in my shop is a Powermatic lathe: a large, heavy machine that enables me to be as precise and creative as my imagination and effort will allow. With this wonderful forest resource combined with lots of equipment and skill I create one of a kind pieces that are functional and pleasing to the eye.
My process for creating a bowl goes something like this. First I select a tree for harvesting. Since small pieces can be incorporated into a bowl, the tree can be of a secondary quality since I can eliminate knots and other defects during the sawing and assembling phase of the work. Trees with features that are considered defects in the hardwood industry sometimes produce very unique grain and color patterns that I find useful. This enables me to utilize the resource in a better way.
I have had to learn how to fell a tree properly. You can get hurt if the job isn't done right and it is dangerous enough when done correctly given that branches can come raining down and the unforeseen can happen. Protective gear is a must. After the tree is felled and cut into lengths to minimize features in the log such as sweep, branches and defects, it is out of the forest and over to the sawmill. I may recut the ends of the logs so that I have a clean surface onto which I apply end grain sealer.
The log is placed on the band saw, oriented so the best boards will be obtained, then sawn into boards of varying thicknesses. I have homemade forks attached to the bucket of my tractor to help move things around.
Each board is labeled with a date and species using a magic marker. They are stacked on a drying rack within an airy shed with stickers (spacers) to create an air space between each layer and allow for air flow, facilitating the drying process. A rule of thumb is that it takes one year of air drying for each inch of board thickness. When dry to about 12% moisture content the wood is ready to be brought into the shop for a little final drying.

|
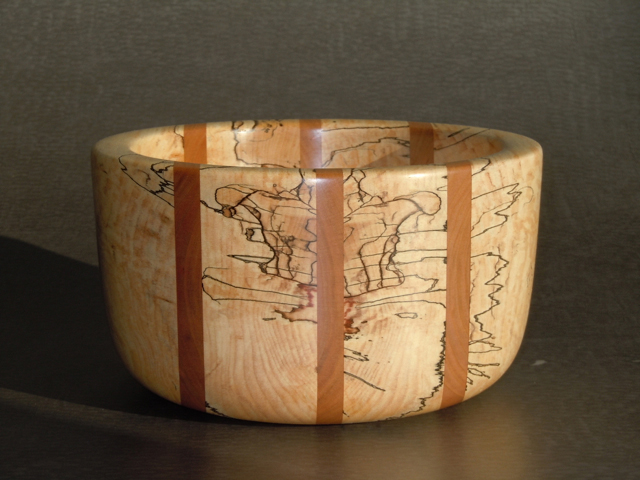
From the wood available in the shop I select boards which might be combined into a blank for turning. The boards are cut to length, the ends sealed and planed and joined to perfection. This step is important. The jointer and planer must be set up correctly and the blades must be sharp or good results will not follow. The wood is dry assembled with the aim to create pleasing patterns by combining different species and each board's special features. The preconfigured wood is then glued into a rectangular blank with as many bar clamps as space will allow holding things fast. After the glue dries the blank is cut into a cylinder on the band saw. I apply a waste block to the bottom of the blank onto which the face plate is attached. And I use all the holes. Anyone who has had a heavy blank come off the lathe at 900 rpm knows better than to attach the work lightly.
|
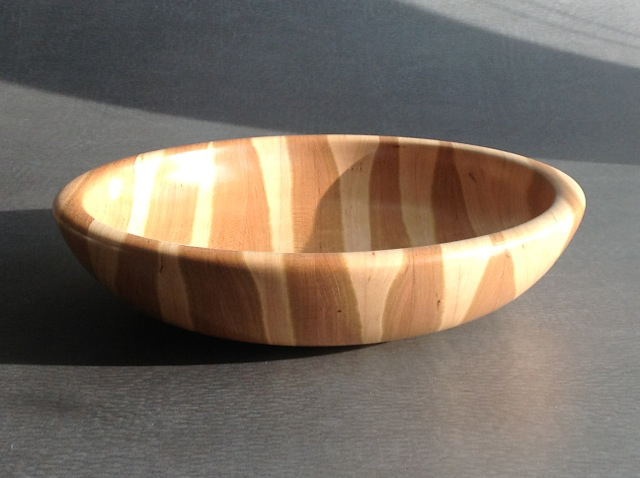
After truing up the blank on the lathe the creative work begins. I try not to have a preconceived idea of the shape of the piece. Once trued I will look at grain patterns, interesting features and the way multiple species are making contrasts. A general idea of the shape of the piece is formed, which I reserve the right to change as I go, and I begin creating a work. I turn the outside first. Pleasing curves are a must. When working on the inside of the bowl you must decide how thick the walls will be. Good work exhibits no tear outs, has smooth, continuous curves and is sanded to perfection. When a bowl is in hand, its shape, size and weight form a relationship that can make a piece feel just right or clunky.
A food safe finish is applied by hand. Two or three coats are applied with fine steel wool used between coats. I inscribe a serial number, which uniquely identifies the work, my name and the species of the wood used on the bottom of the bowl. It is photographed and cataloged in a database on my computer.
I have created well over 1500 pieces which reside in homes from one end of the US to the other and in a few foreign lands as well. Turning is a satisfying and creative activity that is a joy for me to be involved with.
You can email John at
jgperrella@gmail.com.