Turning a tool handle
by Curtis Turner
Round Rock, TX
Note: click on any picture to see a larger version.
There is a great sense of satisfaction that comes from making your own tools. I take pride in the sense of self-sufficiency when I have created something useful. I find that this sense of accomplishment is a common motivator for both woodworkers and woodturners. This month we will turn a handle for a turning tool that can be used and admired for decades.
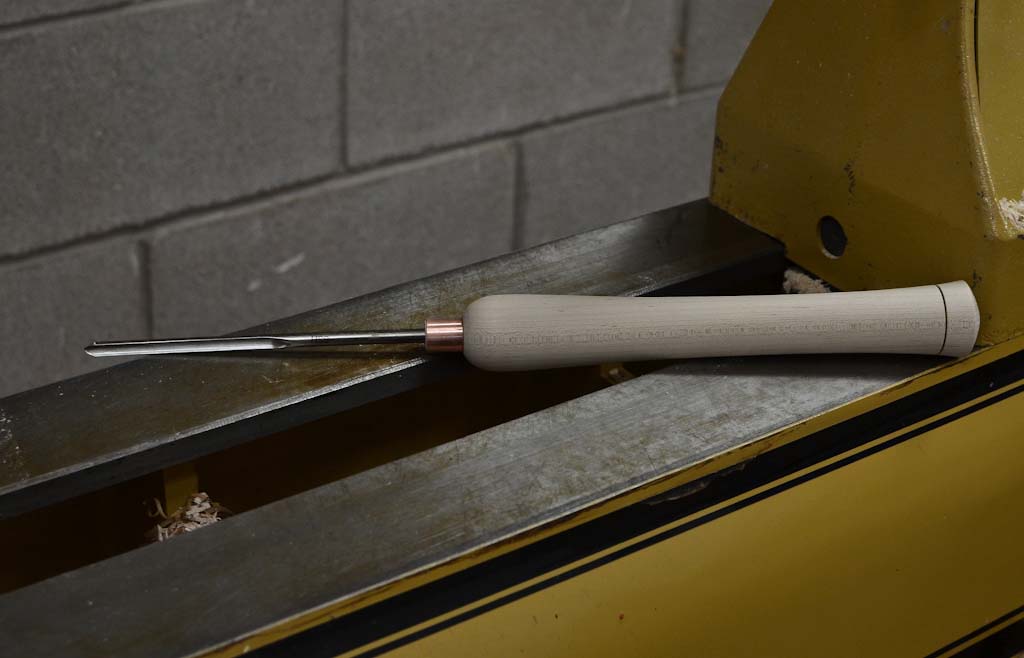
In my case, I had acquired a small spindle gouge mounted into a wood handle that was entirely too long for this gouge. I decided to make a replacement handle and placed this unused tool back into action.
The wood
I selected a piece of straight grain maple. Any hard, straight-grain wood would work. For example, I have successfully used oak, mesquite, and jatoba as tool handles. However, you should avoid any woods that have splating or other defects, as they will have diminished strength in use of the final tool.
This handle is for a small spindle gouge, therefore this handle is a bit smaller than for most of my other tools. The completed length of this handle is 10". If you are replacing a handle for a larger tool, you can simply scale the handle to fit the tool.
First step
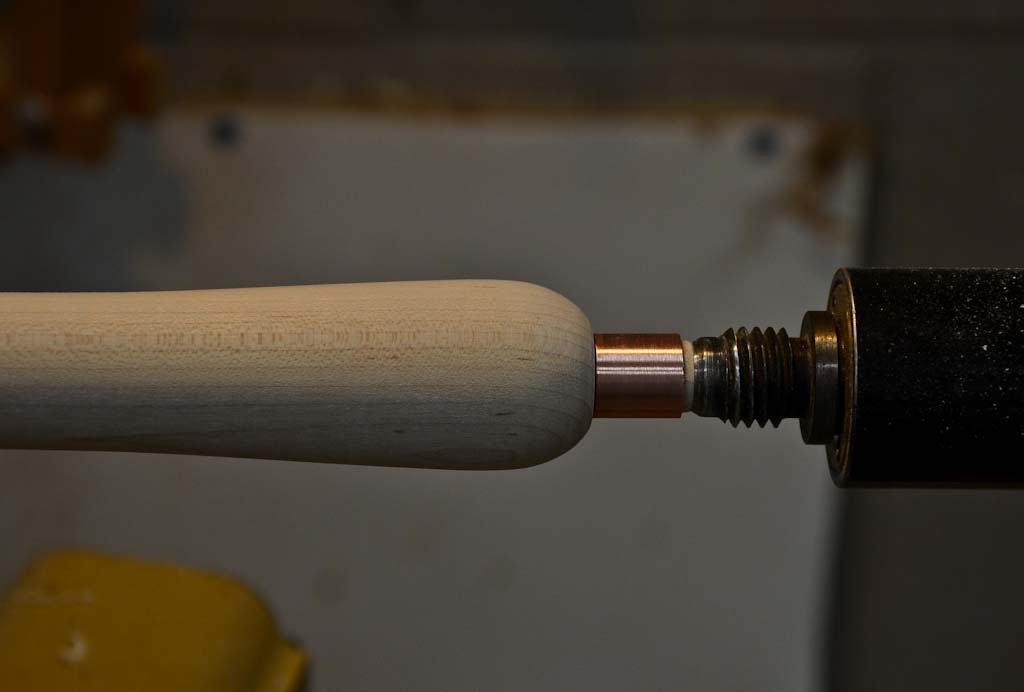
I began by using a pipe cutter to cut a ferrule from a section of copper pipe. The ferrule length, in this case, is 5/8". I also used the de-burring tool attached to the pipe cutter to smooth the inside edge of the ferrule. The ferrule provides a band that holds the wood fibers in place, thus reducing the chance the fibers will split during the tool’s use.
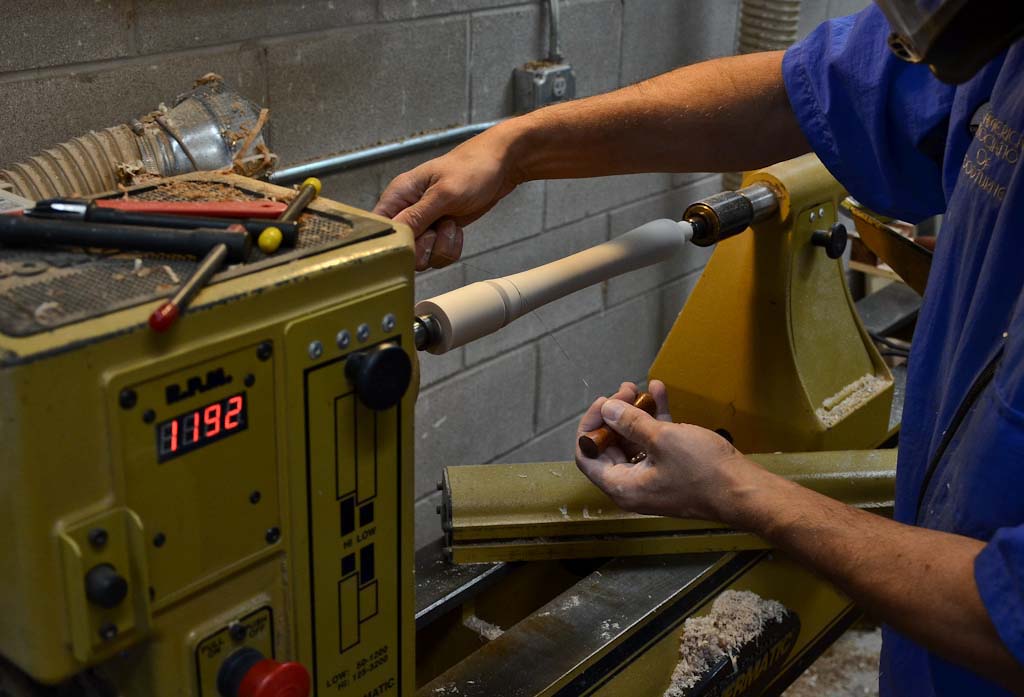
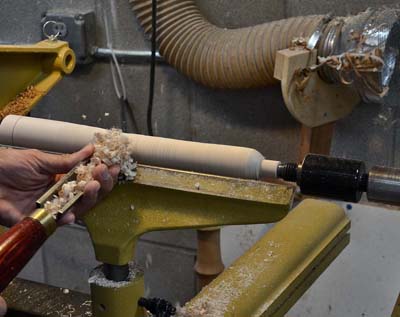
Next, I mounted a blank between centers and turned it round. In this case, I turned the blank down to approximately 1-1/2" diameter. I used a spindle roughing gouge and a skew for the bulk of the work at this stage.
I opted to position the tenon at the tail stock end of the lathe. This placed the heavier mass of the blank at the head stock end. In addition, this allowed me to turn the tenon down to 5/8" and still have support from the live center.
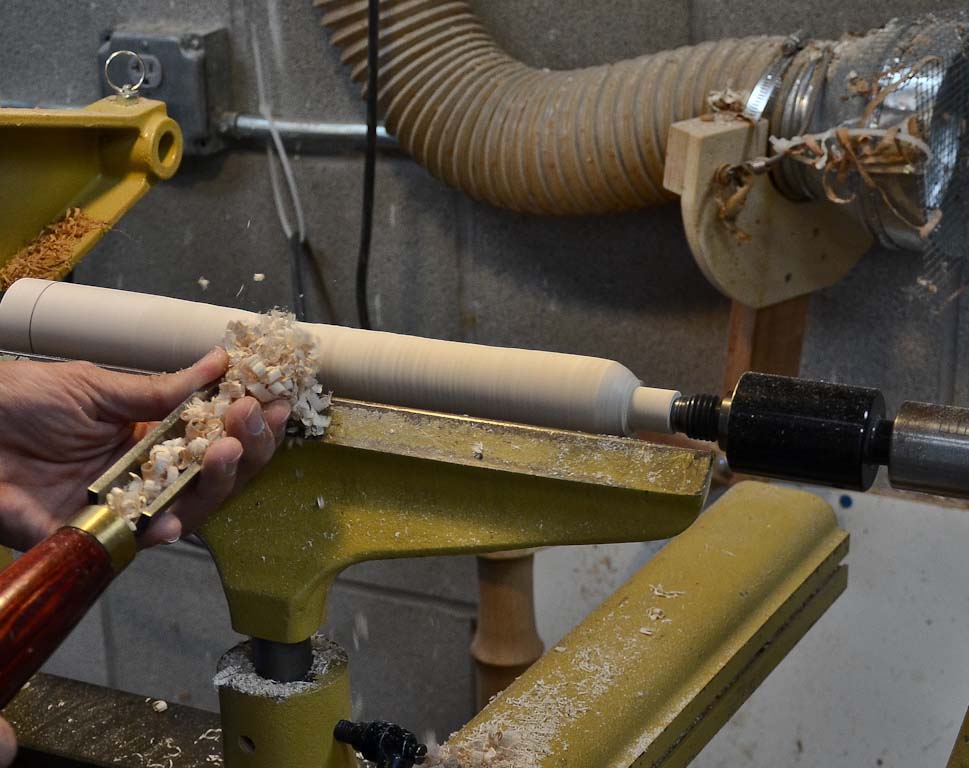
Shaping the handle
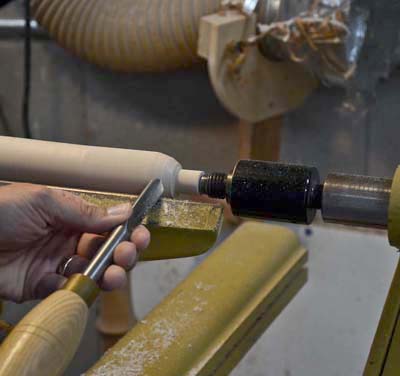
I begin by marking out for the length of the copper ferrule. I recommend that the tenon be just about 1/8" longer than the length of the ferrule. I think it is easier to remove the excess tenon than it is to reshape the entire handle if your tenon is too short. This excess can be sanded away later. I used a large parting tool to remove most of the tenon, still leaving it oversized at this stage. Defining the tenon allowed me to have a clear view of this transition.
|
|
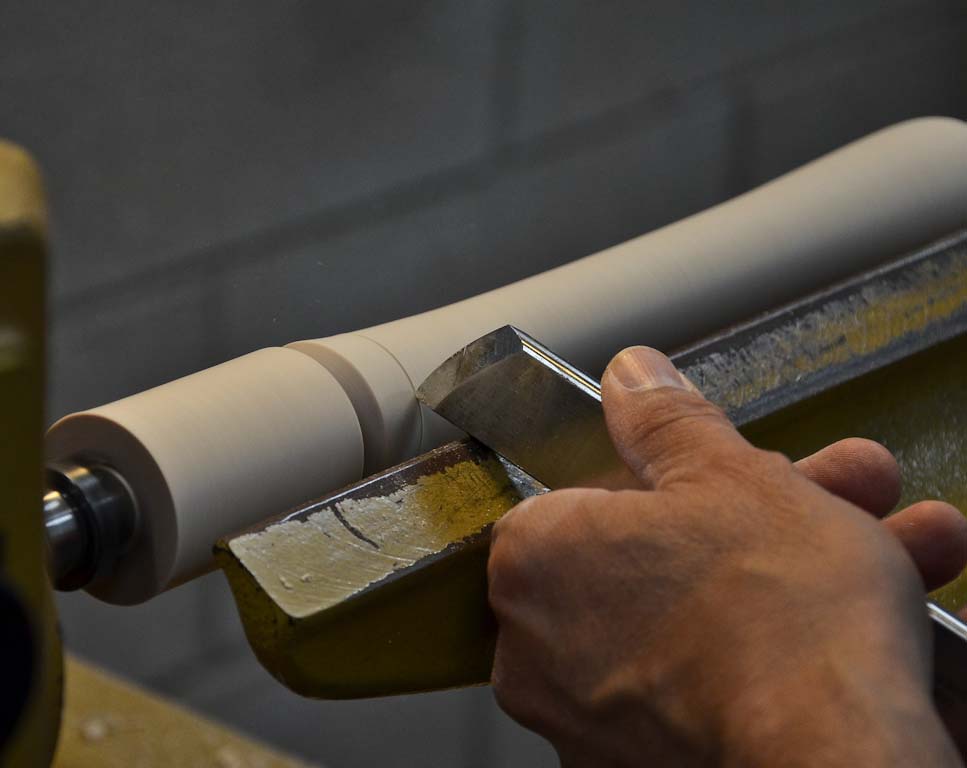
Next, I begin shaping the handle to the profile I prefer. My goal at this stage is to shape a handle that feels comfortable in my hand. I used a spindle roughing gouge and skew to shape this stage of the handle. I also used a spindle gouge to shape the large diameter of the handle where it transitions to the tenon. I made this large curve terminate just above where the copper ferrule butts into the shoulder of the tenon. Remember to test the feel of the handle as you go. This helps you find the bumps and dips that may not be visible by eye.
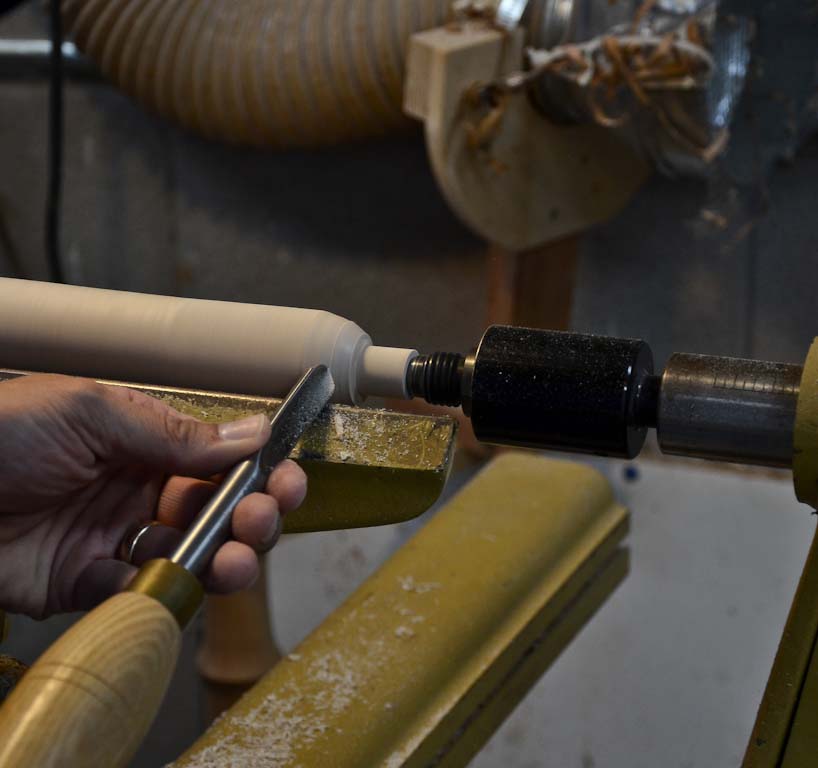
Details add character
The end of the handle can be shaped to your preferred pattern. I chose to add a single v-groove near the end of the handle. I then used a wire to burn in a black line to add a decorative visual detail.
Once the overall profile was complete, I then turned my attention back to the tenon. I completed turning the tenon to fit the ferrule. I then pushed the ferrule into place. This requires several back and forth test fittings. I wanted a tight fit without causing wood fibers to buckle and tear out as I forced the ferrule into place. Once in place, I sanded the ferrule to create an even, attractive appearance. If your ferrule is a bit loose, adding a drop or two of CA glue will solve this problem.
Drilling on the lathe
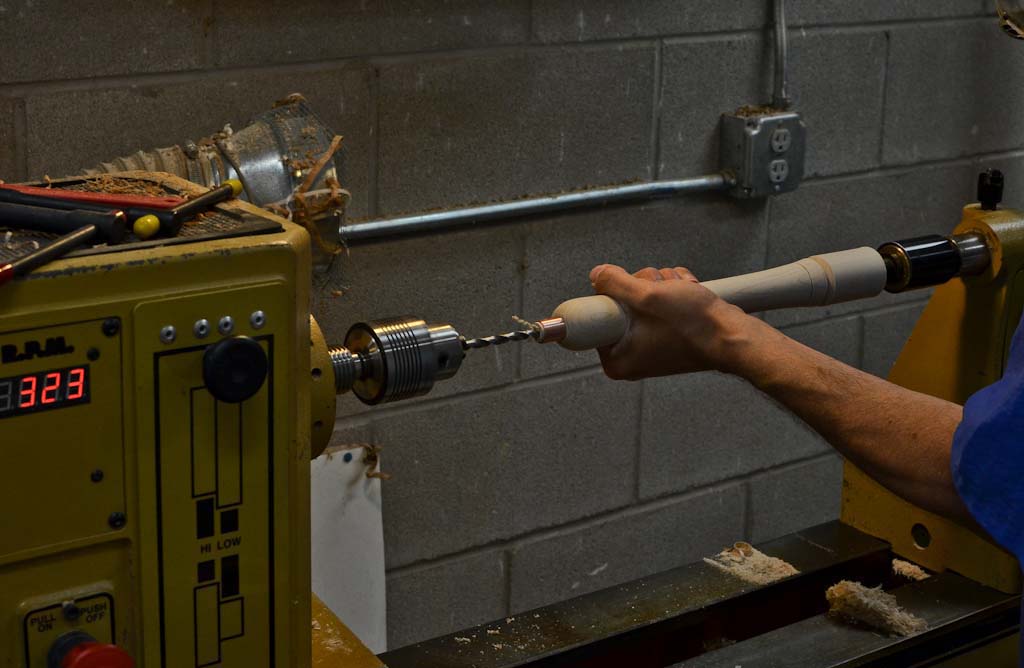
Next, I mounted a drill chuck with a 1/4" drill bit into the head stock, and reverse mounted the handle. The point from the drive center was used to locate the end of the handle into the live center. The drill bit was centered into the point left by the live center. I then locked the tail stock, set the lathe to slow speed (sub-325 rpm), held the handle, and used the quill advance wheel to push the handle onto the drill bit. I drilled approximately a 4" deep hole into the handle. This operation could also be completed on a drill press. However, I personally find it much easier to accomplish this task on the lathe.
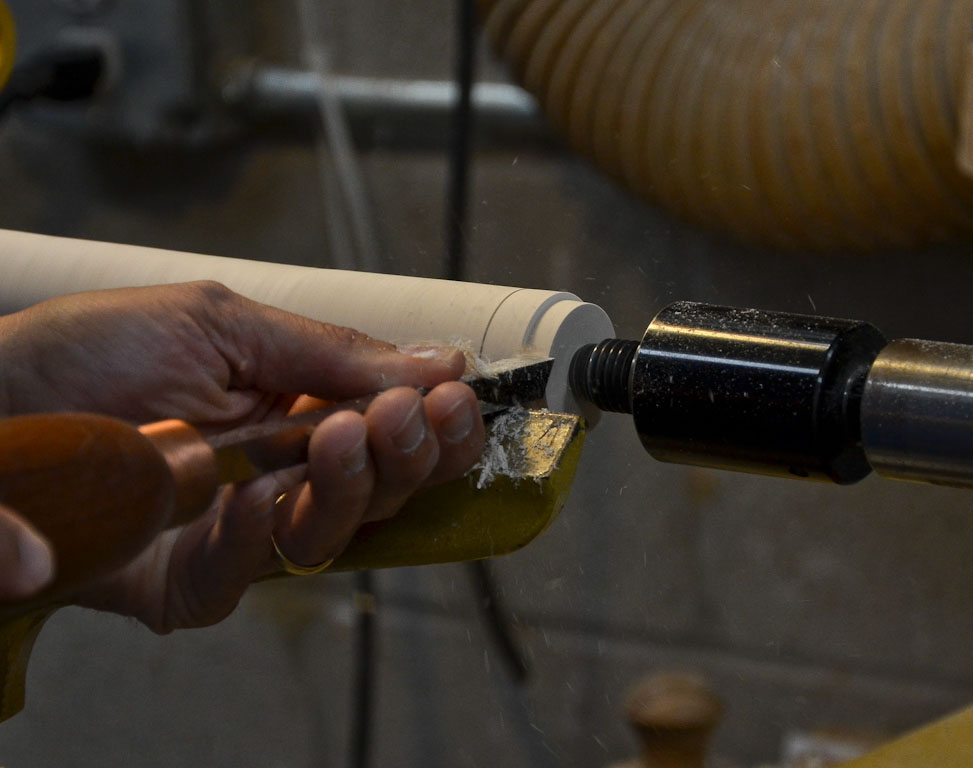
Parting off the handle
Now the handle is almost complete. I remounted the handle and parted away the waste. I used a skew to remove most of this material. The skew leaves a clean cut across the end grain, meaning less sanding, however, a spindle gouge could also be used. I then cut the remainder away with a small hand saw. I used a
Foredom flex shaft tool
to sand away the excess on the tenon and on the end of the handle.
I sanded the handle to 180grit. This leaves a smooth finish, without making the tool too slick and thus too difficult to hold securely while turning.
Mounting the tool
Now it's time to complete this project. The tool should have a very tight friction fit into the handle. A drop or two of CA or epoxy can be added into the hole if the tool is loose in the handle.
The handle can be finished in a variety of methods. For example you could apply any dye, stain or finish you prefer. However, to save time I have chosen not to apply a finish to this handle.
I am pleased with how this project turned out. I am looking forward to putting this tool back into use. This is a quick project you can complete in an afternoon.
Curtis is 2012 President of Central Texas Woodturners, a member of the American Association of
Woodturners, and a member of Fine Woodworkers of Austin. Curtis teaches and demonstrates nationally
for Lie-Nielsen Toolworks. He also owns a studio where he teaches and works. Curtis lives and
works in Central Texas with his wife and four young children. Take a look at his
website at
www.curtisturnerstudio.com
.