Creating a Turned Bandsaw Table Insert
by Rick Morris
Duluth, GA
Note: Click on any picture to see a larger version.
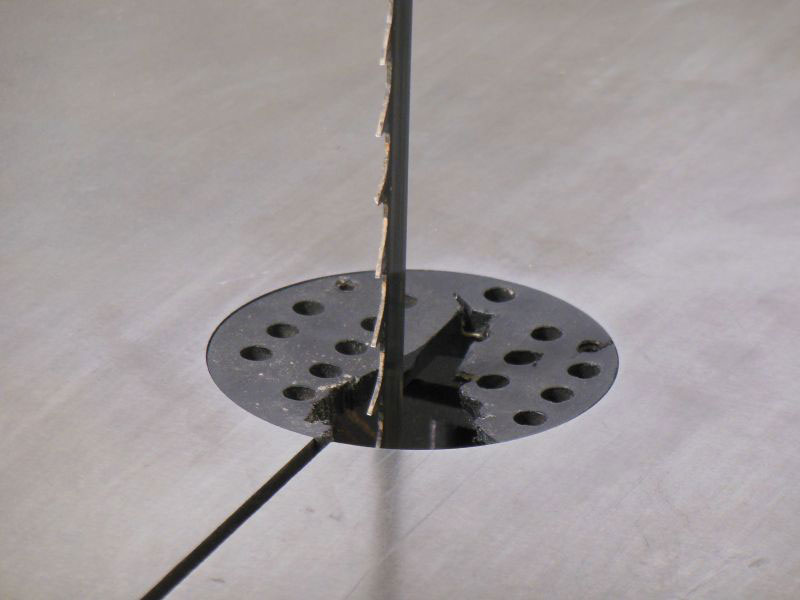
Recently, in a move designed to strike terror into the heart of any sane woodworker, I attempted to crosscut a 3" diameter cylinder on my bandsaw, WITHOUT holding it securely in any kind of clamp. Although I still have all my fingers, the bandsaw blade emerged from the incident severely bent out of shape, and the bandsaw table insert, that little plastic round thing in the bandsaw table that surrounds the blade, was missing chunks of its self-image (see Figure #1).

|
|
Figure 1 - The bandsaw table insert – busted!
|
Well, that's what the internet is for…..I could buy another insert in the time it takes to google it (30 minutes to an hour, considering all the false leads I followed). However, although available from several shops with an online presence, it was going to cost me about $10 for the insert plus another $7 for shipping. Seventeen bucks for a little plastic disk? Why not cut my costs by making a new one on the lathe – after all, the lathe is for making things round, right? How long could it possibly take? (Don't answer that, it's a silly question.)
Getting Started
Any woodturner should be able to make a bandsaw insert. It calls for several chunks of scrap wood at least as large in cross-section as the diameter of the bandsaw table insert, a minor amount of woodturning skill, and innumerable trips from the lathe to the bandsaw to check the fit.
I know you're anxious to get started, but do these two things first:
-
Unplug the bandsaw's power (don't skimp on this step!)
-
Take the blade off the saw – you need unobstructed access to the blade opening in the table of the saw to work on most of this project.
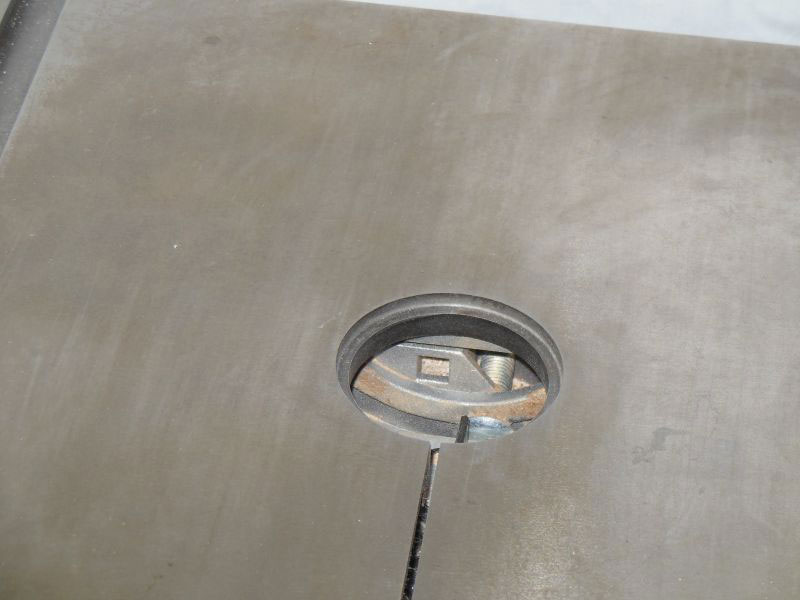
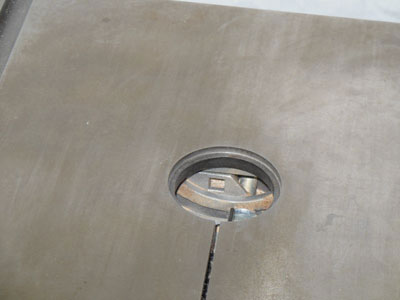
Let's take a closer look at the bandsaw insert opening (Figure #2)
|
|
Figure 2- The opening in the bandsaw table for the insert
|
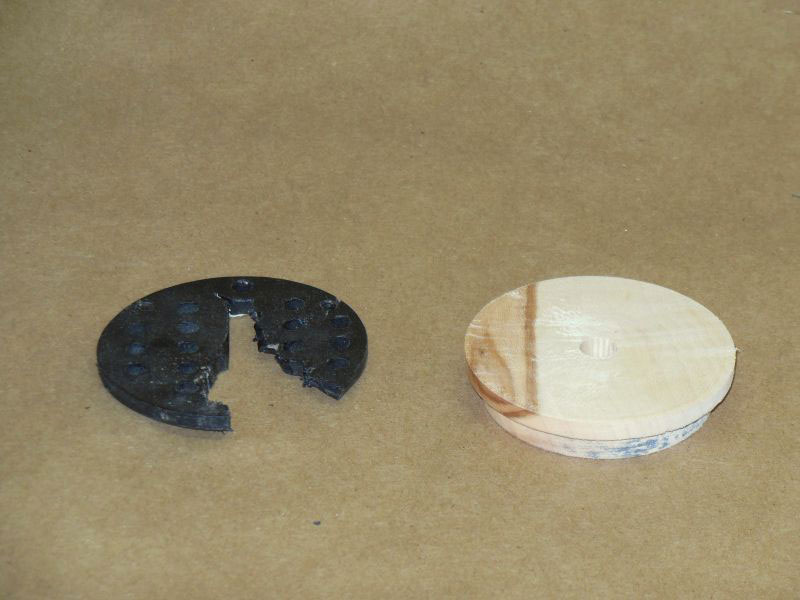
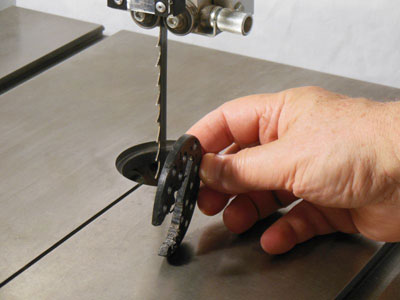
As well as a closer look at the manufacturer's bandsaw table insert (Figure #3).
|
|
Figure 3 - The manufacturer's insert
|
The table opening on my bandsaw is stepped, which must be a design feature, since otherwise the round insert would just fall through it. I don't know if your bandsaw is exactly like this, but I think it's a good bet. The manufacturer's insert is a flat thin disk, fitting into the outer diameter of the table opening. This thin size is all very well and good for it, since it's made of (presumably) some high strength plastic; but for a wooden insert, some additional thickness is desirable for strength. So my turned insert is a stepped cylinder, fitting into both the inner diameter and the outer diameter of the table opening (Figure #4).

|
|
Figure 4 - The turned insert, with a tenon
on the bottom for a strength
|
This approach allows me to create as much thickness as I want – in this case, I will end up with about a 1/2" thick disk.
Turn it sideways
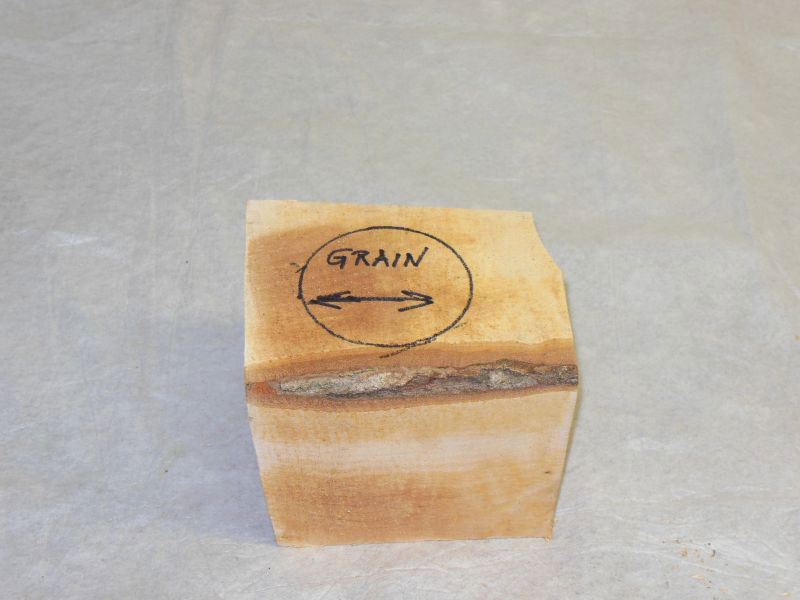
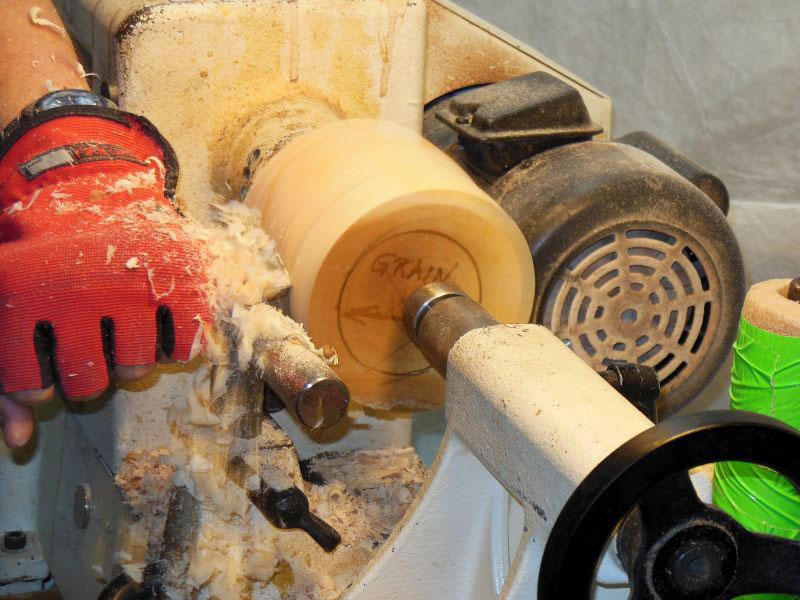
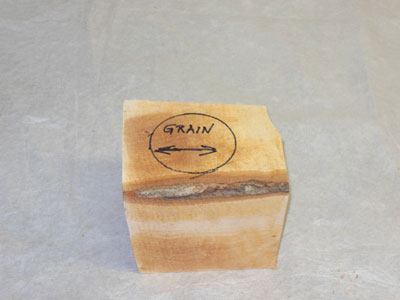
For additional strength, I decided to turn the insert so that the surface is long-grain wood, instead of cross-grain; that is, my turning blank is mounted as a bowl, rather than as a spindle. Figure #5 shows the face of the blank that will be turned with a tenon for mounting in a chuck. (Note: your turning blank will probably not come marked with the circle and arrow – I had to pay extra for this.)
|
|
Figure 5 - The blank is mounted so that the grain will
run parallel to the bandsaw table
|
The following instructions assume the use of a chuck for holding the blank; if you're using a faceplate mounting, the procedure is the same, save for the steps to mount on a faceplate instead of a chuck.
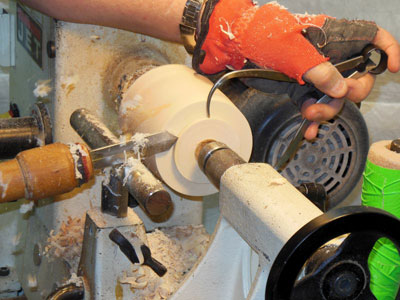
Start turning between centers, roughing down the blank to a cylinder (Figure #6).

|
|
Figure 6 - Rough the blank down to a cylinder
|
Then face off the tailstock end, and turn a tenon for fitting in a chuck (Figure #7).
|
|
Figure 7 - Turn a tenon on the blank for
mounting in a chuck
|
Remove the blank, reverse it end for end, mount it in the chuck, and re-true it.
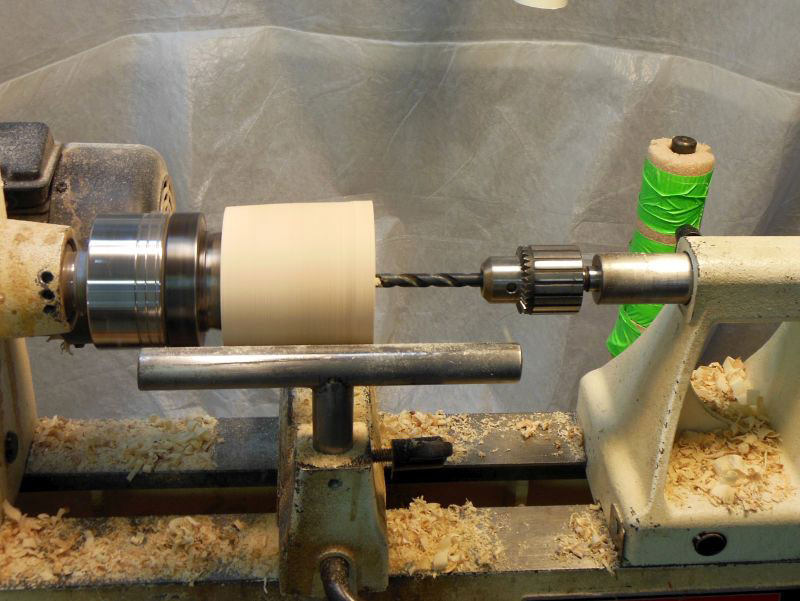
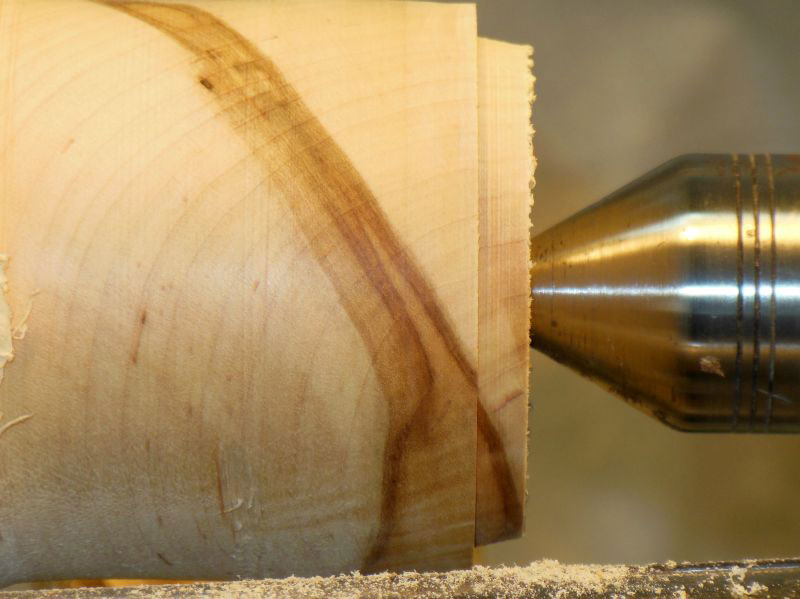
Using a Jacobs chuck in the tailstock, drill a 3/8" hole in the end of the blank (Figure #8).

|
|
Figure 8 - Drill a 3/8" hole in the blank, 2" to 3" deep
|
This hole serves two purposes:
-
It will be the starting point for the bandsaw blade opening
-
It will allow easy mounting of the turned insert for final surfacing (more about this later).
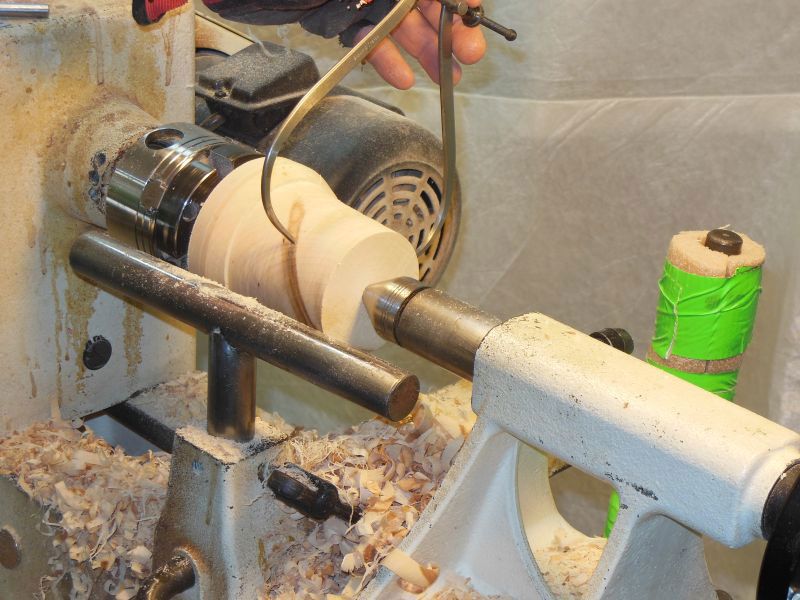
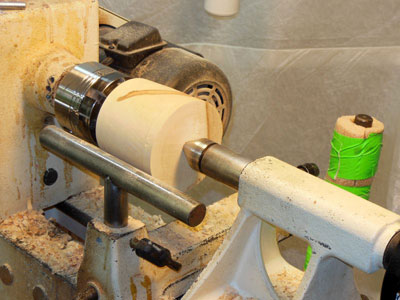
Drill the hole at least a couple of inches deep. Then, for a bit more steadiness, bring up a tapered live center in the tailstock (Figure #9).
|
|
Figure 9 - Use a tapered live center in the tailstock
to add stability to the blank
|
Turning the two diameters
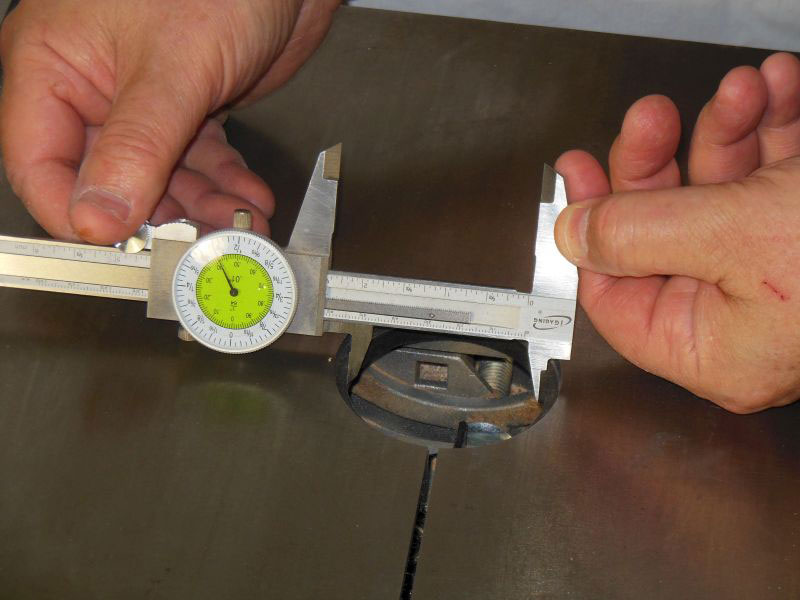
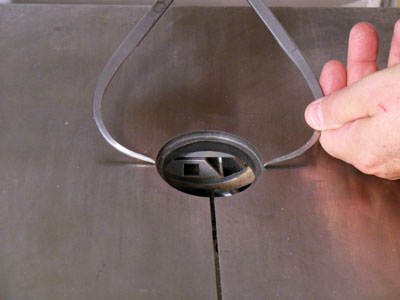
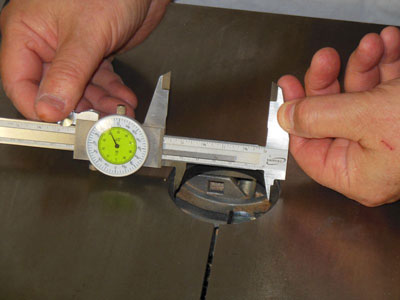
Back at the bandsaw, set a pair of calipers to the diameter of the larger (topmost) opening in the bandsaw table (Figure #10).
|
|
Figure 10 - Set a pair of calipers slightly more than the
outer diameter of the table opening
|
If you are affluent enough to have another pair of calipers in your workshop, set it to the diameter of the inner hole (Figure #11).
|
|
Figure 11 - Set another pair of calipers slightly more
than the inner diameter
|
Then open up both calipers by a fraction, say a half-turn on the caliper adjusting nut – this will make it easier to cut the diameters a bit oversize, so that you can subsequently creep up (or is it "creep down"?) on the exact size.
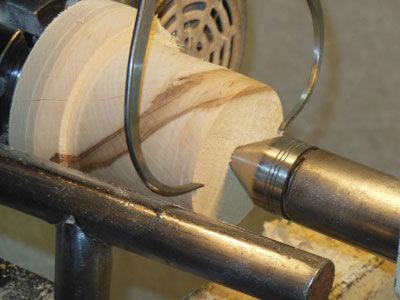
The outer diameter is the first to be turned on the blank (Figure #12).
|
|
Figure 12 - Cut the outer diameter on the end of the blank
|
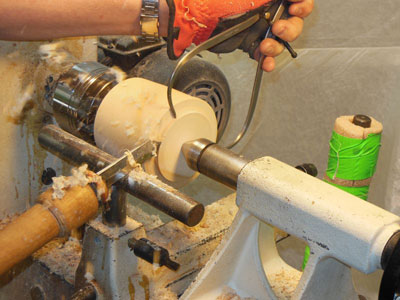
Turn the end of the blank to the outer diameter, and then extend this size some inches to the left, to get a comfortable length of wood to work with, as shown in Figure #13.
|
|
Figure 13 - Begin cutting a 3" to 4" cylinder
to the outer diameter
|
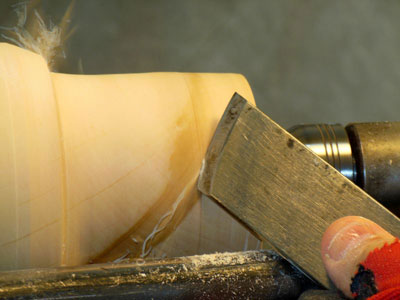
I am using a skew here, but you get to choose your own weapon. Check the size frequently (Figure #14)
|
|
|
Figure 14 - Check the diameter frequently – you don't want
to accidentally cut too much away
|
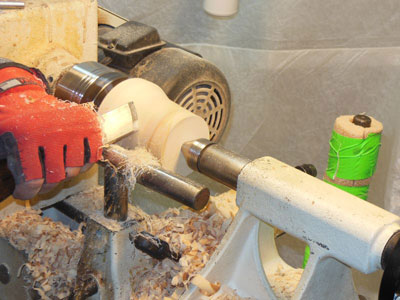
With the previously-set calipers, continue to reduce the diameter until you have a uniform cylinder of the diameter of the bandsaw's table opening (Figure #15).
|
|
Figure 15 - Continue cutting and checking until
you have a uniform length
|
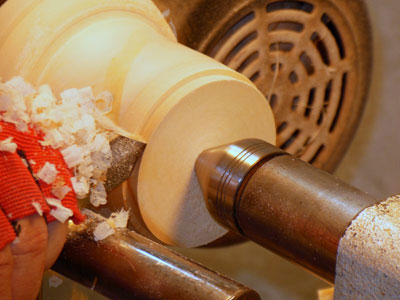
Now you can start turning the tenon to fit in the inner hole of the bandsaw table opening. (You should have this diameter already set on your second pair of calipers. Only one pair of calipers to work with? Change the setting on the first pair, you won't need it again unless you're turning multiple inserts.)
The diameter of this tenon is slightly less than the outer diameter of the piece (Figure #16).
|
|
Figure 16 - The diameter of the tenon to be cut next is
slightly less than the outer diameter just cut
|
The length of this tenon should be at least a quarter inch – longer is better, unless there is some obstacle directly underneath the bandsaw table opening. Diameter-wise, there isn't much material that must be removed, so ease into the cut (Figure #17)
|
|
Figure 17 - Start cutting the inner diameter
|
Go slow, checking the diameter frequently (Figure #18).
|
|
Figure 18 - Once again, check the size frequently
|
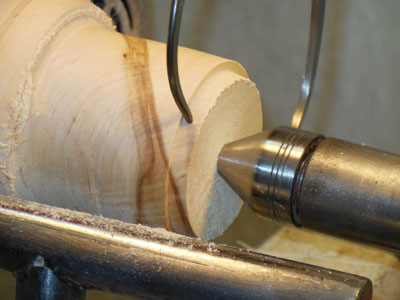
To make it easier to get to the final fit, cut the shoulder at a slight angle (Figure #19).
|
|
Figure 19 - Taper the tenon slightly, to make it easier to
creep up on the correct size
|
Fitting the insert
You should be sure that you are wearing comfortable walking shoes at this point. You'll be making a lot of trips between the bandsaw and the lathe, fine-tuning the fit of the turned insert into the table opening. (Actually, it's not all that hard - after one or two or thirty-seven tries, I nailed it.)
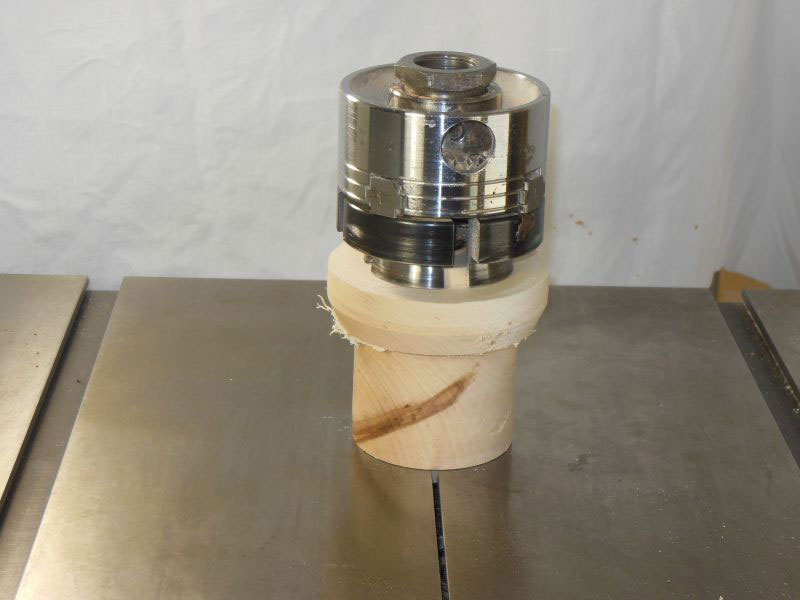
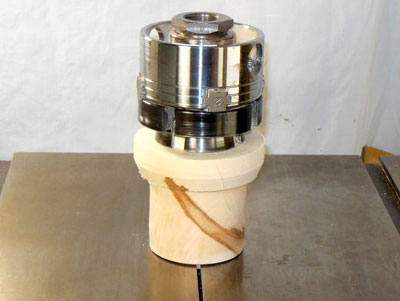
Remove the chuck and blank from the lathe – don't take the blank out of the chuck, just leave it mounted. Take the chucked blank to the bandsaw and place it on the table opening (Figure #20).
|
|
Figure 20 - The first fitting attempt – put the work piece,
still in the chuck, into the table opening
|
It should drop at least a little into the table opening; it may not go down all the way, which is fine; you want to get to a snug fit, not start with a loose fit.
As you can see in Figure #21, my first cut is not quite small enough – the piece goes into the lower opening, but not all the way to the shoulder of the tenon. Again, that's fine.

|
|
Figure 21 - Unless you're really lucky (or really good),
the tenon will be a bit too large
|
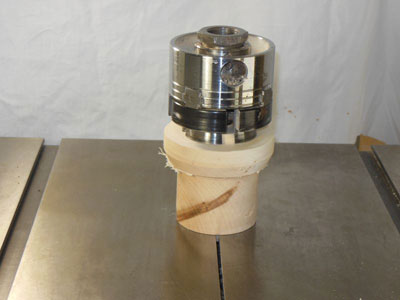
So, back to the lathe, screw the chuck onto the headstock again, and take a little more material off the tenon. Remove the chuck again, and go back to the bandsaw for another trial fit. Rinse and repeat, until you get to Figure #22, where the work piece fits snugly down into the lower opening and rests on the tenon shoulder. (Note that since the outer diameter of the work piece is turned slightly larger than the outer opening in the table, the work piece won't go down any further than the tenon shoulder.)
|
|
Figure 22 - Sneak up on the right diameter, until the tenon
goes all the way into the table opening
|
The next set of fitting trials is for the outer diameter; when finished, the work piece will drop into the table opening fully, so that the inner diameter tenon is resting solidly on the inner opening in the table, and the outer diameter of the work piece is snugly inside the outer diameter of the table opening….it's easier to do than it is to describe!
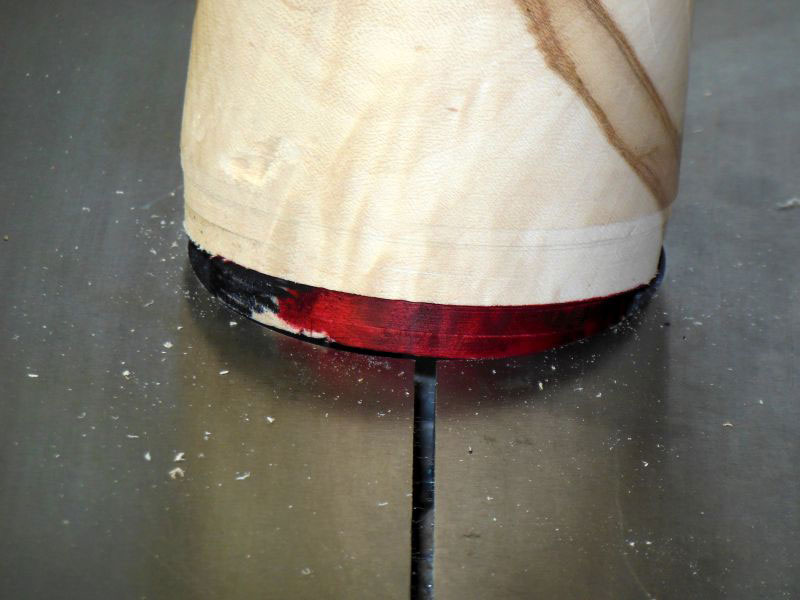
To show the process with a little more clarity, I have reduced the outer diameter slightly and colored the inner tenon red (Figure #23).

|
|
Figure 23 - Fitting the outer diameter –
the tenon has been colored red
|
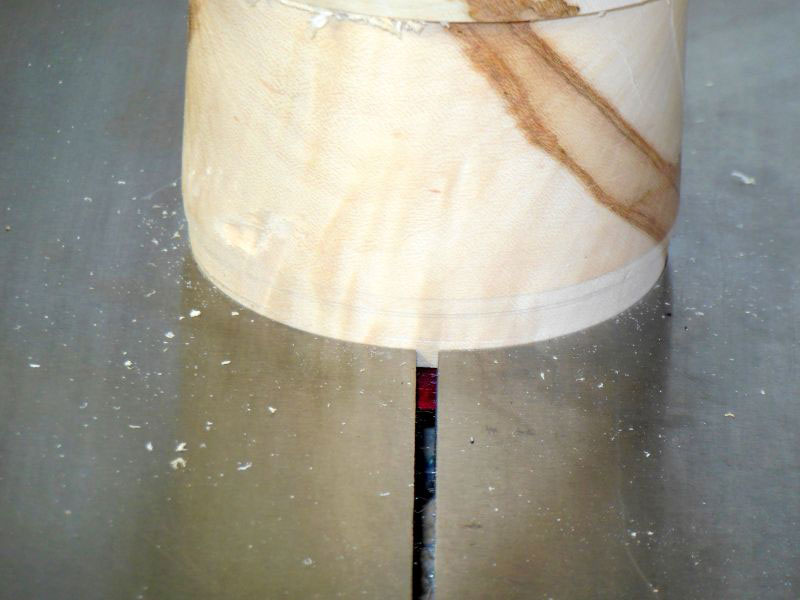
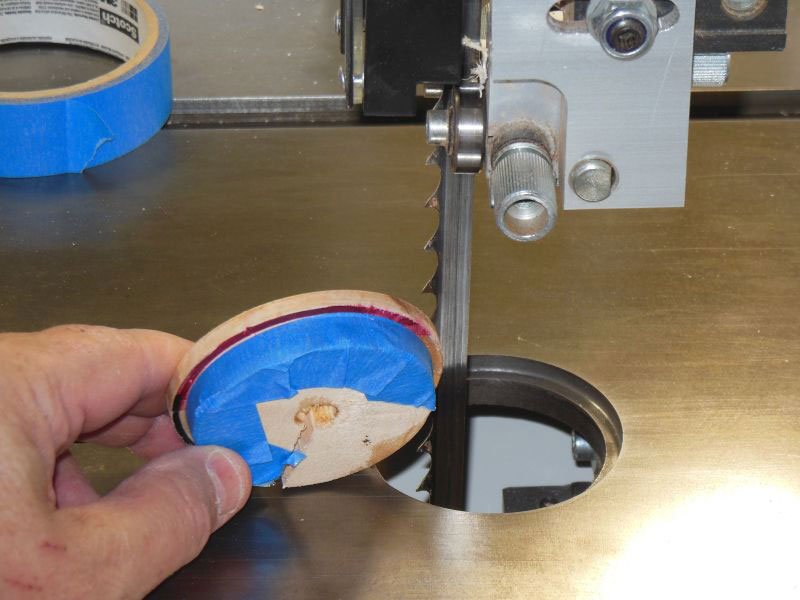
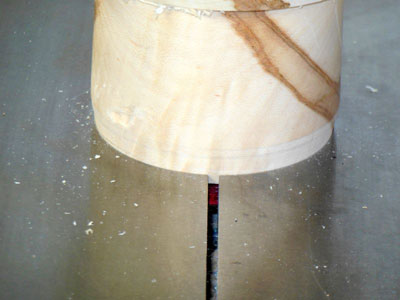
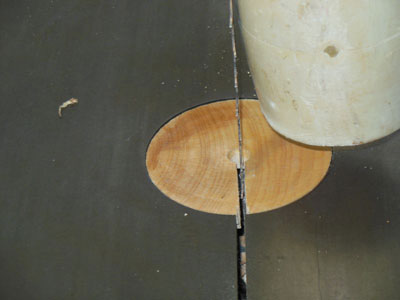
Figure #24 shows the work piece inserted in the outer diameter of the table opening – you can just see the red of the tenon in the bandsaw blade slot at the table opening.
|
|
Figure 24 - The outer diameter is just fitting into the
table opening – the colored tenon is visible
|
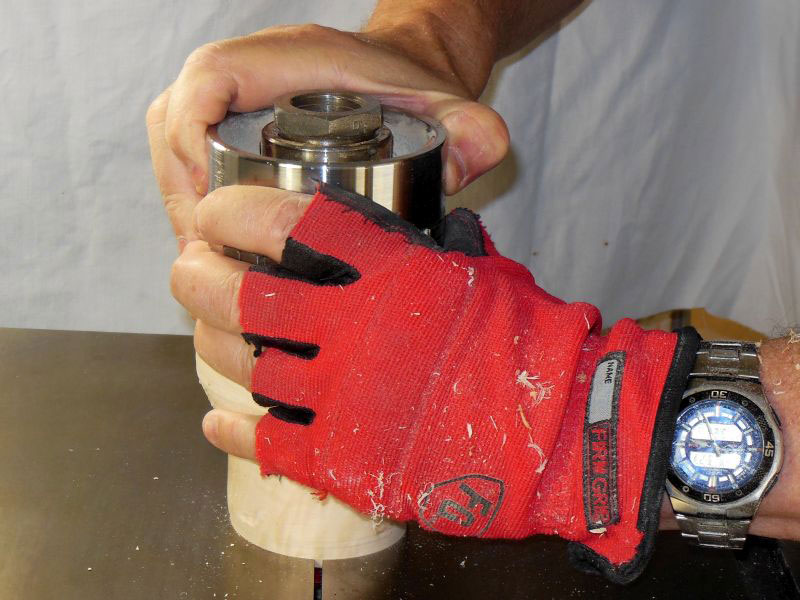
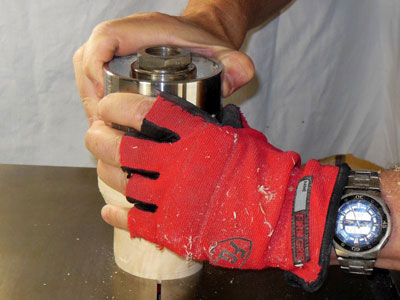
As the outer diameter of the work piece has been turned slightly oversize, the piece probably isn't fully seated inside the opening at this point; if you can rock it back and forth, it definitely isn't down far enough. Grab the work in both hands and rotate it (Figure #25).
|
|
Figure 25 - Twist the work piece around in the table opening
|
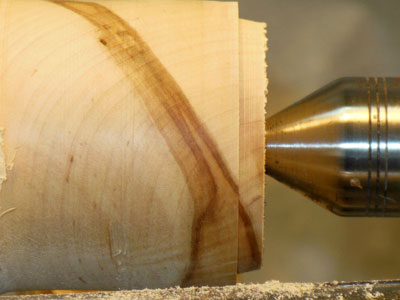
This will leave a mark at the "choke point" (Figure #26), showing where to continue the cut.

|
|
Figure 26 - The twisting will leave a faint mark on the
side of the work piece
|
Back to the lathe, remount, and re-turn, and return to the bandsaw. When it's right, it will fit snugly (or perhaps sloppily – we'll address that later) into the table opening. It won't rock back and forth, or move sideways. It will feel stable.
Separate the insert from the blank
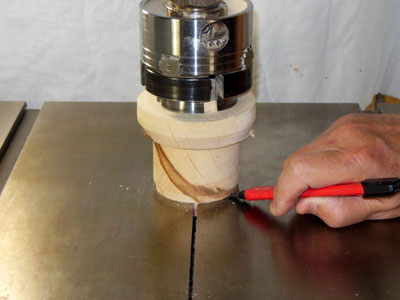
Take a pencil, and mark a line around the edge of the table opening (Figure #27).
|
|
Figure 27 - When the fit is right, mark around the
outside of the work piece
|
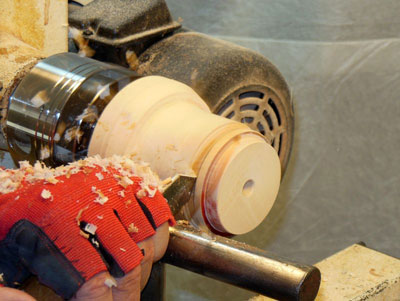
Take the work piece back to the lathe and remount it – you're ready to cut the insert free of the blank, at the line you just marked (Figure #28).

|
|
Figure 28 - This mark is the "upper" surface of the insert
|
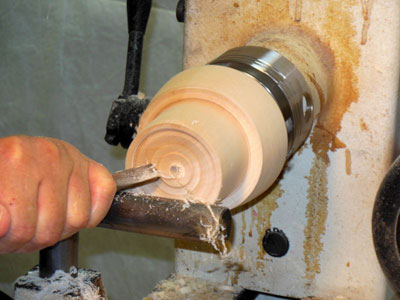
With your parting tool, start cutting just to the left of the line (Figure #29).
|
|
Figure 29 - Start parting off the insert
|
This will leave the insert sitting very slightly high in the table opening. (If you cut to the right of the line, the insert will be too short, so that it sits below the surface of the table.)
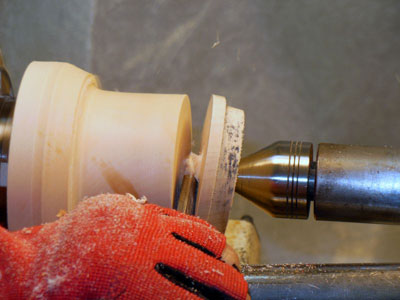
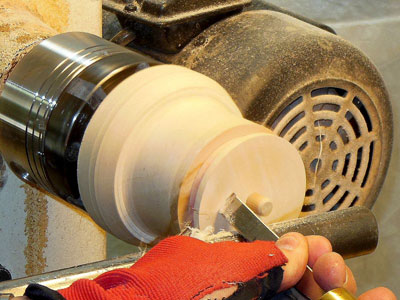
Continue the parting cut, making any relief cuts to the left as necessary (Figure #30).

|
|
Figure 30 - Make relief cuts as necessary,
and continue parting
|
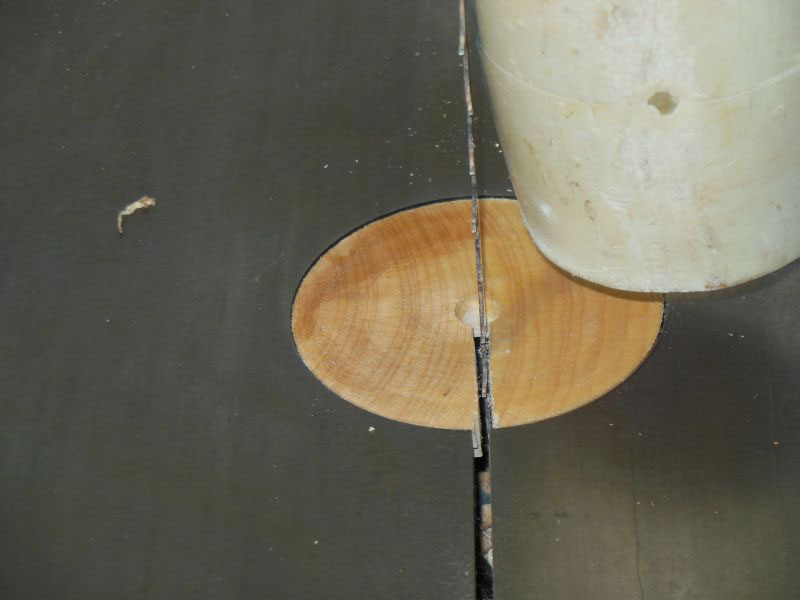
Then part off the insert (Figure #31).
|
|
Figure 31 - The part-off will happen when you get to the
hole previously bored in the blank
|
Remember that hole you drilled through the end of the blank? The separation will come sooner than you think.
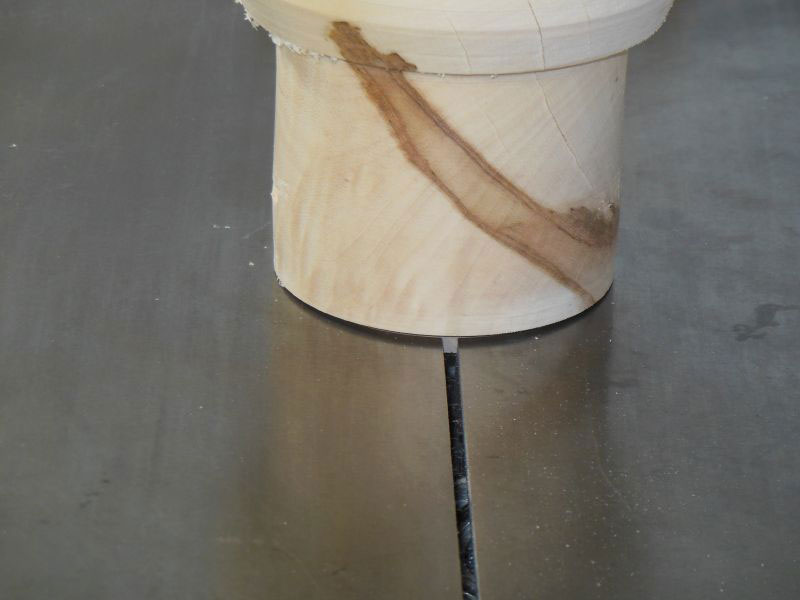
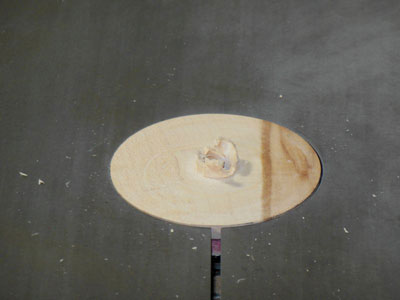
Take the separated insert back to the bandsaw, and put it into the table opening (Figure #32).
|
|
Figure 32 - The separated insert should fit into
the table opening
|
Amazing! It falls right into place! (Or it should, if you carefully followed these instructions and had the patience of a saint to sneak up on the final fit.)
Fine-tuning the height of the insert
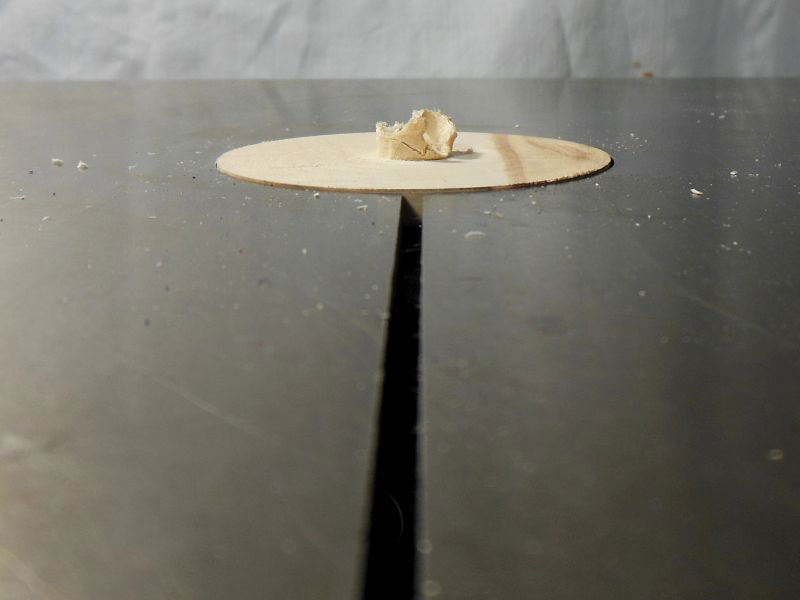
The insert is probably sitting just a bit proud of the bandsaw table surface (three paragraphs ago, I told you to cut just to the left of the marked line). In Figure #33, the slight rise above the table's surface is evident.

|
|
Figure 33 - As planned, the insert sits
just a bit high in the table
|
This is where the hole in the center of the insert comes into use. Push a 3/8" dowel plug through the center hole in the insert and put it into the blank that is still in the chuck (Figure #34).
|
|
Figure 34 - Push a short length of 3/8" dowel through the
insert and position it back on the blank
|
Tap it gently until it is snug against the blank (Figure #35).

|
|
Figure 35 - Gently tap the insert into the blank, tenon first,
leaving the top surface exposed
|
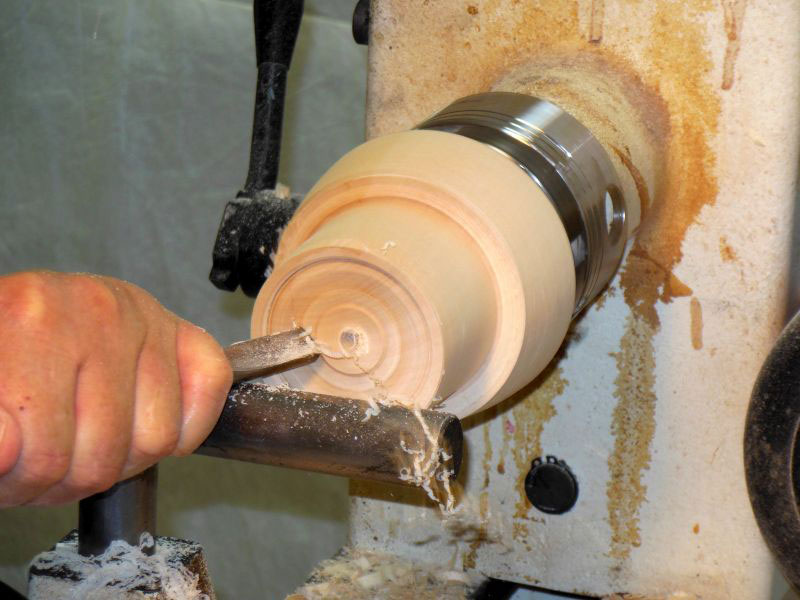
Now use whatever tool you like (in Figure #36, I'm using a ½" skew in shear-scraping mode) to carefully remove material from the face of the insert (that is, the top surface of the insert when it sits on the bandsaw table).
|
|
Figure 36 - Cut and fit until the insert is the right height
|
Once again, go slow, and stop frequently to put the insert back on the bandsaw table to test the reduction in height. Keep on until the insert is sitting flush with the table.
(Note: as shown below in Figure #37, you may wish to make a jam chuck to finish the surface of the insert. I didn't find it helped all that much, and decided to stick with the hole-and-dowel method.)
|
|
Figure 37 - Optional method to finish the surface of
the insert: cut a jamb chuck in remainder on the lathe
|
Final steps
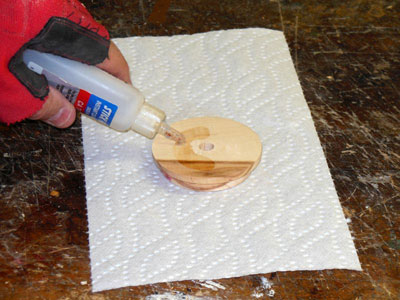
I suggest dousing the top and bottom of the insert with thin CA glue to strengthen the wood (Figure #38).
|
|
Figure 38 - Flood the top and bottom of the insert
with thin CA glue, to add strength
|
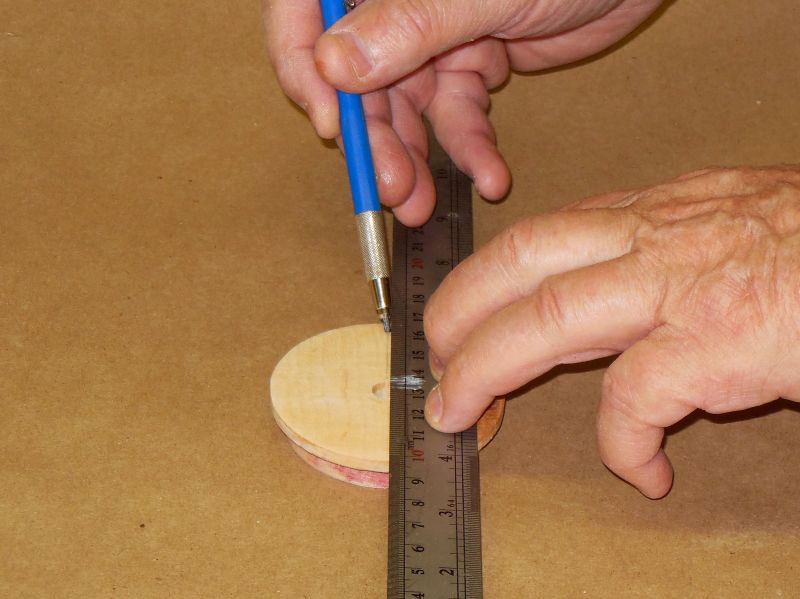
After that glue has set, draw a center line parallel to the grain (Figure #39).

|
|
Figure 39 - Mark a line parallel to the grain
for the blade slot
|
This is the cut line to make the slot in the insert for the bandsaw blade to go through.
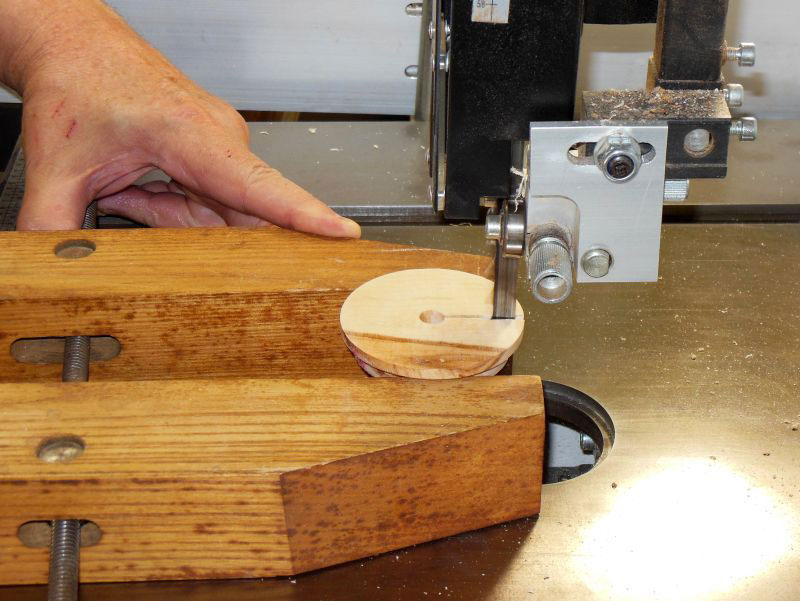
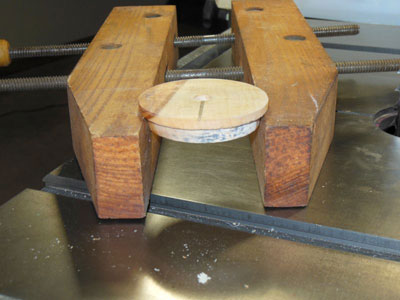
Put the bandsaw blade back on the bandsaw, and plug the power cord back in (you did unplug it earlier, didn't you?). Clamp the newly turned insert in a woodworking clamp, gripping the lower tenon of the insert in the clamp's jaws (Figure #40).
|
|
Figure 40 - Clamp the insert before cutting the blade slot
|
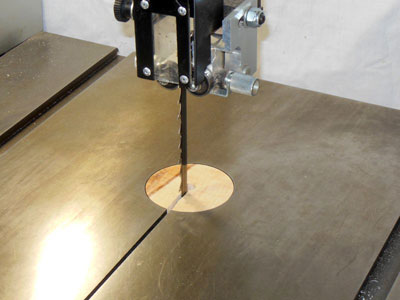
Carefully cut a slot in the insert, from the edge to the center hole (Figure #41).

|
|
Figure 41 - Carefully follow the marked line to cut a slot
for the bandsaw blade
|
Depending on the blade on the bandsaw, a single cut might do, or several cuts might be necessary to open up the slot.
Take the insert out of the woodworking clamp, and from the rear of the bandsaw blade, put the insert into the table opening.
You've now got a new bandsaw table insert (Figure #42) at no additional cost! (Cost effective? Depends on how much you value your time. And your money.)
|
|
Figure 42 - Now the insert fits into the bandsaw table,
around the blade
|
But what if the insert doesn't fit snugly in the table opening?
Chances are, the new insert is just a bit loose in the table; it's difficult to get an absolute exact fit. Unfortunately, a slightly loose fit will allow the insert to rotate some when the bandsaw is cutting, which would then allow it to get chopped up a bit during normal use. Of the five inserts that I made, every single one needed a little bit of help to fit tight.
There are a couple of ways to handle this. The first is my old friend, masking tape (Figure #43).

|
|
Figure 43 - You may need to adjust the snugness of the fit
– masking tape will work
|
It's not elegant, but it gets the job done. (A more classic approach would be to use duct tape.)
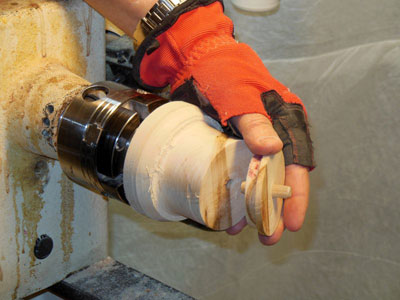
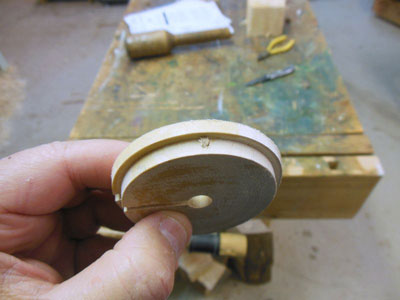
The second way to tighten the fit is to add one or two "adjusters" to the perimeter of the insert's lower tenon (see Figure #44, the small stub of wood at the top of the insert). I put two of these on each insert, on opposite sides.
|
|
Figure 44 - Or the fit can be adjusted by putting a couple of
wood "plugs" in the side of the insert
|
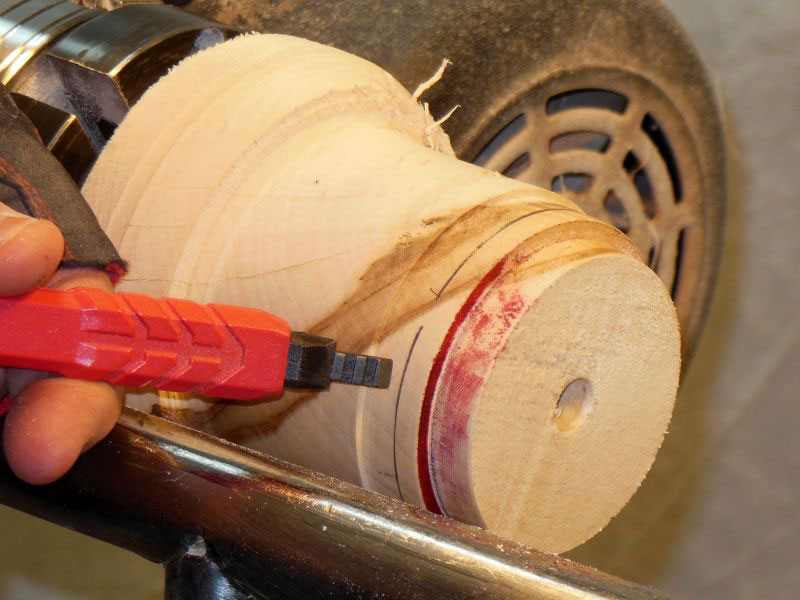
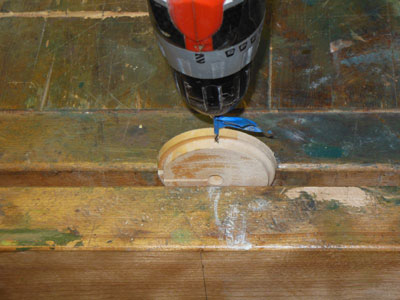
It's a quick and easy fix, only requiring six additional photos. Start by drilling a small hole in the tenon of the insert (Figure #45).
|
|
Figure 45 - Drill a small hole on both sides
of the insert's tenon
|
I'm using a 3/32" bit, and drilling down about ½" (the piece of masking tape on the bit serves as a depth stop). Do this on opposite sides of the insert, 90 degrees to the blade slot.
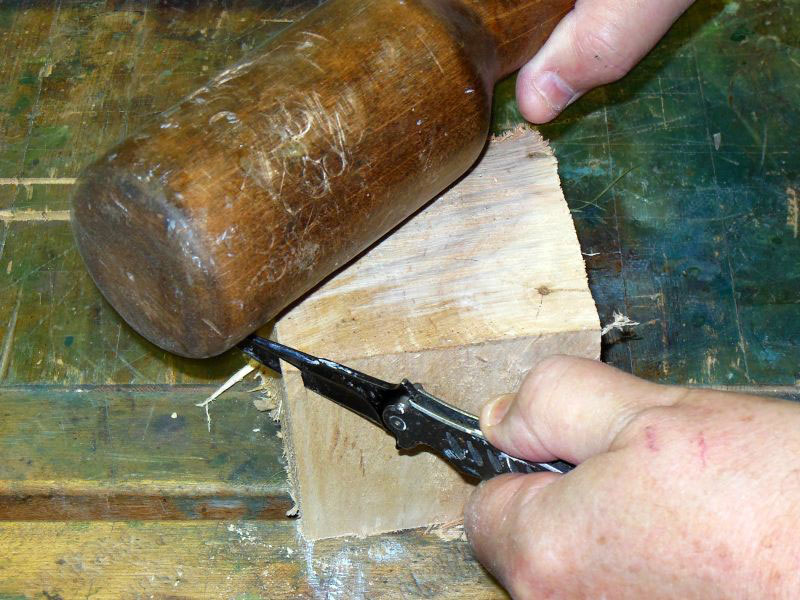
Whack off a small splinter of wood, along the grain, from a scrap (Figure #46).

|
|
Figure 46 - Cut a splinter off of any scrap piece of wood
|
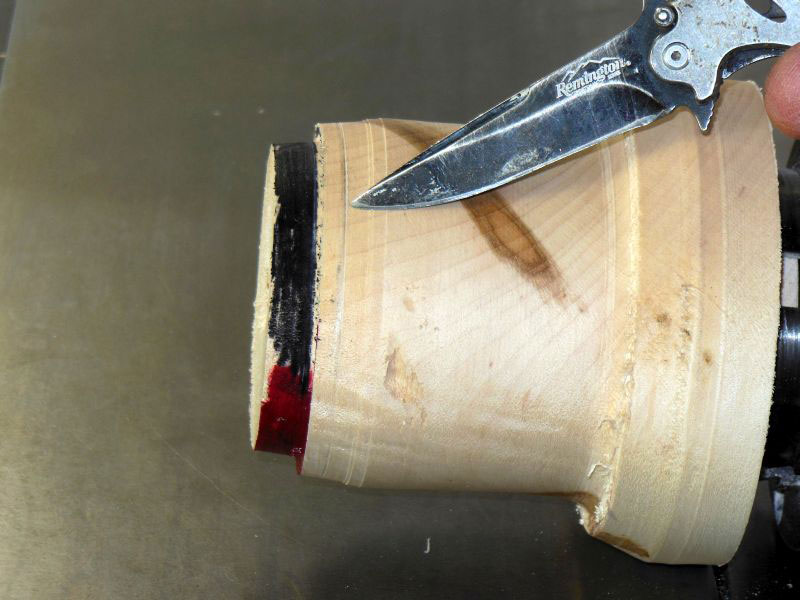
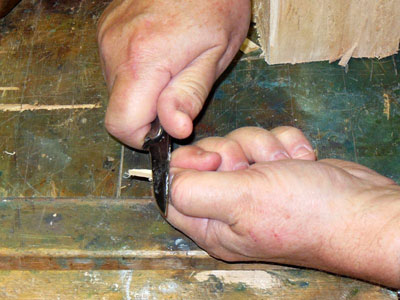
Use a small knife to whittle the splinter down to a point that will just fit in the hole drilled into the insert (Figure #47).
|
|
Figure 47 - Whittle the wood splinter down, so that the tip
just fits in the hole just drilled
|
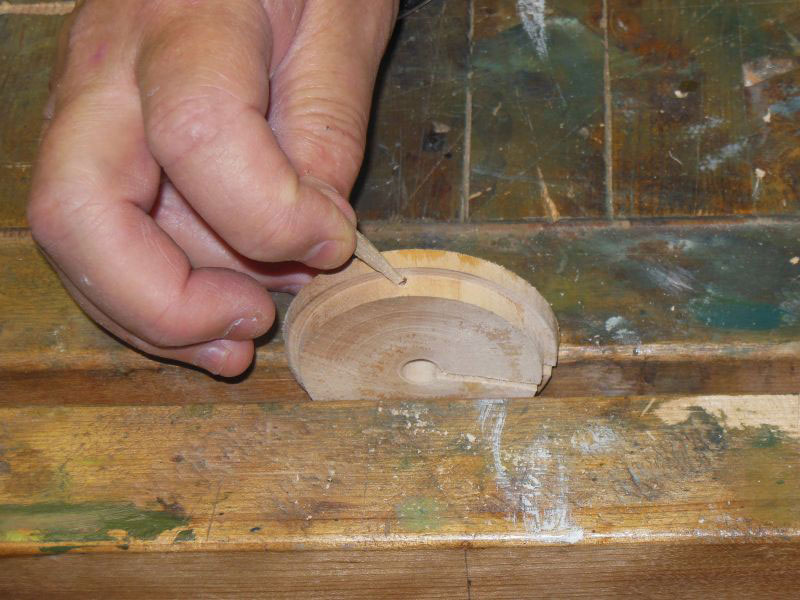
Put the splinter into the hole (Figure #48) – finger pressure is all that's necessary, you don't want to risk cracking the insert by hammering a large wedge into it.

|
|
Figure 48 - Push the splinter into the hole in the insert
|
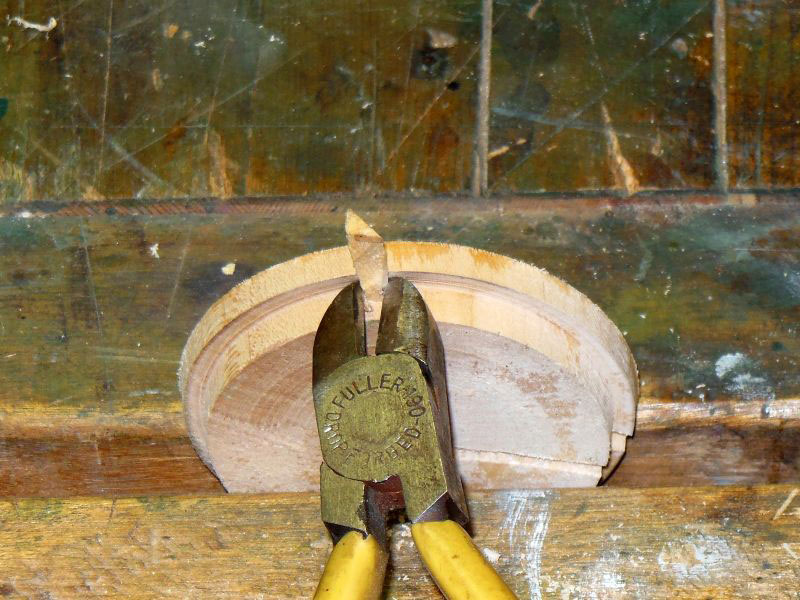
Use whatever tool is handy to nip off the splinter about an eighth of an inch above the surface of the insert (Figure #49). Do this to both holes.

|
|
Figure 49 - Cut off the excess, leaving a sixteenth or less
above the edge of the tenon
|
Back to the bandsaw….the insert won't drop fully into place now. Use a mallet (or your fist, but beware of the blade teeth) and tap the insert down flush with the surface (Figure #50).
|
|
Figure 50 - Gently tap the insert back into the
bandsaw table opening
|
The edges of the table opening will shave or compress the protruding wood splinters in the side of the insert, and you will be left with a snug fit. The insert will still pop out easily if pushed from below, but it will only rotate in the table grudgingly.
You're not stopping now, are you?
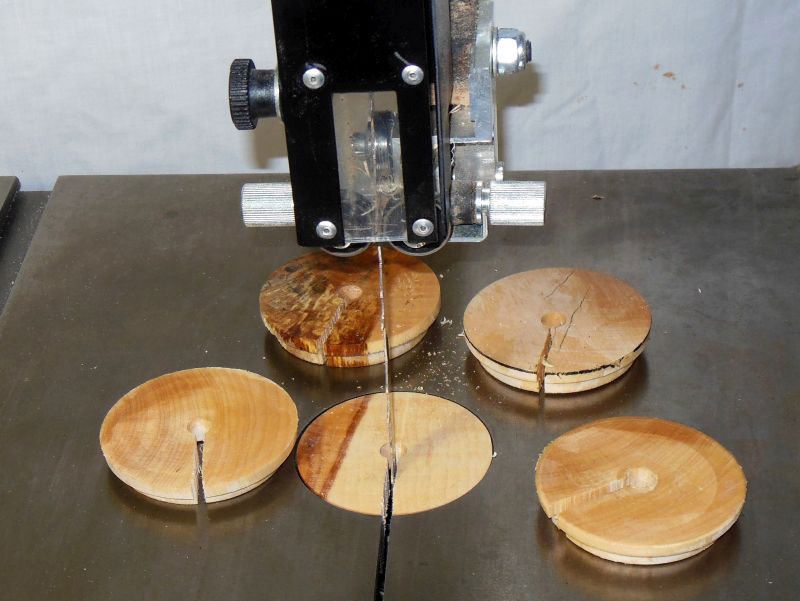
I suggest making a handful of these inserts (Figure #51), because six months or a year from now, you'll have forgotten how to do all this. It's only been a few days for me, and I've already forgotten!

|
|
Figure 51 - Don't stop now –
turn a handful while you still remember how
|
------------------------------------------------------------------------------------------------------------------------
ADDENDUM: After publication, a reader contacted me to warn me of a potential problem with making your own bandsaw table inserts. If the insert is too thick, then when the bandsaw table is tilted to its maximum angle, the slot in the insert may not be wide enough to allow the blade to pass through unimpeded.
Please take this possibility into account if you make your own inserts. Before operating your bandsaw with your homemade insert, tilt the table slowly and check the clearance of the blade through the insert’s slot. If necessary, you can make the slot wider, or you can cut the slot with a downward angle to allow more room.
Thanks Kim!
You can email Rick at
carlrmorris@att.net