Turning with Temple: Turning New Porch Columns
by Temple Blackwood
Castine, ME
Note: click on any picture to see a larger version.
One of the recent jobs in my shop started nearly two years ago when I was contacted by a young Boston architect who has a summer home nearby in Penobscot, Maine. He found me at the Wilson Museum where I offer summer demonstrations as part of the living history exhibit, and when we talked he told me he was developing a relationship with a group who wanted to build a new Buddhist Temple in the Boston area. He was designing the entry porch posts to welcome people to the Temple, posts that he customized to reflect the traditional shapes and characteristics of the religion.
Intrigued by his project but doubtful at that time that it would become a reality, I responded positively, and we remained in contact over the long time of his negotiations. He infrequently called and visited when he came to his Penobscot home, and on one occasion he arranged to stop in with several drawings for a different project. This other project included a circular building that hosted three different roof-top configurations that he wanted turned for a three-dimensional model of the project he was building for his client. While he visited and we talked about sailing on the Penobscot Bay, I turned and sanded his three small roof-top shapes, each of which was quite a different approach to setting the theme of the larger building complex. He explained that he felt a full three-dimensional model of the project would help his client decide on which approach would be the best. Later he kindly emailed me to let me know that project had been a success and which of the three choices the clients chose.
Needless to say, I was delighted last spring (2014) when he stopped by to tell me that he had finalized his discussions with the Buddhist Temple clients and that we would move forward with the project to construct and hand-turn the special entry porch columns. He brought with him the scaled drawings, and we discussed the several different ways to approach the project, agreeing upon using
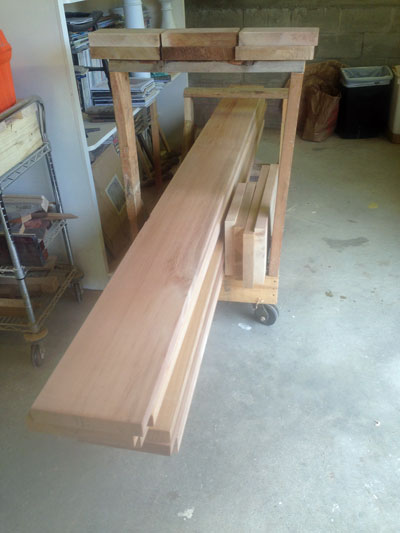
Western Red Cedar
for the material in 2" X 10" X10' dressed boards (because of their weather-resistant and limited expansion qualities) glued up with
Titebond III
(known for its durability, waterproof, and long work-time qualities).
|
|
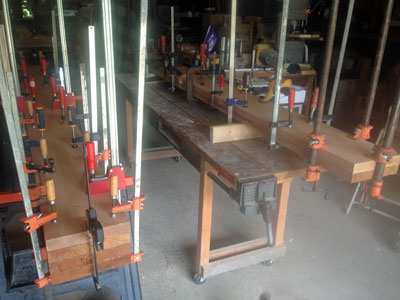
Figure 1 - Row Stock 2"x10"x10'
|
Knowing that my shop is a small-scale operation with limited resources, he kindly offered to pre-pay the full cost of the materials (nearly $1800) in deposit and said that he would pay the balance when he picked up the finished posts. Working with my local lumber supplier salesman at
Ellsworth Builders Supply, I placed the order, and about three weeks later they delivered the beautiful boards to my shop carefully wrapped, well dimensioned, dressed, and all longer than the required 10'.
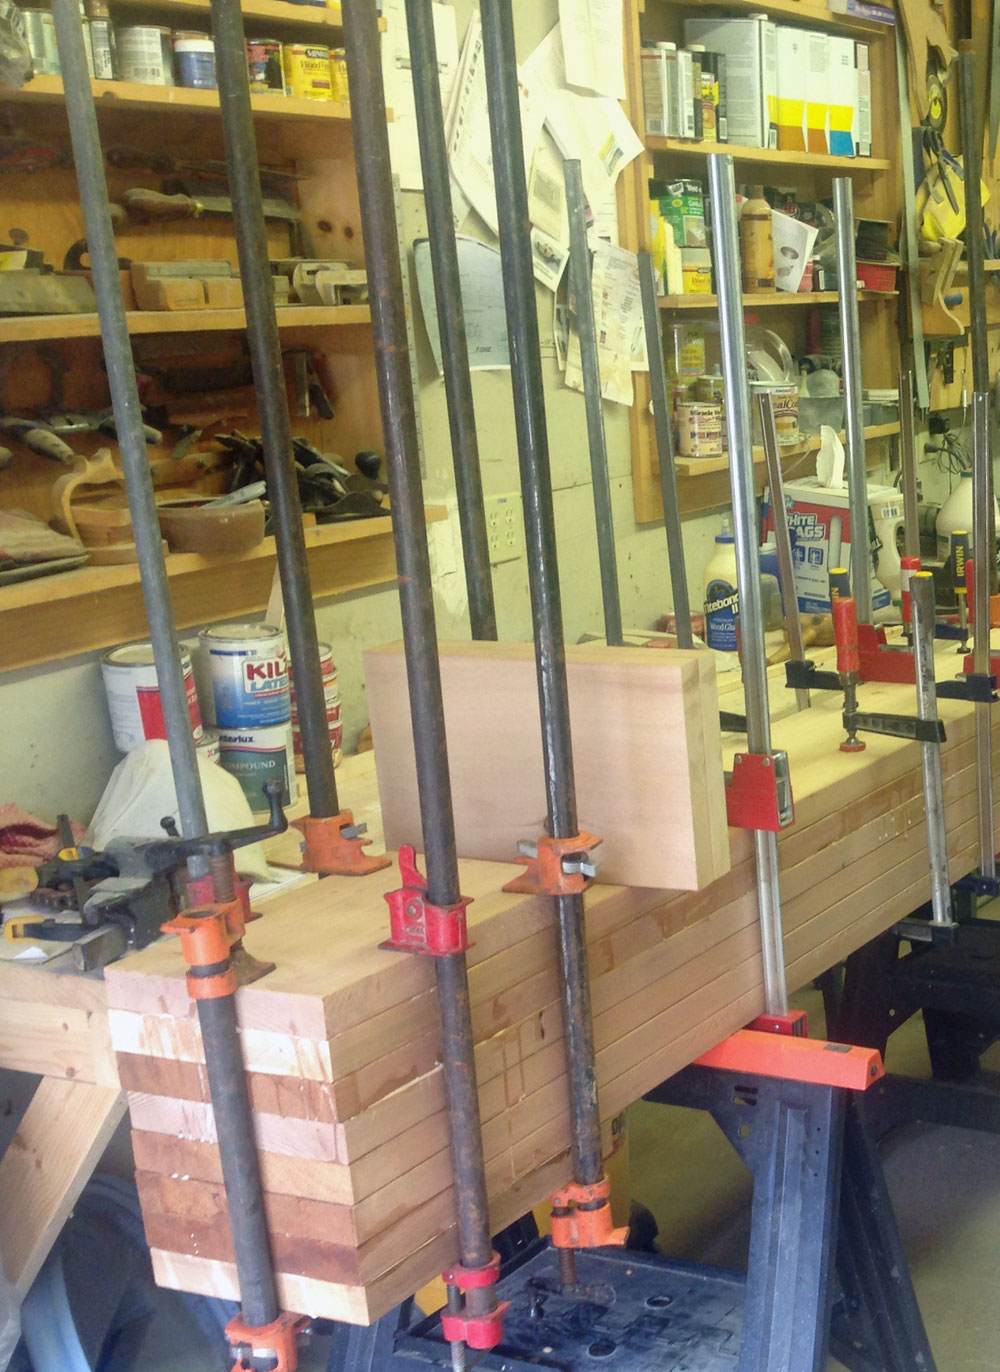
Realizing that I own far too few heavy clamps that would expand to the 10" and 14" thicknesses needed, I anticipated that during the glue-up of the two posts I would need a great many more clamps to be able to work efficiently. Fortunately I was able to borrow many more clamps from my son (a boat-builder at
Brooklin Boatyard) and two other local building contractors for whom I have done some work.
|
|
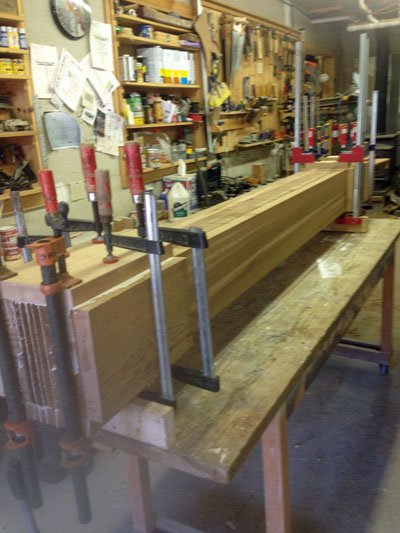
Figure 2 - Glue-up Progressing
|
I began by cutting off the twelve boards to the 10' length, and carefully saving the shorter sections, my friend at EBS was able to provide me with raw stock that left me with only one piece 2" X 10" X 4' left over – an efficiency I appreciated and was later able to use on another job. Working fairly quickly, I applied the glue to the boards using my old standby applicators (I save all those plastic credit-card solicitations that come in the mail for just this purpose) and clamped pairs of 2"X 10" X 10' planks together until I ran out of clamps.
At a dressed actual thickness of slightly over 1-1/2" X 9-1/4" each, I ended up gluing several pairs together first using my shorter clamps, followed by gluing the pairs together using the longer clamps. In all cases, I took special care to keep the board edges as aligned as possible for reasons that will come clear in the final gluing step (Figures 3 and 4).
The core finished post for the columns measured an actual 8" diameter without taper, and with the six stacked boards measuring an actual 9" X 9-1/2", my prepared blank would meet the basic need for most of the 10' length. My planed additional glued board sections would accommodate the two 9" diameter rings and the bottom 12" jar shape with ring that I came to think of as the acorn.

|
|
Figure 3 - Adding the extra board sections for the
rings (top) and acorn (bottom)
|
In Figure 3, the top and bottom extra board sections have been glued and the two side board sections are standing on edge to be glued at the next step. The same is true of the top two ring sections.
|
|
Figure 4 - Adding the last ring and acorn boards
|
After the glue fully dried on the stacked lumber, the excess glue was cleaned, the edges of the stacked boards were hand-planed and rough sanded at the positions of the 12" diameter acorn and the 10" diameter rings, the final board sections for the top rings and bottom acorn and ring were glued and clamped. At this point, each post blank weighted well over 150 lbs.
Working by myself, the process of gluing up, clamping, drying time, unclamping, gluing the next section, etc took about three full days with two sessions of gluing each morning and afternoon. After that, the completed column blanks rested to cure the glue for another three days before beginning the turning.
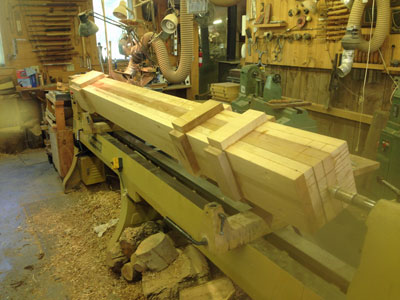
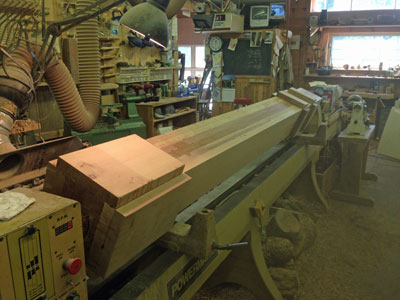
Using my portable hydraulic table, I loaded the column blank, wheeled it into position, and levered the blank with blocks and wedges to center mount it between centers on my Powermatic 4224. With the two extensions I am able to turn up to 15' long posts.
|
|
Figure 5 - Glue dried, raw blank mounted to turn
|
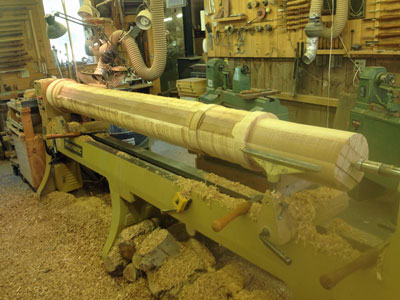
Even at this 10' length, these posts require starting the turning with power at a fairly low 200rpm to rough-to-round before moving to a final rpm of between 500-600. Notice the magnetic extra off/on safety switch (bright yellow in Figure 5) that can be moved to wherever the turner might be working.
|
|
Figure 6 - Clearing the way to begin the fun part … turning
|
|
|
Figure 7 - View from the other side
|
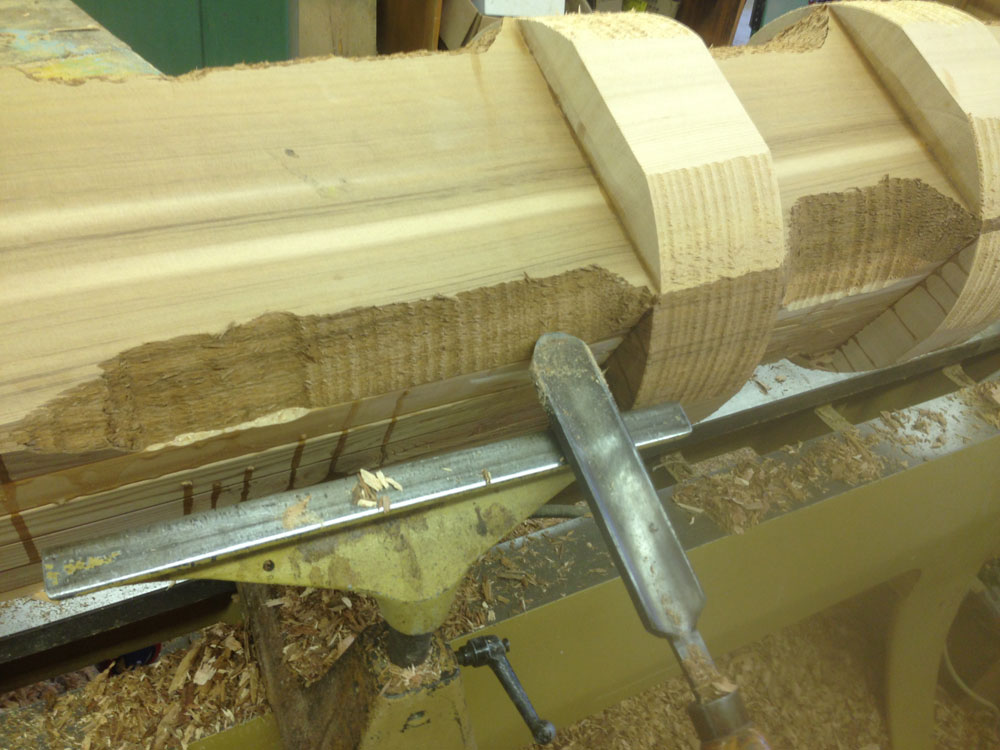
Once securely mounted between centers, in this case with a 6" faceplate with 2" long screws and a revolving live center well set from the tailstock, the actual turning begins using a 1-1/2" Sorby roughing gouge, a 2" skew chisel (reground from a Sorby heavy scraping tool), and a standard Sorby 3/8" beading & parting tool.
|
|
Figure 8 - Begin to dimension and design at the tailstock
|
The three critical spindle turning rules continue to hold firm for (or perhaps even more ) for these larger spindles:
-
Keep the bevel rubbing (critical)
-
Cut from the large diameter toward the smaller diameter
-
Work and finish at each diameter (large to small) on the right (tailstock) first before addressing that diameter in the middle and then on the left (this leaves the most mass of stock toward the power source and limits whip and rippling from the vibration).

|
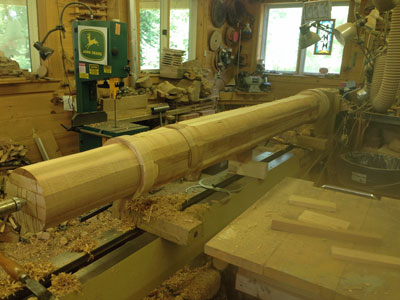
|
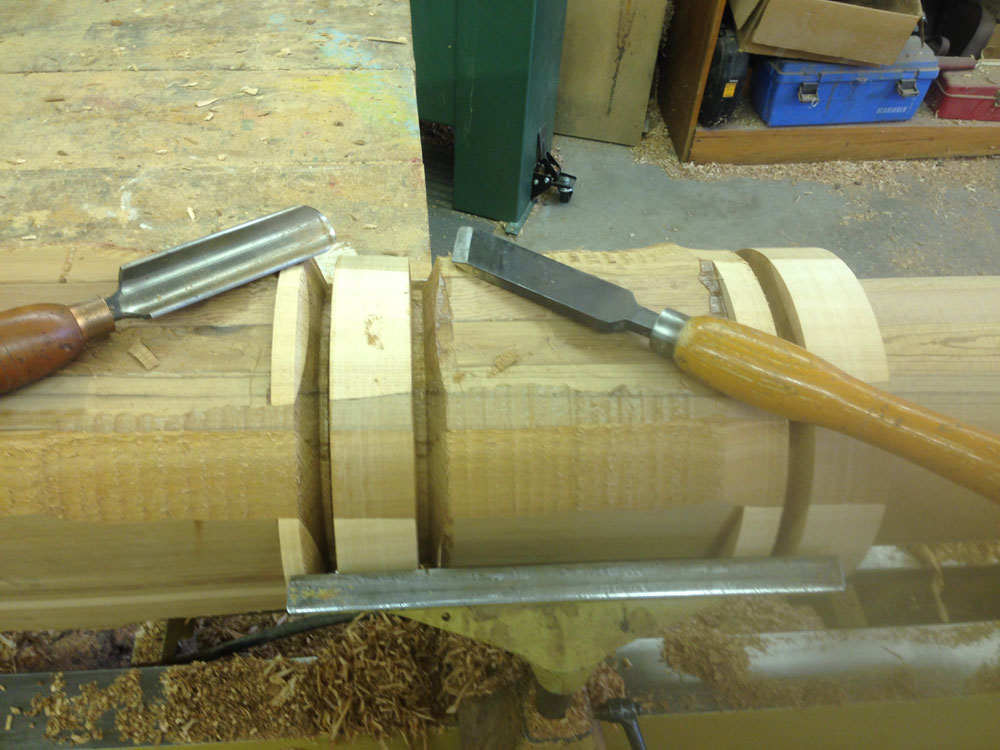
Figure 9 - Defining and positioning the upper rings
|
The extra sections of boards more than covered the area of the two top rings, and positioning and sizing them accurately was critical. This was also why the 14" tool rest was handier than the longer rest that worked better on the long straight 8" post section.

|
|
Figure 10 - Finished and smoothed outer ring diameter
with the final top and bottom of each ring established.
|
With the top-most 8" section complete and ready to smooth (Figure 10), that smoothing occurs and the exact position of each upper ring is identified and completed.
|
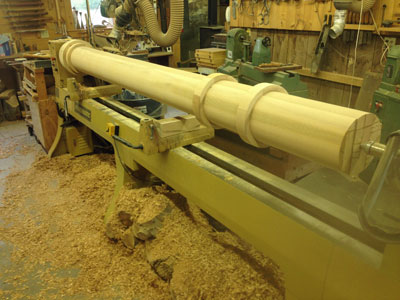
|
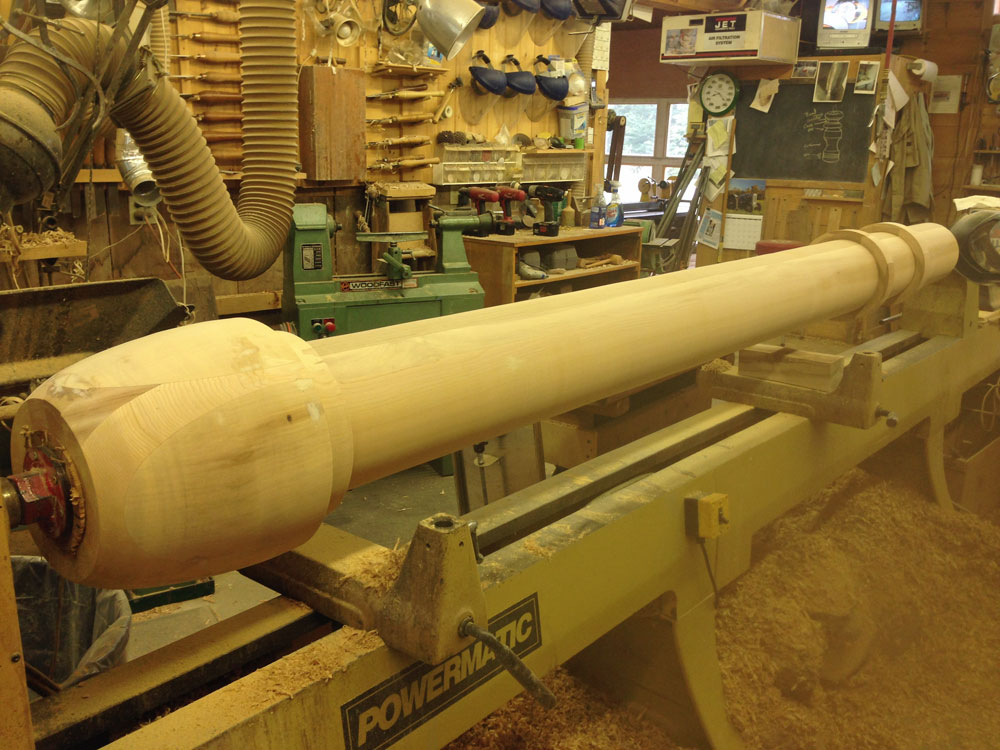
Figure 11 - Completed column turning ready to sand.
|

|
|
Figure 12 - Note that the dust collector hose allows a full
range of travel the length of the lathe to facilitate its use.
|
Note the unusual profile of the bottom acorn with a top ring that matches the two upper rings.
Having two banjos allows the use of a larger tool rest, in this case a custom-made 48" rest that saves time and makes smoothing long straight skew runs much more efficient. In Figure 12 the banjo remained in position from using the 14" tool rest to complete the acorn. The tool rests are removed for safer sanding.
|
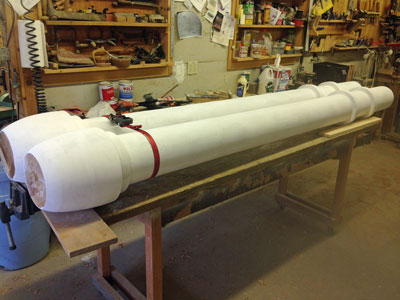
|
Figure 13 - Ready to ship
|
My architect friend had asked that the posts be primed before shipping to make their work on the installation easier in the cold weather. I believe he also wanted to make the posts look more finished to the client before and when initially installed. After covering with four old sleeping bags wrapped tightly with duct-tape to protect the detail, I helped load the posts, now about 120lbs of awkward length into the shipper's truck for the trip south.

|
|
Figure 14 - High-value, hand-turned, future mulch
|
"One man's [chips] are another [woman's garden]
treasure." The clean-up in woodturning shop brings closure to a major project and is part of the sensual Zen of mixing the sounds, smells, texture, and active kinesthetic pleasure that so many of us find in working with beautiful wood.
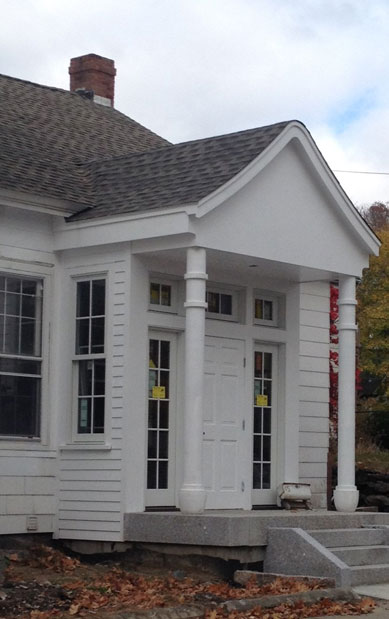
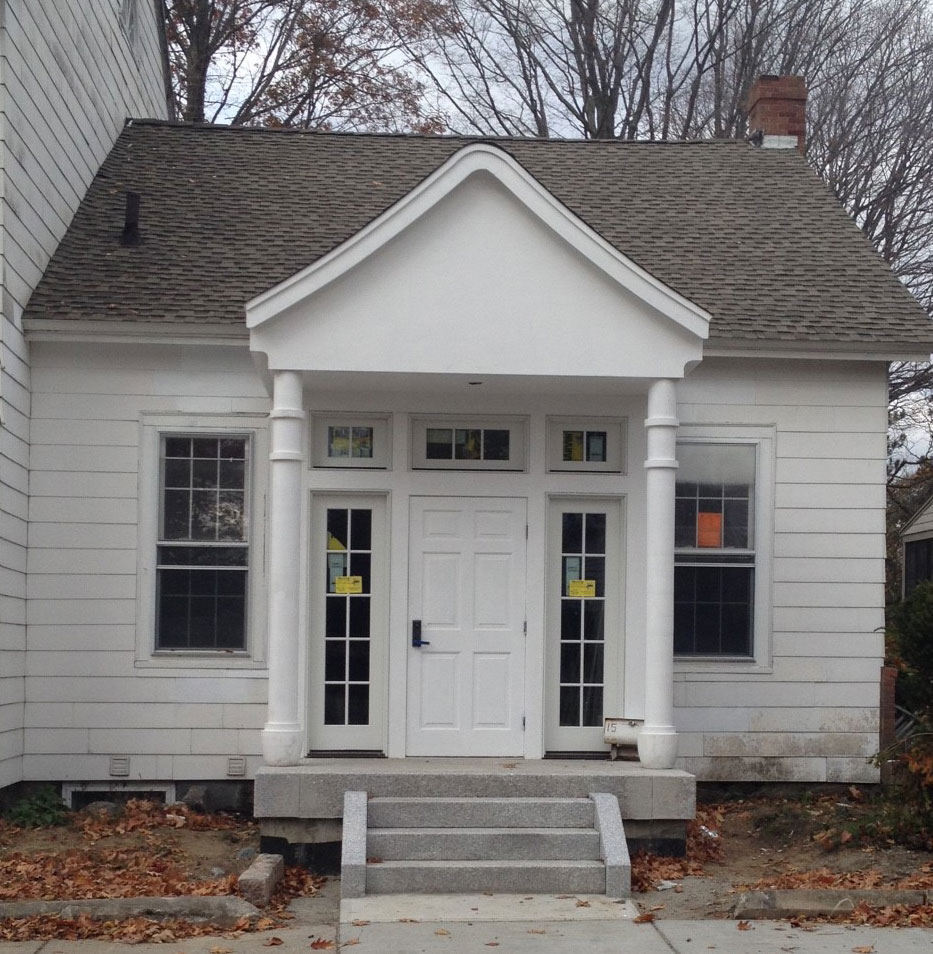
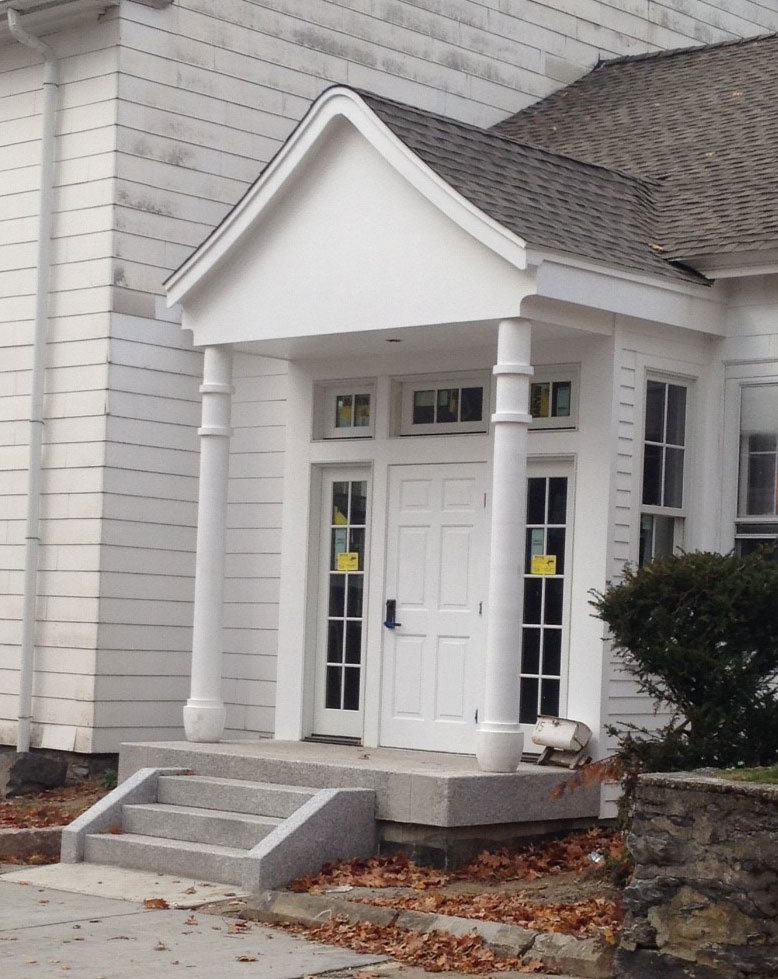
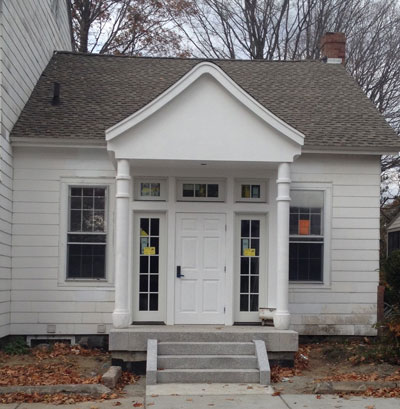
The final installation of the new columns produced a thoughtful follow-up photo from my architect friend and added a new spot to my future visits to the Boston area.

|
|
Figure 15
|
|
|
Figure 16
|

|
|
Figure 17 - The columns finally installed in the new
entry-way in the Buddhist Temple just outside Boston.
|
While porch posts, even entry posts are often not actively seen by people, similar to newel posts, stair balusters, and finials, creating architectural fixtures in a building offers a lasting sense of satisfaction, especially as they enhance the visual image of the building and suggest a level of permanence and dignity.
For my part, I enjoy the longer and more meaningful relationship with the architect and with the other people (unknown) who installed, painted, and ultimately use the entryway each time they enter the building.
You can email Temple at
temple@highlandswoodturning.com
Take a look at Temple's Website at
http://www.highlandswoodturning.com/.