|
|
Canarywood & Chakte Kok marking gauge
|
Making my Own Marking Gauge
by John Eugster
Las Vegas, NV
Click on any picture to see a larger version.
I've been using a standard type of Marples gauge for 30+ years and although it functions well there were some things I didn't care for. Through the years I've adjusted and played with it to keep it in good working order but like the saying goes -- I wasn't married to it! From time to time I'd do an internet search to see what was out there but nothing really stood out until I saw
Jeff Hamilton's website
and noticed he offered a replacement cutter. Well, now I ran out of excuses and it was time to make a gauge that suited my style and his cutter was just the thing. During my email correspondence with him I asked if he would mind if I possibly used some of his design when I made mine. The way he worded his reply led me to believe that many orders for his completed marking gauge came from the same people who ordered the replacement cutter. Understandably, once you attempt to make your own it's pretty tempting to just go ahead and order his!
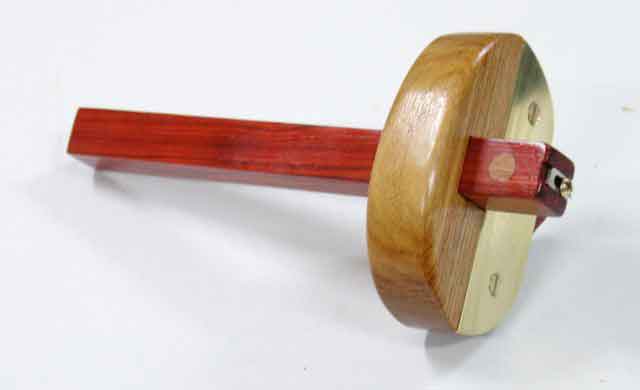
The body of my gauge is made of Canarywood and measures about 1" thick and 2 3/4" x 4". I had a small section of this wood left over from a dining table and chairs project and really like the coloration. I needed to laminate two pieces together so I made the square hole for the beam first and then joined the pieces. Making the beam was the challenge because I needed a way to run a machine screw into some type of metal to securely hold the cutter. That's what the Cherry plug conceals. After drilling a hole for the 6-32 brass machine screw into the end of the beam, I then drilled a 3/8" hole completely through it. I then taped a piece of aluminum for the screw and inserted it into the hole.
To keep it in position, I screwed the machine screw into it and then glued in the Cherry plugs from both sides. Once the glue was dry I cut them flush and sanded smooth. I think that not only does this conceal the fastening system but it also adds a decorative element to the gauge. Here's a close up of the beam and body:
|
|
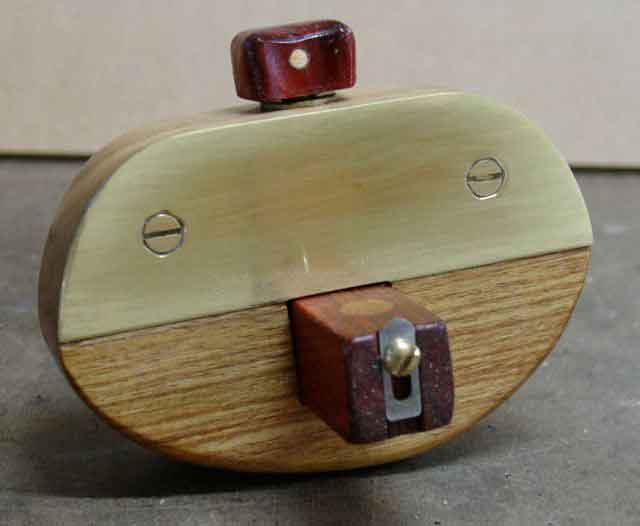
Close up, notice the locking knob is on the bottom
|
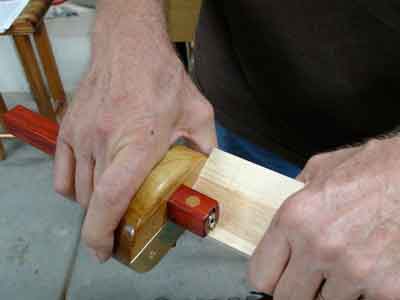
For a wear surface, I used a piece of .064 brass (approx. 1/8") that has been screwed and epoxied onto a recess cut in the body side. The locking knob consists of a 1/4", all-thread brass rod with a Chakte Kok hand formed knob that has been epoxied and pinned to it. The main thing I prefer about my design is that the locking knob is on the bottom of the gauge. It has always bothered me a little that with traditional style gauges it is difficult to wrap your hand around it -- the knob is right under your finger. With my gauge that's not a problem:
|
|
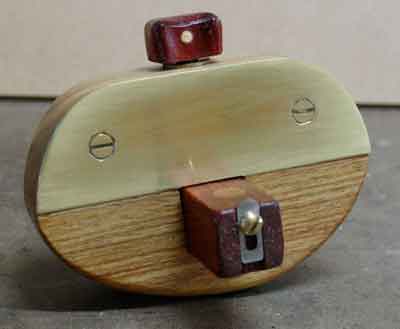
Hand wraps around without knob interference
|
My use of the gauge so far has been rewarding, whether marking with or across the grain it works great. Being able to wrap my hand around it gives me a firm grip and lots of control. Since the body is fairly large as well, there is a lot of contact with the piece being marked. Almost a cross between a marking gauge and a panel gauge.
After 31 years in the woodshop, I am now a retired Industrial Arts teacher. About two thirds of my career was spent at the junior high school level with the remaining years teaching construction at a boys prison. Throughout my teaching career I also took on custom furniture work completing a full spectrum of projects. Examples of my work can be seen at
my website
. To keep my clients informed about the progress of their projects I use
my blog
. The blog is also an extension of my teaching career where I share my thought process as I work on various projects and why I make the decisions I do. There's a pretty complete tutorial that covers the making of this marking gauge as well.
Retirement has given me the opportunity to not only take on projects full time but also to share my passion for the craft. I teach individuals in my shop one on one and have also taught a few classes at a
local woodworking school
here in Las Vegas.
You can email John at
eugster96@cox.net
or take a look at his website at
www.woodworksbyjohn.com
.
Return to
Wood News
front page