By Tim Carter
 The Lazy Susan went out of style in the 1950s when they were made of plastic in those awful colors that were so popular back then. I'm going to tell you how to make a Lazy Susan out of cabinet grade wood on your lathe that will be the centerpiece of your kitchen or dining room.
There are 3 parts to the Lazy Susan, the top, the base and the bearingsthat connect the two. The
bearings
, which are available in multiple sizes, can be purchased from most hardware stores. I generally use the 4" size.
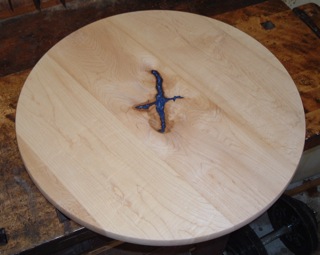
Wood selection is important. The wood must be kiln dried and acclimated to your climate to make sure it doesn't warp or cup after you've glued it up. The type of wood is up to you. I prefer hardwoods like Maple, Walnut, Oak and Cherry. Exotic woods like Wenge, Canarywood, Bloodwood, Zebrawood, Padauk and Bubinga are excellent choices as well but they will cost a lot more than domestic hardwoods.
The size is up to you but you should consider where it will be used as you're deciding how big it will be. If it is going to be used on a dining room table, you have to have enough room for place settings. I generally advise people to leave about 14" to 18" for place settings. So if the table is 48" wide and you are going to use 16" for place settings, the Lazy Susan can be 16" in diameter.
A Lazy Susan 16" in diameter will require about 2.3 board feet of lumber, 1.8 board feet for the top and 0.5 board feet for the base. The dimensions of the blanks are for the top, 16" x 16" x 1" and for the base, 8" x 8" x 1". The base is generally about half the diameter of the top to provide stability. I prefer to make the top and base out of the same type of wood but you can use one type for the top and a different wood for the base.
The top is glued up with Elmers Carpenter's glue using either 2 or 3 biscuits to strengthen the joint and to make it easier to align the wood in the clamps. The base can be glued up without biscuits as it is much smaller and easier to handle than the top.
Once the glue has cured, the blanks need to be flattened on one side with a belt sander. After the side is flat, use a straight edge to mark the diagonals with a pencil or marking knife to find the center of each blank. Drill a small hole (1/8" x 1/8") at the center point. This is the reference point that will be used to mount the faceplate and subsequently the bearings. The reference point on the blank that will be the top is going to be on the bottom of the top when it's finished. However, the reference point on the blank that will be the base is going to be on the top of the finished base. It is very important to make sure that this point is in the true center of the blank. If you're off, the Lazy Susan will wobble as it turns.
 Mount the top on a faceplate and put it on the lathe. Start the lathe at a low speed and true up the outer edge of the blank making it a circle, using either a gouge or scraper. When the blank is round, the edge can be cut to whatever profile you prefer. I generally round the edge gently so it feels comfortable when someone grabs it to turn the Lazy Susan. At this point, the edge can be sanded while the blank is on the lathe. I generally sand to 400 grit.
The top of the blank can be turned to whatever thickness you prefer. The blank starts out 1" thick and I usually turn it down to 3/4", initially using a bowl gouge and then switching to a square scraper to do the final cuts. As you turn the top of the blank, you need to check the top frequently with a straight edge to find the high and low spots on the blank. I don't worry about getting the top absolutely flat at this point, as I'm mainly cutting the blank down to the thickness I want while trying to keep it as flat as possible. When the blank is at the thickness you want, take it off the lathe and use a belt sander to get the blank absolutely flat. I start with an 80 grit belt and finish with a 150 belt. The final sanding on the blank is done with an orbital sander, starting at either 100 or 150 grit and finishing with 220 grit.
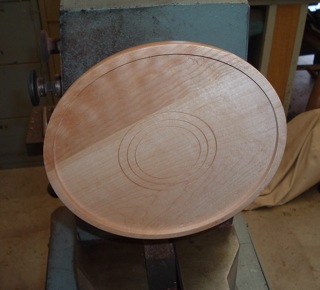
The base is turned a little differently. The top of the base will be where the bearings are mounted and the bottom is where the base will sit on the table. The edge of the base is generally turned with a bullnose profile but it can be any profile you prefer. The bottom of the base is turned flat and then recessed to provide a foot similar to the foot on a bowl. The base can be turned with either a gouge or scraper, whichever you prefer. The base is sanded on the lathe, using a progression of grits, finishing with 400 grit.
At this point, you're ready to drill the mounting holes for the bearings. This is a critical step! Take your time!
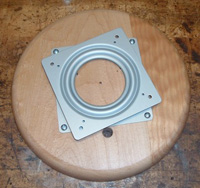 There are at least 2 ways to lay out the hole patterns to mount the bearings. The first is to carefully measure the hole pattern on the bearings and lay it out on the blank with a protractor and ruler. There are 2 different hole patterns on the bearings, with one side being larger than the other. Using the reference hole in the blank, measure the distance from one hole in the bearing to the hole diagonal from it. Divide this distance by 2 and set up your protractor for this distance. Draw a circle on the blank with the point of the protractor in the reference hole. Set the bearing on the blank and move it around until the circle is lined up in all 4 holes of the bearing. Mark the holes and use a 7/64" drill to drill the holes 5/16" deep. I use #6 x 3/8" Phillips pan head sheet metal screws to mount the bearings.
A second way to lay out the hole pattern is to make an insert to fit into the inner circle of the bearings with a small sharp brad or nail in the exact center that will fit into the reference hole on the blank. I made an insert using a piece of 3/8" plywood about 2" in diameter. Mount the plywood on a block of wood using 2-sided tape and mount the whole assembly on a faceplate. Bring the tailstock up and hold the plywood in place. Turn the plywood, using a scraper for the best control and precision. Use a pair of out side calipers to turn the plywood close to the finished size. When you get close to the finished size, turn a little and check the size with the bearings. When the insert fits snugly, you're at the correct size. While the plywood is on the lathe, put a Jacobs chuck in the tailstock with a 1/8" drill bit and drill a hole through the plywood. Take the plywood off of the lathe and push a nail or brad with a 1/8" diameter though the hole and cut it off with about 1/8" to 3/16" protruding from the plywood. Use a drop of Super Glue to secure the nail in place.
 Place this insert in the bearings and place it on the blank with the nail inserted into the reference hole and mark the hole pattern on the blank. The holes can be drilled as outlined above.
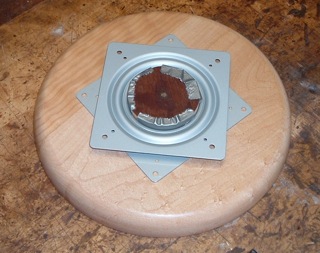
There is one additional hole that must be drilled. In order to mount the bearings on both the top and base, there must be an access hole drilled in the base. The easiest way to locate and drill this hole is to mount the bearings on the base and rotate the bearings so the hole pattern on the top plate of the bearings is midway between the lower hole pattern. Use an awl and mark the top of the base. Use a 1/8" drill and drill through the top of the base to the bottom. Turn the base over and use a 7/16" drill to drill back through this hole, drilling from the bottom to the top. Now you can mount the top on the bearings.
