Making a Veneer Compass Rose
(Page 3 of 3)
Making the Rose
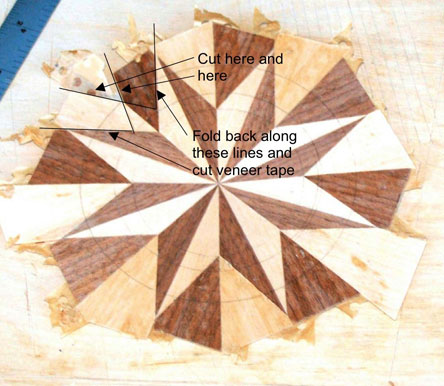
To begin making the rose, we have to mark where the cuts will be made. We said that the rose would be about 5 1/2 inches in diameter, so we can lay in a circle with a 2 3/4 inch radius, using the compass tool. Next, we have to decide what the inner radius will be for the major points. I chose a radius of 1 3/8 inches but that is strictly personal preference. A larger or smaller radius can be used to suit your artistic sensibilities.
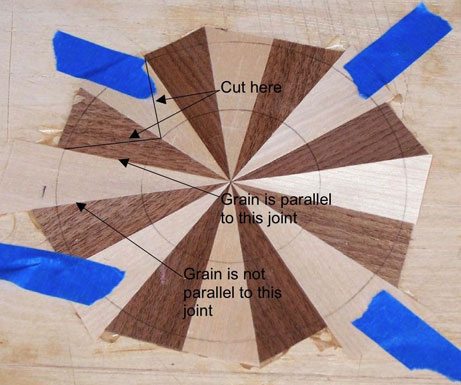
Now, what I'm going to do is make a cut from the intersection of a seam and the circles, as marked on the picture above. Note that I want to leave a point on the rose where the grain of the veneer is running parallel to the joint. This will cut a wedge from the outside of the rose. In the next picture you can see the cut wedge in the upper left hand corner of the picture.
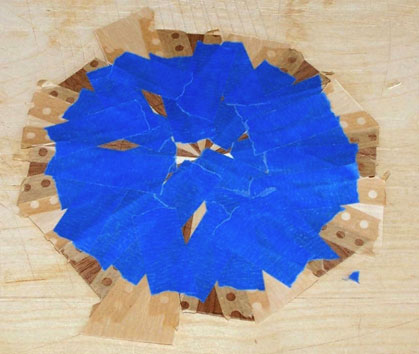
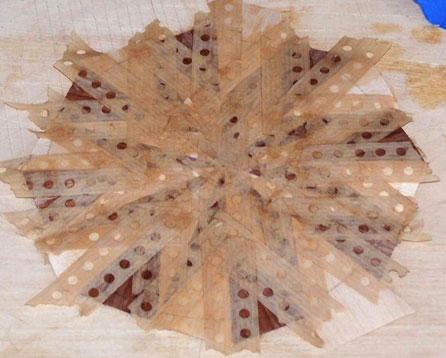
I now take this wedge and sand the edges to make sure they are smooth and straight, then I will turn that wedge over and put it back into the place where I cut it from, so that the dark side of the cut wedge is on the light side of the rose. When I see that it fits well, with no gaps, I tape it in with blue tape. I do this eight times, one for each of the minor compass points. When finished, I have blue tape all over the glue side. Note the veneer tape on the wedges I just cut since I turned them over and reinserted them into the cuts I made.
Now, let's turn the piece over so that the show face is up.
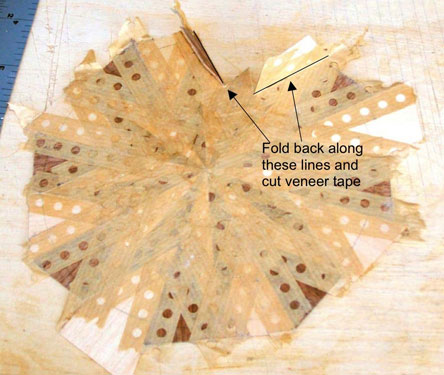
Note how the major points of the compass rose stand out now because they are covered with veneer tape. The wedges do not have any veneer tape on them because the side showing used to be the glue face (and we don't put veneer tape on the glue face). Our next step is to use veneer tape to attach the wedges to the main body of the rose. You must also put veneer tape on the joint in the middle of the wedge because we're going to remove all the tape from the rear and that joint must be held together.
Set the piece aside and let the veneer tape dry well. Our next step is to turn the piece over and remove all the blue tape and the veneer tape from the glue face. The veneer tape on the show face must be dry and holding the pieces well or we'll have a mess on our hands.
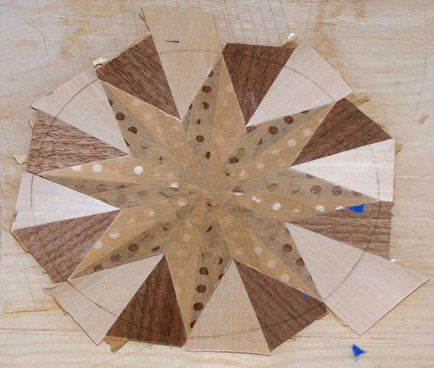
In this next picture we see the glue face of the piece, with blue tape removed. To remove the veneer tape, I mist it with water. Once the water has soaked into the veneer tape, I can peel it off.
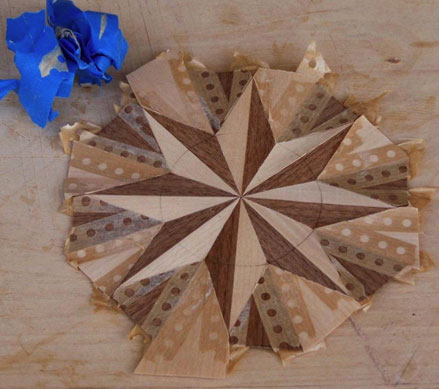
Here you see the glue face with the veneer tape removed. You can see how the cut wedges were reversed and re-inserted into the places where they were cut from.
Since we put water on the piece to remove the veneer tape, we need to set it aside and let all the water dry before taking the next step.
After leaving it sit between two pieces of plywood overnight, we're ready to complete the cutting.
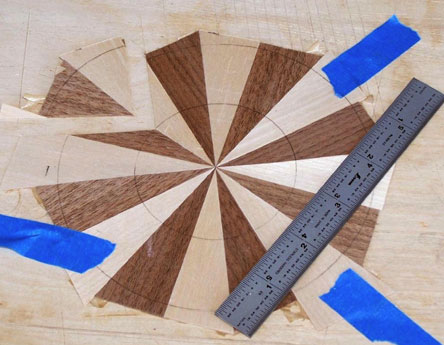
Our next step is to draw two circles which represent the top and bottom of the minor points. I chose a radius of 2 1/4 inches for the outermost points and 1 3/4 inches for the junction with the major points. Make a cut between the two circles on the junctions shown in the next picture.
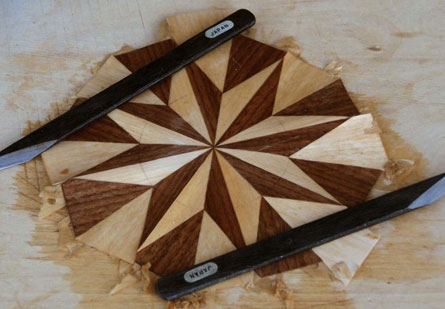
Once the cuts are made, fold back the remaining pieces of veneer and cut along the veneer tape. See the next picture.
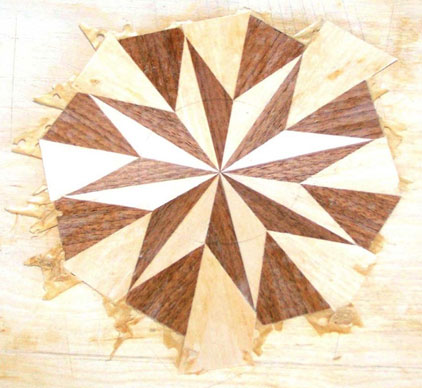
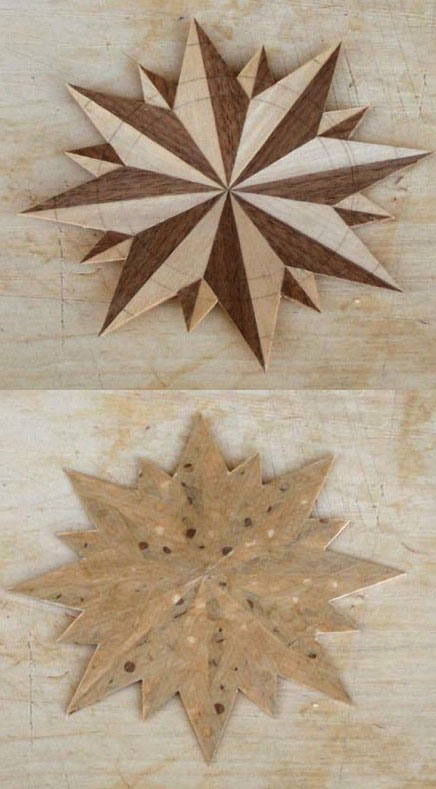
Once you make all the cuts, you have completed the compass rose. The next two pictures show the completed compass rose from the glue face and from the show face.
To inset the compass rose into a veneer field, position the rose in place and tape it with blue tape. Make a mark on the compass rose and on the field so that you know the orientation and can reposition the rose properly - although the rose looks symmetrical, it is not and will only fit one way after you cut the field.
Now, using a sharp knife, cut the field using the border of the rose as a guide. When you come to a piece of tape which is holding the rose to the field, remove that piece, make your cut and then replace the tape. When the cut is made all around the rose, remove the rose and snap out the waste from the field. Then using your marks, inset the rose into the field and hold it in place with veneer tape on the show face.
This completes the tutorial. I hope you enjoy working with veneer as much as I do. If this article has been of value to you, please send me an e-mail with nothing but a subject of "Compass Rose, Wood News" so that I'll know that the paper is being read and used. I will not send you any messages unless you ask me a question.
Mike Henderson
michael.henderson@cox.net
The author is a retired electrical engineer who worked in communications for most of his career. He began woodworking about five years ago, taking woodworking classes at Cerritos College. You can see more of his work at
http://www.mikes-woodwork.com/mikes_projects.htm
, and you can see more about him at
http://members.cox.net/michael.henderson/
