Make Your Own Baseball Bat
by Jack Masten
North Creek, NY
What does a retired Industrial Arts Teacher give his 15 year old grandson for a gift? Seeing that
he is the starting catcher on his high school baseball team, why not make him a baseball bat from
Northern White Ash.
Materials and tools needed
-
Northern White Ash 3" x 3" x 36" long
-
Lathe
-
Roughing gouge
-
Parting tool
-
Spindle Gouge
-
Skew
-
Band saw
-
Finishing Supplies
-
Caliper
-
Ruler
-
Pencil, paper, hardboard
-
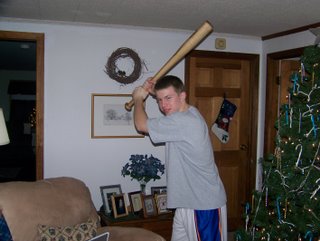
One Grandson (pictured)
My idea to turn a wooden baseball bat for my Grandson Tim first came to me while I was having a
discussion with a friend about the baseball bats being used by the Major Leaguers. When I was
growing up and playing for the Basloe Dodgers in Herkimer, New York, almost all of the bats
available were made from Northern White Ash. This was the case for many years until recently someone
decided that Maple would make a good bat. By the way, have you seen those bats exploding when they
hit a ball? Well most of them are Maple, not Ash.
|
Step 1:
Obtain a piece of Northern White Ash
|
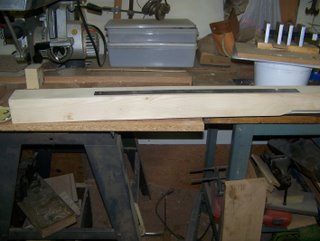
1. Step 1 is to obtain a dry (7% or less) piece of Northern White Ash, 3" x 3" x 36" long. I was able to
secure a piece from a friend with a band saw mill, but almost any good hardwood dealer could be a
source for this wood. If the wood is not dry, it should be left in your heated shop for at least 3
weeks before turning.
|
|
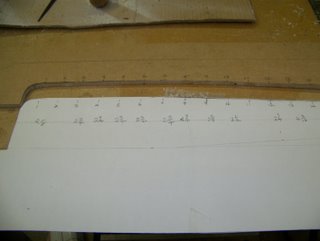
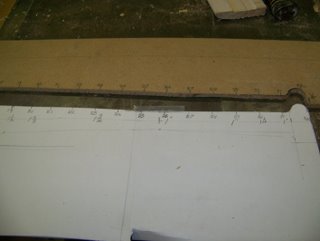
Step 2:
Lay out the dimensions of the bat.
|
2. Using heavy paper, lay out the dimensions of the bat. I used a bat that was acceptable for high
school play. Cut out the pattern and trace it onto a piece of hardboard. Using a band saw or hand held
jig saw, cut out the shape, saving the negative portion as well to use to check the turned piece.
|
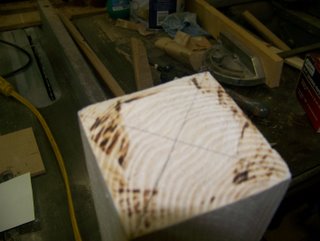
Step 3:
Mark the stock.
|
3. Draw a pencil line from corner to corner on both ends of the stock.
|
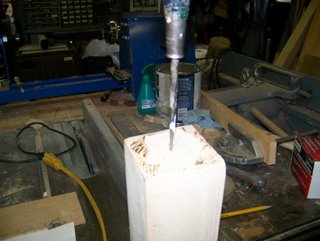
Step 4:
Punch a small hole.
|
4. Punch a small hole at the intersection of your lines at both ends.
|
Step 5:
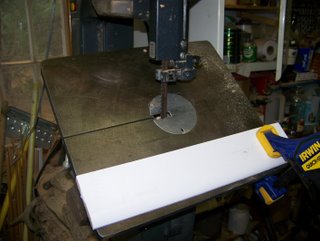
Cut the corners off at 45 degrees.
|
5. Set up band saw to cut off corners at 45 degrees. If you do not have a band saw, you can hand
plane the corners off.
6. Tap the live center into one end of the stock and mount the stock on lathe, secure the tail
stock, and set the speed to 600 rpm.
|
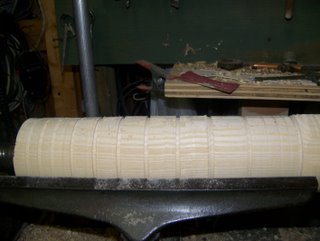
Step 7:
Turn the piece using your roughing gouge.
|
7. Using your roughing gouge, turn the piece until it runs smooth and is round to 2" diameter for
the length of the stock. At this time turn the speed up to 1200 rpm.
|
|
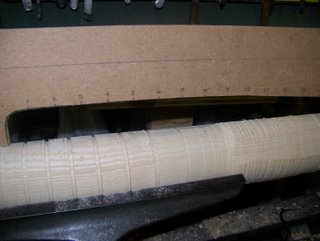
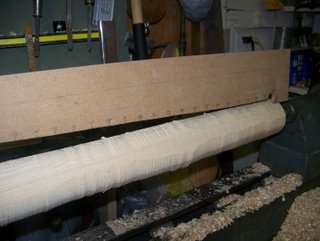
Step 8:
Mark and cut the barrel, and taper the stock using the parting tool and
caliper.
|
8. Following the pattern, layout and using the parting tool and calipers, mark and cut the barrel of
bat for 12" length. Work the barrel on the live end of the lathe. From this point to the knob,
following the pattern, lay out and using the parting tool and caliper, taper the stock to make the
handle to about 1" diameter. The knob size is optional, or cut to match your original plan.
9. Using the spindle gouge, turn the stock to dimension. Use the negative portion of the pattern to
check the shape of the turned areas on the bat.
10. Sand the bat using 60 to 220 grit sandpaper. Apply one coat of shellac and rub out, then apply 2
coats of spar varnish.
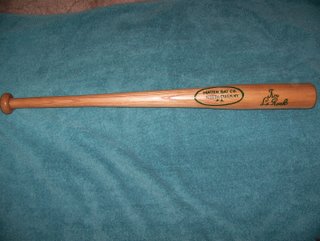
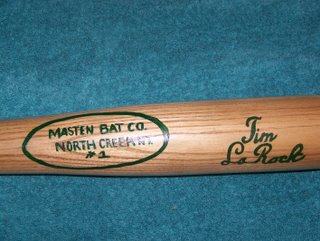
11. Design a label and Grandson's name and paint onto the finished bat.
Jack Masten is a retired Industrial Arts Teacher. You can reach him
by email at
jackaudie@frontiernet.net