
>
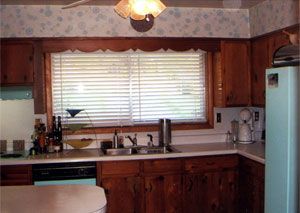
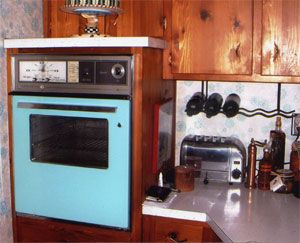
One of the great advantages of working at Highland Woodworking is the ready access to not only an extensive range of tools and supplies, but to a wealth of information as well. So when I decided to refinish my kitchen cabinets, I sought advice from several of my co-workers. My cabinets were over 40 years old, made of either pine or beech (opinions varied), stained a cherry color, and finished with shellac. The shellac was either orange shellac or it had simply yellowed over time, because the cabinets had an ugly orange hue. I wanted to change the color to a deep reddish walnut or dark red mahogany, with the least effort possible, of course. Little did I know this project would expand my horizons and lead me into the scary, mysterious realm of spray finishing that I thought belonged only to the most experienced of woodworkers.
As there are always many ways to achieve a particular result, the methods suggested by each of my co-workers varied from individual to individual. The options presented to me were 1) to strip the cabinets down to bare wood with a chemical stripper, stain them, and topcoat with a clear finish; 2) sand the cabinets down to completely remove the shellac and then stain them and topcoat them; or 3) sand the cabinets lightly, wipe a gel stain on them and then topcoat. Frankly, none of those options appealed to me since I really did not want to strip the existing finish off, chemically OR mechanically, and the thought of wiping a stain on cabinets, frames and 35 cabinet doors was rather daunting. So I did something I think many people do - I kept asking folks what I should do until someone gave me the answer I wanted to hear, which was that I did not have to strip them!
 One afternoon I solicited advice from one of our finishing instructors, and as he was trying to convince me that it wouldn't take me any time at all to sand off the existing finish on the cabinets, one of my co-workers standing nearby said, "You don't have to strip them just put a coat of
SealCoat Dewaxed Shellac
on them and then topcoat them with a tinted finish."
"Really?" I asked excitedly, "What kind of tinted finish?"
"Whatever you want," Chris said, "once you apply the dewaxed shellac, you can put just about any finish you want on top."
"Wow! Well, what do I have to do to tint a finish?"
"Just use Transtint Concentrated Wood Dyes or Universal Tinting Colors (UTCs) you can put them in practically any finish."
I felt as if I had won the lottery! I had finally gotten the answer I had so desperately been seeking.
 That weekend, armed with naptha and #0000 steel wool, I took down my cabinet doors and thoroughly scrubbed off the kitchen goop that had built up over the years. I did the same to the frames and the outsides of the cabinets, and then gave all the surfaces a final wipe-down with denatured alcohol. I then filled all the scratches, gouges and nail holes with
Famowood Wood Filler
, sanded the patches after they dried and lightly sanded over any old dust nibs and minor surface imperfections.
As a topcoat, I had decided to use Ceramithane , a very durable waterborne polyurethane. The following weekend I went home with a quart of Sealcoat, a quart of Satin Ceramithane, and several colors of TransTint dyes and UTCs to experiment with. Carefully counting the drops of dye and colorant as I added them to the finish, I tinted the shellac to a dark reddish brown. I then brushed it on the back of one of doors. After several tries, I finally got the color just right.
A co-worker had asked me a few days earlier if I had ever decided what to do with my kitchen cabinets. After telling him of my plans to use shellac and a tinted finish, he asked how I intended to apply the finish. "I just thought I'd brush it," I said.
"Well, Ceramithane is good for brushing, but spraying would be much quicker," Mike said.
"But I've never really sprayed before," I said, "All I've ever used is spray paint from a can."
"You can do it," he said, "Watch the Spray Basics (220110) video we sell, look through Andy Charron's Spray Finishing (200835) and the Spray Finishing and other Techniques (203171) books. Then go home, get a pile of scrap wood and PRACTICE, PRACTICE, PRACTICE."
 I was skeptical, but another wonderful thing about my co-workers is their ability to inspire confidence. Being seasoned woodworkers, they have first hand knowledge of tools and techniques and the skills required to use them. I figured if my co-worker thought I could spray my cabinets, I probably could.
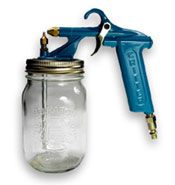
Since I only had a small 2HP 4 gallon compressor, I couldn't use the Shop Fox Mini HVLP Gun (173274), but coincidentally, our buyer had recently acquired a Critter Spray Gun (192701) he wanted to test and I had seen it on his desk. The unit consisted of a siphon gun that screws onto a standard 16 oz. Mason jar, and I was excited to read on the package that it could be used with a compressor as small as ¾ HP. The spray pattern on the gun ranged only from 1/2" 3-1/2", but that would be perfect for my cabinet doors. Blair gave me the gun, providing I give him my opinion of the product afterward. (Later I had no problem convincing him we simply HAD to sell it!)
I took home a copy of the Spray Basics video. After viewing the video and spending a few lunchbreaks that week reading about common finishing problems, spray booths and proper spraying techniques in the spray finishing books, I felt more confident about trying my hand at spraying.
 That weekend, in my basement shop I threw drop cloths over everything, and set up a spray area on my workbench with a large Lazy Susan turntable. I placed a box fan with a furnace filter taped to it right behind the spray area, put another fan facing out in the window behind my bench, and cranked up my
JDS Air-Tech 2000 Model 750 Air Cleaner
. I practiced outside with the gun for a few minutes, spraying just plain water to get a feel for the gun and the spray pattern it produced. I experimented with the nozzle on top of the fluid tube, raising and lowering it to adjust the material flow and adjusting the pressure on my compressor to see how it affected the spray. I soon felt comfortable enough to try the shellac. I poured the SealCoat I had tinted through a cone
Straining Filter
(196099) as I filled the Mason jar on the Critter, then set my compressor to about 45psi and sprayed a test board. I was astonished spraying with the Critter was not unlike using a can of spray paint, and I had easily applied a nice, even coat of shellac. I sprayed a few more scraps and then eagerly moved on to the cabinet doors.
I filled several extra Mason jars I had purchased with SealCoat so I could simply switch jars as I emptied them while spraying. As I had learned from the video and books, I flooded the surface just enough for the finish to flow out in a smooth level coat without puddling. Before too long I had the fronts of all the doors sprayed and laying out to dry. I unscrewed the jar of shellac from the Critter and put a lid on it and set it aside for later. Then I screwed a jar of ammonia and water to the gun, sloshed it around to clean the tube, sprayed the Critter outside for a few seconds and that was it, the gun was clean. A few hours later I returned to my shop, screwed the jar of SealCoat back onto the gun and sprayed the backs of the doors.
 The next day I tinted the Ceramithane, following the "recipe" I had concocted when tinting the shellac. The colors came out remarkably close. I didn't worry about achieving an exact match since I would be completely recoating all the surfaces. I first used a
Fine Scotchbrite Pad
(196203) to remove any dust nibs on the doors, and then sprayed the Ceramithane just as I had the shellac. It went just as smoothly. I followed the same schedule for the kitchen cabinet frames and sides, only I brushed on the shellac and Ceramithane with a foam brush. (I must say the Ceramithane is indeed very brushable.)
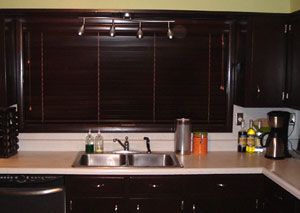
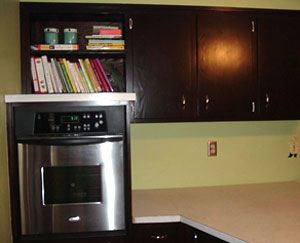
I re-hung the cabinet doors with new hinges, replaced the old pulls, and my cabinets looked almost as if I'd replaced them with new ones! My wood blinds were now the wrong color, however, so what did I do? I took them down, cleaned them, took them apart, and sprayed them with the Critter! I figured I was going to have to replace them eventually, so I didn't have much to lose by trying stain them to match the cabinets. I sprayed the SealCoat and Ceramithane on the blinds just as I had on the doors, and again, the results were remarkable. New appliances and a nice coat of paint on the previously wallpapered walls, and my kitchen was utterly transformed and updated!
For a few months now I have marveled at how quickly (and fairly easily) I was able to refinish my kitchen cabinets with no spraying experience and still achieve such professional results. The end results far exceeded my wildest hopes and expectations. Not only did I save an incredible amount of money, but I was introduced to the world of spray finishing and its amazing possibilities. If you've always wanted to try spray finishing but have been overwhelmed by the different guns available, or you don't want to invest in a large air compressor or an expensive HVLP system, the Critter Spray Gun is just for you. It is simple enough to not be intimidating, plus it's affordable, versatile and extremely user-friendly. I think even experienced finishers will enjoy its simplicity and be pleasantly surprised and impressed with its performance.
Now if only laying the porcelain tile on my kitchen floor will go as smoothly as the cabinets did...