An Introduction to Sphere-based Turning
by Joe Skehan
Salt Lake City, UT
|
|
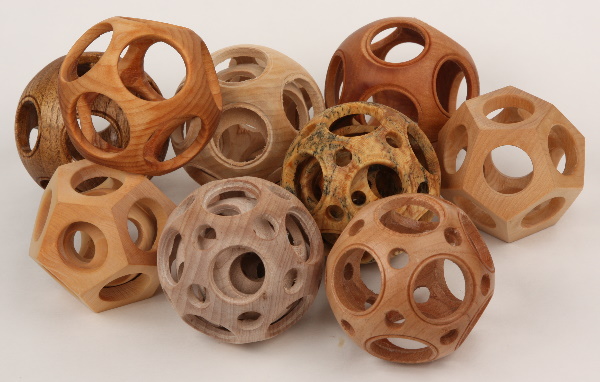
Figure 1. Some of the author's sphere-based creations.
|
Most wood turning is performed on material mounted in a single plane; the wood is placed between
centers or held in a chuck. It is then worked perpendicular or parallel to the grain. However, as
early as the 16th century, turners discovered that if the material being worked was in the shape of
a sphere, then it could be worked from any point, rotated and then worked from any other point,
producing concentric designs. This is the basis for all sphere-based creations.
History
|
|
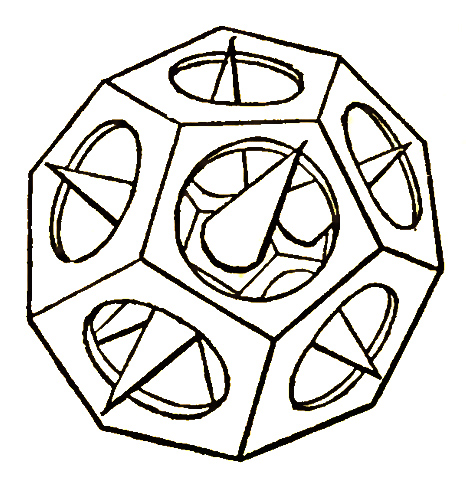
Figure 2. Holtzapffel's star in dodecahedron.
|
The earliest known reference to these items dates from 1581 by Georg Wecker, court turner to Duke
Augustus, Elector of Saxony. Many of the modern tools and processes for these creations were
outlined in 1816 by L. E. Bergeron in his 'Manuel du Tourneur' which included detailed drawings and
explanations. These were further covered in 1881 by John Jacob Holtzapffel in volume IV of 'Turning
and Mechanical Manipulation'. Chinese craftsmen started making them in the 18th century. Often made
of ivory, these 'Chinese balls' were usually intricately carved and ornately decorated.
What are these things?
|
|
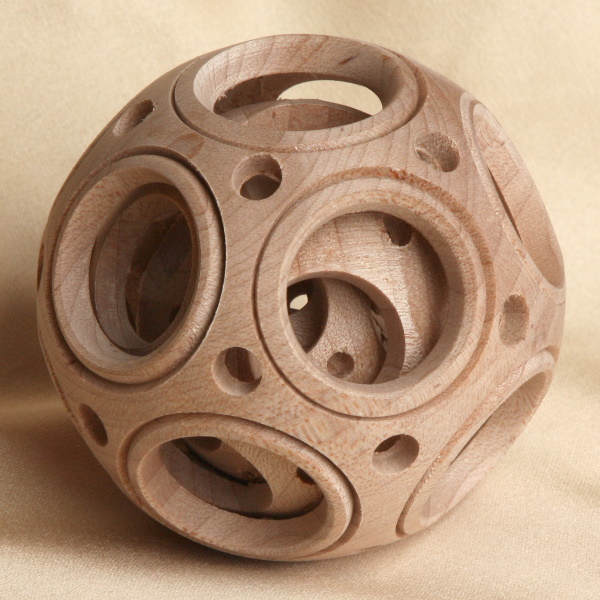
Figure 3. Five-level Chinese ball.
|
The most common modern pursuit is what's commonly referred to as the 'Chinese ball'. It's usually
a wooden sphere about 2-1/2″ in diameter with 12 holes about 3/4″. The sphere is
1/8″ thick and inside it, separated by a 1/8″ gap is another sphere. The second sphere
also has 12 holes and contains a third sphere. The third sphere contains a forth sphere and finally
a solid ball 1/2″ in diameter for a total of 5 spheres (4 hollow and 1 solid), all contained
within each other.
This general description is only a common implementation and the variety of items produced is limited only by the imagination and skill of the turner.
Creations may commonly have as few as 6 holes or as many as 32 (usually 12 large and 20 smaller). They may contain a greater or lesser number of
spheres, or simply be hollow balls. Instead of additional spheres, they may contain cubes, stars or even lidded boxes. Also, the external shape can
also be something other than a sphere, such as the 12-sided dodecahedron shown in the figures.
What's the trick?

|
Figure 4. Perseverance is a helpful skill. Things
don't always work out the
first time.
|
There is no trick. These items are created exactly as you see them. There is no way to open them
(except in destroying them). They're made by securing a sphere in a hemispherical chuck, drilling a
hole and inserting tools that cut a chase at a given distance from the outside of the sphere. The
chases cut from adjacent holes intersect each other and eventually release the interior shape.
You don't need to be an expert craftsman or master turner to make these. It's more important that
you're willing to fashion your own jig and create tools or perhaps modify existing ones. Another
quality of great value is persistence - it's easy to get frustrated when a ball explodes on the
lathe for no obvious reason.
What do I need to make these?
First, you'll need a lathe. Any lathe will do, but because these items are fairly delicate,
smaller lathes do seem to have a slight advantage. You'll also need a Jacobs chuck, a few forstner
bits and maybe some twist bits.
In addition to these items you probably have in your shop already, there are a few specialized
tools necessary. First, you'll need to make a hemispherical jig. This is a piece of wood, secured to
the headstock, that has a hemispherical hollow to hold about 40-45% of a sphere. It also has a
collar that presses the sphere into the hollow to hold it firmly in place. The collar can be held to
the chuck with screws or screwed on with a cap. I've used a 2″ PVC compression fitting to make
securing the collar easy.

|
|
Figure 5. Ball secured in the hemispherical chuck.
|
The next thing you'll need are tools to cut the chases. These are essentially sideways-cutting
parting tools with specific radiuses attached to a curved fence that rides on the outside of the
sphere. You can make these yourself, or purchase a set of
Crown Chinese Ball
tools. In either case,
the tool's fence is a curve to match the outside of the sphere - in our case a 1-1/4″ radius.
The cutter for the outer most chase is held 1/8″ in from the fence and is 1/8″ wide. The
next chase's cutter is 3/8″ from the fence and is also 1/8″ wide, and so on for the 4
cutters needed for a 5 level ball. The shape of these cutters is critical to your success. Make sure
that the cutting end is the widest part of the curved portion and that the radiuses are close to
exact so that no binding occurs.
|
|
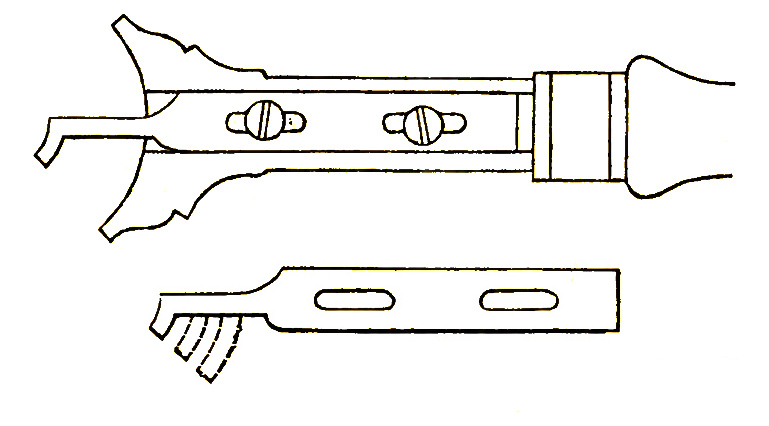
Figure 6. Cutting tool and additional cutters
|
Lastly, you'll need a flat tool rest to register the cutter against while making the cuts. I had
a local machinist make one that is about 1-1/4″ wide and 5″ long. It needs to fit into
your lathe's banjo, and be very flat and stable.
What's the process for making one?
|
|
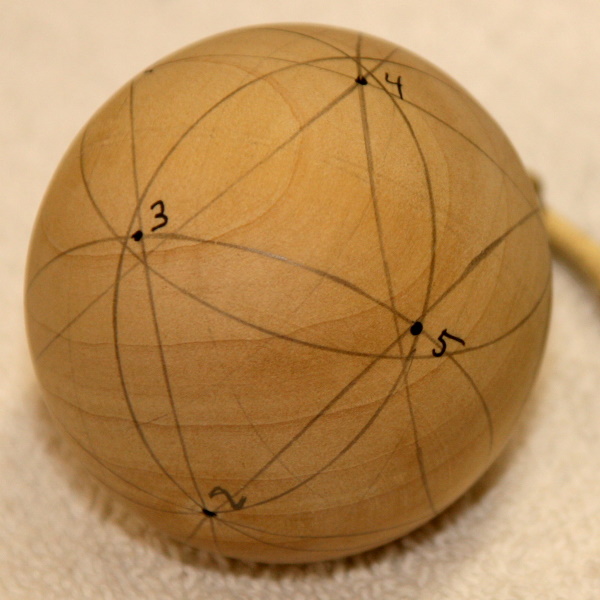
Figure 7. Sphere with 12 points marked.
|
The best place to start is to make a 1-level ball; that is, a hollow sphere with 12 holes. Start
with a 2-1/2″ sphere of close-grained wood. You can use pre-made wooden balls, but they're
usually not very round, which can get frustrating. As you learn the basic skills, you'll probably
want to start making your own. Mark one of the end-grain points on the sphere and then set out 11
more equally spaced points. This is done with a compass set to 1-5/16″. Scribe a circle from
the first point, then place the compass anywhere on that circle and scribe another circle. Continue
this from each intersection of the circles and you'll have 12 equidistant points.
Place the sphere in your hemispherical chuck with the first end-grain point facing out. Bring up
the tailstock with a 3/4″ forstner bit inserted and center the bit on the point, press it
firmly against the back of the chuck and secure the sphere with the collar. Back the bit off the
sphere, ensure the chuck can turn freely and turn on the lathe. Drill into the sphere a little over
half way, retract the bit and turn off the lathe.
|
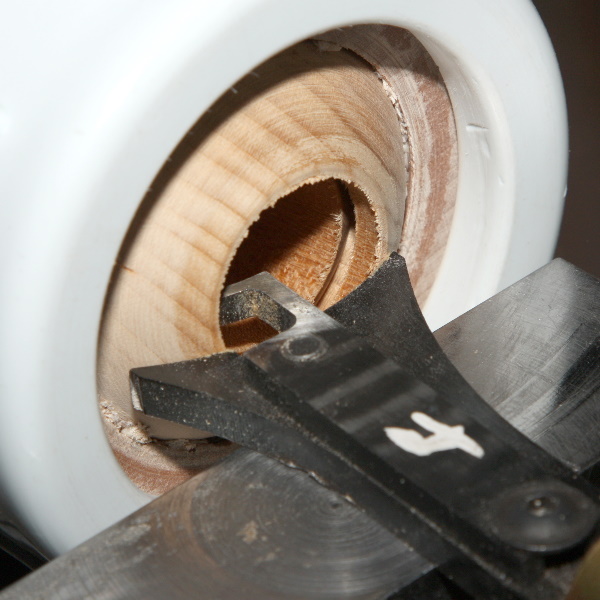
Figure 8. Cutting the chase
for a 1 level ball.
|
Next, bring up the flat tool rest that has been adjusted in height so that the top of the chase
cutter is exactly at lathe center. Set it about 1/2″ from the sphere, ensure the chuck can
turn freely and turn on the lathe. Register the chase cutter flat against the tool rest and
carefully insert the cutter into the hole until the fence is against the spinning ball. While
keeping the fence against the ball and the tool flat on the tool rest, very slowly move the cutter
into the wood. Continue until the cutter has reached its maximum depth; you may need to retract it
once or twice to clear chips or even quench the cutter if it's gotten hot. Perform any sanding
before moving to the next hole.
|
|
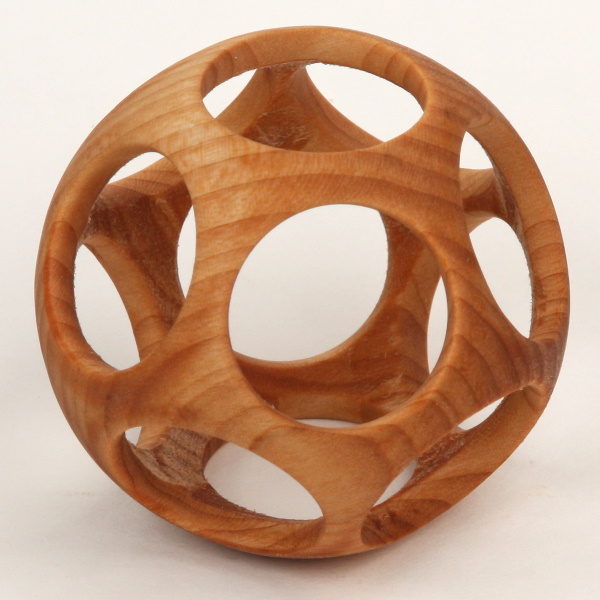
Figure 9. Completed 1 level ball.
|
When you're finished with the first end-grain point, repeat the process on the second end-grain
point, and then for each of the 10 additional points. Proceed slowly, keep your cutter sharp, take
your time and always work safely. Congratulations on your first 1-level ball!
Once you've mastered the 1-level ball you'll have all the basic skills for creating any of these
masterpieces. Your only limit is your imagination, creativity and perseverance.
About the author: Joe Skehan has been woodworking as a hobby for over 20 years. He resides in the
Salt Lake City area and can be reached via
joe@magicalwoodproducts.com. This article first
appeared in the June 2010 of our sister publication,
Wood News Online.

