A mallet makes for a "fun"ctional project
by Curtis Turner
Round Rock, TX
This month, we focus on a simple but functional project: a mallet. This handy project is
fast-paced and has a wide range of acceptable designs, so it's perfect for a beginning turner. This
project will take a beginner about 2 hours to complete. A mallet also makes a great gift for a
woodworking friend.
Wood selection
Wood selection is an important consideration if your mallet is to be your workhorse, "go-to"
mallet. A straight-grained hardwood blank such as Maple, Mesquite, Pecan or Ash would be a nice
choice. However, if this mallet is to be a show mallet and will sit next to your premium
collector chisels, well, then, anything goes.
The key consideration here is to select a blank that is free of voids, knots and other issues
like spalting. All of these characteristics will create weakness in the mallet. The size of the
finished piece will drive the rough blank size. A blank of approximately 3" square and 12" in
length will work perfectly. I used an Ash blank for the sample illustrated in this article. I
found this blank to be a little lighter-weight than I prefer in a working mallet.
I regularly use a Lyptus mallet I turned years ago. I'll never turn Lyptus again -- I am still
picking the short straight grain chips out of my socks. Another favorite of mine is a small, yet
heavy Oak mallet I turned from locally harvested material.
Setting up
Start by marking the center on both ends of the blank, and placing it between centers on the
lathe. Next, turn the blank by hand, to ensure it spins clear of your tool rest. If you are new to
turning, this could be one of the larger blanks you have ever turned (this is much bigger than a pen
blank). Don‘t be intimidated! Start with a slow speed, such as 300 RPM. You can increase
the speed as the blank is turned down to round. Always stand clear of the blank when you first turn
on the lathe. Once you see the blank is spinning without significant vibration of the lathe, you
can proceed to turn. If your lathe vibrates wildly, you should slow down the speed, or adjust to
better center the blank. As with any turning operation, if you are uncomfortable or unsure of the
proper technique, step back and rethink your approach. Of course, you should always wear your face
shield anytime the lathe is on!
Tool selection
The best tool for removing the bulk of the material is a spindle roughing gouge. For this
particular mallet, I used a 3/4" spindle roughing gouge to get the blank turned to round. The next
tool in the lineup was a 1-1/4" skew. Yes, you should practice with and become comfortable with this
tool, although you probably don't need a skew this large to start. However, this size has the mass
to remove a lot of material quickly, while providing a level of control lacking in a small skew. It
does a great job of smoothing out the blank, cutting in lines for key transitions, and much more.
As an alternative to using the skew, you could use a 1/2" spindle gouge on the body and cut away
the end grain on the handle end. You will find that the skew will leave a much cleaner surface.
Save yourself the sanding work and try the skew first. I know you can accomplish this with just a
bit of practice.
Finally, I used a thin parting tool to remove all but the tiny nubs at each end.
Now for the turning!
Use the spindle roughing gouge (SRG) to take the blank to round. Adjust the tool rest to allow
the SRG to be cutting at, or just above, the center line of the blank. I moved the tool rest closer
to the blank as I worked. Always spin the blank by hand after each adjustment to ensure it turns
freely.
Once the blank is round, you have an opportunity to practice a few different techniques. I would
encourage you to try using the skew to make various cuts, such as planing cuts and finishing cuts
(long point down). Don't be afraid to experiment! If you make a mistake at this point, you can just
erase the "catch" by removing more wood.
Layout lines
Note: click on any picture to see a larger version.
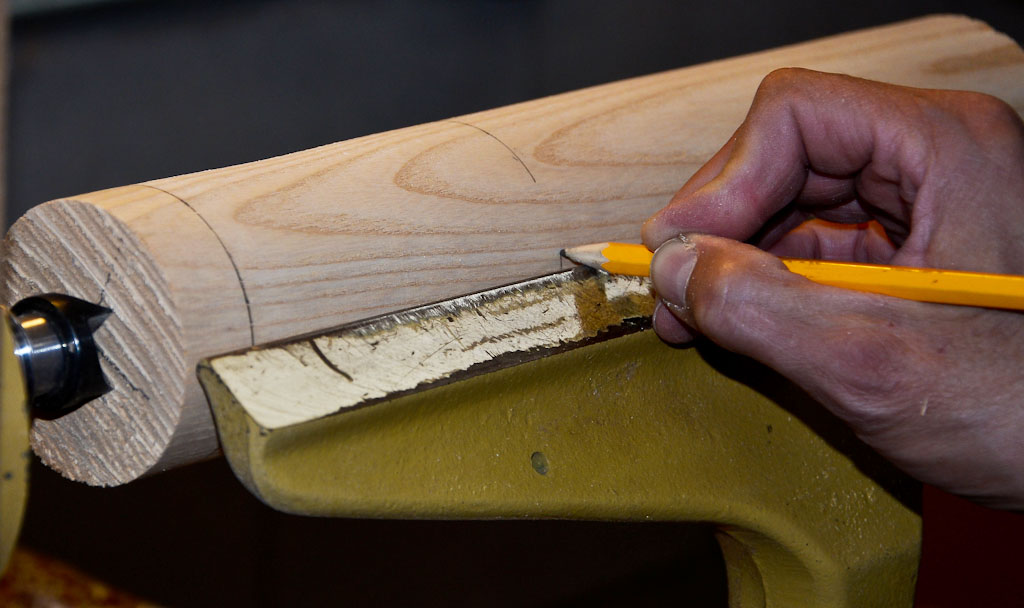
Now let's move on to initial shaping. I turn off the power to the lathe, and place my hand on
the blank to estimate where I would like the handle and other transitions to occur. I mark those
with a pencil. Turn on the lathe, and make a shallow cut with the long point of the
skew to mark these locations. This will give you a deeper, visual marker for the transition points,
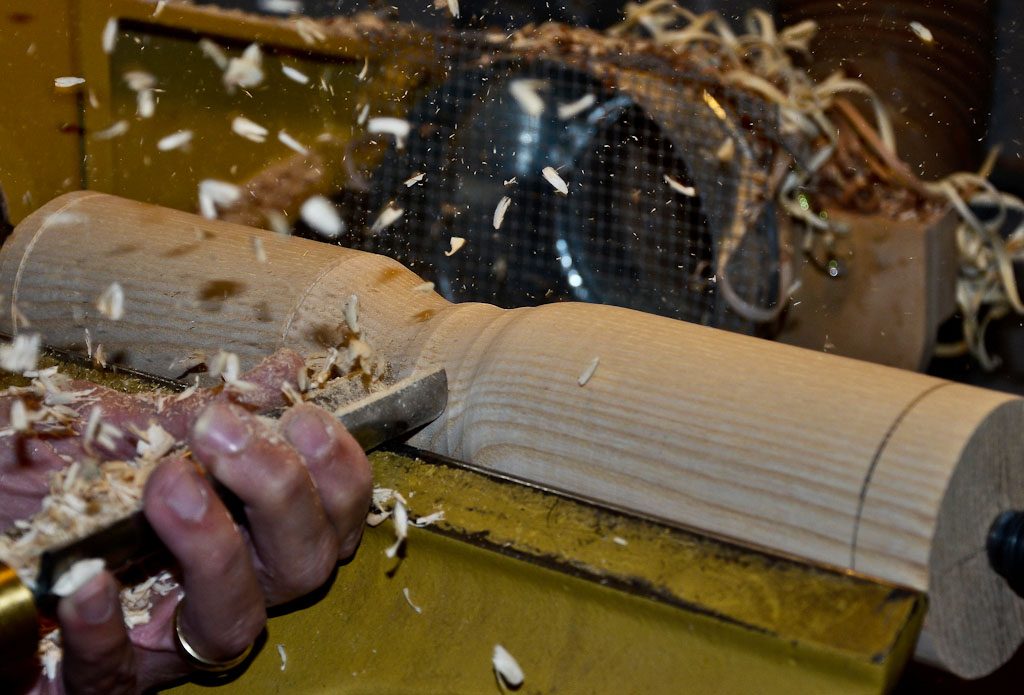
once the pencil marks are turned away. I then use the SRG to make sweeping cuts to
shape the handle. At this point the handle is still quite large.
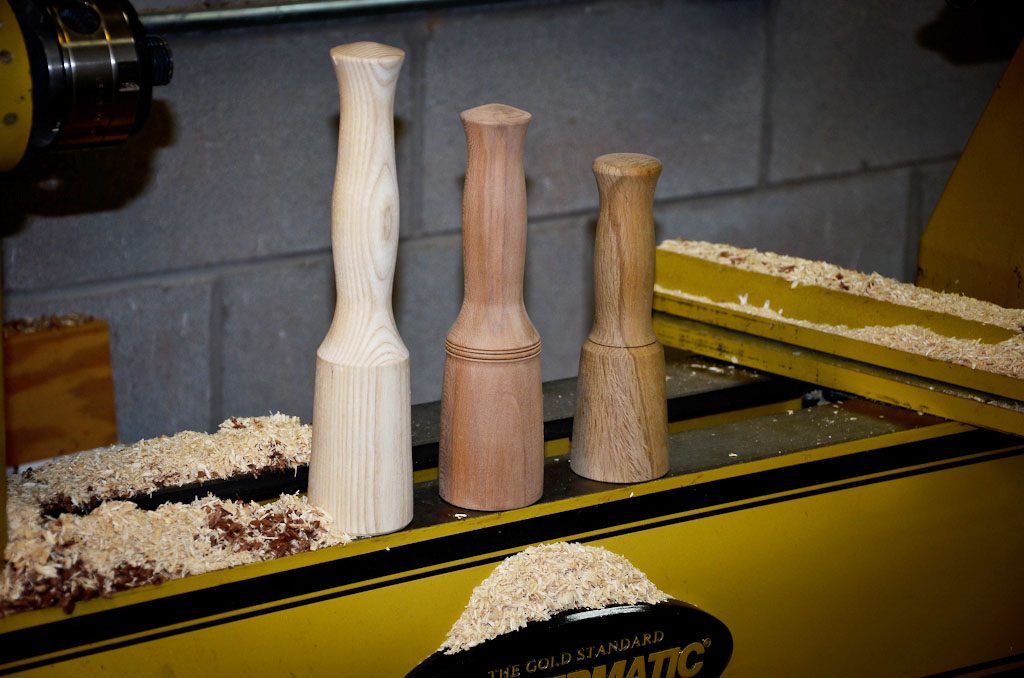
Refinements
In this next phase, you will refine the shape of the mallet. Now would be the time to determine
the shape of the mallet head. You have several options. The mallet in the illustration has a
tapered head. The largest diameter is furthest away from the handle. Your options also include a
pure cylinder, or a head that is a bit broader in the middle. I have tried using mallets of all of
these shapes on bench, mortise, and carving chisels. I have not found one style to be more
comfortable than another. So, select the shape you like best.
You may choose to add embellishments to your mallet, such as burning in lines or beads. These
are purely decorative, but definitely mark the tool as uniquely yours. You may also choose to cut in
lines on the handle to give added grip. These can be added by making v-cuts with skew (long point
down).
Work the transition, from the head down to the handle. I prefer a broad half cove shape. This
cove allows me to comfortably choke up on the mallet when I want to make light, controlled taps.
The remainder of the handle is further refined with the SRG, and finished with a
skew. You could also use a spindle gouge here if you preferred.
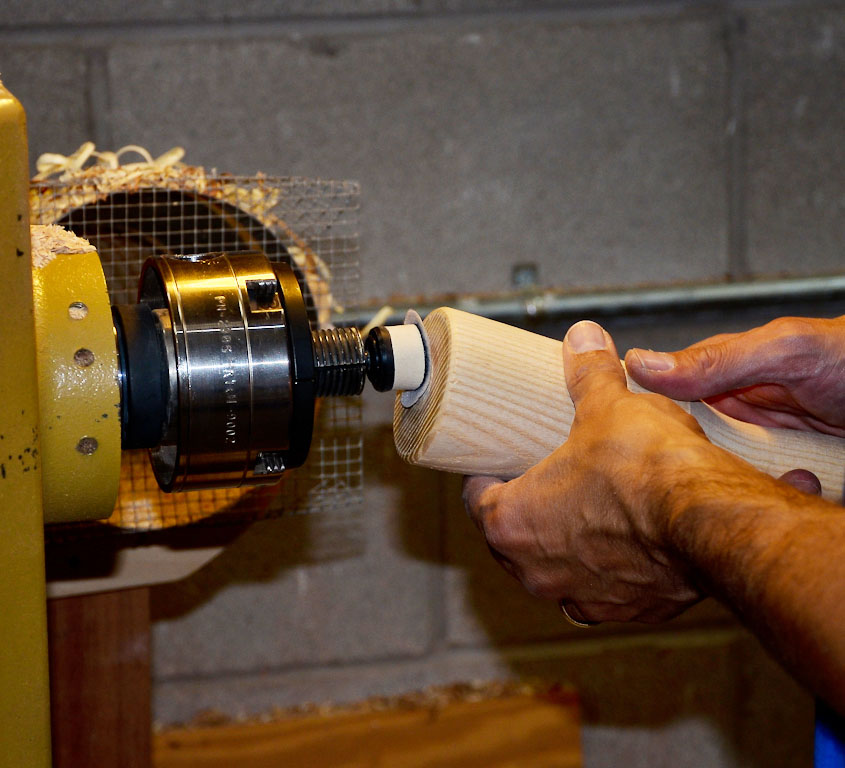
I frequently test fit the handle to my liking during this phase (with the lathe powered off, of
course). Once I am happy with the handle fit, I move on to the end. I generally shape the handle
end to a half dome. You can make this cut with either a skew or spindle gouge. You
may also choose to make the end flatter if you want to add rings, texture or other embellishments in
the end of the handle.
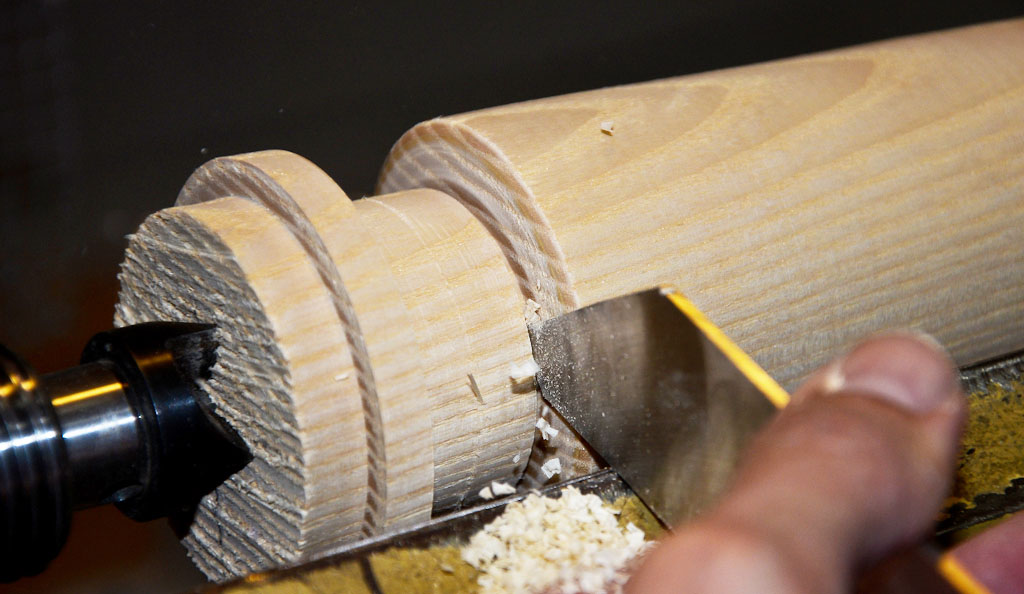
Parting off the mallet
The end is in sight! You've created a custom mallet to fit your hand. Now you need to carefully
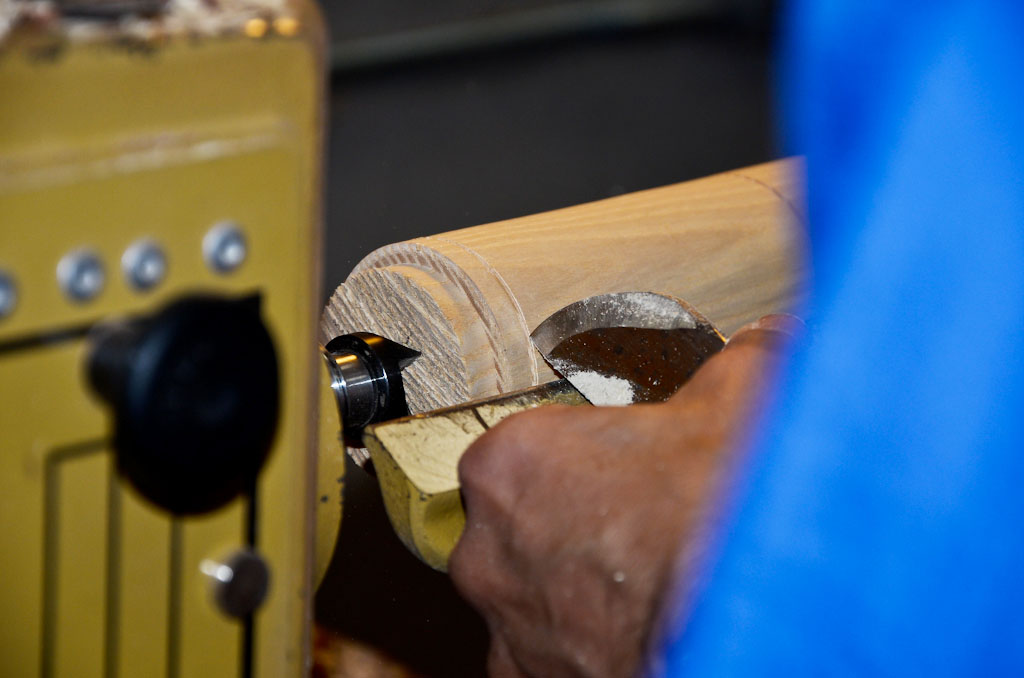
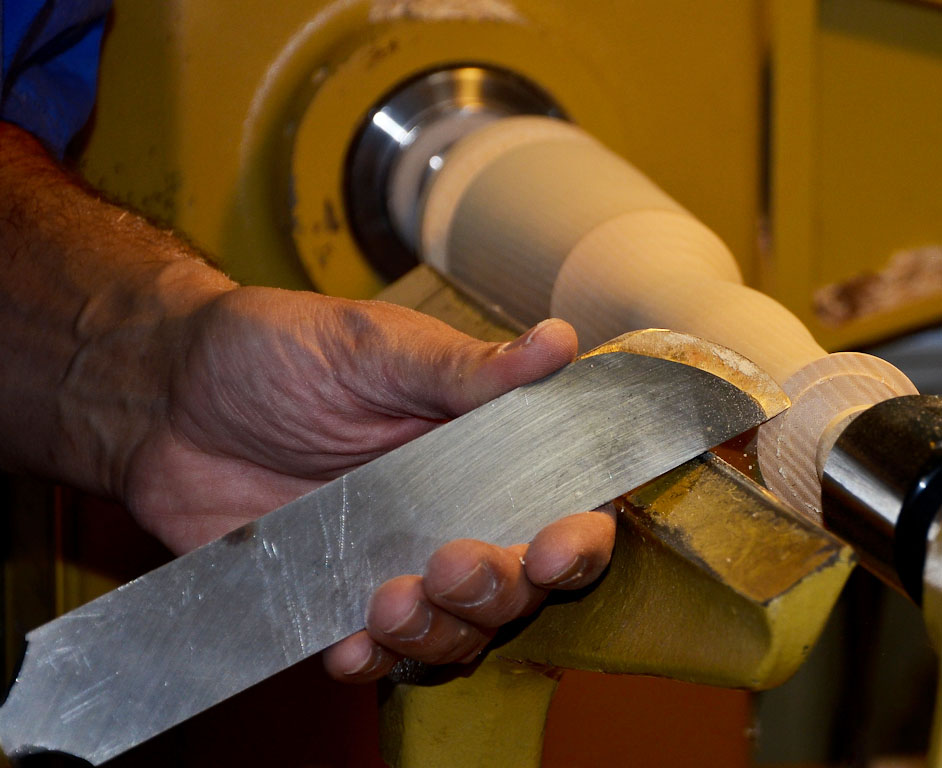
remove your masterpiece from the lathe. I used a thin parting tool to remove most of
the unwanted stock. At the handle end, I made straight cuts (90 degrees to the tool rest) on the
waste side. On the mallet head end, I made slightly angled cuts to undercut the mallet. We want
the mallet to be able to stand on its head and not wobble. (I am sure there's a joke in there
somewhere).
Once I have parted down to a 1/8" diameter, I turn off the lathe and use a thin saw to cut off
the final bits. I then use a 1" sanding disk to remove the excess nubs and smooth out both ends of
the mallet. This disk could be mounted in a hand drill, chuck with #1 jaws, or a
flex shaft rotary tool like a Foredom.
Finishing options
On most of the mallets I turn, I never sand beyond 150 grit. I usually don't apply a finish if
it will be a working mallet. However, for your show mallet, you should sand to your liking and
apply your finish of choice. Waterlox would be a good option. You can buff to add to the luster of
your new work of art. Take a picture of your new tool, and enjoy your accomplishment!
Curtis is a former President of
Central Texas Woodturners, a member of the
American Association of Woodturners, and a member of
Fine Woodworkers of Austin. Curtis teaches and demonstrates nationally for Lie-Nielsen Toolworks. He also teaches for TechShop. He owns a studio where he teaches and works. Curtis lives in Central Texas with his wife and four young children. Take a look at his website at
www.curtisturnerstudio.com or visit his
Instagram: tx_planes.