A Custom Bowl makes a great gift
by Curtis Turner
Round Rock, TX
Note: click on any picture to see a larger version.
The holiday season is fast approaching, and a custom-made bowl makes a great gift for a teacher,
family member, or friend. This is a great beginner project, and it can be completed with either a
purchased blank or with a blank for which you harvested and managed the entire process from log to bowl. A small
simple bowl can be completed in a few hours. Entire books have been written about bowl turning.
Books by
Ellsworth
and
Raffan
are great starting points. This article is intended to get you started
with a few simple strategies.
Select a blank
Select a blank that is sound, free of cracks and voids. As you gain more experience, you can
experiment with more challenging blanks. American Elm and Sycamore were my choices for this project.
These were harvested about a year ago and allowed to dry in my shop. The finished diameter is 7-1/2".
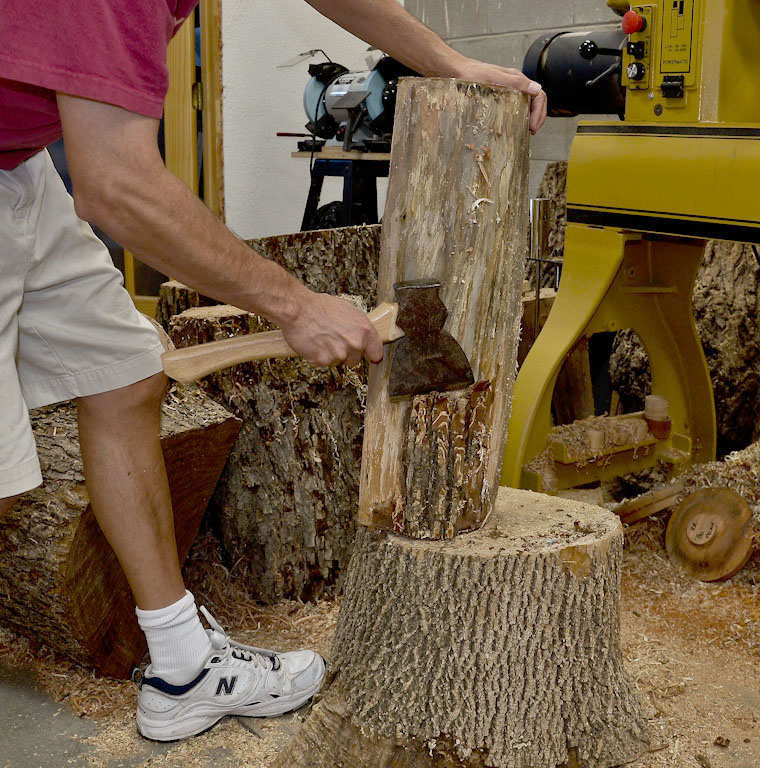
Cutting the blank
I chose to remove the bark prior to turning because the bark was thick and loose. I used a
hewing ax to accomplish this task. This step eliminates the bark, dust and dirt from flying off as
the blank is turned.
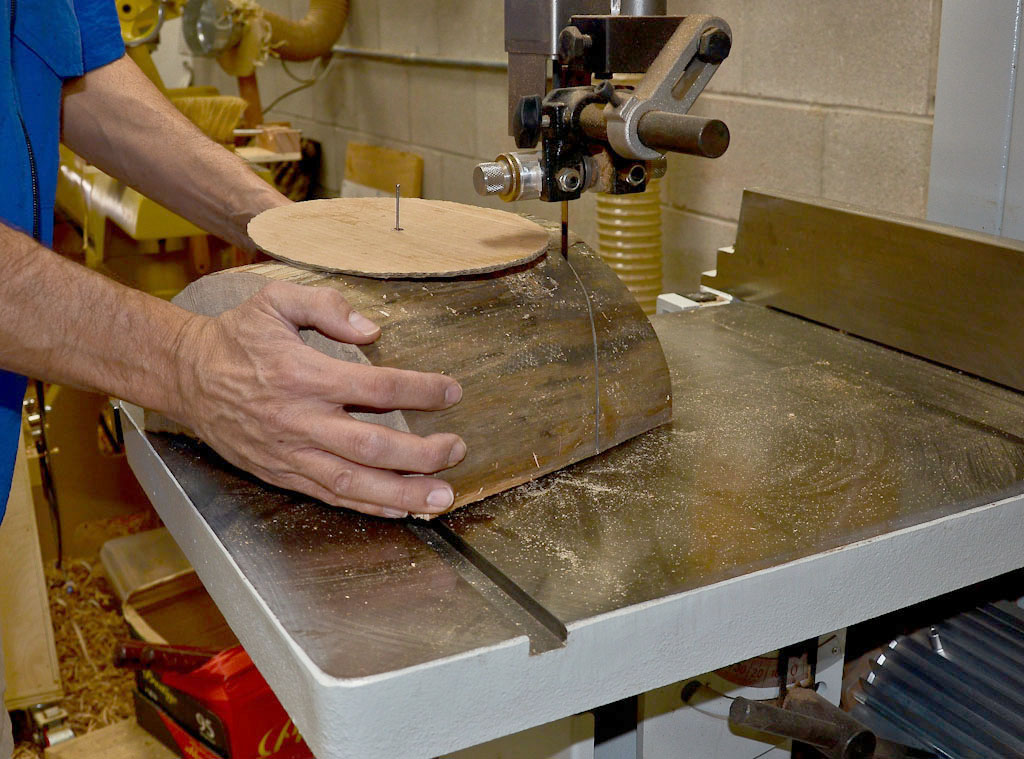
Next, I cut the log into a more manageable length on the band saw. I used a template to cut the
blank. I removed the template, placed it on the opposite side and marked the approximate
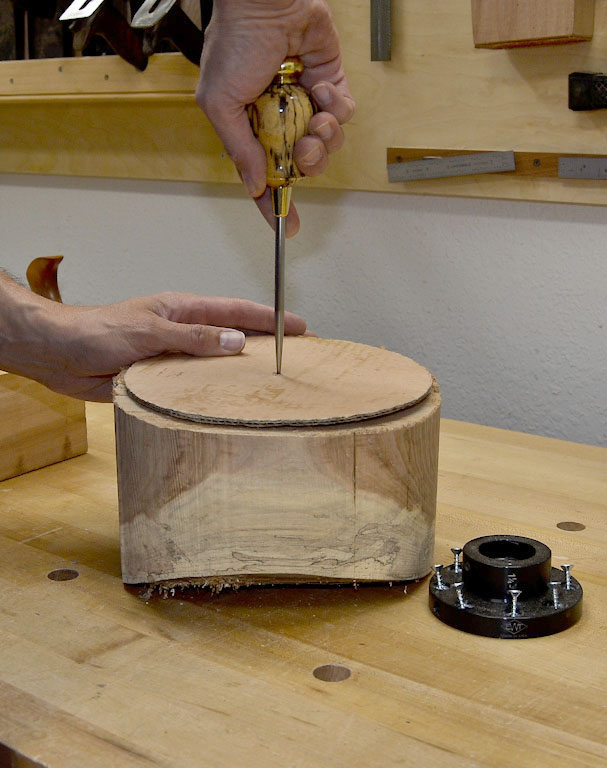
center with an
awl.
I used that center mark as a guide to attach the face plate. I find
face plates are an easy way to secure a blank. Use quality screws to attach the blank. Do not use
dry wall screws, as they do not have the shear strength to handle the torque of turning. If you use
dry wall screws, make sure you have plenty on hand, as you'll be patching dry wall after you launch
a blank into orbit around your shop!
Mounting on the lathe
Always ensure the face plate is securely threaded onto your lathe. I recommend that you bring the
tail stock up and thread the quill into the blank. This will provide extra support during the
roughing process. Next, position the tool rest to allow you to cut at or above center. Always
rotate the blank by hand to ensure the blank will safely clear the tool rest.
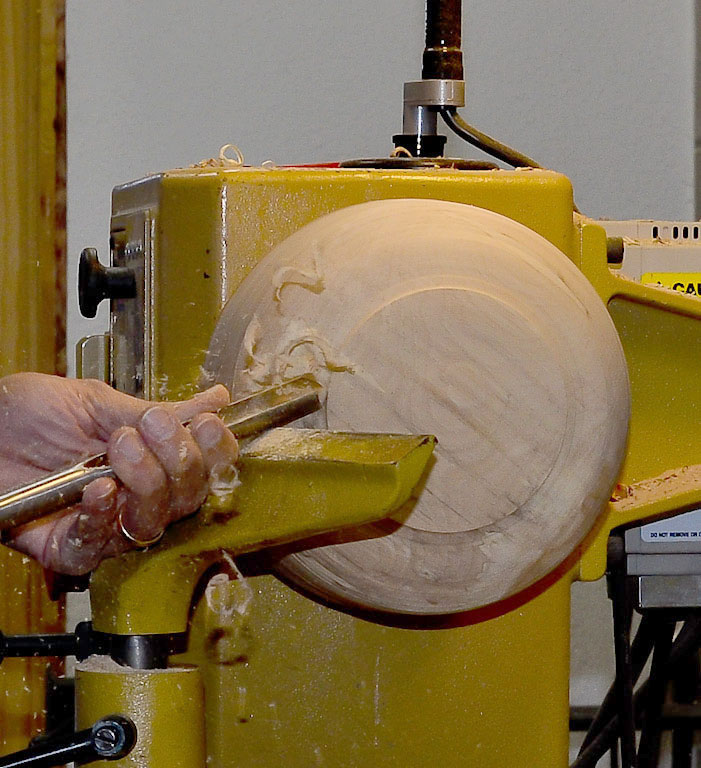
Roughing out
Now the fun begins. Safety is critical in this step. You should use the slowest speed setting on
your lathe at this time. Stand clear of the blank, and (with your face shield on), turn on the
lathe. This test run will tell you immediately if the blank is balanced. If your lathe vibrates
wildly, you should turn off the lathe, remove the blank and remount the face plate. You may even need to go back to
the band saw to refine the blank.
The ABCs
Truing the blank can be a bit of a rough ride. Therefore, it is important to be patient and use
a lighter touch than you might expect. Do not force the tool into the spinning blank, as this will
only increase the bounce of the tool and tire you out quickly. You should engage the tool with sound
fundamentals of the ABCs: "A"nchor the tool on the tool rest; rub the "B"evel; then raise the end of
the tool handle into the "C"ut. In time you will gain a better feel for the bowl gouge.
Tool choice for the exterior
For the exterior, I used several tools. Ironically, you must not use a roughing gouge here. I
realize the name is misleading. Fortunately, the industry is moving to reclassify this tool as a
spindle roughing gouge (SRG). The SRG is of course, for spindle work. The tang of the SRG is not
designed to handle the stress of face plate work such as bowl or platter roughing. The risk is the
tang may break during the roughing work -- clearly, an event you do not want to witness!
One of my favorite tools for this heavy work is a 1/2" bowl gouge. I then used a Sorby 1/2" spindle gouge to
define the tenon for the chuck.
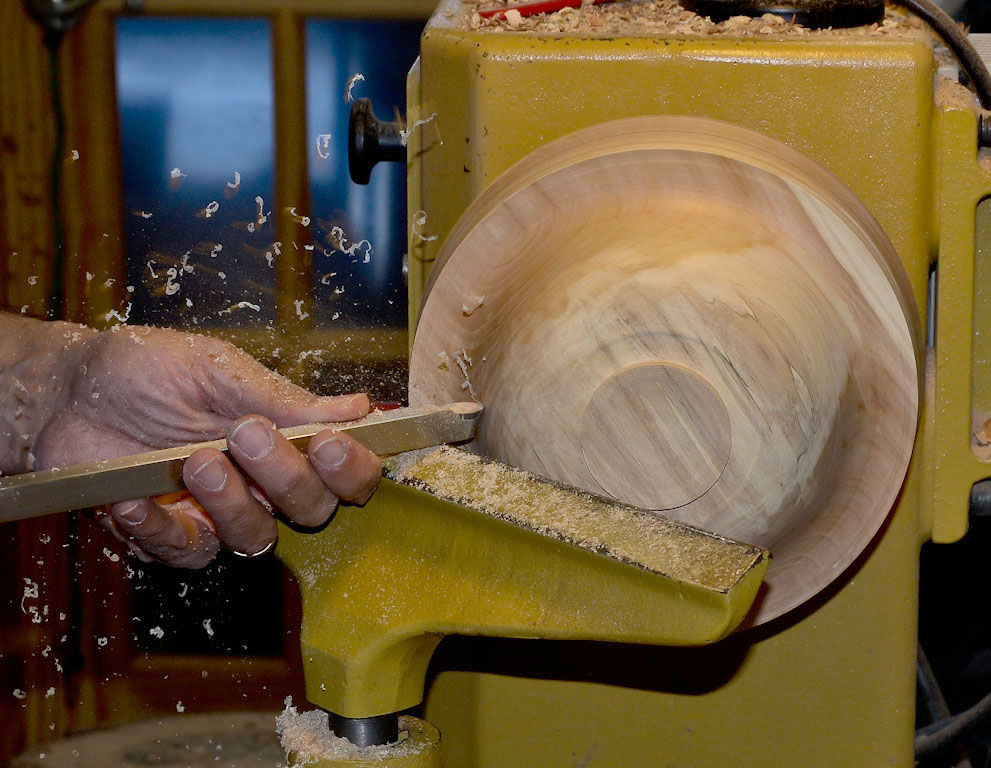
Once the blank starts to turn true, you can move the tool rest closer to the blank and increase
the speed. I tend to true the face of the blank first, and slowly work from what will be the bottom
of the bowl up towards the rim. I stop frequently to inspect the blank. I do this to check the
soundness of the wood. I want to be aware of internal voids, cracks or issues as I turn.
I encourage you to experiment with the shape at this early stage. You may notice a white poster
board tacked to plywood behind my lathe. This provides me a contrasting background to better view
the shape as I turn. You have a chance to play with the design before defining your final shape.
You may discover an unexpected design opportunity. There may be a grain pattern you wish to
accentuate or try to remove. For example, recently I began turning a Sycamore disk with plans to
embellish it with a patina process. However, as the disk began to take shape, I was happy to see a
very pronounced ray fleck pattern. This grain pattern is not uncommon in Sycamore; however, this
pattern looked amazing. So, I happily changed my plans and let this grain pattern become the center
of attention.
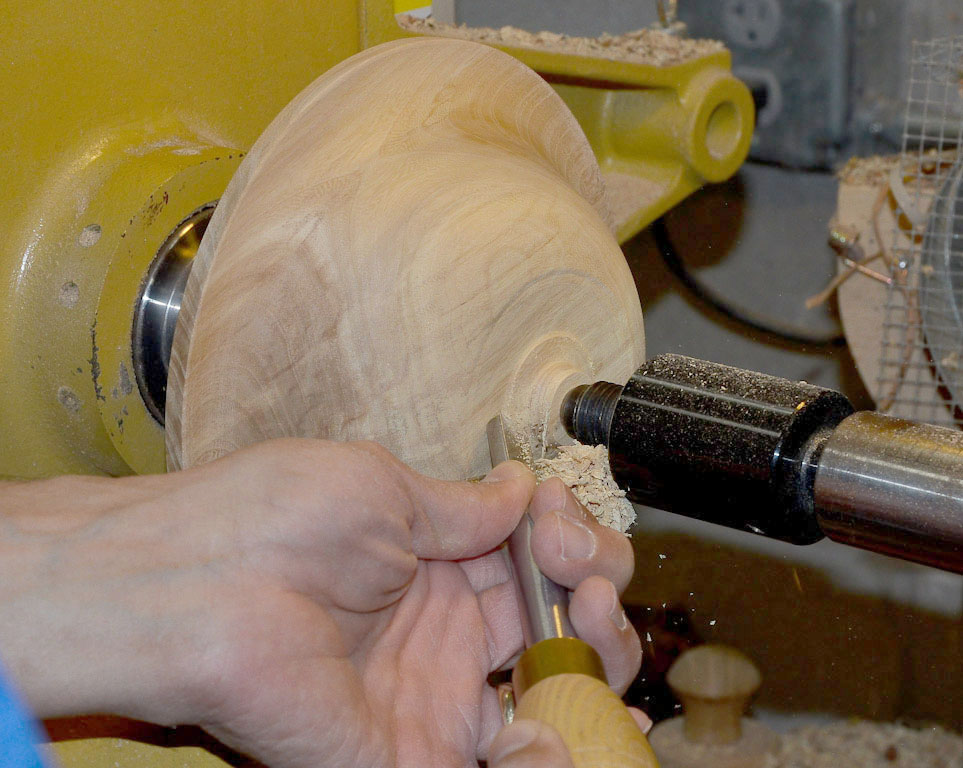
Taking shape
Once your bowl starts to take shape, be mindful of creating a tenon for the chuck to grip. You
will need to remove the tailstock to finish off the bottom. I like to use calipers to size the
tenon to fit the chuck. The tenon should be sized so the jaws are NOT extended to the maximum, as
this reduces the gripping strength. Follow the manufacturer’s guidelines for your chuck. Another
option is a recessed dovetail. This chucking option gives good gripping strength and looks refined
to my eye. If this is one of your first bowls, I suggest using the tenon method. This will be a bit
more forgiving once you are working on the inside bottom of the bowl. It is trickier to measure the
bottom thickness of a bowl with a dovetail recess. Sometimes, you can hit bottom faster than you
think and blow a hole in the bottom of your bowl!
You should think about other design aspects now as well. For example, how do you envision the bowl
sitting on a table? Do you want a foot on your bowl, or do you prefer it to sit on a flat base? It
is helpful, in the beginning, to mark out with a pencil the key transitions and step back and
examine the piece. I sometimes remove the piece (face plate still attached) and set it upright to
better view the overall design.
If the blank is dry, I complete the turning on the outside at this stage. I will finish sanding
before removing the faceplate. However, if the blank is still green (wet), I do not sand at this
point.
Any other exterior details, such as beads or burned lines, should be added now. You could wait
until you've completed the interior and reverse mounted to remove the chuck tenon, but you run the
risk of the blank not running absolutely true, and the rings or beads not being concentric.
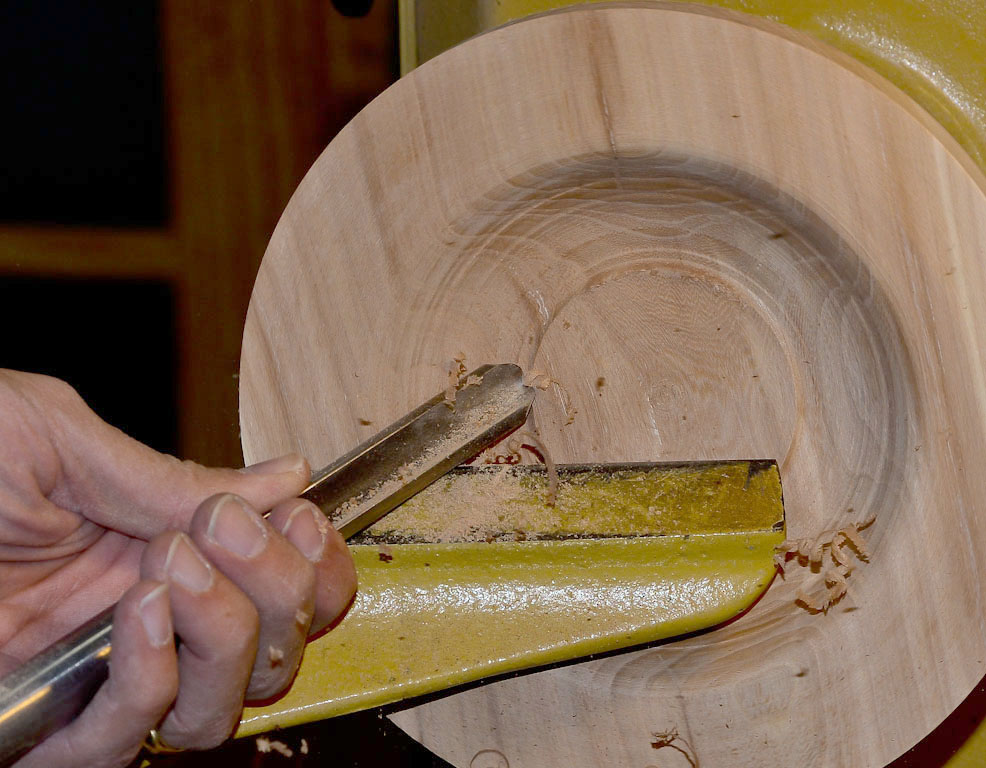
Completing the interior
Tool choice for the interior
I also used the 1/2" bowl gouge
for
the interior. The bowl gouge did most of the interior work, with the Easy Finisher removing tool
marks and refining the finished surface. The Easy Finisher performs best if you take a slower
relaxed pace. This is a refinement tool. It has a different feel than the bowl gouge. However, I
have in the past put this tool to the test on an end grain Pecan box and was amazed how well it
performed with bulk removal. I have also used a heavy scraper to reshape the bottom curve -- so you
certainly do have options.
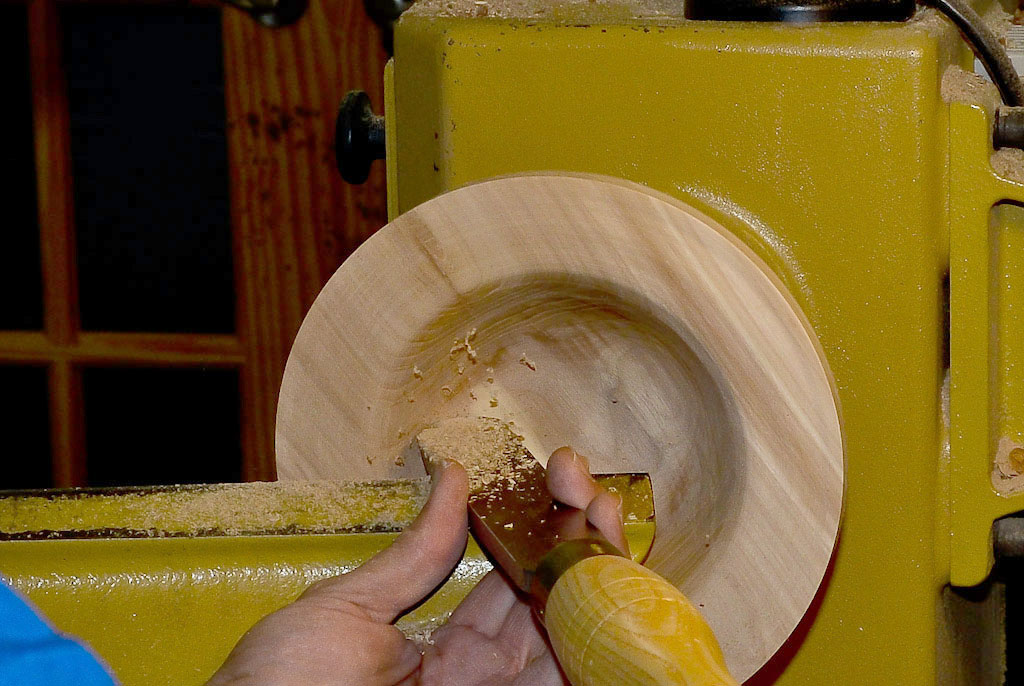
Mount in chuck
Remove the face plate, mount the piece in the chuck, and thread it onto the lathe. Inspect for a
tight fit and bring up the tail stock for safety. Set the speed to the slowest setting, stand
clear, and turn on the lathe. If the piece runs smoothly, then start your work on the interior.
Stop periodically to check the thickness of the bowl. Go for what looks good and feels right to
you. If this is your first bowl, don't try for a super thin form. A thickness of about 1/4" is a
good goal and helps ensure success.
If your blank is still wet, you need to leave the bowl extra thick and set it aside in a paper
bag or under shavings to help control the drying process. The wall thickness should be about 10% of
the diameter. The extra thickness gives you material to remove and re-true the bowl after it has
dried. Drying a green bowl can take 3-6 months depending on the wood and your drying
conditions.
The challenging part now is creating an even thickness from the sides down through the bottom.
This can be monitored with calipers or by feeling the sides and bottom with your hands. I use both
methods.
Do not remove so much material that there will not be enough wood for the base once you reverse
chuck the bowl. Next, define the bottom on the exterior. I use a shop-made gauge to help mark the
bottom, and then transfer the corresponding depth on the exterior. I then mark a line to represent
the bottom interior, and then strike another line, adding about an 1/8" (varies based on the scale
of the item) to represent the exterior bottom of the bowl.
Once you are satisfied with the interior form, move on to sanding the interior. If the
interior still has tool marks you were not able to remove, then start with 80-100 grit sandpaper.
Move up through the grits until you are happy with the results.
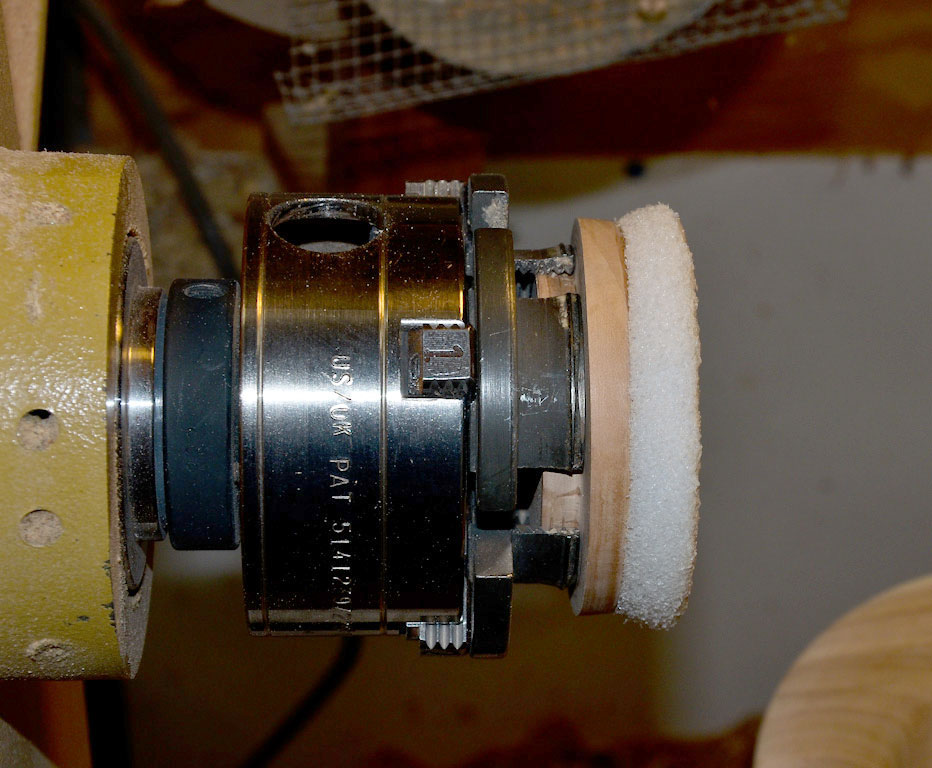
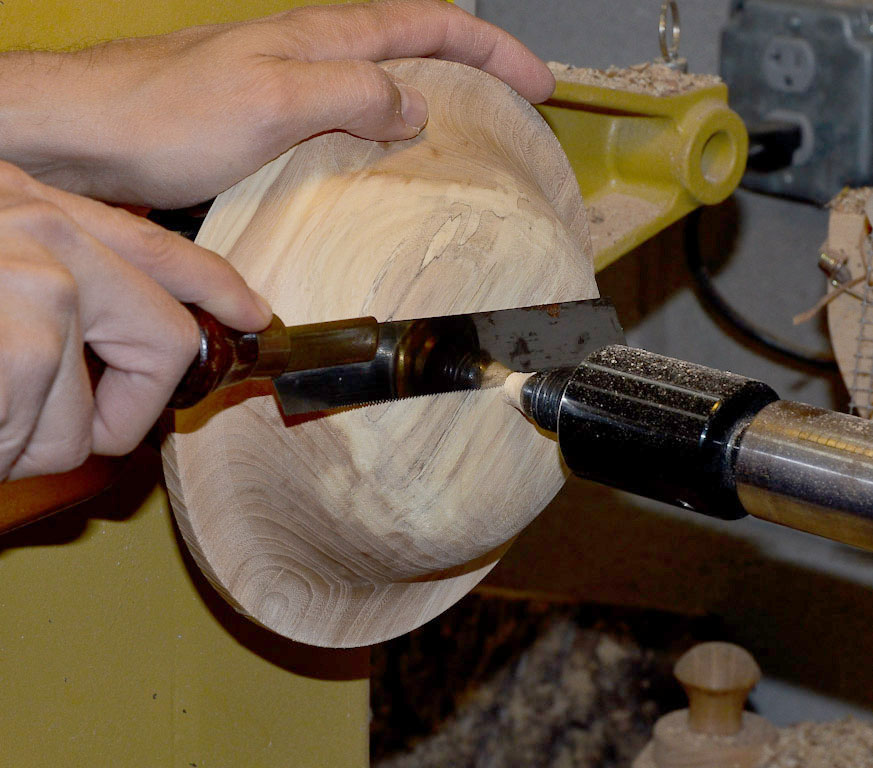
Reverse chuck
Now we need to remove the bowl and remove the tenon. This step involves reverse chucking or jam
chucking. I simply mounted a round wood block with foam glued to it in the chuck. The foam
provides a cushion to protect the interior as well as a positive grip. I fitted the bowl over this form and
moved up the tail stock for support. I then turned away as much of the tenon as I could
reach with the spindle gouge up to the revolving center of the tail stock.
The base, with or without a foot, should be undercut now. This concave base will allow the bowl
to sit flat and not wobble. Now, turn off the lathe and remove your piece. The bowl will have a
small nub on the bottom to clean up. I use a combination of strategies for this process. I use a
small
flex hand saw
to remove most of this nub. Then I use small shop-made sanding disks to blend the bottom
or handheld rotary tools (Dremel or Foredom) to blend. Also, goose neck card scrapers work quite
well.
Admire your work
Congratulations, you just completed a bowl. Now you can ponder what finish to apply. The choices
are virtually limitless. They run the gamut from a warm satin finish to a high gloss finish. There
are oils, waxes, shellacs and lacquers. If you are new to finishing, I would suggest an oil finish
like Waterlox or a simple wax and buffed finish. Feel free to
email
me
a photo of your work. I would love to see it!
Curtis is a former President of
Central Texas Woodturners, a member of the
American Association of Woodturners, and a member of
Fine Woodworkers of Austin. Curtis teaches and demonstrates nationally for Lie-Nielsen Toolworks. He also teaches for TechShop. He owns a studio where he teaches and works. Curtis lives in Central Texas with his wife and four young children. Take a look at his website at
www.curtisturnerstudio.com or visit his
Instagram: tx_planes.