I decided to kick off the new year by building a stool for my shop. I have dragged my current
shop stool around my shop for years. I always disliked having to interrupt my work flow to go retrieve
my stool from the other end of the shop. (Now, don't get any ideas that I have a massive shop.
It's just that stopping to go get the stool would break my rhythm.) So, it was high time I
saved myself a few steps, which will add up for each project over the next few decades.
This project will be more challenging than most. A turned stool with four legs requires
multiple parts, and fitting mortise and tenons. However, with patience you can make this project over a
long weekend. I used several lathe accessories to make this job easier. While these are not
critical, they sure made the project go smoother. First, I used the
Oneway DrillWizard, which is a
fixture for holding a drill at precise angles and heights. This ensures the holes (mortises) are
drilled correctly. I also used the
Oneway Spindle Steady. The steady rest provides support while
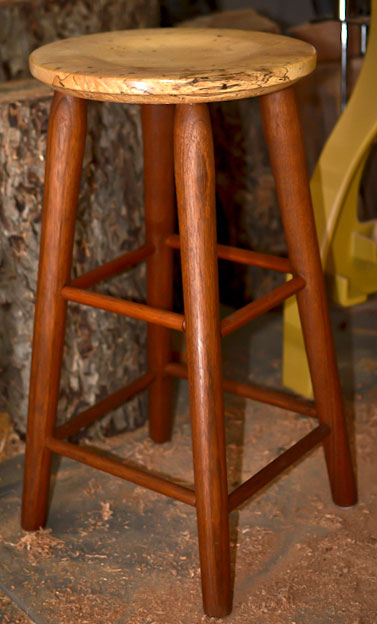
turning long thinner blanks. More about these goodies later. For the seat of the stool, I used a
pecan blank with slight spalting. The seat blank was about 2 1/2" thick by about 16" in diameter.
I chose jatoba for the legs and rungs. Jatoba is a hard exotic wood that I have used for tool
handles. I knew this would create a nice dark wood that contrasts pleasingly with the pecan. The
darker wood will also hide the scuff marks and dirt this stool will experience in the shop. I
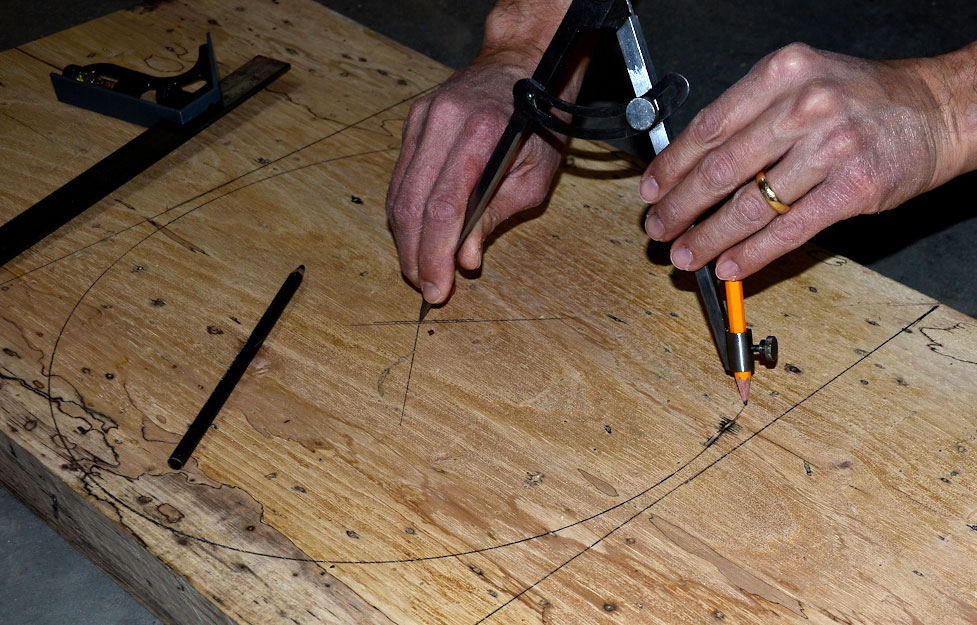
started by laying out the desired diameter of the seat, and cutting wide of the line. By the way, I
love using this
Gladstone Heavy duty 8" compass. It is well made, and has a nice
weight and balance. (see photo below left)
Note: click on any picture to see a larger version.
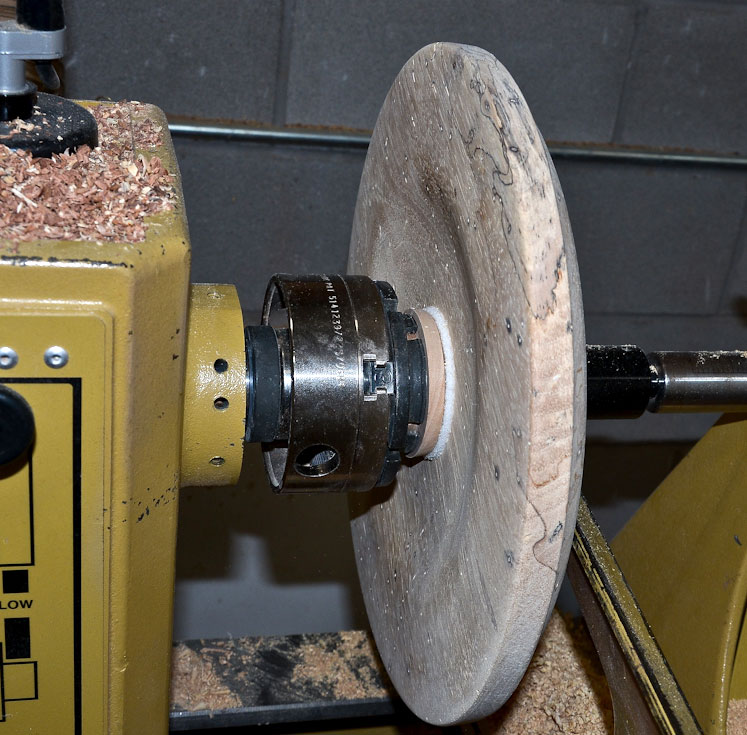
I then mounted a faceplate to what will become the top side of the seat. Next,
I turned the bottom to my desired profile. I also turned a tenon for my
Stronghold chuck. After
that, I used the compass to strike a line to mark where I wanted the legs positioned. I set this
line about 2" inside of the outer dimension of the seat. (see photo above right)
All about the angles
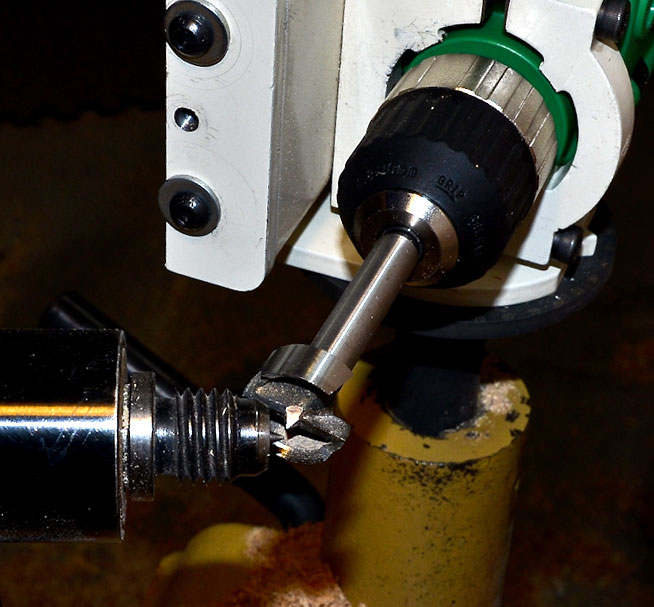
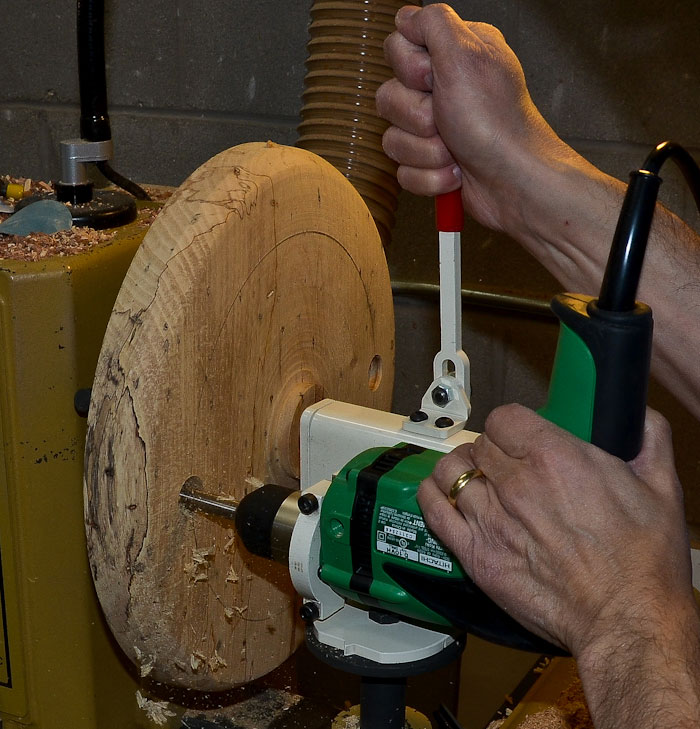
Next, I set up the
Oneway DrillWizard
by mounting a 1" Forstner bit in the drill. It is
important to align the DrillWizard with the center of your lathe on both X and Y axis. (see photo
above left) Note the square on the lathe bed aligning the banjo (see photo above right). I decided use a 10-degree
angle for the legs and rungs. This matches the angle on my "old" stool. I wanted to make sure the
stool was stable, yet didn't have legs that splayed out so far that they were in the way. I
recently made a mini-stool for my 2-year-old daughter. I used about a 15-degree angle to make her
stool a bit more stable. I made sure the legs did not extend much beyond the seat thus avoiding a
tripping hazard. (see photo below)
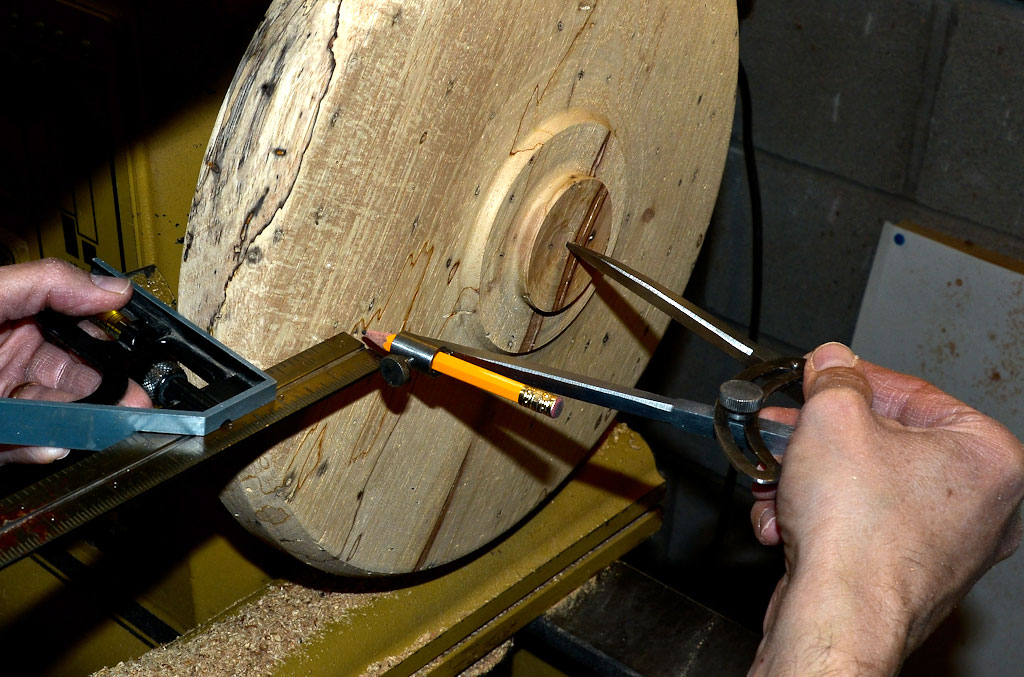
I used a
sliding bevel gauge
to find the angle on my "old" stool and compared it using a
protractor to find the actual angle. I then used that number (10 degrees) to adjust the DrillWizard
to that angle. The DrillWizard has angles marked on the base that allows you to easily to match
angles.
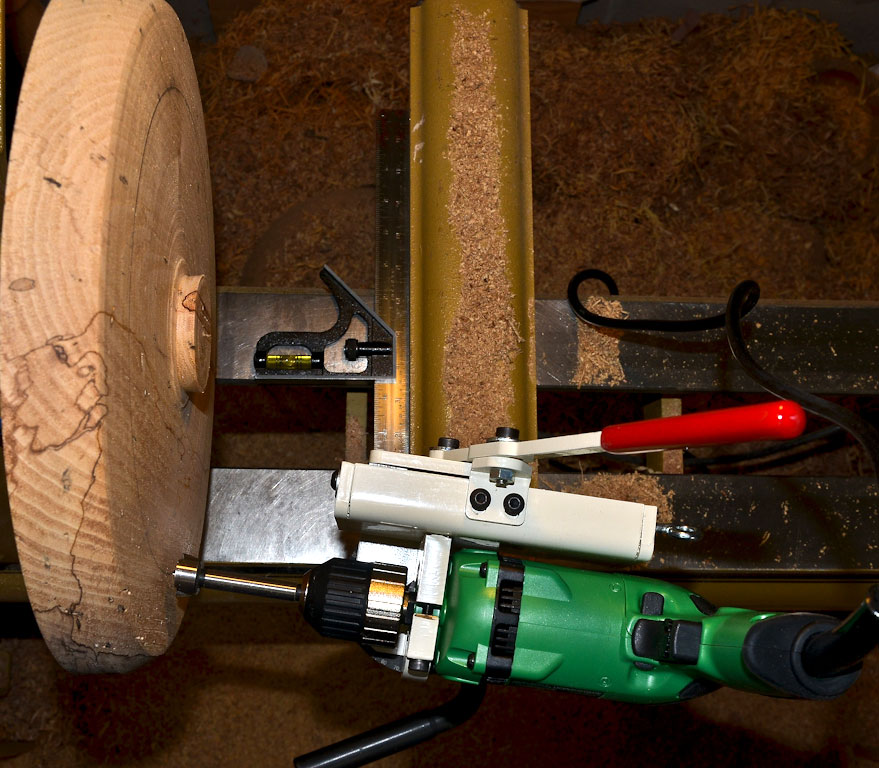
I then used the locking indexing head on my lathe to prevent rotation of the seat blank while I
drilled the hole. The locking index also allowed me to mark off the four points for each leg. It
is a good practice to unplug your lathe while the indexing head is locked. You don't want to forget
and accidentally turn on the lathe.
I drilled a 1" hole 1" deep. (see photo above) The DrillWizard also allows you to set the depth.
This will make for a consistent depth and prevent you from accidently drilling through the blank.
(I know that kind of thing never happens to you, right?) I then rotated the blank to achieve the
hole spacing for the legs. I didn't move the DrillWizard during this process. This kept my
alignment consistent.
Turning the seat
Once I completed the bottom, I reversed the blank and turned the seat. First, I turned away the
screw holes from the chuck. Next, I began to shape the seat. The seat could be flat, but why not
add a bit of a profile to make it more comfortable? The seat was inspired by my recent visit to
Thos. Moser's showroom in Freeport, Maine. Their stools are simple, beautiful and comfortable.
After finishing the seat, I reverse-mounted the piece and turned away the tenon. (see photo
above).
I used a bit of thick packing foam glued to a block that was mounted in the chuck. This gives a
soft but grippy cushion to help hold the piece while the tenon is removed.
(Below is a video that shows how to remove a tenon.)
Matching legs and rungs
I chose to create a simple leg profile that was inspired by turning tool handles. Shaping the
tenon and the leg was essentially the same process as turning a tool handle with a tenon for a
ferrule. I created a pattern once I turned a shape I liked. I then used calipers and this pattern
to make three more legs. (see photo below left)
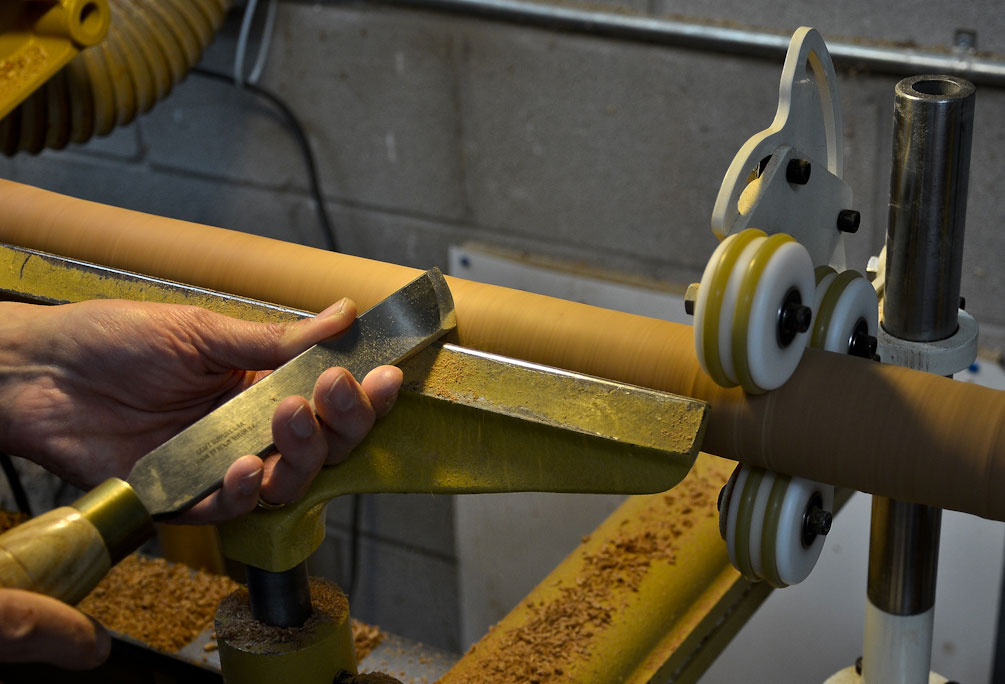
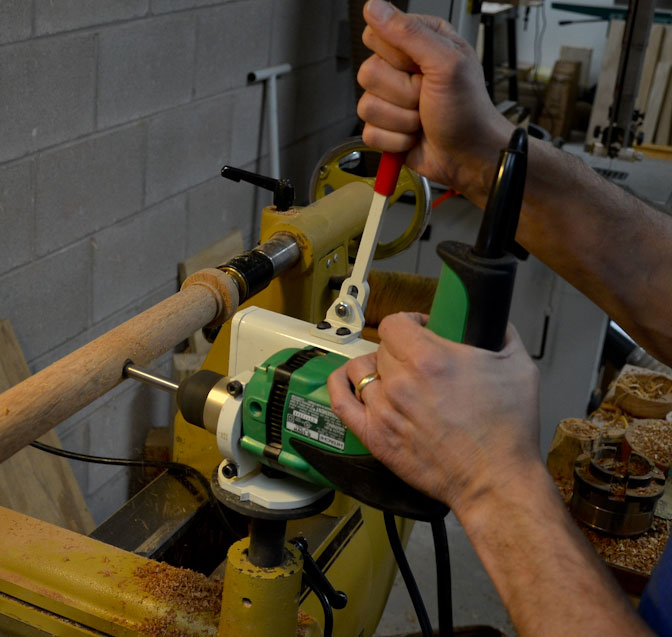
I used a spindle roughing gouge and a skew to shape each leg and rung. I used a spindle steady
rest to help eliminate almost all vibrations (see photo above right). A side note: if you have ever turned
long and/or thin spindles then you know the piece can develop a whipping or vibrating action. It
becomes difficult to make smooth cuts when this starts to occur. The
steady rest
provides support
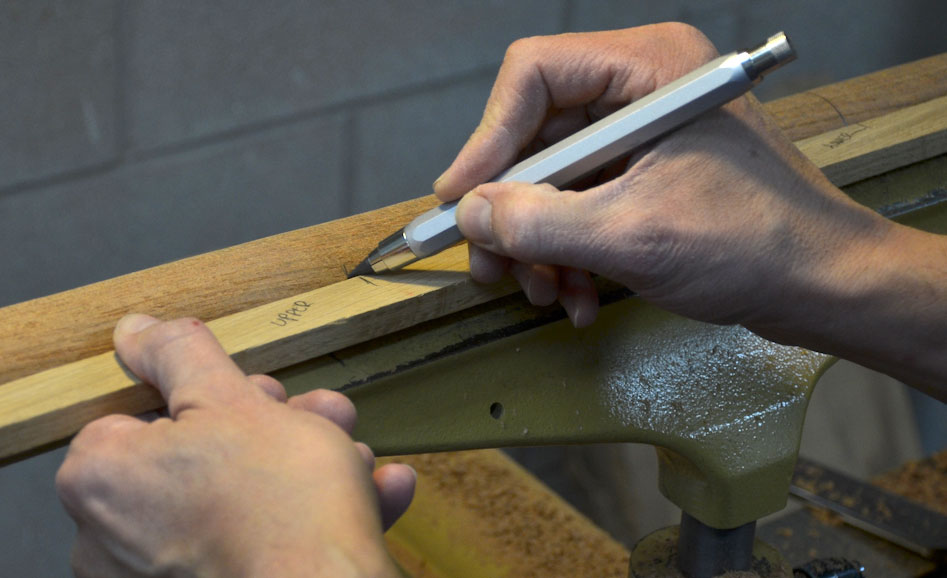
and virtually eliminates the vibration. I then sanded to 220 grit. I used a story pole to mark
key transitions and layouts for the mortises for the rungs (see photo 10). This helps to ensure a
consistent layout from part to part. I didn't part off the legs at this point. I wanted to turn
all the legs and drill all the rung mortises, before parting off the legs. This bought me a margin
of safety just in case I ran into a problem with subsequent legs.
Once the legs were turned I focused on the rungs. Each rung (8 if you are keeping count) was
turned to 1/4" with a 5/8" diameter tenon that was just under 11/16th" long. Of course, the rungs
are not all the same lengths. I offset each hole by ½" so I would not have two mortises on the same
leg interfering with each other and creating a weak joint. This meant that of the four upper and
four lower rungs, only two were of the same length. You should measure each carefully. You need to
really focus without distractions during this build. It is easy to lose track of which operation
you are working on. So think through each step carefully. You are in the home stretch now and
don't want to rush.
Drilling for the rungs
I remounted and realigned the DrillWizard. I changed to a 5/8" drill bit and adjusted the
depth. I used the same 10 degree angle to drill the rung mortises. The mortises were drilled at a
depth of 11/16th" (see photo above). Each hole was offset by ½" and 90 degrees to each other. Again,
I used the indexing head on my lathe to make this operation simple.
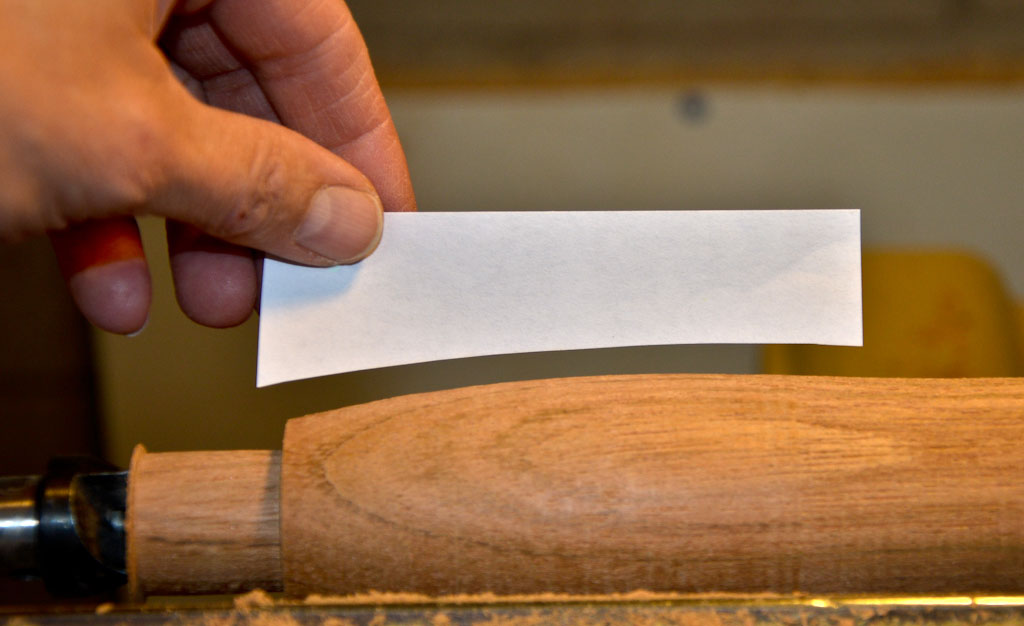
Test fitting
Now it is time to test fit. Make sure your parts fit snugly, but allow room for glue. This is
not a project you want to get part way through assembling, only to realize something is not fitting
correctly. So, start thinking about your glue up strategy. You should mark or stack your parts in
a way that makes sense to you. I did several dry runs to ensure everything would go smoothly. I
used
Titebond liquid hide glue
for this project. This bought some additional working time since it
takes longer to set up. Perhaps the biggest benefit will be if I ever need to replace a broken rung
or a loose joint, the hide glue is reversible. I am happy to report that my glue up went smoothly!
I had to resist the temptation to sit in the stool as soon as the clamps came off. The glue
needs to set up for a minimum of 24 hours before the joints are stressed.
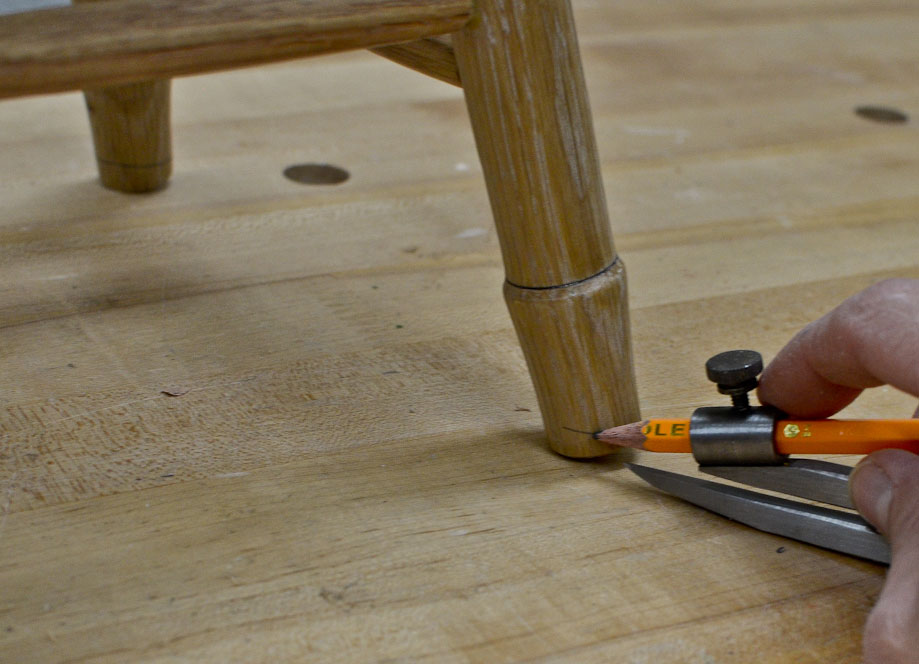
You will likely need to adjust one or more of the legs to ensure the stool sits flat on all four
legs. This is done by using a compass to mark around each leg (see photo above). Then cut to the line
using a crosscut hand saw. You should also bevel (chamfer) the end of each leg. This looks nice,
but more importantly, helps to prevent the wood from splitting as the stool is moved about.
The finish
I sanded and applied several coats of lacquer to the seat prior to the glue up. I applied
Watco Medium Walnut oil
to the legs. This created a nice contrasting color to the lighter seat. I am
looking forward to many years of use from this project.
Good luck with your project.
Curtis is a former President of
Central Texas Woodturners, a member of the
American Association of Woodturners, and a member of
Fine Woodworkers of Austin. Curtis teaches and demonstrates nationally for Lie-Nielsen Toolworks. He also teaches for TechShop. He owns a studio where he teaches and works. Curtis lives in Central Texas with his wife and four young children. Take a look at his website at
www.curtisturnerstudio.com or visit his
Instagram: tx_planes.
Errors regarding pricing and specifications are subject to correction.
SOME SALE QUANTITIES MAY SELL OUT and become unavailable at the advertised price.