Turning an Egg
by Curtis Turner
Round Rock, TX
An egg is one of the simplest turned forms. However, its simplicity belies the challenges this form
holds for the new wood turner. There is a narrow range of acceptability in this form. An egg
should not be too rounded, or too pointy. Everyone knows what an egg looks like. If you deviate
from this accepted range of "normal," your egg will not look like an egg. This is very different
from your other turned work. Your bowl, platter, or box is of your own design. These other items
can take whatever shape suits your fancy. However, an ill-formed egg just looks like…well let's be
nice and call it an artist's interpretation of an egg.
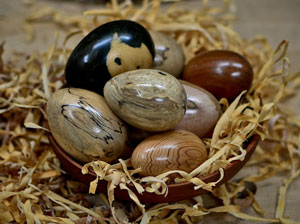
As a form, the egg is an excellent way to collect and display samples of wood species. The form
clearly shows face, edge, and end grain. This form is very pleasing to young and old alike. It
invites the viewer to pick up and hold the egg. The size of the egg can be very tiny (think
humming-bird sized), up to dinosaur size. Egg turning is a good use for all those bits and pieces
of interesting wood we just can't bear to throw away. A nicely turned egg from a showy sample of
wood also makes a pleasant gift or display.
I was recently given a small branch of guayacan by a local saw mill owner. This wood has a deep
green-figured appearance. Guayacan is also known as lignum vitae. This wood is incredibly hard,
with a specific gravity of 1.37. No surprise, this was the hardest wood I have ever turned. This
wood is so dense that when placed in water, it sinks without hesitation. Since the stock piece was
rather small, a turned egg was the best choice for a project.
A great exercise
A benefit of turning eggs is the sheer practice of tool control it requires of the turner. Yes, the
first few eggs will be a scrambled mix of mistakes. (Sorry, I couldn't resist the pun.) At least
you are practicing with small bits of wood, and not wasting larger blanks. The egg can be turned
with just a few tools. The most useful tools will be a spindle roughing gouge, spindle gouge and
yes, the skew. Other benefits: Eggs can be turned on any sized lathe, and they don't take very long
to complete.
Picking your material
I would recommend that you select a species of wood that is very cooperative for your first egg.
Generally, cherry, walnut or maple would be a good starting point. Green wood would be fun to
turn, but will likely distort as it continues to dry. Selecting dry stock will be your best bet. A
good starting blank would be about 4-5" in length by about 2" square. This will be mounted as a
spindle.
Get it round
For my egg project, I first turned the stock to round with the spindle roughing gouge. I turned the
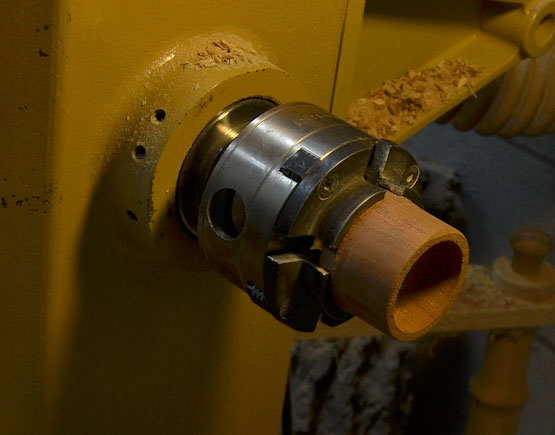
blank between centers, and formed a tenon on one end to mount in a small chuck. I used my Oneway
Talon chuck with the #2 jaws for this project. Then I mounted it in the chuck. I brought up the
tail stock to re-true the blank. Once the blank was round, I removed the tail stock.
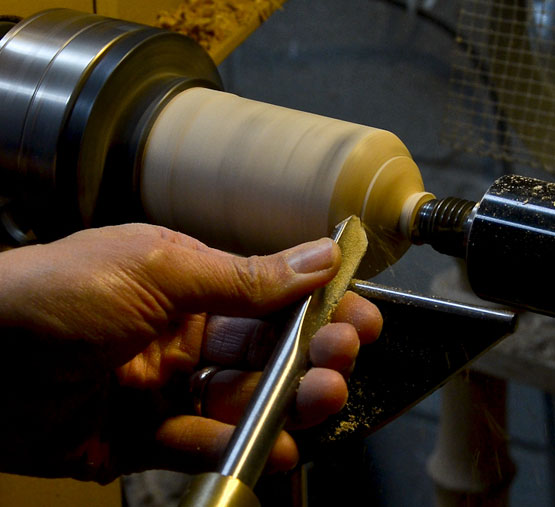
Next, I started working on what I call the "fast curve," or the fat end of the egg. This is the
fast curve because this curves breaks or slopes very quickly. I prefer to turn the fast curve on
the tail stock side. I have better access this way. If the fat end were near the chuck I would
have less room for the tool.
Note: click on any picture to see a larger version.
I switched to the skew and spindle gouge to shape the fast curve, after the bulk was removed with
the spindle roughing gouge. This takes a bit of back and forth, first turning, then stopping, and
then examining your work before going back to turning again. (See photos above.)
The middle
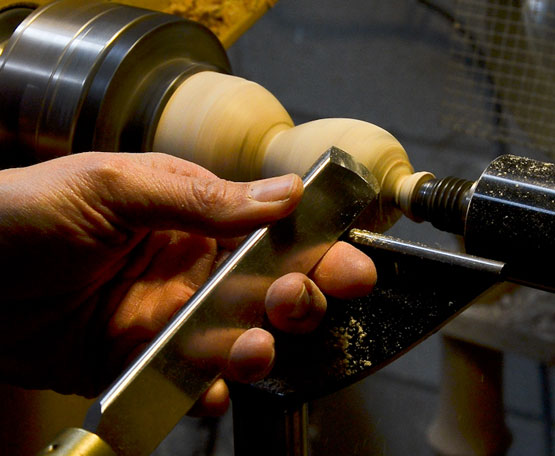
Once the end was complete, I continued to work from the middle to the "slow curve," or the narrow
end, of the egg. It is important to keep a flowing curve to your form. There are no flat spots on
an egg. I took time to examine my work as I turned, to ensure I was achieving a pleasing curve.
This portion of the egg can be turned with a combination of spindle gouges and a skew. The skew can
be also used on its side as a scraper to blend the curve. (See photo above left.)
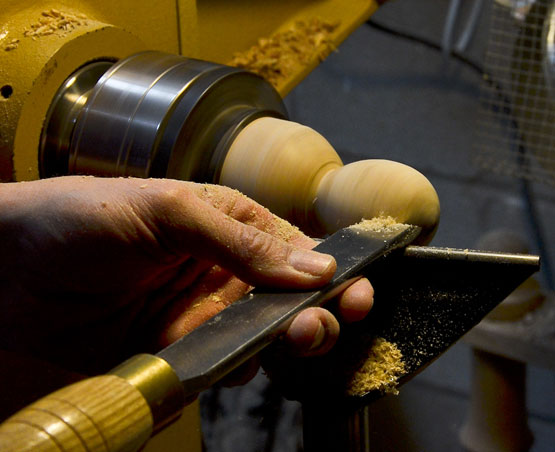
I turned the slow curve to about a 1/4" tenon and then sanded the egg. (See photo above right.) I sanded the egg
up to 400 grit sandpaper. Then I further reduced the tenon. Finally, I cut the remaining tenon
with a thin flexible flush cut saw.
Reverse mounting
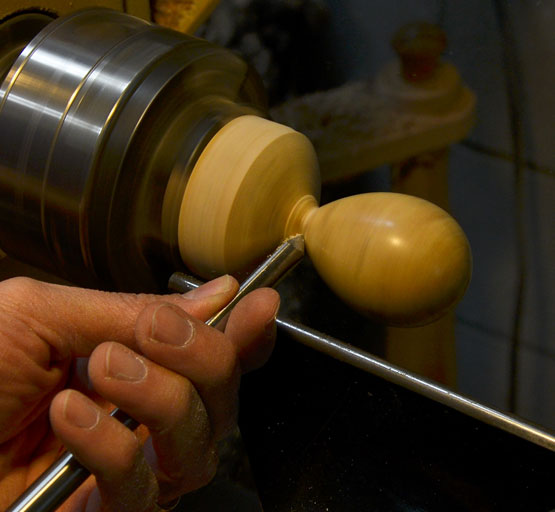
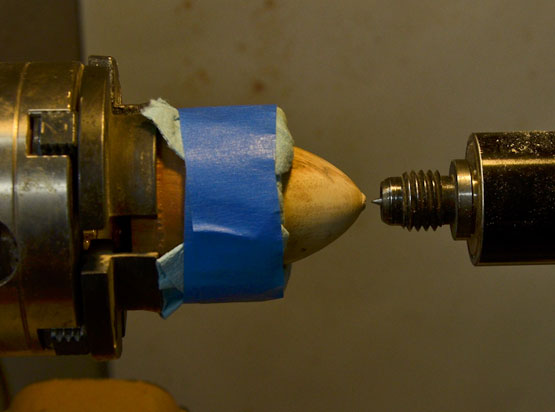
Next, I reverse mounted the egg in a jam chuck. (See photo below left.) A jam chuck is simply a piece of
wood that is turned and partially hollowed out to receive the project piece. I used an existing
jam chuck for this egg. However, the chuck I used was a bit too large to hold the egg snugly. So,
I added two pieces of paper towel to hold the egg with a friction fit.
I used the center point of
the live center to help center the egg in the jam chuck (See above right.) Fortunately, I only needed
to remove a small amount of material, and sanding was sufficient for completion. You may find that
that you need to remove more material. If so, you will need a very snug fit. Perhaps even wrapping
painter's tape around the egg and chuck will help hold the egg in place.
Finishing
For this egg, I sprayed on a coat of sanding sealer. Once the sealer dried, I lightly sanded, first
with 400 grit, and then with 1,000 grit. I then used the Beal buffing system to bring up a nice
gloss finish. (see photo 7) You have many finishing options for this project. They range from no
finish, to buffing with the Beal buffing system, to spraying on many coats of lacquer. For
example, I once turned a large egg and rubbed on a gold leaf wax, and hid the "golden egg" for my
kids to find in an egg hunt.
Turning an egg is a challenging project for many, but with a little practice you can turn out a
dozen in no time. Have fun using up all those scraps you've been saving.
Curtis is a former President of
Central Texas Woodturners, a member of the
American Association of Woodturners, and a member of
Fine Woodworkers of Austin. Curtis teaches and demonstrates nationally for Lie-Nielsen Toolworks. He also teaches for TechShop. He owns a studio where he teaches and works. Curtis lives in Central Texas with his wife and four young children. Take a look at his website at
www.curtisturnerstudio.com or visit his
Instagram: tx_planes.