Turning a large oak bowl
by Curtis Turner
Round Rock, TX
Note: click on any picture to see a larger version.
A friend recently asked for my assistance in turning a large, red oak bowl. My friend, Pete, is a long-time woodworker, but is new to turning. He was lucky enough to have harvested a part of large red oak tree. The piece he wanted to turn was from a portion of the tree which contained a large burl-like growth around the base. He knew he had a unique piece, and wanted some advice on how to proceed with cutting, mounting and turning this blank. We discussed his options and decided how to maximize this material. Even though the rough chainsaw marks obscured the real beauty, we could tell this was a very unusual blank.
Over the past year, Pete cut and stored the blank to dry. He also filled a few voids with
System 3 Mirror Coat Epoxy. The epoxy was tinted with a red dye. The blank was about 2 ¼" by 16"+ in diameter. The blank was still very heavy, but had dried without any issues...or so we thought.
Design objectives
Amazing as this piece was, and as much as I wanted to turn the blank myself, Pete did the vast majority of turning, with a little of my guidance here and there. He set the following design objectives:
-
Create a bowl as large as reasonably possible
-
Show the grain
-
Strive for a large rim
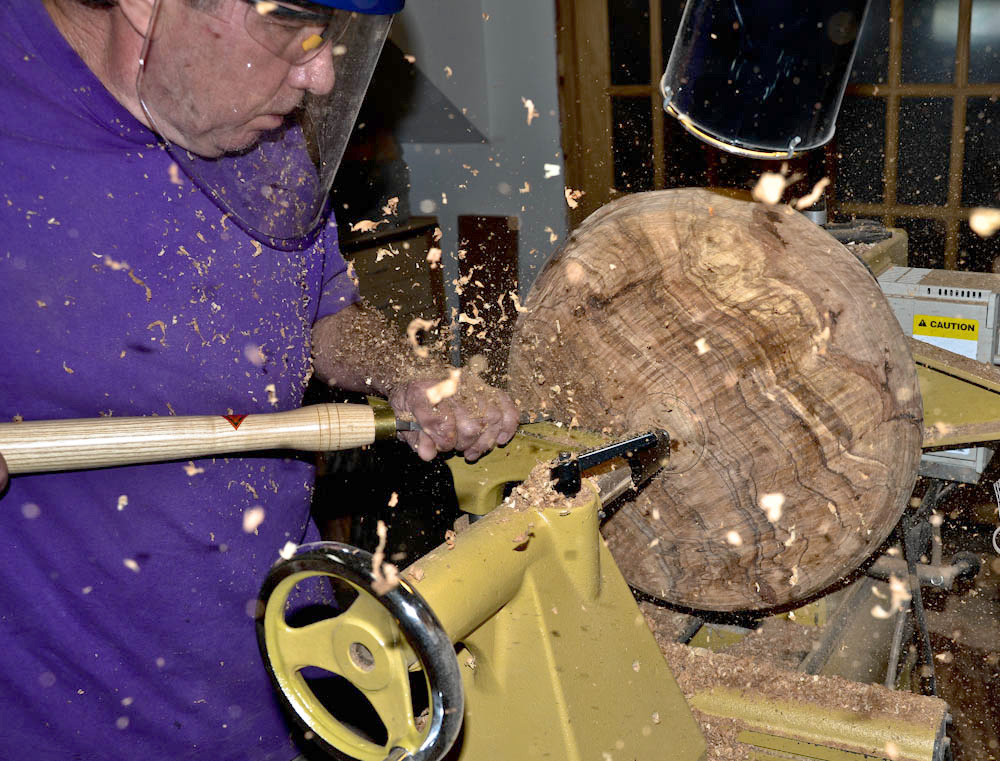
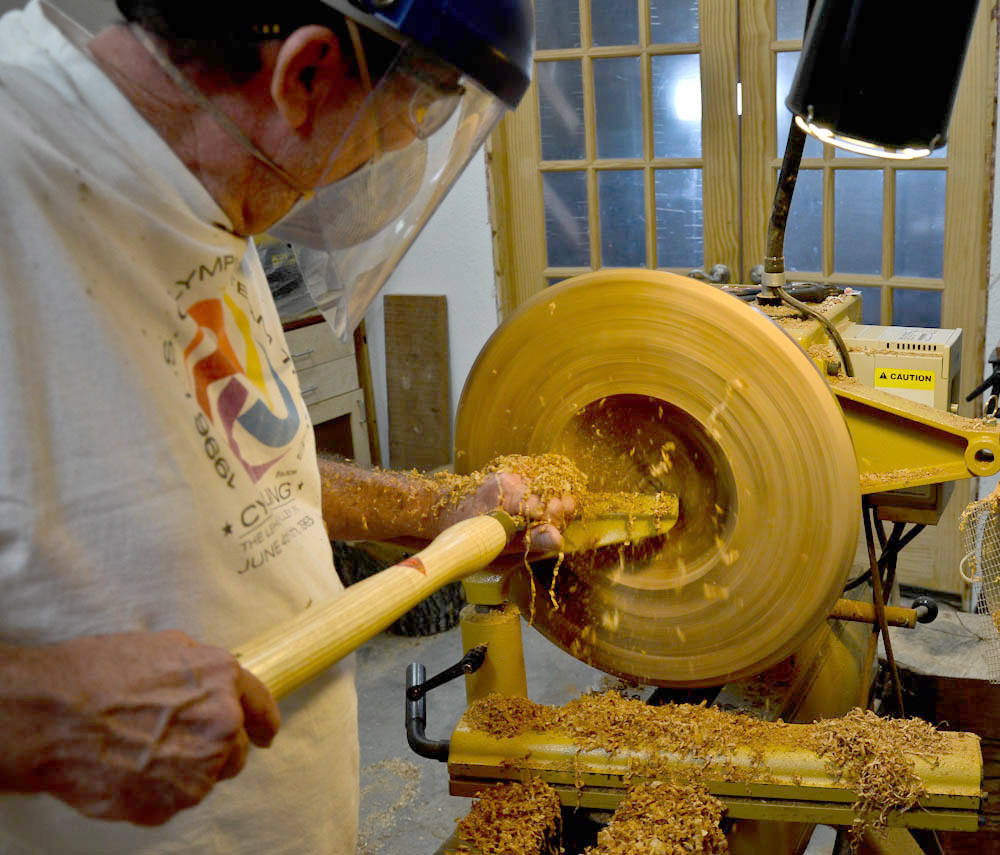
We examined the blank, and determined which side would be the face, or show, side, and mounted a face plate to that side. We pulled up the tail stock for safe measure. We then proceeded to true the blank. We initially used a slow speed (less than 500 RPMs). The roughing process was accomplished with bowl gouges. We used a spindle gouge to help form the tenon, which eventually was used to reverse-mount the blank.
Much to our surprise
As we began shaping the bowl, we were afraid that we made a mistake. We had revealed a swirling grain mixed with pronounced streaks of white (not likely sap wood). It looked spectacular: more like marble than wood. (Fortunately for the tools, not quite as hard as marble.) At this point I began to doubt that this was red oak. However, we grew concerned that we had chosen the wrong side to be the face. We continued on with our plan, hoping the other side contained the same intriguing grain patterns. This was not to be the only surprise in this project.
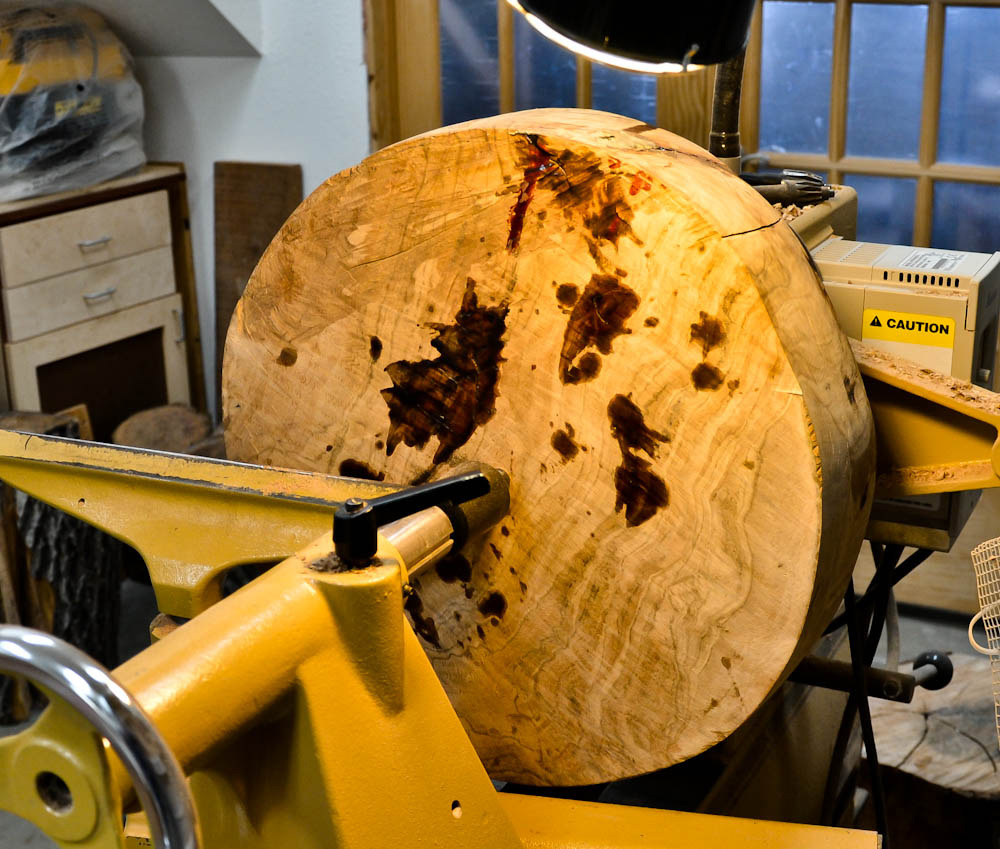
More epoxy
As we removed material, a few areas presented serious structural integrity concerns. We were already working very hard to manage this piece through the process, without sacrificing the overall size. The size and grain was the whole story with this piece. The blank had an area with a large bark inclusion. Fortunately, it looked, and felt, tight and sound. However, there were several areas on the rim that contained a series of cracks. So we opted to stop for the day, to allow Pete to add more Mirror Coat Epoxy to the areas of concern.
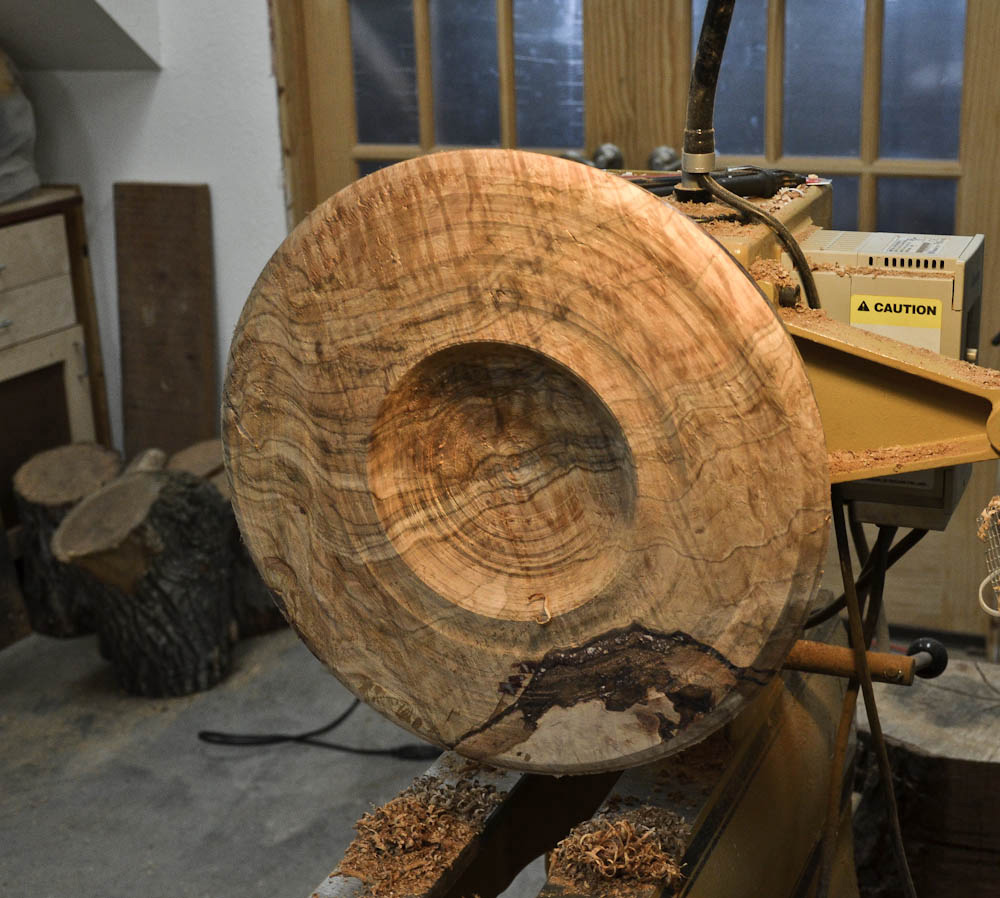
Reverse mounting
The next morning, we were eager to reverse-mount the blank into a chuck. We used a
Oneway Stronghold chuck. We now began the process of turning the face (interior of the bowl). We were pleased to see that this side was just as showy as the underside. Pete began working within the layout lines that defined the rim and bowl.
Sound of the oak
As Pete turned, I realized things didn’t "sound" right. So I had Pete stop to evaluate the situation. When things don’t sound or feel right, there is usually a reason that needs to be investigated. Pete felt the tool was not cutting well, and he swapped for another bowl gouge, while I sharpened the first tool. The second bowl gouge didn’t sound any better, and Pete swapped again for the newly sharpened gouge. That gouge started sharp, but didn’t last long. We then tried a heavy scraper. It would cut portions of the bowl just fine; however, like the bowl gouges, it failed to produce satisfactory performance. We looked at the turned piece several times during this phase.
I examined the edges of the tools, and was surprised to see mangled edges on both the bowl gouge and scraper. We speculated that perhaps dirt or rocks were lodged in the bark inclusion. Interestingly, we noticed that the wood was still slightly damp. The wood should have cut much more easily than what we were experiencing. I even stepped in to give it a try myself. I experienced the same results. Definitely not an error in our technique.
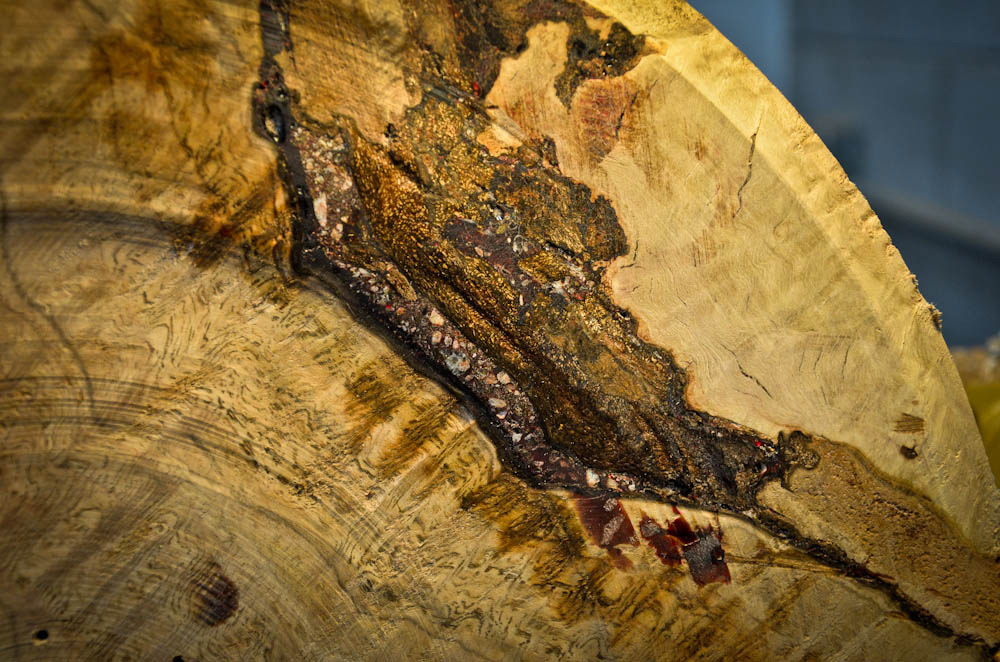
I inspected the blank and narrowed down the uncooperative area. It happened to be in an area of Mirror Coat that Pete had applied about a year ago. Strangely, we had no problems with the Mirror Coat in other areas of the blank. We were stumped.
The "Ah-ha!" moment
Then Pete said, “I think I know the source of the problem.” He took a wet paper towel, and wiped off the challenging section. He realized he had applied crushed granite in the voids along with the Mirror Coat. This was a technique he had used successfully on custom furniture in the past. However, it presented a significant road block here. We were faced with either developing design changes or excavating the granite and replacing it with unadulterated Mirror Coat. Pete chose the latter.
We opted to rough hollow the bowl with a combination of the bowl gouge and scraper. We stopped for the day to allow Pete to perform surgery on the granite/epoxy. Pete was successful in removing the granite with a rotary tool. The area has been filled with pure Mirror Coat Epoxy. We will complete this project in a few more days but unfortunately not in time to meet the press deadline.
The lesson here is, if things do not sound or feel right, there is likely a valid reason. It is always wise to investigate. The risks could have been quite high if we opted to stubbornly push the tool into the blank harder or crank up the speed. The granite could have grabbed the tool and wrenched it from our control, or caused the blank to tear apart sending a large dangerous shard of wood flying around the shop. Trust your instincts and stop when something isn’t working quite as expected. You may save yourself a tool, a blank, or even a finger or two.
Curtis is a former President of
Central Texas Woodturners, a member of the
American Association of Woodturners, and a member of
Fine Woodworkers of Austin. Curtis teaches and demonstrates nationally for Lie-Nielsen Toolworks. He also teaches for TechShop. He owns a studio where he teaches and works. Curtis lives in Central Texas with his wife and four young children. Take a look at his website at
www.curtisturnerstudio.com or visit his
Instagram: tx_planes.