A Turned Plant Stand
by Curtis Turner
Round Rock, TX
Note: click on any picture to see a larger version.
This project combines face grain and spindle turning, and creates an attractive piece of furniture. While this is a simple project, it is a bit more advanced than turning a bowl.
I was inspired by shaker plant stands and candle holders to create this simple version of a plant stand. However, this project lends itself to a great deal of variations. A series of tables could be created, in varying heights, to make an attractive display.
This piece is intended as a plant stand, but could also be scaled up to make a small table. We need to consider a few factors in determining size. First, what is the objective of this stand? Will it need to tuck into a tight spot, or should it be adjusted so as not to interfere with a window view? Also, the size and weight of the planter or item to be displayed on the table will determine the size of the base, holder and spindle. Another important factor to consider is the length of your lathe. The spindle length of your lathe will determine if the spindle can be completed in one piece or require two spindles that would be glued together to achieve the desired final length.
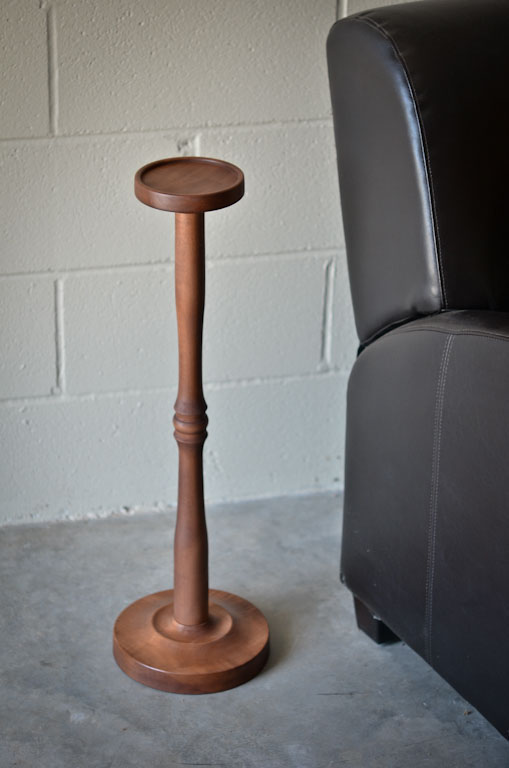
Top
I started with the stand top, and then turned the base, followed by the spindle. There is no magic order to turning the parts, as long as you plan out your mortise dimensions. I will explain further in just a moment.
I chose locally harvested pear for the base and top. I selected a blank that would yield a top of about 5" in diameter.
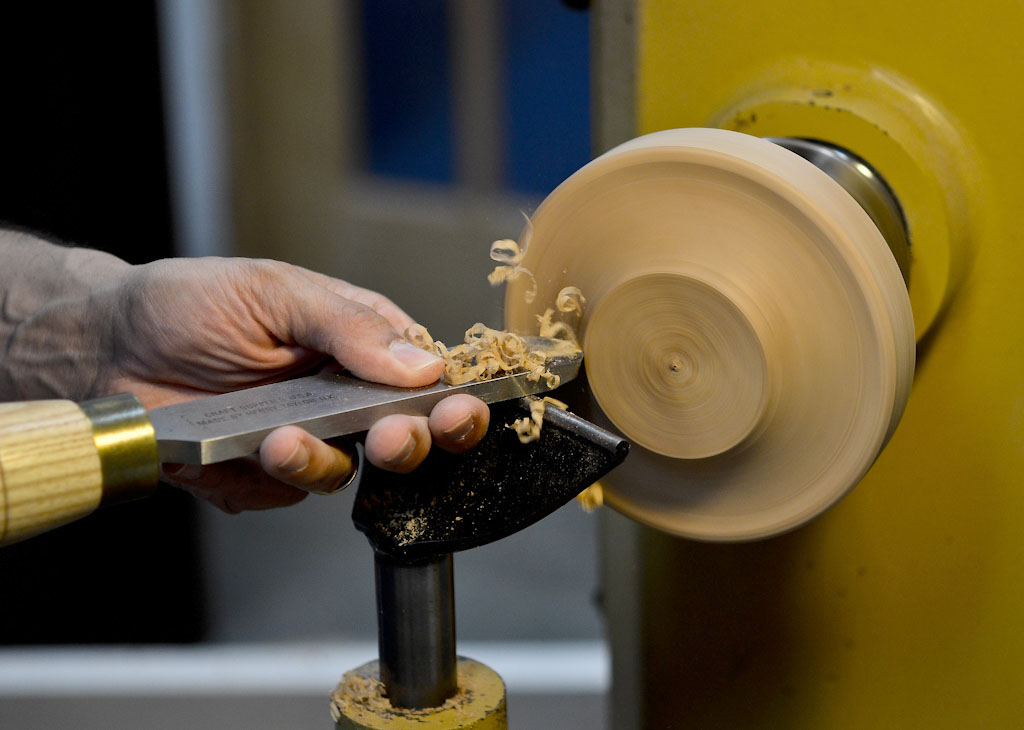
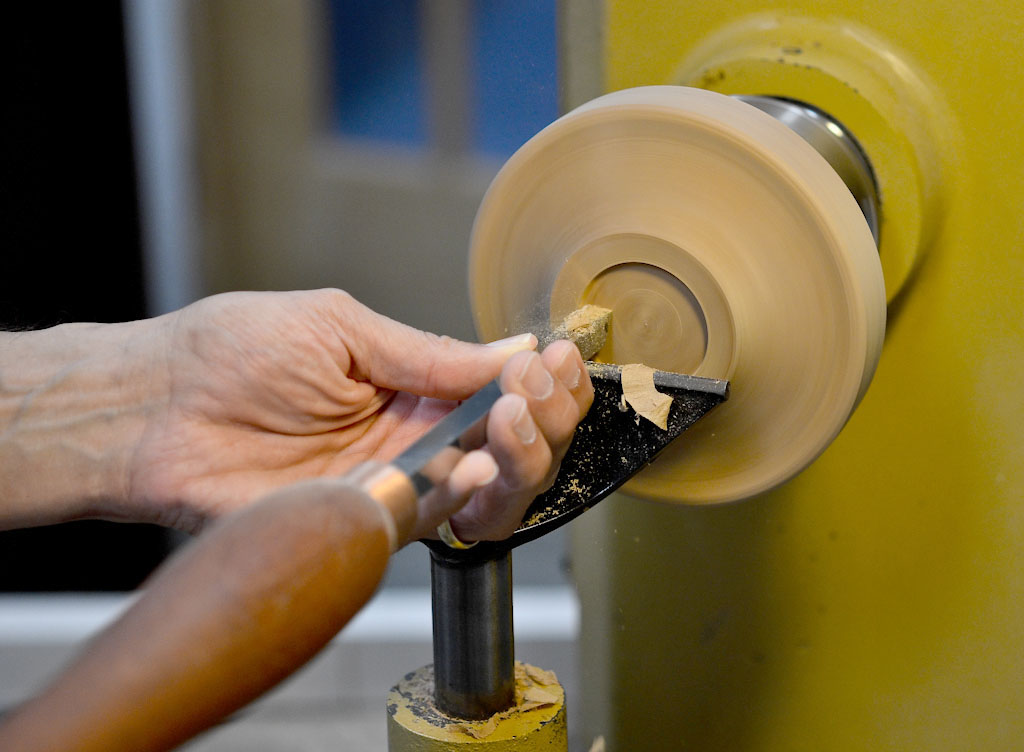
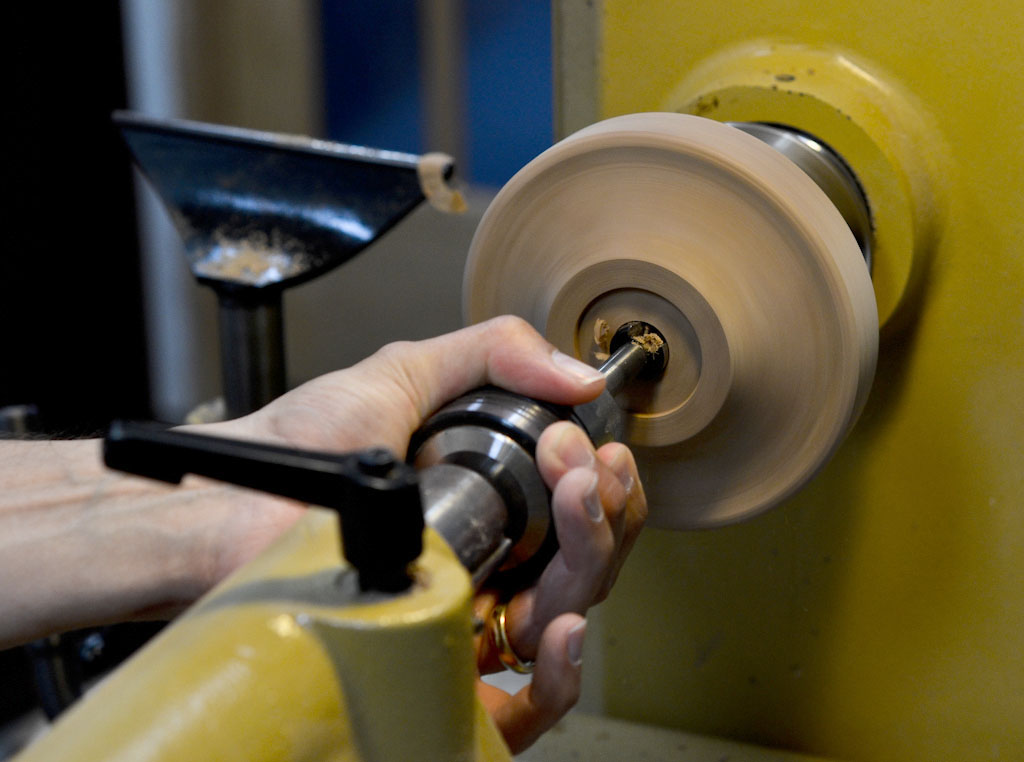
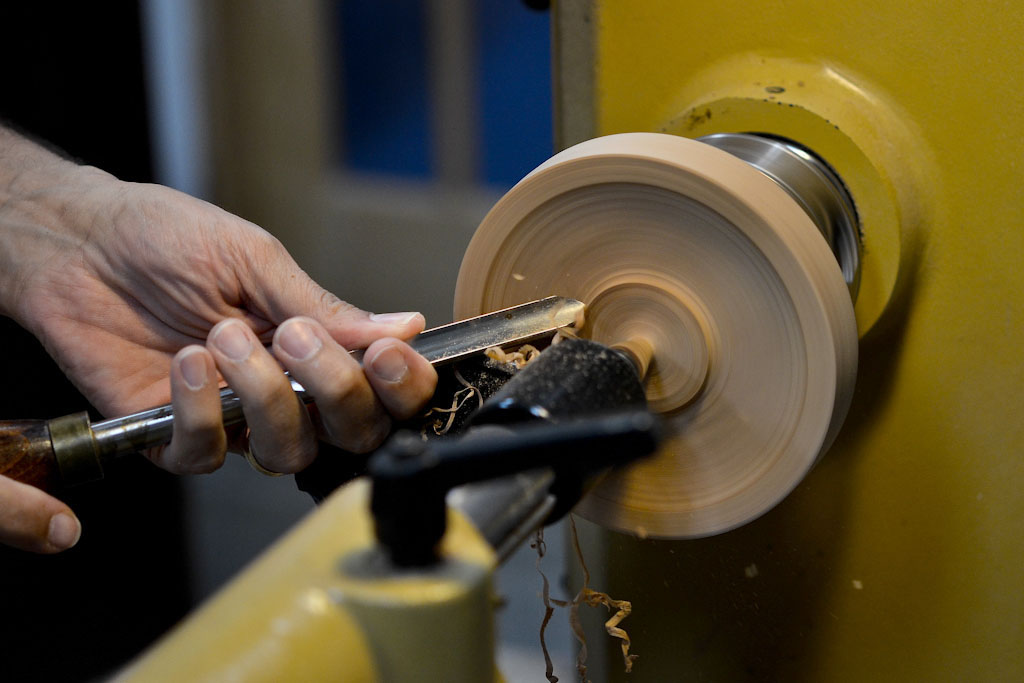
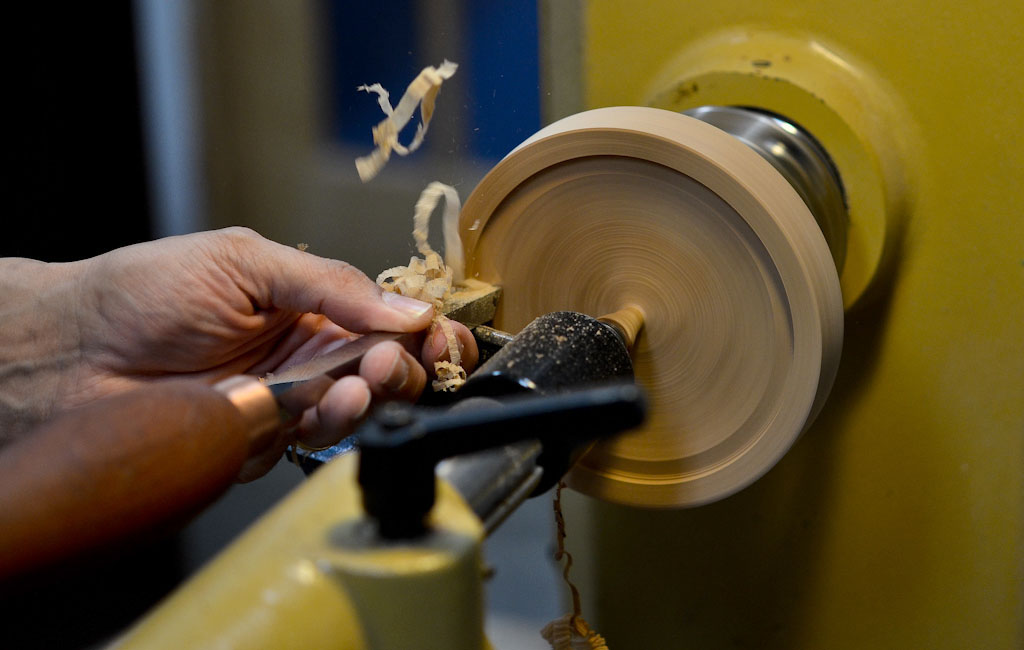
I used a face plate for the initial work. I created a recess for an internal chuck grip. Then, I turned a shallow flat bottom recess in the face of the top. I used a combination of spindle gouges and a shop-made bedan. The bedan was used to create a square lip around the perimeter. Once I turned the details on what will be the underside of the stand, I drilled a 3/8" mortise about 3/8" deep. This hole will receive a matching tenon, which will be turned on the spindle.
After sanding, I reverse-mounted this in a
Oneway Talon Chuck
with
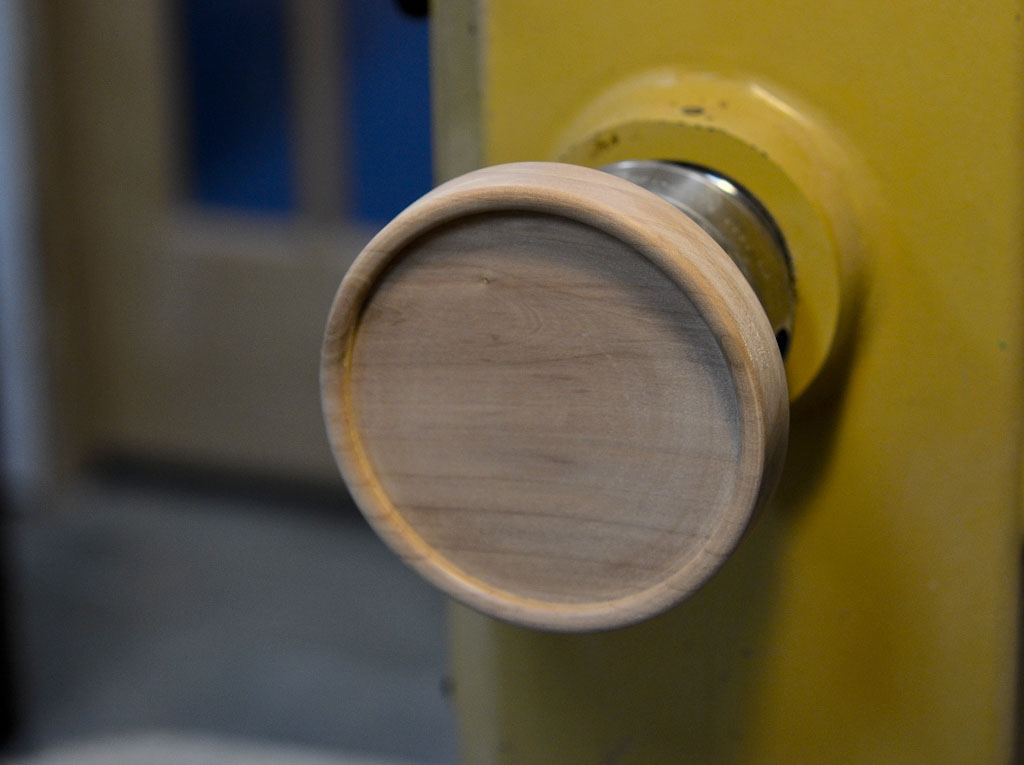
Smooth Dovetail Jaws. This chuck is perfect for this size work. I then used a spindle gouge and bedan to detail the top. At this point, imagine this as a giant coaster. In fact, I have made several coasters (usually from mesquite) using this same technique. (Hint: Coasters make a great gift.) Now, a last bit of sanding before removing the stand top from the lathe.
Base
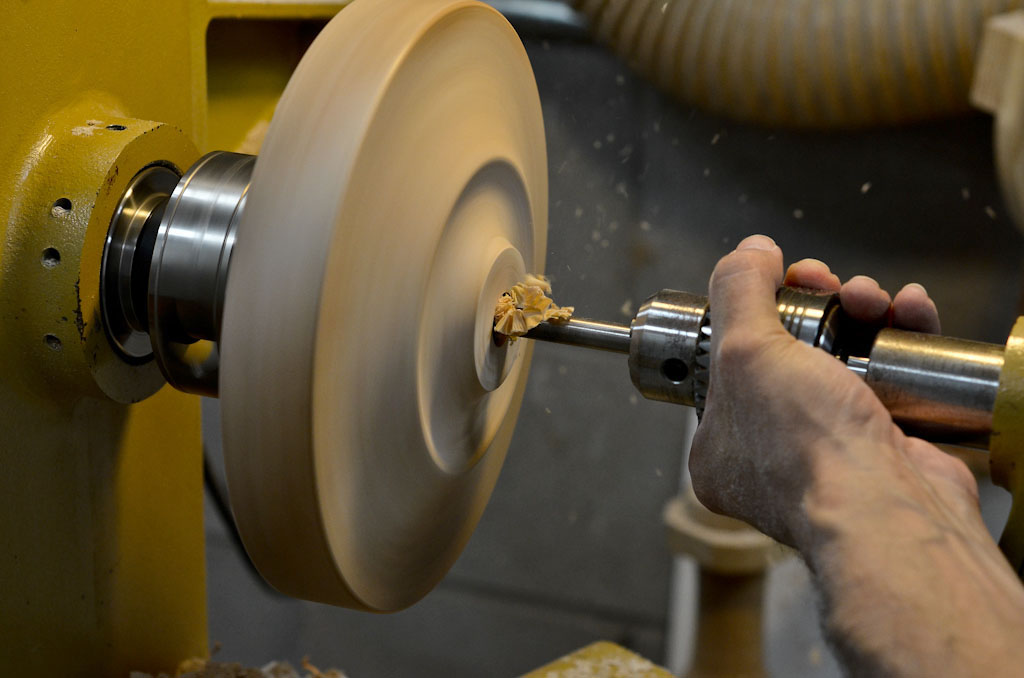
Next, I worked on the base. I selected a blank that would yield a turned base of about 8 1/2" in diameter by 2" thick. I wanted a heavy stable base. I used a face plate and turned this as if I was turning a platter. I created a tenon for reverse chucking. I undercut the base using a spindle gouge, so that once the tenon was removed, the base would sit flat on the floor. I then remounted the blank and shaped the stand to the desired profile. I used a bowl gouge, spindle gouge and a scraper to create the profile similar to how the top was created. After the final sanding, I drilled a 3/4" mortise about 3/4" deep. I then removed the base, and used a foam-padded jam chuck to hold the piece, while I turned the tenon down to about an 1/8". I then cut the stub tenon off with a small saw, and sanded the bottom, maintaining an undercut or slight cove to the base.
Spindle
For the spindle, I used maple left over from a commissioned piece. You can use matching or contrasting wood for your spindle. I cut a blank about 2" square by about 26" long. This blank allowed me to create a turning with 24" between the top of the base and the bottom of the top. (Did you follow that?) You will need to size your spindle to fit your lathe. If you have a shorter lathe, you can turn the spindle in two sections. You will need to make the necessary adjustments to create a mortise and tenon to join the two spindles in the correct orientation. Ideally, you would design a transition that can hide this joint.
|
|
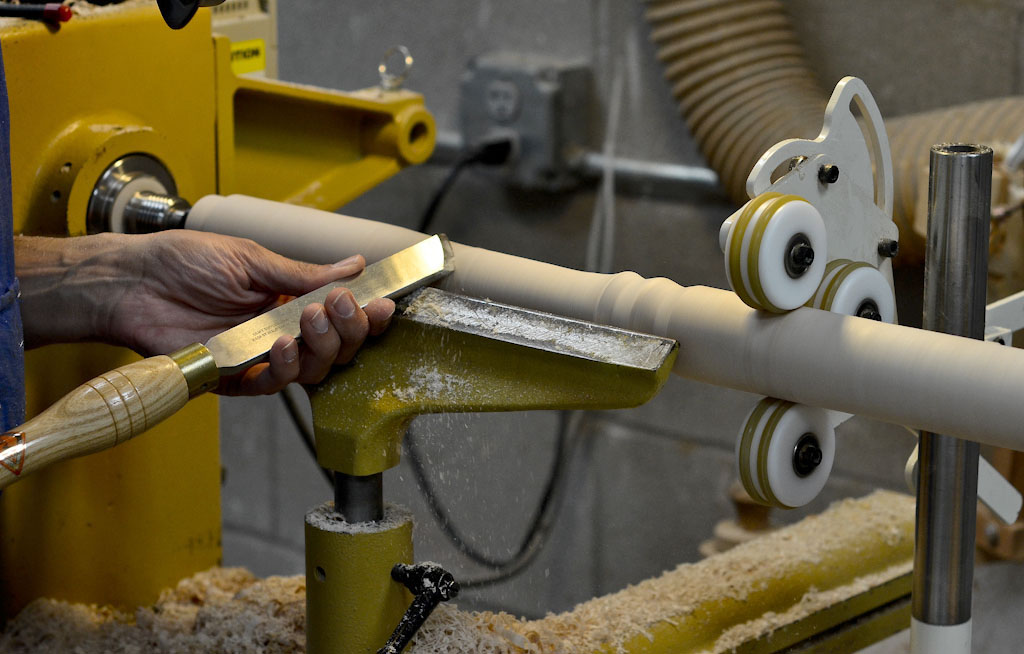
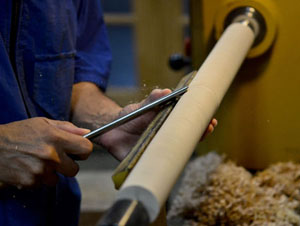
Fortunately, this was a one piece spindle for this project. I did find it helpful to use a
Spindle Steady Reset. Without one, you can use an underhand technique to support the turning to minimize vibrations. However, the longer or thinner the spindle, the more challenging it becomes to turn without creating vibrations. The vibration results from the pressure of the tool, and the whip that occurs in thin pieces. This action creates spirals in the spindle, which becomes difficult to turn away. The spindle steady rest provides support to reduce the flex in the spindle, and allows the turner to focus on the turning, rather than wrestling with the spindle.
The spindle can contain any design element you choose. For example, you could turn a long string of beads, or create a simple tapered spindle. For this project, I chose a rather simple design to highlight the beauty of the wood. The base of the spindle is slightly larger than the top. I added a single bead in the center of the blank.
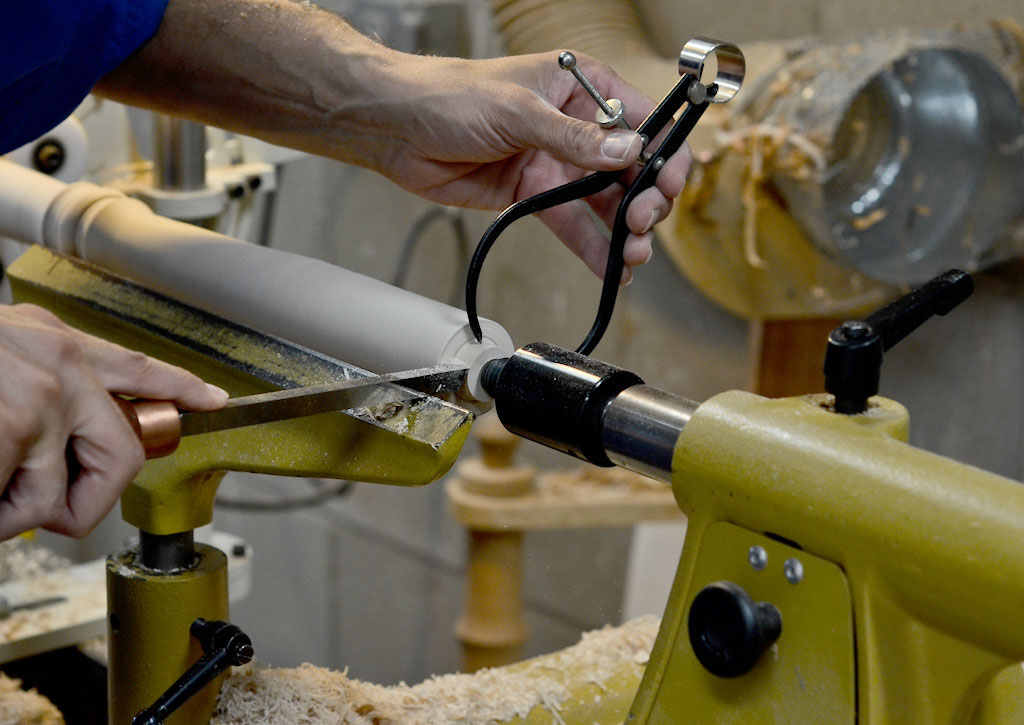
I turned a 3/4" tenon on each end, and slightly undercut the base into the tenon with a small skew. I wanted to ensure the spindle would seat tightly on both the base and the top. I sized the length of the tenon to match the depth of the mortises.
Sanding was done on the lathe. I reduced the speed of the lathe to about 400 rpms and sanded with 120 grit. I then turned off the lathe, and sanded with the grain using 180 and 220 grit. This process combines the speed of rough sanding on the lathe but also eliminated the lines left by sanding with the lathe spinning.
Finishing
This piece was dyed with
Transtint Medium Brown. This dye allowed me to achieve an even color between the pear and maple. I selected these woods, in part, because I knew they were similar in pore/grain appearance. Thus visually, they would appear to be the same wood. I was able to blend the dye to achieve a similar color between the different woods. After letting the dye dry, I applied a few coats of lacquer. I finished up with a dark wax.
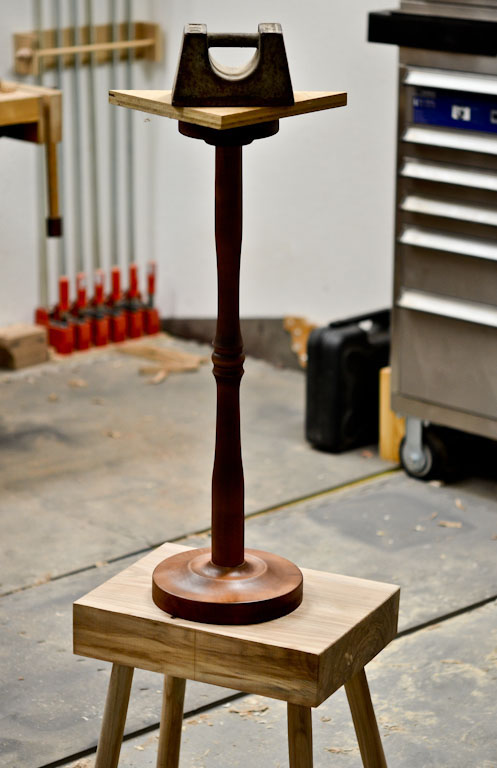
Final glue up
I chose to glue up the pieces last. I did this just in case disaster struck; I could easily rework the affected piece without having to start over with the entire project. This also allowed me the opportunity to seal the wood around the glue joints, eliminating any issues later. If glue is allowed to seep into the wood around a glue joint, it can cause problems in fit and finish when the dye/stain is applied. It is common for the glue to block the absorption of the dye/stain. This leaves an unattractive noticeable "mistake" that is difficult to correct. I still have early pieces where glue drips are noticeable in the finished piece, and it bothers me to look at them.
I used a
liquid hide glue
to join these pieces. I used a level to ensure the project lined up correctly. I then placed a scrap piece of wood on the top, and placed an old scale weight on top to serve as a clamp.
This project is an easy project to complete over a weekend. It can be sized to meet your design requirements. It could even be used as a raised coaster to hold your favorite tall frosty beverage. Finally, it makes a thoughtful gift, especially if it is presented with a nice potted plant or flower.
Curtis is a former President of
Central Texas Woodturners, a member of the
American Association of Woodturners, and a member of
Fine Woodworkers of Austin. Curtis teaches and demonstrates nationally for Lie-Nielsen Toolworks. He also teaches for TechShop. He owns a studio where he teaches and works. Curtis lives in Central Texas with his wife and four young children. Take a look at his website at
www.curtisturnerstudio.com or visit his
Instagram: tx_planes.