Paper Pot Maker
by Curtis Turner
Round Rock, TX
Note: click on any picture to see a larger version.
Spring time!
The southern states are already thinking about (and maybe experiencing the early signs of) spring. I realize my northern friends have a longer wait. This just means you will have more time to complete this project. The project is a newspaper pot plant starter, which will be a handy tool for the gardener in your family.
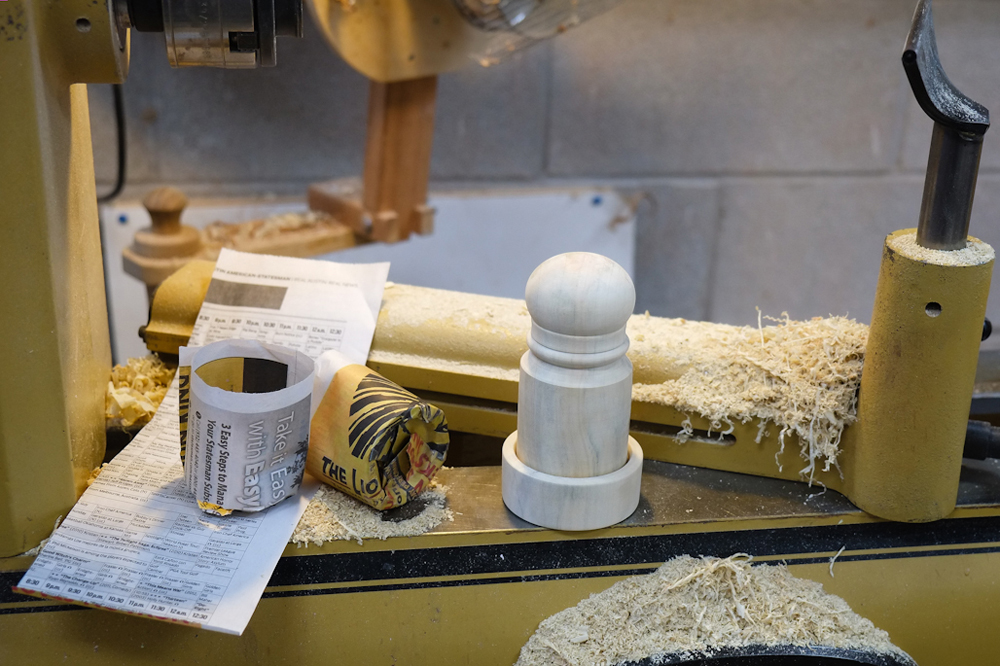
The idea behind this project is to use old newspapers to create a small seed starter pot. This tool you will create allows the gardener to wrap newspaper around a turned wooden form, creating a paper cylinder. Then the open end of the newspaper is folded in, and pressed into the base. This forms a small pot suitable for filling with potting soil to plant seeds. Once the seedling has emerged, the entire pot can be planted directly into the ground. This is a great recycling project!
This turning is one of the more challenging projects I have introduced to you. It requires measuring and test fitting to achieve the proper fit. However, I am confident with some patience, you can handle this project.
Recycled Materials
It seems only appropriate that reclaimed wood be used for this project. So, I chose a box elder blank that I harvested locally a few years ago. I started with a blank about 3 1/2"square x 8" long. The final size can vary. This one ended up measuring 5 ½" tall with a 2 ¼" diameter. The base has a 3" diameter.
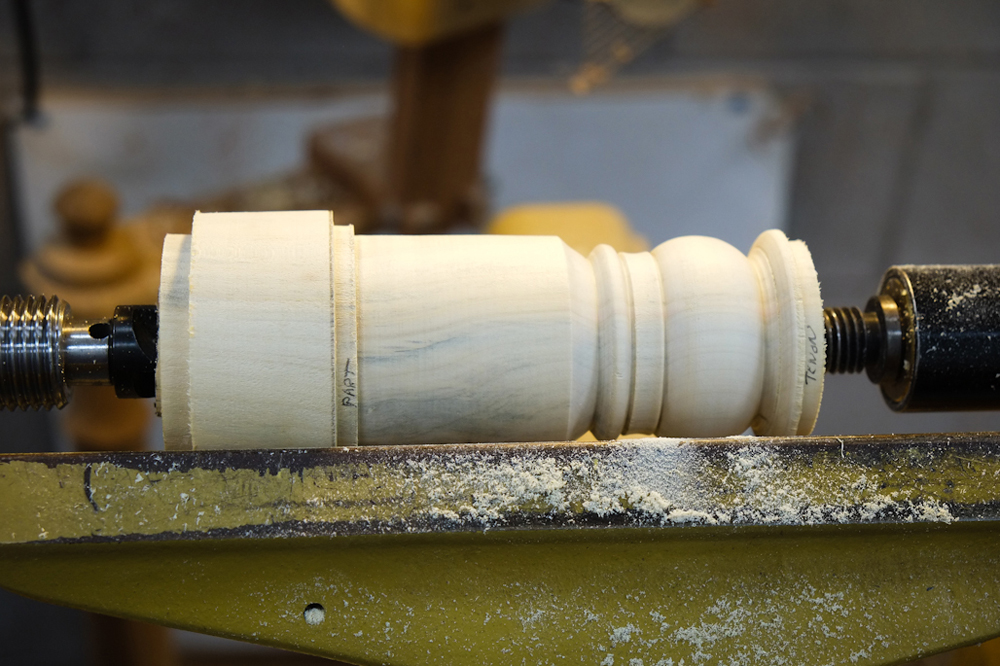
I started by turning the piece down to round and marked my layout lines. Then, I started shaping the top of the maker. You have an opportunity to add a few beads, coves, or any embellishment shape you prefer. However, since the top will be pressed down into the base by hand, you should make the top comfortable. A round over top is ideal.
The base
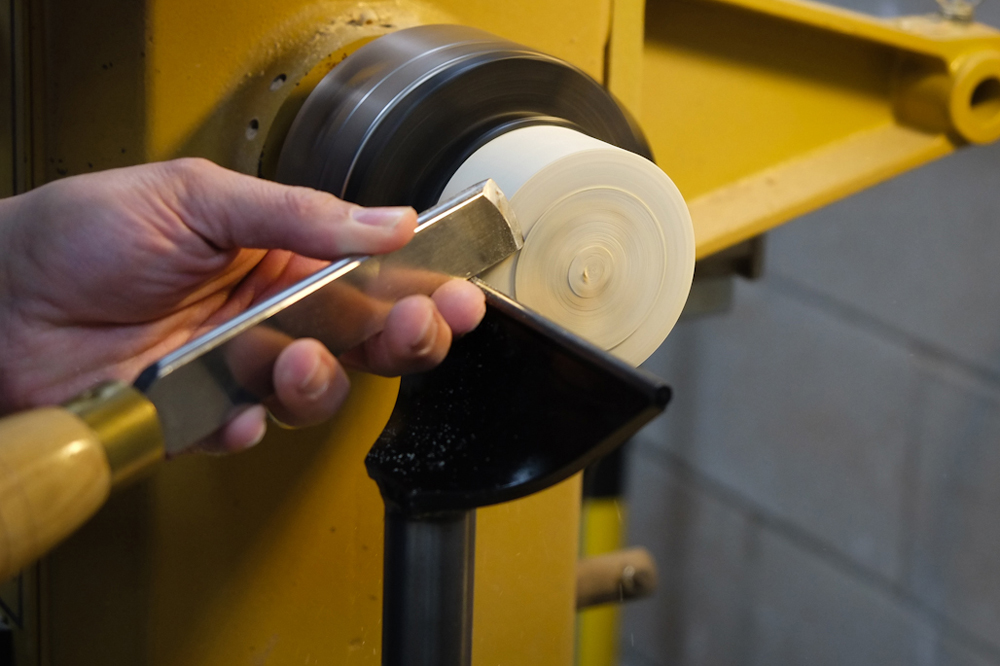
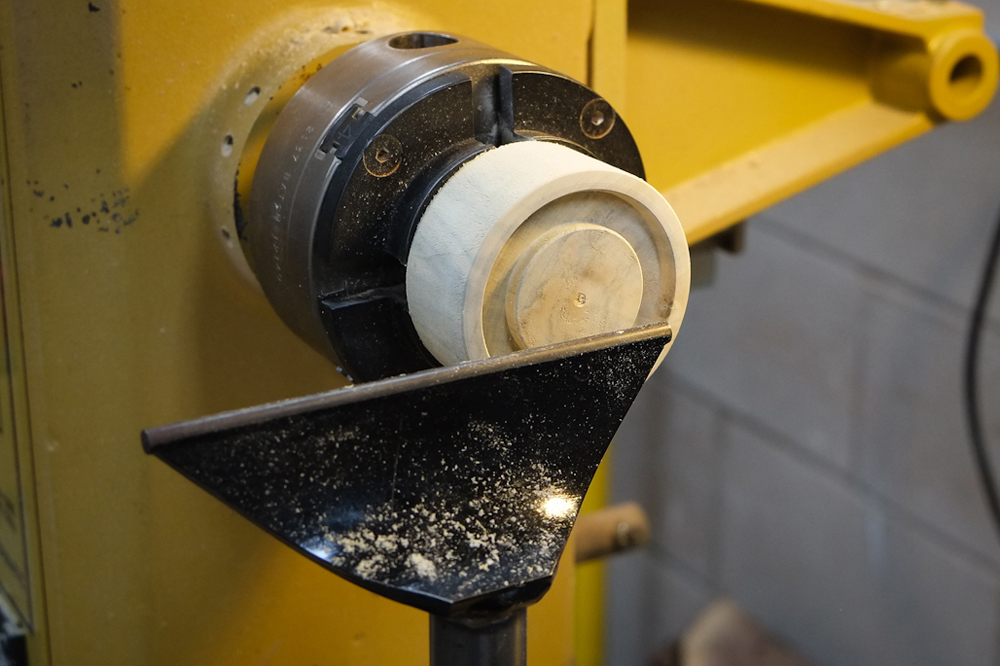
Once I parted off the top, I mounted the base into a Oneway Stronghold chuck. A smaller chuck would be acceptable for this turning. I then used a skew to clean up the end grain..
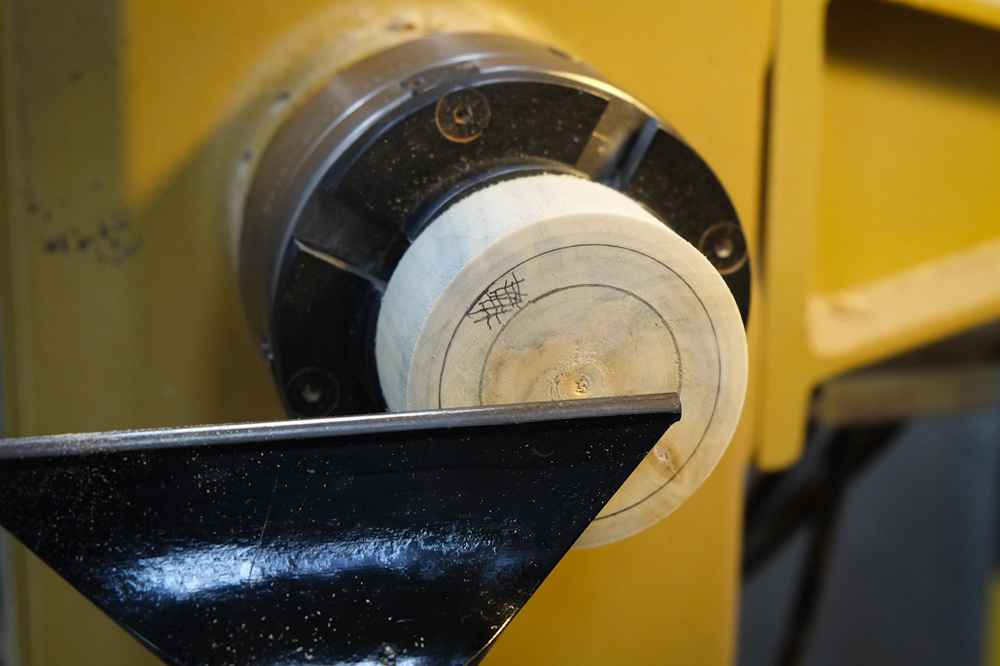
Next, I marked out the outside diameter of the top on the base. Remember, the top must fit into the base. So this larger diameter will serve as our outside line in the base. I removed a small amount of material from the center of the base so I could test fit the top. Once I knew the top fit correctly into the base, I was ready to turn the mortise. I then used a bedan (or parting tool) to turn a mortise into the base. The mortise is 1/4" deep.
Back to the top
Back to the top
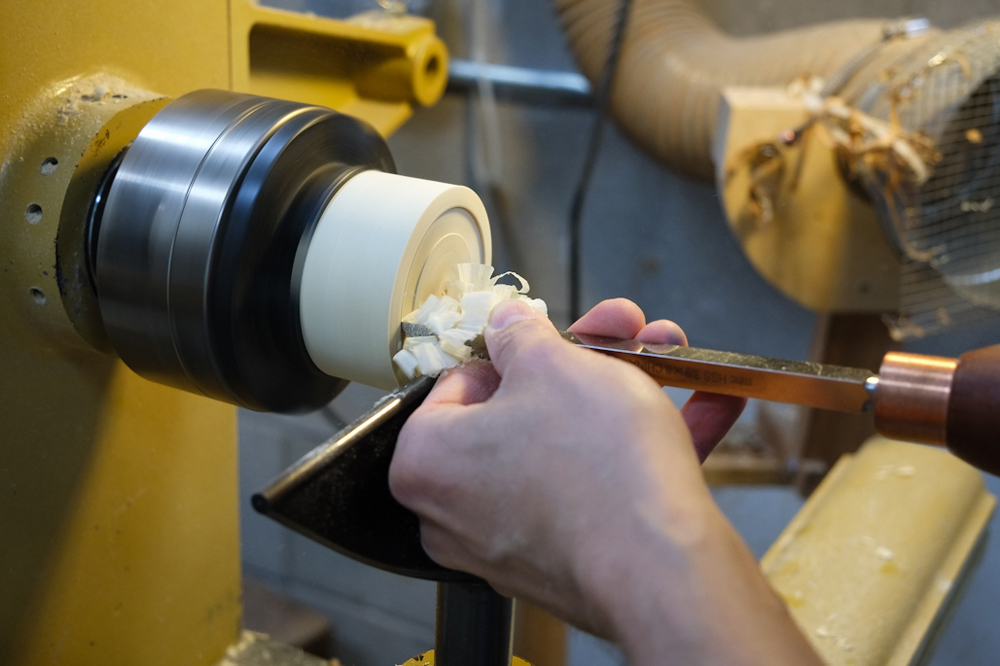
I mounted the top into another chuck so I could turn a mating profile to fit the base. I cleaned up the end grain again with the skew. Next, I used dividers to transfer the measurements of the center of the base to the bottom of the top.
I then used the bedan again to turn a mortise into the top. The goal here is to have the center of the base and mortise compress the newspaper against the mating form of the top. You must test fit the pieces as you go. Resist the temptation to create a suction fit. You are not making a box lid. It is important to allow for a little play in the fit. If the fit is too snug, you will tear the newspaper. I also recommend that you chamfer all the edges of the form, to minimize sharp corners tearing the newspaper.
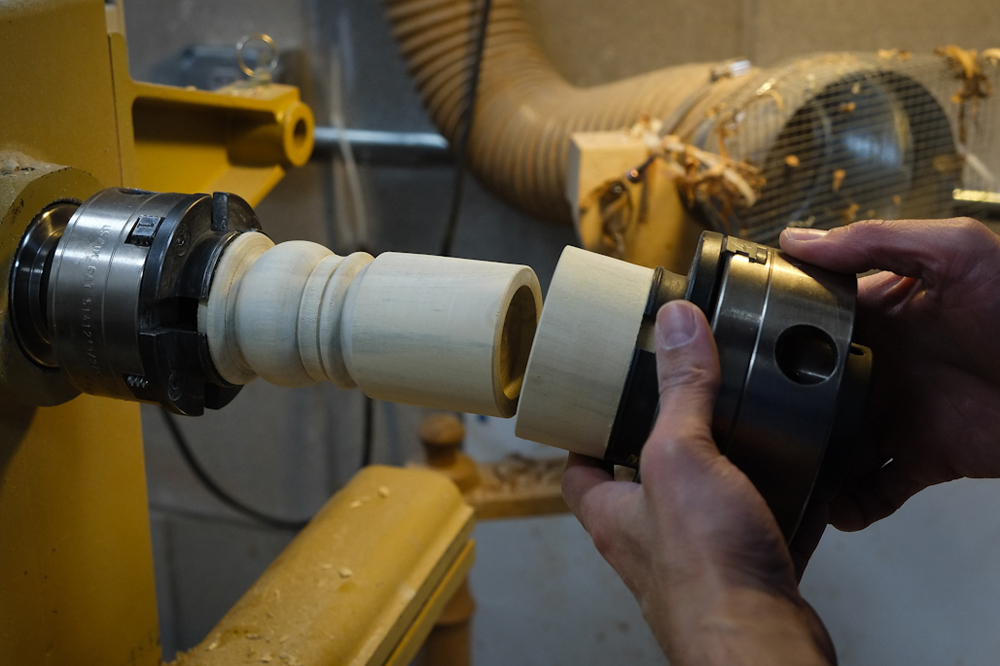
Once I was satisfied that I had achieved the appropriate fit, I parted the top off from the chuck. Then I reverse-mounted the top into the chuck jaws, to clean up the end of the top. I then repeated this step with the base.
Finishing
This project does not require sanding or the application of a finish. However, you may sand if you prefer a smoother finish. I am reluctant to apply a finishing chemical, since there is a chance that a finish might transfer onto the newspaper and then to the soil once water is applied.
How to use
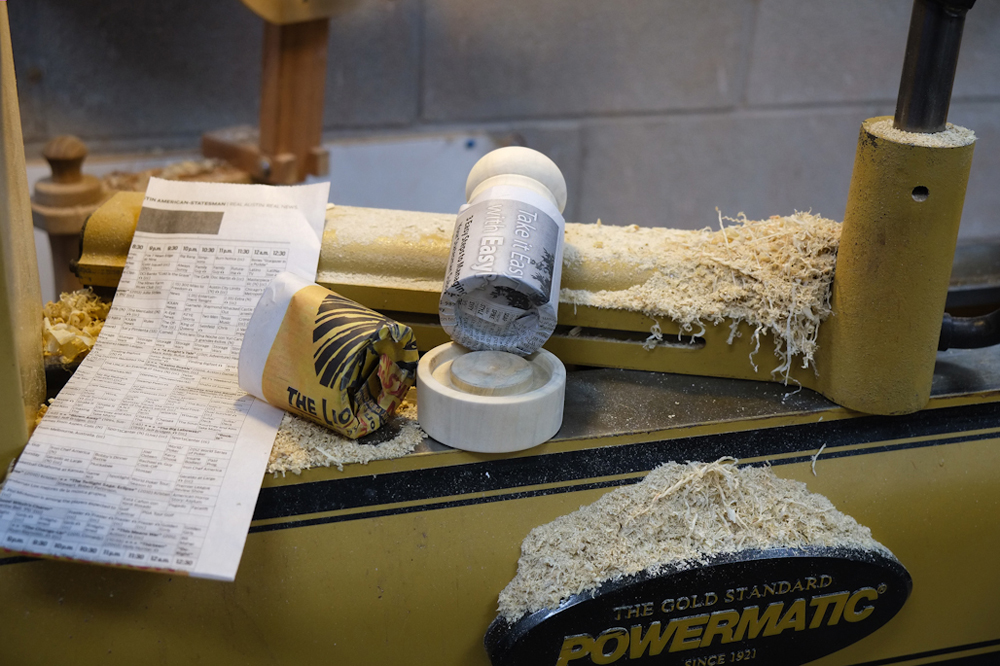
You will need to cut newspaper strips into lengths about 3" to 5" wide and about 6" to 10" long. The variable here is the diameter you chose for your project. You will need to experiment to find the correct size for your seed starter pot. Simply wrap the newspaper around the top, leaving an inch or two extending past the bottom of the form. Then, fold the excess into the mortise on the top. Next, compress the top into the base. Twist the top into the base, to form a crease into the newspaper. Now you can slide the freshly made pot off the top. Repeat the process for as many pots you need.
I hope your new garden tool gives you a jump start on your garden. Good luck during the growing season.
Curtis is a former President of
Central Texas Woodturners, a member of the
American Association of Woodturners, and a member of
Fine Woodworkers of Austin. Curtis teaches and demonstrates nationally for Lie-Nielsen Toolworks. He also teaches for TechShop. He owns a studio where he teaches and works. Curtis lives in Central Texas with his wife and four young children. Take a look at his website at
www.curtisturnerstudio.com or visit his
Instagram: tx_planes.