Turning with Temple: Long, Thin-Stem Goblets
by Temple Blackwood
Castine, ME
Note: click on any picture to see a larger version.
The following summary presents one workable process of turning a long, thin-stemmed goblet on the lathe:
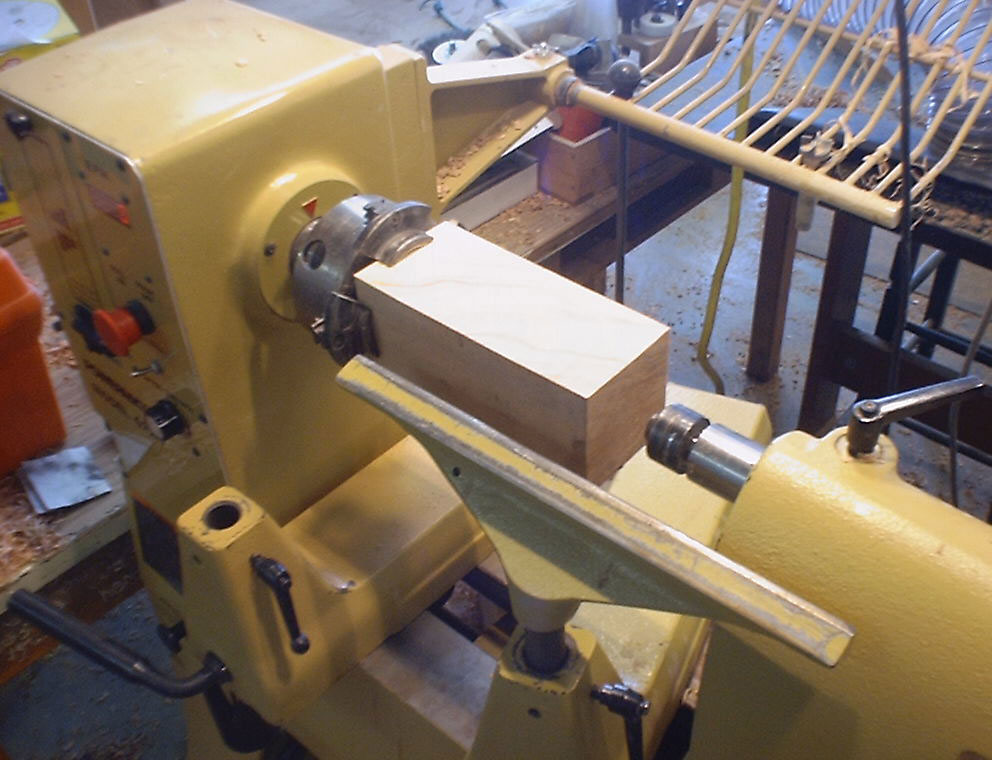
Begin by mounting the blank to be turned in a self-centering chuck, glue block, or faceplate. The most efficient method for safely mounting the blank is a four-jaw self-centering chuck. For safety and smooth turning, when using a glue-block, consider turning a tenon as part of the glue mounting; if using a faceplate, clearly mark a generous distance showing waste section with embedded screws. Lovely wood and careful turning efforts can be too easily ruined by too little attention to the initial mounting operations. As the old-timers say in Maine, a small mistake at the beginning can easily later leap the gap from the frying pan into the fire with disastrous results to both the work piece and the artist.
Round the blank to a smooth cylinder slightly larger than the maximum diameter of the desired goblet’s bowl and slightly longer than the full height. Try drawing a profile of your design on graph paper to establish the most pleasing relationship between the cup (shape, diameter, and depth) and the length, thickness, and detail of the stem. Study (and sometimes borrow or photo and measure -- always with permission) a pleasing goblet in glass, metal, or ceramic from a high-end restaurant or store to give three dimensions to your vision. Pay particular attention to the transitions between cup and stem and between stem and base. The base is typically slightly smaller in diameter than the shadow of the largest diameter of the bowl.
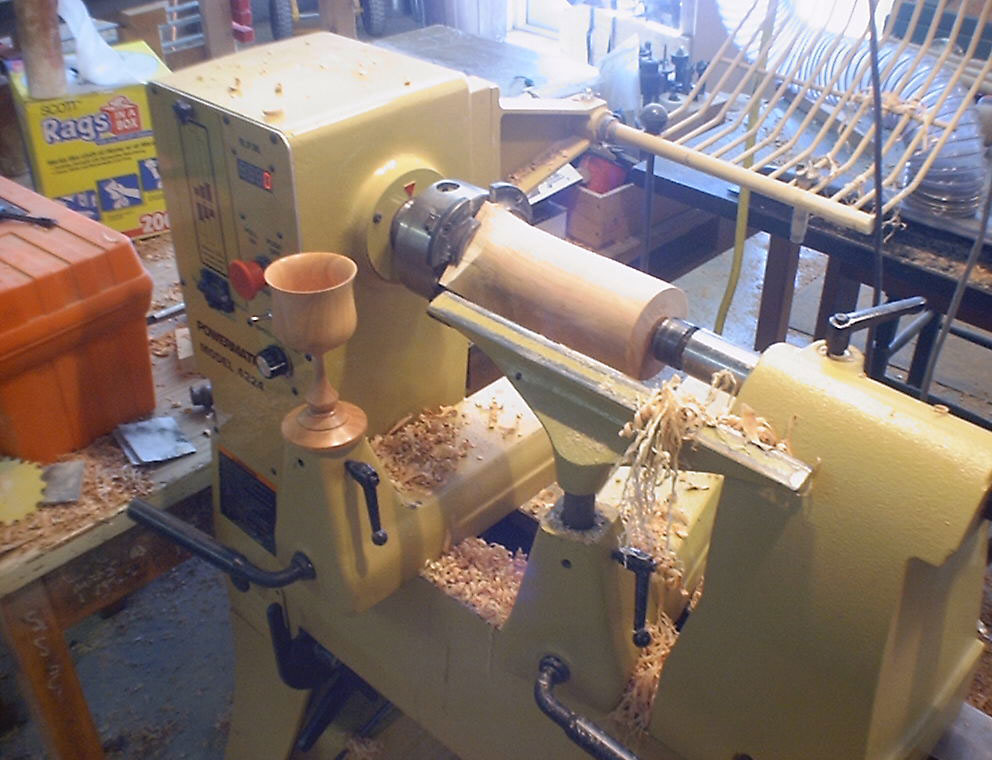
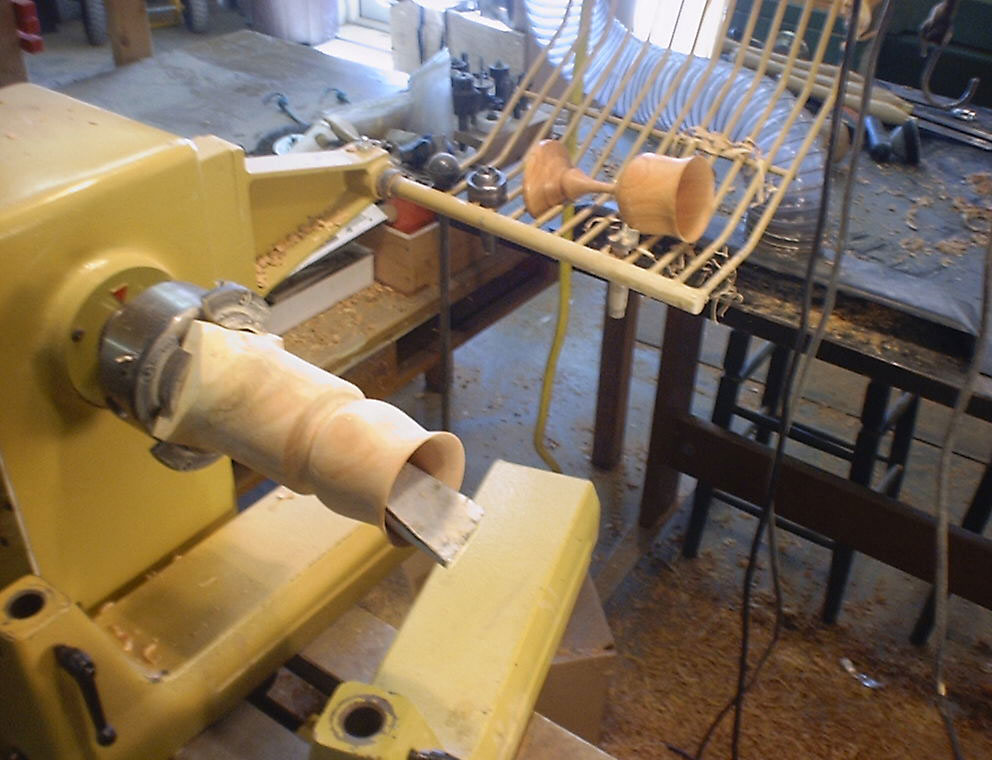
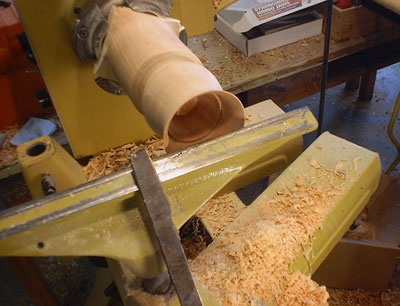
Shape, smooth, and sand the outside of the goblet cup with particular attention to the cup lip. Do not shape to final stem size; rather, leave at least 2/3 of the cylinder diameter to support the hollowing stress. Remove the tailstock.
Using a fairly slow lathe speed, drill out the center of the goblet cup taking care not to drill past the final interior depth.
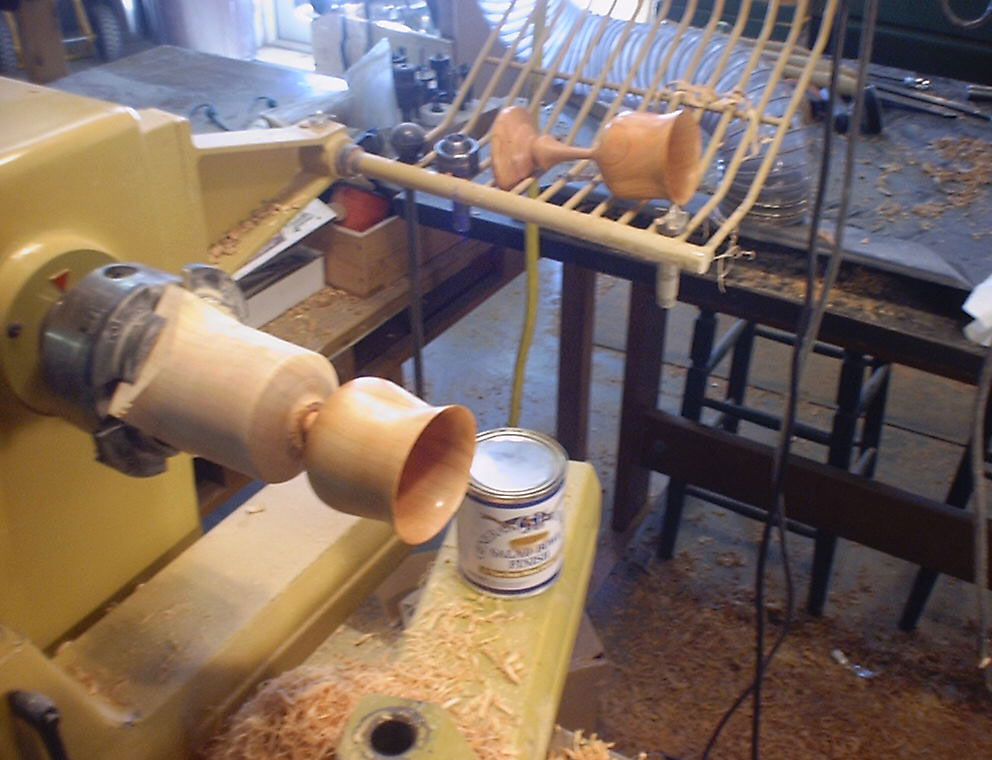
Hollow the cup by removing the first 1/2 inch of wood to finished wall thickness and detailed attention to the finished inside lip of the cup. Follow with removing the bulk waste with a detail or fingernail gouge to the bottom of the drilled depth. Using the angled side-scraper, turn to finished wall thickness. Using the rounded scraper detail the challenging interior transition from side-to-bottom and finish the bottom. Sand the inside of the cup smooth. Finish and friction dry the outside and inside of the goblet cup with an appropriate "food-safe" finish, wax, or epoxy. Remember that extremely thin-walled goblets, although most delicate and attractive, will become a challenge to drink from because the liquid (perhaps a nice wine or champagne) will tend to leach down through the open grain of the bottom if the drink is set down for a while.

|

|
|
|

|
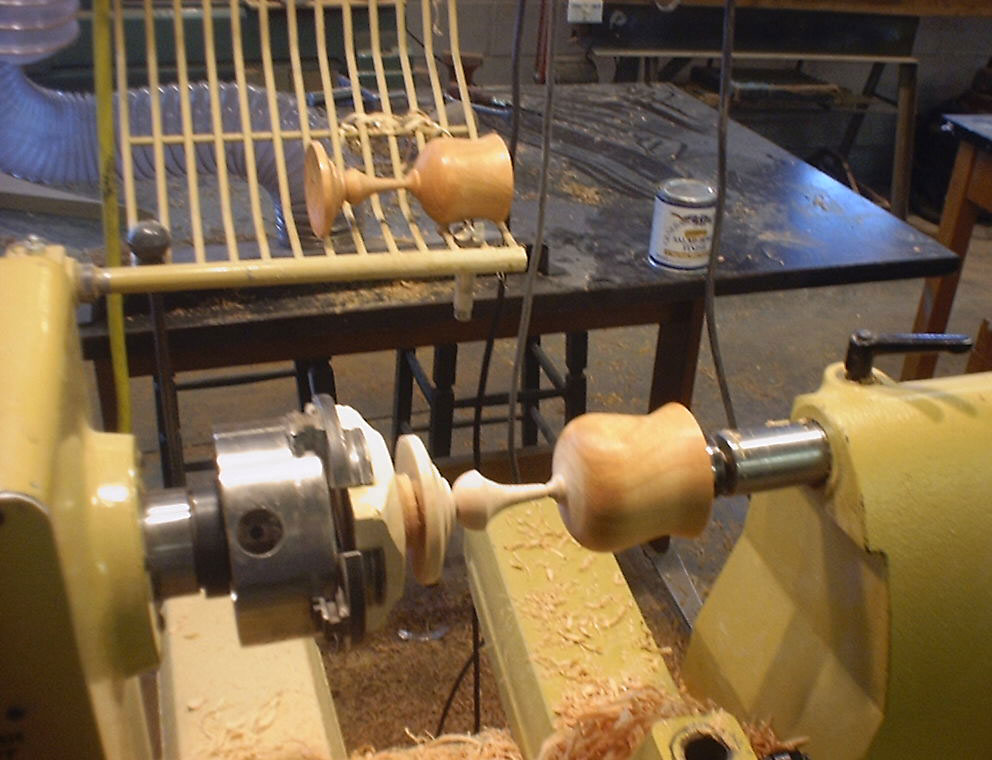
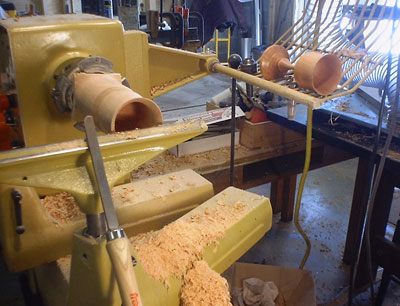
Loosely pack the goblet bowl with soft paper. Soft and friendly T-paper seems to work best because of its strength and flexibility. Reintroduce the tailstock with the live center running in the cup against the paper/foam. This will support the large goblet bowl once the goblet stem is thinned. Do not expect to return to work or finish the bowl once the stem is thinned.
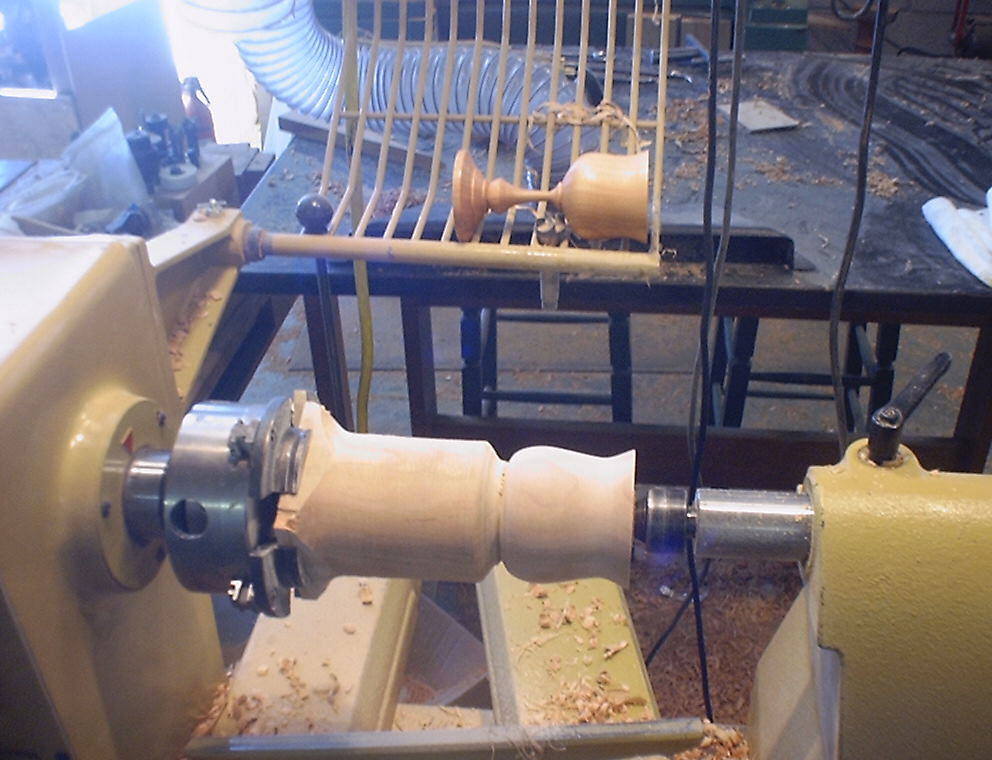
Define the bottom of the base (taking into account size and shape as well as the need to angle the parting tool for the cut-off without hitting mounting screws or chuck fixtures. Mark also the style and visual "weight" of the goblet base to establish pleasing proportions.
Working from tailstock-to-headstock (from right to left) progressively thin the stem to the next detail diameter. Observe that the last cut is typically at the thinnest diameter and any cuts, sanding, or finish between the smallest diameter detail and the tailstock risks a fatal twisting failure.
Detail and complete the stem tapers, beads, jars, and coves (often a captured ring generates the "oh, wow!" factor) from large-to-small and from cup-to-base.
Sand and finish the stem and base. Below the goblet bowl, use either the same food-safe finish or another.
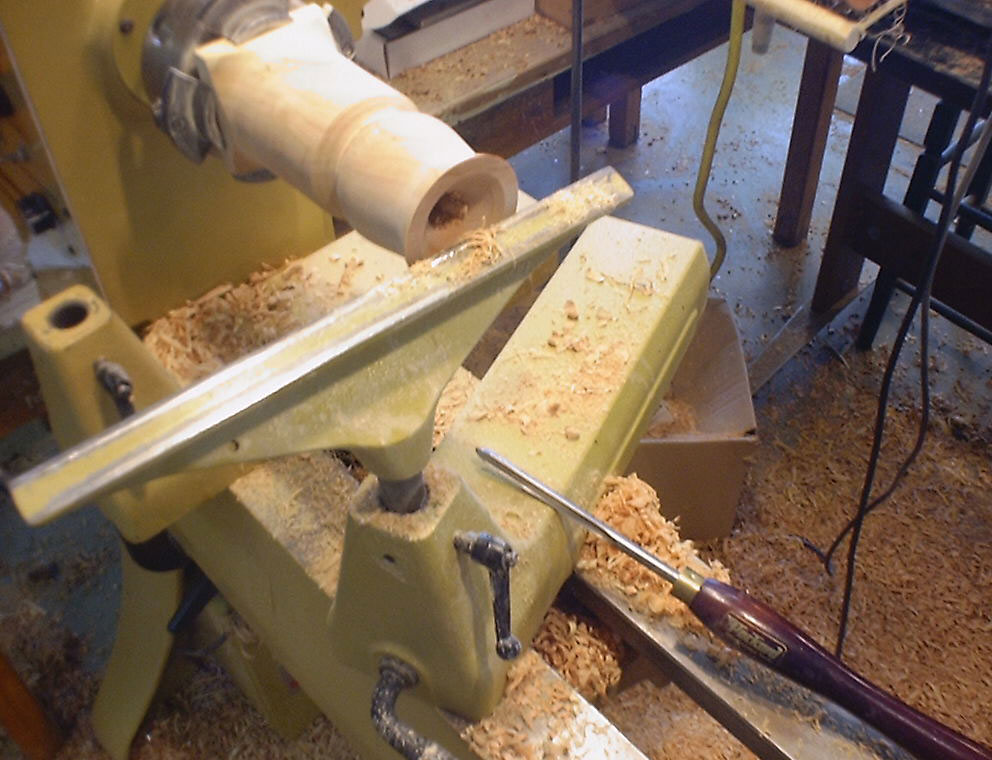
Part off by reverse-hollowing the underside of the goblet base with a sharp taper. With the live center holding the bowl steady and the tapered plug from the headstock, the goblet will stop still restrained between centers when finally cut off the driving waste block.
Smooth and apply finish to the bottom before signing. Consider adding a second and third coat of food-safe finish to the inside and outside of the cup. Apply wax or other additional finishes only to the base and stem to avoid an unpleasant "taste" when the goblet is used. If you are satisfied with your design, make another one just like the first!
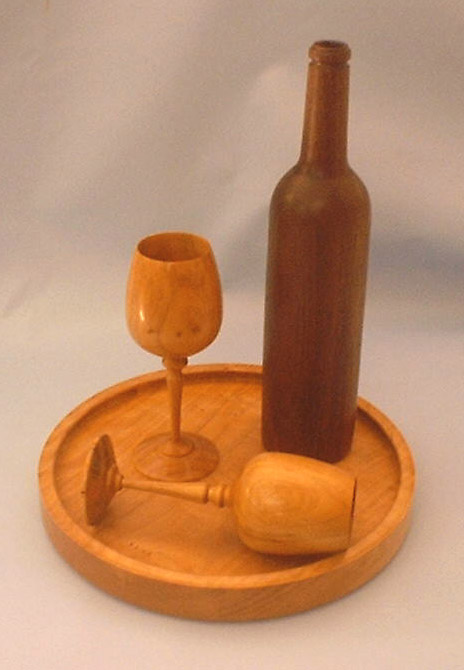
A pair of goblets or flutes can make a remarkably fine wedding present, especially if accompanied by a full-size copy of a distinctive well-hollowed wine bottle made from a contrasting wood.
You can email Temple at
temple@highlandswoodturning.com
Take a look at Temple's Website at
http://www.highlandswoodturning.com/.