Quick, Easy, and Great-looking Turned Christmas Ornaments - Part 1 - Snowman
by Rick Morris
Duluth, GA
Note: click on any picture to see a larger version.
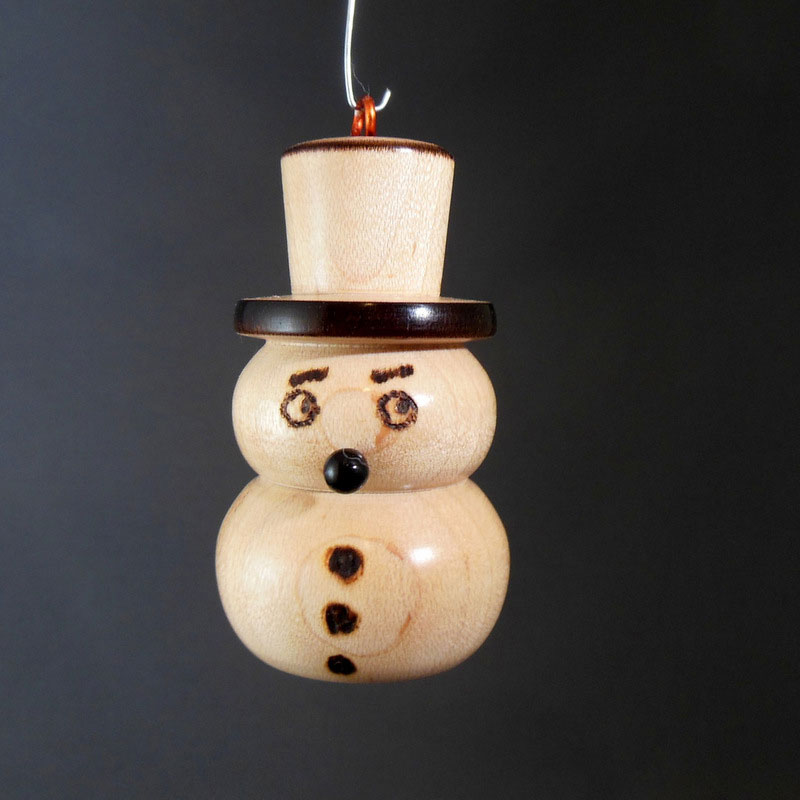
It's not too late to turn some ornaments for Christmas gifts! In this article I will show you how to turn a snowman ornament. You can also watch the video of how to turn a snowman ornament by
CLICKING HERE.
You can view
Part 2
and
Part 3
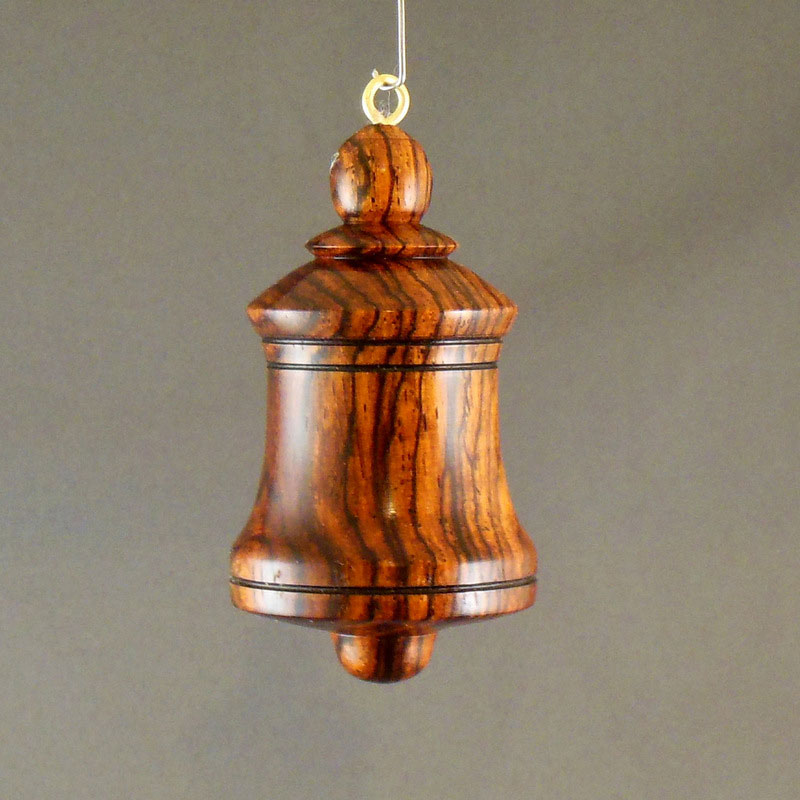
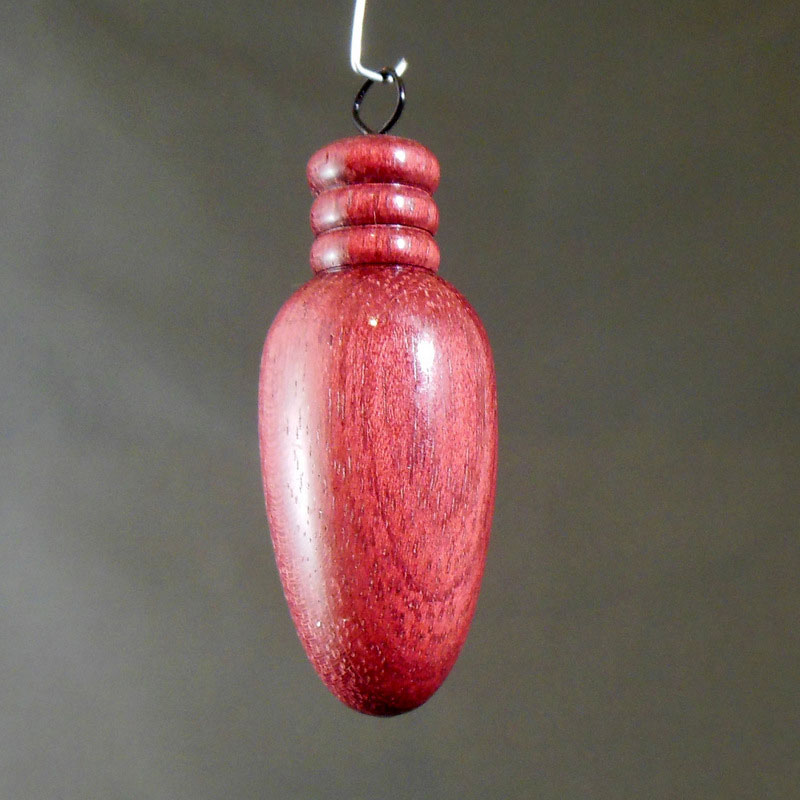
of this article in the Highland Woodworking Blog, where I teach you how to turn a bell ornament and a christmas tree light ornament. All three finished products are below.
When Christmas rolls around, as it seems to do every year, I begin to think of what I want to turn to give
out as small Christmas gifts. Last year and this year, I have settled on making three different types of
Christmas tree ornaments.
Christmas tree ornaments must be small and light enough so that they don't drag the tree branch down
to the floor. Since I want to make several dozen, not just one or two, they also must be fairly easy to
make, not requiring much time per ornament. And, of course, they must look great when they're done!
I suppose in one sense this article is aimed more at the beginning woodturner rather than at the seasoned pro – turned Christmas ornaments are not really anything new in the world of woodturning, and I imagine most experienced woodturners already have made ornaments.
There are quite a lot of woodturned ornaments showing up on the Internet, and many of them are very complex and beautifully made. But while I have made a few of those elaborate ornaments, I found them quite time-consuming, and when I'm making dozens of small token gifts to give away, I want something simple and easily made.
All of these ornaments are easy to make, and all lend themselves to "mass production" – making multiples by performing each step of the fabrication on all items at once, then proceeding to the next step on all items, etc. This can be a little on the boring side, but it is much faster than doing a single item from start to finish, all at one time, then doing the whole thing again and again and again.
One other advantage of these ornaments is that since they are small, they don't need much wood. If you've got cut-offs laying around from earlier projects, this might be a good use for them. If you're going to buy some exotic tropical hardwoods (which make great ornaments!), you won't have to spend a fortune to get enough wood to make a dozen or more ornaments, because you only need to buy 1-1/2 inch and 1 inch spindles.
Materials Required
-
Wood spindles: 1-1/2 inch thick and 1 inch thick
-
Brass screw eyes or 16 gauge decorative wire for making hangers
-
Small map pins (for the snowmen noses)
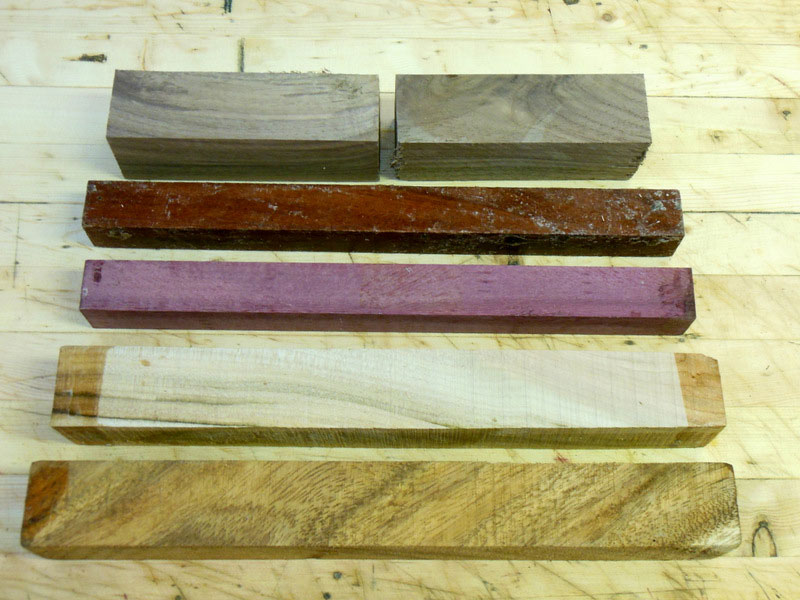
I use a variety of woods for these ornaments. See Figure 4 for most of the woods that I'm using on this
project, which are (from top to bottom): walnut, quina, purpleheart, silver maple, and koko. Some of this
wood is left over from earlier projects, and some of it I purchased just for these ornaments (the quina,
the purpleheart, and the koko).

|
Figure 4 - From the top, walnut, quina,
purpleheart, sliver maple, and koko
|
Brightly colored exotic hardwoods make beautiful ornaments. Purpleheart really stands out. I also love
the color of padauk, redheart, and cocobolo. Cocobolo is fairly expensive, but I can usually find
purpleheart and a few others at almost reasonable prices, sometimes even on sale.
For these ornaments, I am starting with 12 inch lengths of 1 inch square spindles for the Christmas tree
bulbs and 1-1/2 inch square spindles for the snowmen and bells. My ornaments are cleverly sized so that a
starting width of 1 or 1-1/2 inches is just right for the maximum diameter of the ornament. The lengths of
each ornament blank are between 3 inches and 3-1/2 inches, which isn't so cleverly sized for cutting from
a 12 inch length – I only get three blanks from a 12 inch piece, with a small piece left over. You may wish
to vary my dimensions if you take up the project yourself.
Domestic woods that you might be able to harvest locally will also make great-looking ornaments:
walnut, maple, cherry, etc. If by some chance you have a very plain wood, you can also dye it with a
wood dye, although this adds another step to the fabrication. For the obvious reason, the snowman ornaments are best made from a light-colored wood. If you can
get holly without mortgaging your house, it would be ideal. I have, however, settled for maple and
occasionally, ash.
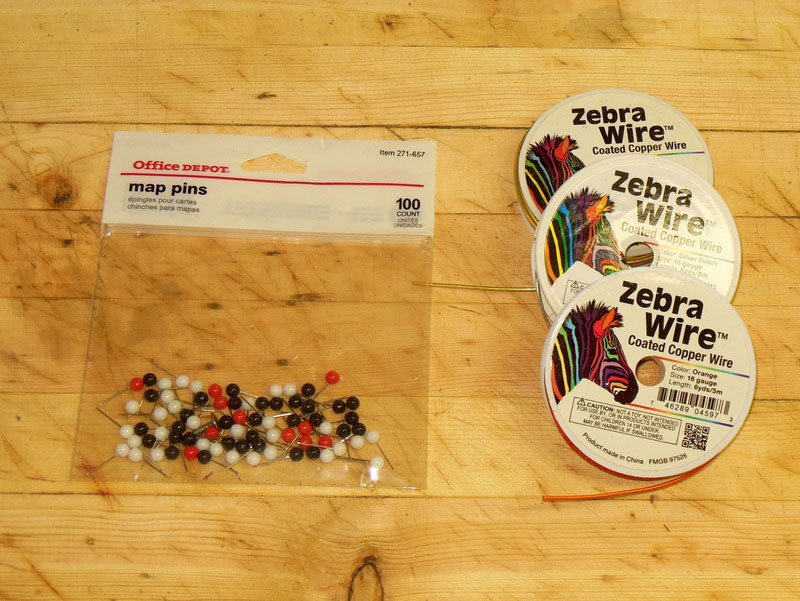
Brass or silver screw eyes can be used for the hangers on the top of the ornament. I want more variety
than that, so I purchase 16 gauge craft wire in different colors (brass, silver, red, and black) and use a
homemade bending jig to form a small loop which I glue into a hole in the top of the ornament.

|
|
Figure 5 - Map pins and wire for the hangers
|
Tools Needed
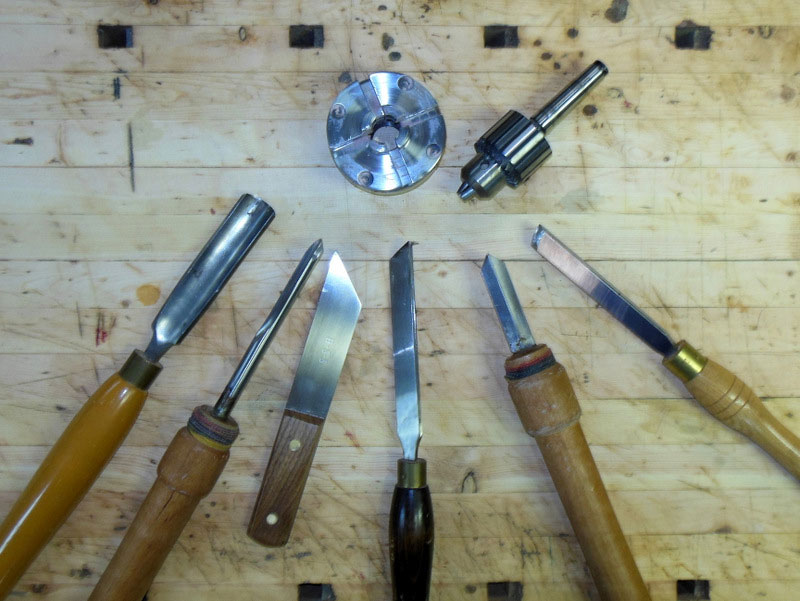
Most woodturners, even beginners, will, I think, have all the tools necessary for making these ornaments. I use the following:

|
Figure 6 - Turning tools used, from left, counterclockwise:
roughing gouge, spindle gouge, narrow parting tool (optional),
fluted
parting tool (optional), diamond parting tool (optional),
skew (optional), Jacobs chuck, scroll chuck
|
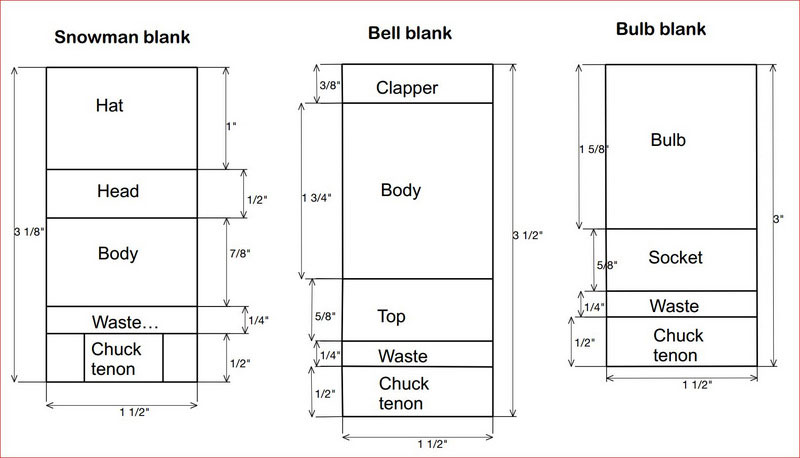
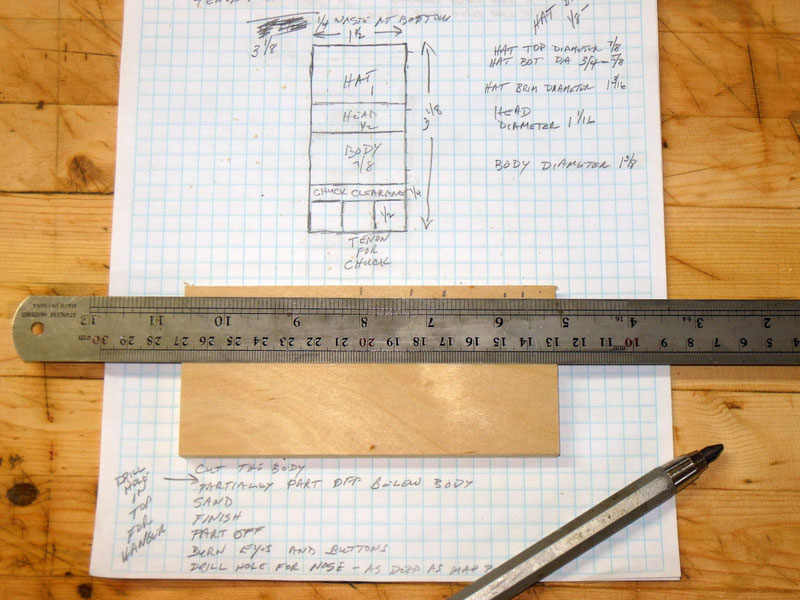
Make a Sizing Template
For making more than one or two ornaments (I'm shooting for three dozen this year), it helps to make a
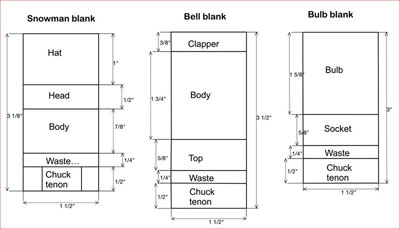
template for each ornament. Figure 7 shows the size of each ornament blank, with the important
dimensions.
|
|
Figure 7 - Diagram of ornament blanks
|
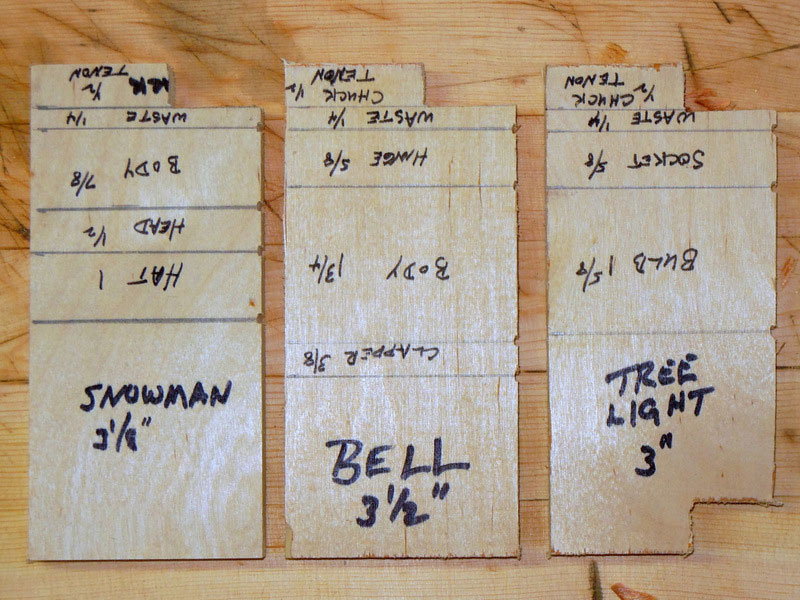
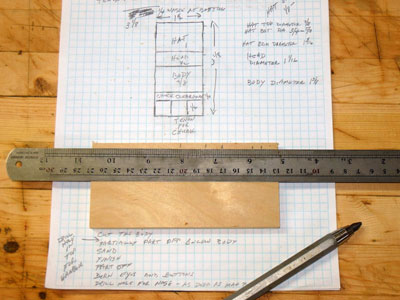
From these dimensions, I made a sizing template for each ornament, as shown in Figure 8.

|
|
Figure 8 - Size templates for the ornaments
|
The template provides a quick way of marking off the different sections on the blank, when you are ready to
turn the ornament. The template is used after the blank is mounted in the chuck. It includes the length
of the mounting tenon, and it also includes a 1/4 inch waste area that will be adjacent to the chuck; this
leaves room for parting off.
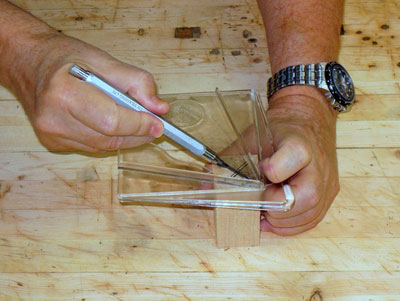
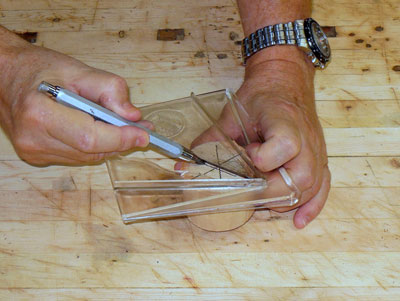
Making the template is simple, of course. Transfer the measurements from the template diagram to a
length of wood. See Figures 9 and 10. For ease of use, I cut a notch in the corner where the template will
be against the chuck (this is the tenon area). I also cut very small notch at each line, where the template
will be up against the blank; this allows the pencil tip to stay steady when marking on the spinning blank.
|
|
Figure 9 - Mark the cutting points on the template…
|
|
|
Figure 10 - …and draw a line across for ease of use
|
Note that the snowman blank has the hanger (the top of the ornament) on the tailstock side, whereas
the bell and light bulb blanks have the hanger on the headstock side, so lay out the templates
accordingly. (The difference in which end is the ornament top is what I have found convenient, but you
may wish to change it.)
Cut the Blanks
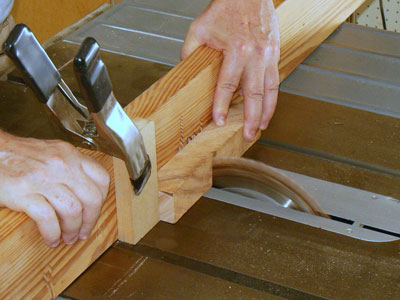
I cut the blanks on a table saw, but a band saw will work, as will a hand saw, although slower. I suggest
clamping a stop block on the miter gauge (see Figure 11), at the length of whatever blanks you are
cutting. This makes rapid work of cutting a dozen or three blanks.
|
|
Figure 11 - Cutting a blank to length
|
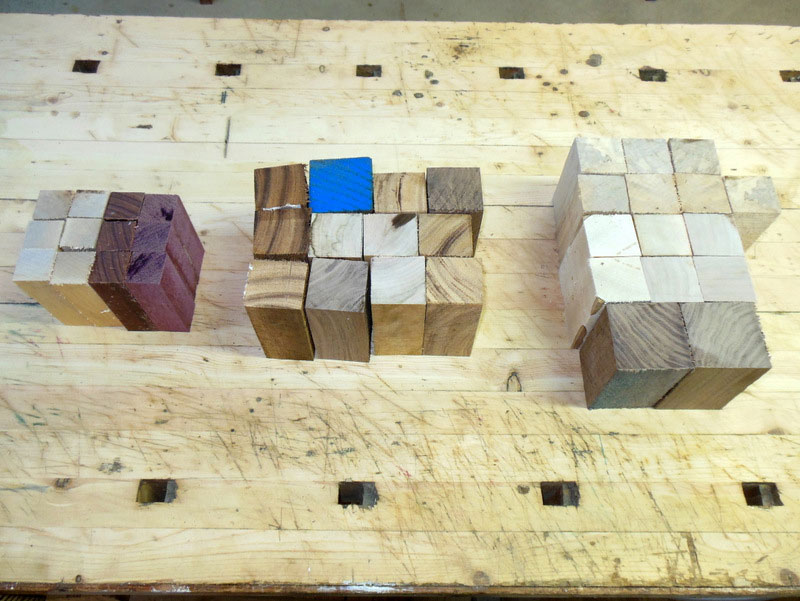
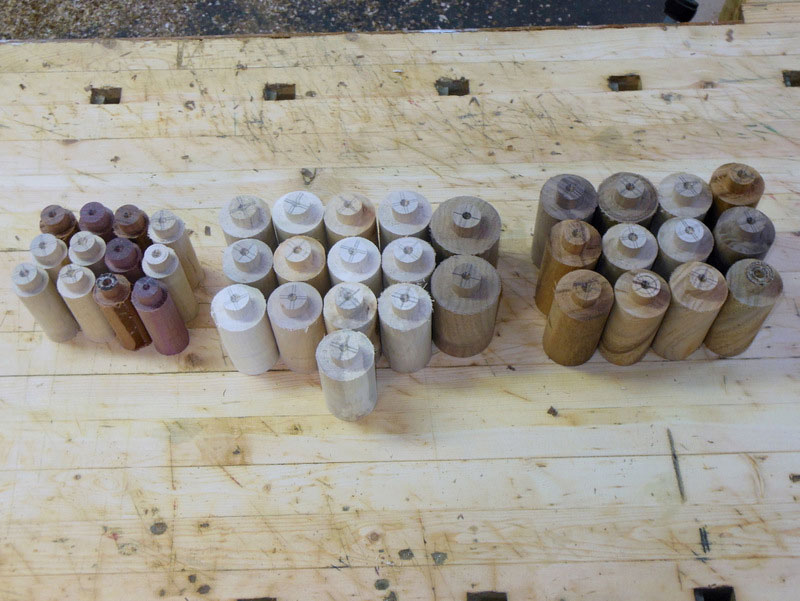
Note that the blanks don't have to be exactly 1" or 1-1/2" square; that's a minimum that I use. As you can
see in Figure 12, I have a few oversize blanks in the rightmost stack.

|
Figure 12 - A dozen each of blanks for
three types of ornaments
|
Rough down the blanks and turn a chuck tenon
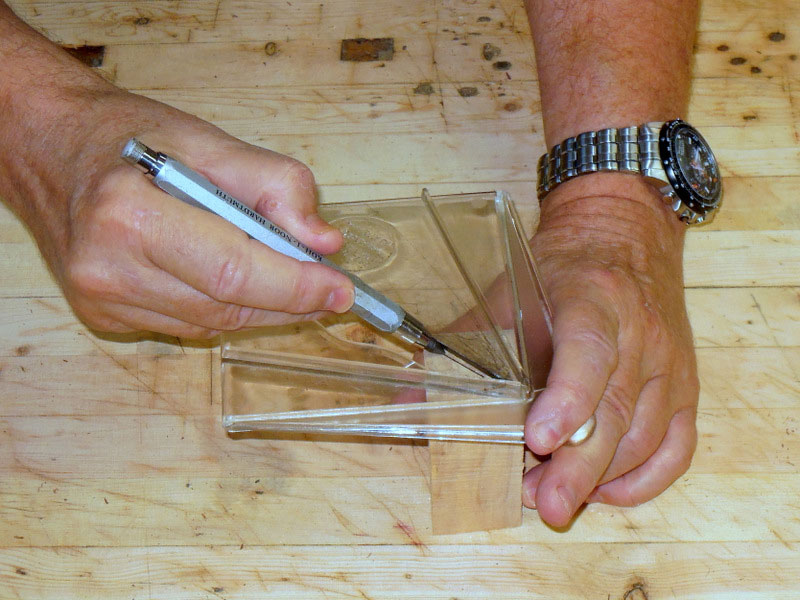
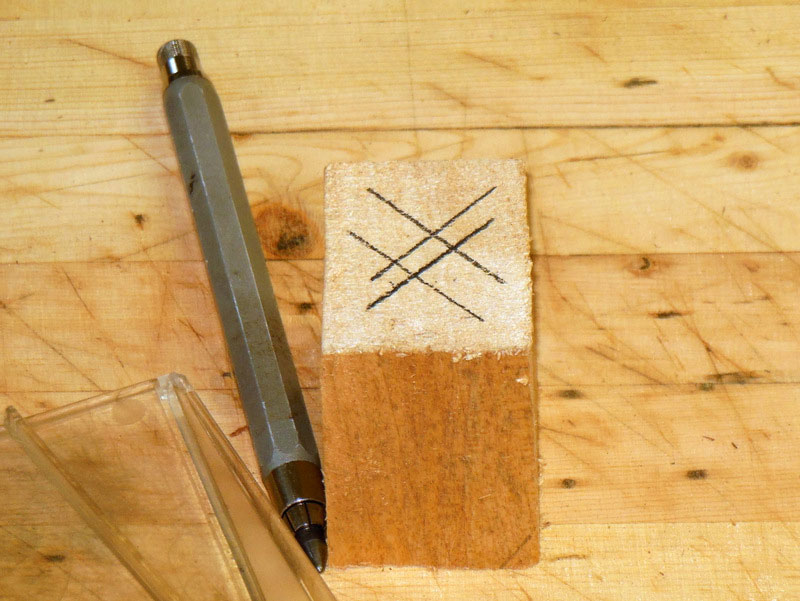
I always mark the center of a blank; I could just estimate it, which would be faster, but these blanks are
already small, and a centering error would make them even smaller after roughing down.

|
|
Figure 13 - Mark the first diagonal...
|
|
Figure 14 - ...and mark the other three diagonals
to get the center
|
I use an
inexpensive center marking gauge. It
always locates the center, even if the workpiece is not square. Just position the gauge at each side of the
piece, draw a line across the center, and after four lines, the center is….in the center.

|
|
Figure 15 - Marking the center of a not-so-square piece
|
|
|
Figure 16 - Marking the center on a round piece
|
The blanks will be roughed down between centers. If you've got a Steb center, it is ideal for this task;
these blanks are small, especially the light bulb blanks, and the Steb center is much less likely to split a
blank than the larger point of a standard drive center.
|
|
Figure 17 - A Steb drive center
|

|
Figure 18 - A small blank mounted between
a Steb center and
a live center
|
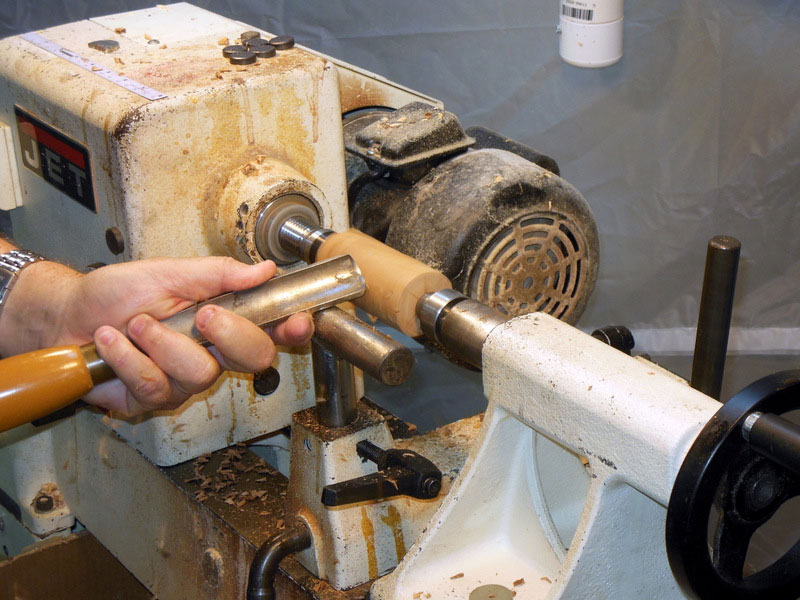
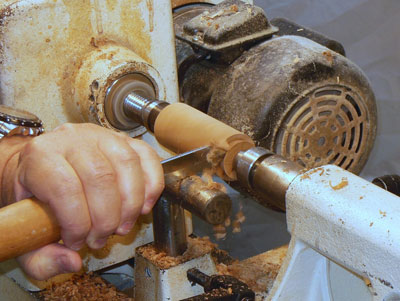
With the blank mounted between centers, rough it down to round. For this size blank, I typically run the
lathe at 1100 or 1500 rpm. I'm using a 1-1/2" European-style roughing gouge.

|
|
Figure 19 - Roughing down the blank to round
|
I check for roundness by lightly touching the shaft of the gouge to the top of the spinning piece; if it bounces around, I'm not down to round yet.

|
Figure 20 - Checking for roundness by lightly sitting the
shaft of the roughing gouge on top of the blank
|
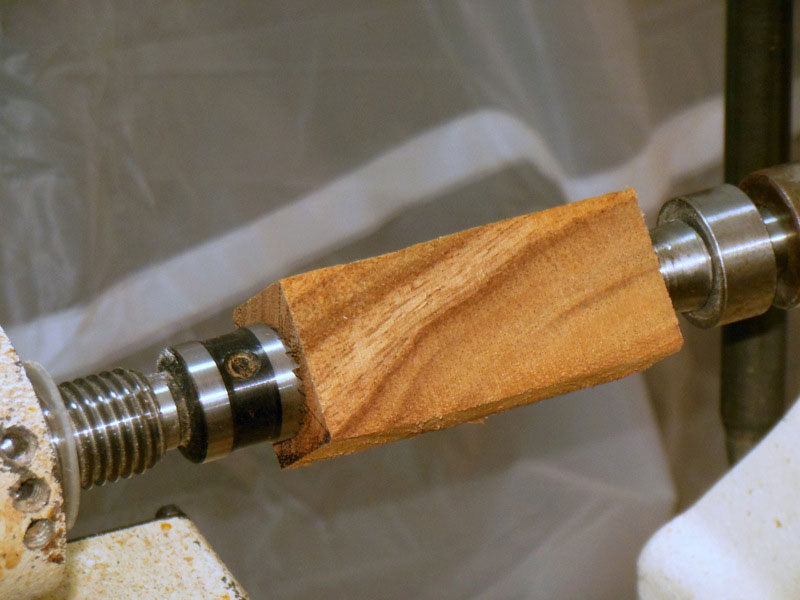
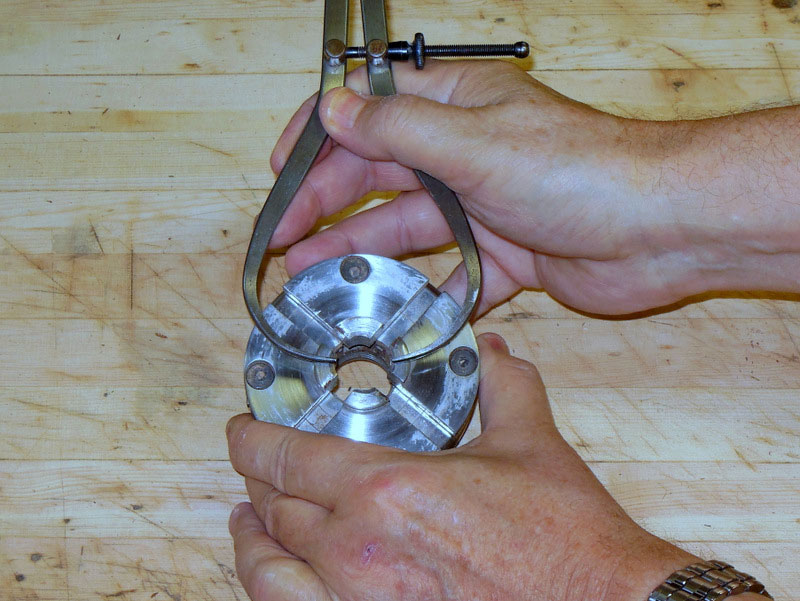
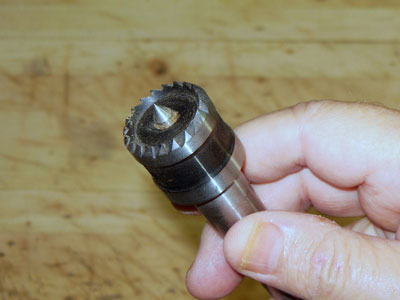
After roughing, the blanks will be turned using a chuck to hold the piece. So a mounting tenon needs to
be turned on one end. I'm using a
Nova Midi chuck
with small jaws (Number 1, I think). To get the size
for the tenon, you can use a caliper set to the jaw opening, or, just as easy or easier in this case, use an
open-end wrench that fits the jaw opening.

|
|
Figure 21 - Set a caliper to the max opening of the chuck...
|
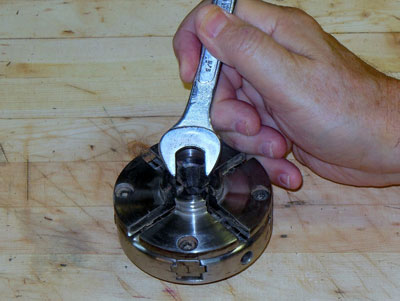
|
Figure 22 - ...or find an open-end wrench
that fits the opening
|
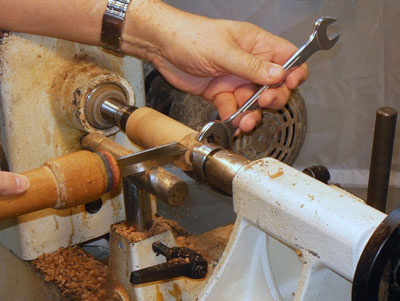
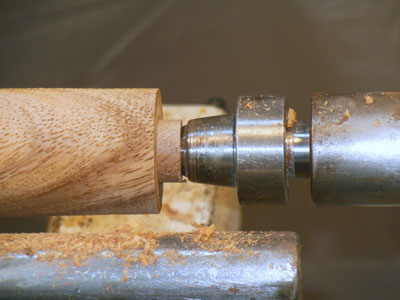
I use a
diamond parting tool
to turn the tenon, and a wrench for sizing. But for this size jaw on my chuck,
I've got an even easier way (see Figure 25). The diameter of the end of the live center is just about the right
size, so after doing the first blank to verify that sizing, I turn all the other tenons to size just by cutting
down to the live center edge.
|
|
Figure 23 - Cut the tenon for later chuck mount
|
|
|
Figure 24 - Use a caliper or wrench to get to the right size
|
|
Figure 25 - If your live center is just right,
you can cut the tenon using it as a gauge
|
|
Figure 26 - After cutting the first one, make sure it's the
right size before proceeding to the other three dozen
|
Now it's just a matter of roughing down all the other blanks and cutting a tenon on each. For the 2014 season, I'm aiming for about three dozen ornaments.

|
|
Figure 27 - Three dozen+ ornament blanks
|
Drill a hanger mounting hole
The top of each ornament will get a small loop, for hanging. So the top needs to have a hole drilled in it.
For my hangers, I need a 3/32" hole.
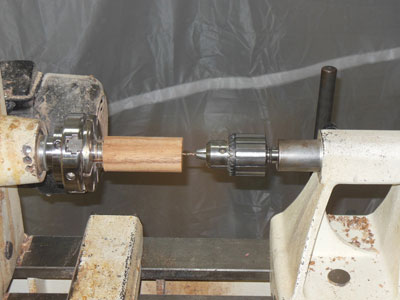
For the snowman ornament, when mounted in the chuck, the top of the ornament is on the tailstock
end of the blank, so when I'm turning the snowman, I can also use a tailstock-mounted Jacobs chuck to
drill the hanger hole.
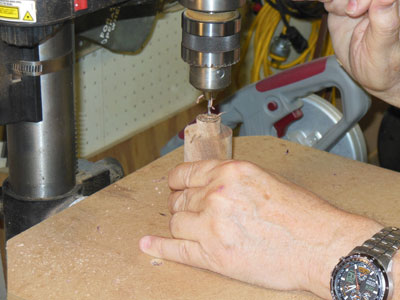
However, the bell and light bulb ornament blanks are mounted so that the top of the ornament is on the
headstock side, and I can't use a tailstock chuck to drill the hole. (You might ask, why not just turn those
two ornaments such that the top is to the right. It's because I've found the bottom of those two
ornaments are much harder to turn if they're up against the chuck.)
Therefore, for the bell and bulb blanks, I drill the hanger hole on the drill press, using the mark left by
the drive center (Figure 29).
|
|
Figure 28 - Drilling a hanger hole on the lathe
|
|
|
Figure 29 - Drilling a hanger hole on the drill press
|
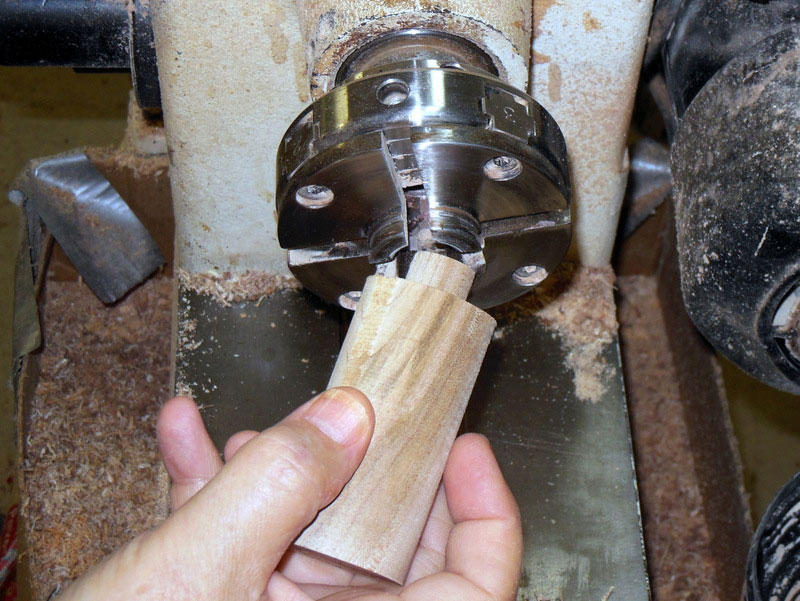
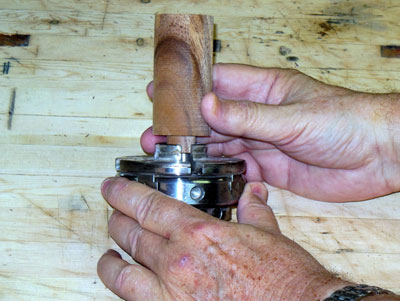
Reverse and re-mount the blank
With three dozen blanks cut, roughed, and mostly drilled, it's time to start turning the shape of the
ornament. Grab a blank, push the tenon into the chuck jaws, and tighten the chuck down on the blank.

|
|
Figure 30 - Put the blank into the chuck jaws...
|

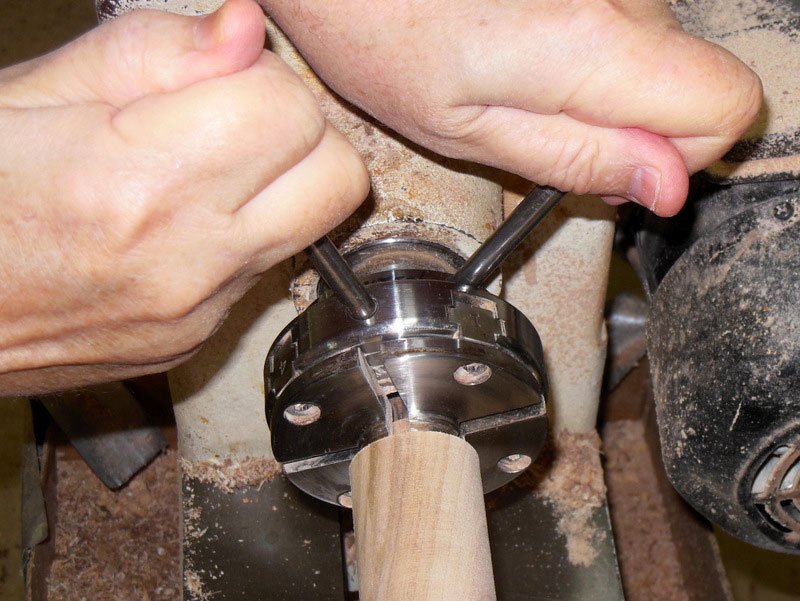
|
|
Figure 31 - ...and tighten the jaws
|
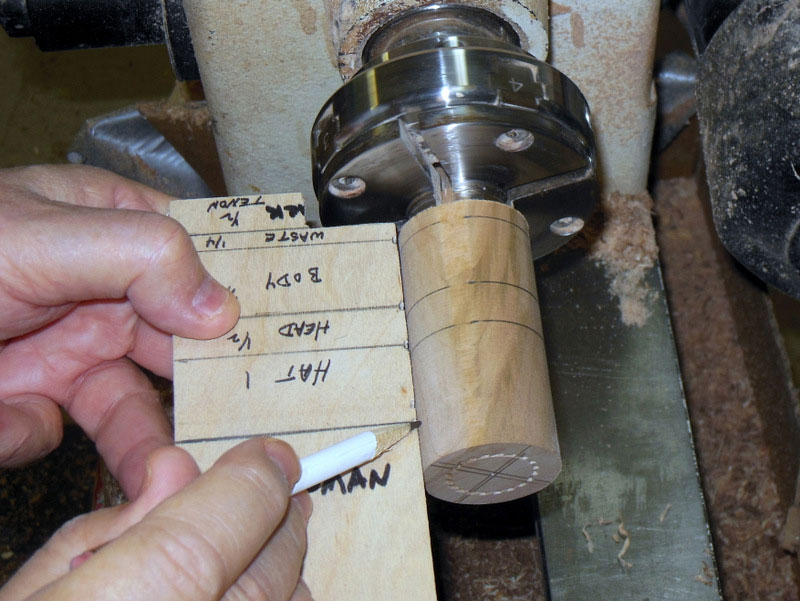
The Snowman
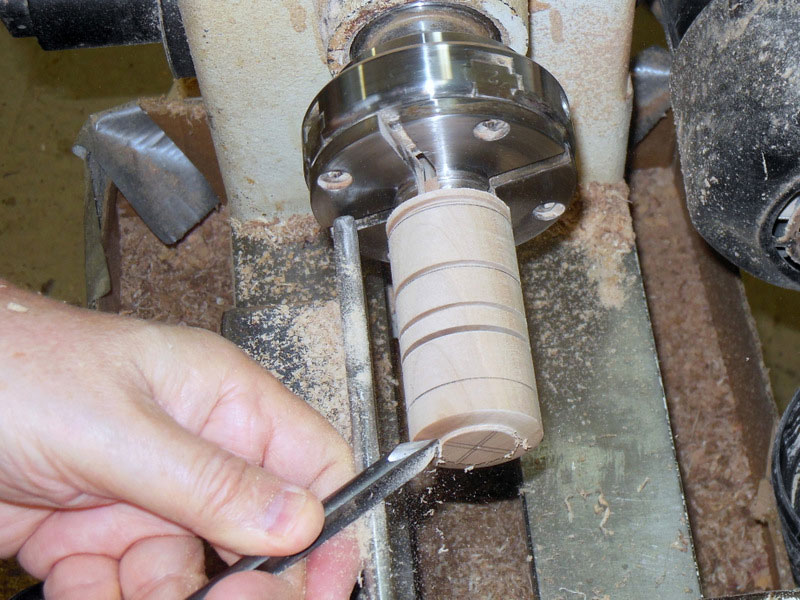
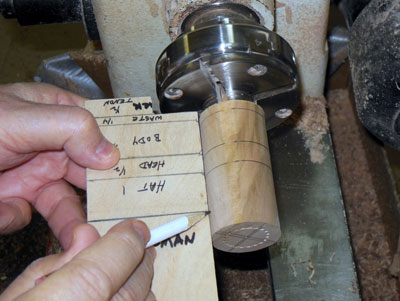
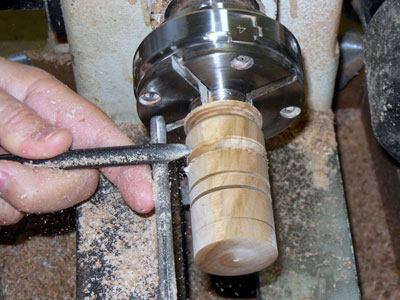
Now we get to use those nifty templates we made. With the lathe running, carefully hold the template
up to the blank (Figure 32), with the "waste" area against just ahead of the chuck jaws. Hold a pencil at
the line on the template, against the spinning blank. This marks off a waste area at the bottom of the
ornament, and the areas for the body, head, and hat. Anything to the right of the outermost line can be
removed, or can be used to make the snowman's hat taller.
|
Figure 32 - Use the snowman template to mark
the main points of the turning
|
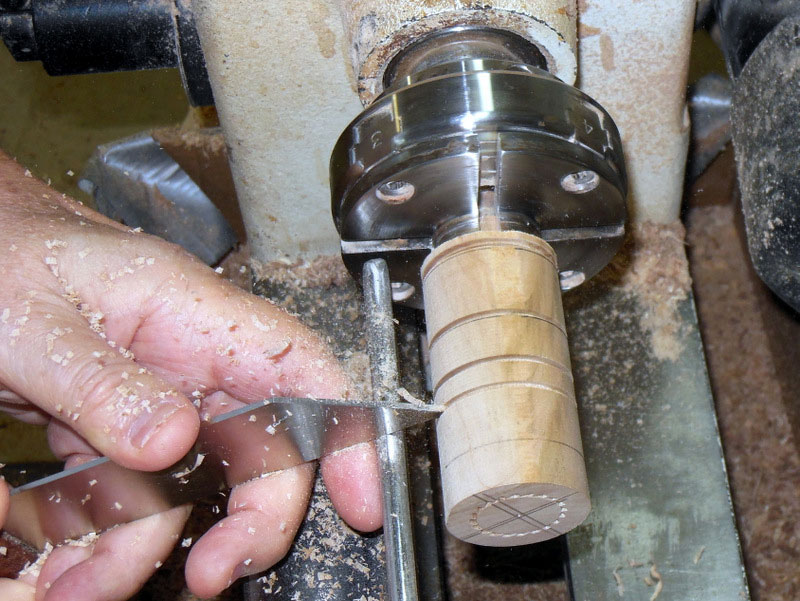
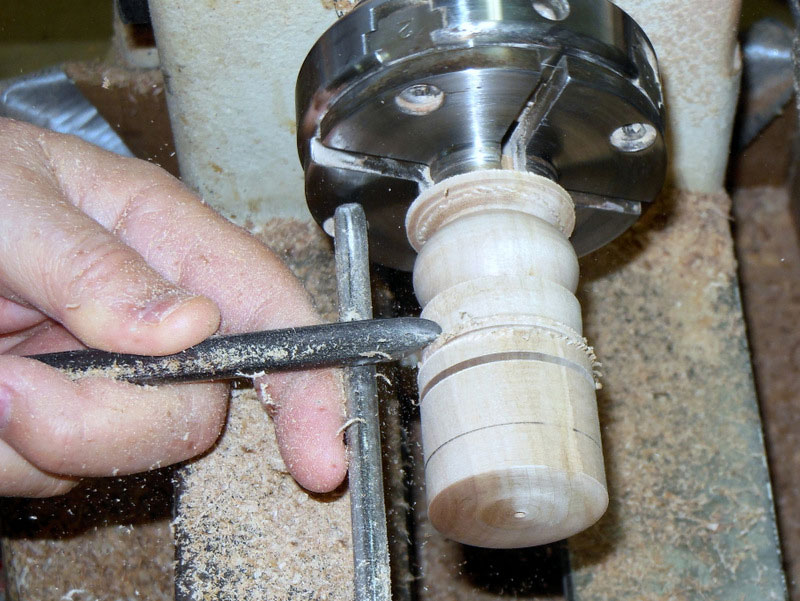
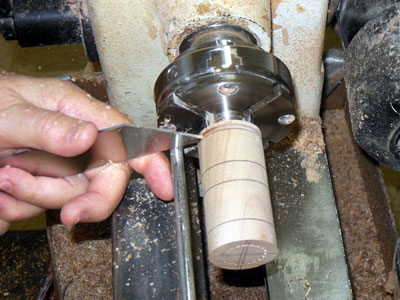
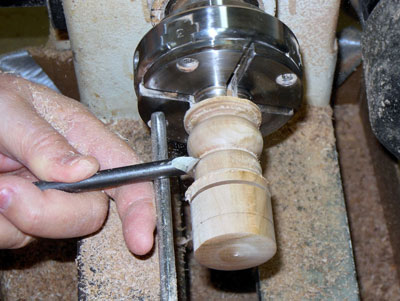
Start at the leftmost line, and use a narrow parting tool (really, any parting tool will do), and cut in a half
inch or so, to delineate the bottom of the turning (Figure 33). At each of the other marked lines on the
blank, cut in about 1/4 inch. Now the three parts of the snowman (body, head, and hat) are all set. You
might also want to cut in the brim of the hat, by cutting about 1/4 inch above the head cut.
|
|
Figure 33 - Cut in at the left side of the body
|

|
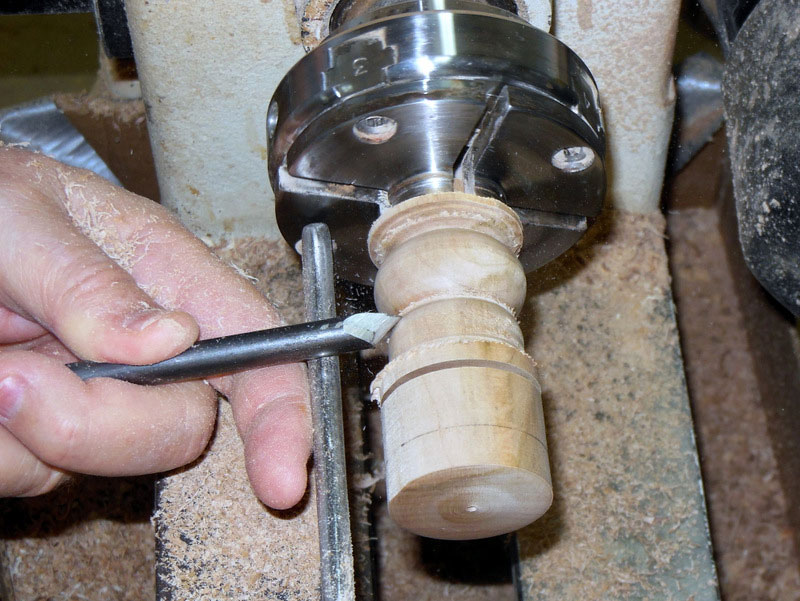
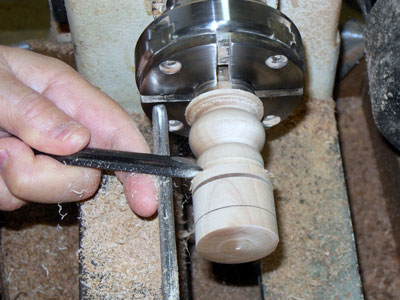
Figure 34 - Continue cutting at the marked lines -
and make one extra cut for the hat brim
at about 1/4 inch above the head
|
The rest is easy - get your spindle gouge, and remove all wood that doesn't look like a snowman. You're done!
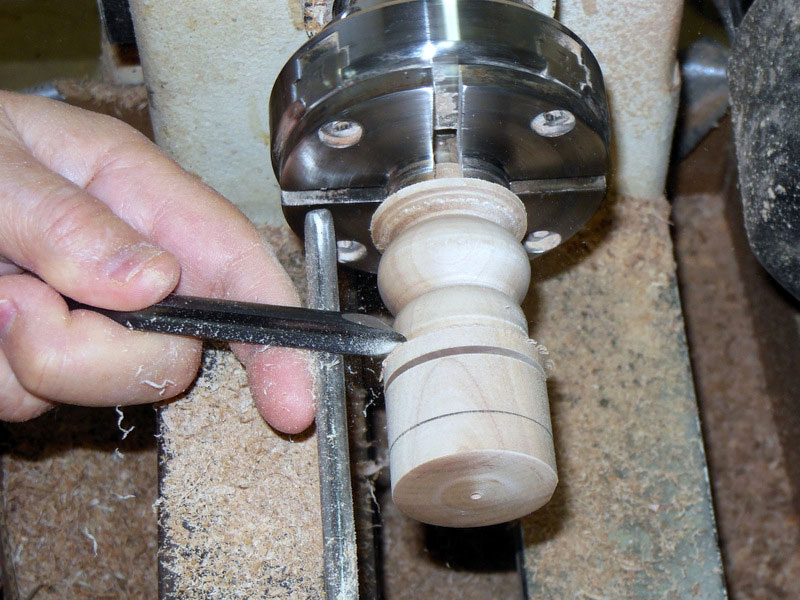
Just kidding! All seriousness aside, use the spindle gouge and start at the top of the hat (rightmost end
of the blank); cut a slight crown to the top of the hat.
|
|
Figure 35 - Slight round over the top of the hat
|
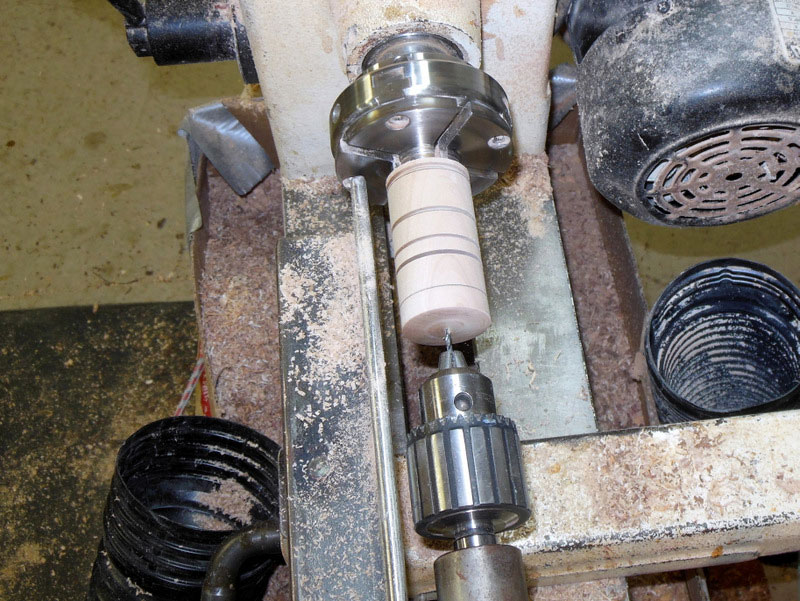
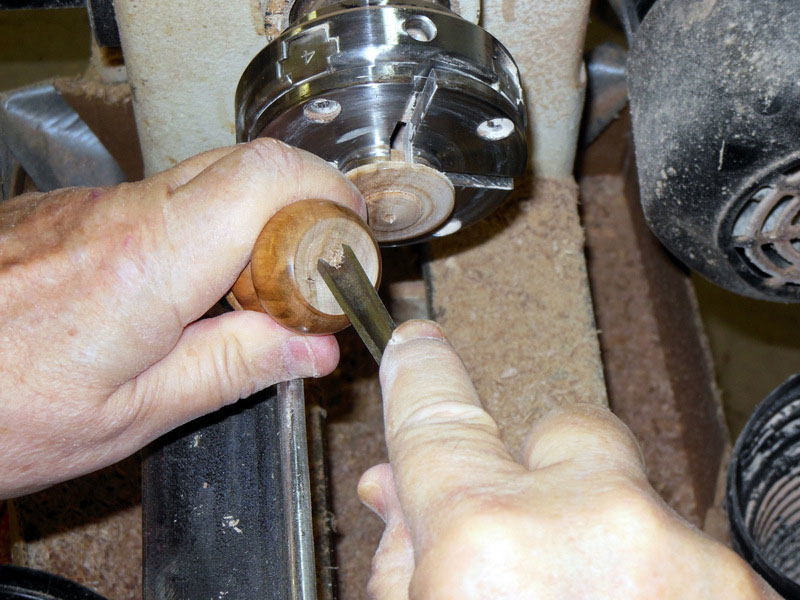
If you've got a Jacobs chuck for your lathe, now is a good time to drill the hole for the hanger that will be
screwed in later. Put a 3/32 inch drill bit in the Jacob's chuck, put the chuck in the tailstock, move the
tailstock up to the blank, and with the lathe running (you might want to set the speed down to 400-600
rpm), drill a hole about 5/8 inch deep.

|
Figure 36 - Using a Jacobs chuck in the tailstock,
drill a hole to later mount the hanger
|
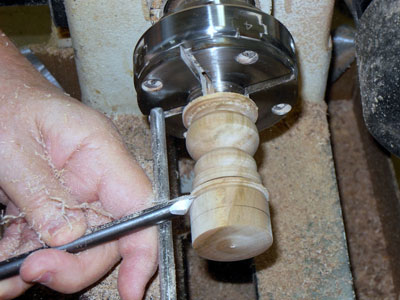
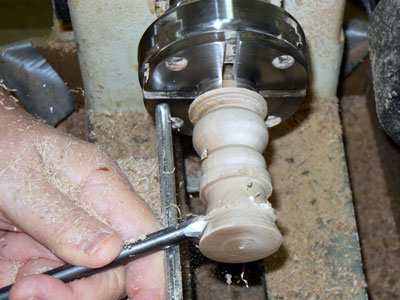
Start on the body next (Figures 37-40); it's the section next to the drive center. It only needs to rounded to a
depth of a half inch or less to look good; you don't have to go too deep. The snowman is supposed to
look fat and puffy. Start near the edge, and roll the spindle gouge to the left; then go to the right edge,
and roll the gouge to the right. Keep working toward the midpoint, start with the gouge flat and rolling it
so the flute points in the direction of the cut. Essentially, you're cutting a big fat bead.
|
|
Figure 37 - Start rounding the body
|
|
|
Figure 38 - Roll the gouge from the center to the edge...
|

|
Figure 39 - ...work from both sides,
forming the found body...
|

|
|
Figure 40 - ...until it looks the way you like
|
Do the same rounding to the head section, but remember that it needs to be smaller than the body. So
start by reducing the diameter some, then start rolling the gouge to cut the bead.

|
Figure 41 - Start on the head by cutting away some bulk -
the
head must be a smaller diameter than the body
|
|
Figure 42 - As with the body, roll the gouge
from the center to
the edge...
|
|
Figure 43 - ...cutting an even round-over
for the head section
|
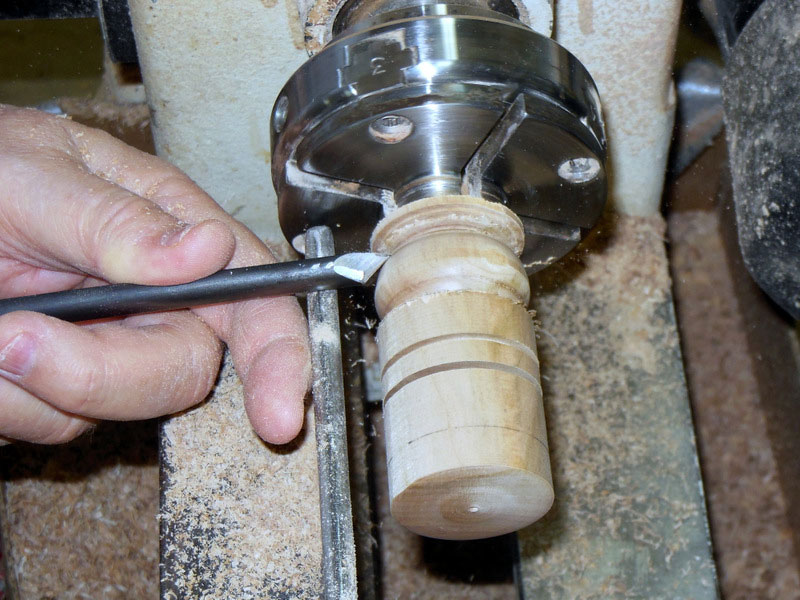
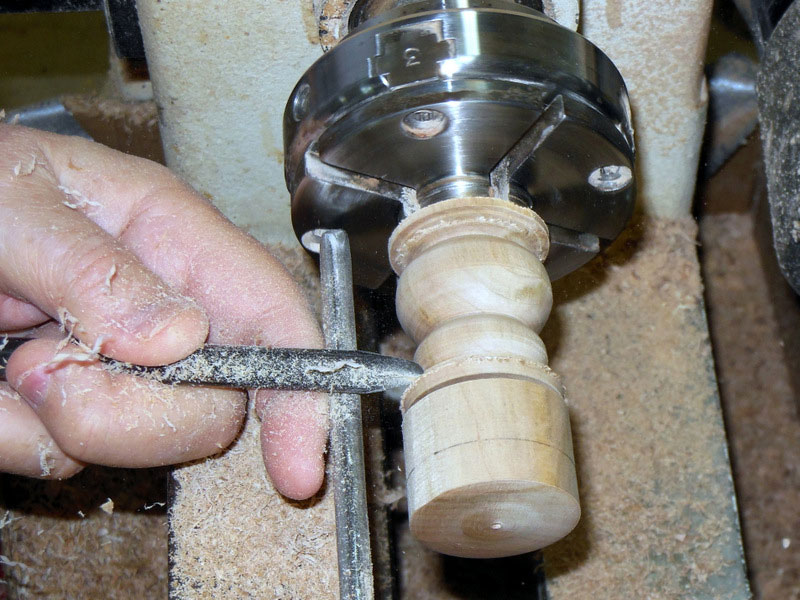
The hat brim should extend slightly over the head, so don't remove too much material there initially
(Figure 44). If you didn't make the brim cut earlier, do it now; cut straight in with a parting tool about ¼
inch about the head.

|
Figure 44 - Narrow the diameter of the hat brim
down a little
|
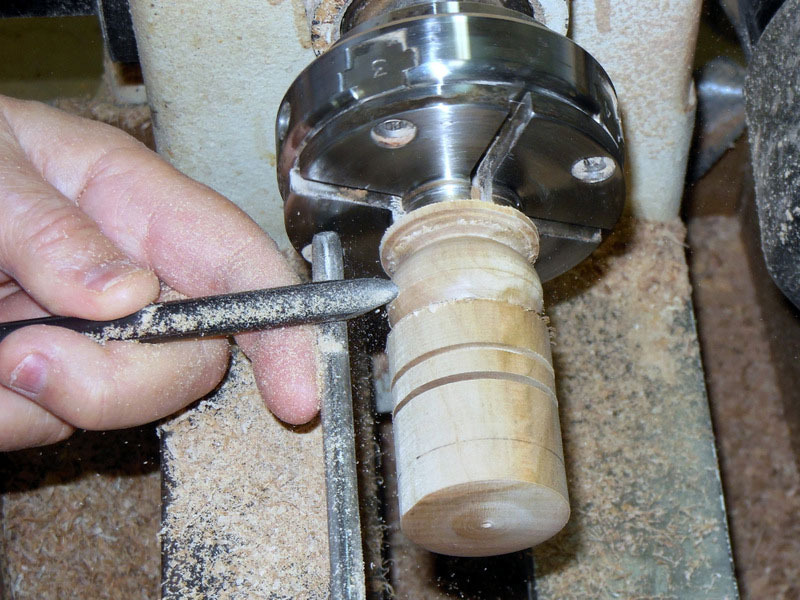
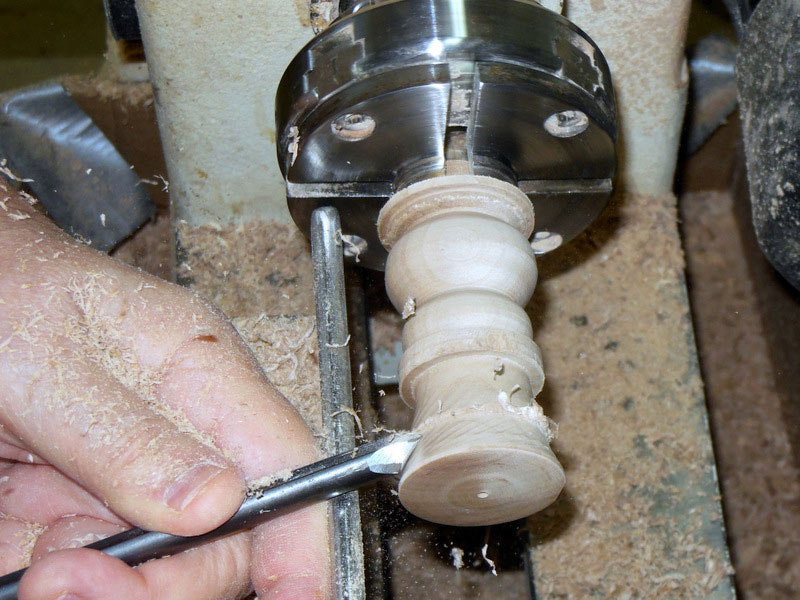
Then start turning the top of the hat. You want a slope from the top down to the brim. Start to the right
of the brim, maybe a quarter inch (Figure 45), and cut in with the spindle gouge, down to the brim.
Move a bit more to the right, and do it again (Figure 46). Soon, you'll be making a smooth cut from the
top edge of the hat all the way down to the brim (Figure 47). This gives the hat (a top hat, by the way) a
jaunty appearance (and snowmen
know
jaunty, let me tell you!).
|
Figure 45 - Start the top of the hat by cutting the lower
edge
in, narrowing the hat from the top to the base
|
|
Figure 46 - I think it looks best when the maximum width of
the hat is about the same as that of the head...
|
|
|
Figure 47 - So keep working the hat until it is the right size
|
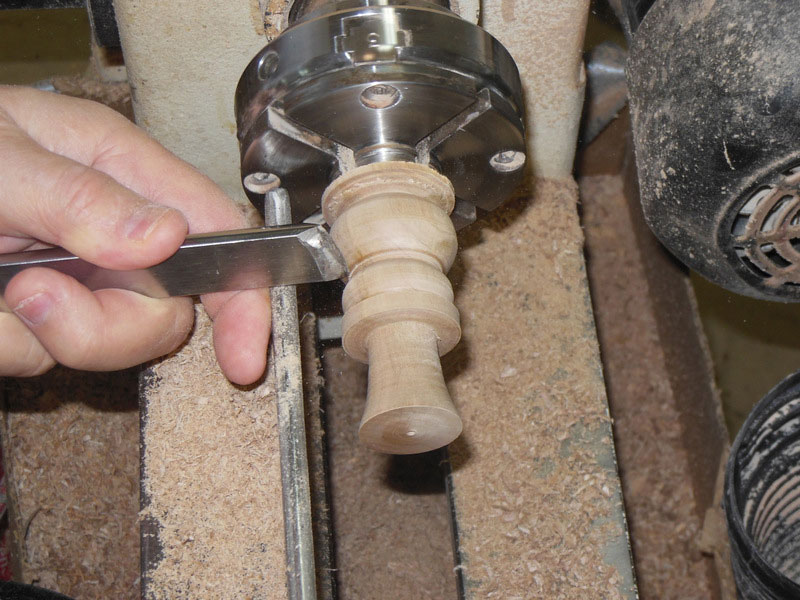
If you're confident with the skew chisel (or if you're just wild and crazy), make a paring cut at the top of
the brim, to remove the rough top surface (Figure 48). You can also use the skew to clean up any tool
marks that might be in the grooves between the brim and head, and head and body (Figure 49).

|
Figure 48 - If you're confident with the skew, use it to
smooth the top edge of the brim, and narrow it if necessary
|

|
Figure 49 - You might also want to use the skew to clean-up
any tool marks left by using the gouge in the tight corners
|
Keep working on the body and head and hat until it looks the way you want it.
Now it's time for sanding. Since it's a small ornament, sanding doesn't take long, thank goodness! I start
sanding 180 grit and go up to 600 grit – I want a high shine when I'm done.

|
|
Figure 50 - Sanding time!
|

|
|
Figure 51 - Sand all the corners, any roughness will show!
|
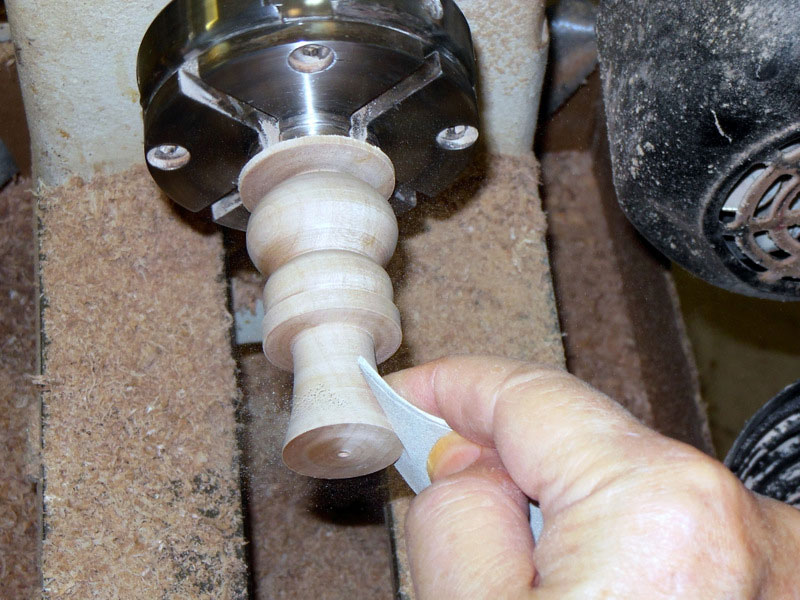
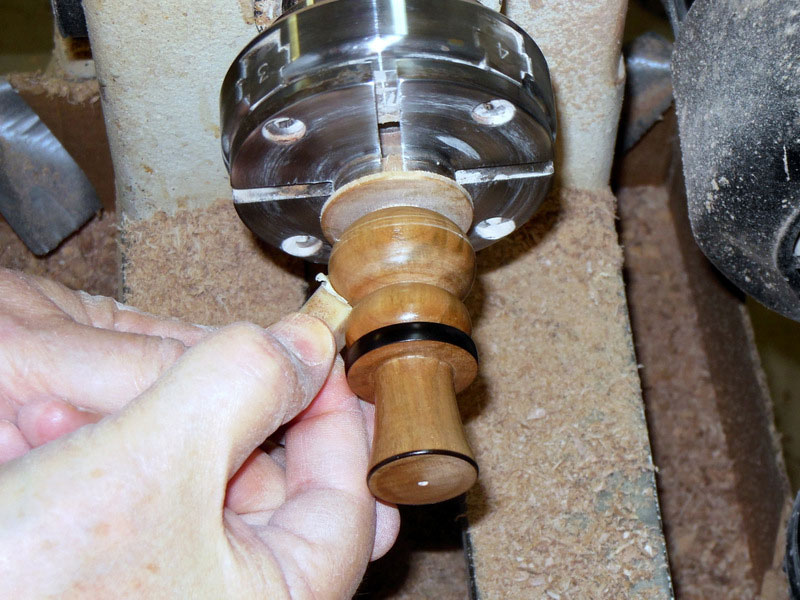
After sanding, I use a piece of paper towel or scrap of exhausted sandpaper to burn the brim (Figure 52)
and the top edge of the snowman's hat (Figure 53) by holding the paper against the edge while the lathe
is running at high speed.

|
Figure 52 - Use the non-abrasive side of a piece of
sandpaper to burn the edge of the brim…
|
|
|
Figure 53 - ...and the edge of the top of the hat
|
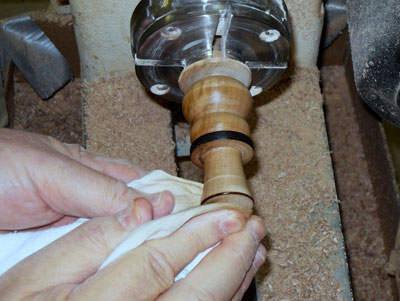
I use a
friction polish
for small items like this. What I use is just white shellac, thinned a little with
alcohol. You can also buy it premade, where it includes wax, I believe. With the lathe off, use a paper
towel and rub the friction polish all over the snowman, paying careful attention to the joints between
the body, head, and hat (miss a spot, and it will show).
|
Figure 54 - With the lathe off, wipe friction polish over
the whole ornament
|
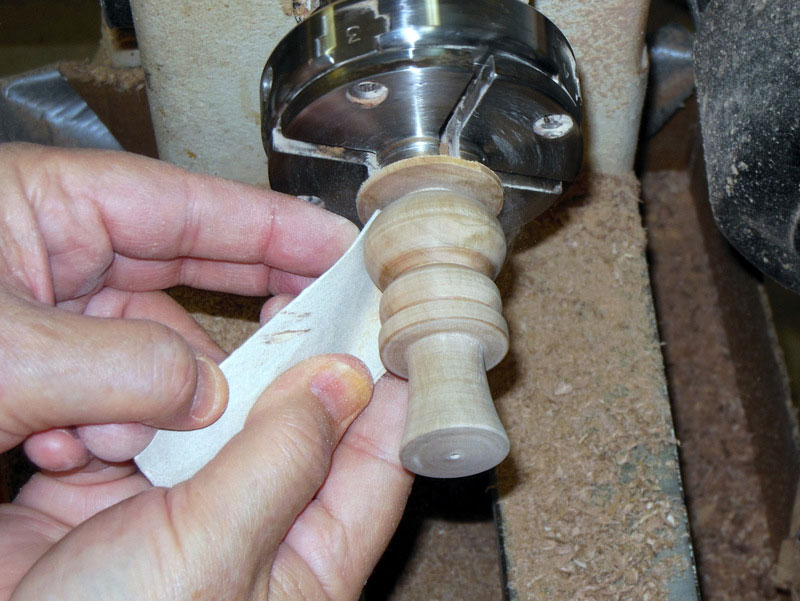
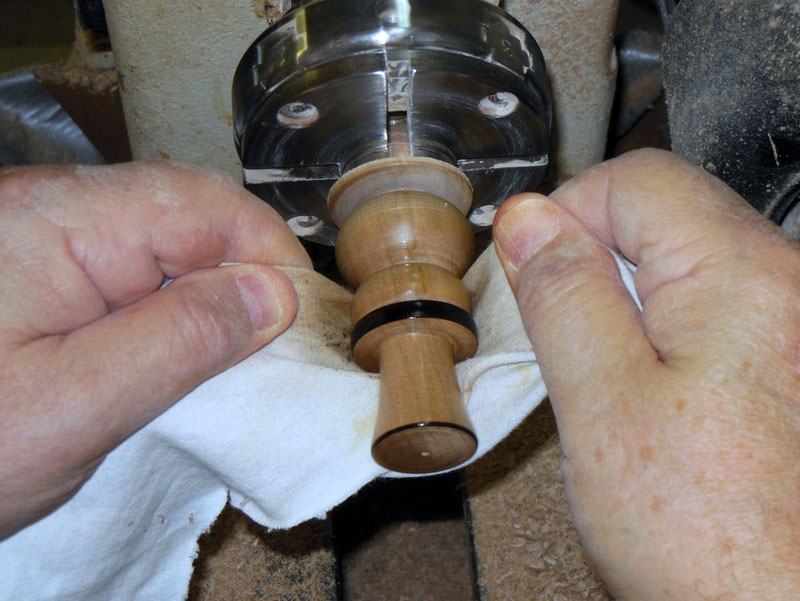
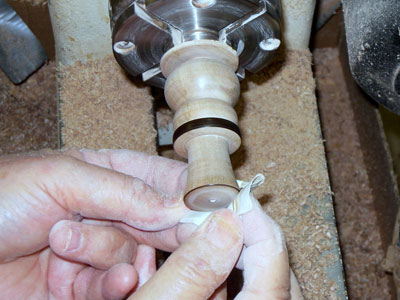
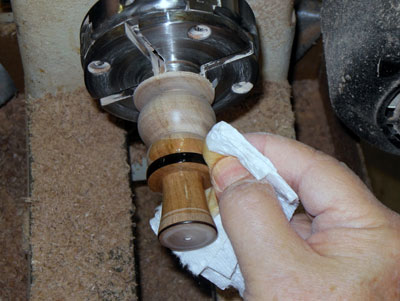
Then, with the lathe running, apply a coat of wax
by holding the wax stick up against the workpiece (Figure 55). Use a paper towel or cloth (paper towel is
safer) to polish it until your fingers are uncomfortably hot (Figures 56 and 57), melting the wax and
shining the surface.

|
Figure 55 - Turn the lathe on and apply a coat of
Carnuba Wax
over the surface
|
|
Figure 56 - Take a paper towel or rag and hold it tightly
against the ornament, with the lathe at high speed...
|

|
|
Figure 57 - ...this melts the wax, then polishes the surface
|
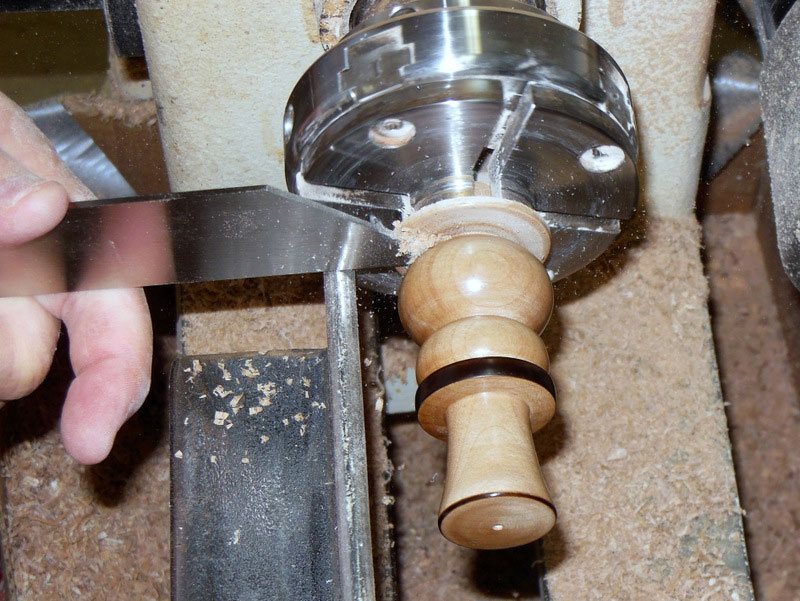
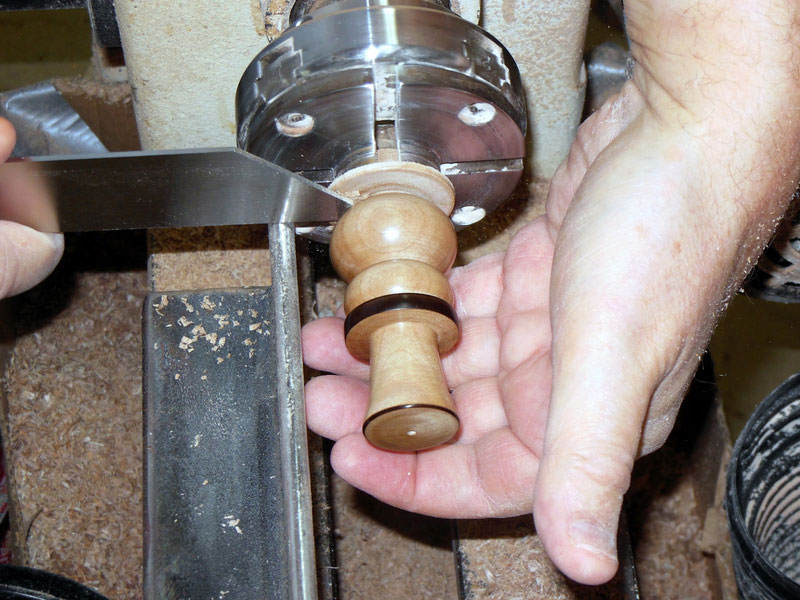
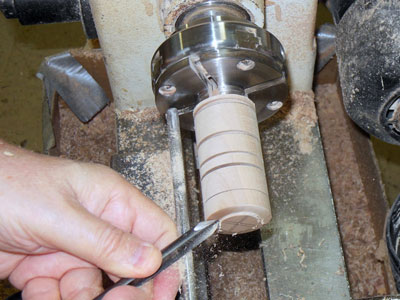
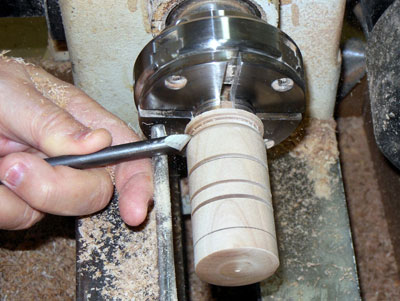
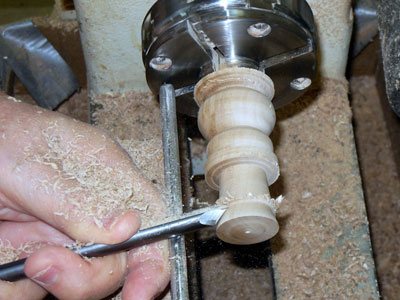
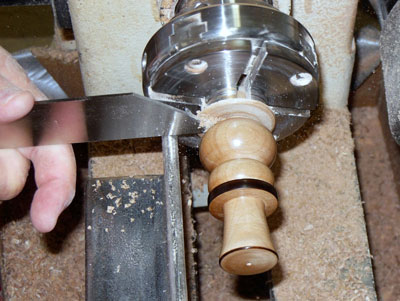
The snowman can be parted off now.
|
Figure 58 - Use a parting tool to cut in at the
base of the ornament...
|

|
Figure 59 - ...and be ready to catch the piece
when you cut through
|

|
Figure 60 - Use a chisel or knife to remove the stub
on the bottom
|
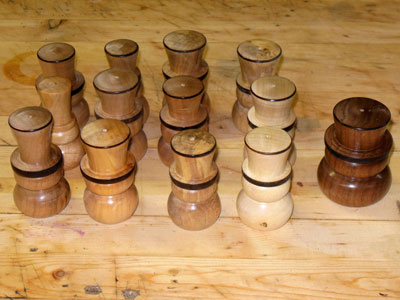
This completes the turning of one snowman ornament. Only a dozen or so more to go!
|
Figure 61 - After a couple of hours,
I have my first set of snowmen turned
|
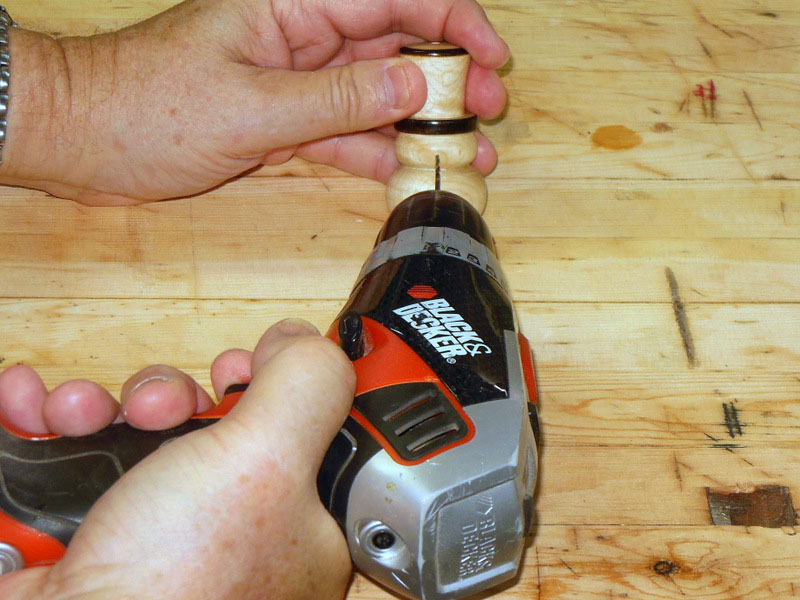
The snowman is ready to get a face now. First drill a very small hole (I use 1/16 inch) for the nose, just
below center on the head section.

|
|
Figure 62 - Drill a 1/16" hole in the snowman's face
|
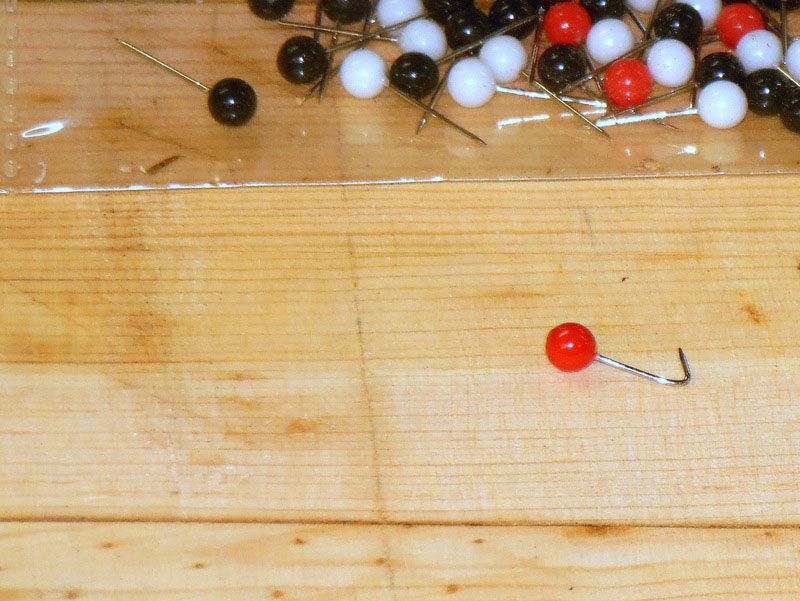
Take a map pin and bend a short hook on the sharp end of
the pin.

|
Figure 63 - Bend a tight hook on the sharp end of a map pin
(sharper than this picture shows!)
|
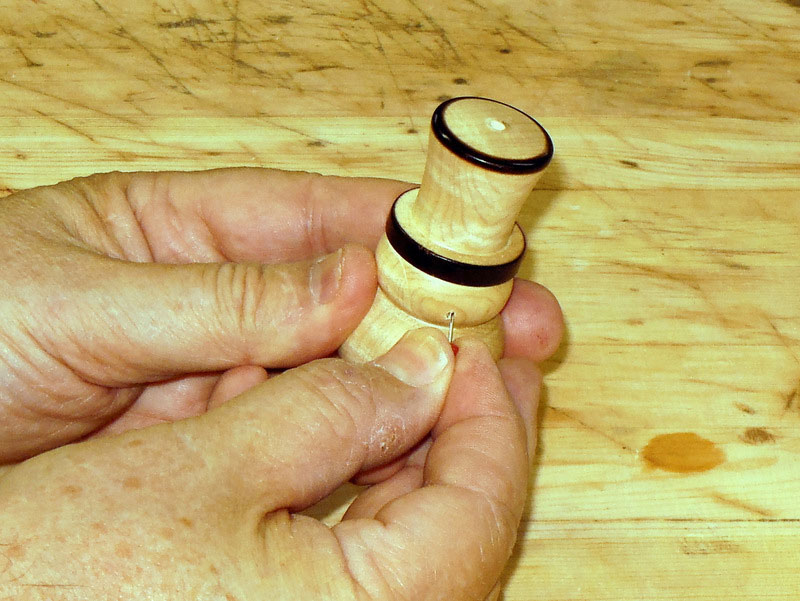
This hooked end is pushed into the hole just drilled, so you may have to experiment
some to get it right. It
must fit tight
into the hole – having it come out is not an option, since kids may
decide to take the ornament off the tree and play with it. The bend on the pin, with the sharp end
pointing up, will ensure that the pin cannot be pulled out of the hole. When you've got the bend right,
put a drop of glue in the hole, and push the pin in

|
|
Figure 64 - Push the bent pin into the hole just drilled
|
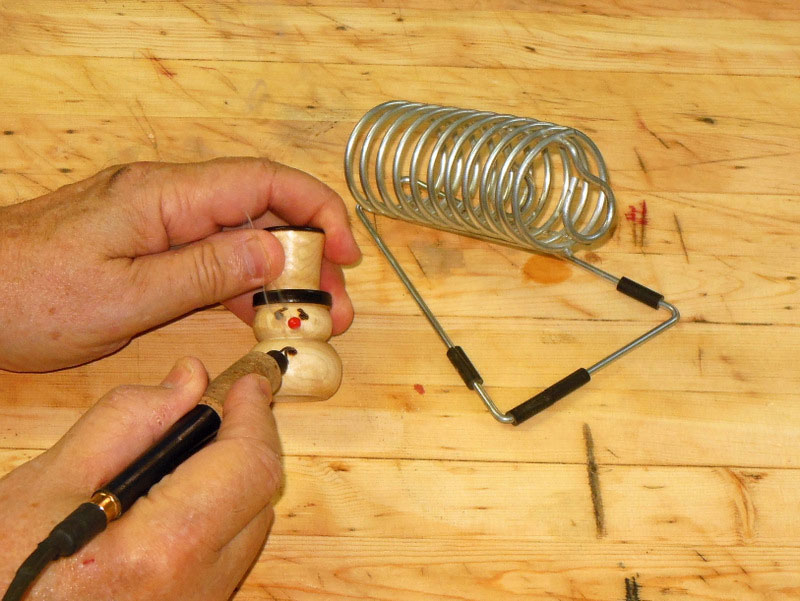
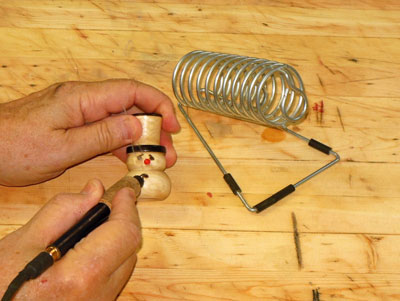
I use a wood burning tool to put on the snowman's eyes and buttons; you may want to use a
felt-tip pen if you don't have a wood burner. The fun thing about these snowmen ornaments is putting
different faces on them; it's amazing how just a couple of lines will change the expression on the face.
|
Figure 65 - Use a wood burner (or pen) to put eyes
and buttons on the snowman
|
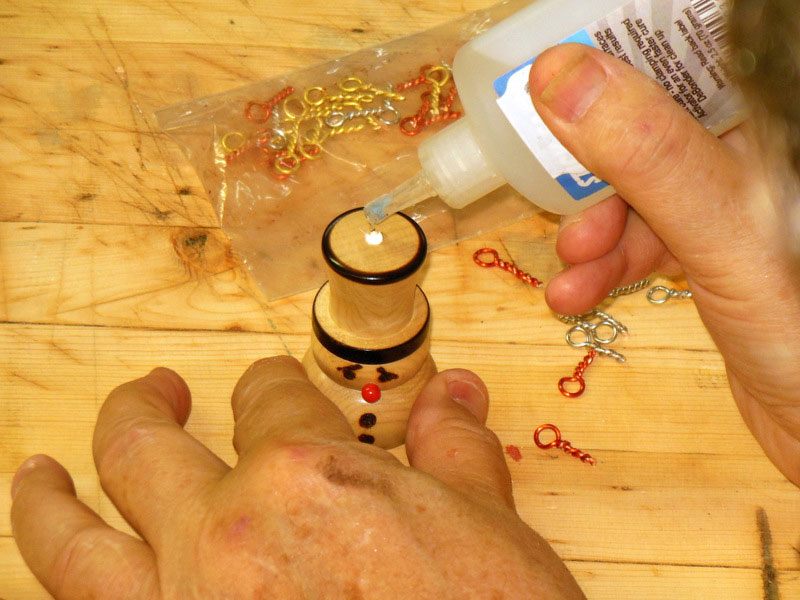
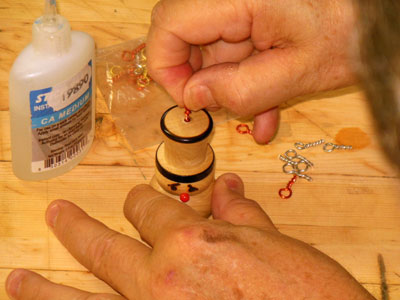
Last step on the snowman. Put a drop of glue
(I'm using thick CA glue)
on the hanger hole on the top of
the ornament, then push or screw in the hanger. The hangers that I make by twisting 16
gauge craft wire (more about this below) will screw in the 3/32 inch hole tightly.

|
|
Figure 66 - Put a drop of thick CA glue on the hanger hole
|
|
|
Figure 67 - and screw the hanger down into the hole
|
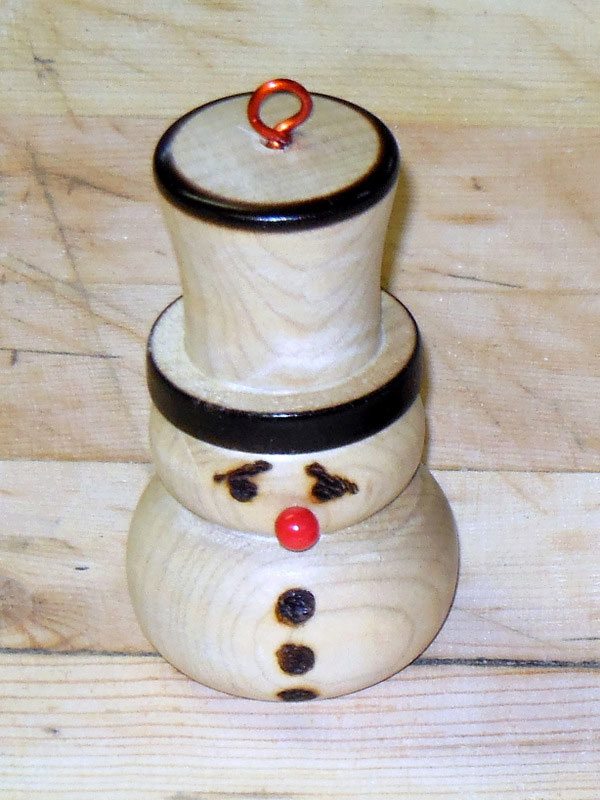
The snowman is done!
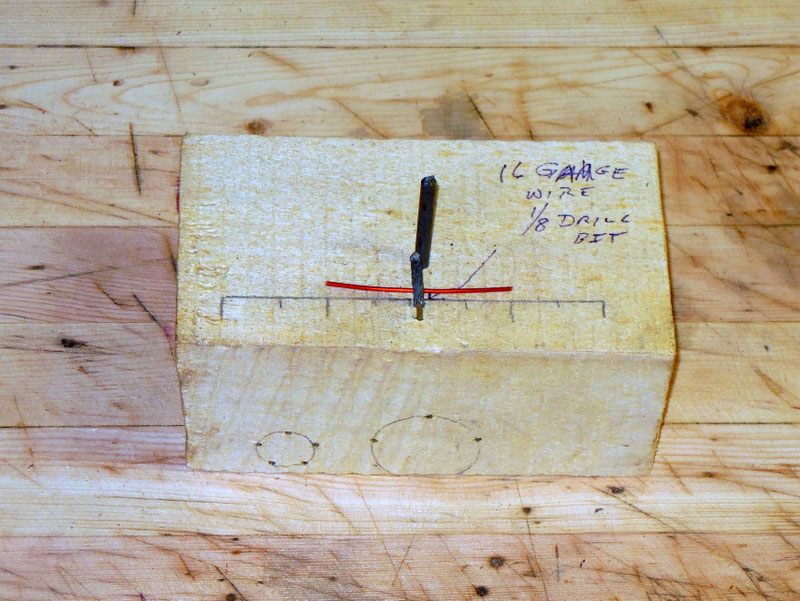
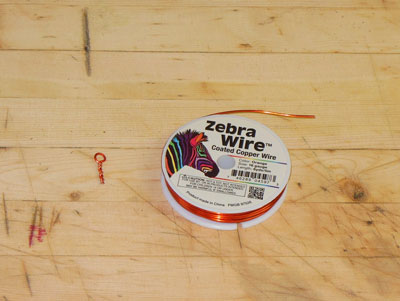
Making the Hangers
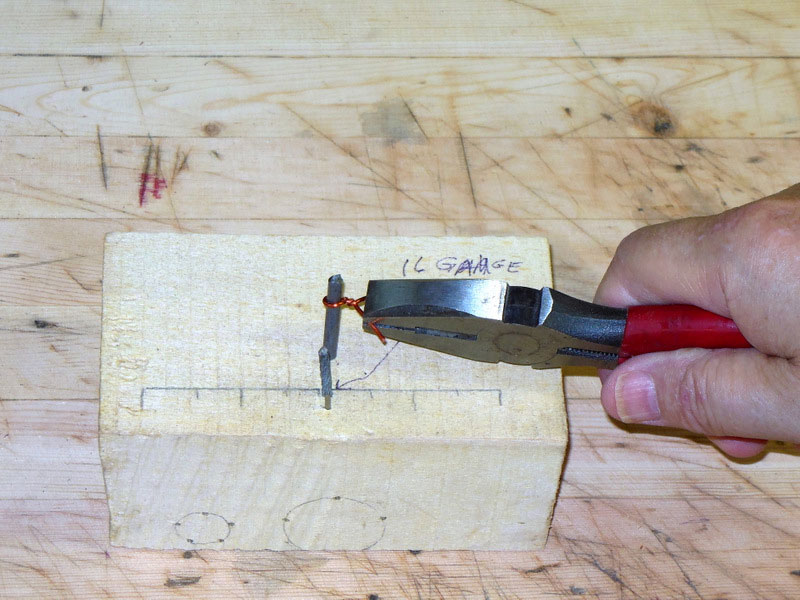
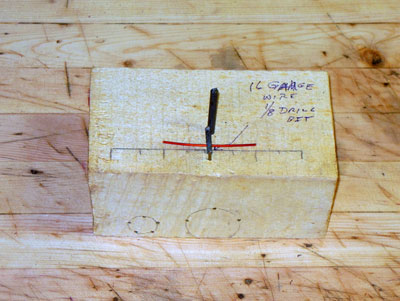
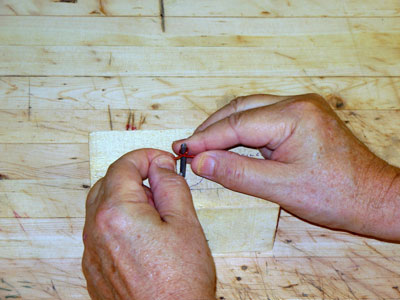
I mentioned earlier that I make my own hangers, instead of just purchasing screw hooks. This is quite easy to do. I use colored craft wire, 16 gauge. I made a small bending jig (very sophisticated - a nail hammered into a scrap of wood), and I form a loop around the nail, then twist it tight, and cut off the excess.
|
|
Figure 69 - Make your own hangers! with craft wire
|
|
Figure 70 - A homemade bending jig for hangers, with a
one
inch piece of wire ready to be bent
|
|
|
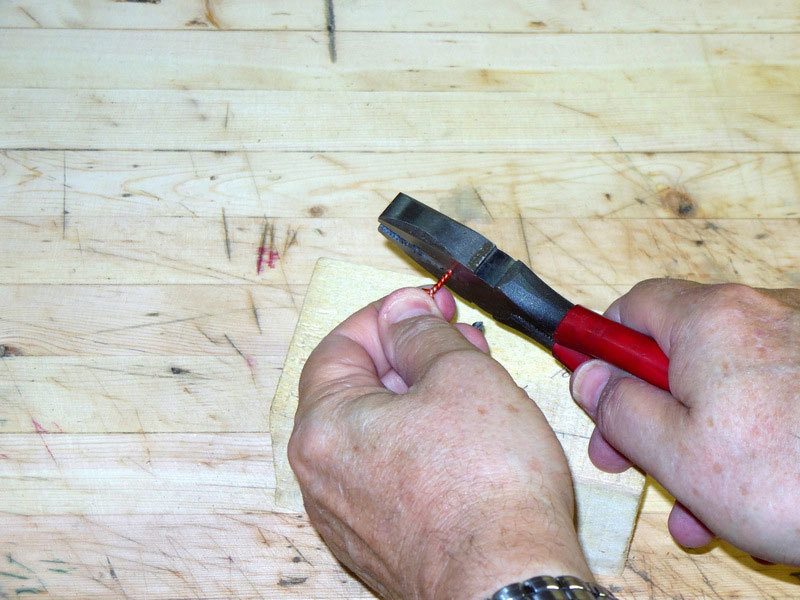
Figure 71 - Form the loop on the hanger
|

|
|
Figure 72 - Twist the hanger ends together
|

|
|
Figure 73 - Cut off the hanger to about 1/2 inch long
|
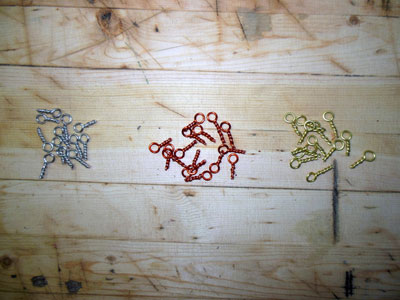
|
|
Figure 74 - The three dozen+ hangers for my 2014 ornaments
|
For more instructions on making the bell and light bulb ornaments, check out the Highland Woodworking blog.
CLICK HERE
to view Part 2 - Creating a Bell ornament
CLICK HERE
to view Part 3 - Creating a Christmas Tree light ornament
CLICK HERE
to see Rick's photo album of completed ornaments
You can email Rick at
carlrmorris@att.net