Celebrating Woodturning by Teaching
by Temple Blackwood
Castine, ME
Note: Click on any picture to see a larger version.
Congratulations to Highland Woodworking in celebration of their 50th publication of the Highland Woodturner! Recognition of this milestone presents a wonderful opportunity to acknowledge past achievements, chronicle the history, and establish new goals for moving forward. The challenge of the first 50 issues has been met which calls for a celebration; the challenge of the next 50 and meeting a new standard of expectations lies before the editors, leaders, and contributors. Acknowledging this milestone inspired me to reflect upon the variety of such occasions during my own career and to revisit the relationship between my "first time" and "celebration milestone" experiences in woodturning.
This past March/early April, Lt. Ryan Mechtel, COO of IMSN (International Maritime Security Network) came to Maine as the lead instructor presenting a two-weekend training workshop for a select group students at the Maine Maritime Academy in Castine, Maine. As they have in the past, the team of IMSN instructors stayed in the office/apartment over
my shop, and from their arrival Ryan began talking about finding a day in the shop when he could begin learning to turn wood. Apparently the desire to explore woodturning has been on Ryan's mind steadily since he stayed above the shop a year ago, and he arrived with this as a priority for his off-time in Castine.
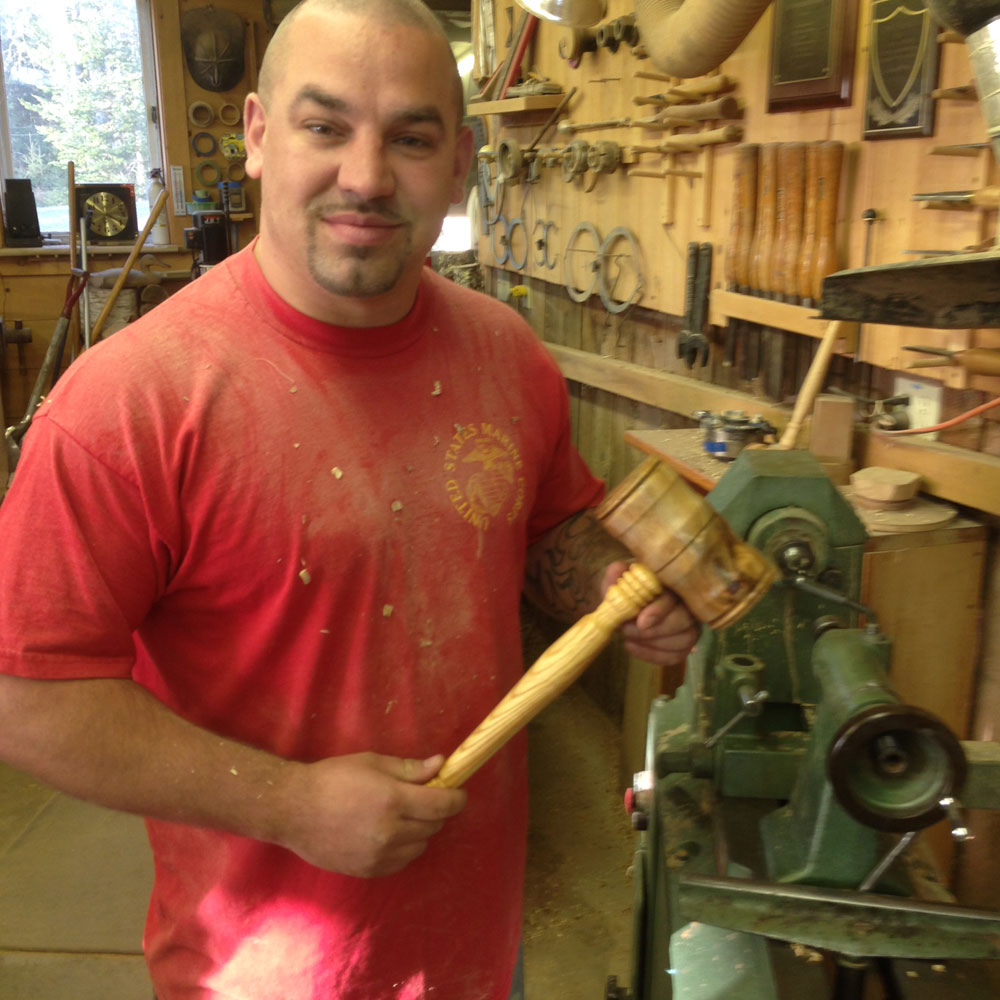
With considerable past experience as a part-time contractor working with tools and wood, Ryan approached his "first time" woodturning lesson wanting to turn a large, ceremonial gavel that would be a gift to recognize one of his friends currently running for the office of magistrate in their local home town in Pennsylvania. Working together, Ryan and I examined several of the gavels and mallets in my shop/gallery, discussed size, color, and texture choices for his gift, and selected wood blanks of brown ash for the handle and rock maple for the head. With this being Ryan's first woodturning experience and wanting to adapt my usual beginner instruction to respond to Ryan's goal, we started with the ash handle blank.
|
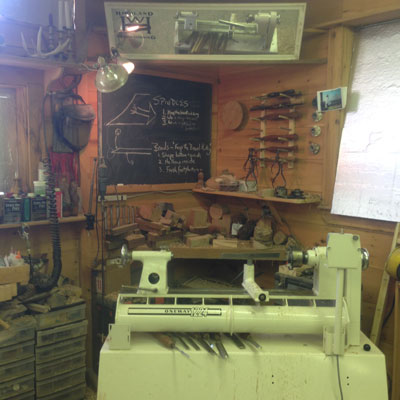
As is my process for beginners, we began at the demonstration lathe where I could show 'n tell the basic parts of the lathe, safe practices, and demonstrate tool use. With a strategically placed overhead mirror behind the lathe, students can observe demonstrations from the perspective of above and behind, similar to what the turner sees. Addressing and naming the first two tools for this project – the
Roughing Gouge
and the
Skew Chisel, we reviewed the critical rules for turning spindles – keep the bevel rubbing, cut from large diameter to small, and work right to left. Terminology, the naming of parts and process, frames the core of clear instructional communication, and Ryan embraced the plan by repeatedly using the correct terms and asking questions about the terms throughout the lesson.
Safety for both the turner and for their audience goes well beyond using proper eyewear and dust management. It involves understanding the importance of mounting the work securely, being thoughtful about the turner's body position, managing the careful placement of the tool rest, positioning the tools properly to keep the bevel rubbing and make efficient cuts, and remaining aware of others working and watching in the shop.
While experience based on hands-on practice is the best teacher, taking the time to talk through each step in design and tool use, while blending the hands-on sensual activity with an understanding of the physics and mechanical positioning helps students begin to build the strong bonds between the physical sensations and mental focus.
For Ryan, the delights of applying his past contracting experiences to this new, physically rewarding activity was clearly exciting, and he stopped the lesson frequently to make note of the similarities and differences. His intense interest and eager attempts to replicate the demonstration paid off in consistent success.
|
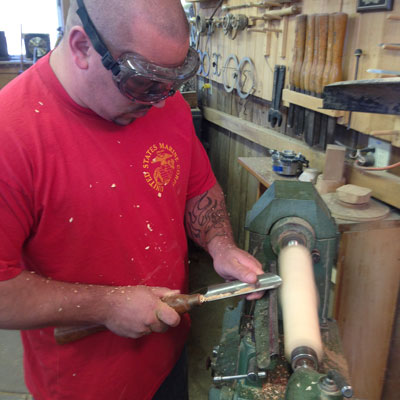
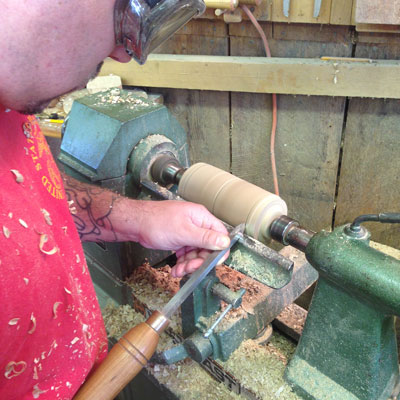
Ryan handled his first roughing gouge addressing the handle blank with concentration and growing understanding. Once rounded, Ryan first observed and then tried out his skew chisel for the smoothing. Guided at first by my hand, early on he experienced the famous "catch" of the long point and was able to explain to me what he knew he had done wrong. While that was not his last catch, he was clearly a natural with the skew and soon smoothed his handle to a pleasing design of curve, shoulder, and bead. His natural hand-eye coordination and understanding of how cutting tools work made him an early success, and he soon came to understand why many turners feel the skew chisel is the best tool in the box.
Once his handle was rounded and smoothed, we returned to my lathe to talk about the critical design issues of how to manage the bottom of the handle, where to put the swell and taper, how to create turned details (beads, coves, v-cuts) to make the critical transition between the handle and the head, and finally how to turn and size the tenon that would later join the two parts.
Again, from a simple demonstration and explanation of the 3/8" beading and parting tool and then making coves with the smaller detail gouge, Ryan began with a sharp pencil to lay out his design which he then worked with the tools practicing the principles of large diameter to smaller, and working from the right to the left.
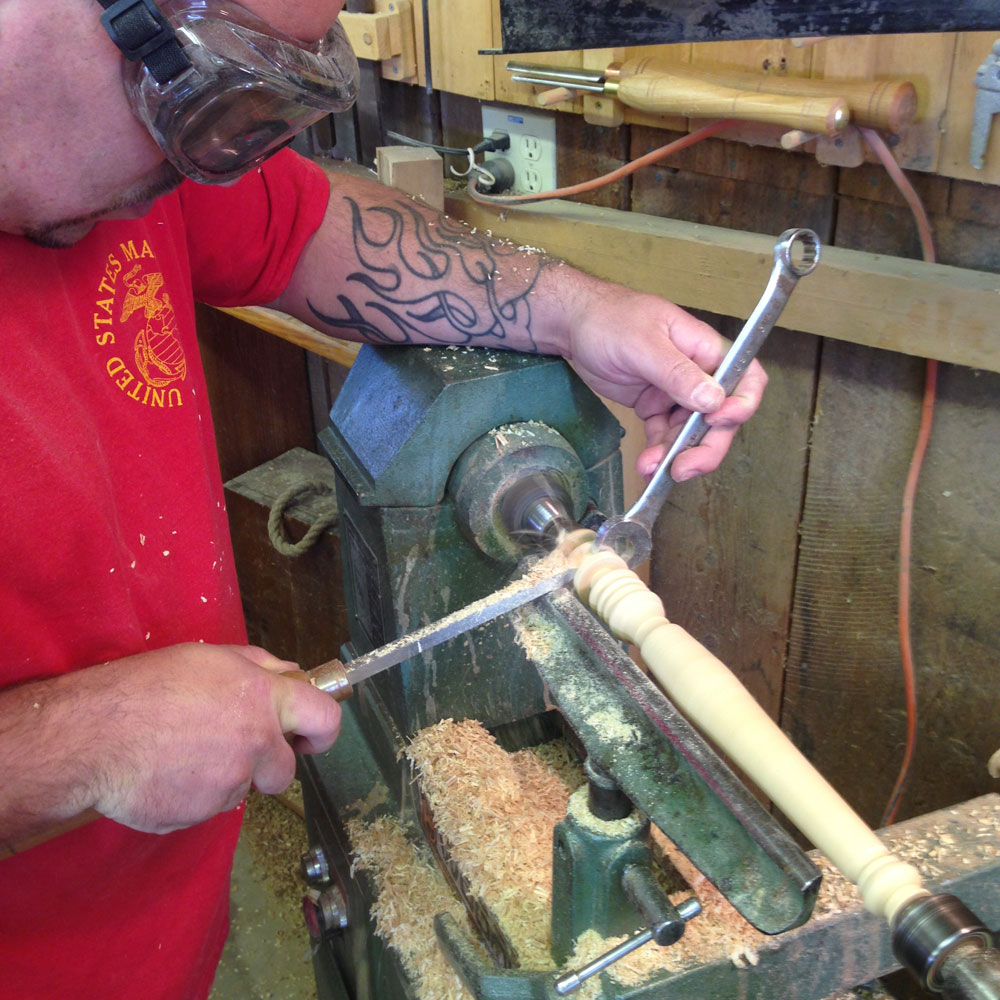
Having observed a short demonstration at the instructor's lathe, Ryan discovered a new use for an old tool. His 3⁄4" "fixed caliper" (open wrench) establishes a true 3⁄4" tenon for the handle.
Sanding
through the grits with the lathe running makes a tiresome chore rewarding and quick. Once again, Ryan's past experience with sandpaper and wood was enhanced by the quick and easy opportunity to harmonize his own efforts with the mechanical advantage offered by the spinning lathe. Through the process of sanding from a course 180 grit through 220 and finishing with 320 which was then used again with the lathe stopped to sand by hand with the grain, Ryan correctly left the last of the fine sanding dust on his handle.
This was especially dramatized when Ryan applied the friction polish I use in my shop, a 1/3rd each measure of shellac, boiled linseed oil, and turpentine stored in an air-tight plastic bottle (dish detergent bottles work extremely well for this). Obviously these materials do not mix well, and the turner must shake up the bottle each time to mix them before applying.
Both Mylands and Shellwax
manufacture similar excellent products with additional polishing qualities.
Applied with a paper cloth (safer than cloth) with the lathe running at a middle speed, the polish uses the remaining sanding dust as a filler, and the heat of the friction causes it to dry. This method can work as a final finish or as a primer for applying other finishes off the lathe. Any spilled or splattered finish cleans up easily with denatured alcohol. With a little practice, the finish can be dribbled directly on the spinning wood with the paper cloth, applying it to the piece without spattering the lathe or turner. Most turners find the incentive in doing this correctly is very motivating, and soon, like correctly positioning the skew chisel for a smoothing cut, it all becomes second nature.
|
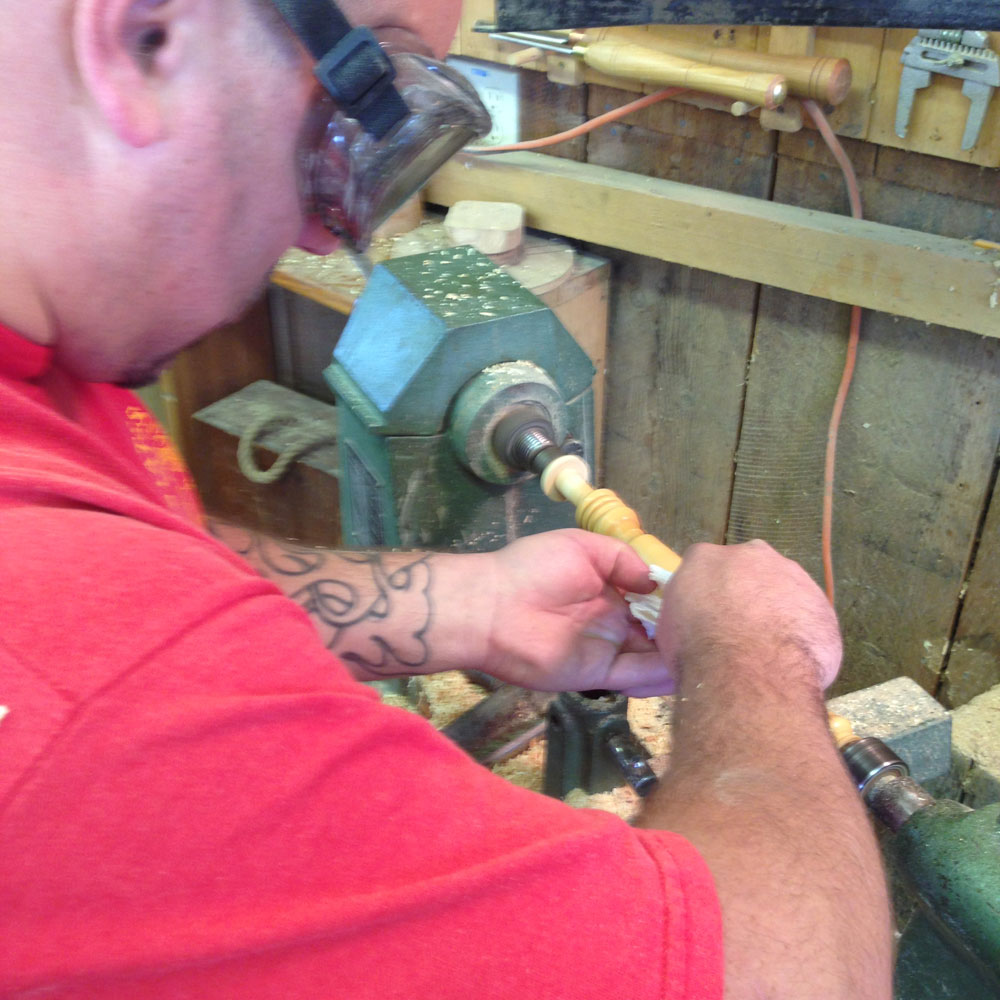
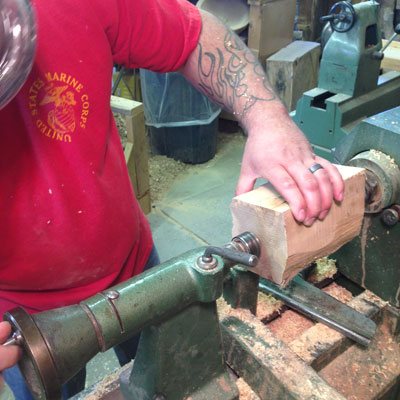
With the handle finished and waste blocks cut away using a V-block on the bandsaw, Ryan shifted his attention to the gavel head using a block of rock maple chosen for some particularly interesting figure in the heartwood. The block was cut longer than the design optimum. The exposed part of the handle should be between 2 and 2-1⁄2" longer than the length of the head and the finished diameters of the handle and head need to be pleasing to the eye.
Following the closely guided steps of turning the handle and a new demonstration, Ryan mounted the blank for the gavel head between centers by himself.
With the bevel rubbing, Ryan took the blank from rough to round and settled in his "artistic eye" the sizing of his final diameter by holding the finished handle in position with the lathe stopped.
Also with the lathe stopped, he set the final length of the gavel head. By using a compass with pencil Ryan marked the positions of the center V-cut and the outer faces of the gavel.
After restarting the lathe, Ryan used the 3/8" beading and parting tool to reduce the size of the waste blocks, create slight shoulder cuts on each end, and cut the center V-cut. The center "V" is both an attractive decoration and a practical aid for later drilling the 3⁄4" hole for the handle tenon. The slight shoulder cuts on each end are also the beginnings of creating an attractive beading and cove decoration while establishing a practical method of the gavel being mis-used and later breaking out an unsightly chip. The outer half of the shoulder will become the guide for shearing the convex face of each side.
|
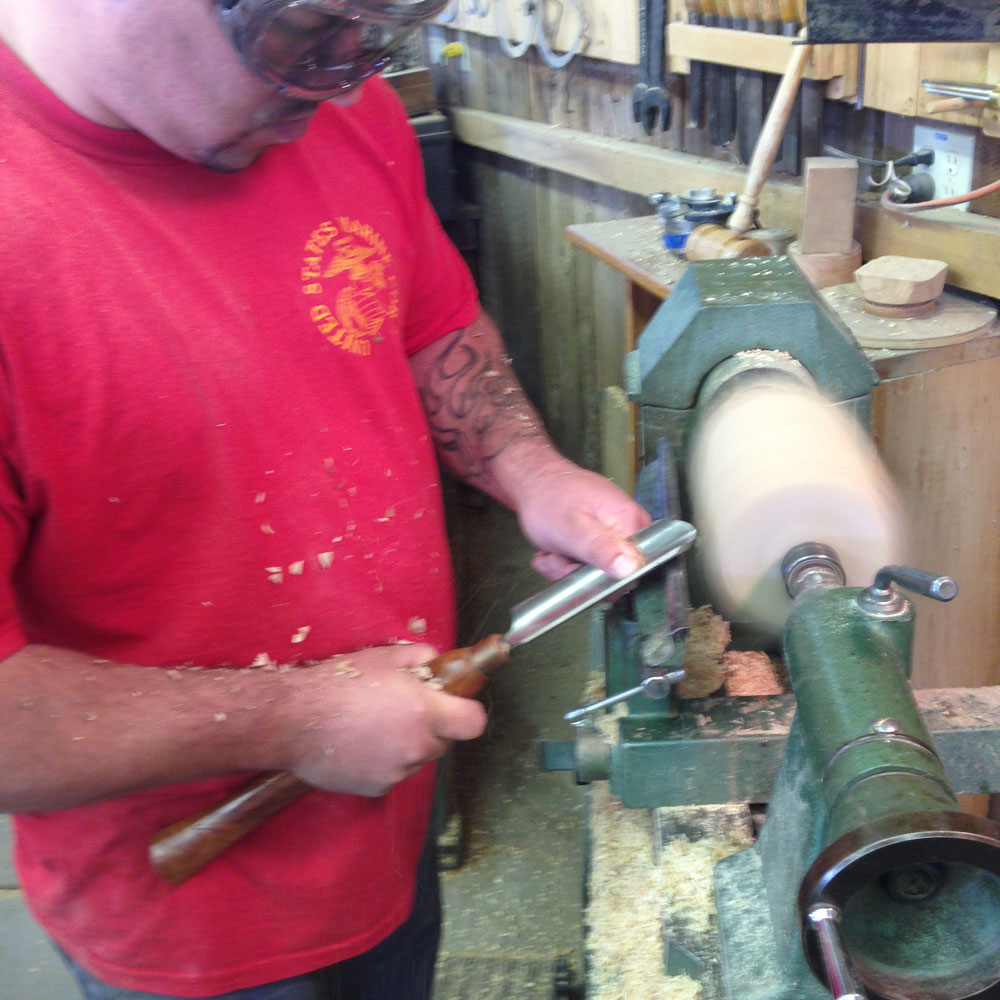
Working from his balanced marks with the 3/8" beading tool, Ryan completed a small bead on each end, slid a 1⁄2 V-cut to make it more dramatic and, after switching to a medium gouge, finished his planed shallow cove on each side of the gavel head. After reducing the waste blocks further, Ryan chose to use the fluted parting tool rather than the skew to make his finish cuts on the convex face ends.
After a full sanding, careful inspection, and polishing, Ryan again worked with the fluted parting tool to reduce the waste blocks while furthering his final convex face cuts, first on the right (tailstock) and then on the left (headstock) leaving the gavel head attached by a 1/8th" pin that he cut off at the bandsaw after carefully removing the head from the drive center. Using a bench chisel, he carefully pared away the remaining face, hand-sanded, and then hand-finished it to complete a smoothly finished, slightly curved face to the gavel on each end.
At the drill press using a V-block, Ryan chose "the most uninteresting" part of his gavel head to drill the 3⁄4" hole for the handle. This exposed the most interesting figure that had originally inspired his choice of wood to be showing when the gavel was laying on its side.
Measuring carefully to be sure the hole was slightly longer than his handle tenon was an easy to understand concept because with the tight fit, the handle would be nearly impossible to pull back out. Using a large pair of slip-joint pliers, Ryan crimped the tenon of his handle to create groves for the
Titebond Glue. He then spread a little glue inside the hole and with a twisting motion to further distribute the glue, he inserted the handle tenon in the head. When he could not push it any further, he stood the new gavel on end and tapped it firmly on the bench until the tenon was fully seated in the head.
Between the tight fit of the tenon and the natural swelling of the compressed tenon responding to the water-based glue, there was no concern about waiting for the glue to dry.
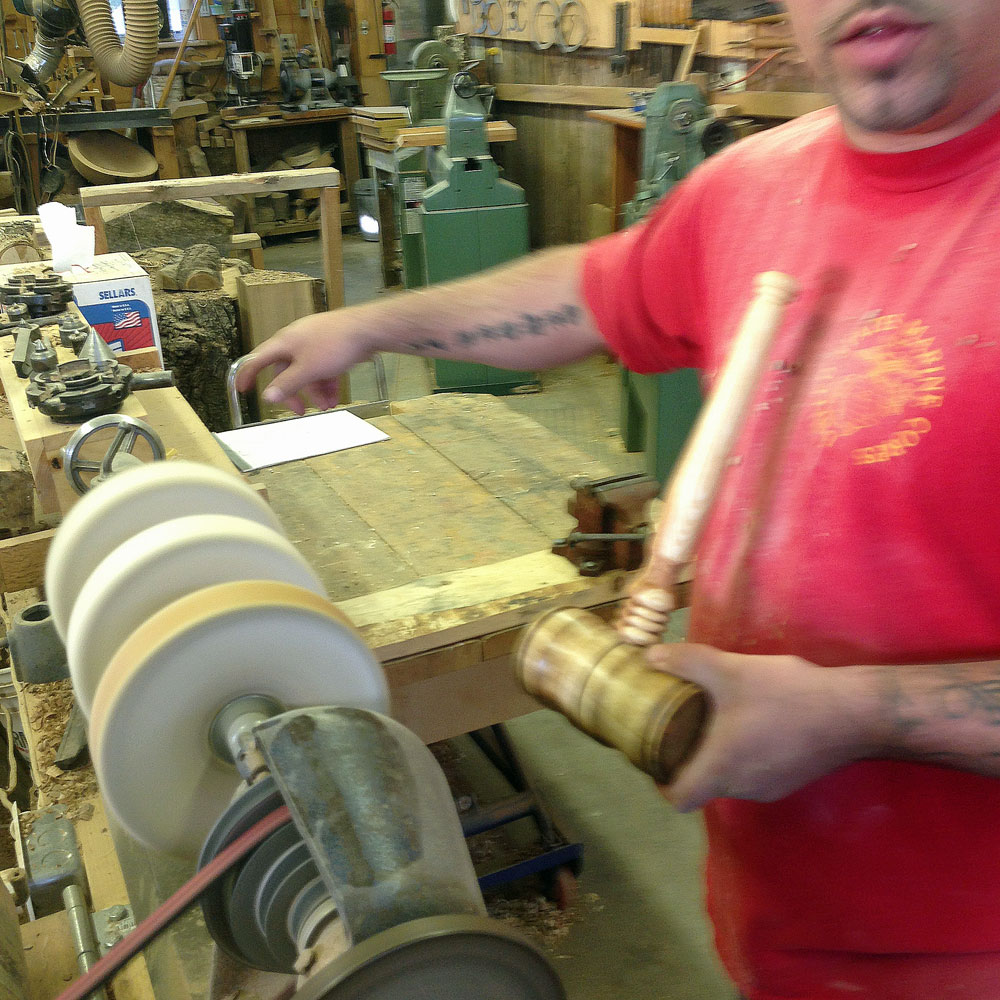
After a short demonstration about safety and technique, Ryan polished his newly assembled ceremonial gavel using the
Beall Wood Buff System. After removing his safety eyewear he was ready to pose proudly for the camera. His well-anticipated and well-earned pleasure was overwhelming, and he continued to talk about the details of his remarkable experience.
Once finished, we sat down for a rest and discussion about woodturning and his potential next steps. His first time turning experience was clearly a success, and he joined the ranks of newly addicted turners. He was further delighted to learn that the
AAW Symposium
this June will be near his home in Pittsburgh. Since leaving, he has written that he has already connected with a woodturning club local to his home.
Ryan's story is particularly dramatic because his personal motivation, his natural physical talents and past experience, and his desire to explore the artist within, all joined together on this occasion to promote his rapid advancement into the world of woodturning. He left with one major problem still to resolve. His pride in his accomplishment of planning, designing, turning, and finishing his first ceremonial gavel made him want to keep this one for himself rather than give it to his friend. He was clearly torn by this dilemma, and we discussed the prospects of his friend either not being elected to the position (although Ryan had already promised a gavel) or his prospects of keeping this one and finding a lathe, materials, and time before the election to turn another one.
This tremendously rewarding harmonic relationship between the wood, the machine, and the artistic/craft talent of the artist seems to offer endlessly desirable opportunities for learning and sharing between people. The generous offering of Highland Woodworking in making the Highland Woodturner freely available to everyone with computer access to the Internet is a celebration of the shared passions many of us have in our own passion for working with wood, especially as we explore the dimensions of our own artistic visions at the lathe.
Woodturning, for me, is quite personal and deeply rewarding. Each new piece of wood is a first time experience. Teaching is about the other people and my opportunity to share in their successful experience – also a deeply personal and rewarding milestone experience enhanced by the sense of connectedness and community in celebration of discovering the beauty that lies within each piece of wood.
Located in Castine, Highlands Woodturning gallery and shop offers woodturning classes and shop time,
a gallery of woodturned art, custom woodturning for repairs, renovations, and architectural installations.
Primary woodturner Temple Blackwood also demonstrates woodturning at Castine's Wilson Museum
Wednesday and Sunday afternoons in July and August as part of the museum's "Living History" program.
You can email Temple at
temple@highlandswoodturning.com
Take a look at Temple's Website at
http://www.highlandswoodturning.com/.