A Wobbly Weedpot - (the weedpot wobbles but it won't fall down)
by Rick Morris
Duluth, GA
Note: Click on any picture to see a larger version.
Do you remember weebles? (If you don't, you're either way too young for this article, or not young-at-heart enough). Weebles are those little kids' figurines with the great slogan "weebles wobble but they won't fall down". And that made them fun… push them over, they popped back up. Push them WAY over, they still popped back up. They really wouldn't fall down.
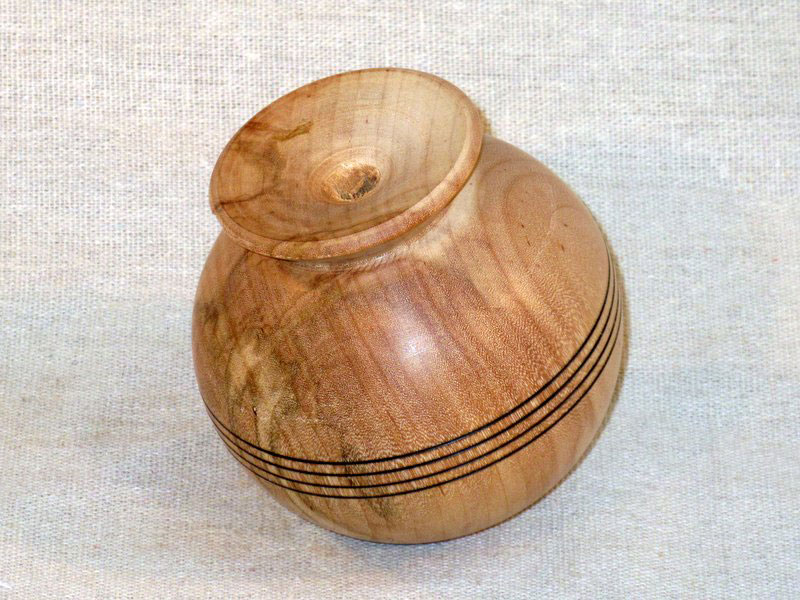
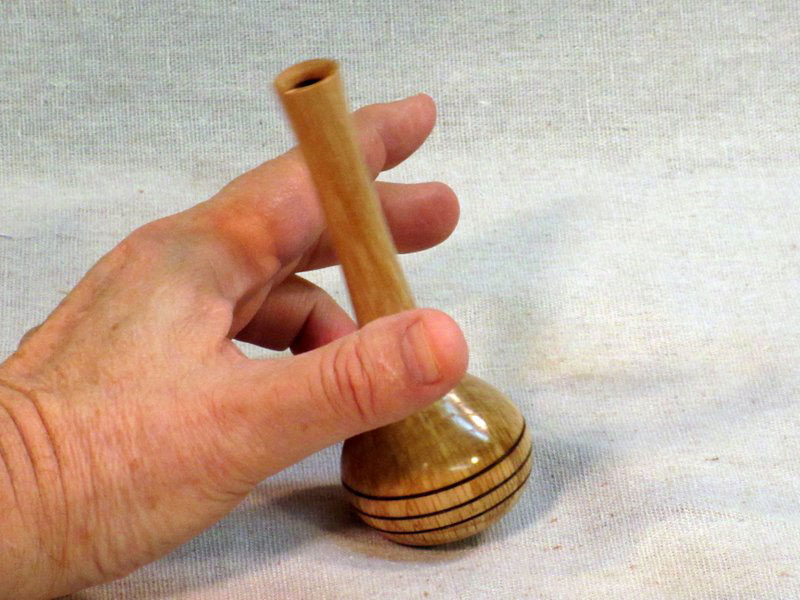
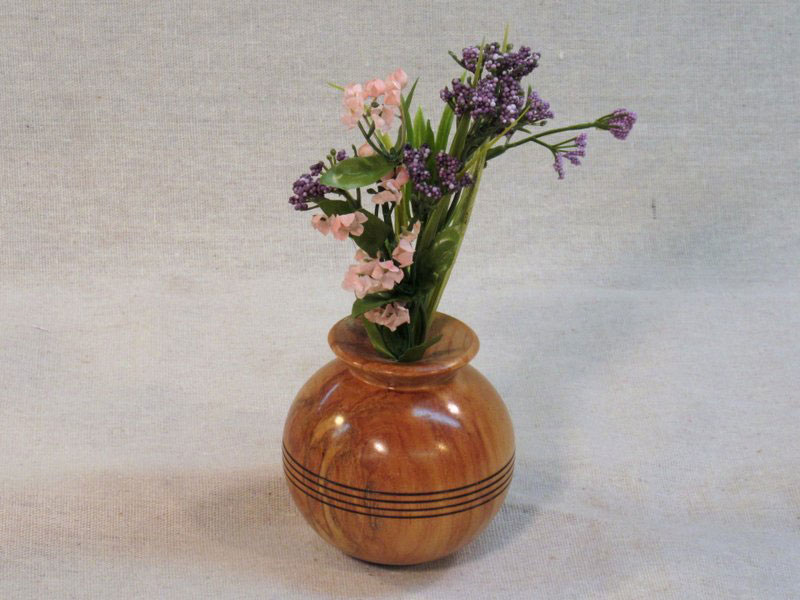
As I was recently contemplating my next weedpot turning, weebles popped up in my mind. I thought "hey, a weedpot that wobbles but won't fall down would be really cool!" Maybe not exactly practical, but that is really not an issue for a weedpot. See Figure 1.

|
|
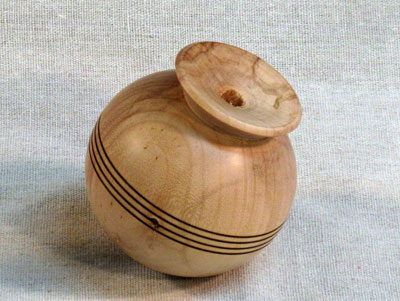
Figure 1 - A weedpot that wobbles but won't fall down.
|
Weebles have a weighted bottom and kind of an oblong shape – that makes them wobbly but fall-over proof. I decided that the weighted bottom was the key (it is, mostly), and started turning weedpots and then putting weight in the bottom.
Let me tell you, it's not as easy as it looks.
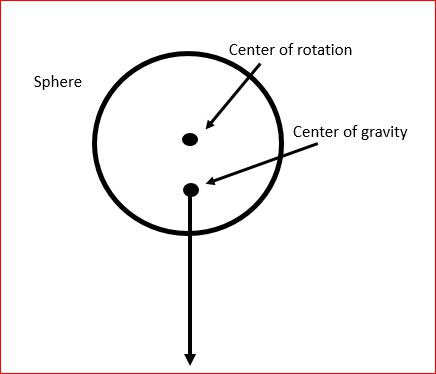
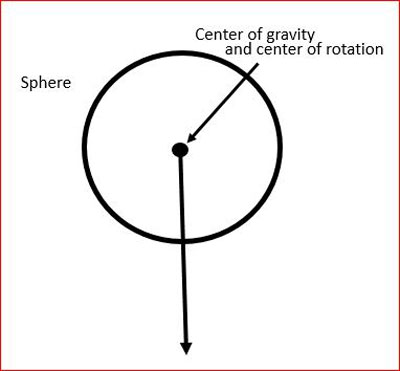
As I discovered after a lot of turning, the whole wobbling-but-rotating-back-upright-again thing is primarily due to displacing the center of gravity of the weedpot downward from the center of rotation of the sphere. In a normal sphere, the interior material is evenly distributed throughout. Therefore, the center of gravity is the same as the center of rotation (Figure 2).
|
|
Figure 2 - A homogenous sphere
|
Now imagine the sphere in the diagram above rolls to the right. What happens to the center of rotation and gravity? Nothing. They stay the same. The center of gravity always points straight down, right through the center of rotation.
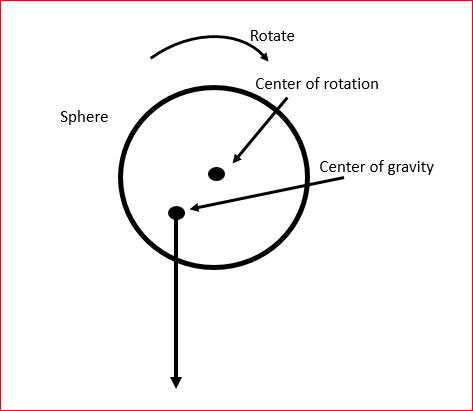
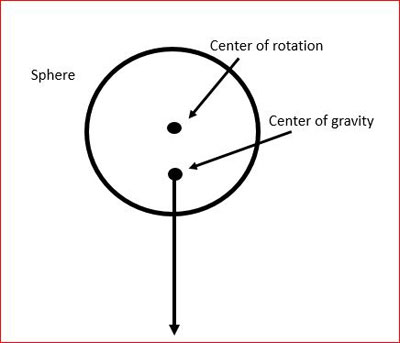
But what happens if we artificially lower the center of gravity? (Figure 3)
|
|
Figure 3 - A sphere with a lowered center of gravity.
|
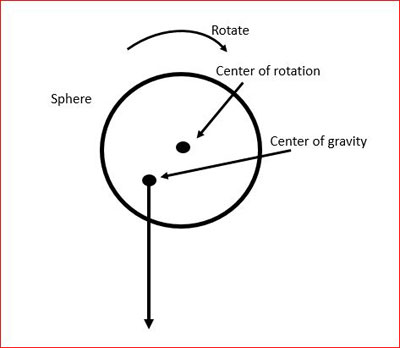
How? I thought you'd never ask. We put weight in the bottom of the sphere. This causes the center of gravity to be lower in the sphere (there is more mass in the lower part of the sphere than the upper part). Now, let's rotate the sphere (Figure 4).
|
|
Figure 4 - When rotated, the lowered center of gravity is
behind the center of rotation.
|
The center of gravity is now trailing the center of rotation. Instead of being stable at that particular position, gravity is exerting an off-center force on the sphere, trying to drag it back to a stable position where the center of gravity and the center of rotation are in line. The sphere wobbles backwards. If the center of gravity is displaced far enough inside the sphere, it will wobble, but it will never fall down.
Pretty cool, huh? Yeah, I don't follow it either.
Putting the Wobble in the Weedpot
To achieve that lowered center of gravity, I decided to hollow out the weedpot, and pour in lead shot. Confident in my design, I proceeded to turn a weedpot, hollow out the interior, put in lead shot, put it back together, and finish it.

|
|
Figure 5 - My first wobbly weedpot – not!
|
It wobbled, and fell right over (Figure 5). Tilt it more than 20-30 degrees, and over it goes. Not good! (I finally sanded a flat on the bottom, so that I could pass it off as a "normal" weedpot.)
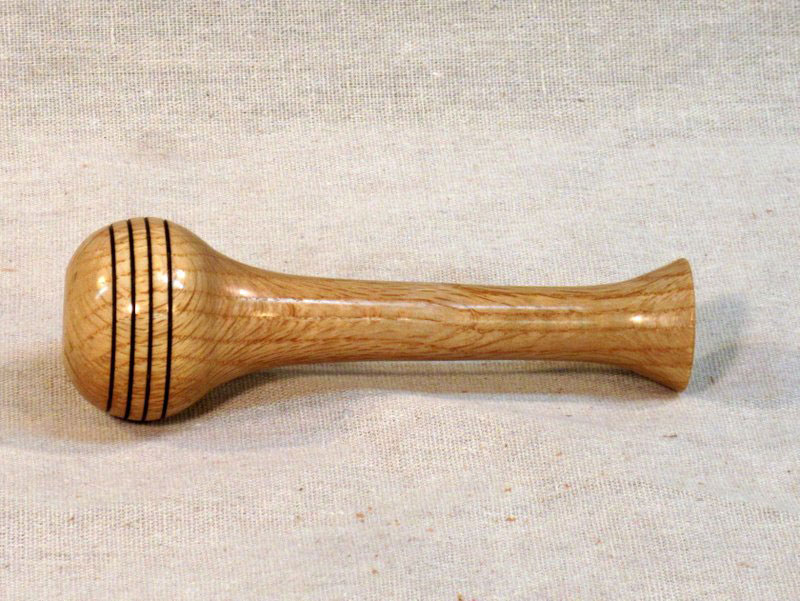
Undaunted, I tried again (Figure 6), this time with a shorter neck. Obviously, the long neck made the weedpot top-heavy.

|
|
Figure 6 - Second wobbly weedpot - not!
|
It wobbled better, but still fell over if tilted more than 30-40 degrees. Not good enough!
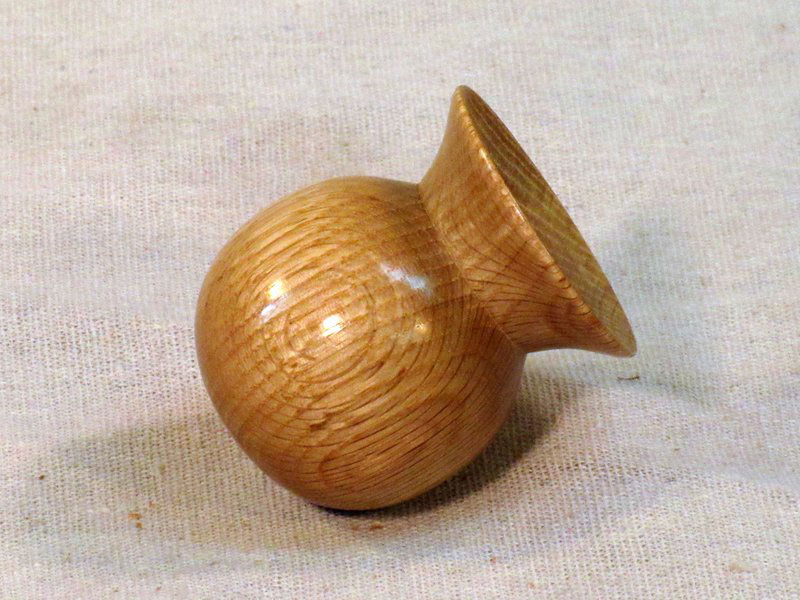
Still undaunted, I decided to forgo the long neck, and turn a squatty weedpot (Figure 7).

|
|
Figure 7 - A short wobbly weedpot - close but no cigar.
|
This one was better. It would wobble nicely, up to around 60 degrees – and then fall over. But I was getting closer.
With some daunt now creeping in, I modified my design again. With the previous weedpots, I had fully hollowed out the spherical part, and filled it completely with shot. This time, I decided to go halfway – I hollowed out the entire weedpot, but only put lead shot in the bottom half of the spherical part. I also made it bigger (Figure 8) – about twice the diameter of my previous efforts.
|
|
Figure 8 - The wobbly weedpot that was!
|
And that was the formula (or at least one formula) for success! That was when I realized the part about the lowering of the center of gravity. It wasn't just the weight in the weedpot, it was restricting the weight to the bottom part of the weedpot.
Let's Turn a Wobbly Weedpot
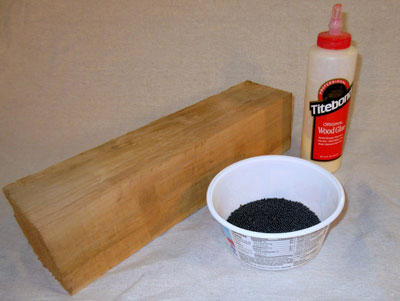
There's not much needed in the way of materials or tools to make one of these wobbly weedpots. As with any weedpot, you need some wood. With a wobbly weedpot, however, you also need some weight and some glue (Figure 9).
|
|
Figure 9 - Requirements for this project: wood, glue, weight.
|
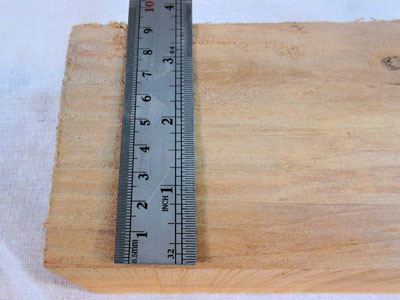
I'm going to start with a blank that's almost 4" on a side (Figure 10) and 10" or 12" long.
|
|
Figure 10 - About 4" in diameter is needed.
|
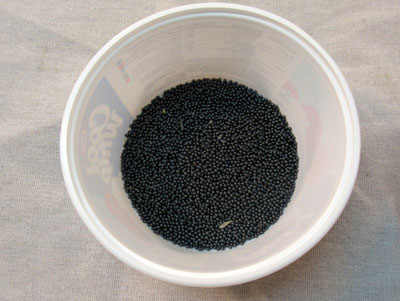
I also need some weight. I've got some lead shot (Figure 11) that I bought years ago for counterweighting homemade turning tool handles. Lead is quite dense, which makes it a good choice for weighted projects like this. It's also toxic, which is not exactly a point in its favor. However, the lead will be totally sealed inside the weedpot, as you will see. If you're making this, and you don't have lead hanging around the workshop, use steel pieces of some sort – old washers, small nuts, etc. Steel is not as dense as lead, but much better than sand. I tried sand, and it just isn't heavy enough and you can't get enough in the weedpot base to provide the shift in the center of gravity that is needed.
|
|
Figure 11 - Lead shot - about a pound's worth.
|
On the wood blank shown just below (Figure 12), I've marked off the various sections of the turning. I want a 1" chuck mounting area on each end, about 4" (same as the width) for the body of the weedpot, and around an inch on the top of the weedpot for a decorative lip. Overall, I need about 7" of length.

|
|
Figure 12 - Marking off the blank.
|
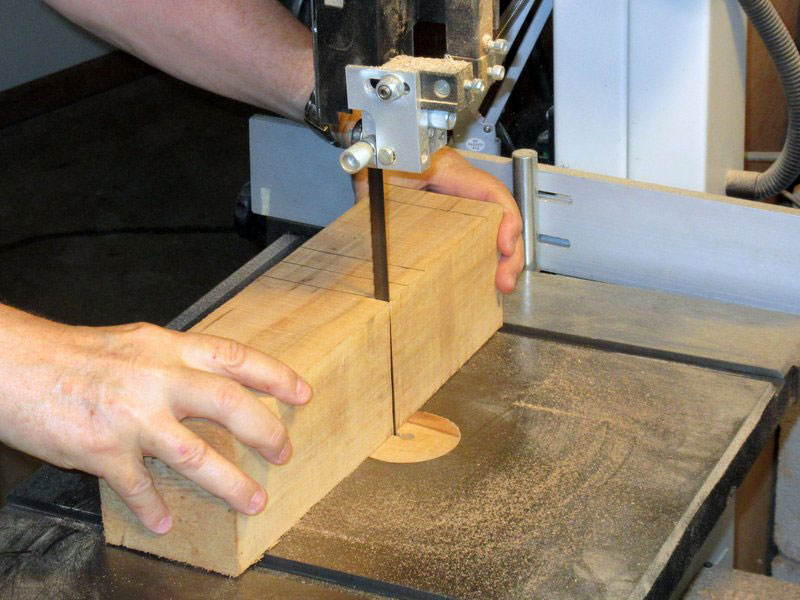
I make my length cuts on the bandsaw (Figure 13).

|
|
Figure 13 - Cutting the blank to length on the bandsaw.
|
And then I mark the centers (Figure 14).

|
|
Figure 14 - Marking the centers on each end.
|
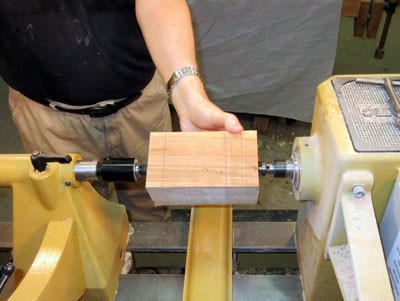
And then I mount the blank between centers (Figure 15).
|
|
Figure 15 - Mounting the blank between centers.
|
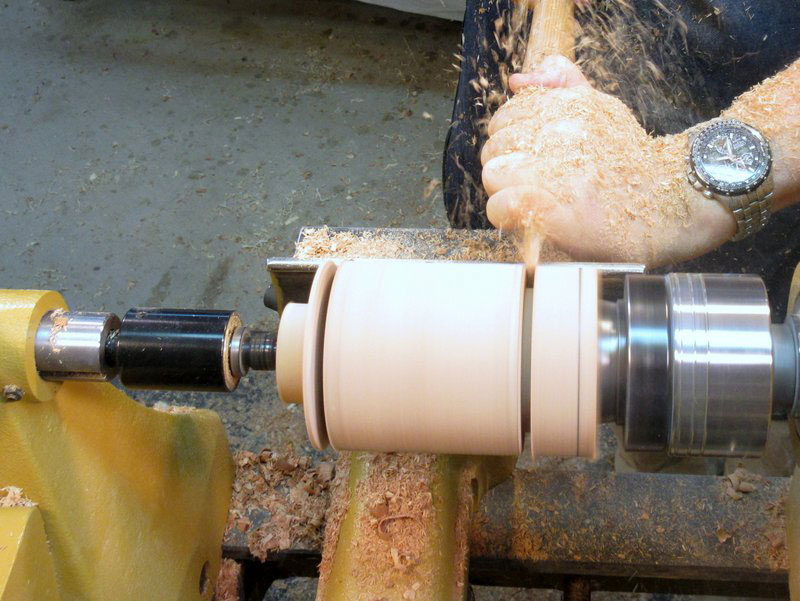
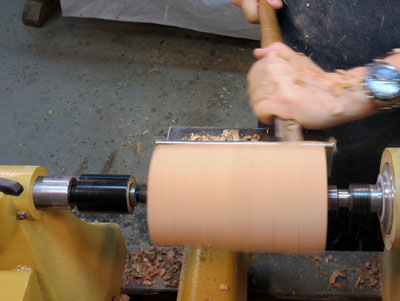
Roughing proceeds normally (Figure 16). I turn the blank down to round, but no further. I want the maximum diameter from the piece.
|
|
Figure 16 - Roughing down the blank.
|
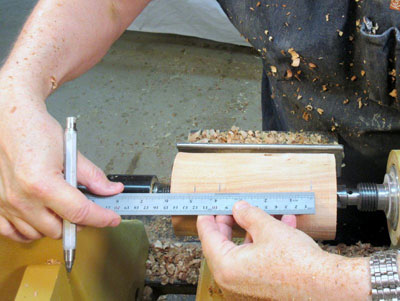
Having cleverly marked off my critical dimensions beforehand, I now have to do that again (Figure 17), since I just turned away the flats of the work piece.
|
|
Figure 17 - Marking off the cutting points on the roughed blank.
|
I'm going to turn a chuck-mounting tenon on both ends of the blank, so I set a caliper to the correct outside dimension for my chuck (Figure 18). I'm using a Nova G3 with deep 50mm jaws.

|
|
Figure 18 - Setting calipers to the right chuck jaw size.
|
Now I turn the tenon on both ends, around 3/4" wide (Figures 19 and 20).
|
|
Figure 19 - Cutting a mounting tenon on the top.
|

|
|
Figure 20 - And a mounting tenon on the bottom.
|
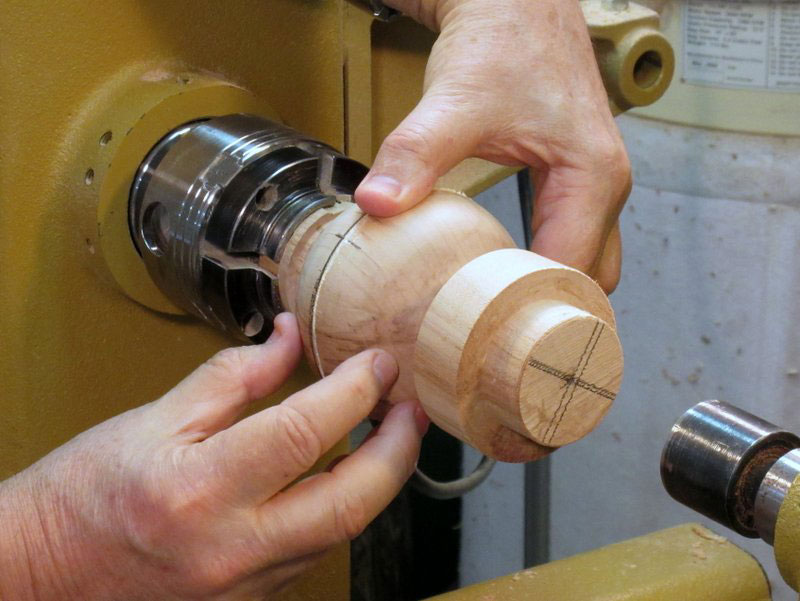
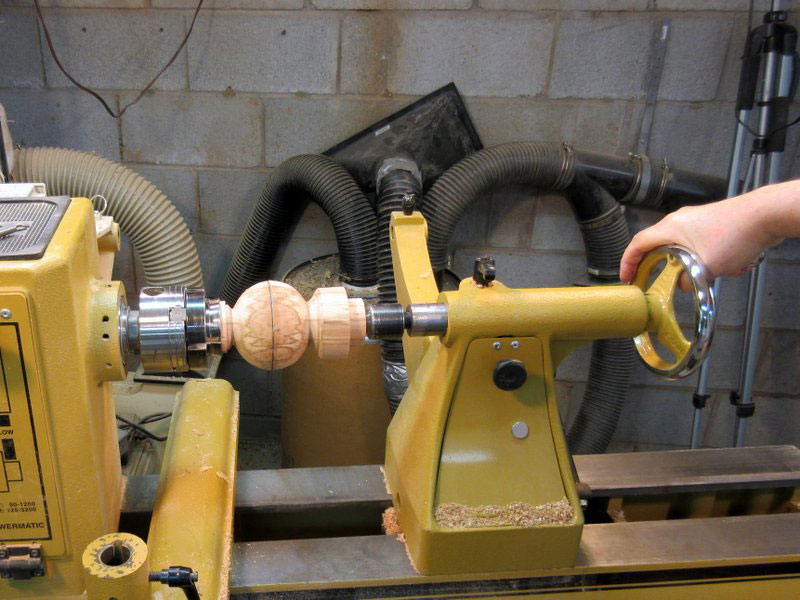
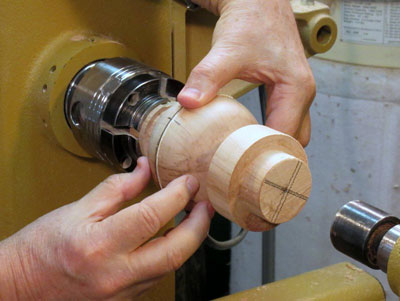
Now I switch to using the chuck (Figure 21). I put the top of the blank (or what will eventually be the top of the weedpot) into the chuck, and bring up the tailstock for some extra stability.

|
|
Figure 21 - Mounting the blank with the top in the chuck.
|
Turning a Round (a sphere, around, get it?)
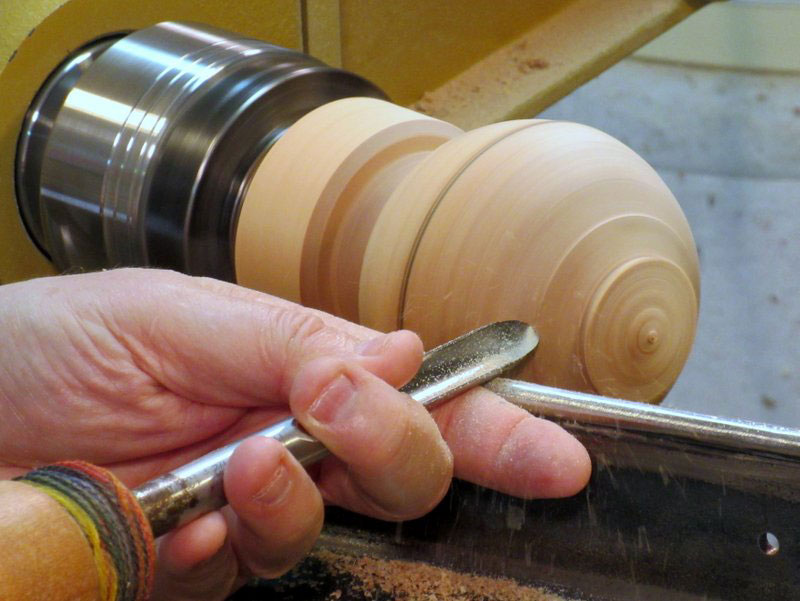
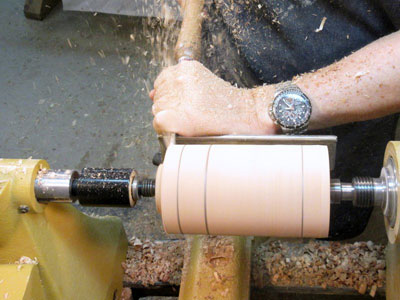
Now I can make the cuts to define the top and bottom of the spherical part of the weedpot (Figure 22).

|
|
Figure 22 - Cutting the top and bottom points of the
spherical part.
|
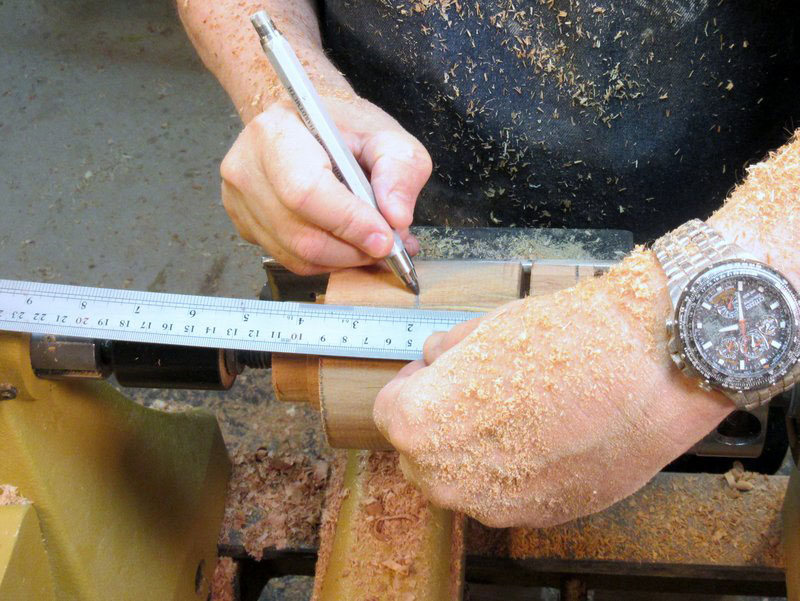
With the top and bottom set, I measure and mark the midpoint of the spherical section (Figure 23).

|
|
Figure 23 - Marking the midpoint of the spherical section.
|
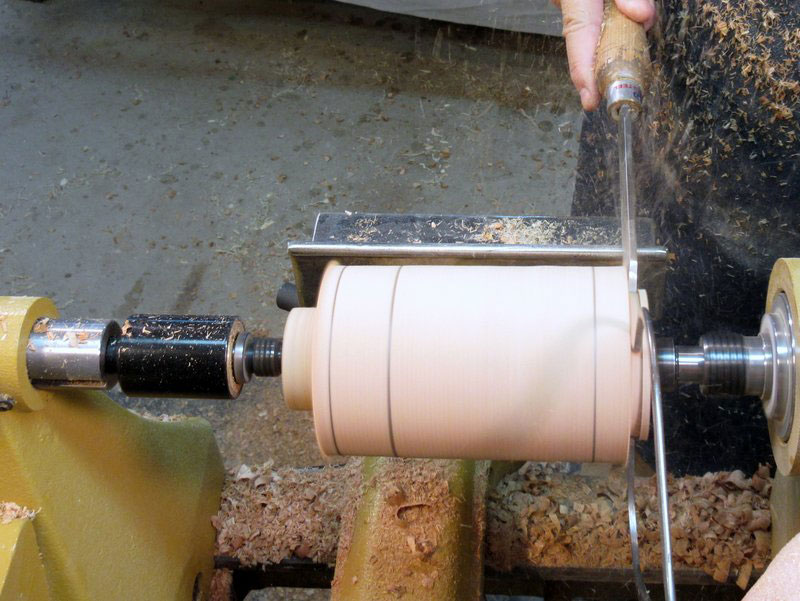
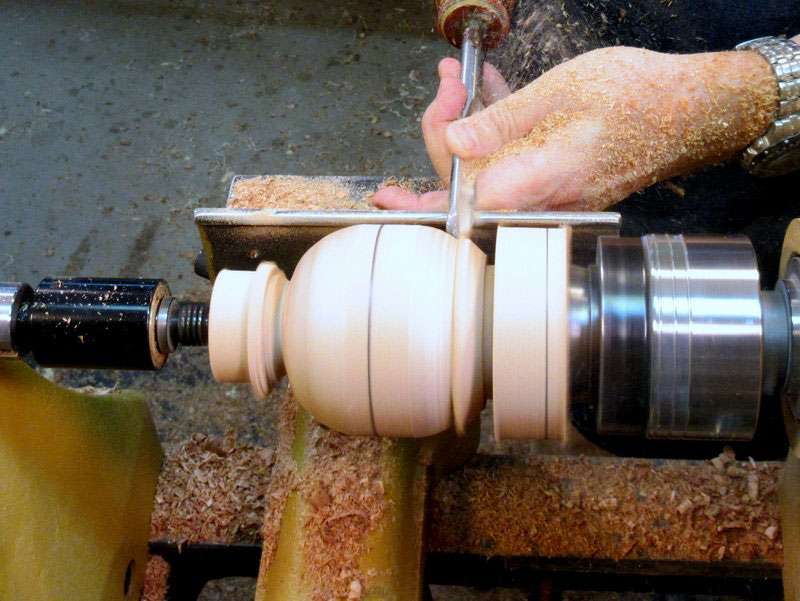
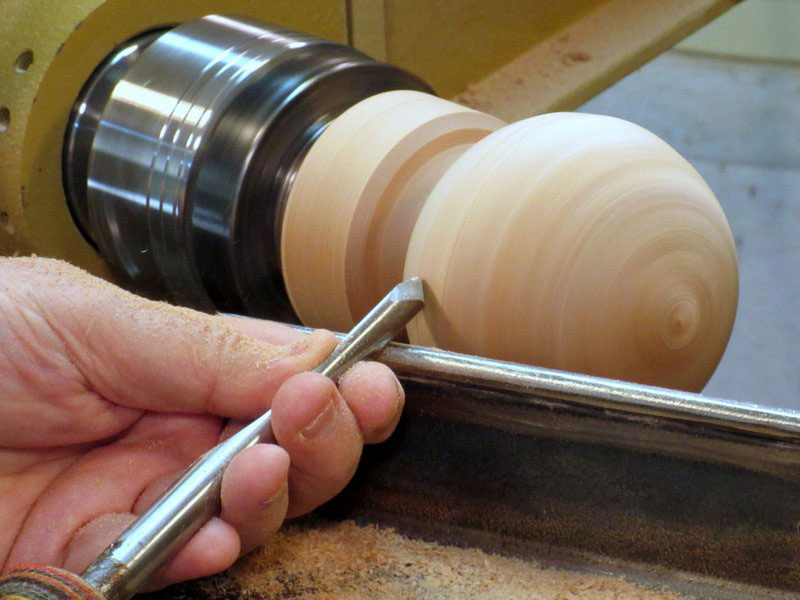
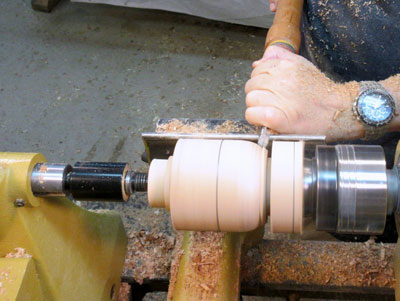
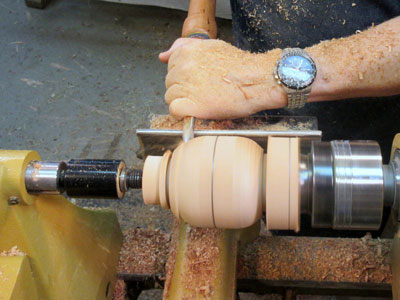
Now it's just a matter of cutting the spherical section (Figures 24, 25, 26, 27). Note that I'm leaving the center line in place.
Of course, the entire spherical section can't be all cut at this point, as both the headstock and tailstock are in the way. But this is okay, because after some more work, I will remount both the bottom and top individually in the chuck for more turning.
|
|
Figure 24 - Cutting the spherical section...
|
|
|
Figure 25 - Still cutting the spherical section...
|

|
|
Figure 26 - Even more cutting the spherical section...
|

|
|
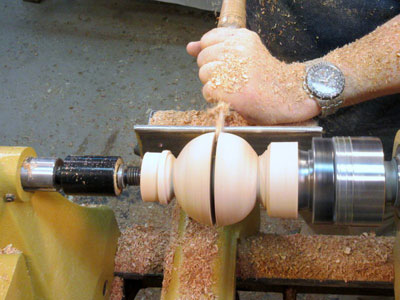
Figure 27 - Wow! The spherical section is about done.
|
A Hollow Victory
I need to hollow out the spherical section, as evenly as possible to the outside of the sphere. I've done this in several different ways on several different weedpots, and I'm convinced that the easiest and most accurate method is to cut the weedpot right through the middle, then hollow the bottom and top halves individually.
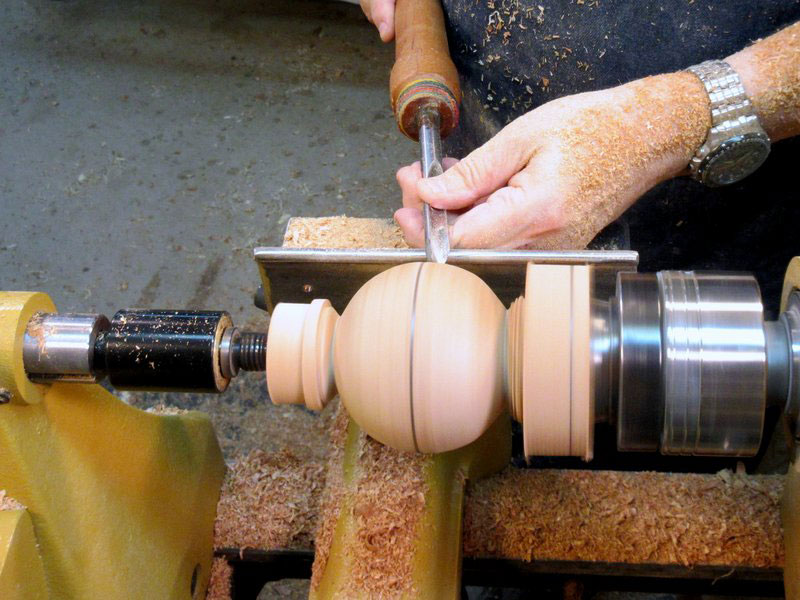
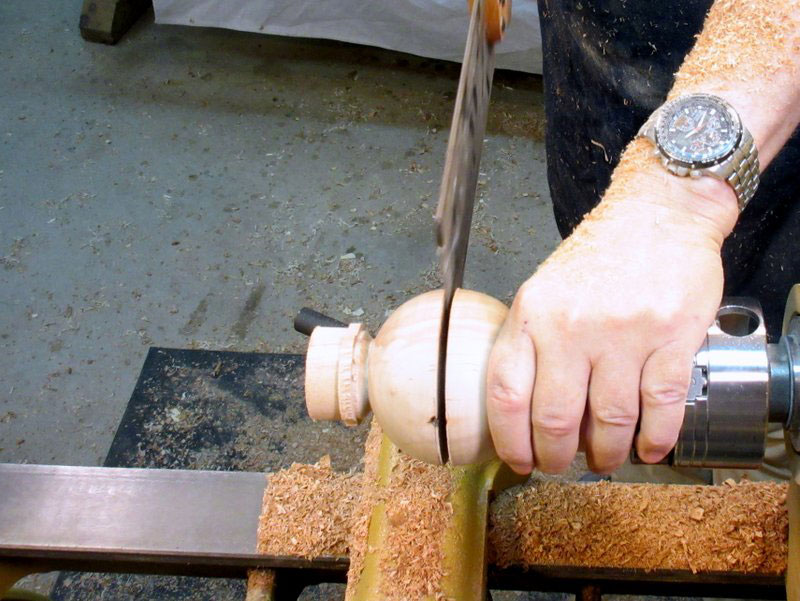
So now I start the cut through the center (Figure 28). I'm using a parting tool to cut through most of the thickness. I'll then use a small saw (Figure 29) to finish the cut.
|
|
Figure 28 - Parting across the center of the sphere.
|

|
|
Figure 29 - Finishing the cut through the sphere.
|
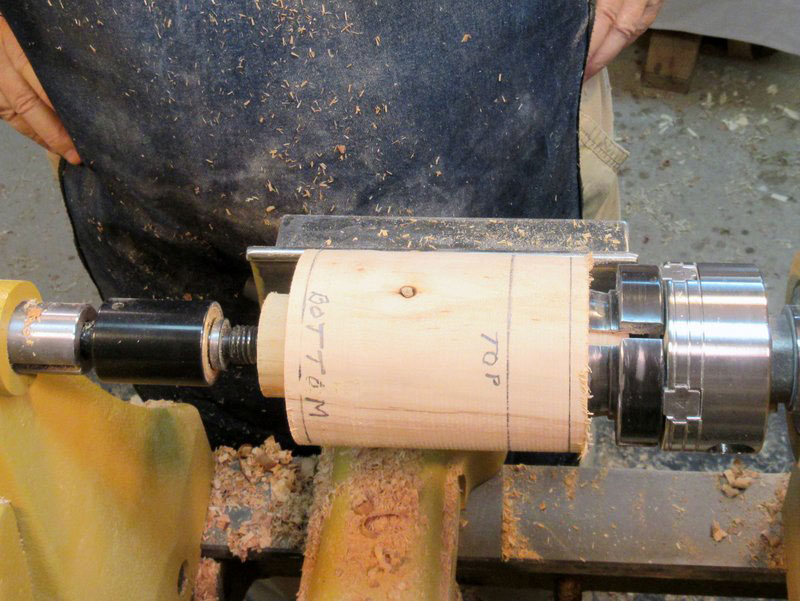
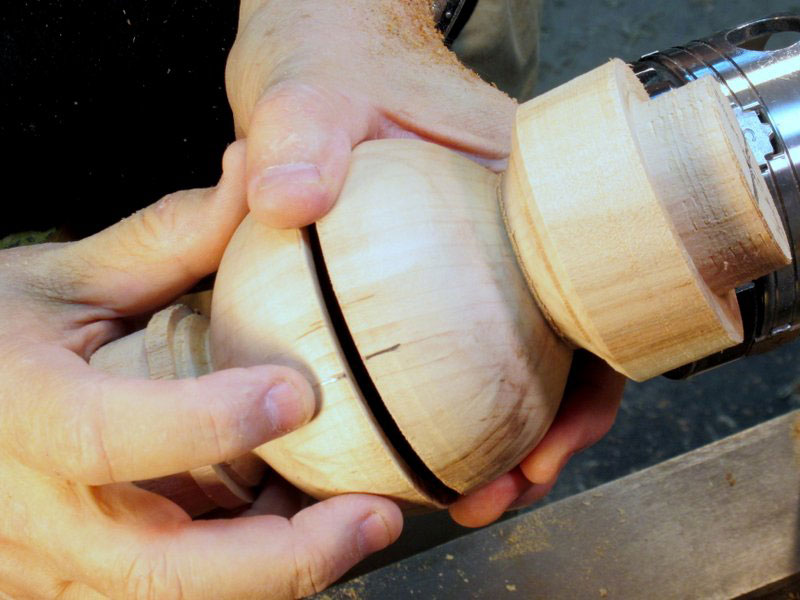
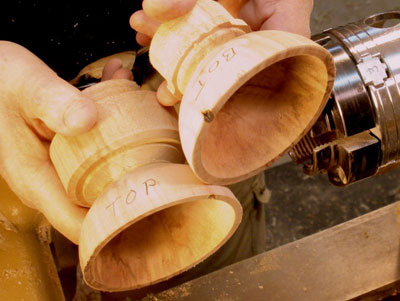
This is the logical time to pause and mark which piece is which (Figure 30), and also to make an alignment mark on both pieces across the cut (Figure 31).

|
|
Figure 30 - Identifying the bottom and top halves.
|
The alignment mark, of course, is so the grain can be re-aligned when the two halves are glued back together.

|
|
Figure 31 - The alignment mark on the top and bottom pieces.
|
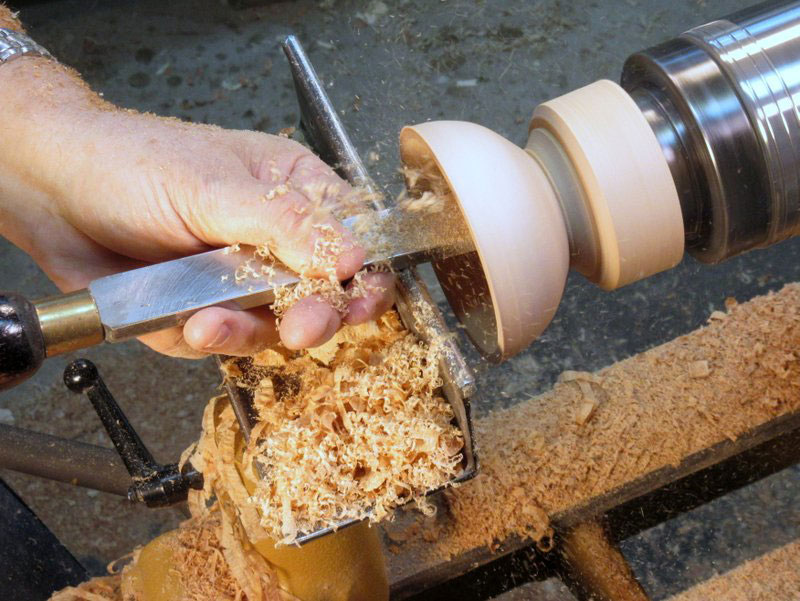
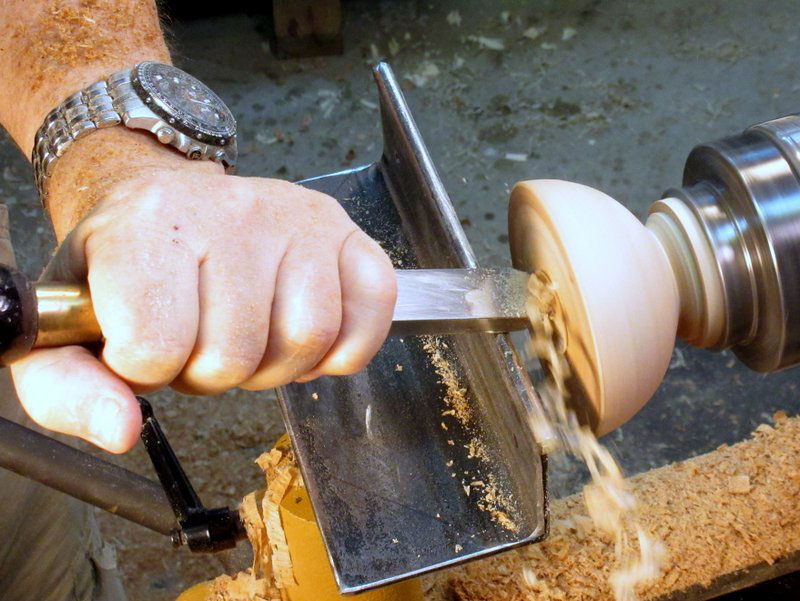
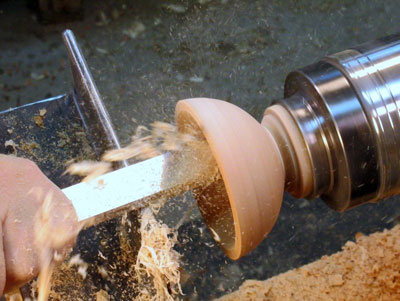
I start hollowing on the bottom half of the weedpot (Figure 32). I'm using a 1" scraper for this. A gouge might be faster, but the hollow is shallow, the cut near the outside needs to be fairly accurate, and the scraper cuts slow enough to not take off too much material in a single pass, but fast enough so that I don't take the rest of the day to hollow it out.

|
|
Figure 32 - Hollowing with a scraper.
|
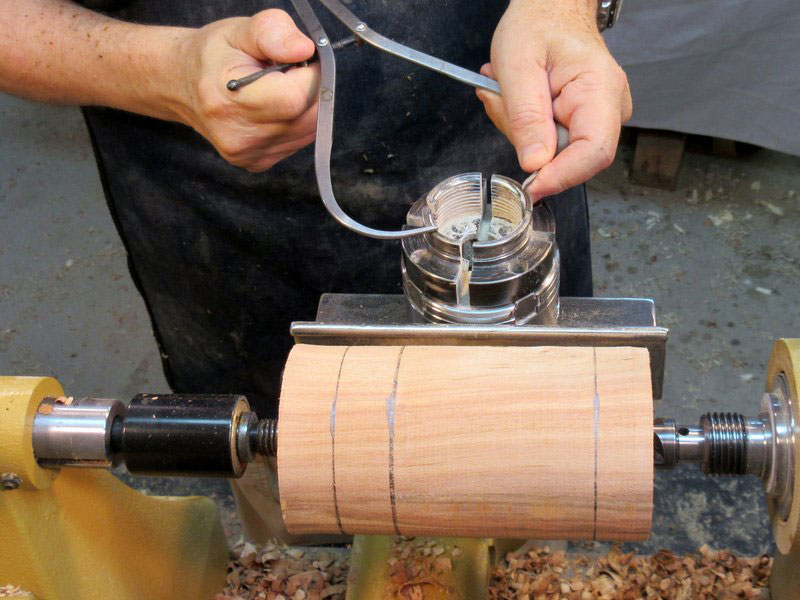
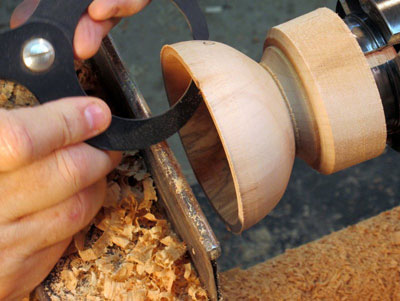
I stop frequently as I get near the outside edge to check the thickness (Figure 33) all the way around the half-sphere.
|
|
Figure 33 - Checking the sidewall thickness.
|
So for a while, I cut and check, cut and check, rinse and repeat, until I get a nice even wall thickness all the way around (Figure 34).

|
|
Figure 34 - Cut and check and check and cut until it is right.
|
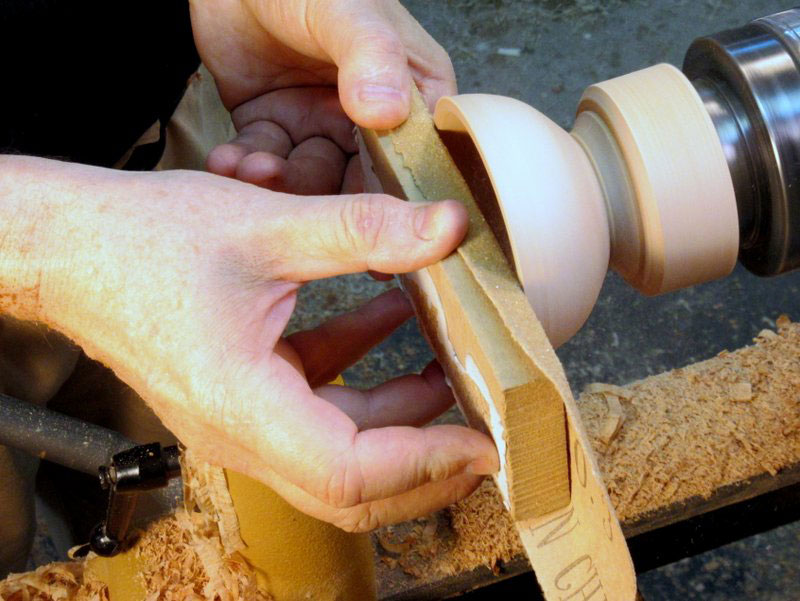
Before I declare it hollowed, I take a piece of sandpaper wrapped around a narrow flat board and sand the rim of the spherical section (Figure 35). This is just in case the edge has gotten chopped up or nicked or something. When I glue the top and bottom back together, I want those mating surfaces to be dead flat.

|
|
Figure 35 - Flattening the rim.
|
Now I do the same thing for the top of the weedpot (Figures 36 and 37).

|
|
Figure 36 - Hollowing out the top section...
|
|
|
Figure 37 - And hollowing out the top section some more...
|
|
|
Figure 38 - The top and bottom sections are hollowed out.
|
Addressing a Weighty Issue
With the interior of the weedpot hollowed out, it can now be partially filled with lead shot to provide the desired degree of bottom-heavy loading. Perhaps it goes without saying, but I'll say it anyway…this applies only to the bottom half – the top half doesn't get any weight.
I'm going to fill up the bottom half with the lead shot, but I have to cap it somehow. I don't want it shifting around while the weedpot is wobbling, and I especially don't want any shot leaking out of the flower stem opening that will be in the top half. So I need to cut and fit a "barrier" at the top of the bottom half.
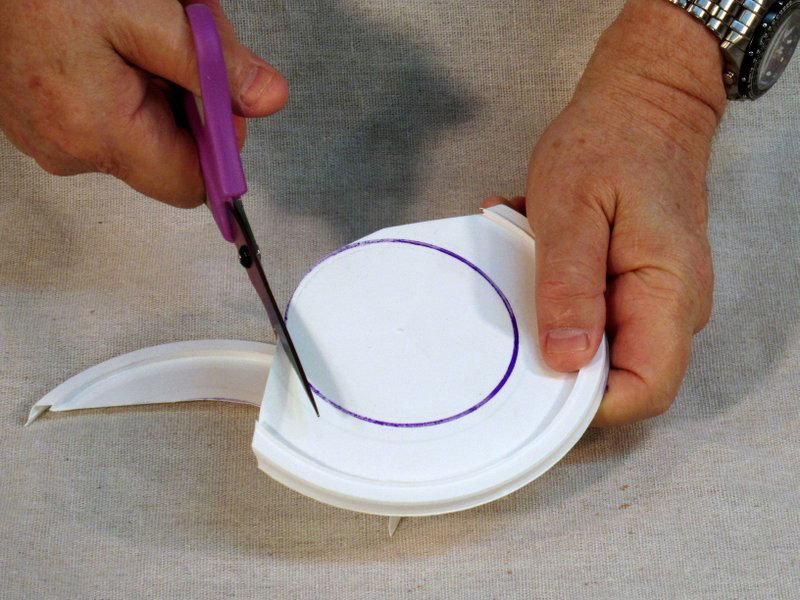
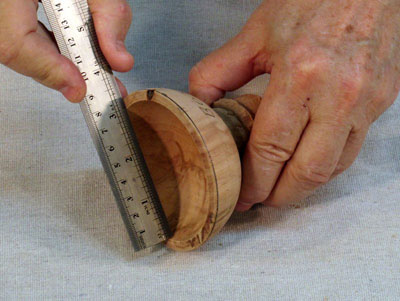
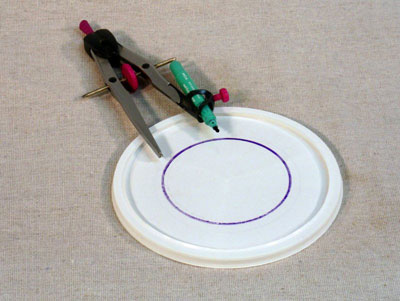
I'm making this out of a piece of plastic food carton. I measure the maximum size of the bottom half first (Figure 39).
|
|
Figure 39 - Measuring the opening in the bottom half.
|
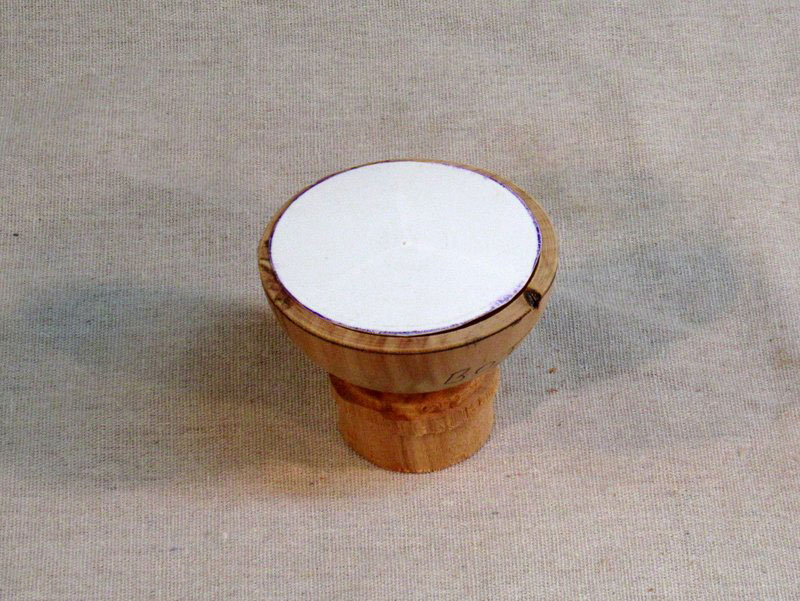
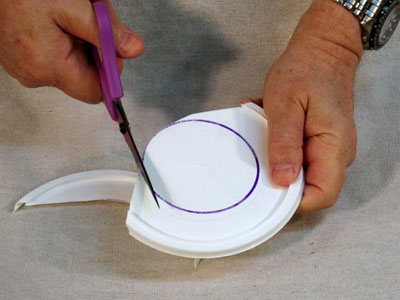
I next draw a circle on the plastic (Figure 40), and then cut it out with scissors (Figure 41). It takes several trimming cuts to get a good fit…the plastic disk needs to fit snugly inside the top of the bottom half's rim (Figure 42).
|
|
Figure 40 - Laying out the circular cut on a plastic lid.
|
|
|
Figure 41 - Cutting out the cap for the bottom half.
|
|
|
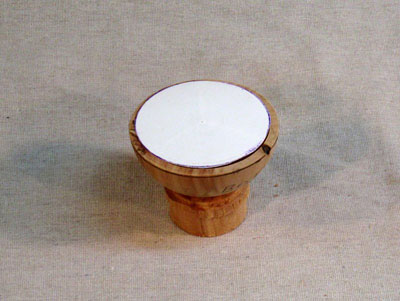
Figure 42 - The plastic disk sitting loosely on top of the
bottom half.
|
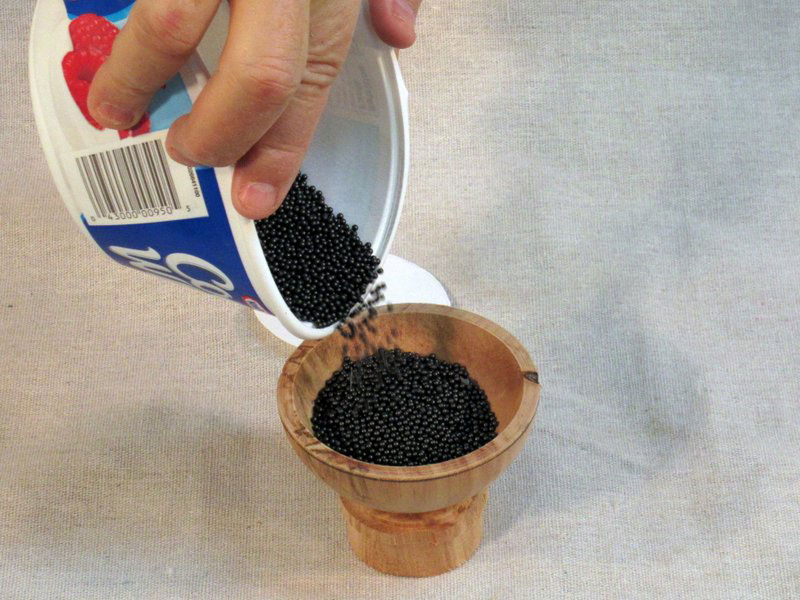
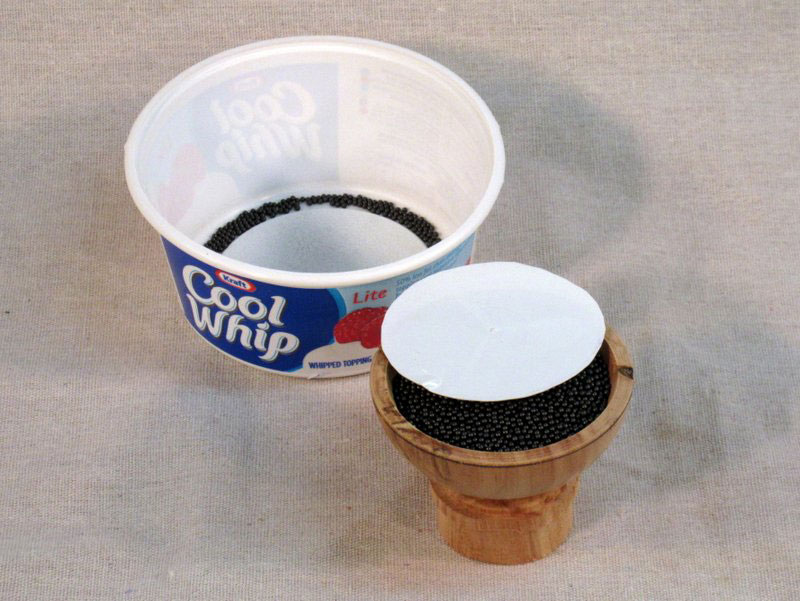
Now I add the lead shot to the bottom piece (Figure 43). I want to get as much as possible in the bottom…the more weight there is, the better the wobbl-ability will be. So I pour it in until it is just shy of the rim (Figure 44).

|
|
Figure 43 - Adding weight to the bottom piece.
|

|
|
Figure 44 - The bottom is full of Whipped Topping
...er...lead shot.
|
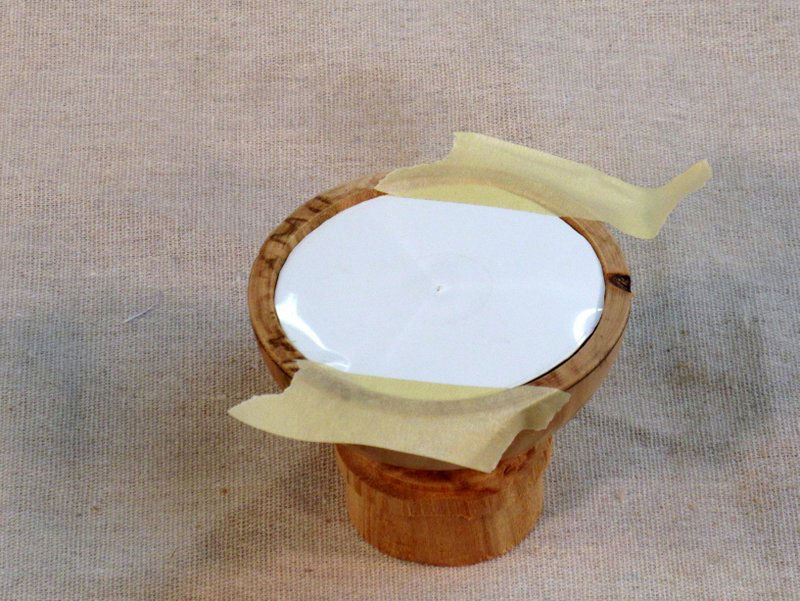
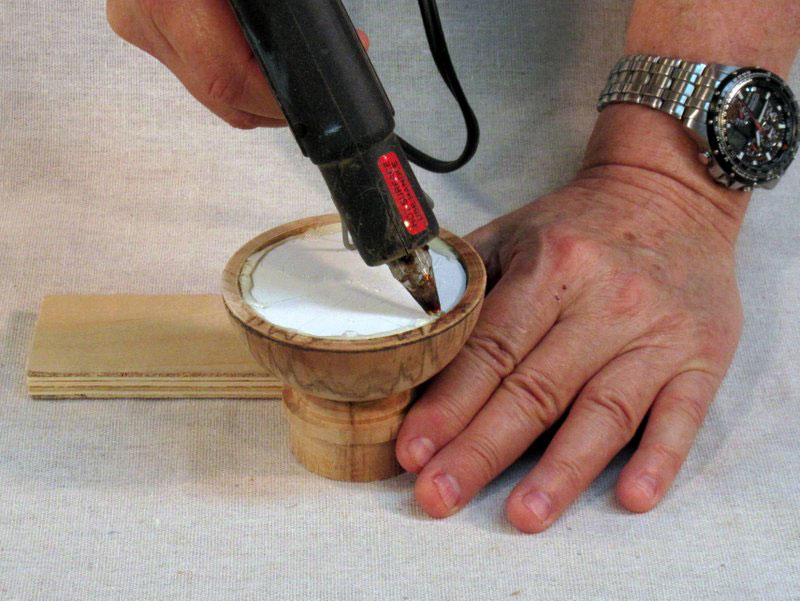
Now the plastic disk is temporarily secured in place with masking tape (Figure 45). This makes it easier to do the next task, which is using hot-melt glue to fasten the plastic in place (Figure 46).

|
|
Figure 45 - The plastic cap is temporarily taped in place.
|

|
|
Figure 46 - Using hot-melt glue to keep the plastic lid
in place.
|
The plastic lid needs to be held securely in place. As I mentioned earlier, I don't want the lead pellets getting loose and maybe sneaking out the flower stem opening. Lead is toxic! So I run the hot-melt glue all around the edge (Figure 47), making sure that there are no cracks between the plastic lid and the rim of the bottom half.

|
|
Figure 47 - Applying hot glue around every bit of the edge.
|
The hot-melt glue sets in just a few seconds. Before declaring victory on the weight front, I shake the bottom piece a bit. I want the shot held tightly…that is, with no room to shift around. If I didn't put in enough shot, it will rattle, but more importantly, if it's loose, it will shift when the weedpot is wobbled, and will affect the won't-fall-down ability. So I want to ensure a tight fill right now. If I have to, I'll tear out the plastic disk and add more shot.
Getting It Together
Okay, the shot is solid in the bottom half. I'm ready to glue the top and bottom back together. I mount the bottom piece in the chuck on the lathe and spread wood glue (I'm using
Titebond Original) on the top and bottom rims (Figure 48).

|
|
Figure 48 - Applying wood glue to the edges of the top and
bottom halves.
|
Remember those alignment marks I made earlier on the top and bottom halves? Now I get to use them (Figure 49). I want the grain to match to whatever extent I can get it to (because of the width of the center cut, it won't match perfectly).
|
|
Figure 49 - Aligning the glue joint
|
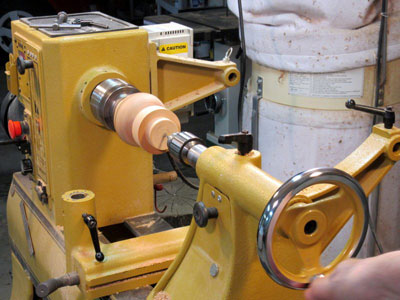
Now I bring up the tailstock with a live center in it, and use that to clamp the top and bottom pieces together until the glue dries (Figure 50).

|
|
Figure 50 - Clamping the weedpot together for the
glue to set.
|
The glue sets in 30 minutes and achieves full strength in two hours. I'm going to take a break!
.....
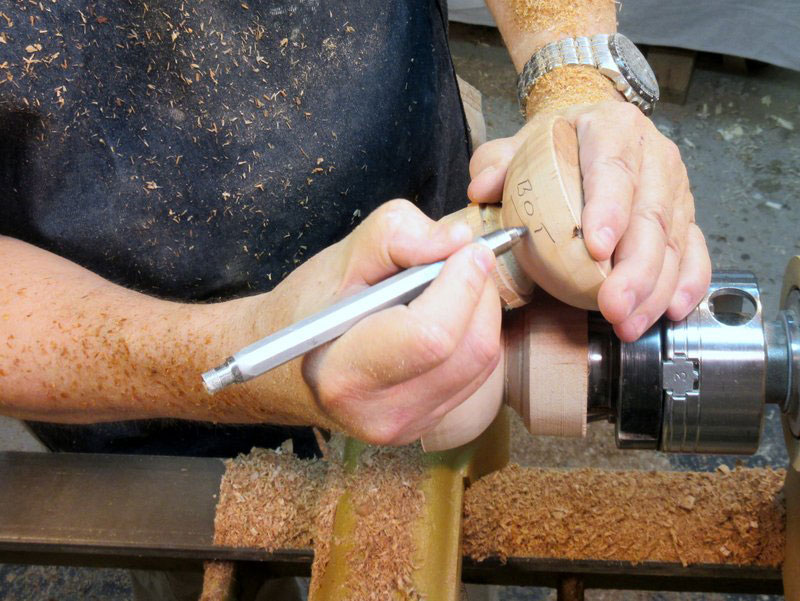
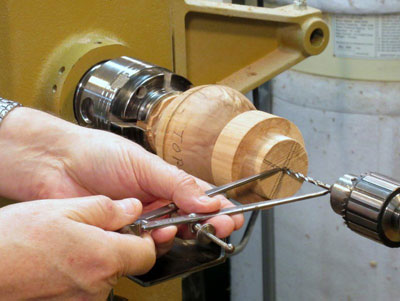
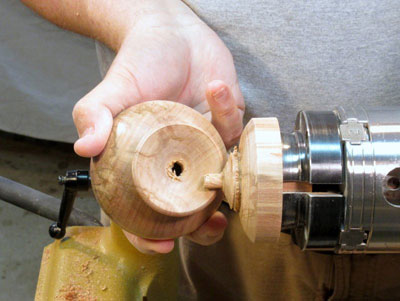
Wow, that didn't seem long at all, did it? I need to drill a small hole through the top piece, so that I will later have a proper alignment of the final hole that I will drill on the drill press for the flower stems. However, I do not want to drill through the plastic divider disk inside the weedpot. So I set calipers to my minimum distance to get through the top, and make sure the drill chuck and tailstock are set up to drill the right distance (Figures 51 and 52).
|
|
Figure 51 - Checking the drilling distance.
|
|
|
Figure 52 - And drilling a small hole for later use.
|
Final Turning
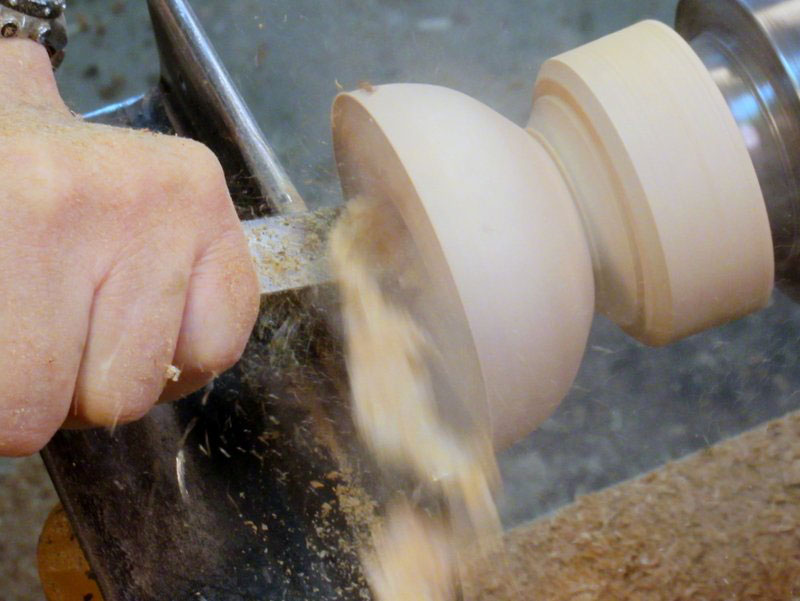
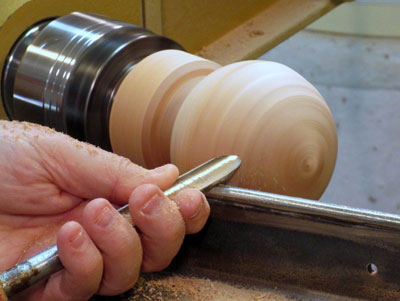
It's time to do the final turning. The weedpot is remounted with the top in the chuck, so the bottom can be turned down to its final shape…a nicely rounded spherical bottom (Figure 53).

|
|
Figure 53 - Trimming the bottom of the weedpot.
|
For a smooth wobble and recovery action, the bottom of the weedpot needs a smooth, even curve. I keep trimming it, using a spindle gouge and then a scraper until I get a shape that looks right (Figure 54).
|
|
Figure 54 - Ensuring a smooth spherical shape
on the bottom.
|
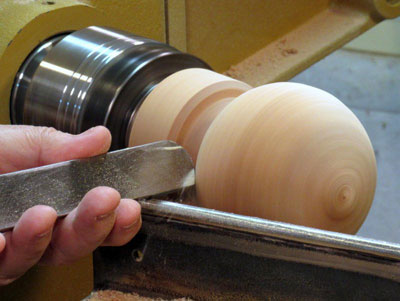
Then I cut a very small flat (about the size of a dime) on the bottom, so that the weedpot will only wobble when pushed, and not with every stray breath of wind (Figure 55).

|
|
Figure 55 - Cutting a small flat on the bottom.
|
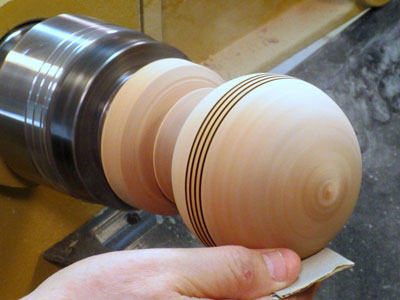
The bottom is done for the moment, and I proceed to finish turning the top (Figure 56). It's pretty much in the right shape, and just needs some tweaking, particularly if the seam between the top and bottom is obvious.

|
|
Figure 56 - Trimming the sphere on the top piece.
|
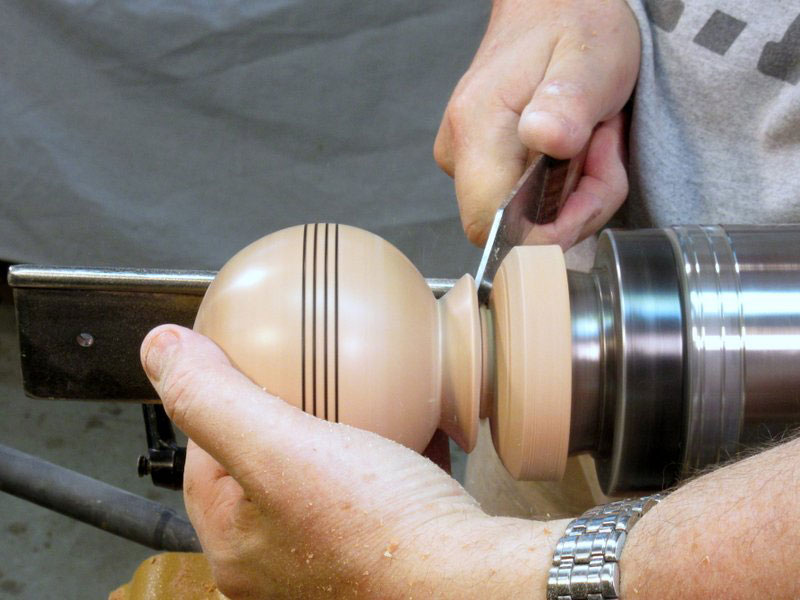
This is also when I finish up the decorative top of the weedpot. I cut a small flaring lip on the top (Figure 57).
|
|
Figure 57 - Cutting a lip on the top of the weedpot.
|
Finishing It Up
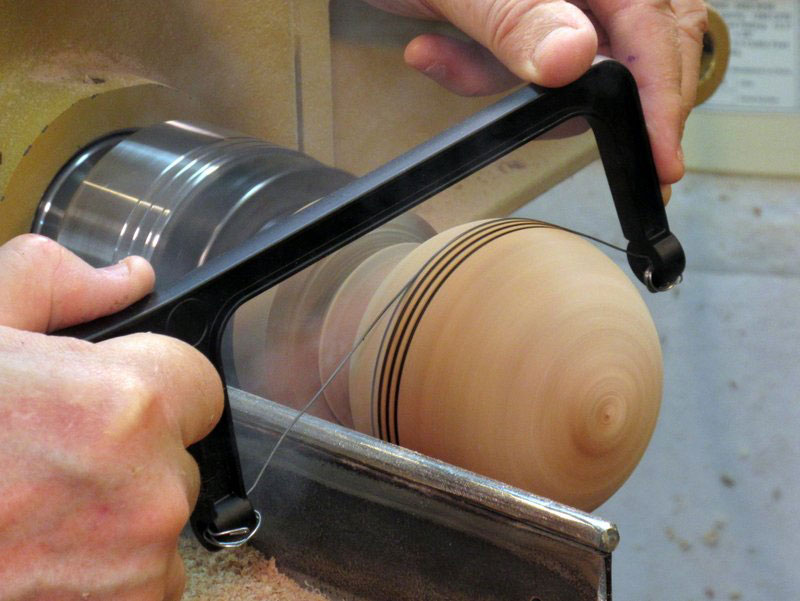
The seam between the top and bottom is usually at least slightly visible, and I don't like it to show…it gives away too much about how I made the piece. So I burn a line right on top of the seam, and then add several more above and below the seam (Figure 58). Now the seam is invisible!

|
|
Figure 58 - Hiding the top-bottom joint
with several burn lines.
|
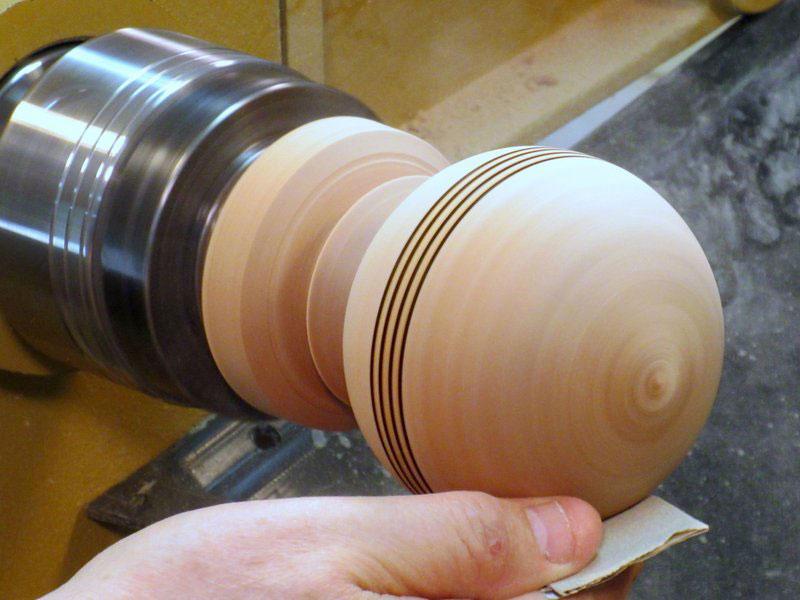
Sanding is still necessary, in spite of my incredible expertise in finish cutting with the gouge and scraper (Figure 59).
|
|
Figure 59 - Sanding is necessary.
|
I use a thin parting tool for the final parting cut (Figure 60).

|
|
Figure 60 - Parting off the weedpot.
|
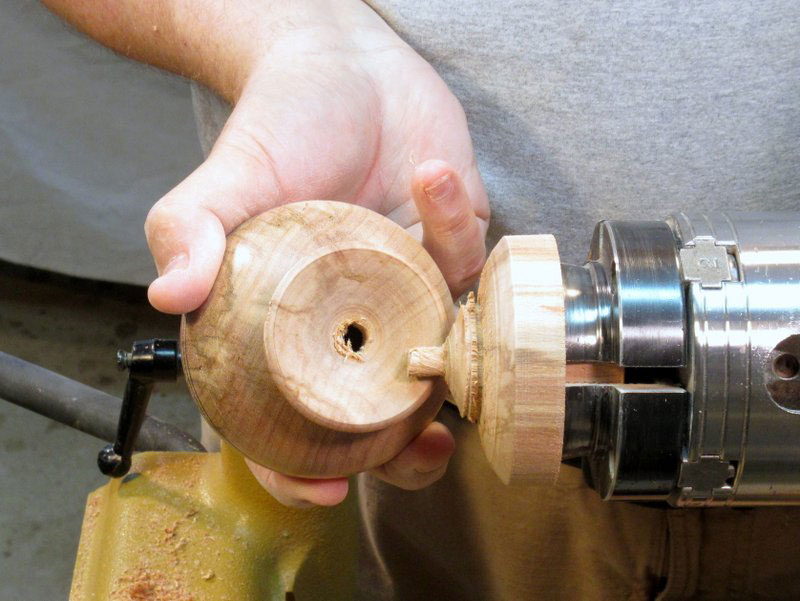
The weedpot came loose a bit sooner than I expected, leaving a hole about 3/8" in diameter (Figure 61).
|
|
Figure 61 - After parting, the flower stem hole is
somewhat ragged.
|
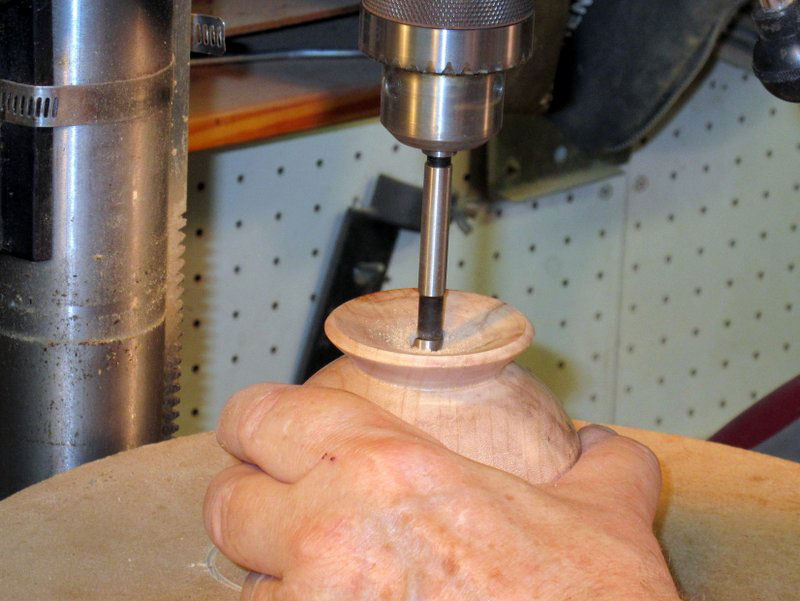
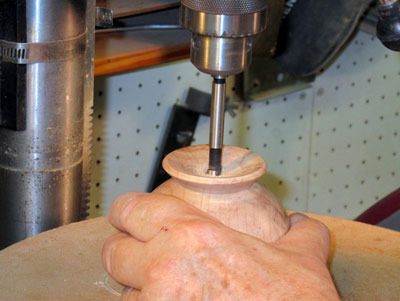
The final hole in the top is done on the drill press (Figure 62).
|
|
Figure 62 - Drilling the flower stem hole in the
top of the weedpot.
|
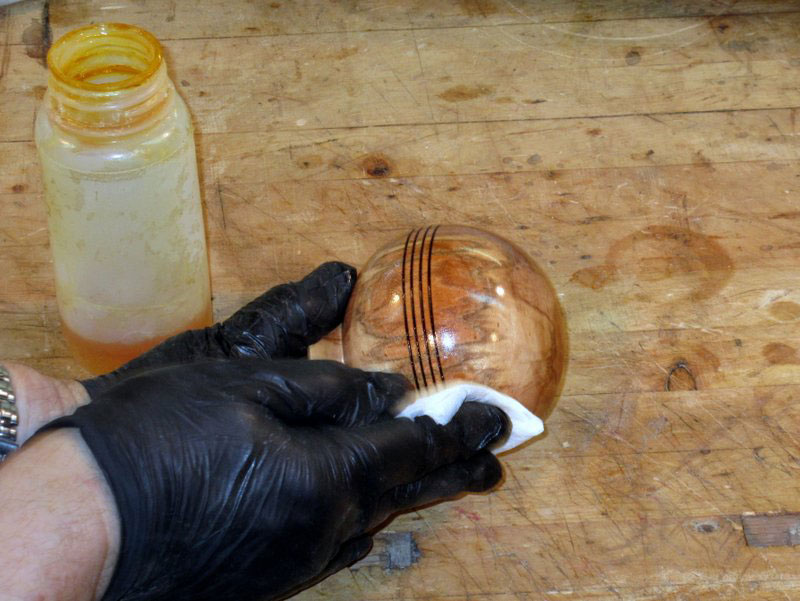
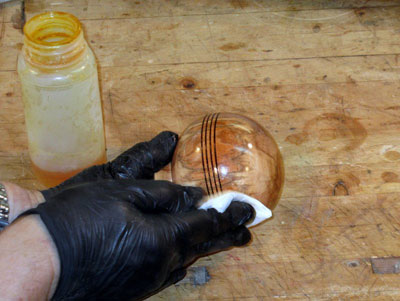
Normally, with a piece this small I would put on a friction polish while it is still on the lathe. But with this weedpot, there is a very good reason why I didn't do that…I forgot. So I wiped on two coats of homemade wiping varnish (Figure 63).
|
|
Figure 63 - Applying two coats of wiping varnish.
|
With the addition of some dried flowers, this weedpot is ready to wobble! But never, ever fall down!

|
|
Figure 64 - Ready to wobble!
|
If you have any questions you can email Rick at
carlrmorris@att.net