The Sailing Vessel Solution
by Temple Blackwood
Castine, ME
Note: Click on any picture to see a larger version.
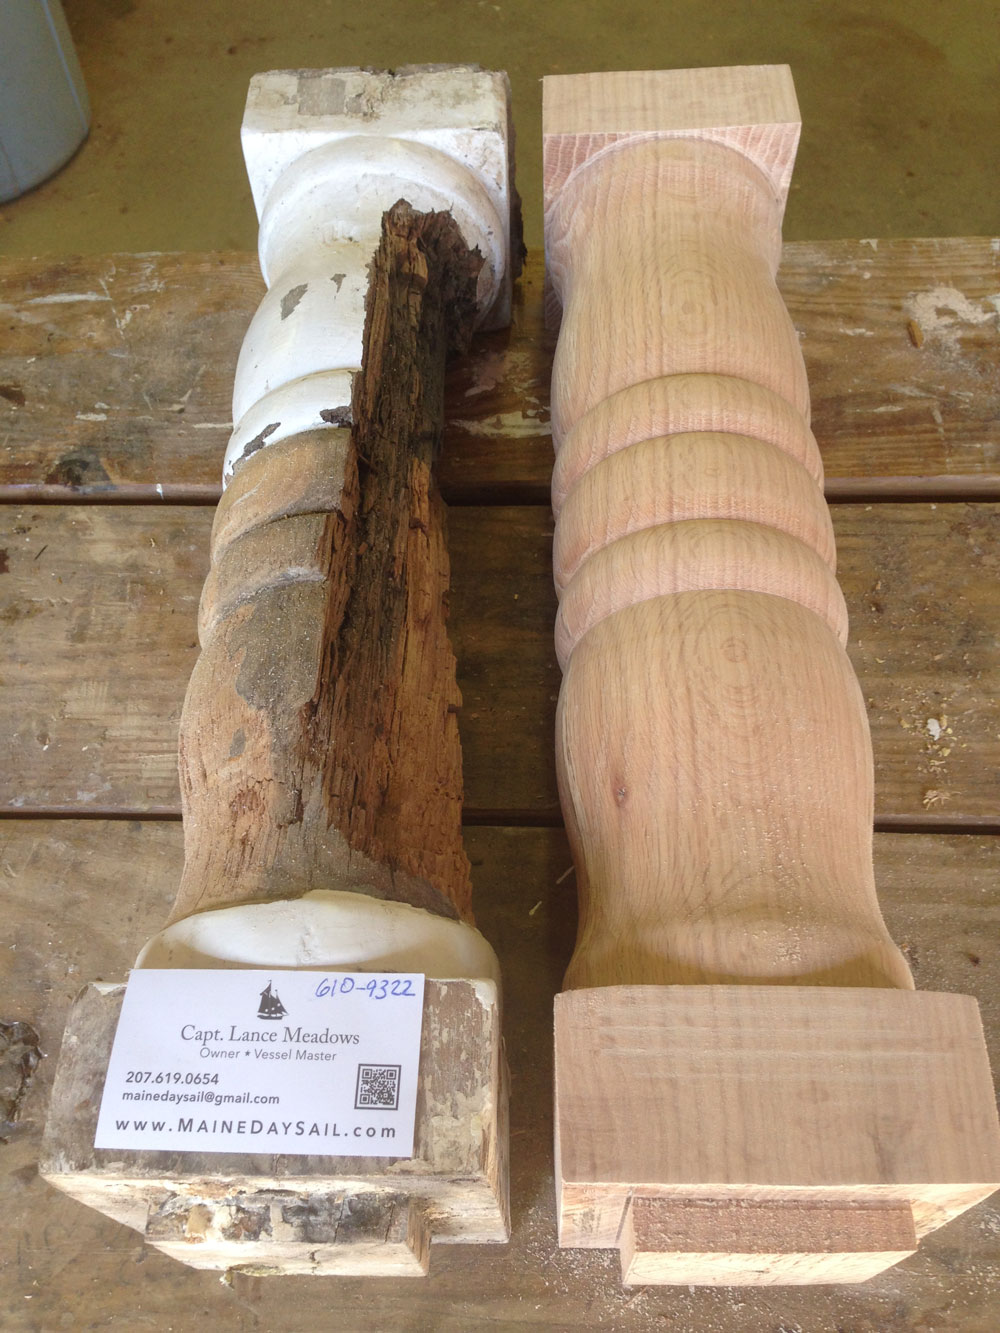
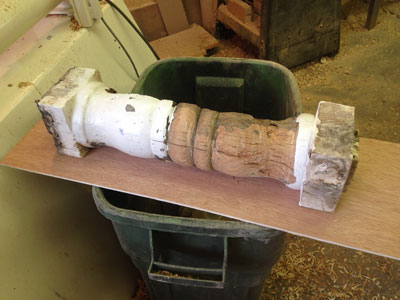
In early spring, Captain Lance Meadows, a colleague from the Maine Maritime
Academy, contacted me by cell phone to see if I could help him with a repair to the
Schooner Timberwind's
oak 5" X 5" X 28" stanchion. With some humility, he added
that with the season rapidly beginning, he needed it "yesterday". The oak stanchion
holds a section of deck at the correct height and a long securing bolt keeps the deck
above and the bulkhead from flexing apart. With pre-summer scheduling making our
meeting difficult, I suggested he drop off the rotted old stanchion in my shop gallery,
which he did.
|
|
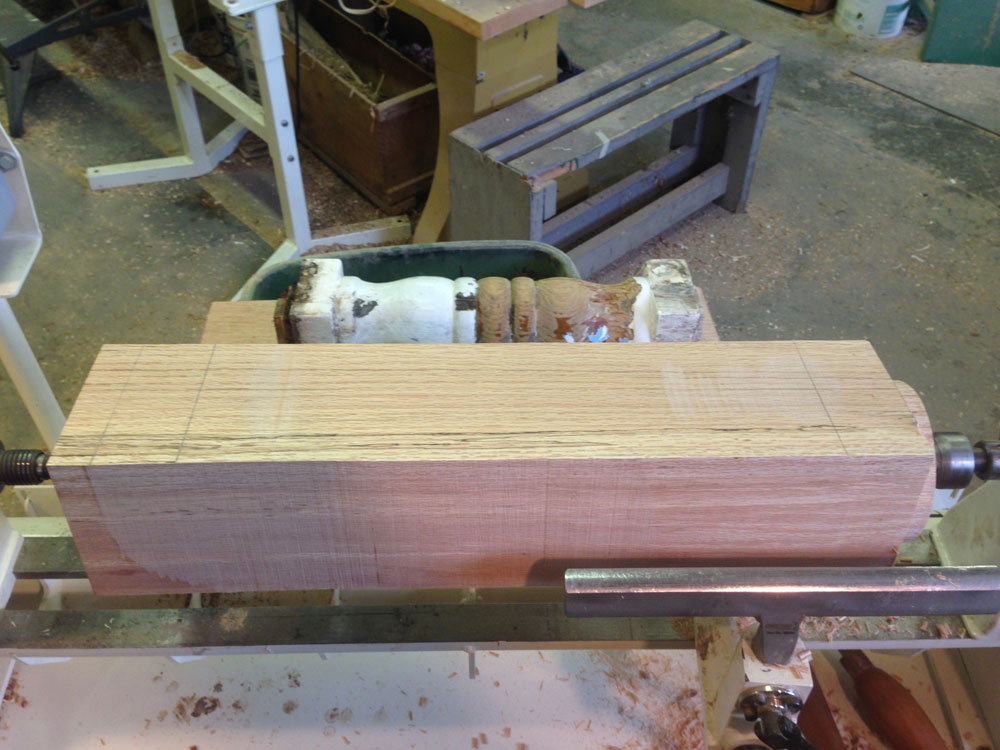
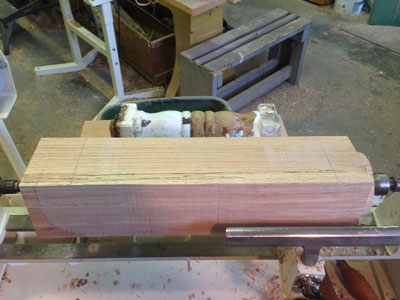
Fortunately, I had a large block of dry red oak in the shop that sawed to the correct
dimension. When Lance first called, he neglected to add that the stanchion also had a
1/2" hole through the center for a critically important securing bolt. Initially, the
Captain said that his crew of shipwrights would drill the centering hole. Later they
revised that plan. The other interesting feature of this, beyond the challenge of taking
measurements in thick, heavy coats of paint and missing rotted portions, was
dimensioning the square tenons on both ends. The deterioration led to a small challenge,
some guesswork, and creative planning for the installing carpenters.
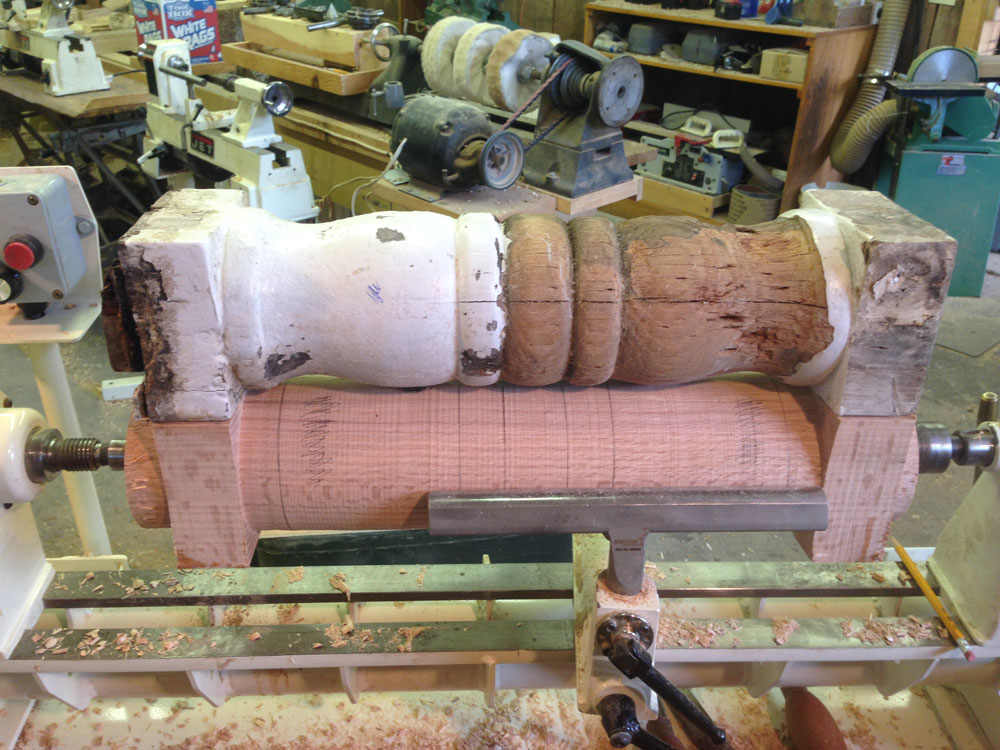
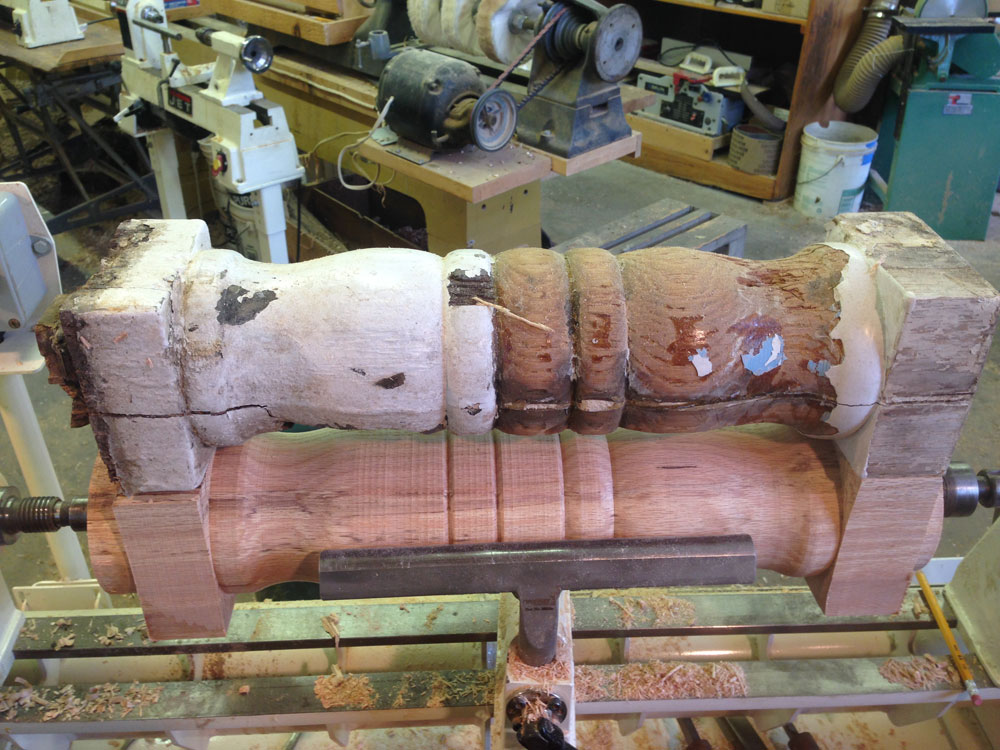
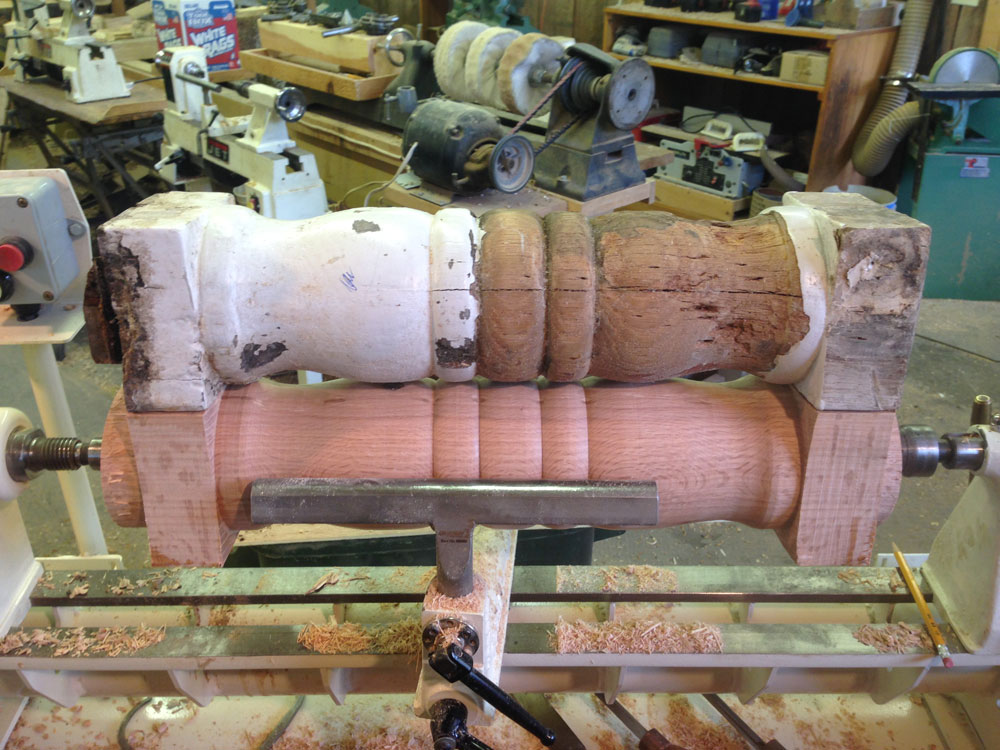
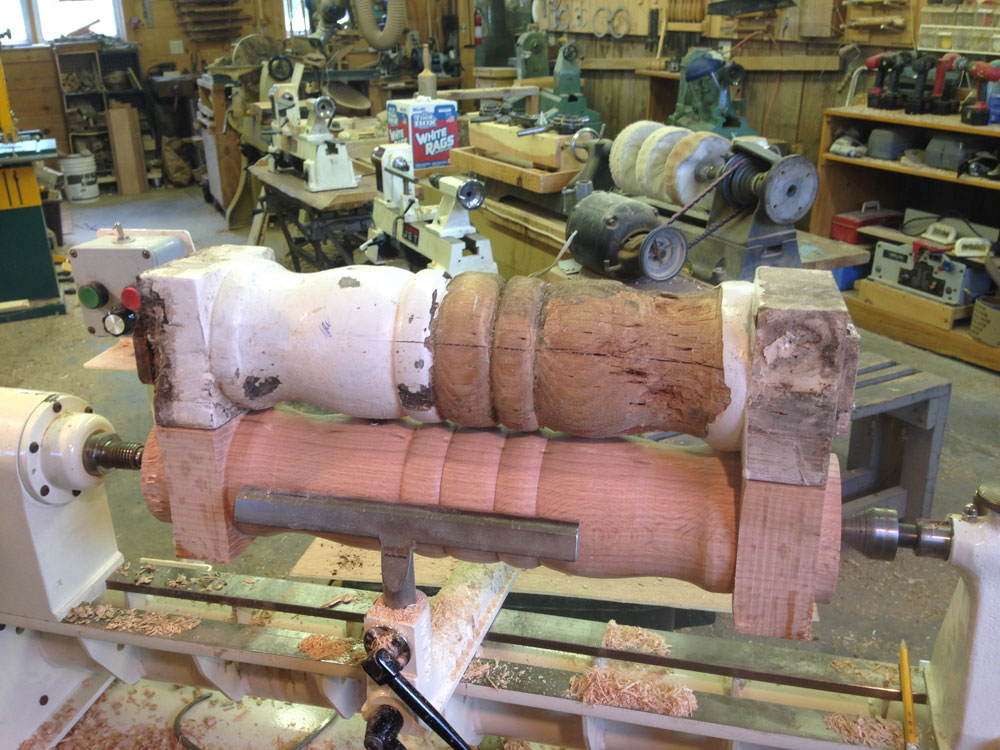
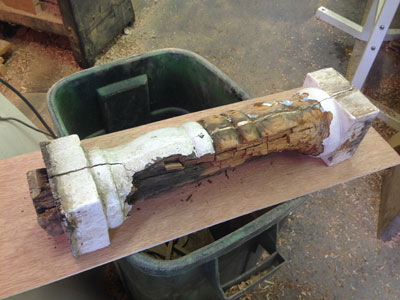
I typically prefer to have a visual model when I turn parts, and the rotted baluster that
Lance provided worked well on a platform just beyond my
lathe.
|
|
Setting up the sawn block of red oak.
|

|
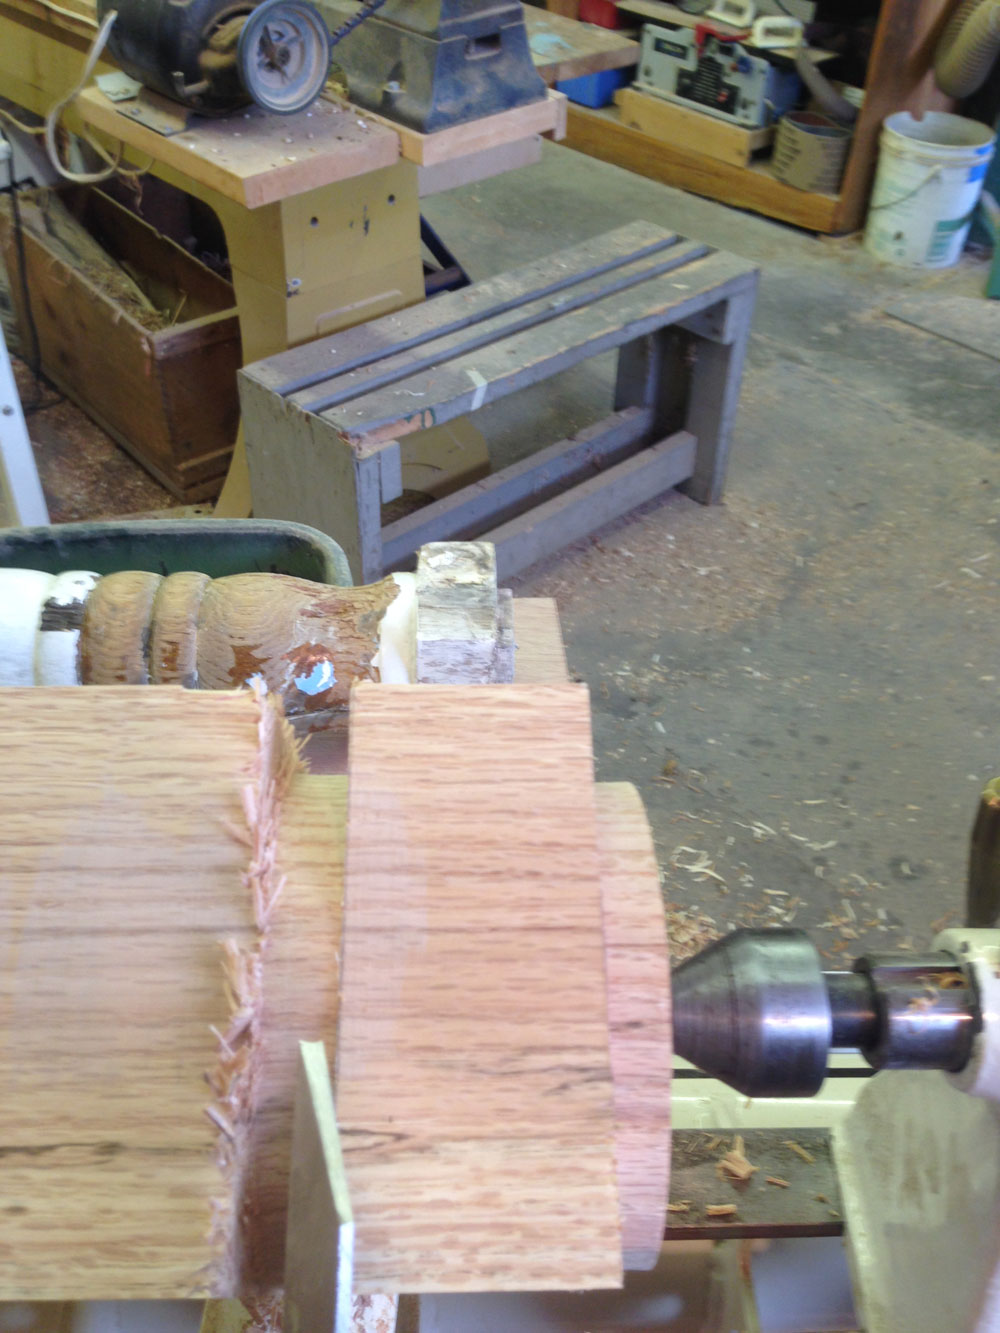
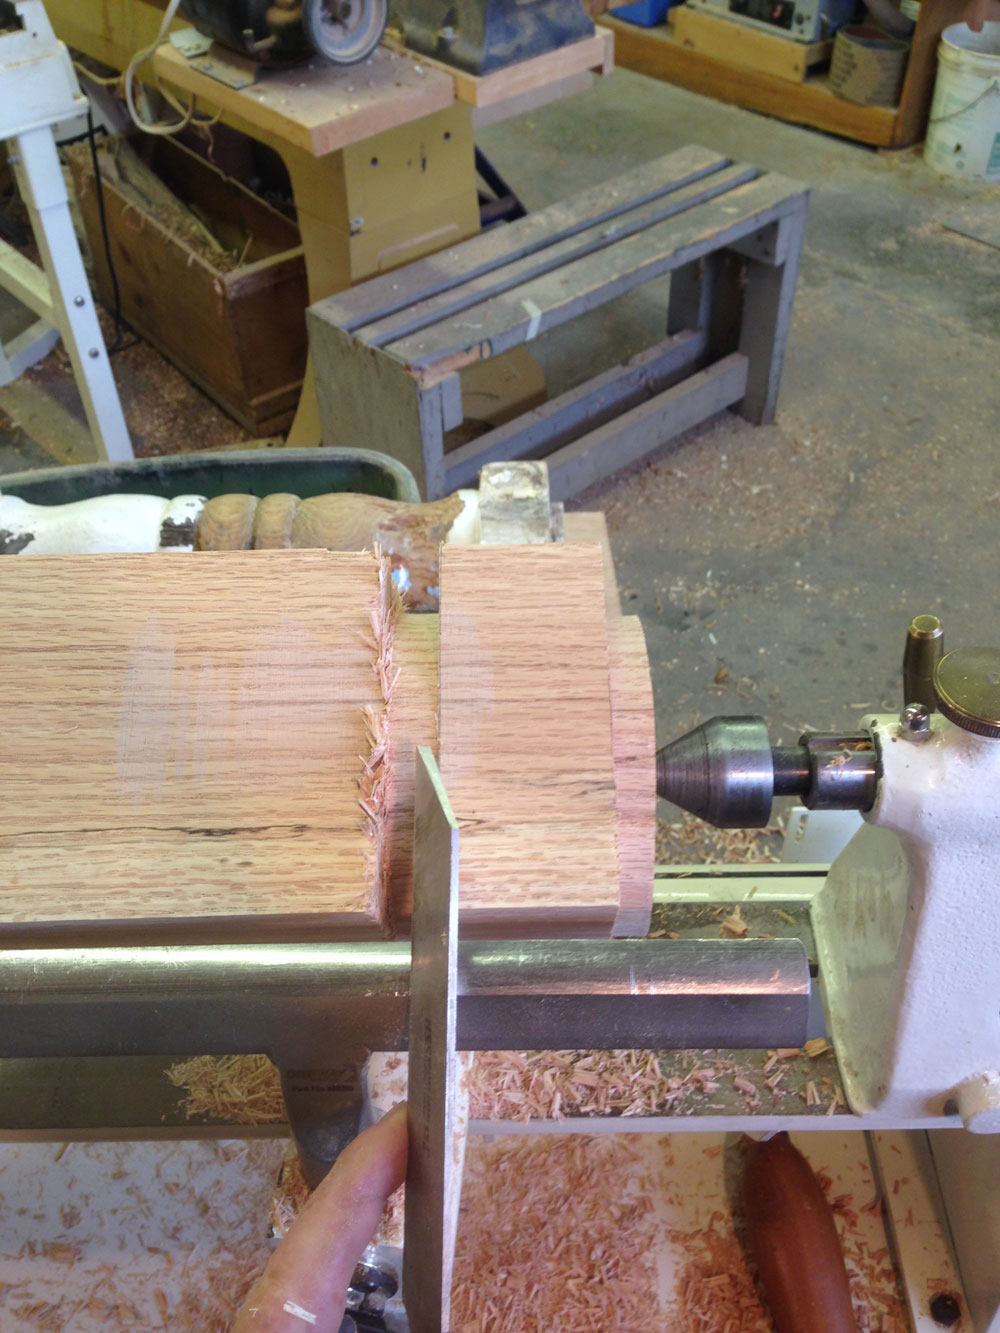
Cutting the crisp shoulder on both the outside tenon
and inner pommel on both ends of the blank.
|
Cutting the shoulder as pictured above works well with either Sorby's 1-1/4" Skew
or
Sorby's Fluted Parting tool, both of which cut and seal the end-grain cleanly in
preparation for using the Sorby 3/8" Beading and Parting tool to dimension the round version of the final tenon.
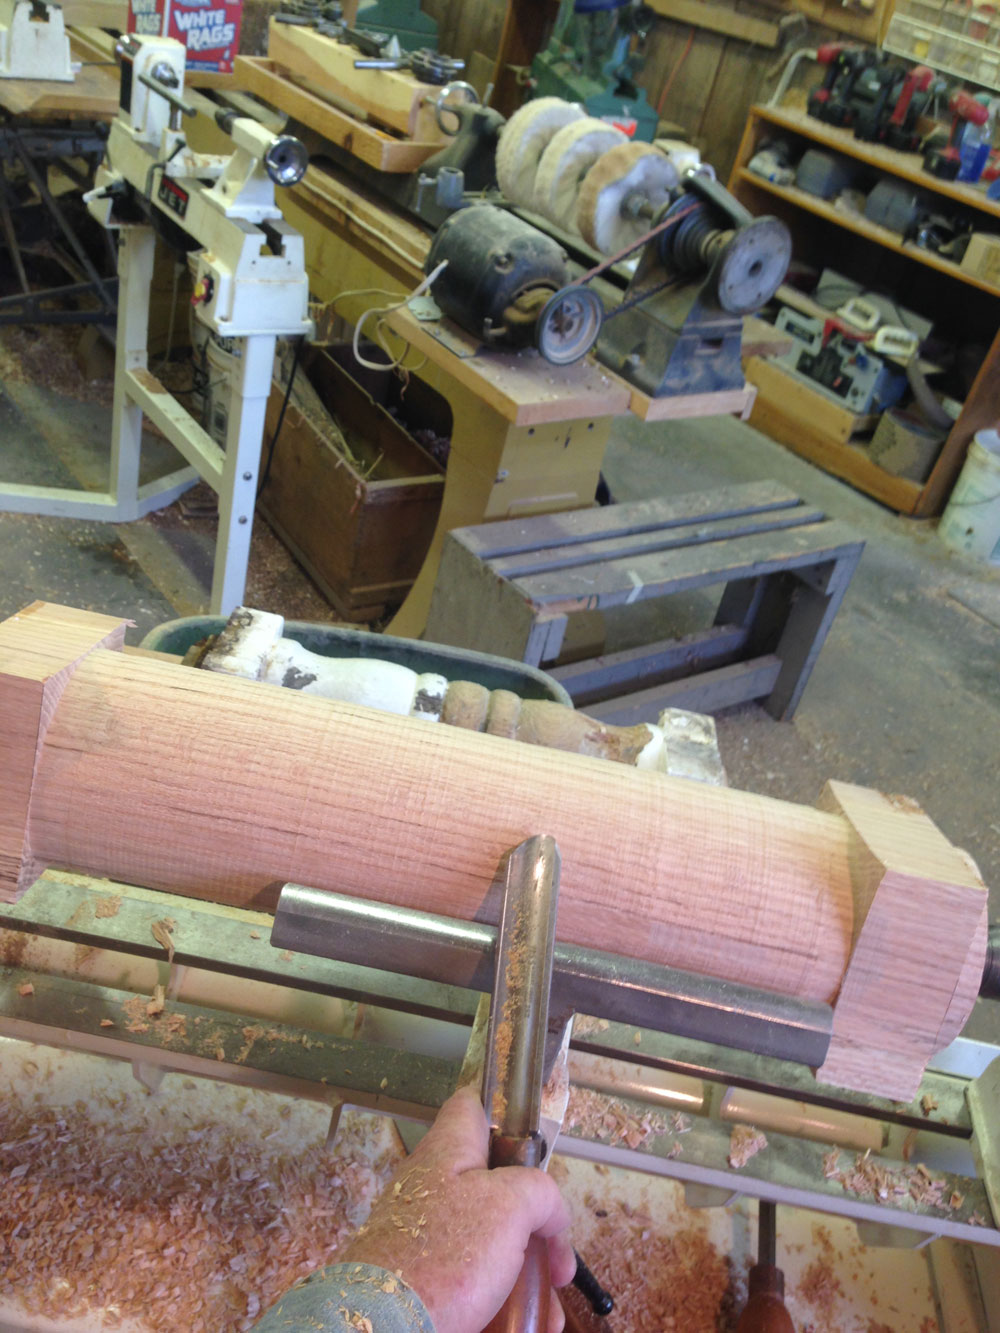
With both ends clearly defined, rounding with the roughing gouge goes quickly. I prefer
the Sorby "Continental Grind" 30mm Gouge for this because it can leave an extremely
smooth surface that makes using the skew to smooth much quicker.
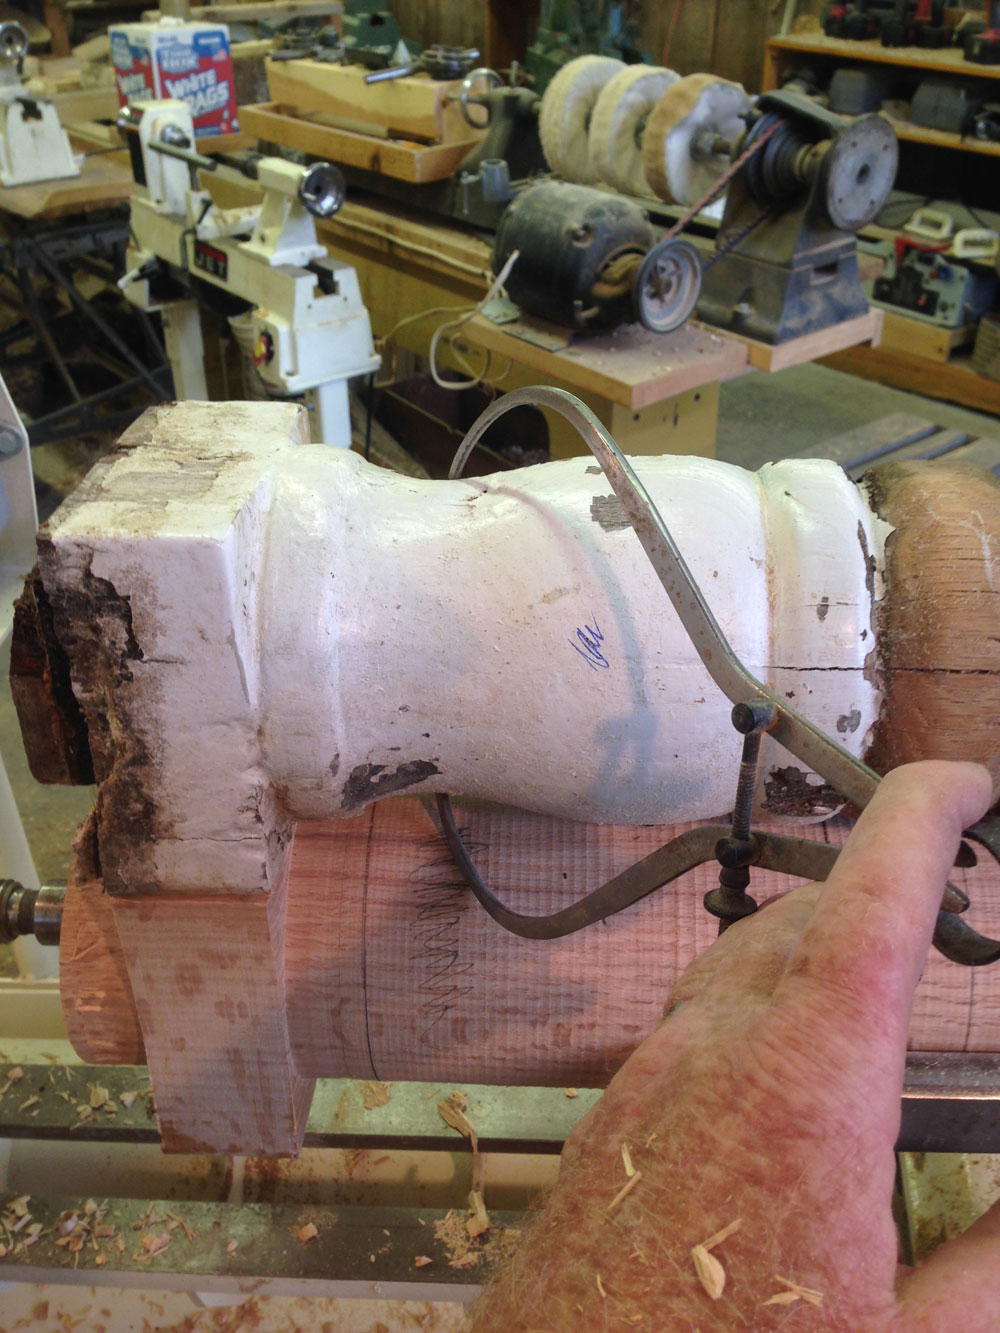
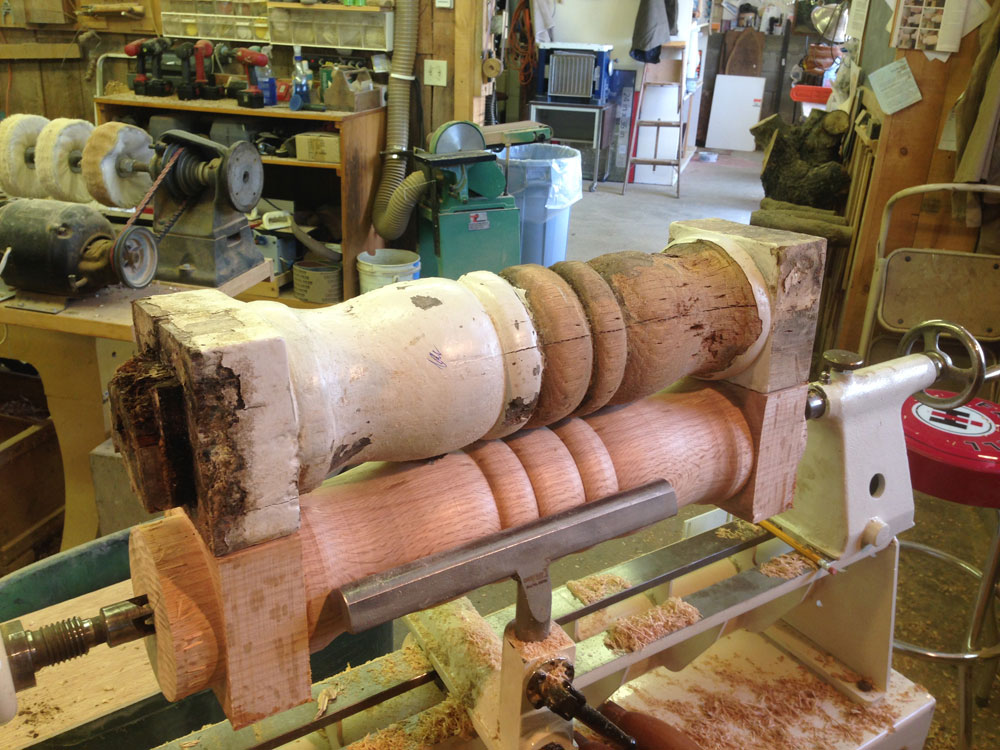
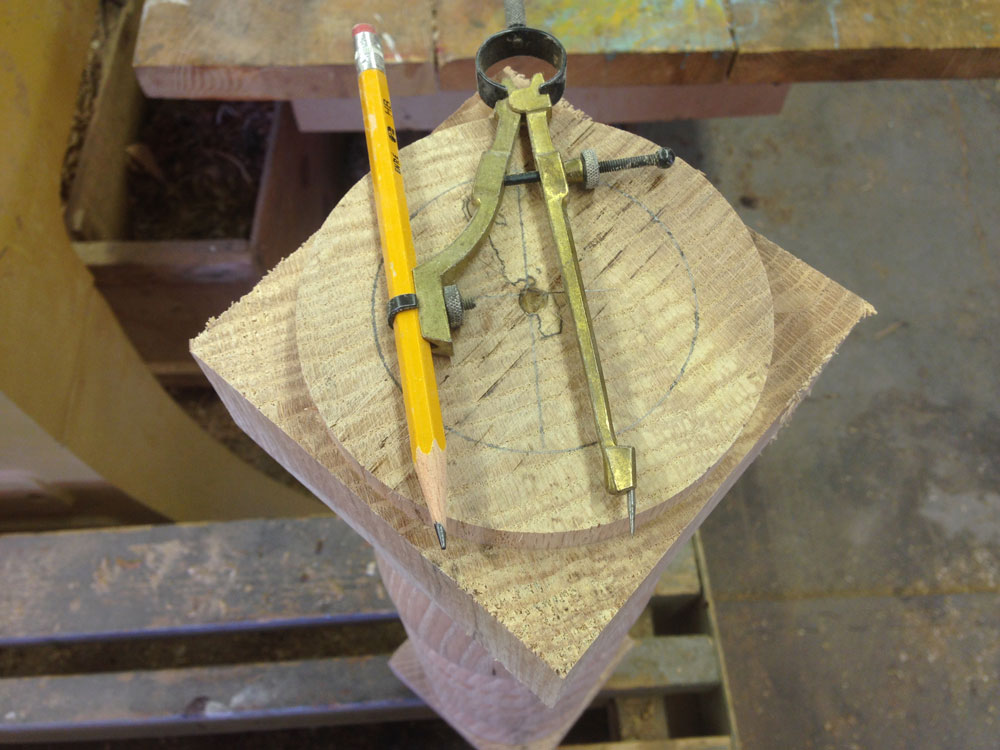
Working directly from the original blank, I lay out the critical points with a pencil.
Followed by dimensioning the smaller diameters of the coves.
Although I typically follow rules #2 "large-to-small" and #3 "tailstock-to-headstock," for
this relatively short and stout piece, positioning the coves and cutting them to the correct
depth seemed more important, and I knew that cutting the centered beads last would not
create a flexing problem that confounds longer, thinner work.
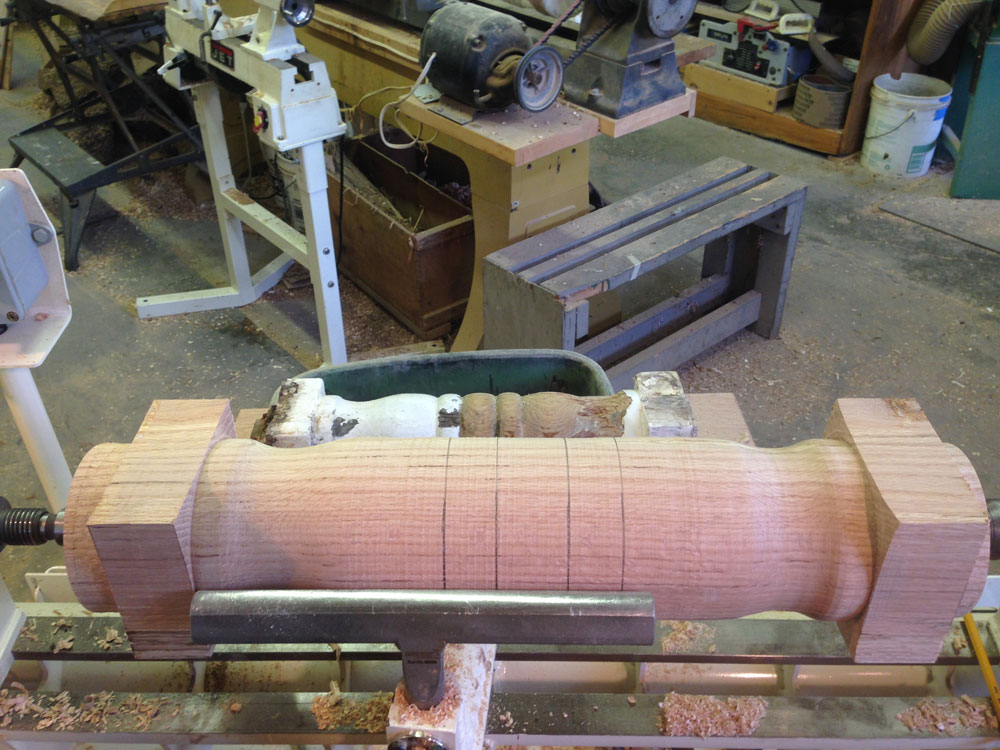
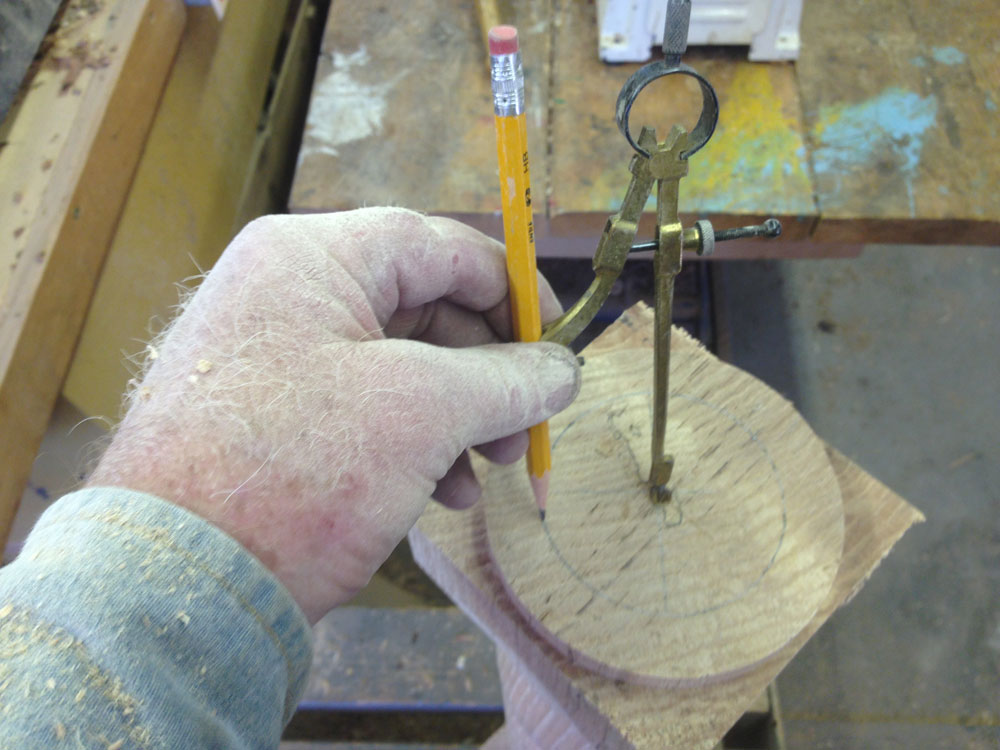
With the actual turning essentially finished, I focused on sizing and cutting the tenons
on each end. Given the outside dimensions of 5" x 5" and being able to "measure" (rot
was a problem) the finished tenon of 3" x 3" squared, I set the center point, scribed with
the compass at 3", and used the bandsaw to cut the tenons square. The two 5" x 5" full
pommels on each end made this both easy and safe.
At that point my part was done. I called Lance, and at some point within a day he swung
by and picked up the finished stanchion.
Two days later, it reappeared in my shop/gallery with a note: "Please drill the 1/2" hole for
us through the center." (I was not surprised).
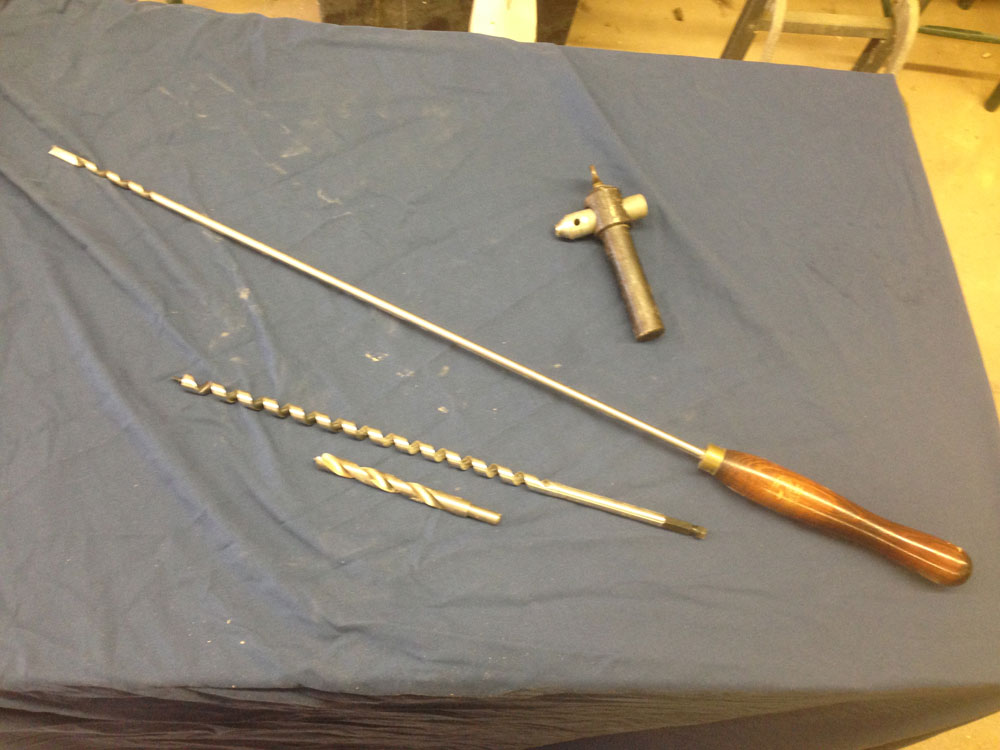
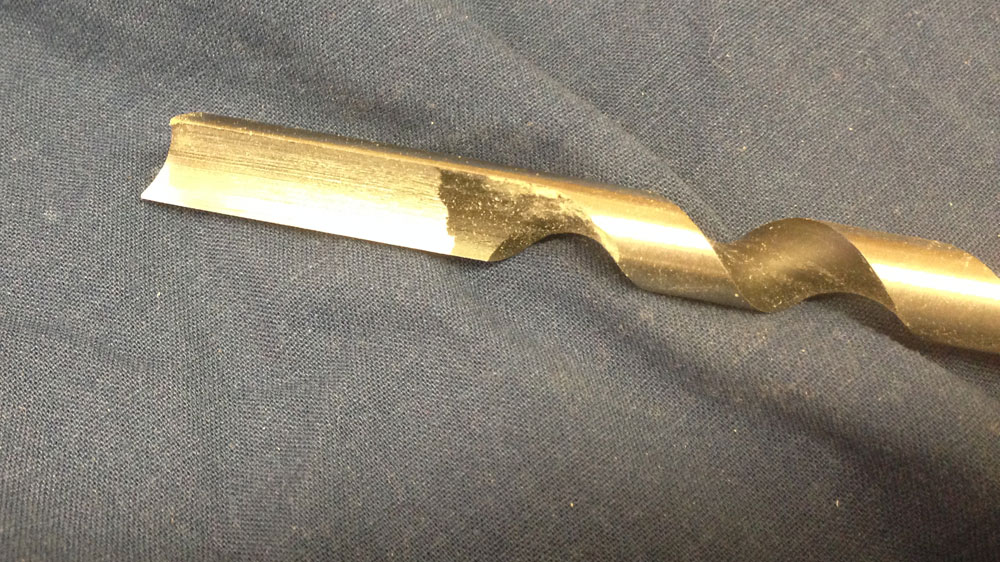
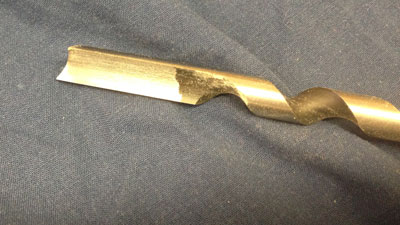
As many woodturners and woodworkers know, long holes through end-grain can be a
challenge to drill accurately because the hard/soft nature of the grain can throw off a long
drill bit. My best tools for drilling this hole accurately include a special tailstock steady,
a 3/8" Bell-Hanger's Bit with a special grind, and two lengths of 1/2" drill bits.
I began by taking a standard short 1/2"
drill bit and drilling as far in as possible from each end.
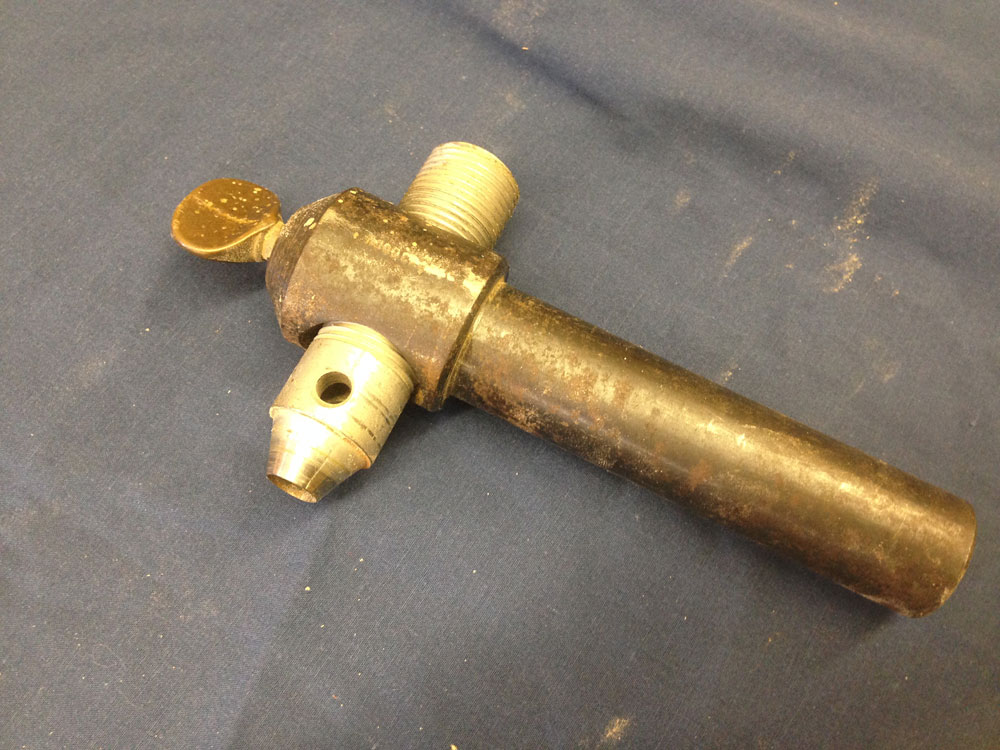
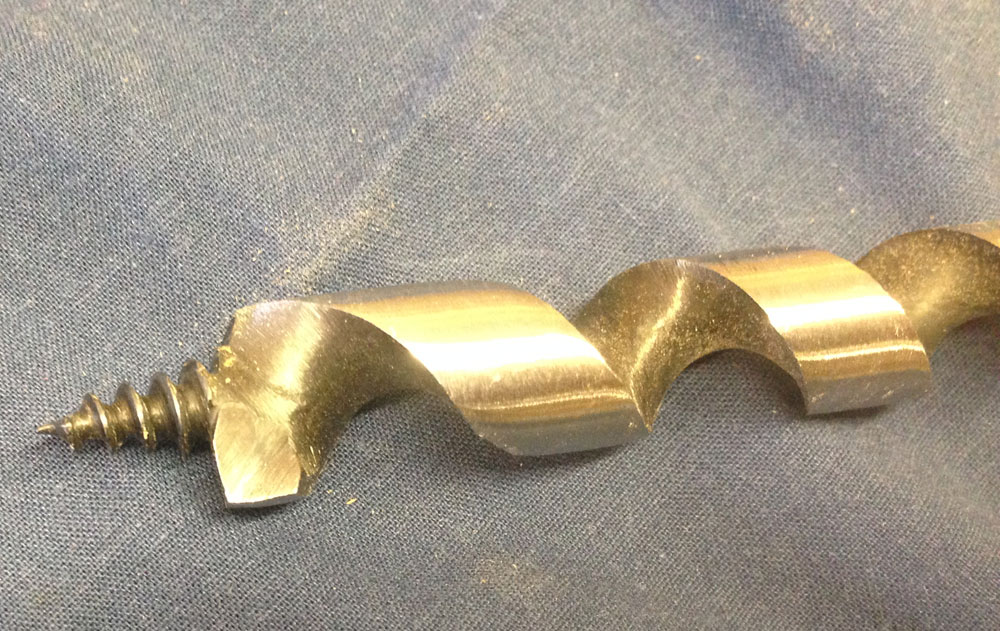
Next, using the adjustable 3/8" Steady for
tailstock mounted in the lathe's banjo and tightened into one of the drilled 1/2" holes, I set
the stanchion turning at a slow 100-200 rpm and introduced the 3/8" Bell-Hangers drill
bit. The unique grind of this bit causes it to seek the center of the turning work. Properly
sharpened, it drills quickly and accurately creating a 3/8" pilot hole through the wood.
The short wooden handle is adequate for holding the bit, and the cutter must be
frequently withdrawn and dumped to avoid clogging and jamming internally.

|
|
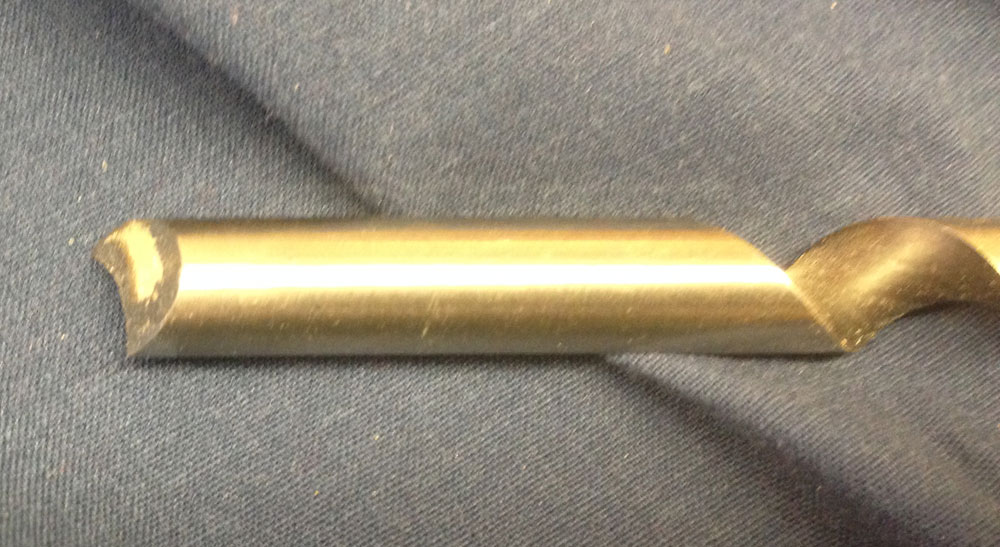
The old 3/8" Bell-Hanger's Bit Cutter (above) that I purchased many years ago works
especially well and seems to operate similarly to a spoon bit. With the work spinning,
that leading sharp point consistently seeks the center of the turning and stays true
throughout. With a 24" Shank, and a piece like this stanchion, the bit finds the initial hole
on the other end without difficulty. If the piece were longer, it could be drilled
successfully from both ends and the center-seeking bit would connect inside the piece.
Another woodturner has a similar bit configuration (pre-Civil War) on a 2-1/2" X 9' twist
bit for drilling the inside of outdoor wooden lamp posts that works with amazing
accuracy.
With the stanchion off the lathe and using a
cordless drill, the 1/2" Spiral Bit filled the pilot
hole with its leading screw and rapidly
expanded the centered hole to the desired 1/2"
without wandering.
Drilling accurately through end-grain wood is a
challenge in both long and short lengths.
Typically for lamps and other turnings I drill the holes before turning the blank and use
the hole to set the drive and live centers to then center the wood blank on the holes. In
the current marketplace, I have not found the old style 3/8" Bell Hanger's bit available
anywhere, but I welcome other suggestions and solutions about how to drill a centered
hole through the end-grain of a long turned piece.

|
Hole drilled through. The finished piece
was soon ready for pickup,
installation,
and painting.
|
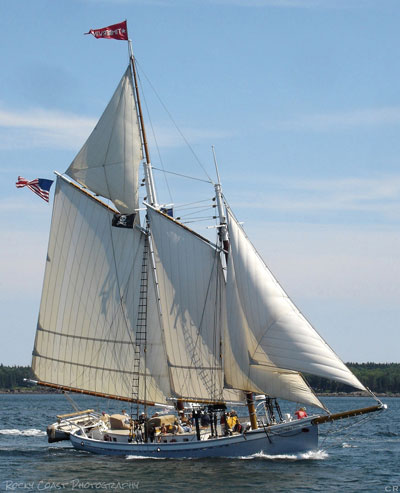
Those readers
looking for a terrific vacation can sign up to see my work in person at
www.mainedaysail.com
and sail the Penobscot Bay from Belfast, Maine.
|
Timberwind under sail with a
working rig.
|
Located in Castine, Highlands Woodturning gallery and shop offers woodturning classes and shop time,
a gallery of woodturned art, custom woodturning for repairs, renovations, and architectural installations.
Primary woodturner Temple Blackwood also demonstrates woodturning at Castine's Wilson Museum
Wednesday and Sunday afternoons in July and August as part of the museum's "Living History" program.
You can email Temple at
temple@highlandswoodturning.com
Take a look at Temple's Website at
http://www.highlandswoodturning.com/.