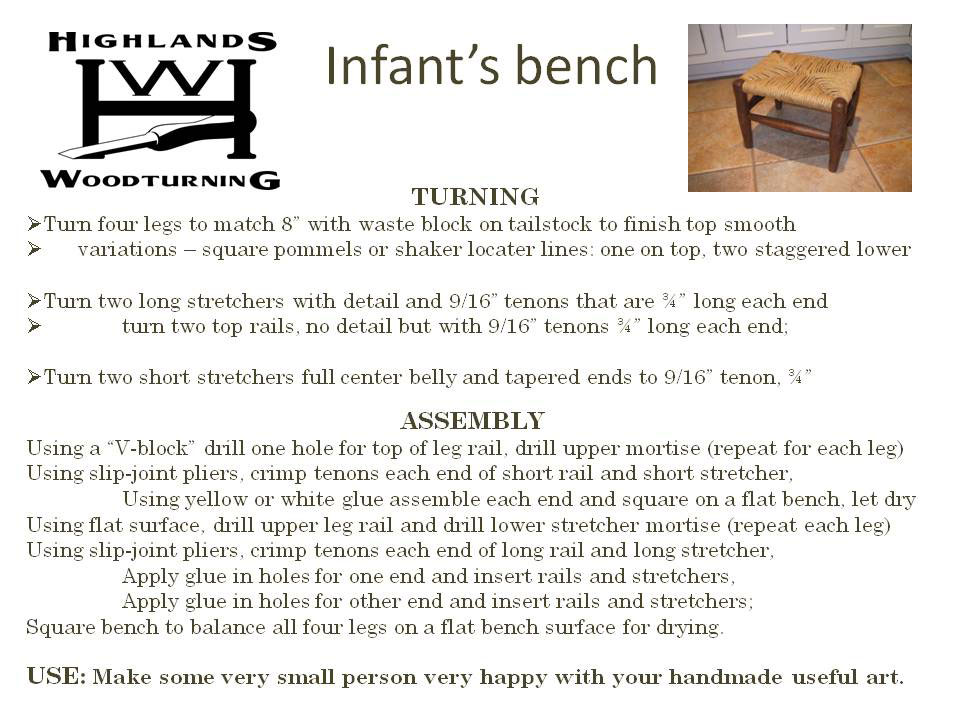
Turning a Small Classic Child's Bench
by Temple Blackwood
Castine, ME
Note: Click on any picture to see a larger version.
One project that offers multiple benefits to the turner is to turn, build, and weave a small child's corded-rush-seated bench. The benefits are that the entire project can be completed in about three-to-four hours, will provide an opportunity for extensive practice with the
skew chisel, presents a modest challenge in turning multiple parts that match and mate, and creates a new avenue for experimenting with practicing design modifications for these and other larger versions of the four-legged soft-seated bench. The resulting bench makes a satisfying new-baby gift for a family, that becomes an heirloom part of the baby learning to stand and walk, the baby learning to carry and climb – or even flip upside down and use for a doll's bed – and the parent/grandparent can use for sitting when putting the child's shoes on. Ultimately, most of these become benches for the bathroom to allow the child to use an adult sink for tooth brushing. As promised, based on reports back to me over the nearly fifty years I have been making and teaching these benches in black walnut, cherry, maple, ash, locust, and oak, this little bench project embraces a variety of satisfying benefits to the turner.

|
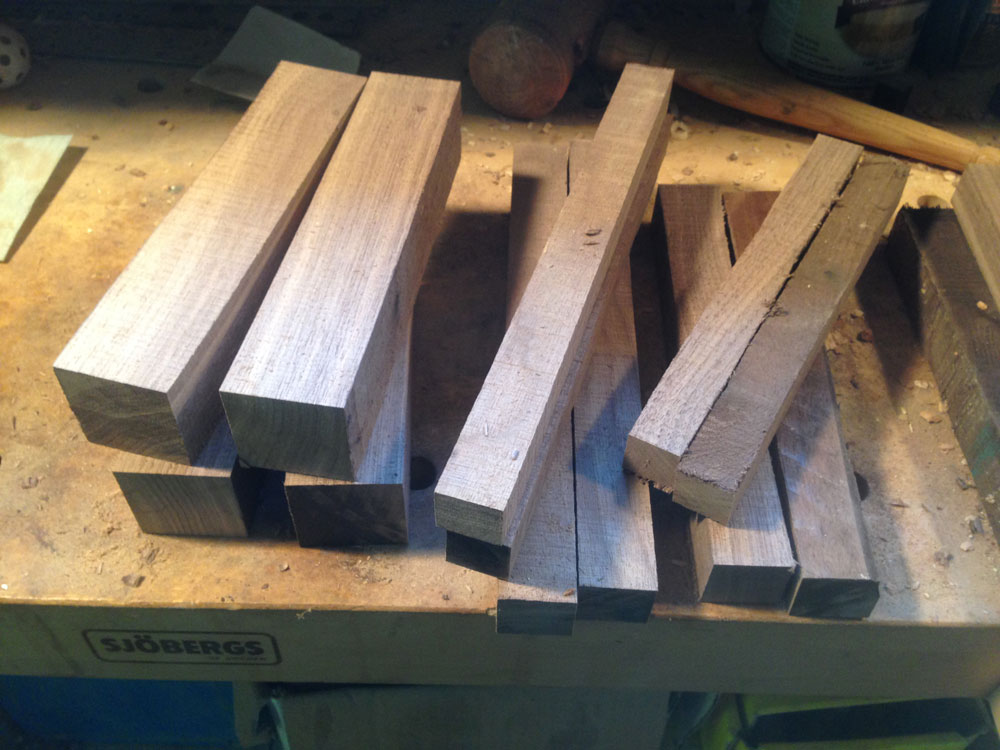
Readers will find a cut-list included for the parts at the end of this article. Depending on the planned type of seating materials, the best planning suggests that the inside rail lengths should be even inches. This allows the turner to use either corded rush materials or 1" Shaker Tape, both of which lend themselves to an easy weave and a nice, light surface for small children. From my own experience, the 3/4" Shaker Tape on this small seat is a challenge for large fingers and more difficult to keep clean from a child's use.
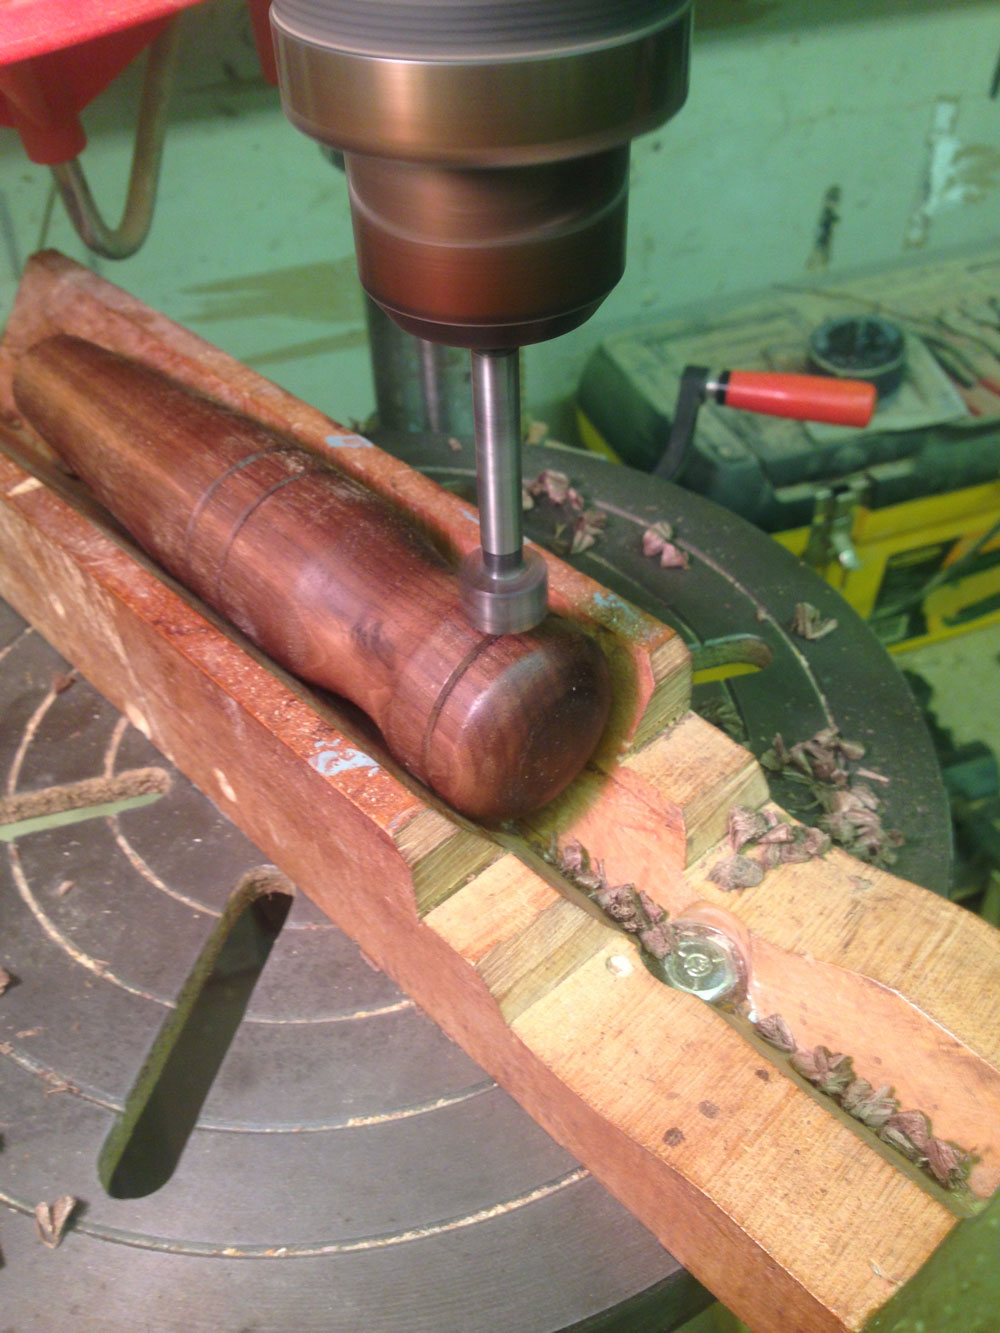
Begin by cutting the raw stock to exactly the suggested lengths. By starting with turning the rails, the turner can quickly make the stock round, practice with the skew, and size each tenon. Each of the stretchers and rails will have a 9/16" X 3/4" (long) tenon on each end. The shoulder between the tenon and the larger diameter of the rounded rail/stretcher ensures the bench will be square and the legs will be perpendicular. One of the simplest ways to cut these accurately is to use a spring-loaded Stebcenter for both the drive and live centers. This allows the turner to quickly loosen the tailstock, flip the turning over, re-center, and reengage it to cut the second tenon.

|
|
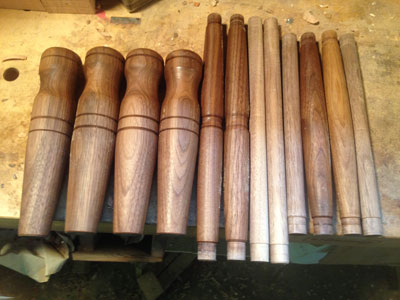
Rail/Stretcher w/tenons
|
The rail/stretcher blanks should be rounded to a final diameter of 5/8" or 11/16". The rails should be a consistent diameter but do not need to be finished because they will be hidden inside the woven seat. Sizing the tenon is critical because an over-sized tenon may split the top of the leg and an under-sized tenon cannot be properly fitted to the bench. Although most of us try it at some point, the glue is not typically a filler/substitute for a loose joint. The lower stretchers will be more attractive with a slight swelling in the middle or even with a decorative bead or cove detail.
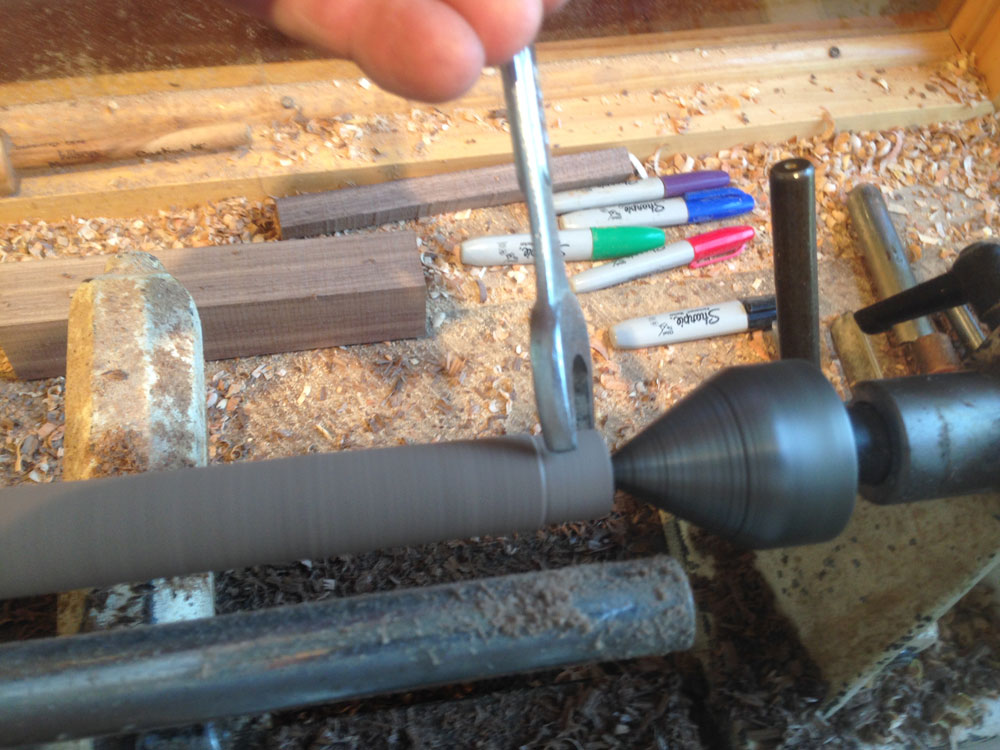
One helpful combination of tools for cutting the tenon is to use a
Sorby 3/8" Beading and Parting tool
in conjunction with a 9/16" open wrench. Properly held, as the parting tool cuts the shoulder, the wrench will slide over the tenon just at the point where it is the proper size. The advantage of the wrench for cutting the tenon is that unlike the adjustable caliper, it will not unexpectedly change its size at some inopportune moment.
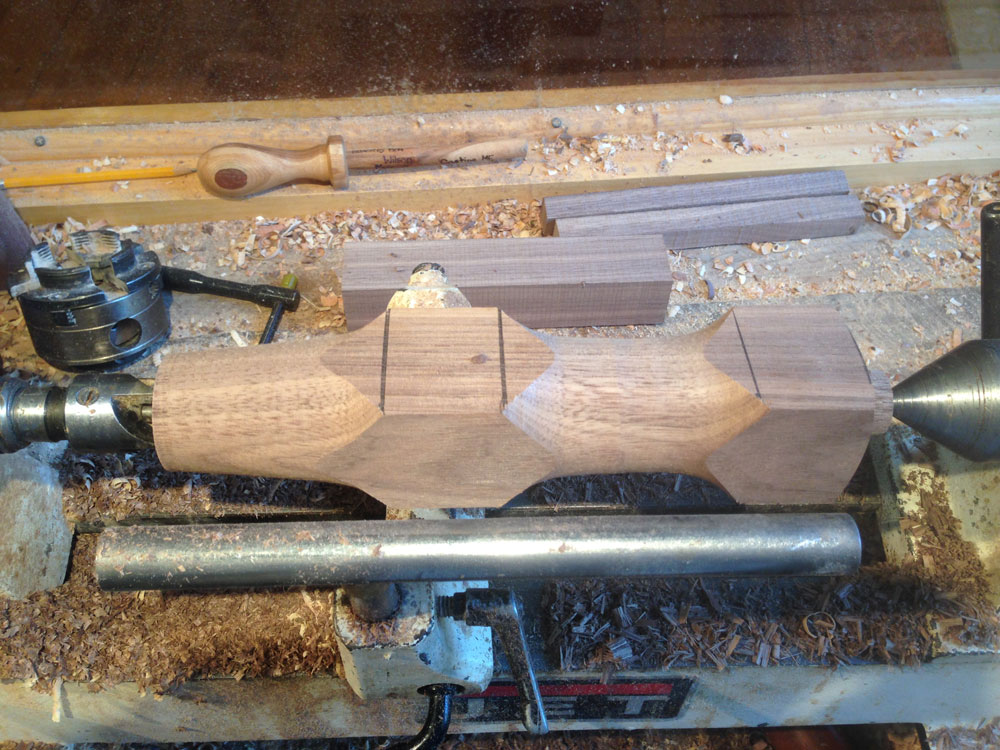
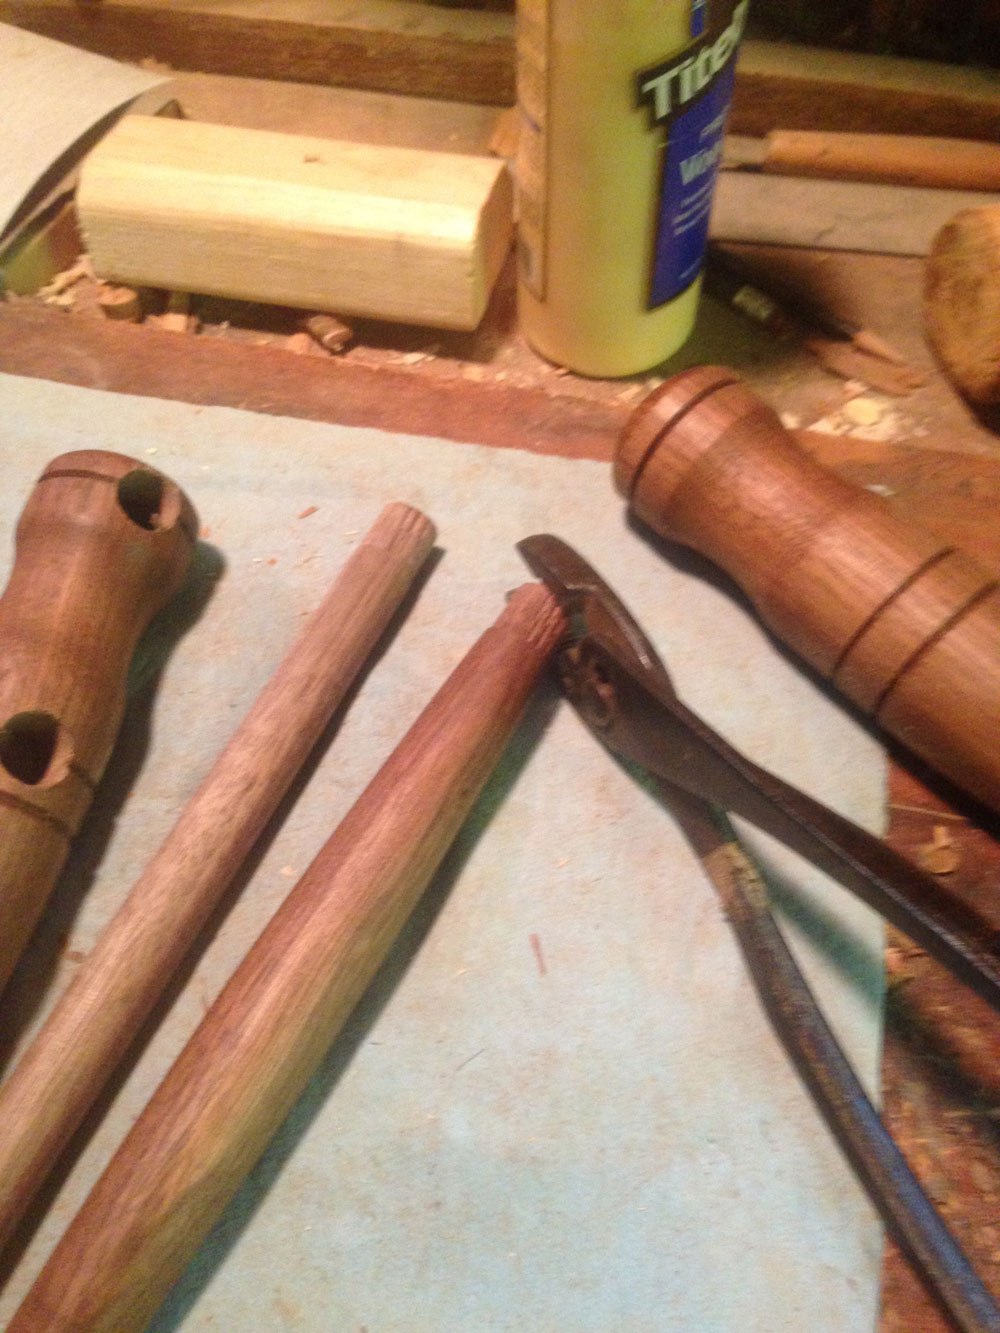
Although my own preference for this bench is a fully rounded leg, another attractive design variation is to measure and create square pommels about 1-1/2" at the top where the rails attach and again about 2-3/4" lower down where the stretchers are fitted. Notice the waste-block mark by the tailstock that will be turned away when the top is rounded. The final appearance can be quite attractive, and the square sections help make it easier to drill the mortise holes at 90 degrees and centered on the leg.
My concerns about using this design for a child's bench is that the hard edge of the squared stock could be a potential hazard, especially for a child just learning to stand and walk.
My preference for this bench is a fully rounded leg with Vee-grooves matched (always measure from the bottom up on the legs) to speed up the drilling process. The Shakers used this often, and it adds a useful and pleasing decoration. Note that having a consistent diameter at both the top where the rails are attached and the lower swell where the stretchers (staggered) are attached is critical to keeping the legs perpendicular and properly spaced.
|
|
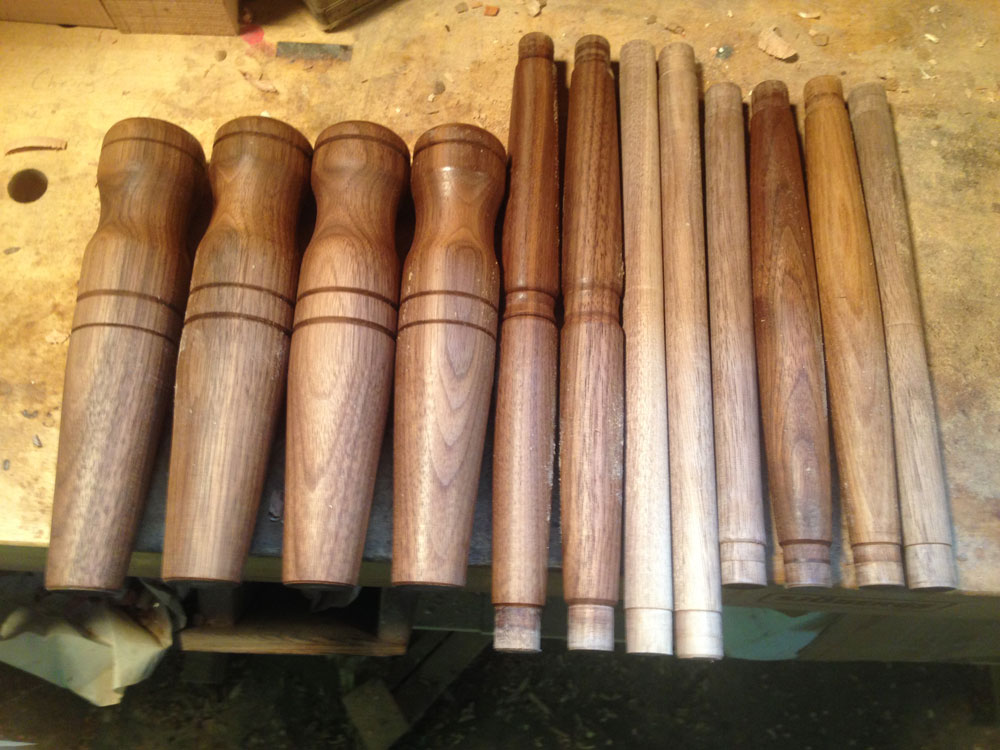
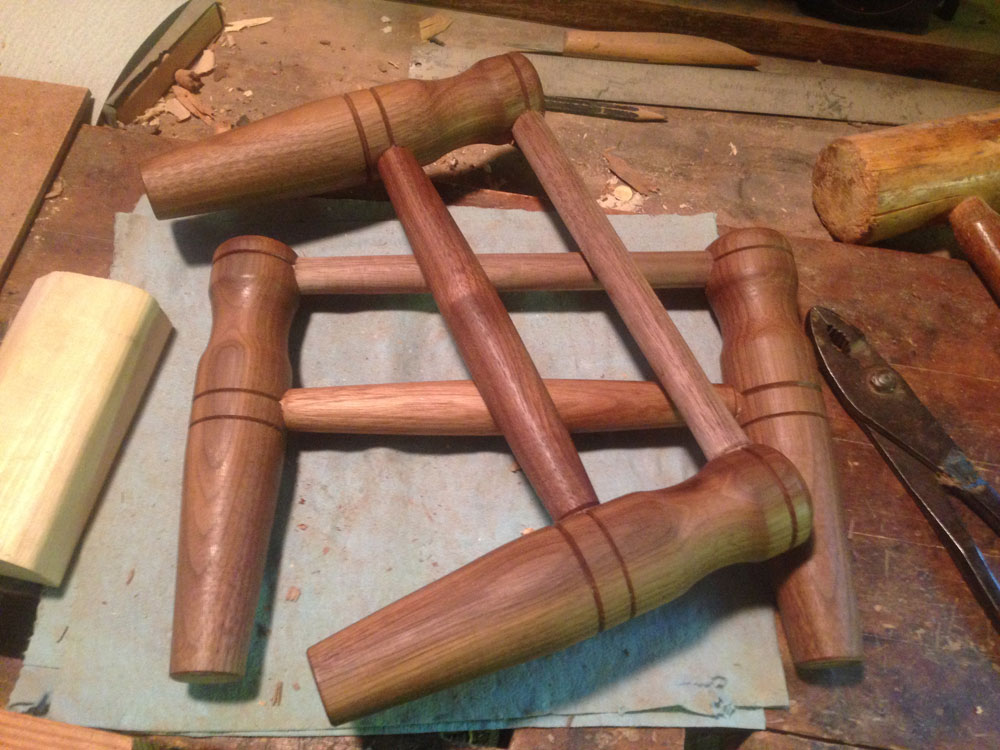
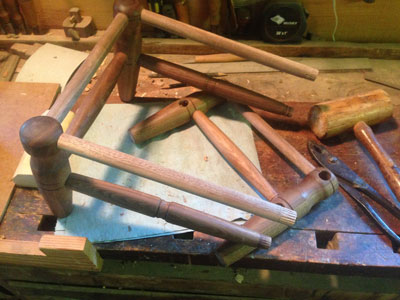
A completed set of turned bench parts
|
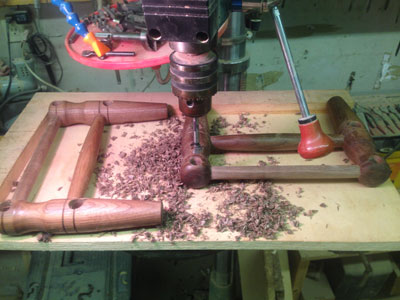
With the rounded leg, using a "Vee-block" to position and securly hold the turned leg keeps the stock from twisting and the mortise centered and true. These measurements are particularly important because the horizontal rails and stretchers must be properly spaced and at 90 degrees to the vertical leg. Any error here will immediately show on the assembled bench. If, however, the turner is distracted and makes an unfortunate error in positioning the mortise, an incorrectly drilled hole can be corrected by plugging the offending hole with the same material and re-drilling after the glue dries. Usually, such a correction can be hidden within the inside of the bench.

|
I prefer to keep the top rails at the same height, but stagger the height of the lower stretchers. The staggered stretchers avoid weakening the strength of the leg. The top rails would seem to weaken the leg somewhat, but the woven seat more than makes up for this by holding the bench corners firmly together as a result of the weave. If the top rails are staggered, the top of the leg protrudes on one side and may be either uncomfortable or unsafe in use.
Assembly
One handy extra step in the assembly is to crimp each tenon prior to gluing. An old pair of slip-lock pliers with serrated jaws will compress and mark the tenon which serves the dual purpose of giving the water-based glue little grooves to fill (and later swell) while helping the full-sized tenon slide into the mortise. Joints assembled in this way seem to last well in spite of later rough treatment of the bench.
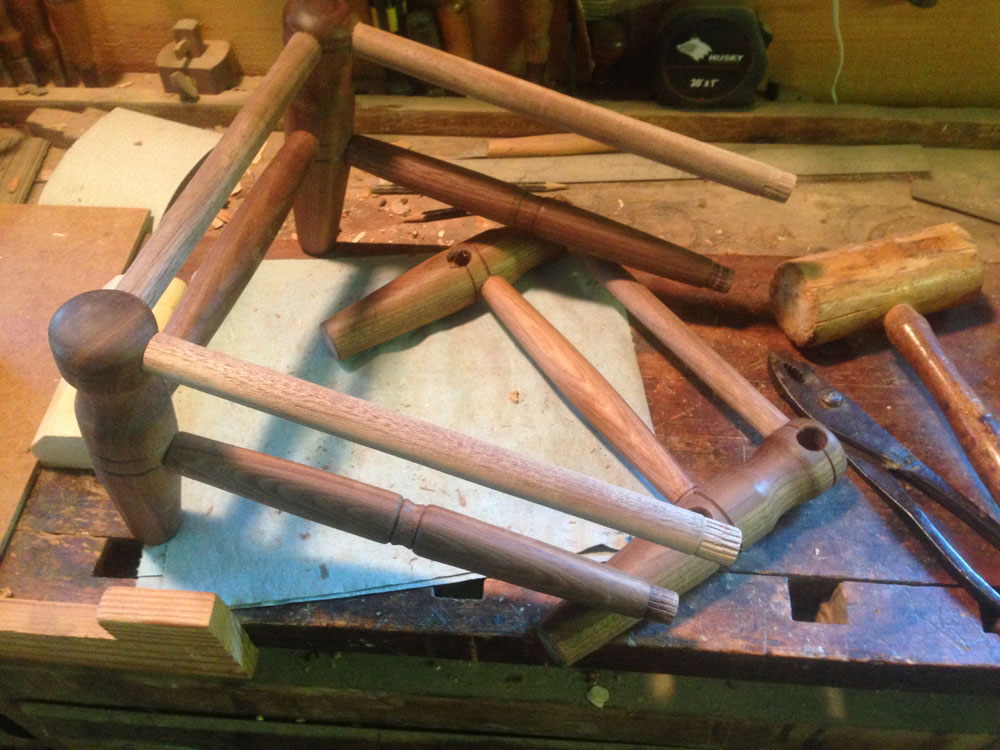
Another simple trick to make assembly easier is to drill the mortises in the legs for each of the short ends of the bench and assemble each end first. This allows the turner to get each end square and true, glued, and finished, ready to easily drill the long side mortises at 90 degrees. By doing this in this order, the final assembly of the longer sides is slightly more flexible and easy to square.
|
|
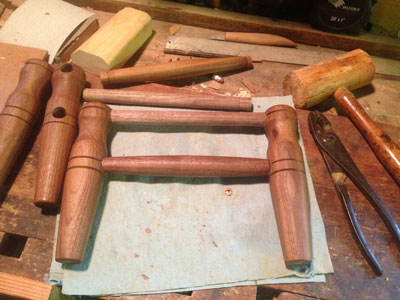
Assemble the short end first.
|

|
|
Then assemble long side stretchers and rungs.
|
|
|
Drill the mortise for the long sides on a flat table.
|
|
|
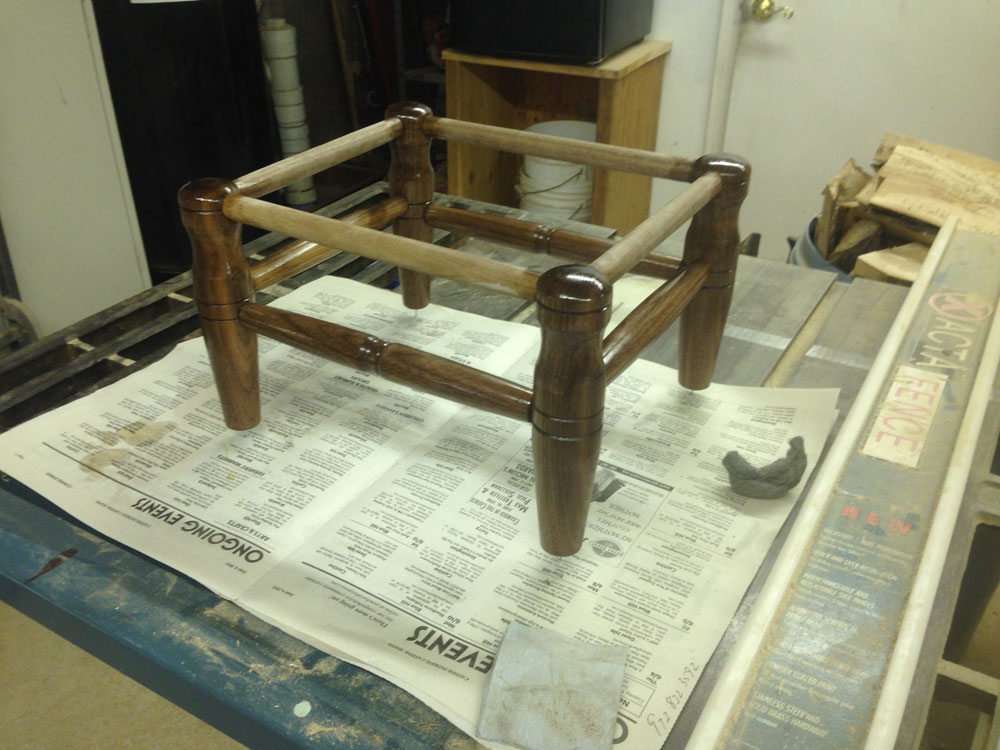
Assemble the final bench frame.
|

|
The fully assembled bench is set square and true on a flat
surface as the glue dries.
|
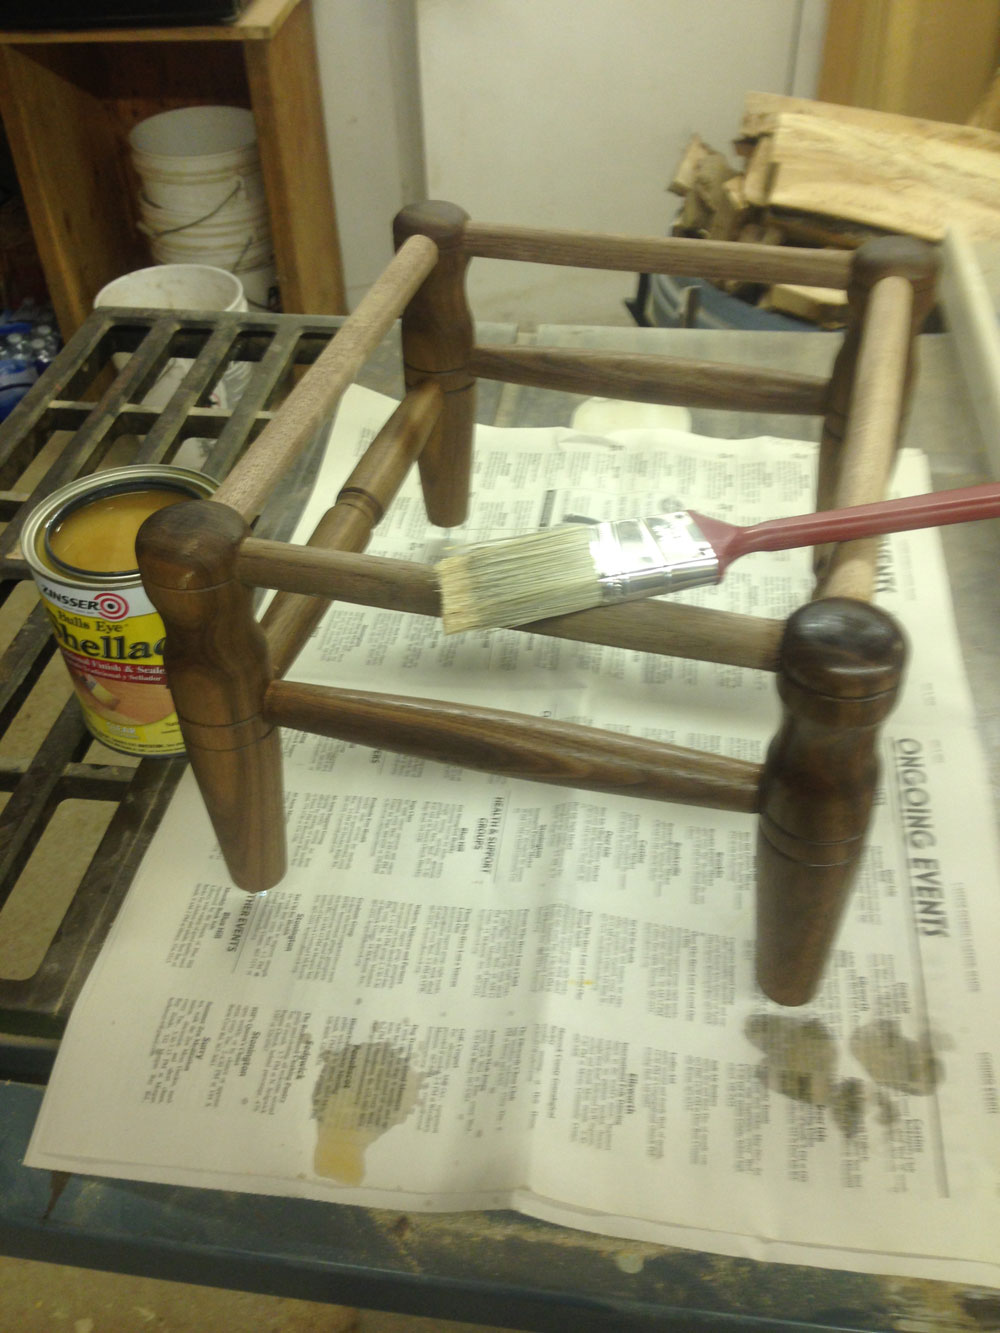
Finishing (this one with two coats of shellac, sanded between, then waxed) is considerably easier before the seat is woven. I also suggest the turner write in (pencil or burning pen) his/her name and date inside one of the rails. While this does not ultimately show, it does identify the maker of the bench for some future craftsperson who replaces the seat.
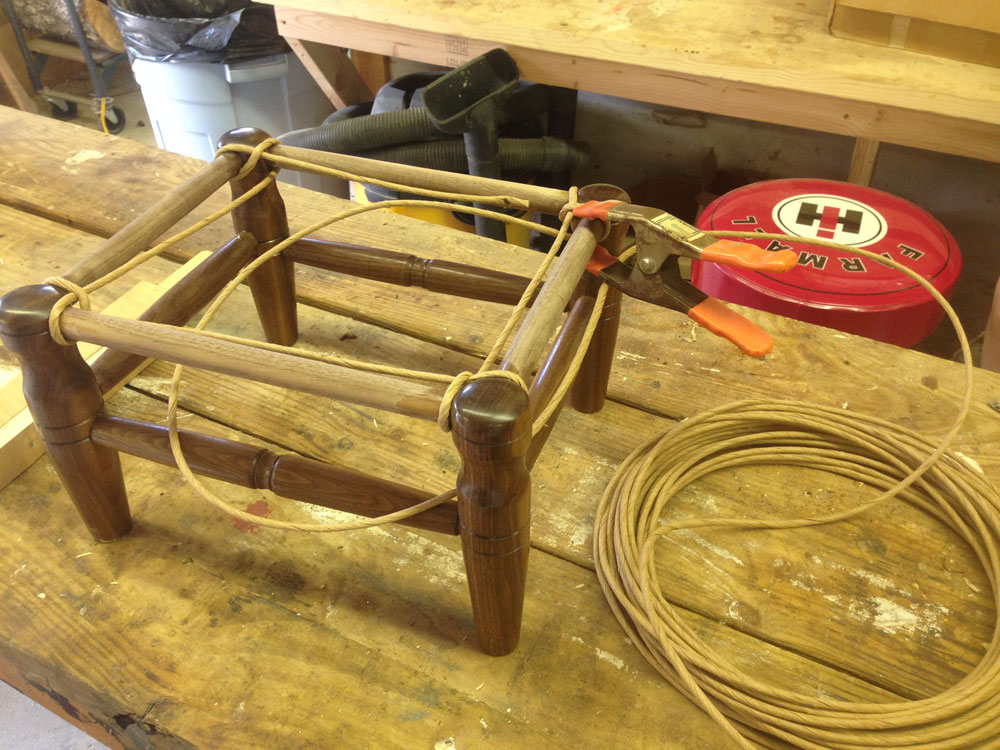
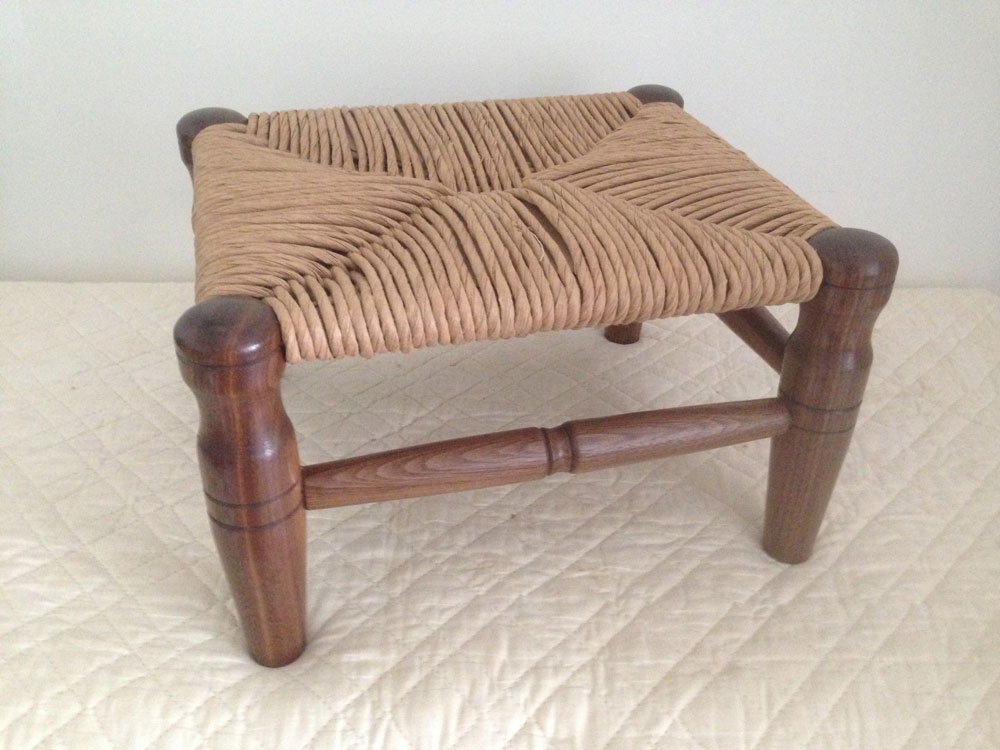
Once the glue dries, weaving the seat with Corded Rush (available with weaving instructions at many hobby shops and on-line vendors), or Shaker Tape simply fills part of a rainy afternoon, while listening to good music or an audio book. While Corded Rush is considerably less expensive than Shaker Tape, the Rush takes nearly three times as long to weave. Both work well on these small benches and last over time.
At a mid-point in weaving, it helps to fill the seat with folded brown paper bag material to make the seat more comfortable and to avoid later flattening.
Enjoy the benefits of a day's project complete, the delights of turning beautiful wood into a useful piece of a family's history, and the satisfaction of enhancing a turner's skills.
Bench Summary and Cut List:
Located in Castine, Highlands Woodturning gallery and shop offers woodturning classes and shop time,
a gallery of woodturned art, custom woodturning for repairs, renovations, and architectural installations.
You can email Temple at
temple@highlandswoodturning.com
Take a look at Temple's Website at
http://www.highlandswoodturning.com/.