Repairing and Replacing Turned Column Bases
by Temple Blackwood
Castine, ME
Note: Click on any picture to see a larger version.
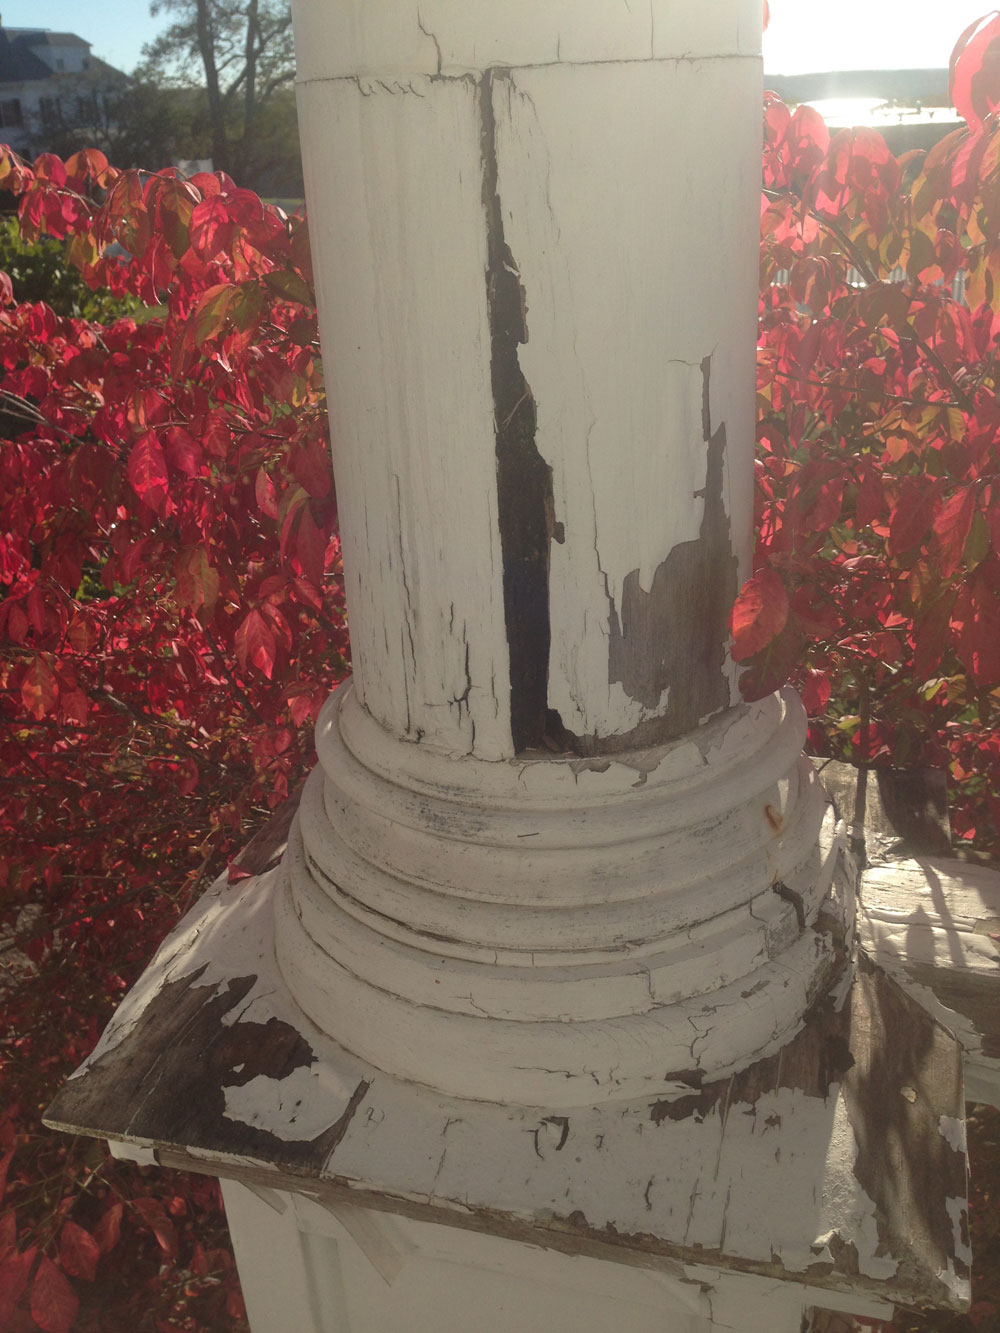
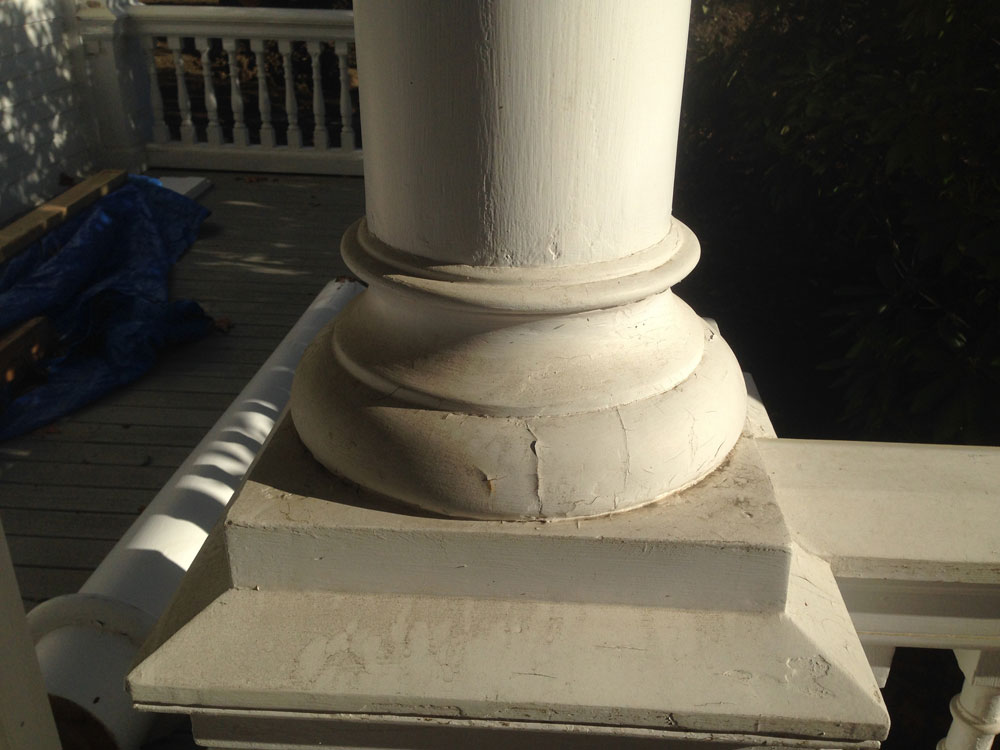
One early winter job in Castine, Maine, where nearly every house is an antique, white clapboard-sided, and lined with beautiful historic lines, was to repair and replace the turned column bases on the front porch of a local music celebrity. Porch column bases often deteriorate long before the columns themselves need repair, and if the bases are positioned and maintained properly, the owner can reduce the potential weather/time damage to the columns themselves.
Characteristically, my long-time friend and talented contractor Homer Lowell was working on the house and its porch in the chilly late November air, moving the project along and planning ahead. He approached me asking to visit the site with him to decide what needed to be replaced and what could be properly repaired. Working together through the eight-column porch, he explained that the owner had instructed him to replace all twelve of the columns with PVC columns and rebuild/repair the bases. We agreed that four of the deteriorating bases could easily be repaired with PC Woody, an epoxy wood-filler, two needed only the lower part of the base replaced, and two others needed the entire stacked base replaced.

|
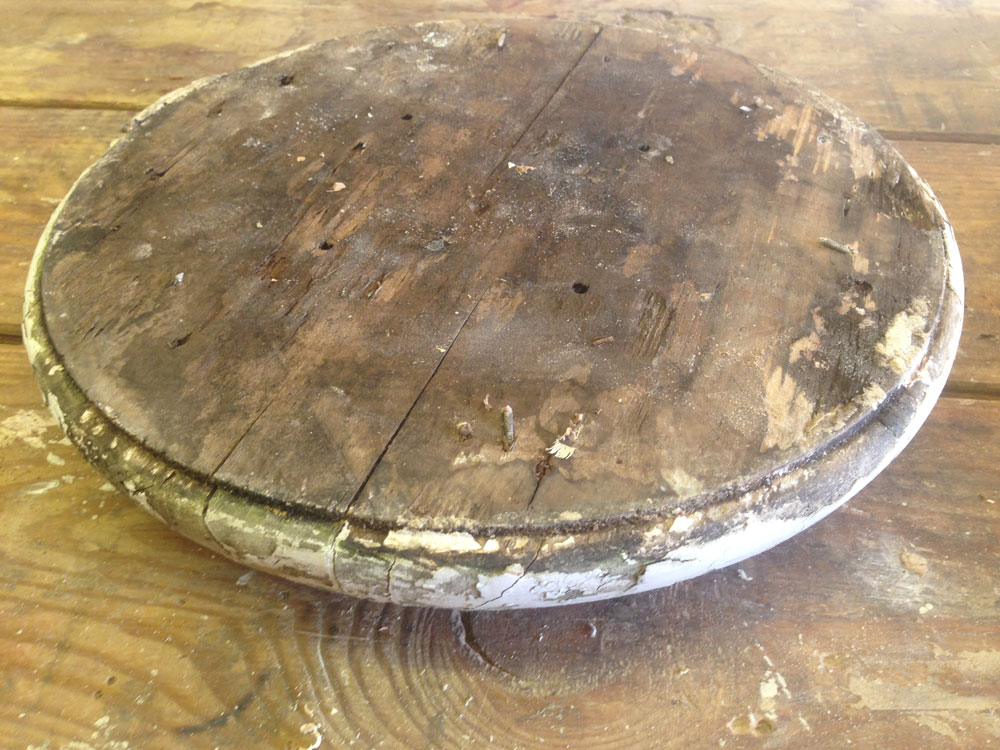
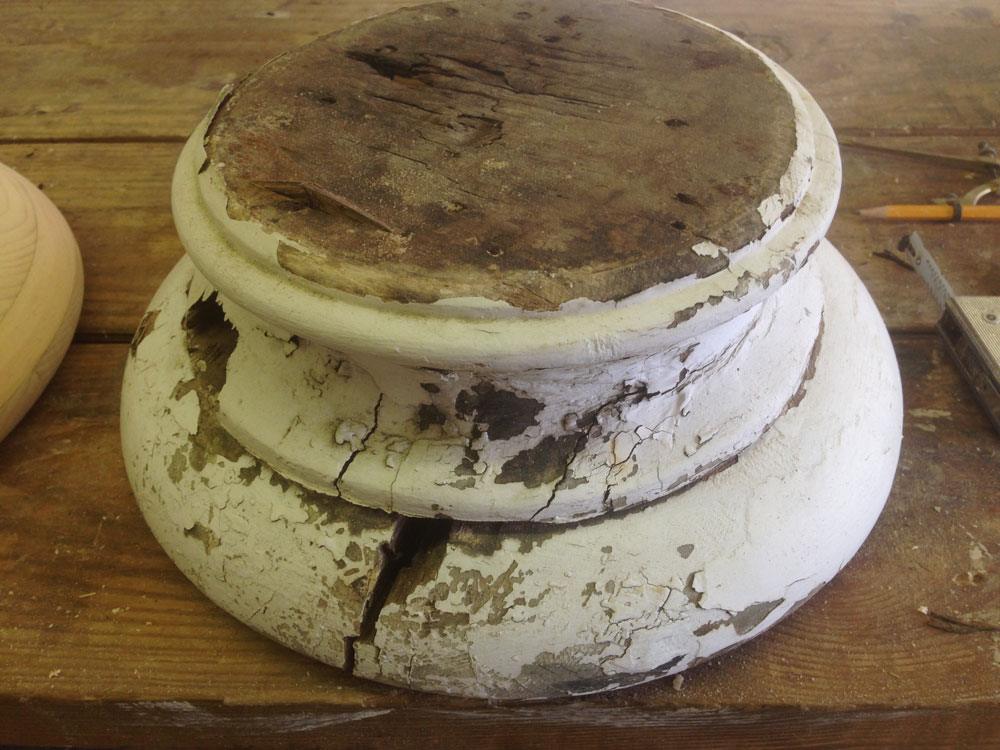
The bases that needed replacing had succumbed to too much water, packed snow, shade, and weather over the years. This was probably due to the position of the entry porch on the house, and definitely because of the harsh winter winds blowing directly up Maine Street off the Castine harbor and Penobscot Bay.
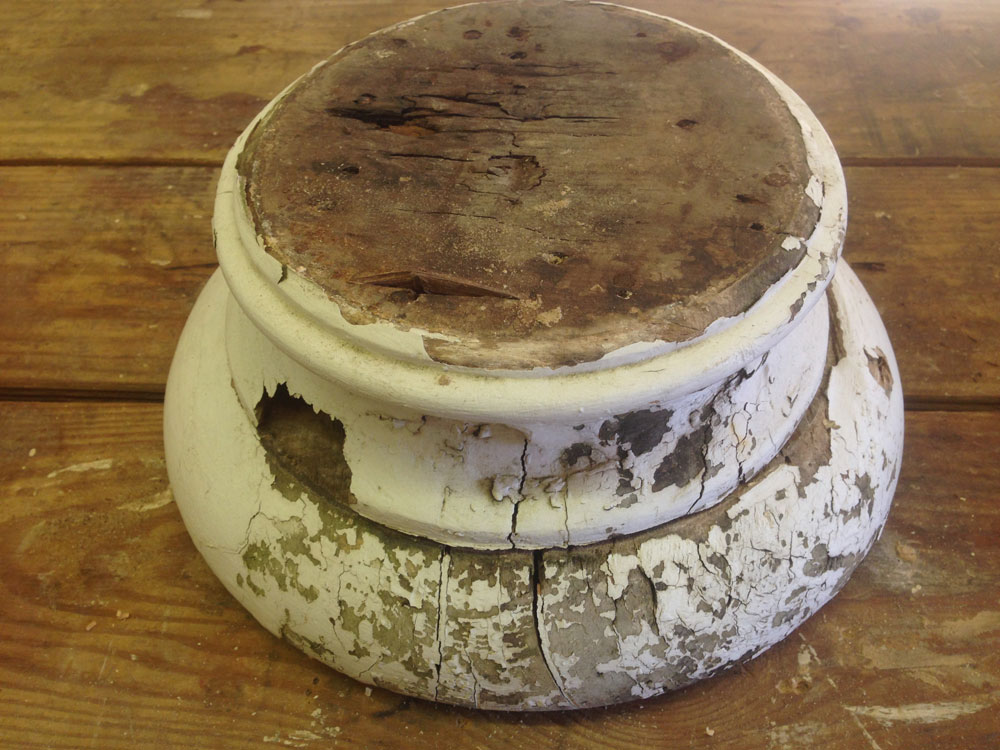
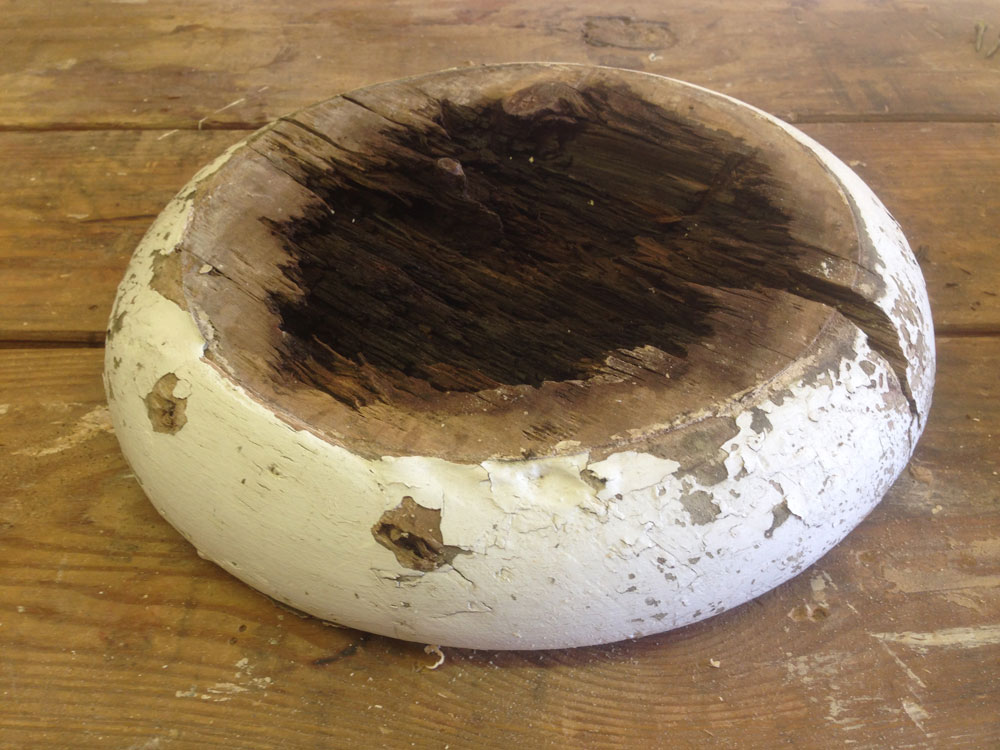
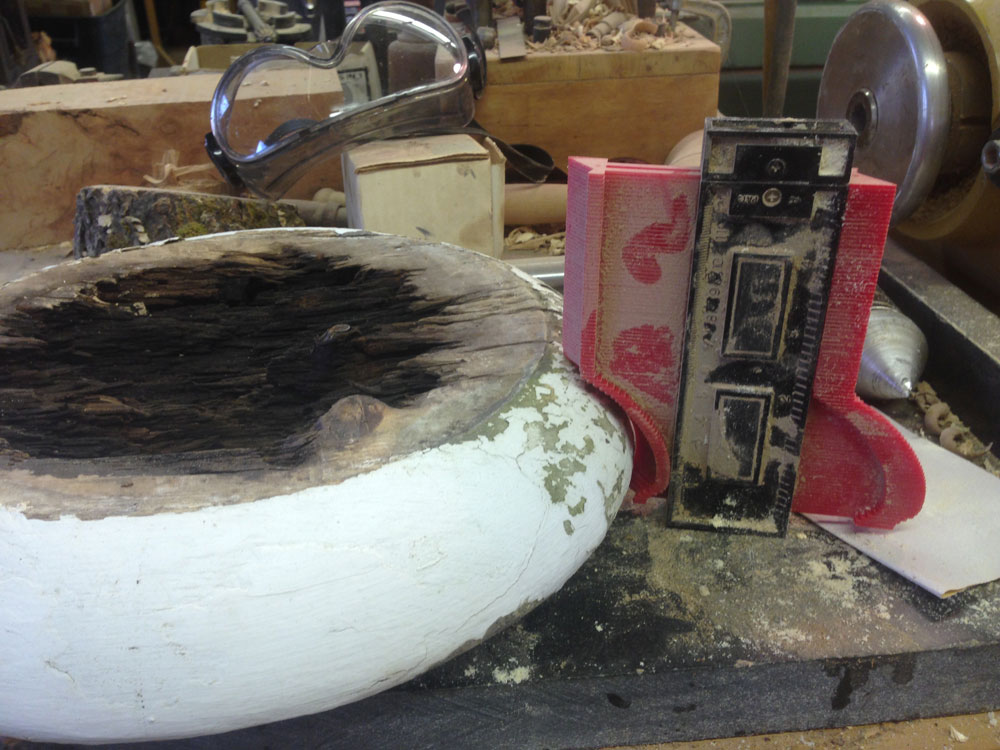
The up-side of one of the rotted bases revealed the destruction from within of the trapped moisture.
The underside of the same rotted base shows a small shoulder that effectively lifts the base slightly to reveal and accentuate the bead. This piece rotted between the upper column bottom and the top of the base, due to water and air seepage, rather than between the lower square base support and the turned base.
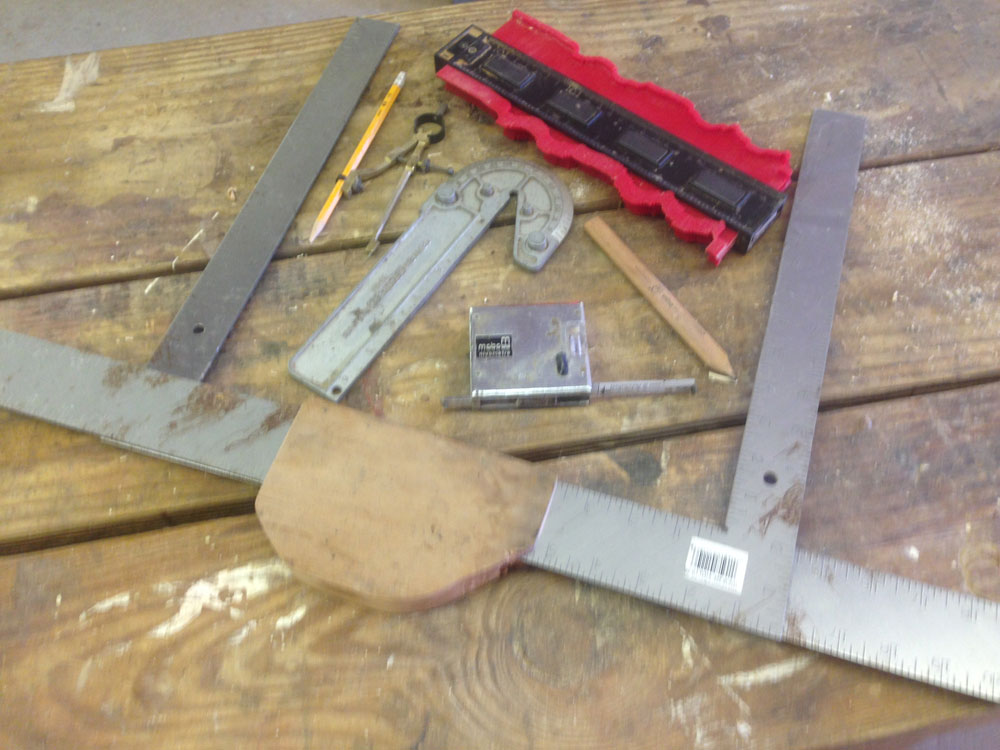
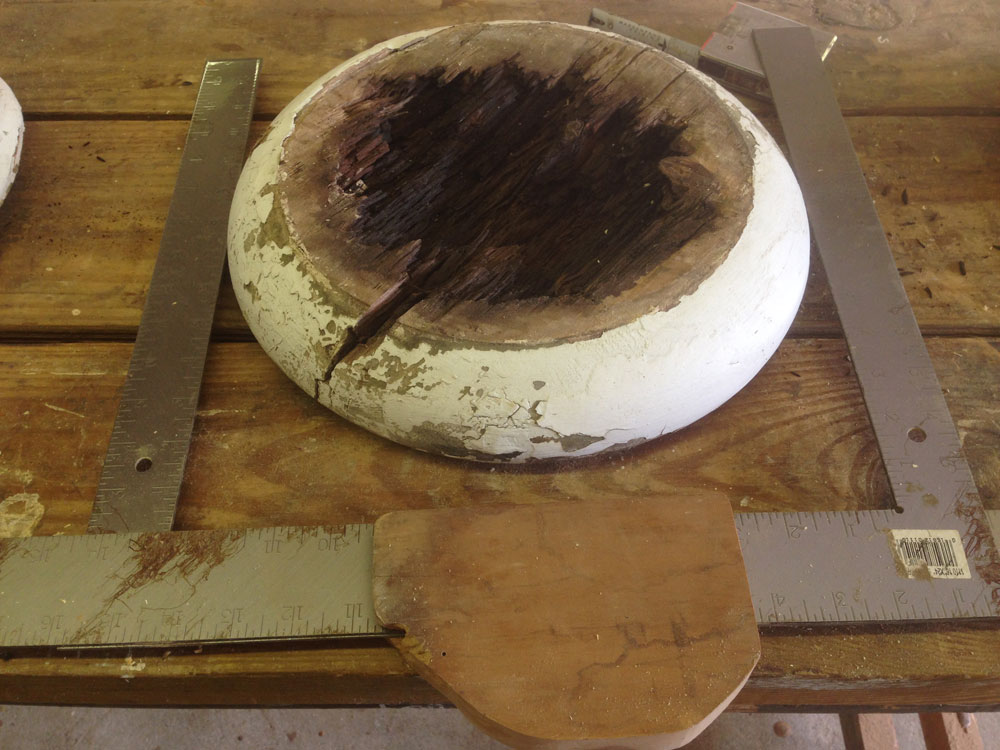
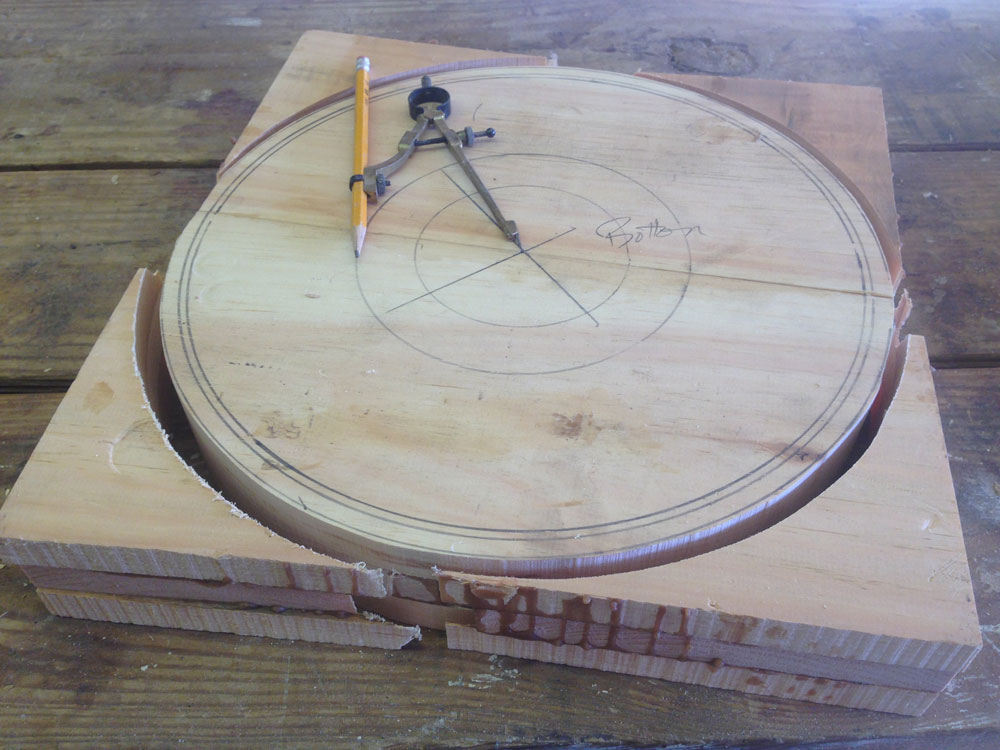
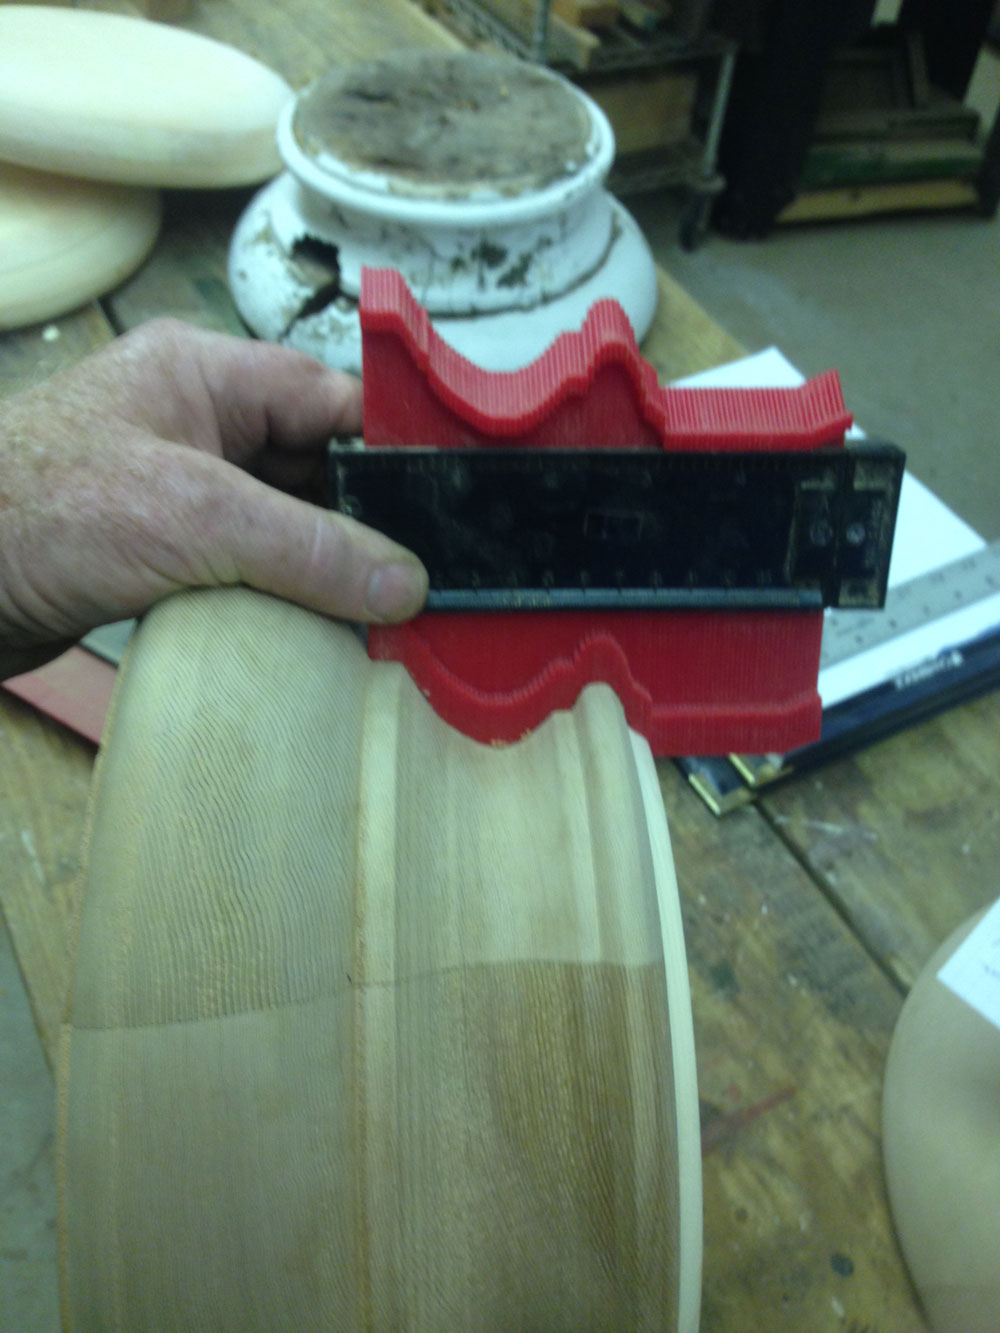
Essential tools for the job are a standard compass, a special circle-marking tape measure for larger circles that gives accurate measurements, a center-finding gauge for rounds, an adjustable profile gauge (red), and an expanded pair of framing squares with a shop-made jam-fixture to measure large diameters with remarkable accuracy.
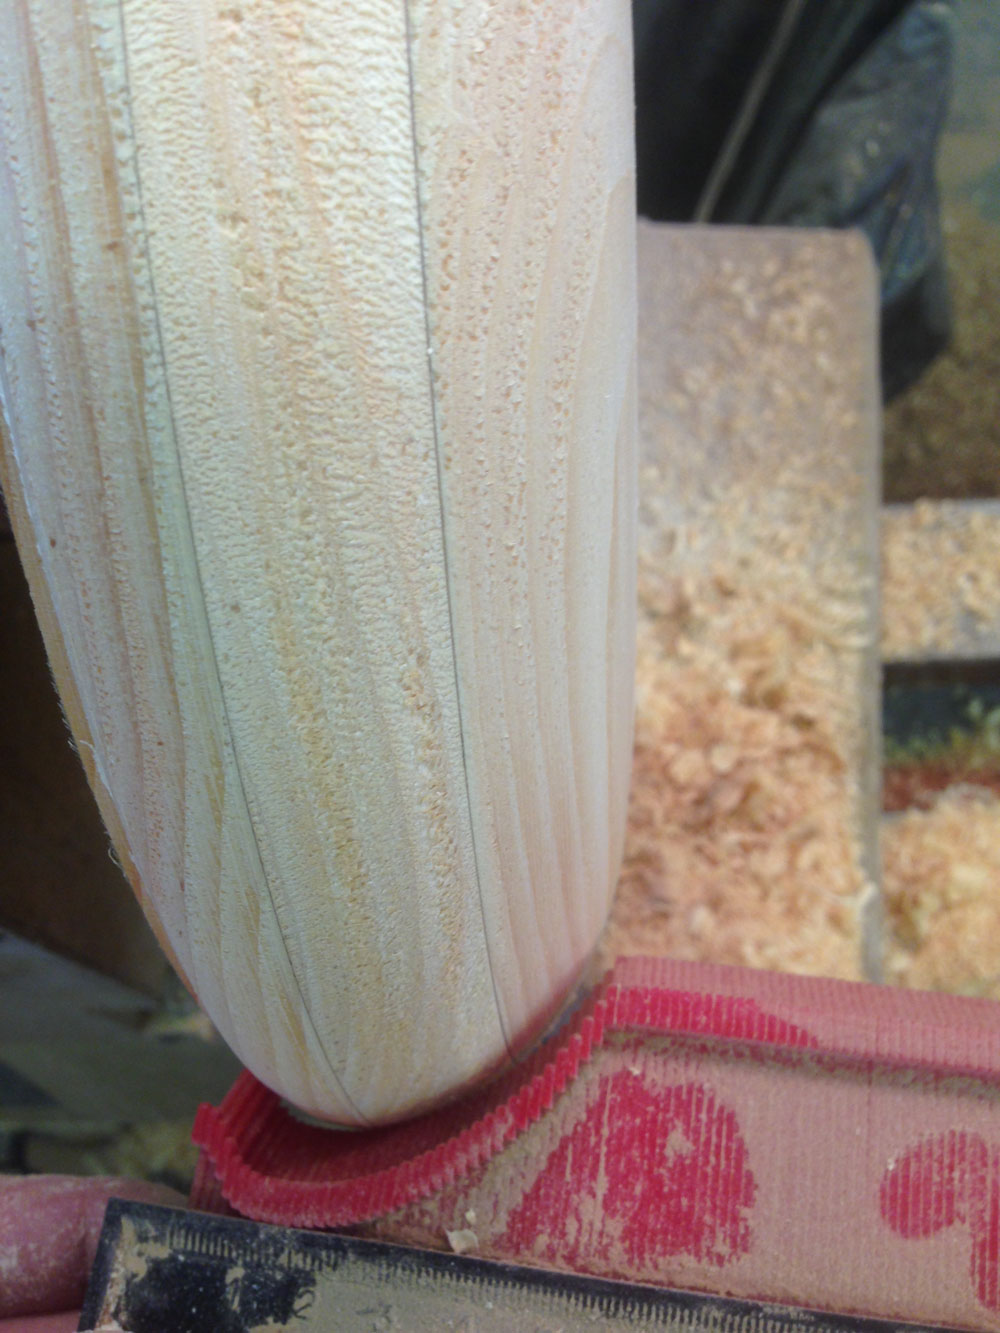
Carefully setting the adjustable profile gauge on the rotted original is essential, and this particular gauge requires care to not distort or change it.
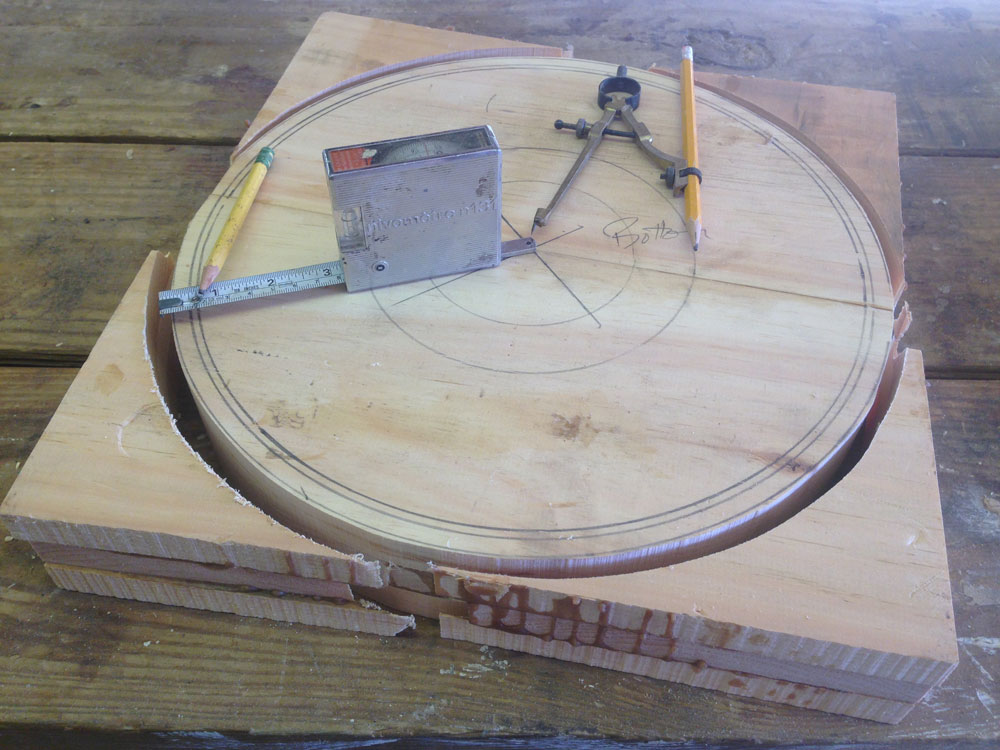
Sizing the full diameter establishes the requirements for the
Titebond III Ultimate Wood Glue
glued-up blanks.
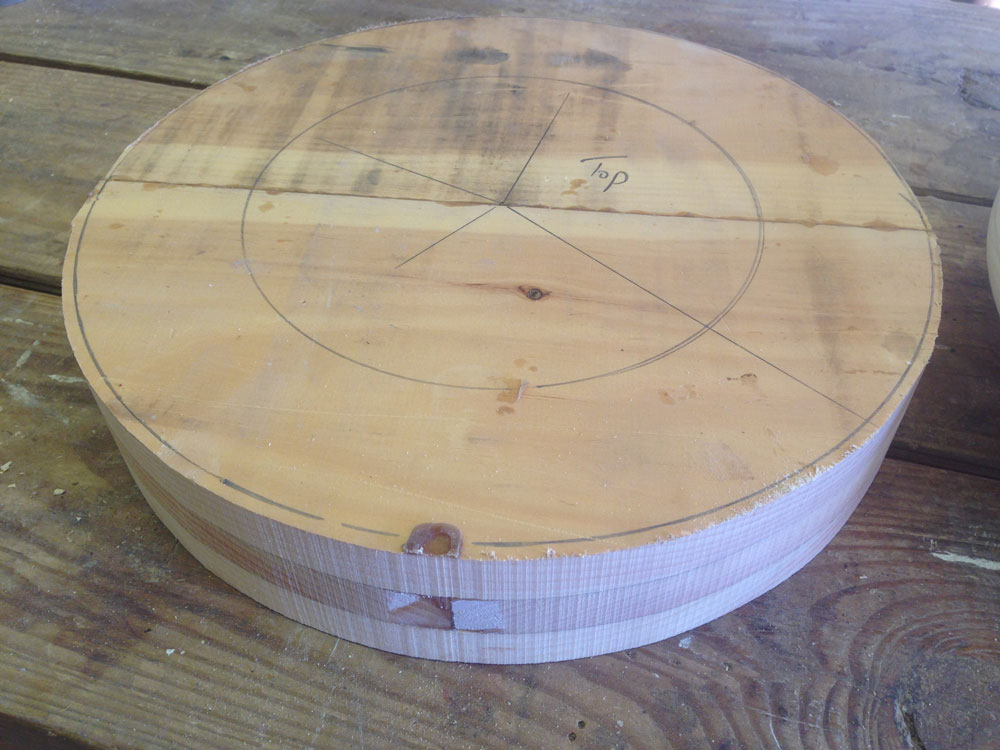
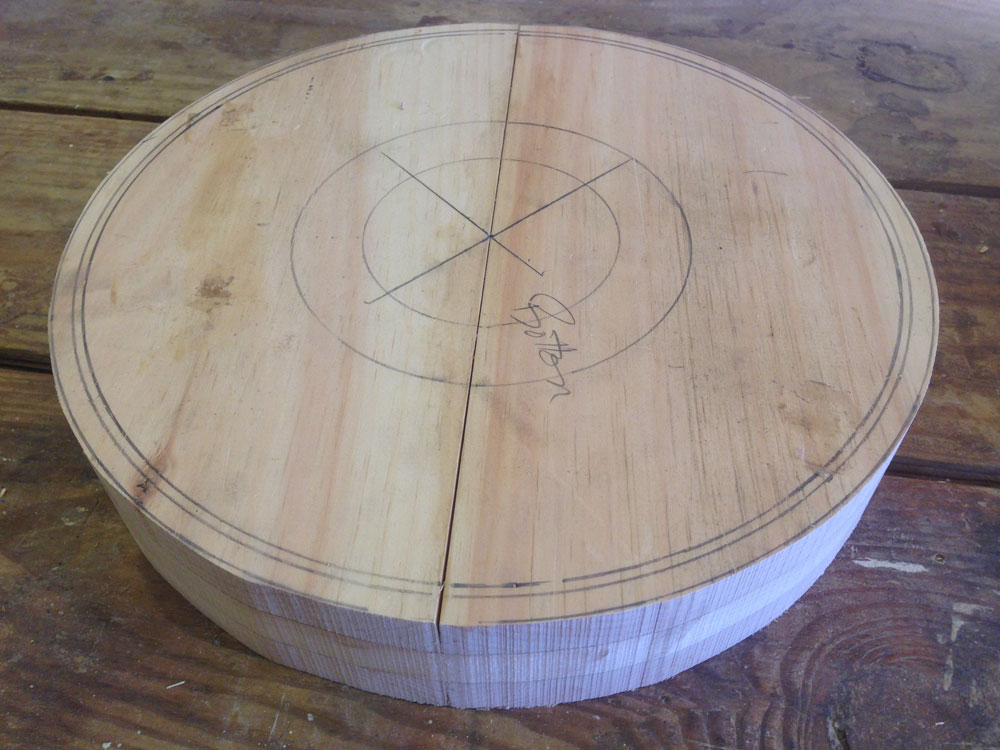
Marking and cutting the outside and inside diameter dimensions of the underside for the replacement blank is an efficiency learned from experience.
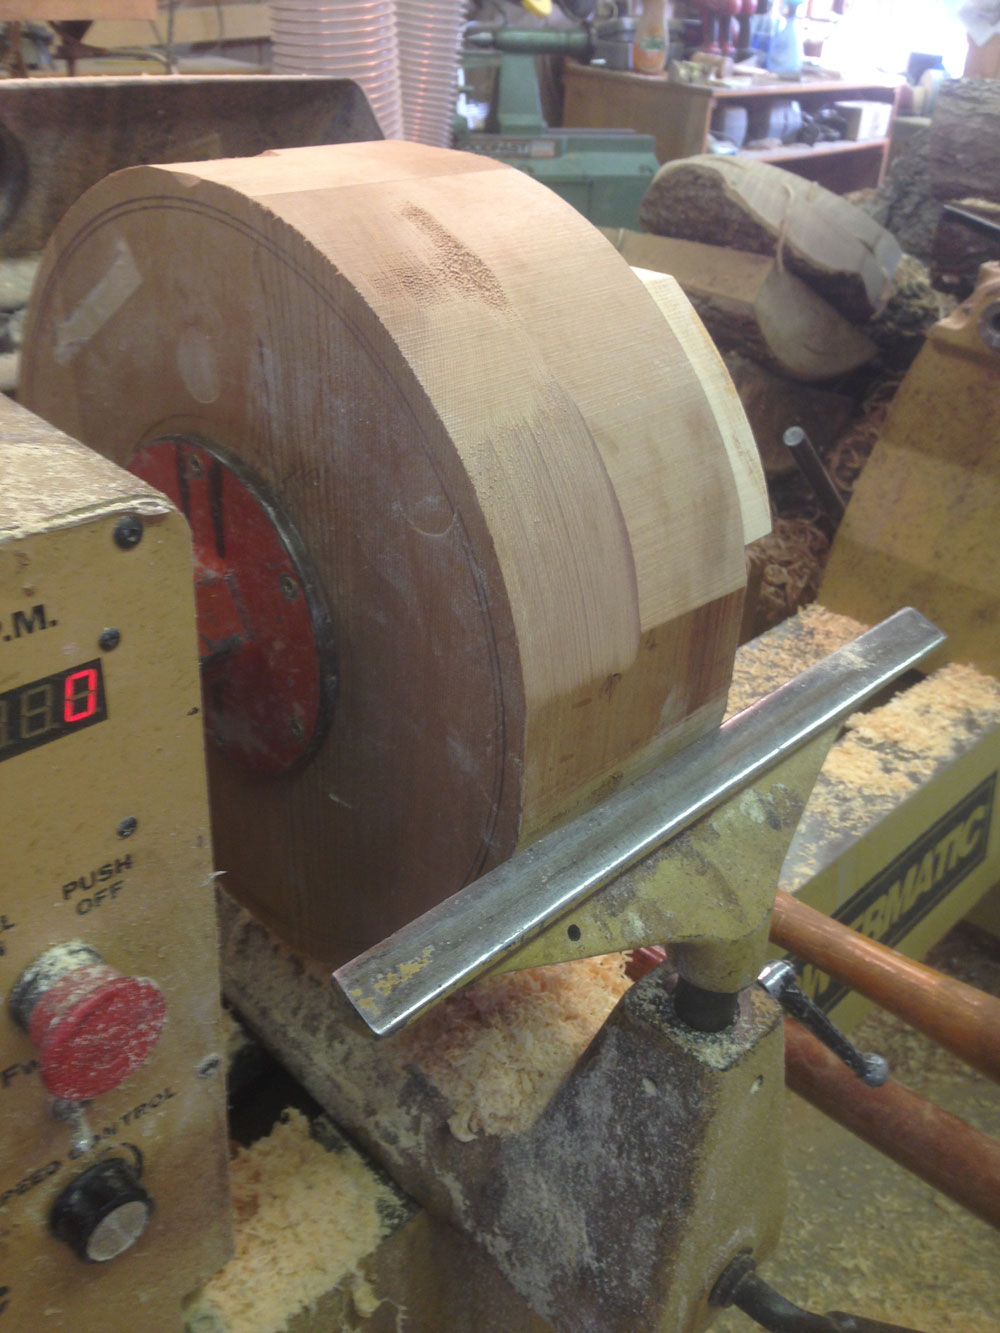
Marking and cutting the new blank round at the bandsaw (the
Woodturners 3/8" 3 TPI Blade
is an exceptional buy) prepares the turning for an efficient process.
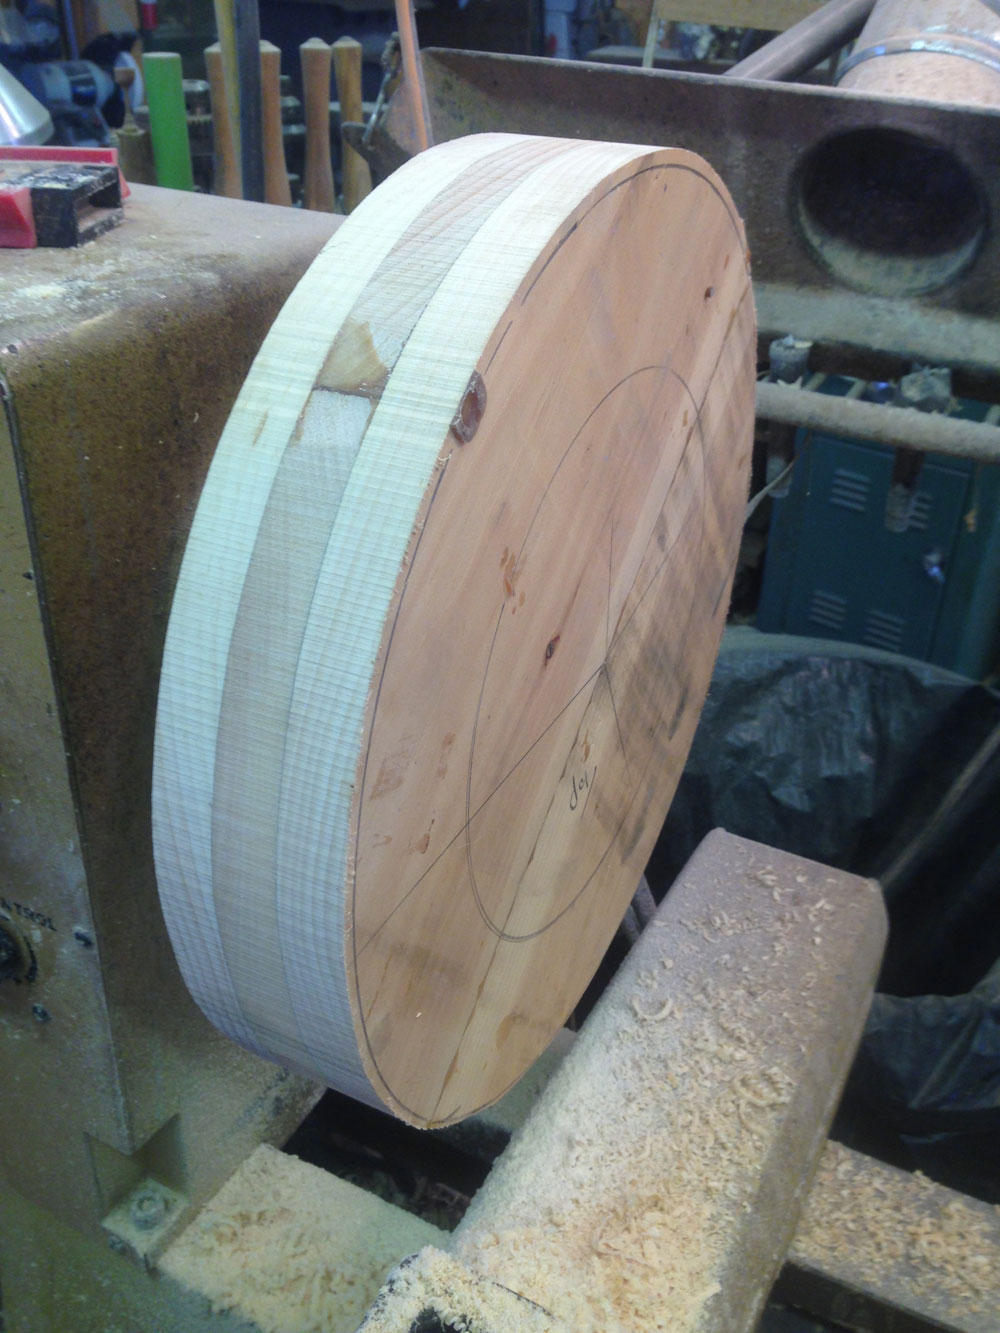
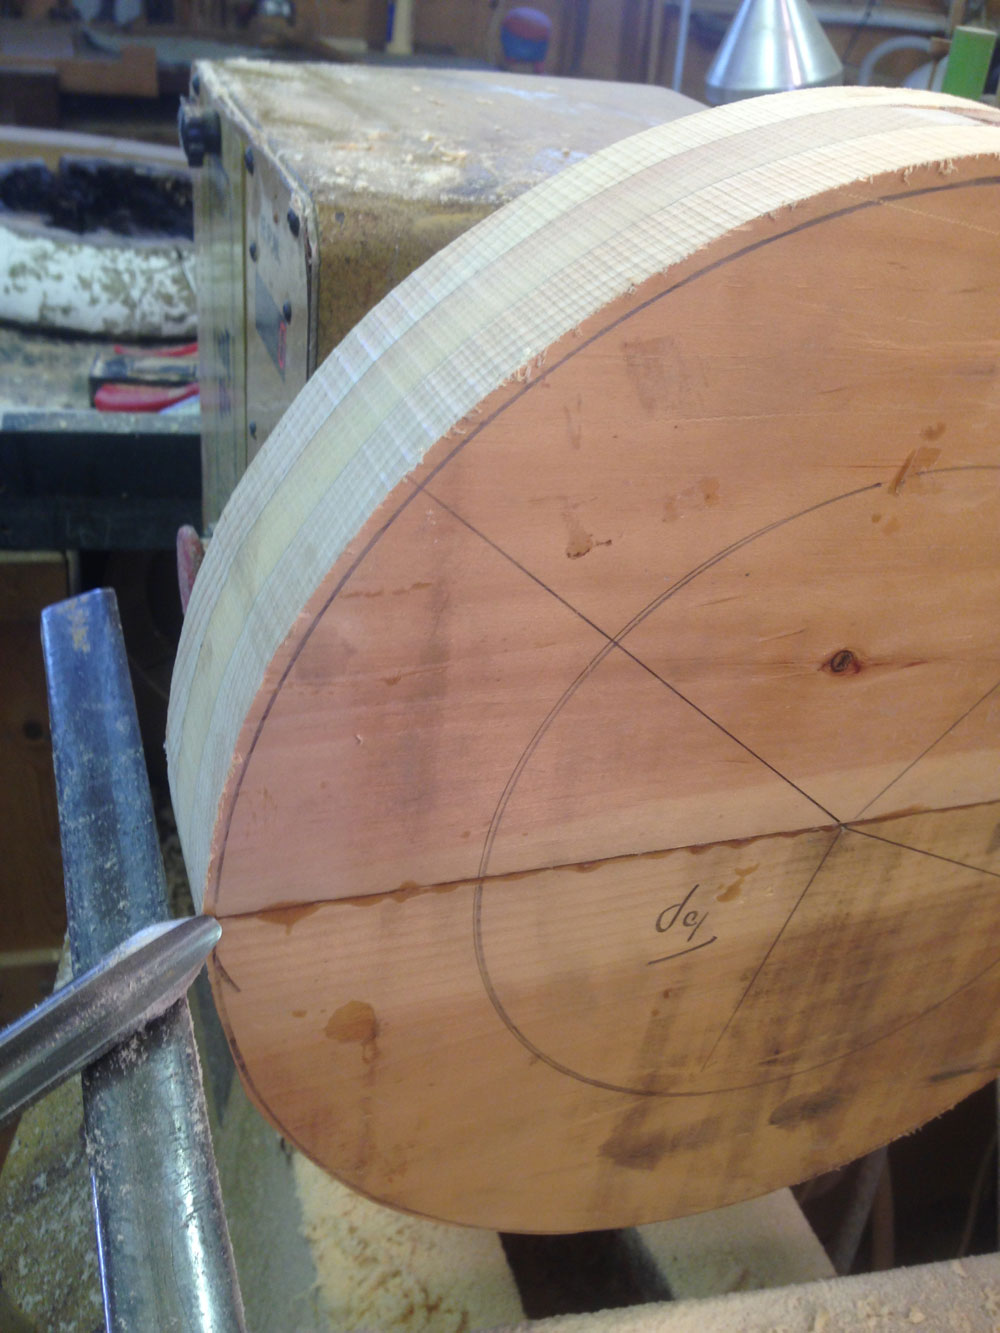
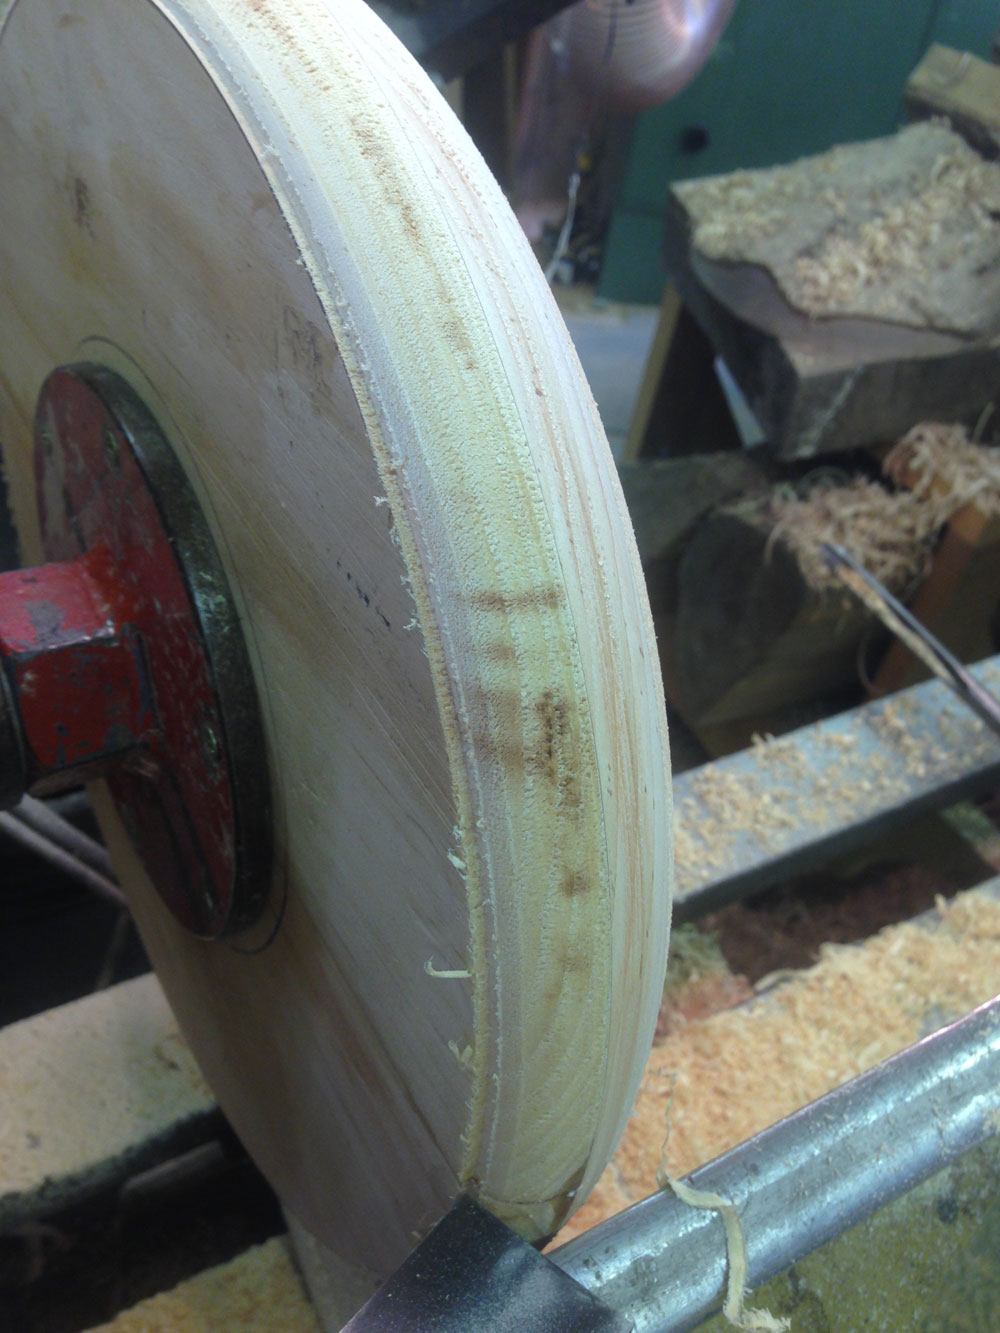
By mounting the blank with a faceplate, the turner sets up the parallel planes and makes it possible to work to all details from a single session.
Roughing the rounded profile with a newly sharpened
3/8" Bowl Gouge
begins the process. The front side (top) of this lower base will round to the inner circle (marked).
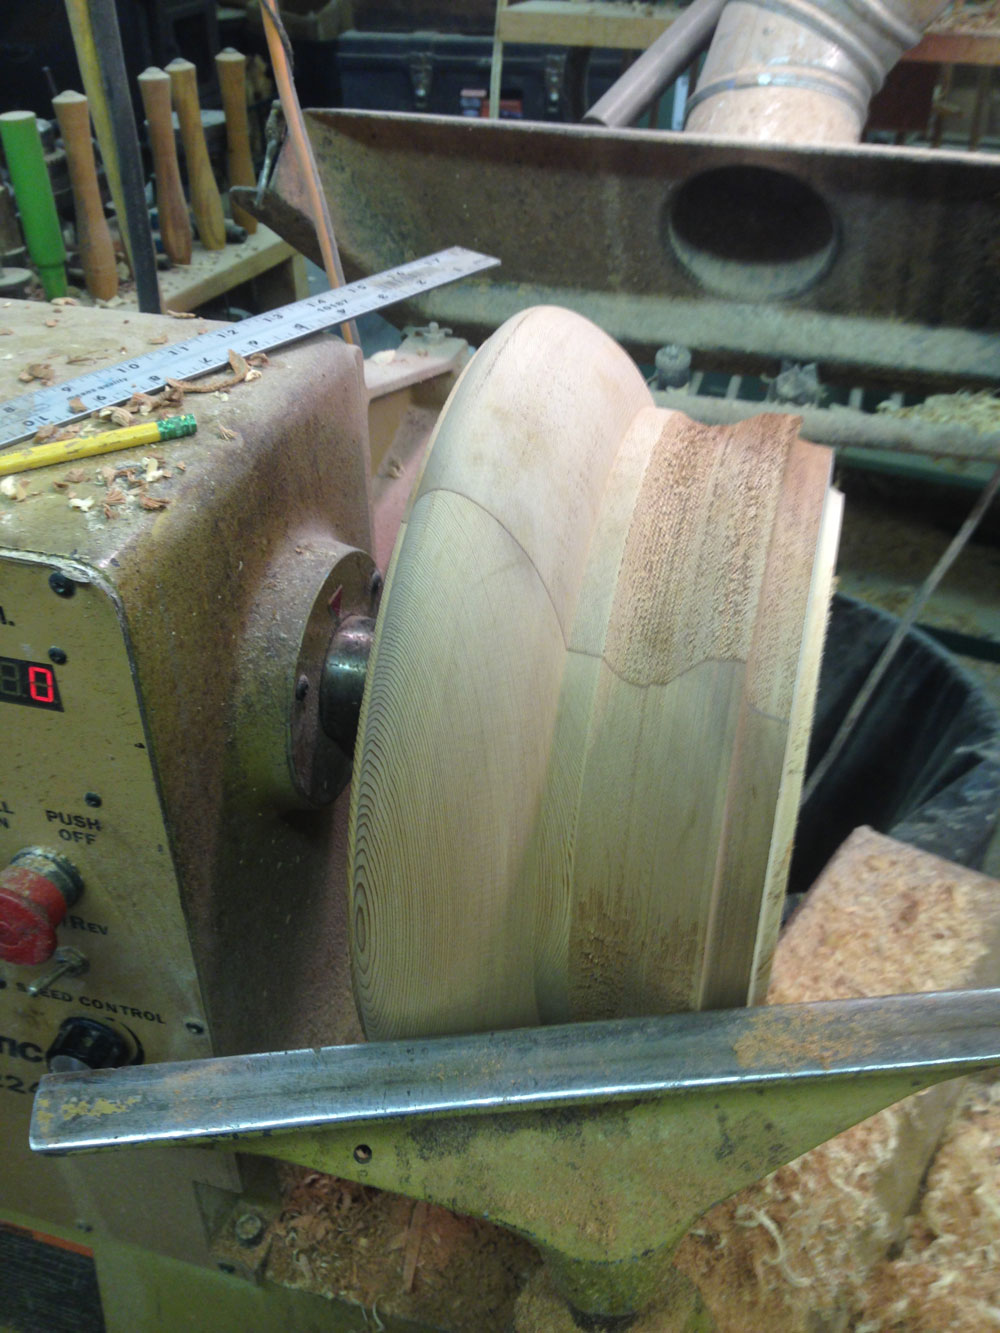
The back (bottom) side will round to the lower shoulder (marked). Following the time-tested "rules" of turning the large diameter details first before addressing the smaller diameter details, means for this base laying out and cutting the small bottom shoulder first is essential.
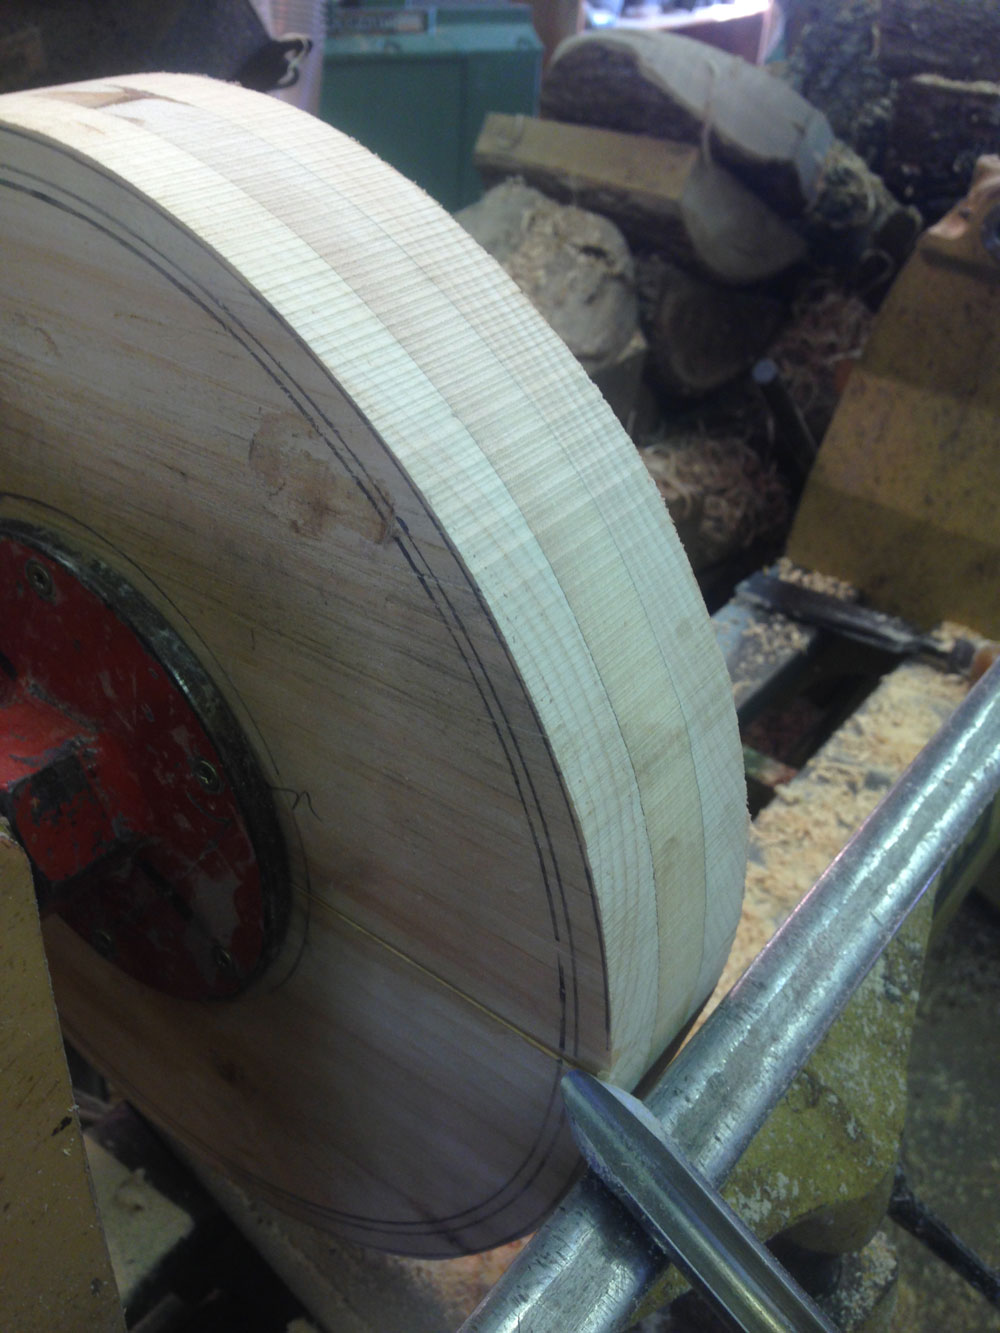
Finishing and refining the profile with its small shoulder with the 3/8" bowl gouge is followed and finalized using a well-sharpened heavy scraper.
Defining the bottom shoulder at this point is essential.
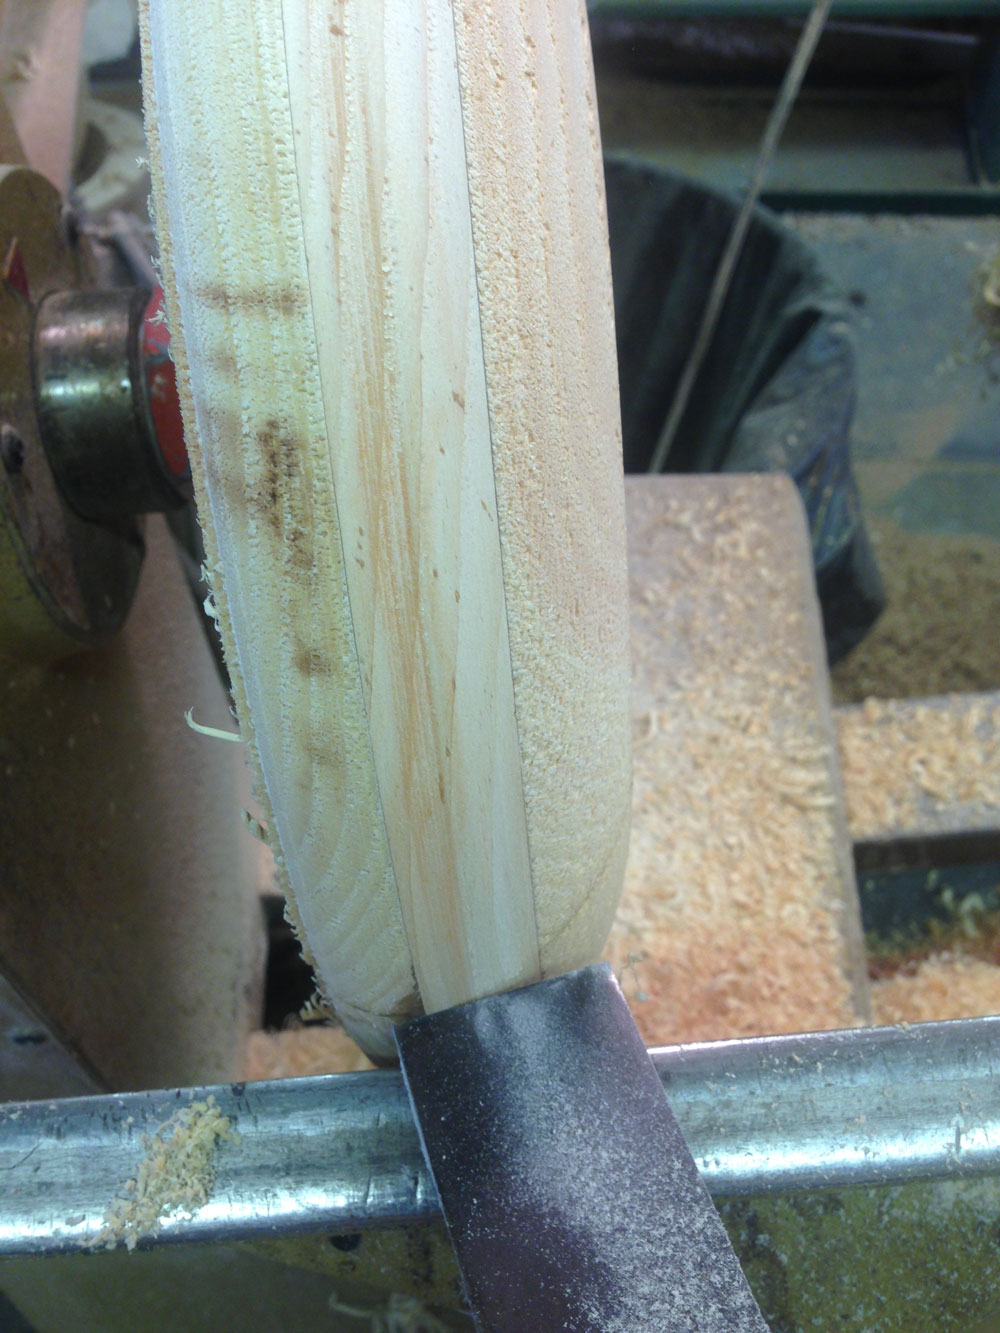
Frequently checking the accuracy of the profile and taking careful small cuts to be sure the new profile is the image of the one being copied ensures that the turner does not remove too much wood. Those curved profiles can be challenging to match.
Amazingly, the natural glance of a person's eye will sense when a profile or horizontal plane is "off" from the others. The eye will never see a slightly smaller or larger diameter. The critical dimensions are height and angles, not diameters, and one of the more difficult woodturning cuts is to match a subtle swell of a bead with the other twelve bases on that porch.
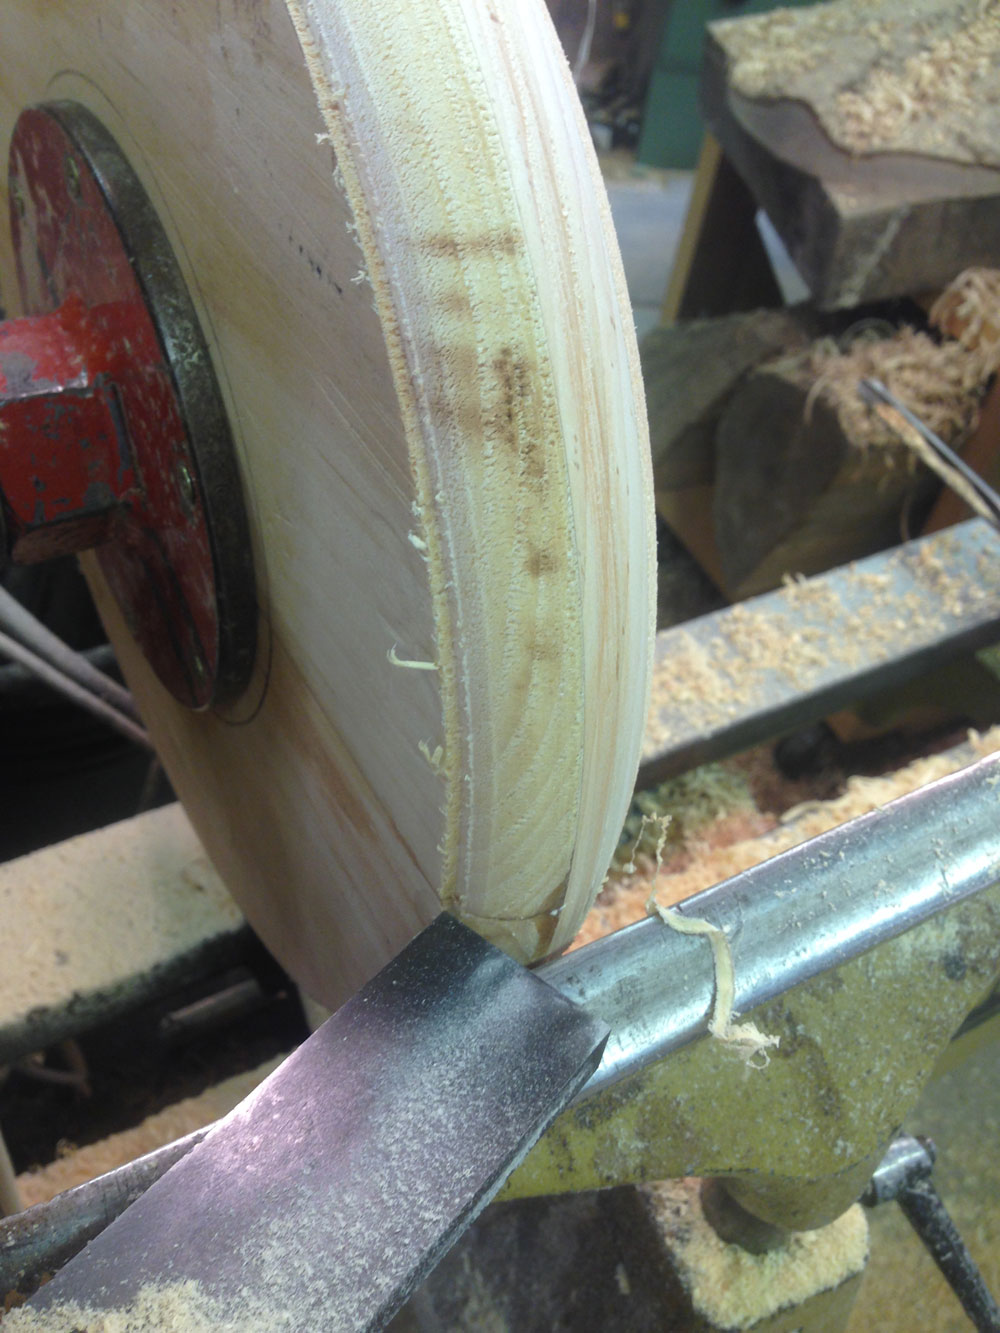
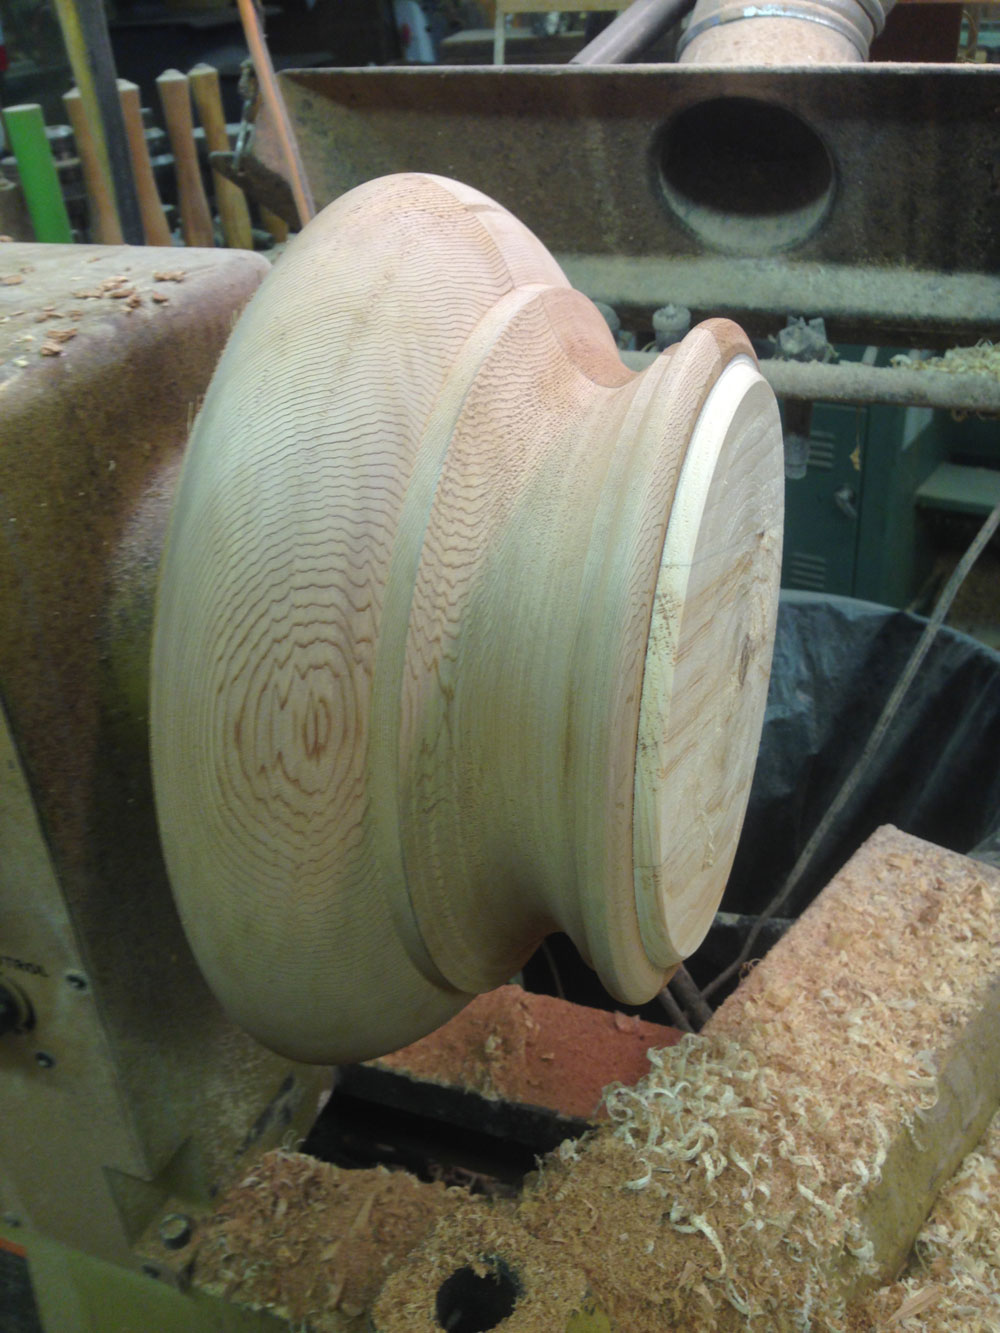
Once the first piece is sanded, finished, and readied to remove the faceplate; the second copy will be relatively simple.
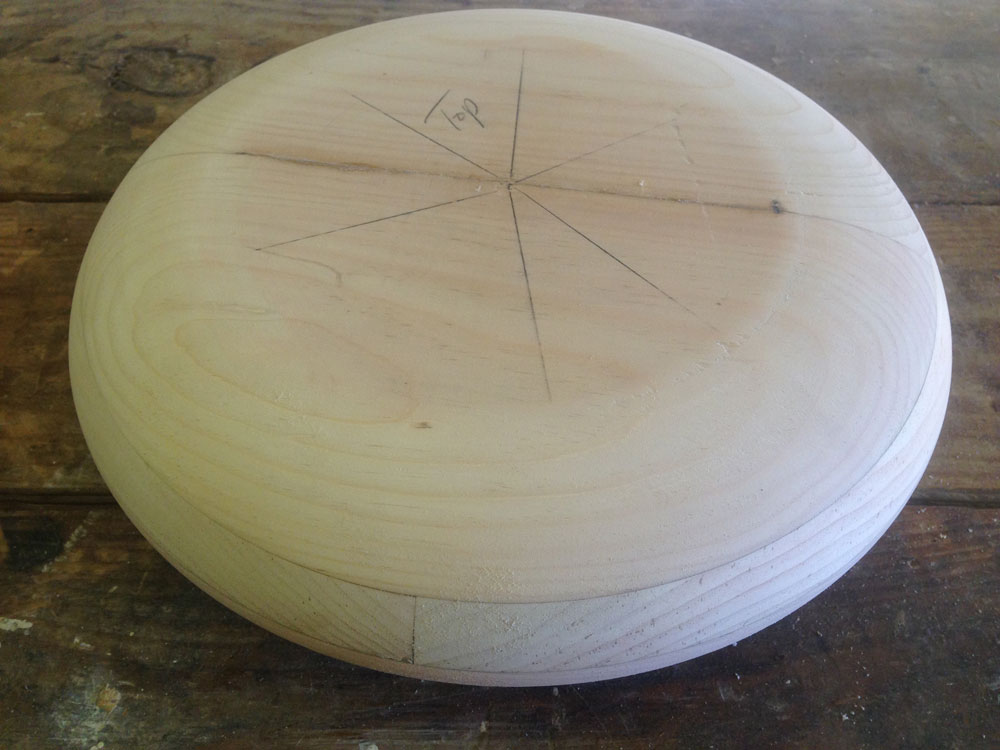
Top view of the finished base is left marked for the contractor to place and caulk to join with the upper section when the column is reassembled on the porch.
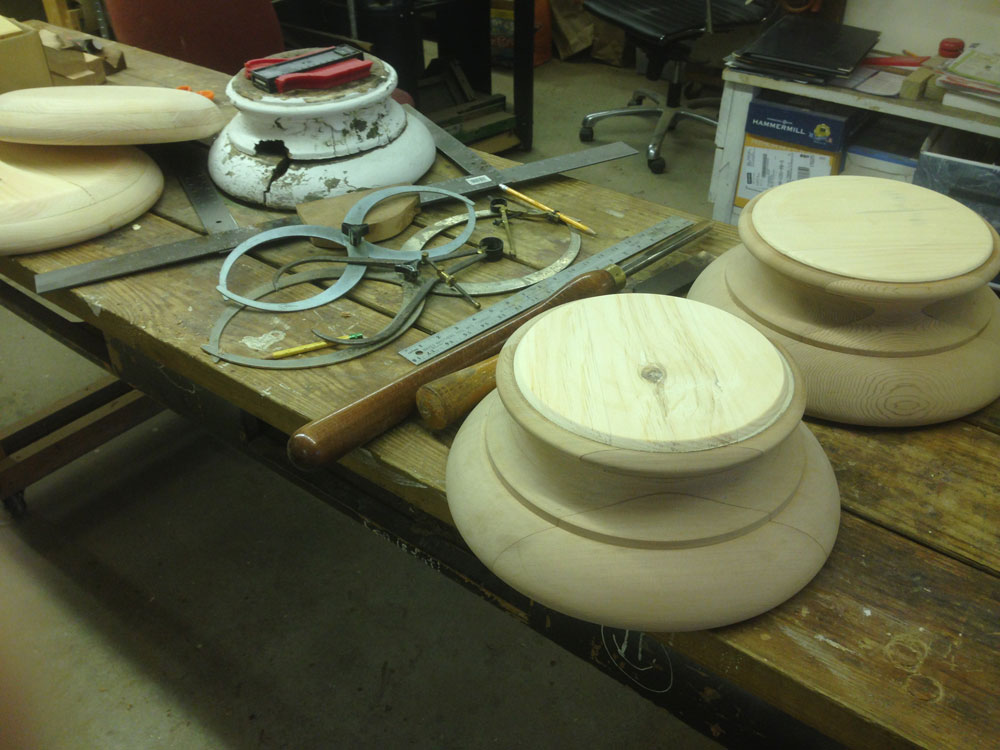
The best of the rotted complete bases was available to copy in the shop. Real source turnings and story-sticks make the work more accurate and efficient.
Glued up (using
Titebond III Ultimate Wood Glue
because of the outdoor application), marked, and mounted on the faceplate, the full base blank is ready to turn.
Once again the initial rounding of the blank followed by addressing the largest diameters first, makes the turning efficient.
Having already turned two of the lower profile bases, the turner can progress quickly and spend more time concentrating on the upper portion of the base.
With the actual turning complete from the bowl gouge followed by the straight-across and round-nose scrapers, the finished base is ready for final sanding. Notice the important dimension of the upper shoulder on which the new PVC columns will sit.
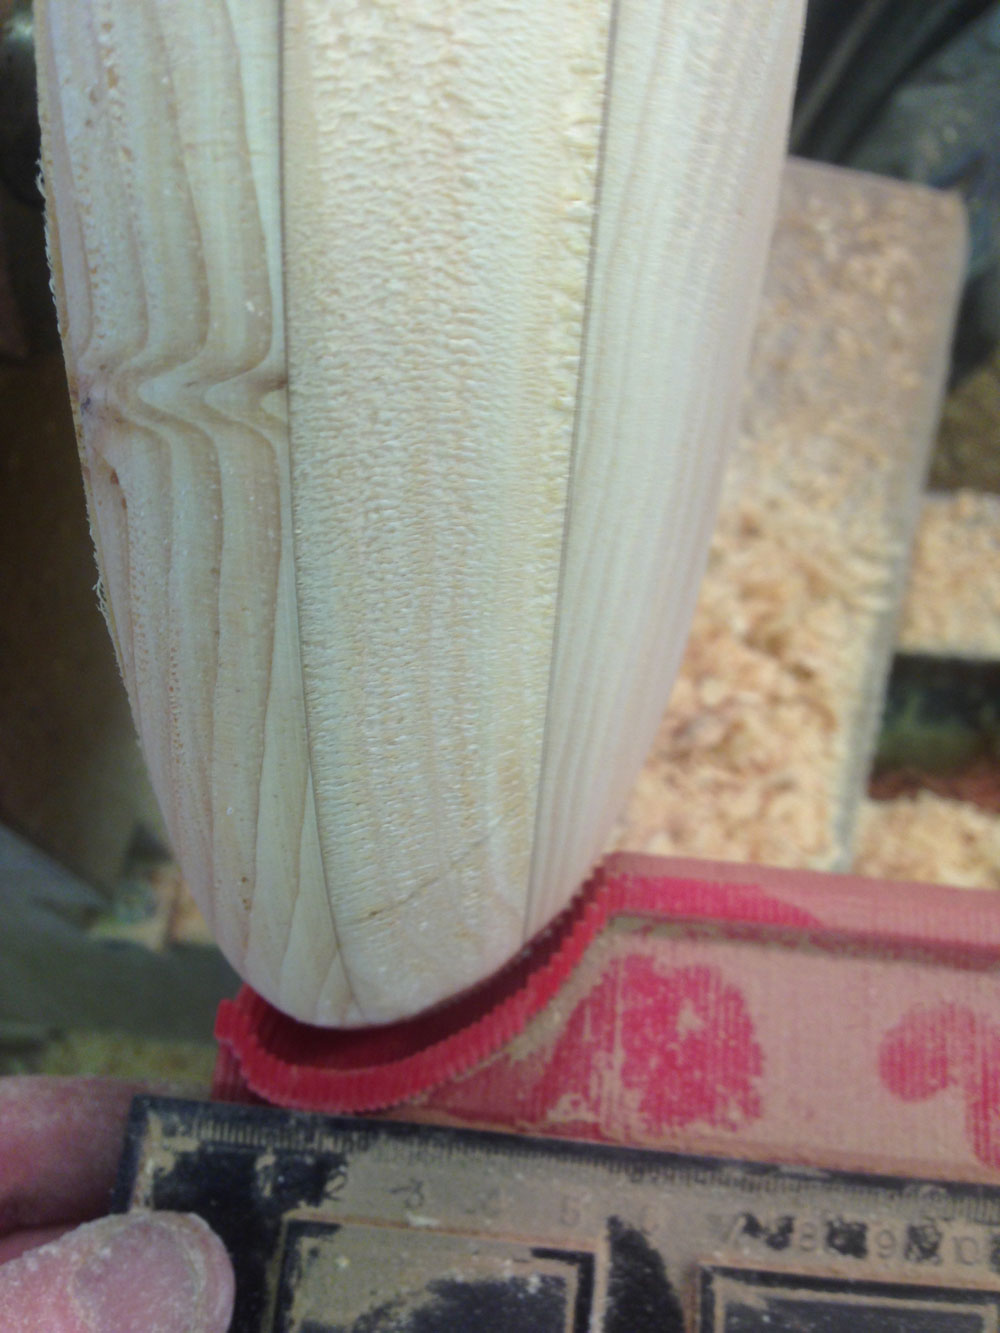
Using the adjustable profile gauge on the upper portion confirms the proper depth and shape of the cove and position of the shoulders and beads.
Having an actual sample of the original base is tremendously helpful because the multiple dimensions are readily available. For many hand-turners, the hand-and-eye measurements in three dimensions enhance the process of making a nearly exact copy.
Job complete: two lower base rounds and two complete bases ready to install. They were delivered on time to the job site, the contractor was pleased (and paid promptly), and his customer was pleased. Success all around.
The unusually warm weather of late November allowed the contractor to install, caulk, prime, and paint the competed work on both the repaired existing bases as well as the newly turned replacements. Now in February they are snow-covered and standing strong against the off-shore winds and moisture.
Located in Castine, Highlands Woodturning gallery and shop offers woodturning classes and shop time,
a gallery of woodturned art, custom woodturning for repairs, renovations, and architectural installations.
You can email Temple at
temple@highlandswoodturning.com
Take a look at Temple's Website at
http://www.highlandswoodturning.com/.