|
|
|
|
Project: Quick, Cheap, Drying Box
By Rick Morris
Duluth, GA
|
|
|
SAFETY NOTE: Please be careful when working with fire hazards (i.e. lightbulbs and cardboard) and never actually put the lightbulb into the cardboard box when drying your wood.

|
|
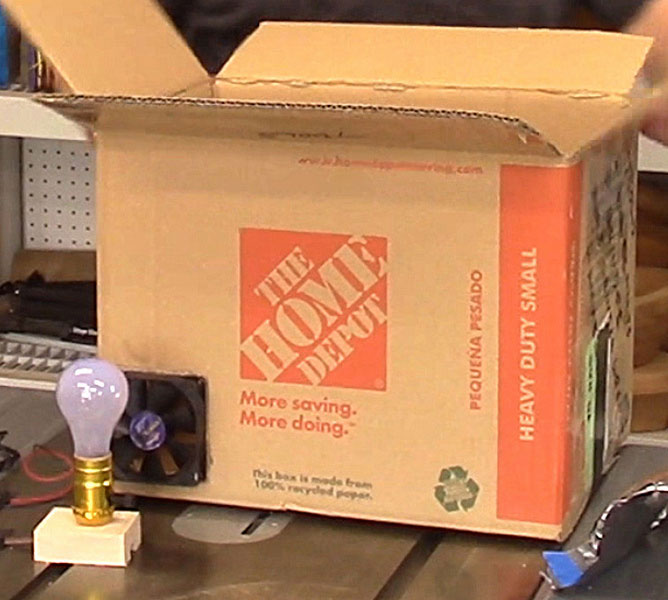
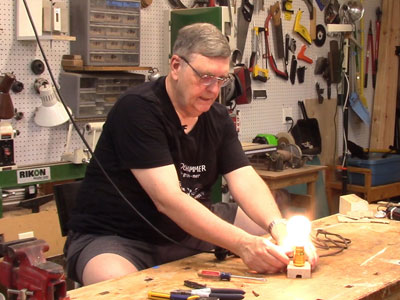
Figure 1 - A drying box for the masses
|
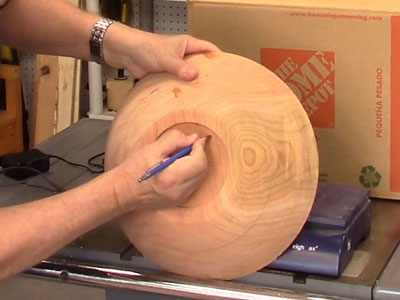
You've just finished rough turning a green bowl blank. You don't want it to crack as it dries. What do you do? Put it in a paper bag with shavings and let it sit for 6 months to a year? You could do that, but if you're me (I'm pretty sure you're not, I would have noticed) you pop it into your handy, portable drying box and in 5-7 days it's ready to turn!
What, you don't have a drying box? I think I can help you out.
Several years ago, I built a nice drying box that was 3-1/2 feet high x 2 feet wide x 1-1/2 feet deep, with three shelves, hidden wiring, and separate switches for heat and ventilation. But after two interstate moves in the space of a year, the drying box is now missing-in-action.
Recently I had just finished turning a 13-inch bowl from very green cherry. I didn't want to wait for slow-mo drying, but I didn't have a drying box any more. It was time to make a new one.
I'm short on space in my current workshop, so I didn't want to build a huge drying box that would dry eight bowls at a time. A box big enough for one 13-inch bowl would be quite sufficient. I also didn't want to spend a lot of money and time in building a new drying box.
A drying box doesn't need to be complicated, sophisticated, or even big, I reasoned. All you really need is a small heat source (say, a flame thrower) and a ventilated container (say, a wind tunnel). But my flame thrower has been in the repair shop forever and I've given up trying to fit my wind tunnel in my new shop.
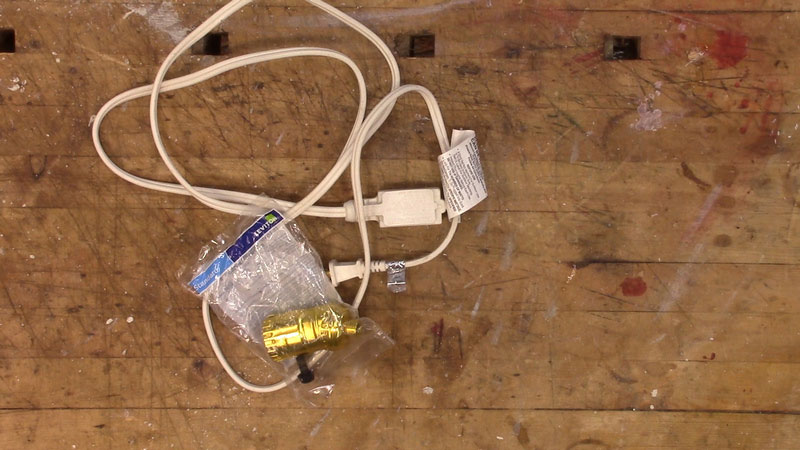
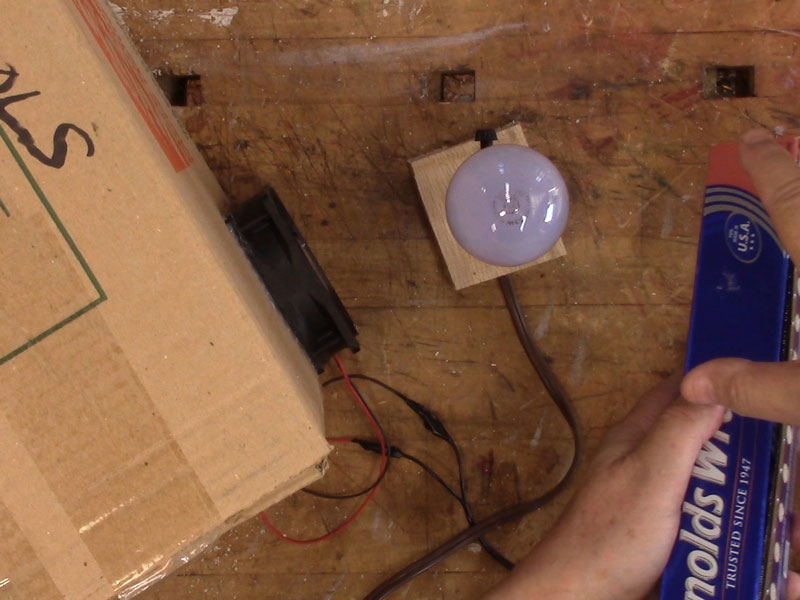
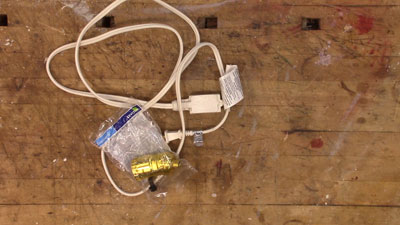
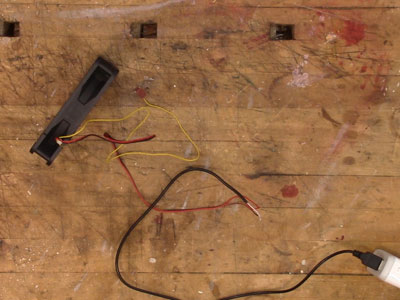
I decided to go for quick, easy, and cheap and I built a drying box made out of:
-
An old cardboard box (the container)
-
An old computer case fan (the ventilation)
-
A light socket with a low-wattage bulb (the heat source)

|
|
Figure 2 - Drying box components - box, fan, light
|
The Heat Source
|
|
Figure 3 - My heat source - a lamp socket
|
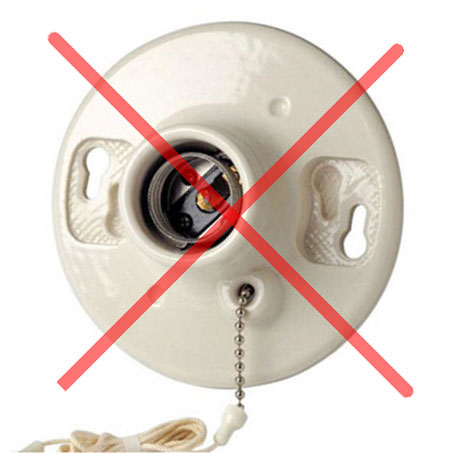
I specifically didn't want a light fixture that mounts on an electrical box, like this:

|
|
Figure 4 - Don't use this for a light bulb holder
|
On this fixture, the wires are exposed on the back. (The wires are normally covered by the electrical box the fixture is mounted on). In this case, I wasn't using any electrical box. (If you're following along at home, don't use anything that would leave a wire or connection exposed).
I added a 53-watt incandescent bulb to make my heat source. I had that size bulb sitting around the workshop, but if I hadn't, I would have probably used a large CFL bulb. CFL's don't give off much heat, but enough for the minor-league drying box I wanted.

|
|
Figure 5 - A low-wattage light bulb completes the heat source
|
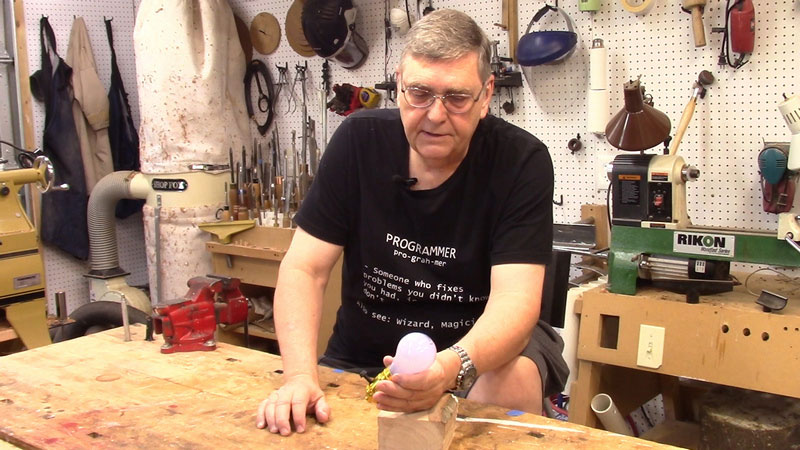
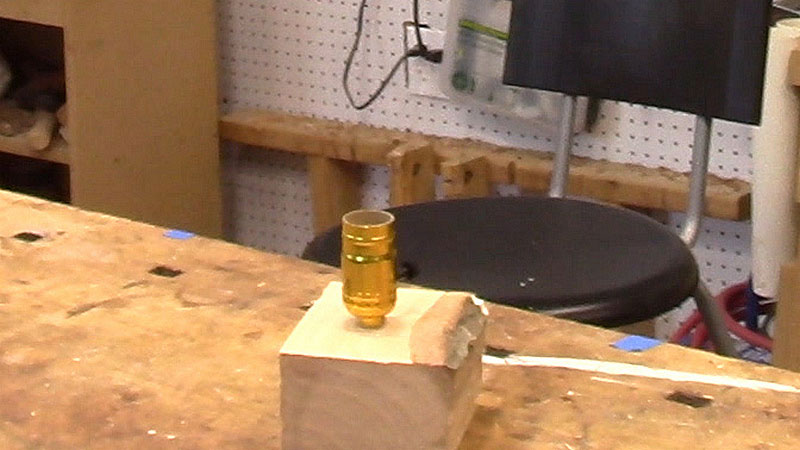
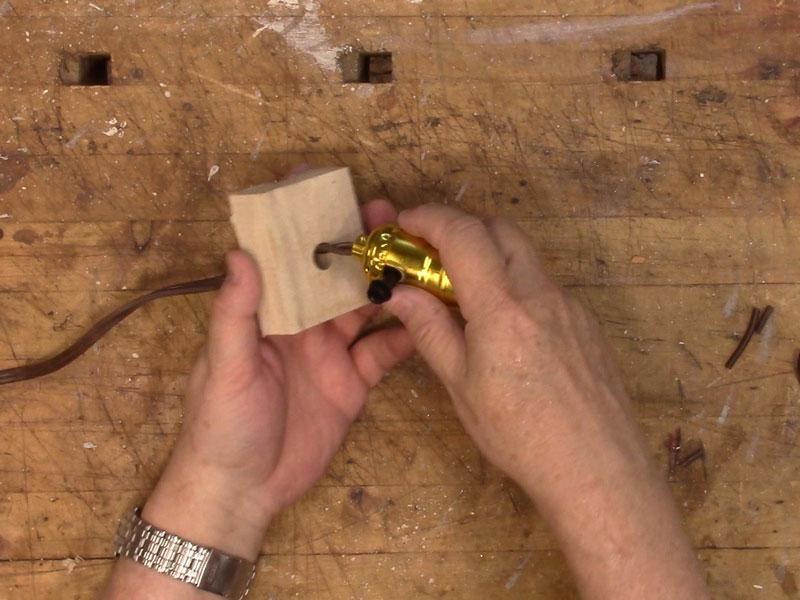
To hold the light socket upright, I built a very simple holder out of a piece of scrap oak.

|
Figure 6 - The light socket needs to be mounted onto
some kind of base
|
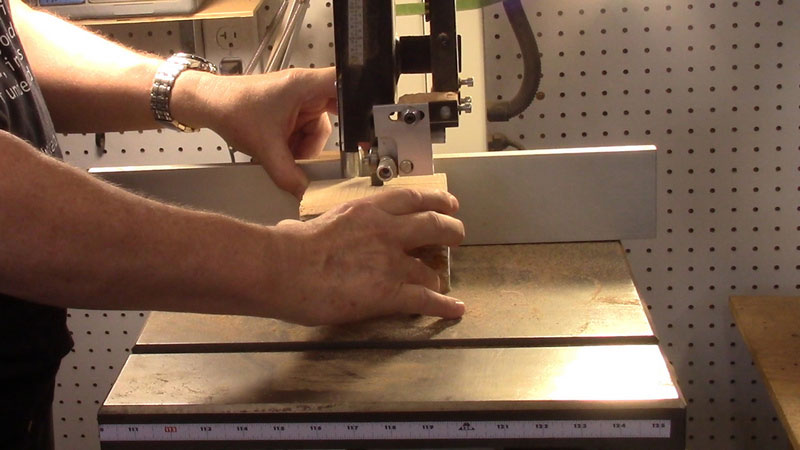
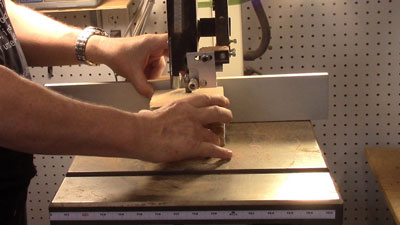
On the bandsaw, I cut the block down to around 3"x2"x1". The dimensions aren't critical.
|
|
Figure 7 - Cutting the light socket mounting block
|

|
|
Figure 8 - A small block is sufficient for the single light socket
|
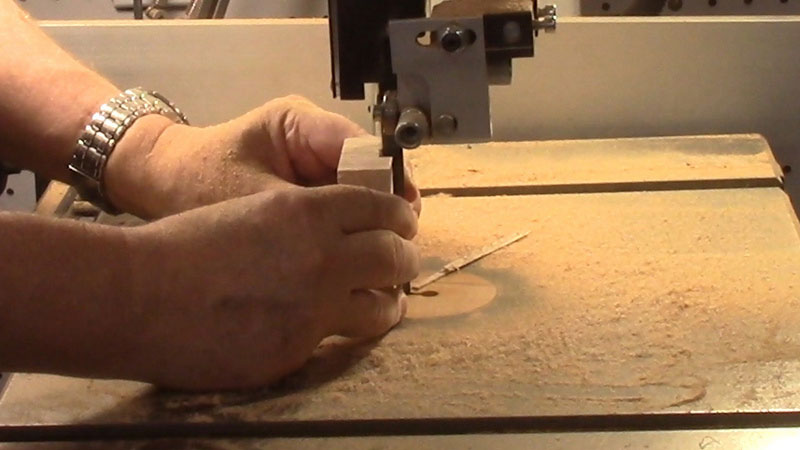
Along the bottom of the block, I cut in a groove about a 1/4" deep and 1/2" wide for the cord to run through, allowing the block to sit flat. This could be done on the tablesaw, but the bandsaw was quicker, and precision isn't necessary.

|
|
Figure 9 - Cutting a wiring groove along the block
|
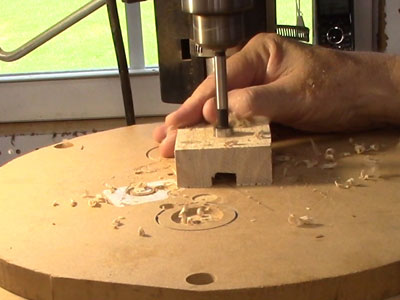
At the drill press, I measured the outside diameter of the light socket mount – I needed a 9/16" hole in the mounting block.

|
|
Figure 10 - Finding the size hole needed to mount the light socket
|
I drilled a 9/16" hole about halfway down the length of the block, right over the groove I had cut on the bandsaw.
|
|
Figure 11 - Drilling a hole to mount the light socket
|
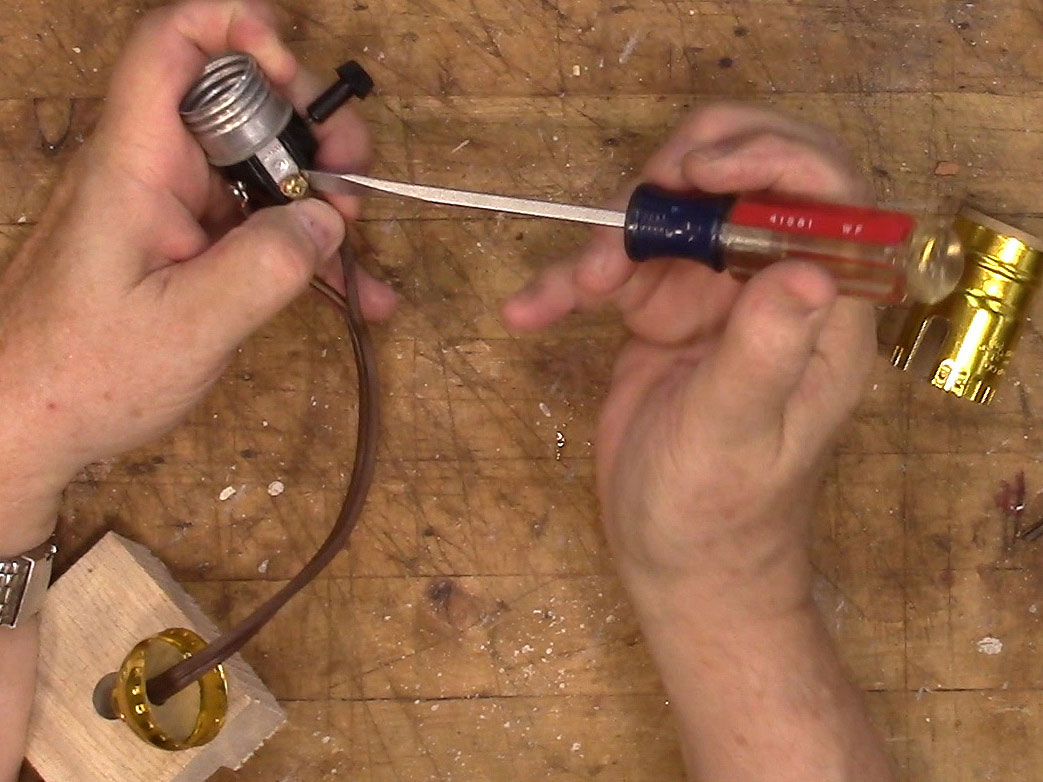
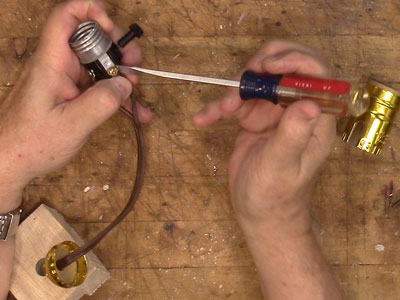
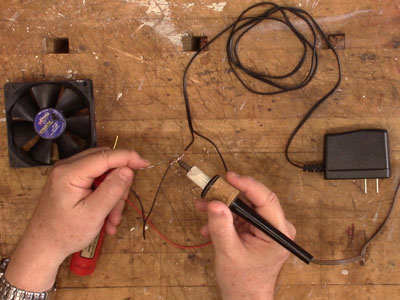
I cut off the receptacle end from an old extension cord, pushed the cut end up through the hole I just drilled, stripped the end of each wire, and connected the light socket.
|
|
Figure 12 - Connecting the light socket
|

|
|
Figure 13 - Fitting the socket into the wood block
|
The socket was a press fit into the hole in the wood block. Time for a quick test!
|
|
Figure 14 - The heat source works!
|
Ventilation
As with the heat source, less is more with ventilation. A large fan or even a small 5" fan you might have sitting on your desk moves too much air. What's needed is just a slow, steady airflow gently blowing into the drying box.
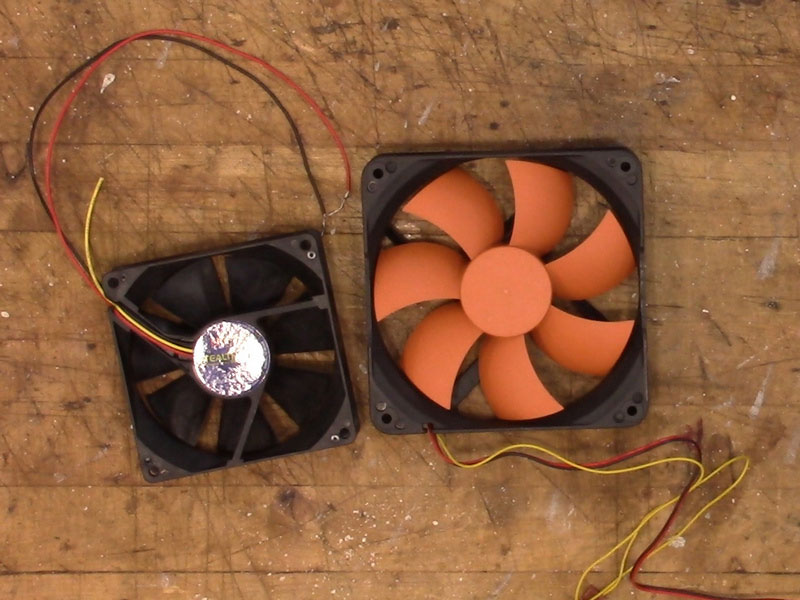
For this, a computer case fan is ideal. I had several of these in my box-of-old-computer-parts-that-will probably-never-be-useful-but-that-I-can't-bear-to-throw-away.

|
|
Figure 15 - An 80mm and 120mm case fan
|
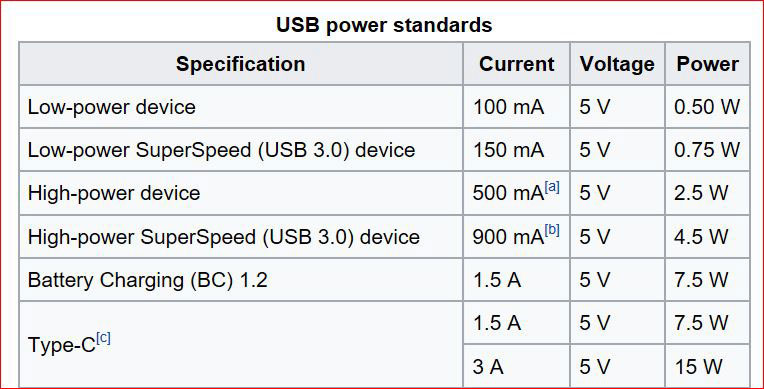
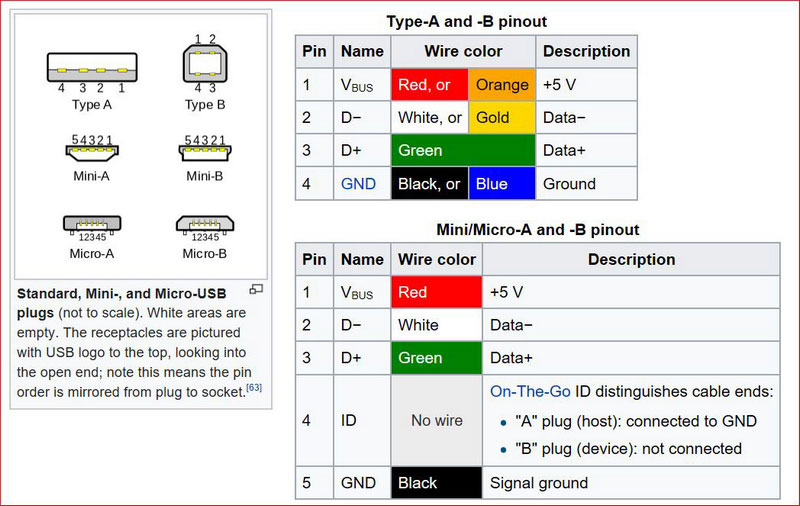
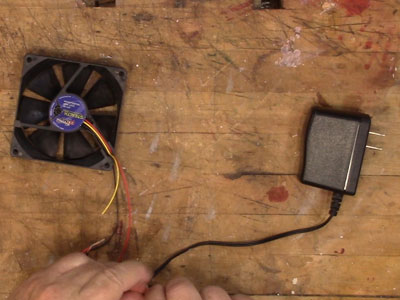
At its highest speed, this fan won't blow away a cardboard box, and even better, it runs on five to twelve volts and draws very little current. (Note that there is a label on the fan that details its voltage and current requirements). Five volts runs the fan at its lowest speed, while twelve volts runs it at its highest speed. And this is good because?
Glad you asked. All those power bricks you get with your phones and electronic gizmos generally put out between five and twelve volts. In particular, all those USB power bricks that come with iPhones and Android phones put out five volts. So a USB five-volt power supply is readily available, even if you don't already have one sitting around the house.

|
|
Figure 16 - USB voltage and power
|
I had both a USB charger and an old twelve-volt, router power supply in my box of parts. I hooked up each power supply to both my 80mm and 120mm fan to test the airflow.
|
|
Figure 17 - 80mm fan and USB five-volt power
|
|
|
Figure 18 - 80mm fan with twelve-volt power supply
|
I decided to use the 80mm fan with the twelve-volt power, but I reserved the right to drop back to the five-volt power if the drying was too fast.
If you don't have your own box of old computer parts, that's not really a problem. You can pick up USB power supplies and cables virtually anywhere these days.
If you decide to use the USB five-volt power to get the slower speed, cut off the end of the cable that doesn't fit into the power brick. You'll find two or four wires. Cables that come for charging will only have two wires while cables for charging AND data will have four wires. Either type will work for you. The red wire is positive, the black wire is negative. The data lines are the white and green wires, which aren't used on this project.

|
|
Figure 19 - USB pinout
|
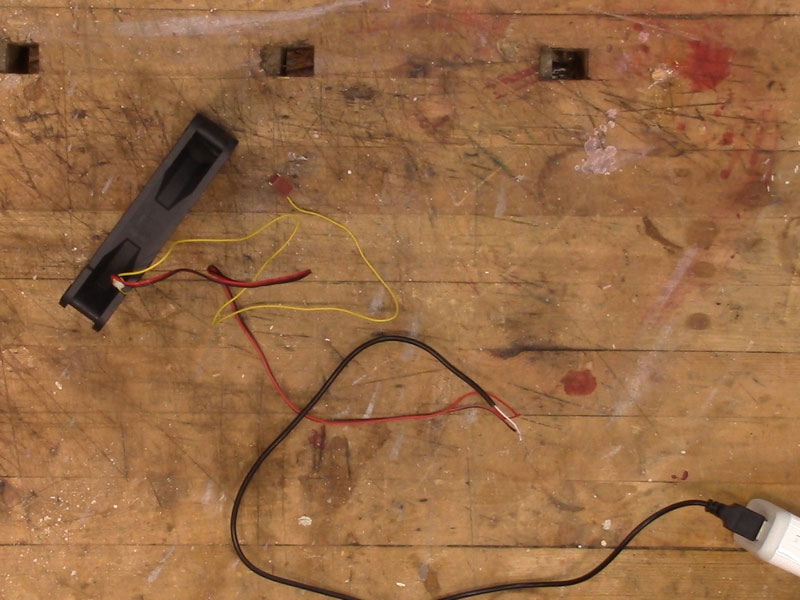
The fan may have two wires or three. The third wire is for sending speed data to the motherboard – it wasn't used for this project.
|
Figure 20 - The yellow wire can be ignored, the red is positive,
the black is negative
|
The two wires I needed to connect were the black and red (in this case, on the twelve-volt power supply the red was actually black with white stripes on it). I stripped the ends of all the various wires, twisted them together, soldered the joints, then wrapped the joints in electrical tape. If you're using a USB cable, the process is the same.
|
|
Figure 21 - Soldering the fan to the power supply lines
|
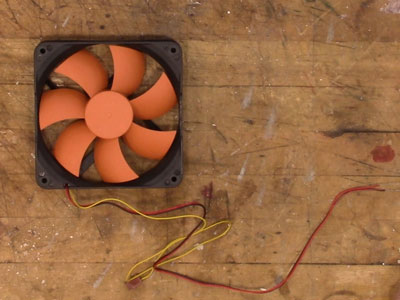
The fan was ready to be installed into the container of the under-construction drying box.
The Container
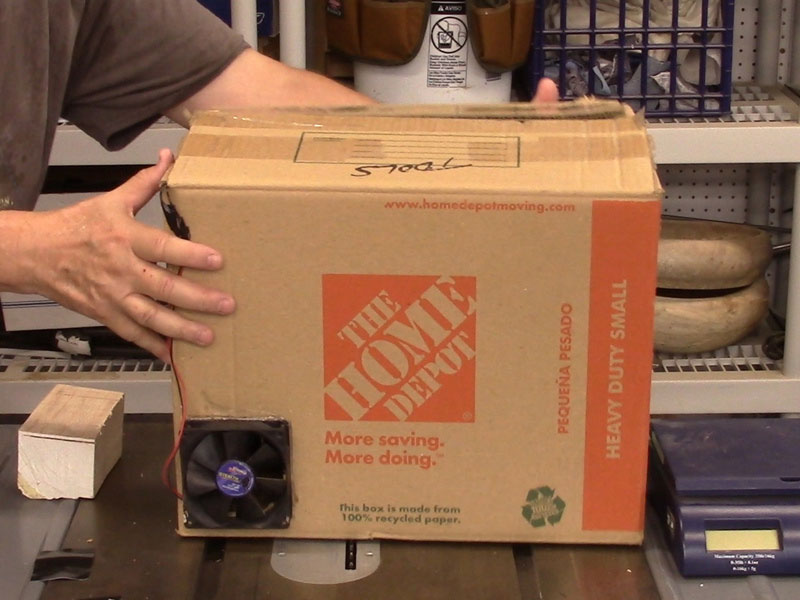
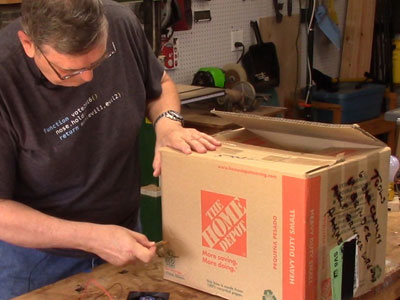
I decided to spare no expense on the container for the drying box - I got one of the boxes I had saved from my last move. It's what we cardboardologists call a “beat-up medium-sized box" (sorry for the technical terminology).

|
|
Figure 22 - My high-tech drying box container
|
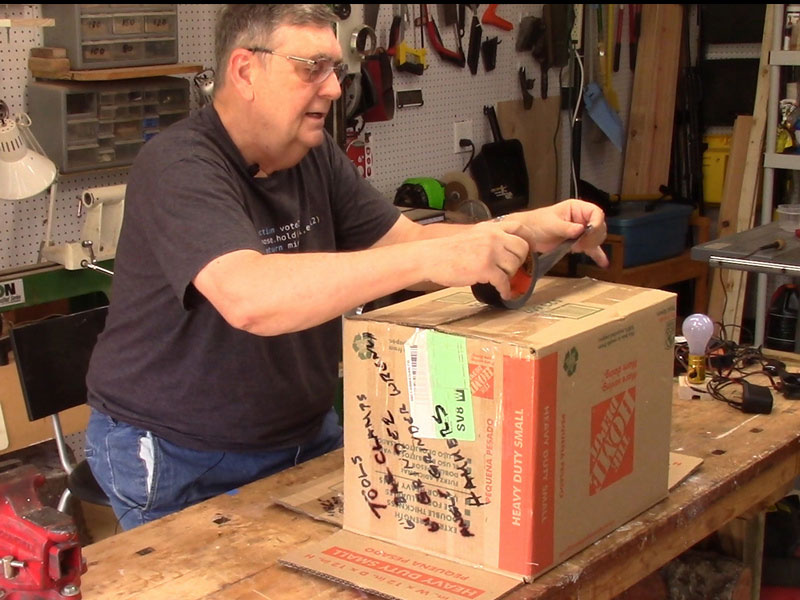
Before we go any further, I must warn you: cardboard construction is not for the faint of heart. You may want to bring in a certified master cardboard engineer for this step. Remember: paper cuts can be dangerous…cardboard cuts can be more dangerous.
I inflated the cardboard box and fastened the bottom with duct tape – and not just any duct tape – I used Gorilla tape (because that's all I had in the workshop). A regular box sealing tape would work fine. Only the bottom needed to be taped, as the top will be the doors of the drying box, as well as the air exhaust opening.

|
Figure 23 - Assembling the box – this is complicated,
be careful with it
|
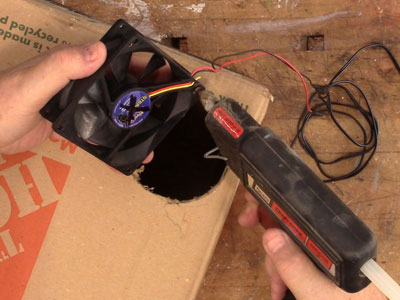
On one side panel of the box, I drew a hole large enough to match the circular part of the fan. This hole can go on any side of the box, but it should be on the lower part, since the air will be exiting from the top of the box.
|
|
Figure 24 - I used a small compass to draw an opening for the fan
|
I then cut out the fan opening.

|
|
Figure 25 - Cutting out an opening for the fan
|
I used hot glue to attach the fan to the drying box.
|
|
Figure 26 - I put hot glue on the mounting wings of the fan...
|
|
|
Figure 27 - ...and along the outside edges
|
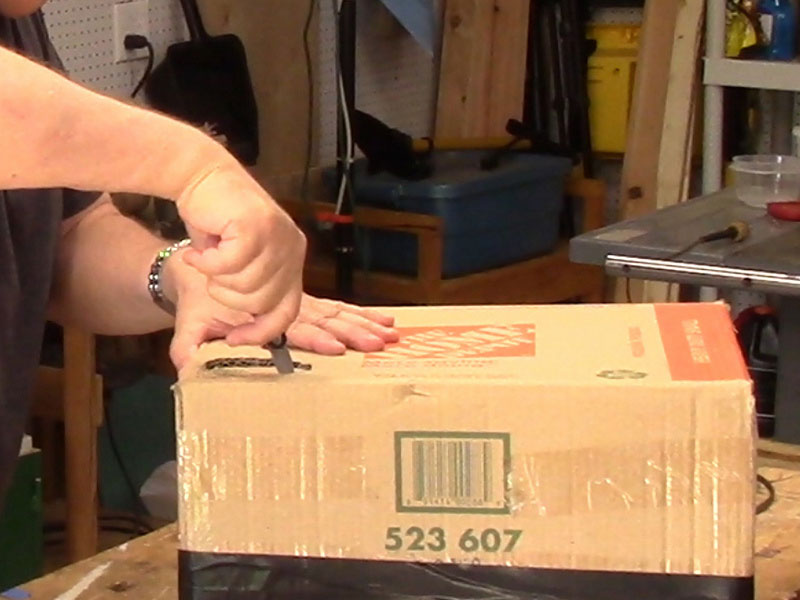
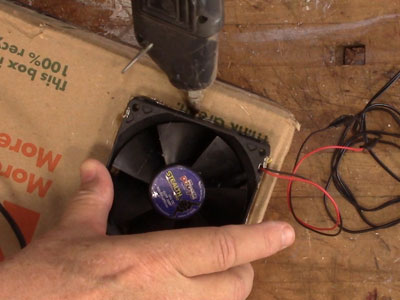
There must be an opening in the top of the box for the air to exit. If the top flaps had fit tightly together, I would have had to cut a hole in the top or side. However, my box had been through two household moves, and had stretched a good bit, such that the flaps didn't completely meet at the top. That gap ended up being my ventilation exhaust opening.
|
|
Figure 28 - An opening in the top is necessary for air exhaust
|
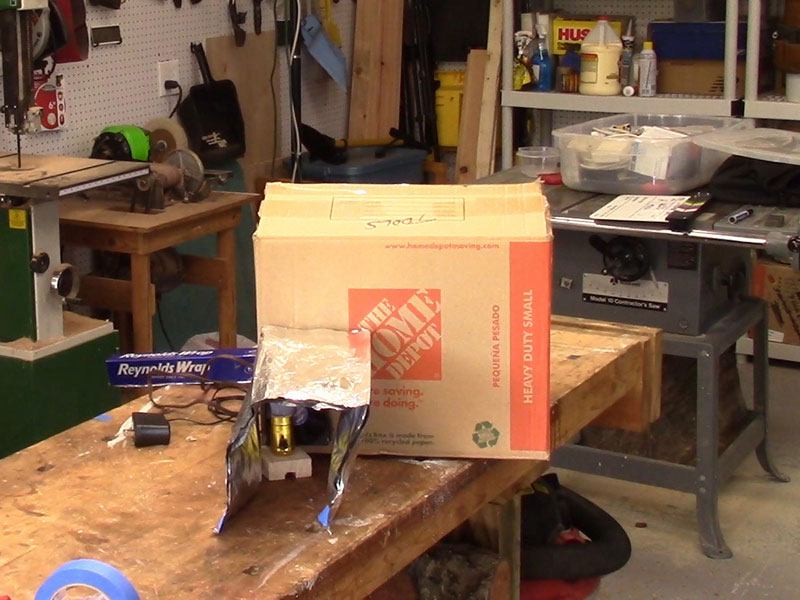
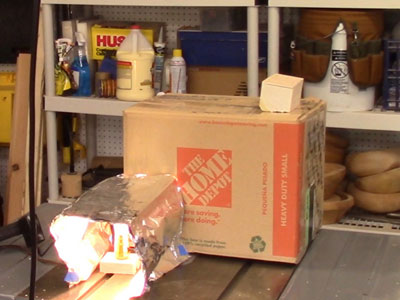
The box was complete at this point. However, I wanted to do one more thing, just to make the heating a bit more efficient. I did not want the light bulb close to the cardboard for obvious safety reasons, so I positioned it several inches away from the fan outside the box.

|
|
Figure 29 - The box with the fan mounted and the light in position
|
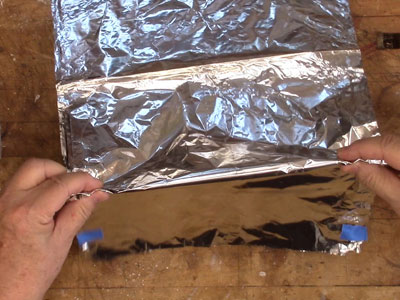
With the light positioned away from the box, I decided to make an airway out of tinfoil to channel more of the light heat toward the fan. I layered four sheets of aluminum foil about 24" long and put two folds in them.
|
|
Figure 30 - A tinfoil channel for the air intake
|
It didn't want to stand up all that much, but I threatened it with recycling, and it got with the program. This feature isn't all that necessary and I might still decide to retire it. Having a lot of heat, as I pointed out, isn't desirable.

|
|
Figure 31 - The tinfoil air channel
|
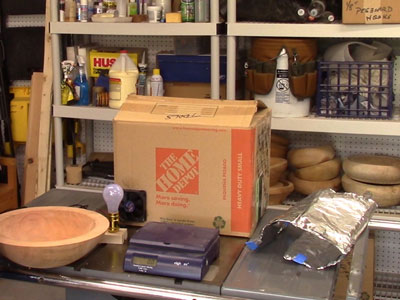
The Drying Box is Done!
It was a simple and quick project. And cheap!
|
|
Figure 32 - The drying box is set up and ready to go
|
Before commencing with the drying, however, it was necessary to take a measurement or two, so that in a few days I would be able to tell if the bowl was dry enough. For that, I used two methods:
-
Weighing the bowl every day
-
Checking the moisture content with a moisture meter
|
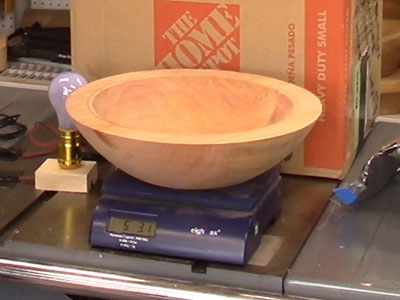
Figure 33 - Before a trip through the drying box, the green bowl
weighed 5 pounds, 3.1 ounces
|
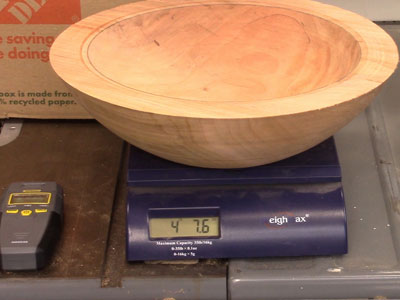
I weighed the bowl, and got 5 pounds, 3.1 ounces. This is my starting point. When I used my full-size drying box from years ago, I would keep the bowl in the drying box until the day-to-day weight loss was 0.3 ounces.
For another check, I used a
moisture meter
that I had only recently acquired. I wanted to check the meter against my home-grown weighing method.

|
|
Figure 34 - Moisture meter reading: 19.6%
|
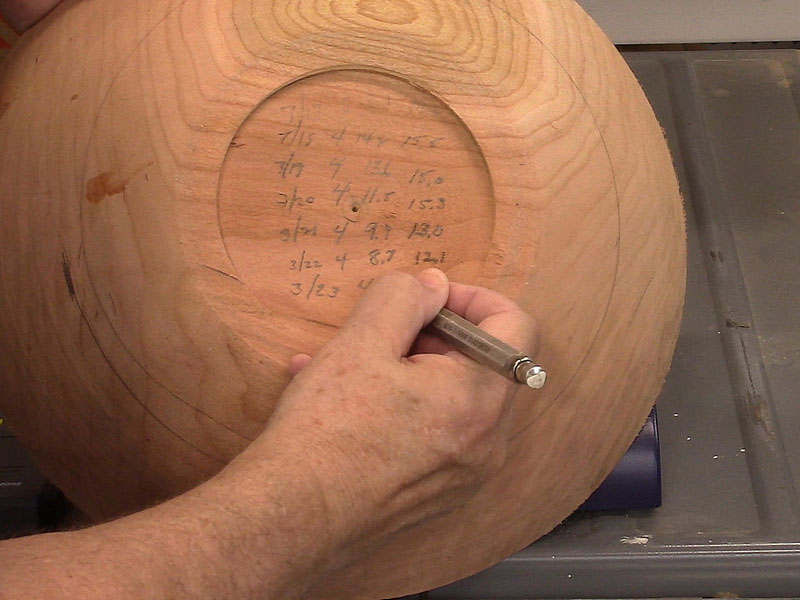
Then I wrote the date, weight, and moisture meter reading on the bottom of the bowl.
|
|
Figure 35 - Recording data on the bowl's bottom
|
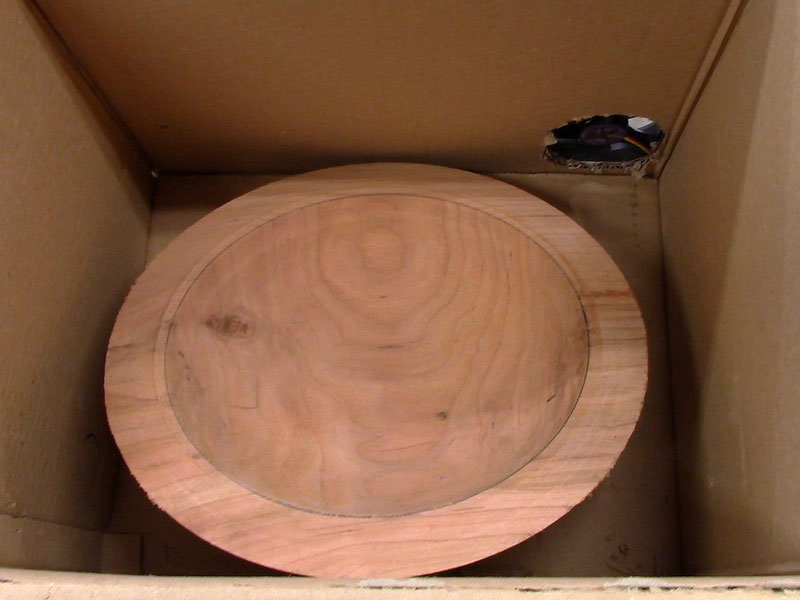
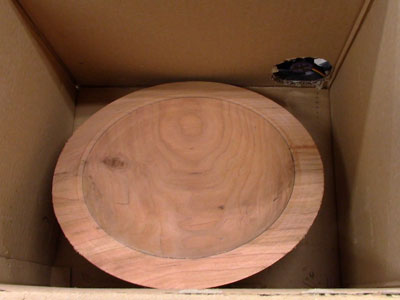
And with that, the bowl was put into the drying box.
|
|
Figure 36 - Bowl in a box
|
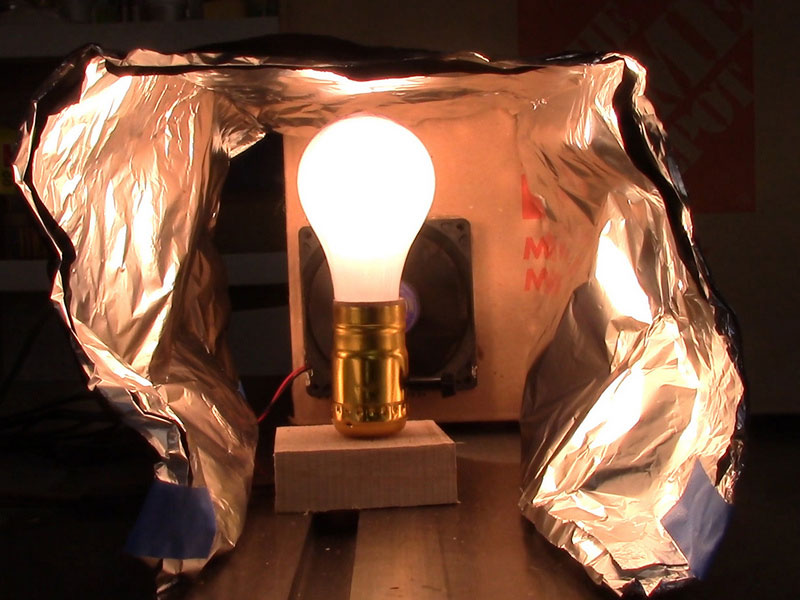
The top of the box was “secured" with a small chunk of wood to keep it closed. The light was switched on. I left the bowl to cook.
|
|
Figure 37 - Drying in progress
|

|
|
Figure 38 - Looking down the throat of the drying box
|
Let me note once again, the light should not be put inside the box, or closer to the box than 3-4 inches.
Some Days Later…
Once a day, at the same time each day, I took the bowl out of the box, weighed it, took a moisture content reading, recorded the data on the bottom of the bowl, and put it back in the drying box.
|
|
Figure 39 - After 24 hours in the drying box
|

|
|
Figure 40 - After the sixth day in the drying box
|
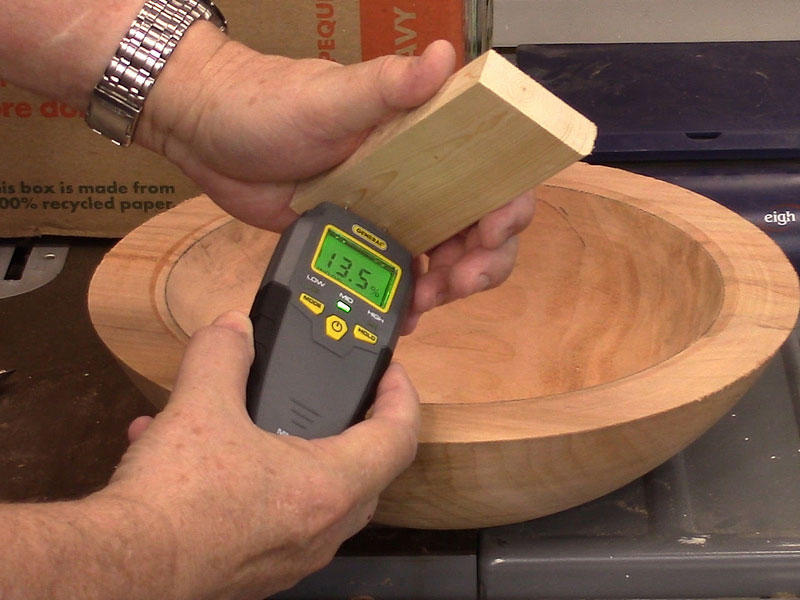
After six days, the day-to-day weight loss was well below an ounce. I used a kiln-dried piece of lumber that had been sitting around my shop for months to see what reading I should get for equilibrium moisture content. I got 13.5%.

|
|
Figure 41 - Checking a dry piece of wood for moisture level
|
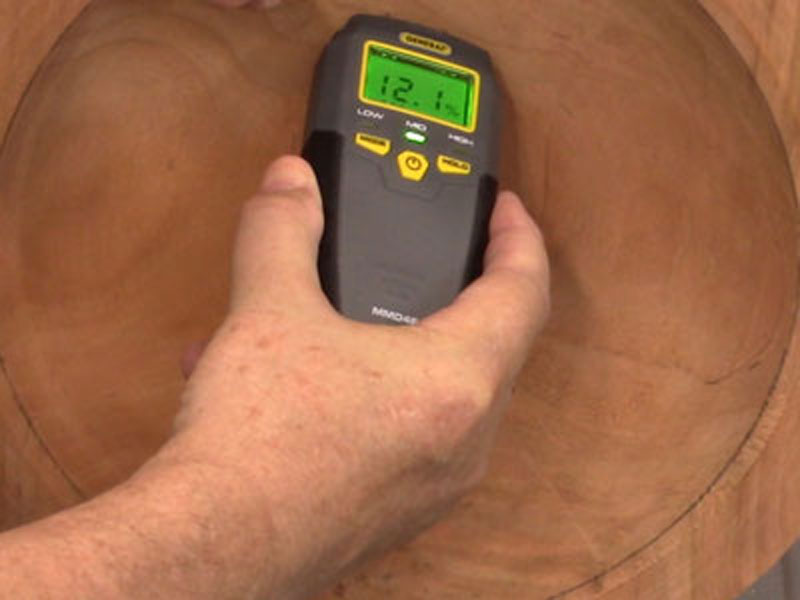
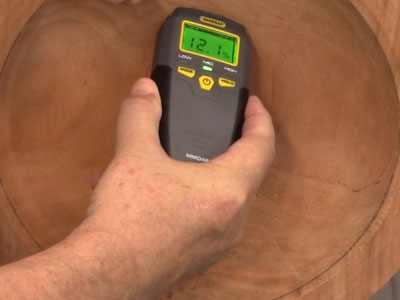
I then checked the bowl's moisture content and got 12.1%.
|
|
Figure 42 - Moisture content of the bowl after six days
|
The bowl is reading a little below the moisture meter's reading on dry wood. I declared victory and put the drying box away. One nice thing about this drying box is that I can put the light, various cords, and the tinfoil piece all inside the box, then put it away on a shelf in the workshop.

|
|
Figure 43 - The drying box components all pack up into itself
|
This is a quick and easy project. If you only want to dry one or two bowls at a time, this works very nicely.
If you have any questions you can email Rick at
rickandcathymorris@gmail.com.
Return to
The Highland Woodturner
front page
|
|
|
|
|