|
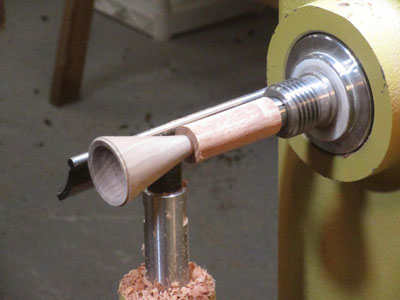
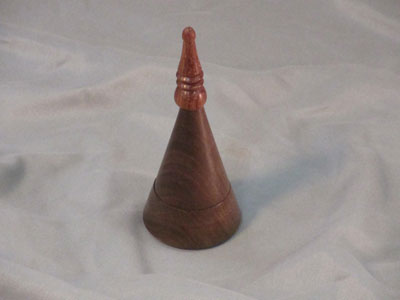
Popular woodturning projects include small round boxes. They are usually made in the general shape of a cylinder, sometimes with a figured instead of plain lid. This project is a small box shaped like a cone, and meant to hold a single ring.
|
|
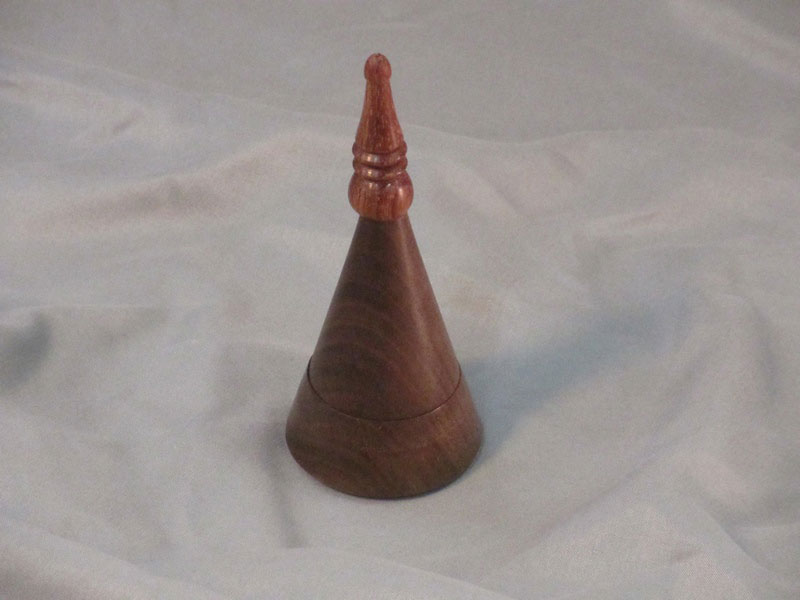
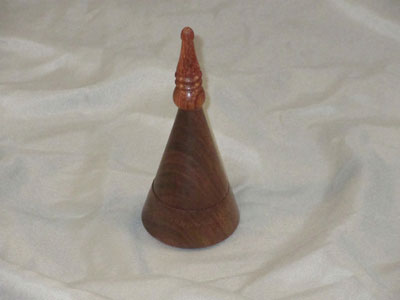
Figure 1 - A conical ring box for all occasions
|
This is a fairly easy item to make. It is turned pretty much the same as any woodturned box, with the exception of the conical shape. The finial on top adds a touch of elegance to the box, as well as a contrasting color if you use a different wood than the box itself if made of.
Very little wood is required. I started with a 6" length of 2"x2" walnut for the box body and a 3" length of 1"x1" bubinga for the finial. No other materials are needed. This is a scrap-box project!
A 2"x2" cross-section spindle is probably the minimum to use; if I had a larger cross-section piece, 3"x3" for example, I would have preferred it, as it would give me more room for chuck-mounting tenons (and for making mistakes).
|
|
Figure 2 - The box body is from a 6" length of 2"x2" walnut
|
|
|
Figure 3 - And the finial is from a 3" length of 1"x1" bubinga
|
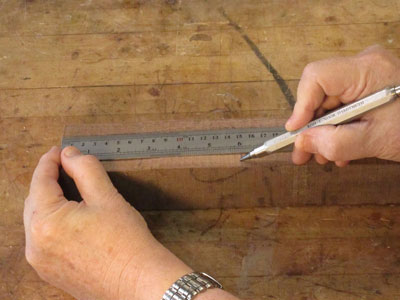
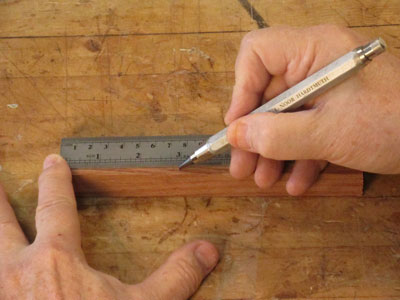
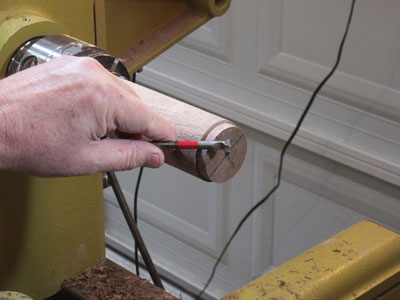
After cutting to length on a
bandsaw, I mark the centers on both spindles, using a
center finder. I position the finder four times, against all four sides, which will give me a close approximation of the center even if the spindle cross-section is not exactly square.

|
|
Figure 4 - Mark the center of each end of each spindle
|
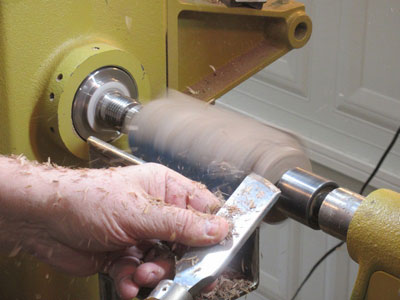
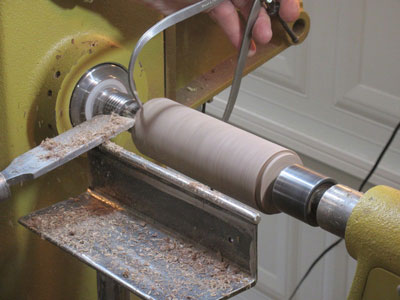
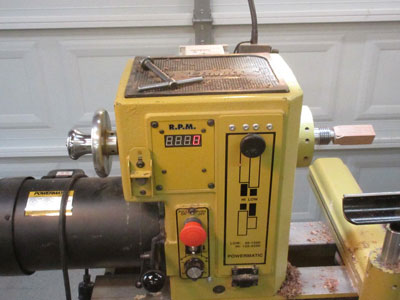
Now it's off to the
lathe
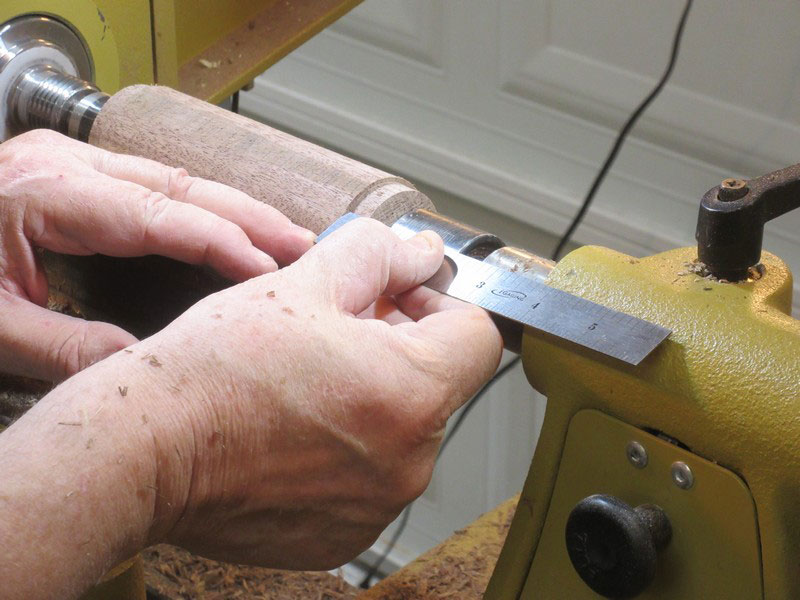
to rough the spindle down to round. I want to get the maximum diameter after roughing so I check often by riding the length of the skew against the cut surface. For this step, I mount the spindle between centers.
|
|
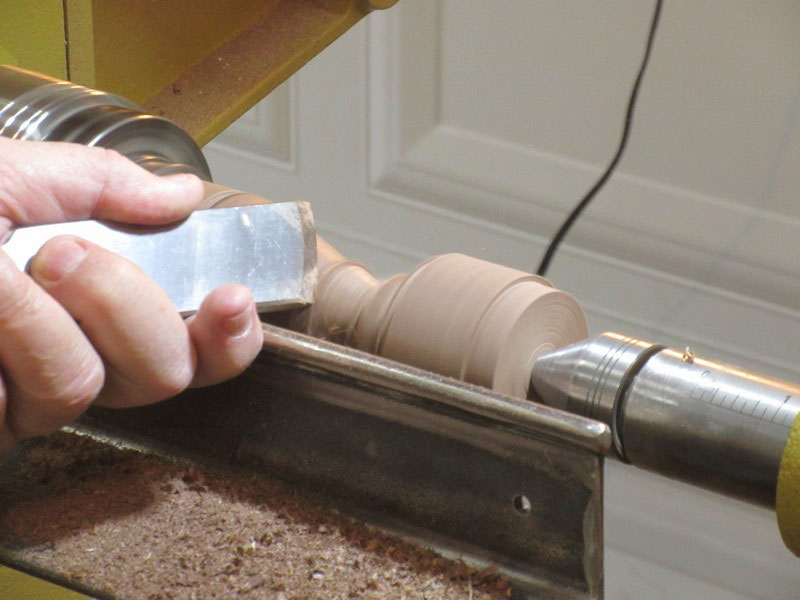
Figure 5 - I use a
skew
to rough the spindle for the body down to round
|
|
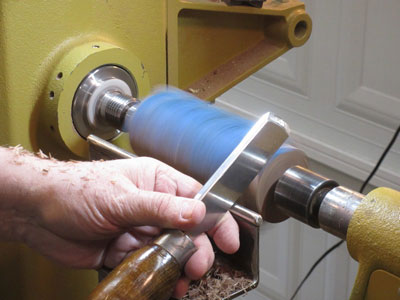
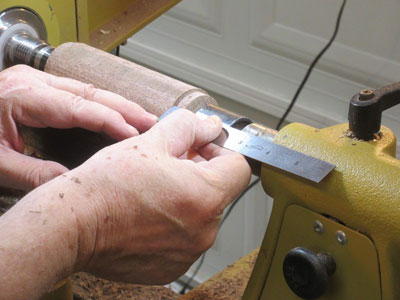
Figure 6 - If the edge of the skew doesn't bounce when laid on
the spinning workpiece, it is round
|
With the spindle round, I cut a chuck tenon on each end. The bottom part of the body and the top part of the body will both be mounted separately during turning. The 2" diameter is only slightly larger than my
chuck jaws, so my tenon is not quite as deep as I would like.
|
|
Figure 7 - Cut a tenon on each end, to match your chuck jaws
|
|
|
Figure 8 - The tenon length is about a half inch
|
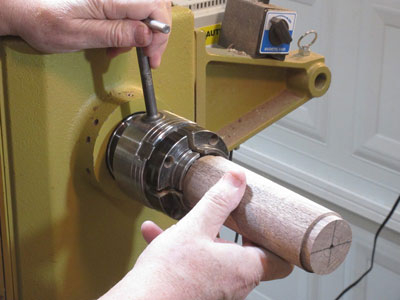
Now I remove the workpiece from between centers and mount it in my
chuck.
|
|
Figure 9 - Mount the spindle in a chuck
|
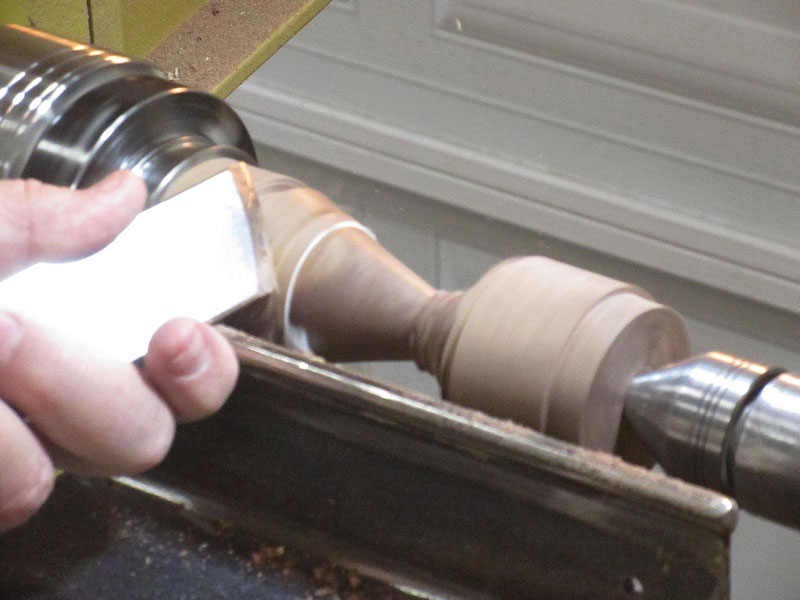
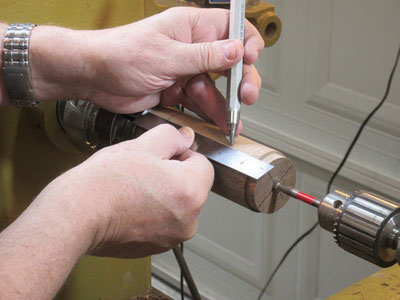
I want the overall length of the box to be in the neighborhood of 3" (without the finial), so I mark off a 3" inch section, roughly centered on the length of the spindle.
|
|
Figure 10 - Mark off a 3" length in the center of the workpiece
|
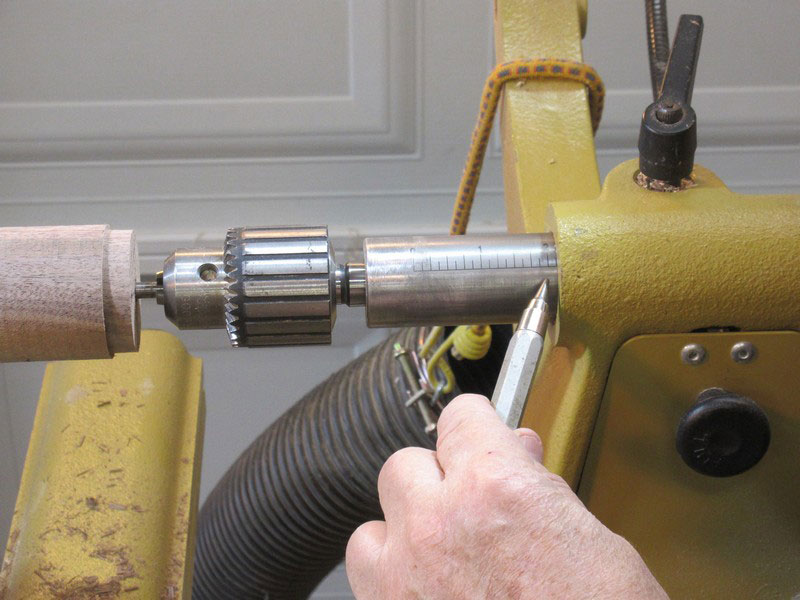
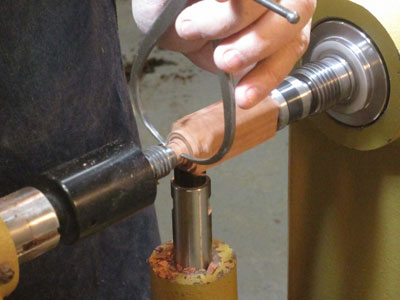
The next step is to drill a hole (in what will be the top) for later mounting of the finial. I will be making the base of the finial 3/8" diameter, so I'm going to drill that size hole in the right end of the spindle. The depth should extend at least 3/8" inch to the left of the 3" length previously marked (i.e. deep enough to extend 3/8" through the eventual top of the box).
|
|
Figure 11 - Use a 3/8"
Forstner Bit
to cut a smooth-sided hole
|

|
Figure 12 - Drill to a depth of around 2" to get at least 3/8"
into the top of the box
|
Now I bring up the tailstock with a cone center to hold the workpiece a bit more securely. This isn't necessary but it does steady that 6" length that would otherwise only be supported by the chuck. The tailstock is removed for later work, of course.

|
Figure 13 - For as long as possible, use the tailstock to support
the workpiece
|

|
|
Figure 14 - Use a
Parting Tool
to identify the top and bottom surfaces
|
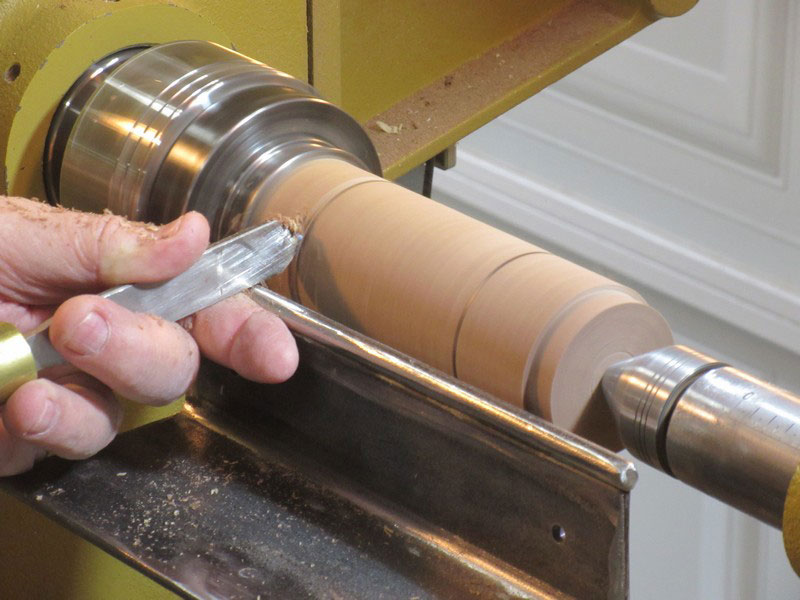
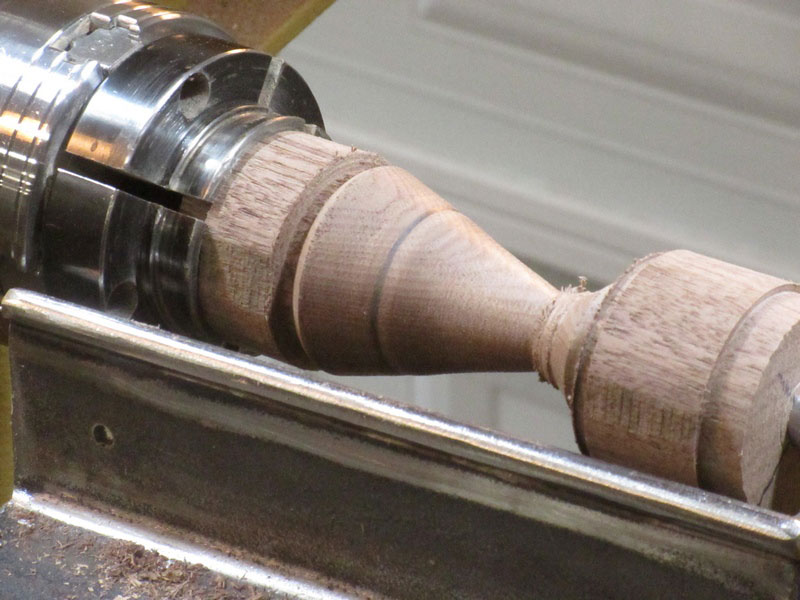
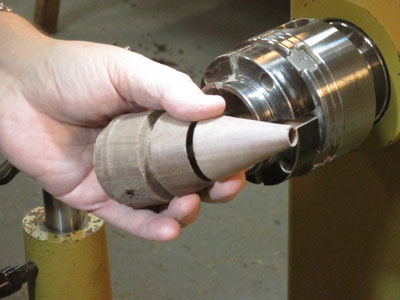
I start cutting a conical shape from the left to the right. The left side will be the base of the box and the right side will be the top.
|
|
Figure 15 - Start cutting a cone down the length of the box
|
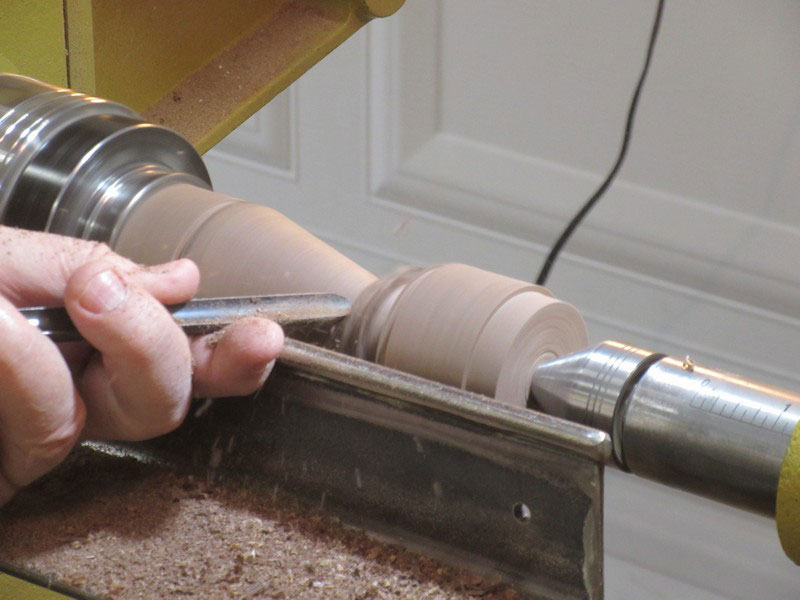
I initially use a
Spindle Gouge, but when the shape is close to what I want, I switch to a skew to get a smoother surface.

|
Figure 17 - After getting the approximate slope,
switch to a skew for a finer surface cut
|
I cut only to within about ¾" of what will be the top of the box. If I extended the cone all the way, it would remove the chuck tenon that I need later to hold the top for hollowing.

|
|
Figure 18 - Don't cut all the way to the top of the box
|
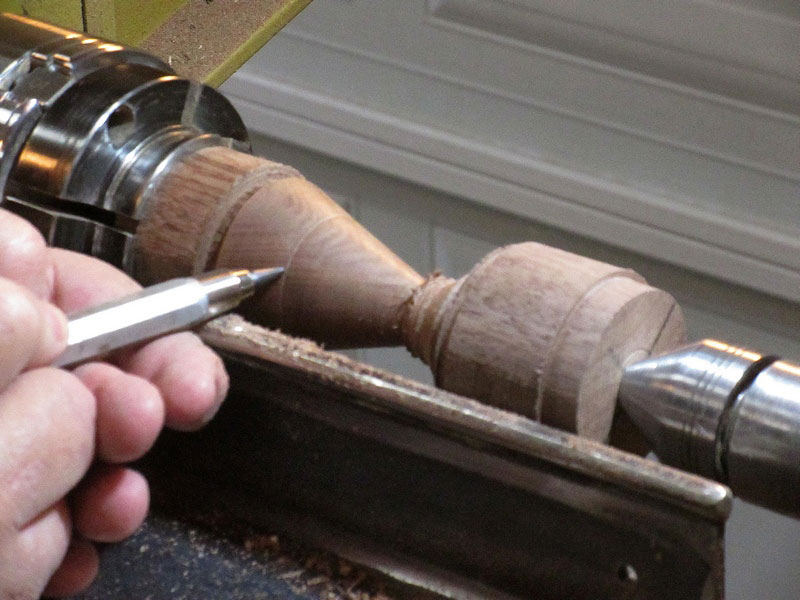
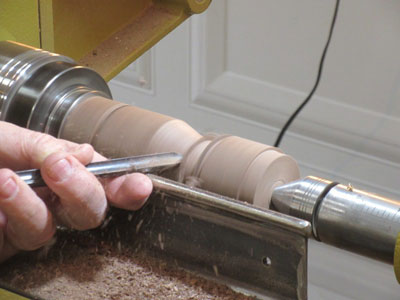
Now I part off the bottom from the top. I do this about 1" from the bottom mark. The exact distance isn't critical, but I do need room for the recess where the ring will sit; on the other hand, that recess shouldn't be too deep in order to make it easier to scoop the ring out.
I use a narrow
Parting Tool
for this cut. I want as narrow a cut as possible; the less width removed, the easier it is to end up with an uninterrupted grain pattern when the top is set on the bottom again. A 1/16" Parting Tool is just about perfect; the final match between the top and bottom shows almost no change in the grain on the outside of the box.

|
|
Figure 19 - Part off the bottom from the top with a narrow
Parting Tool
|
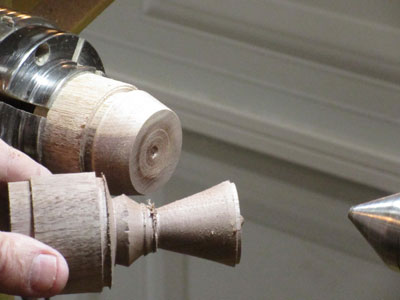
Before fully parting the top from the bottom, I use the Parting Tool to cut a small recess around the outside of the top piece. This forms a tenon that fits into the bottom piece. I have cut it to around 1/16" deep. This turned out to be just barely enough to enable the final fitting (discussed below), and I recommend making this recess at least 1/8" – even 1/4" would be good.
|
|
Figure 20 - The two pieces after parting
|
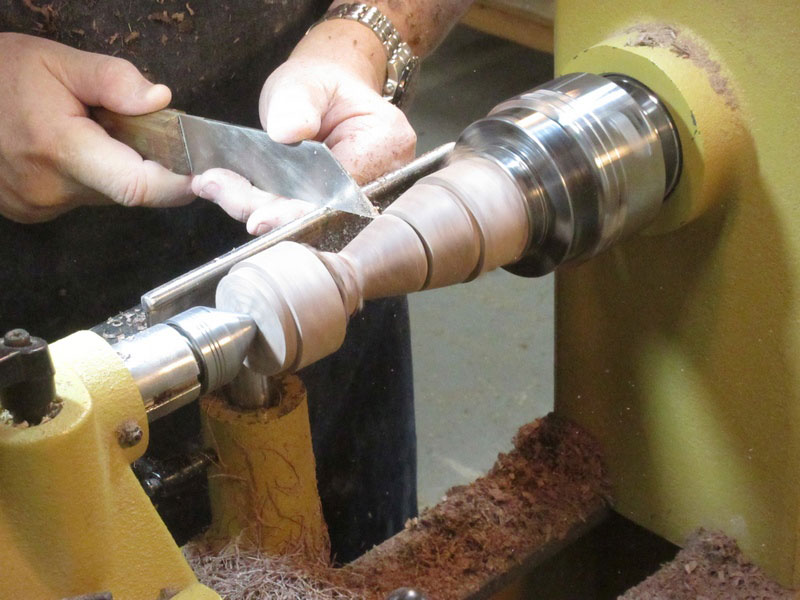
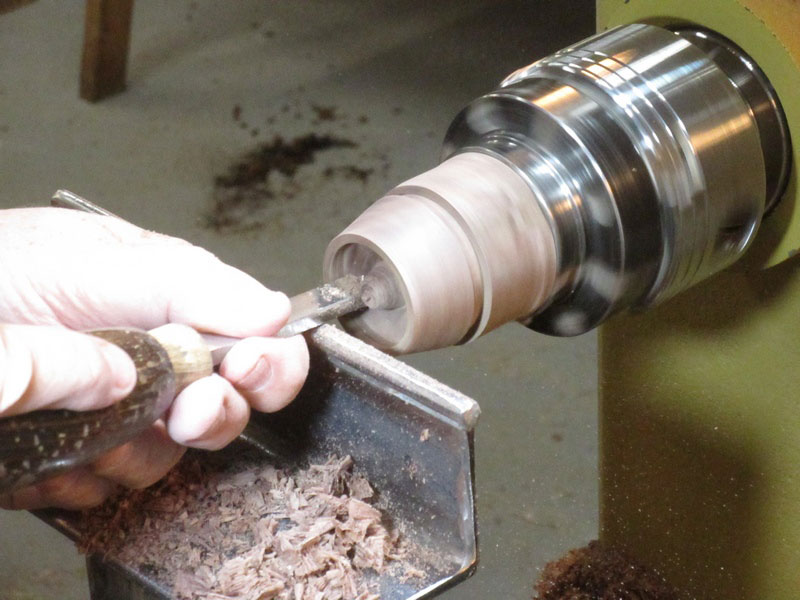
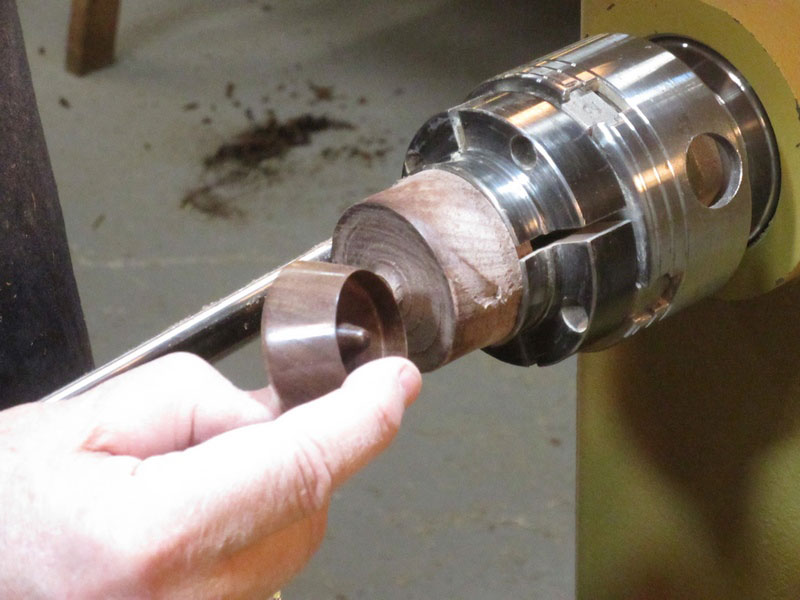
With the bottom of the box still held in the chuck, I hollow it out to a depth of about ¾". For this cut, I am using a flat scraper.
|
|
Figure 21 - A flat scraper is used to hollow the bottom of the box
|
Note that a stub is left in the center of the bottom.

|
|
Figure 22 - Hollow to a depth of about ¾", leaving a stub in the center
|
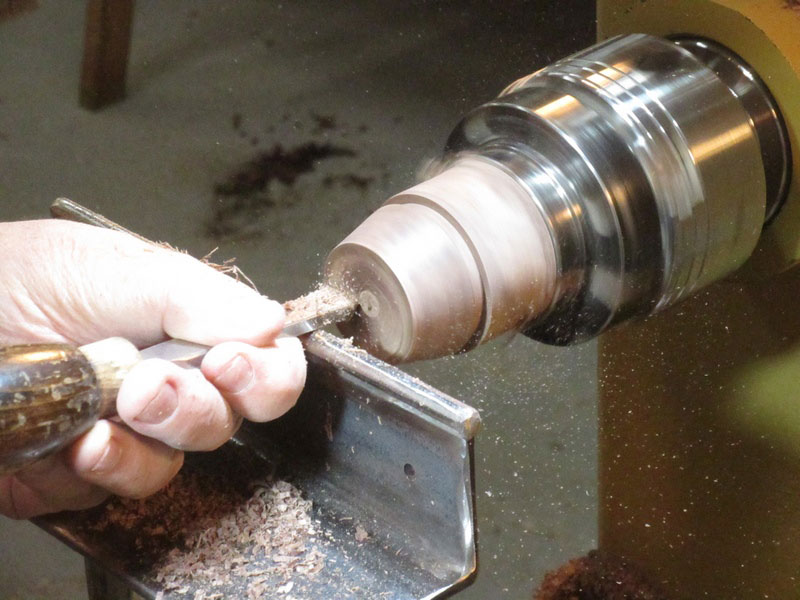
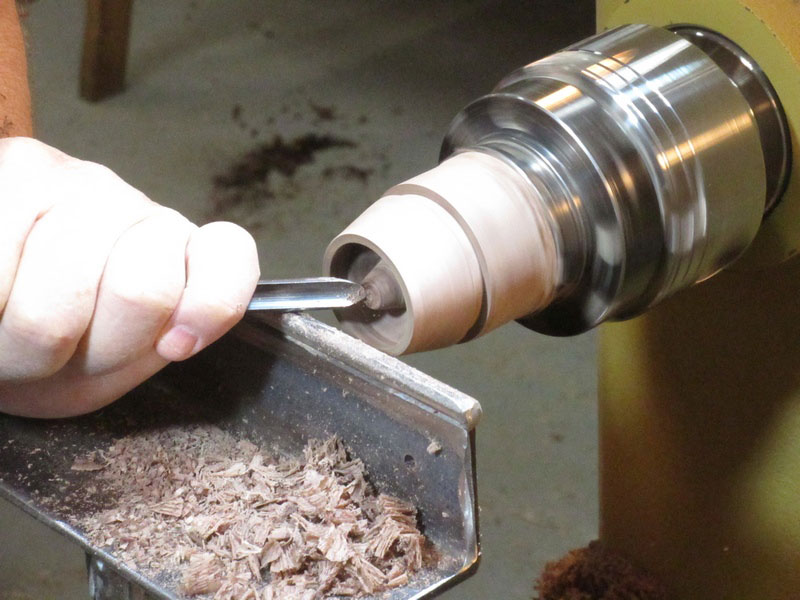
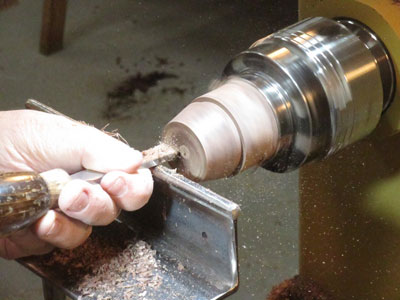
Once the hollowing is done, I use a
Spindle Gouge
to shape that small stub into a conical post which the ring will sit on. The size of this stub doesn't matter too much, but at the base it should be around a half inch. The smallest ring size is 14 mm, a little over ½ inch. Again, this isn't critical; it allows the ring to always rest on or around the raised post, which makes it easier to pick up, I think.

|
|
Figure 23 - Shaping the ring post in the bottom of the box
|
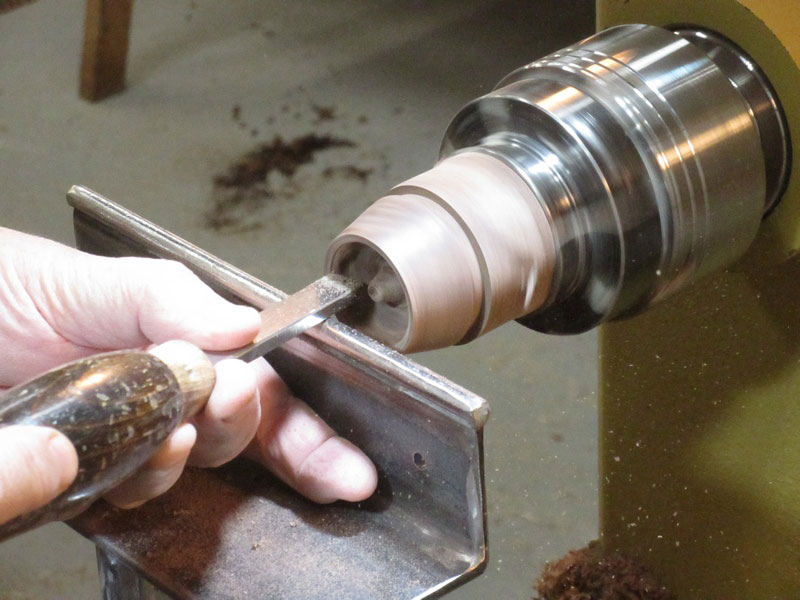
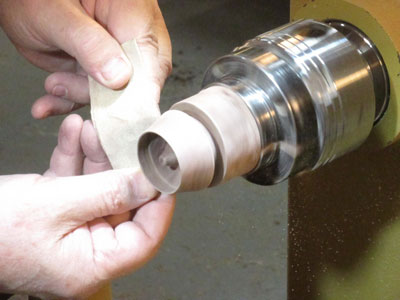
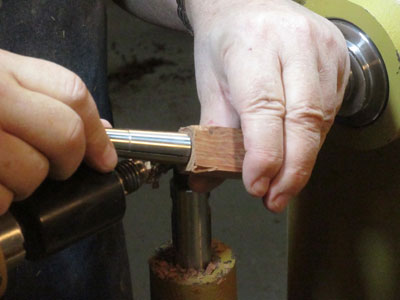
When finished with hollowing the bottom and shaping the interior post, I need to fit the top (whose tenon is already cut) to the bottom by cutting the rim of the bottom narrower on the interior. This calls for frequent tests of the fit.
Because the top has not been hollowed out yet, I drill a ½" hole in the center of the top piece so that it won't hit the post in the bottom.
|
Figure 24 - The drilled-out hole in the top piece which allows
the fitting to proceed
|
The fit between the top and bottom pieces should be a little loose; if it is a tight fit, it would require two hands to pull the top off the box.
|
Figure 25 - Repeatedly checking the fit between the top and
bottom pieces of the box
|
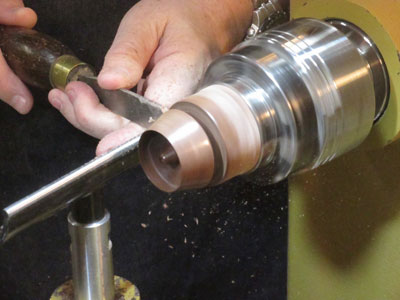
For this cut I go back to the flat scraper and cut parallel to the outside slope of the piece.

|
|
Figure 26 - Widening the bottom opening so the top will fit into it
|
After cutting and fitting and cutting and fitting and even more cutting and fitting I have achieved a slightly loose joint between the top and bottom. It doesn't show all that well in the photo, but due to the parting cut, there is now a ledge on the outside where the bottom and top pieces meet.

|
Figure 27 - The ledge left by the parting cuts material removal
between the two pieces
|
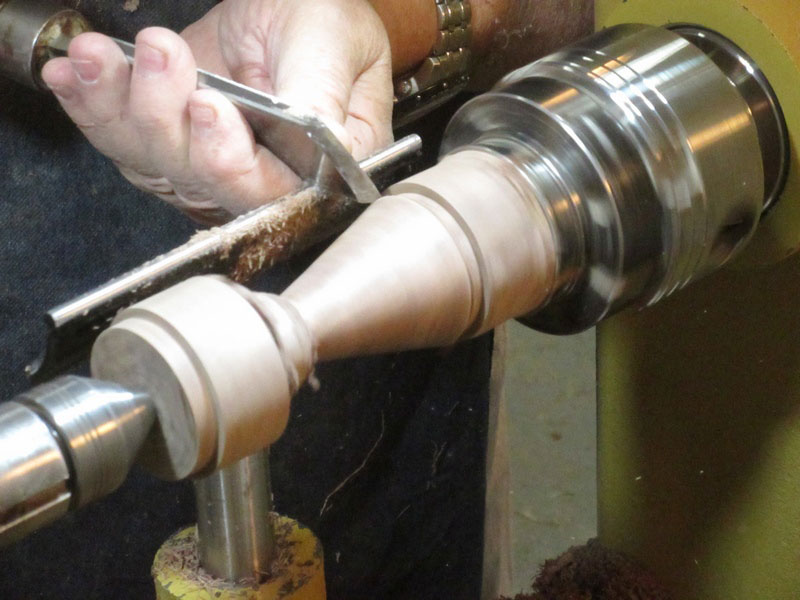
I now use a Skew to remove that ledge by cutting the bottom piece down to the level of the top piece. There's not a lot of wood to remove here, so I go slowly. (That white line showing between the two pieces is a paper towel "washer" used to temporarily tighten the fit).

|
Figure 28 - Using a Skew to recut the slope of the box to remove
the ledge left by the parting cut
|
When I'm done adjusting the exterior fit, I have a very near match on the continuation of the grain of the wood from the bottom to the top.

|
|
Figure 29 - The grain pattern still matches from the bottom to the top
|
With the exterior shape adjusted, I cut a slight bevel on the bottom of the bottom piece which gives it a slight "floating" appearance when sitting on a flat surface.

|
|
Figure 30 - Cutting a bevel on the bottom of the box
|
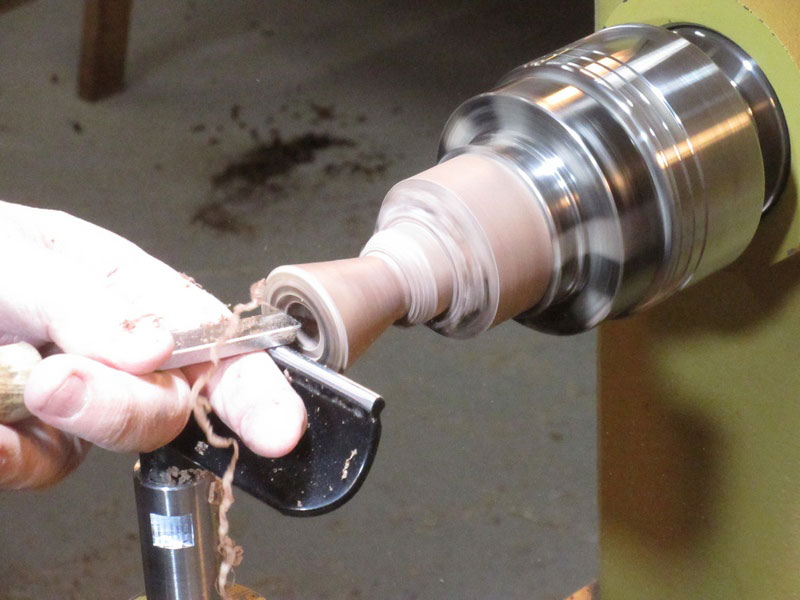
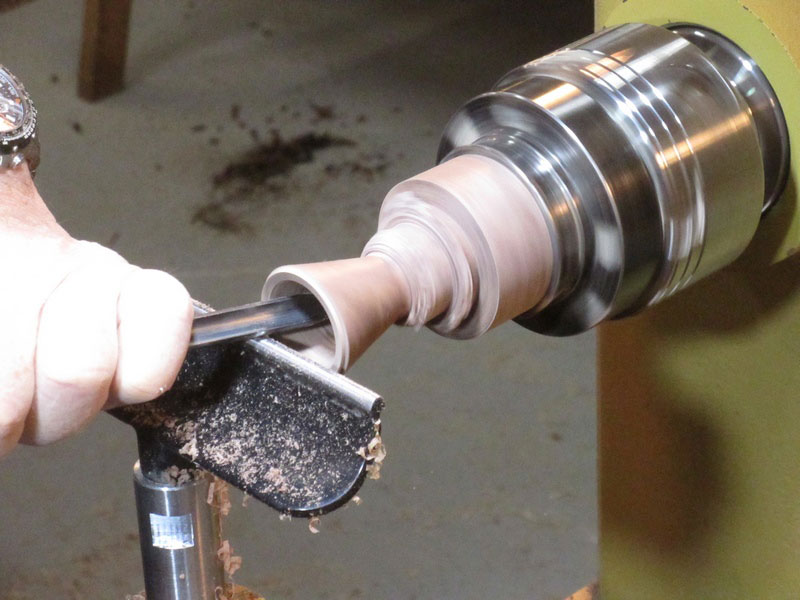
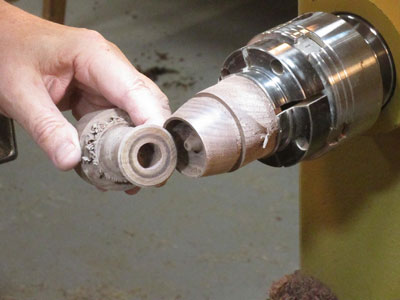
I remove the workpieces from the chuck, and mount the top piece in the chuck. (This, of course, is why I left waste on the top, with a tenon on it). I begin hollowing out the top. In this case, I use a Flat Scraper and then
Spindle Gouge, and again cut the side of the piece parallel to the exterior slope.

|
|
Figure 31 - Hollowing out the top of the box
|
The depth of the recess isn't critical; I take out about 1" of wood.

|
|
Figure 32 - Finishing the hollowing of the top
|
Now the top of the box can be extended upward by cutting away the waste left earlier.
|
|
Figure 33 - Finishing the shaping of the top of the box
|

|
|
Figure 34 - More finishing of the shape of the top of the box
|
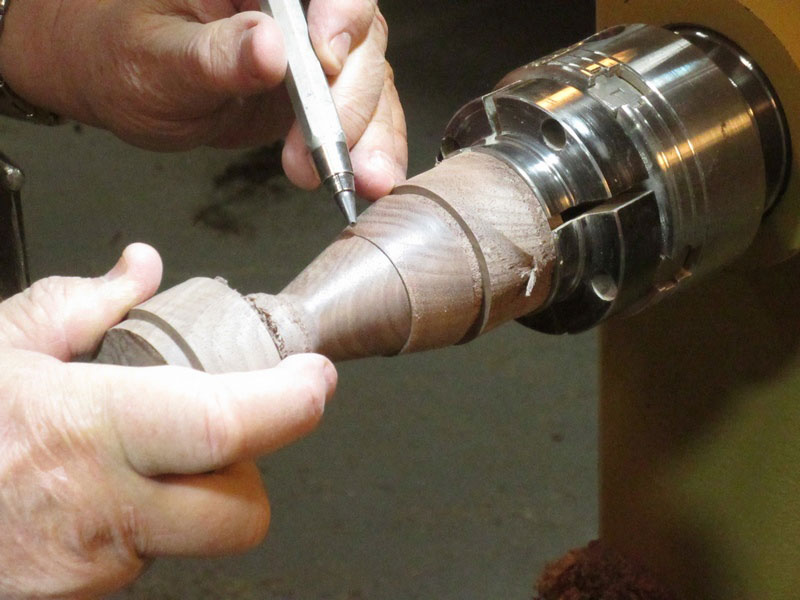
Earlier I drilled the mounting hole for the finial on the top piece. When doing the final shaping on the top I will stop at the point where that mounting hole comes through; the hole is 3/8" diameter.
|
Figure 35 - Checking for the narrowest desirable width
at the top of the box
|
|
Figure 36 - The top of the box top (held against the bottom),
showing the mounting hole for the finial
|
I left the chuck-mounting tenon on the bottom of the box. I now remount the bottom in the chuck and sand it. (This could have been done earlier, of course; I just forgot to do it then).
|
|
Figure 37 - Sanding the bottom piece of the box
|
For this ring box I want a glossy finish so I apply
Friction Polish
to the piece while it's still mounted on the lathe.
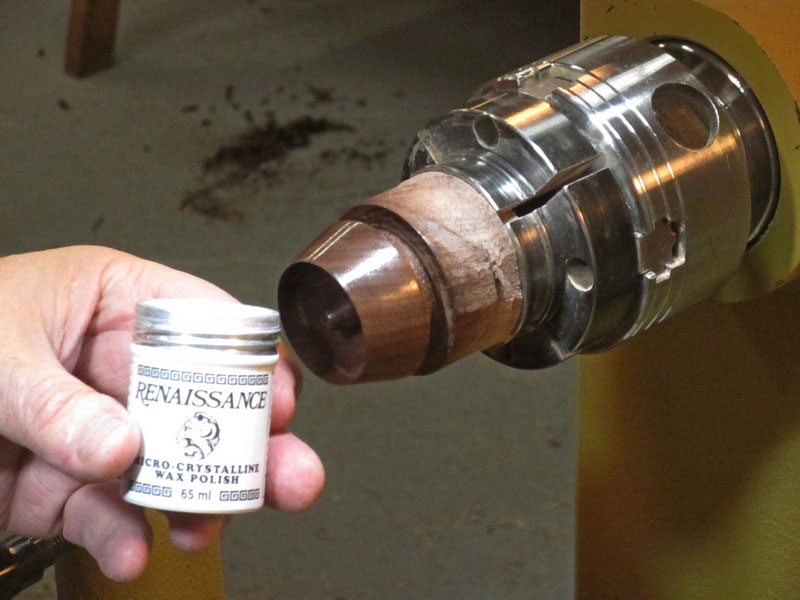
For the final top-coat, I use
Renaissance Wax, because it is more impervious to fingerprints than
Carnuba Wax.
And now I part off the box bottom from the mounting block.
|
|
Figure 40 - Parting off the box bottom
|

|
|
Figure 41 - The near-complete box bottom
|
The very bottom surface of the box also needs to be sanded and finished. Using the remaining waste piece still in the chuck, I make a jam chuck so I can reverse the bottom piece. I sand and finish the bottom.

|
|
Figure 42 - Making a jam chuck to finish the bottom of the bottom piece
|
Time to make the finial! Some time back, I purchased a 3/8" single-collet collet chuck (with an associated drawbar), and I wanted to use it on this project. (I could also use a chuck with 1" jaws or some type of jam chuck). For the blank to be held in the collet chuck, it needs a 3/8" tenon on one end.
|
|
Figure 43 - Preparing the finial blank for mounting in a collet chuck
|
I proceed to cut the 3/8" tenon with a parting tool. In this case, I'm using a
Diamond Parting Tool
that has a thicker blade than my narrow parting tool.

|
|
Figure 44 - Cutting the tenon to fit the collet chuck
|
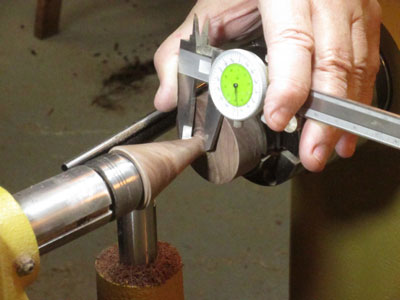
I initially use
Calipers
set to slightly over 3/8" to check the size of the tenon.
|
|
Figure 45 - Using
Calipers
to check the tenon size as I go
|
As with any fitting operation, frequent tests of the fit are needed to get down to the exact size.

|
|
Figure 46 - Testing the fit of the tenon in the collet
|
|
|
Figure 47 - After numerous tests, the proper fit is achieved
|
The tenon-end of the finial blank is inserted into the collet chuck and the drawbar is run through the headstock quill and screwed into the back of the collet. The finial blank is now held securely in the collet and is ready for shaping.
|
|
Figure 48 - The drawbar (left) attached to the collet (right)
|
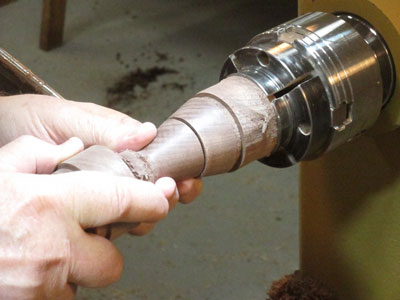
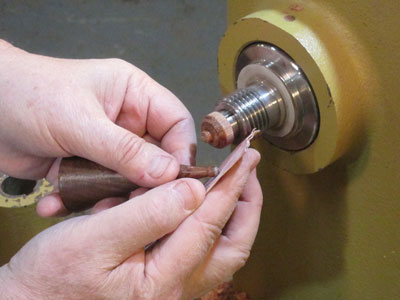
I now cut the tenon on the tailstock end of the finial blank to fit into the opening on the top piece (not shown). It is once again cut and fit, cut and fit, until the finial tenon fits snugly in the top.
|
|
Figure 49 - Fitting the box top to the finial blank
|
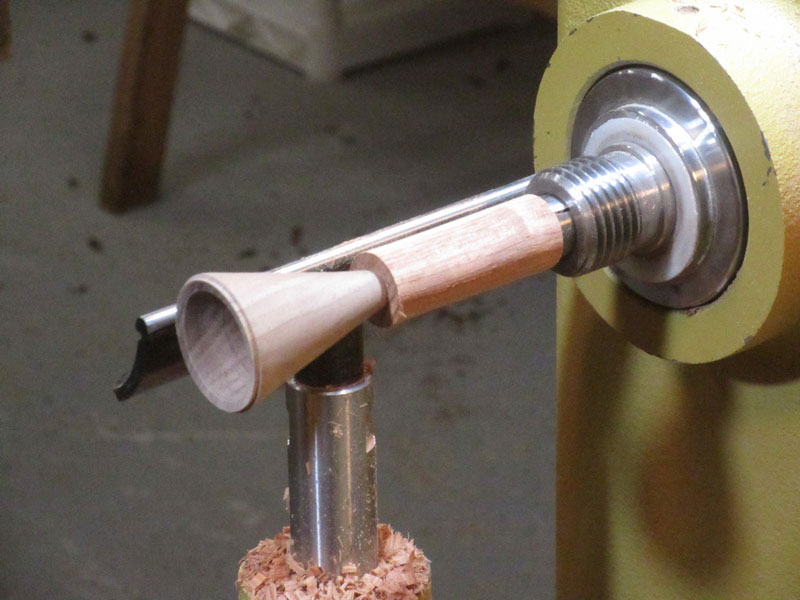
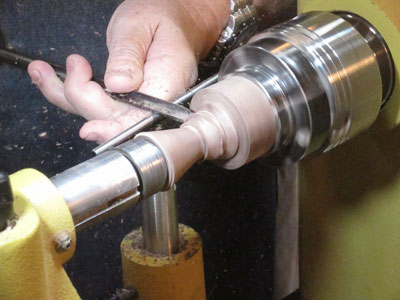
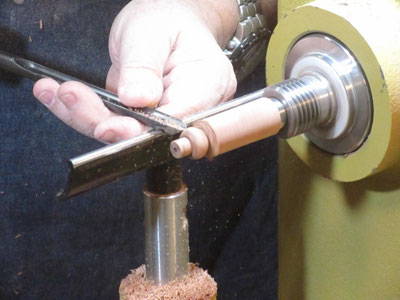
Using a
Spindle Gouge, I shape a large bead at the top of the finial.
|
|
Figure 50 - Shaping a bead on the finial
|
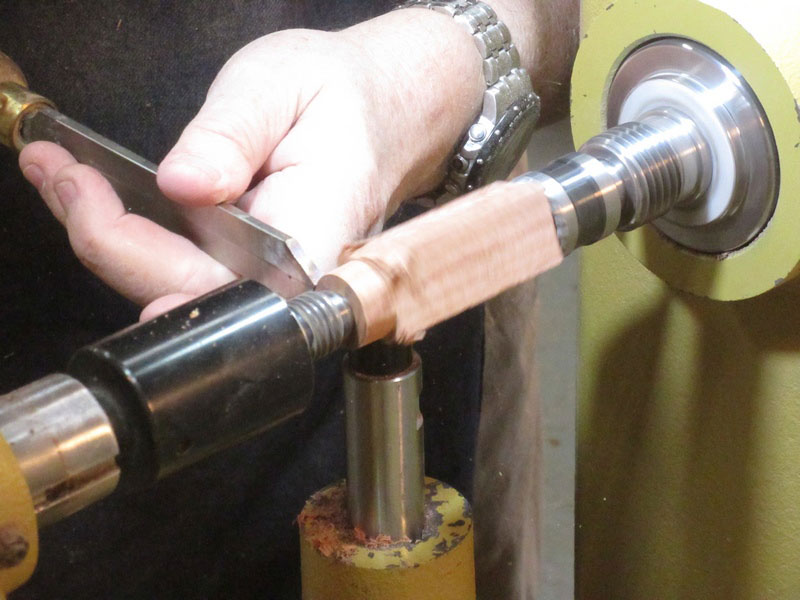
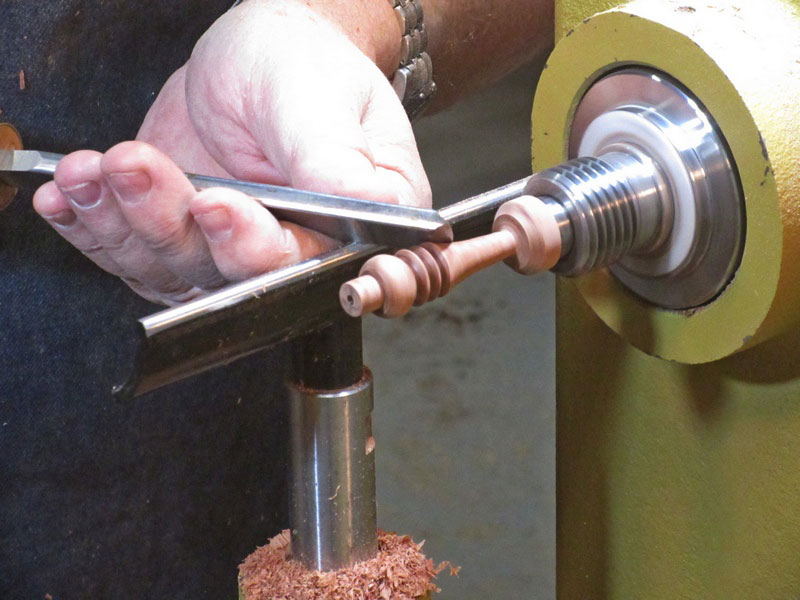
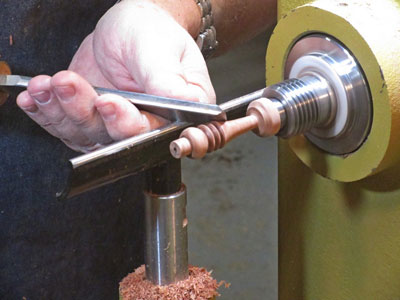
With a Skew, I add some decoration above the bead.

|
|
Figure 51 - Cutting decorative elements on the finial
|
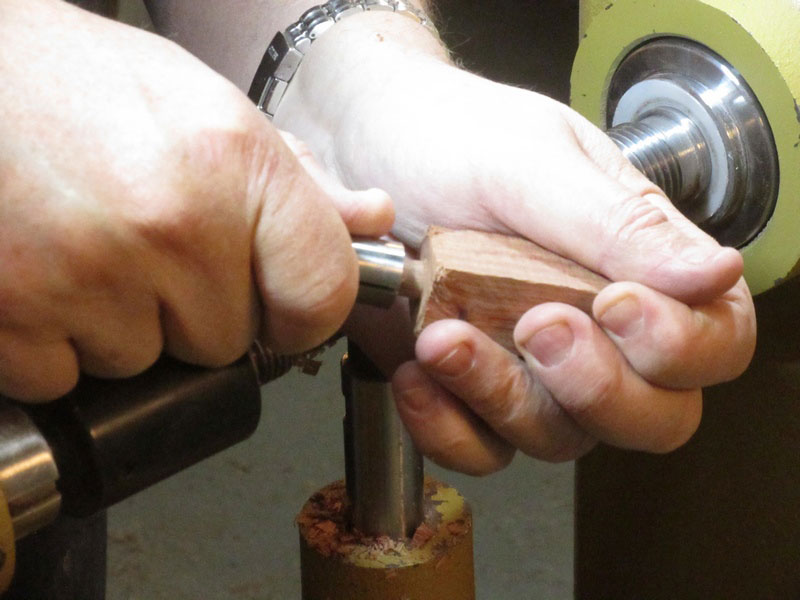
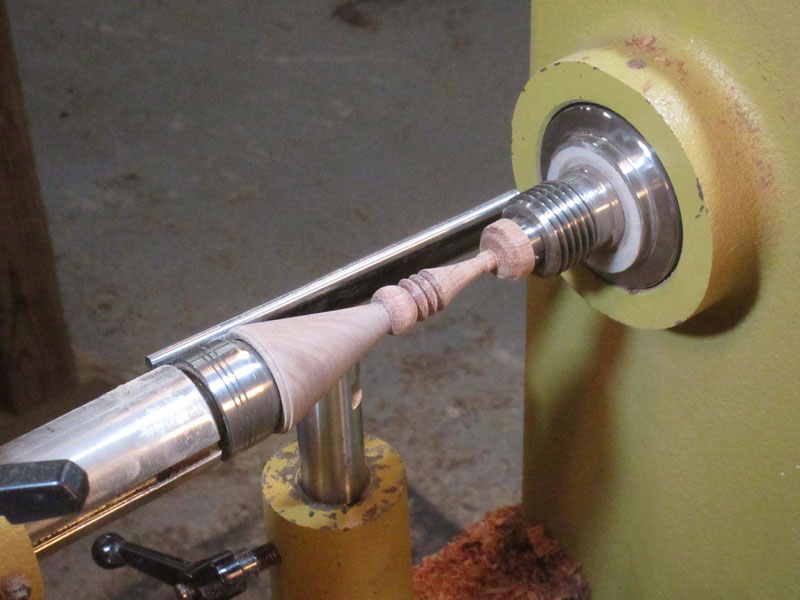
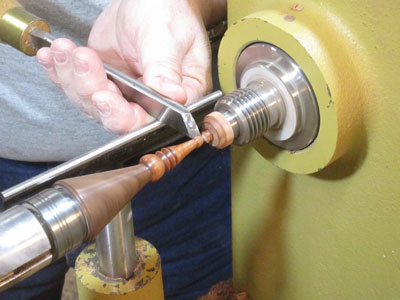
I narrow the finial top with a Skew. I don't want it loose yet, so I don't cut all the way to the top or cut the final shape on the top end.
|
|
Figure 52 - Shaping the upper section of the finial
|
I glue the box top to the finial and bring up the tail stock with a cone center for the final steps.

|
|
Figure 53 - The finial glued to the box top piece
|
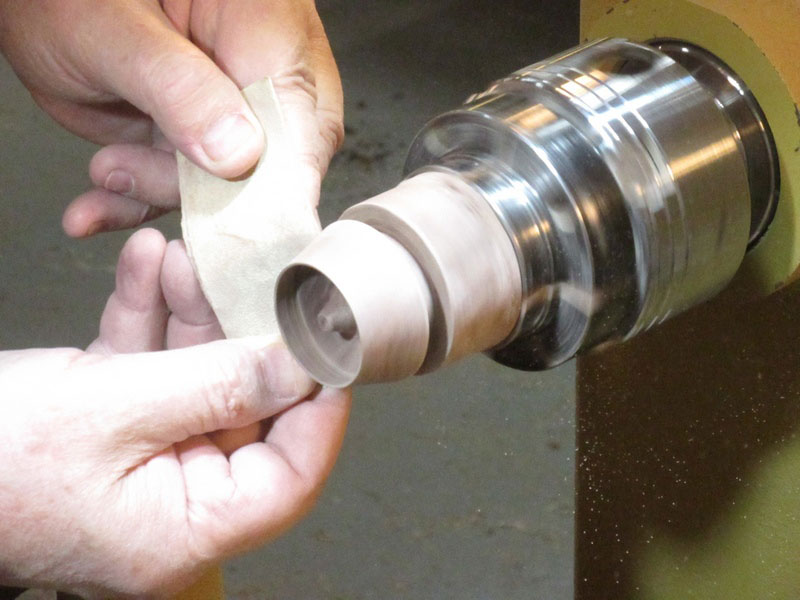
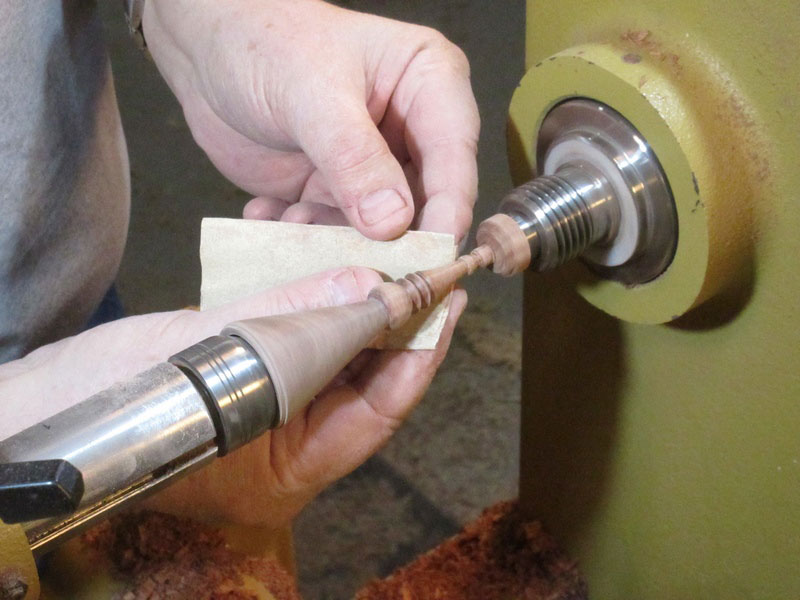
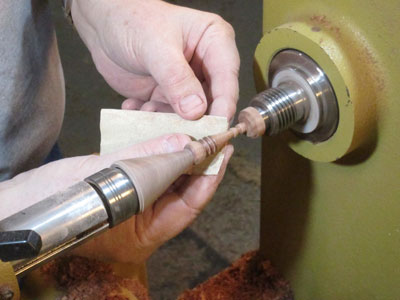
Now I start sanding and finishing the top assembly. I sand from grits 150 to 1000.
|
|
Figure 54 - Sanding the top of the box
|
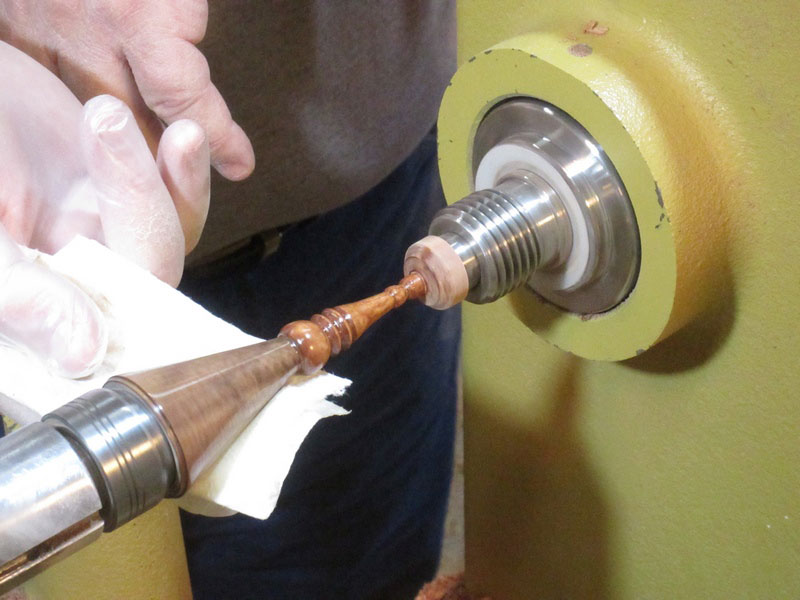
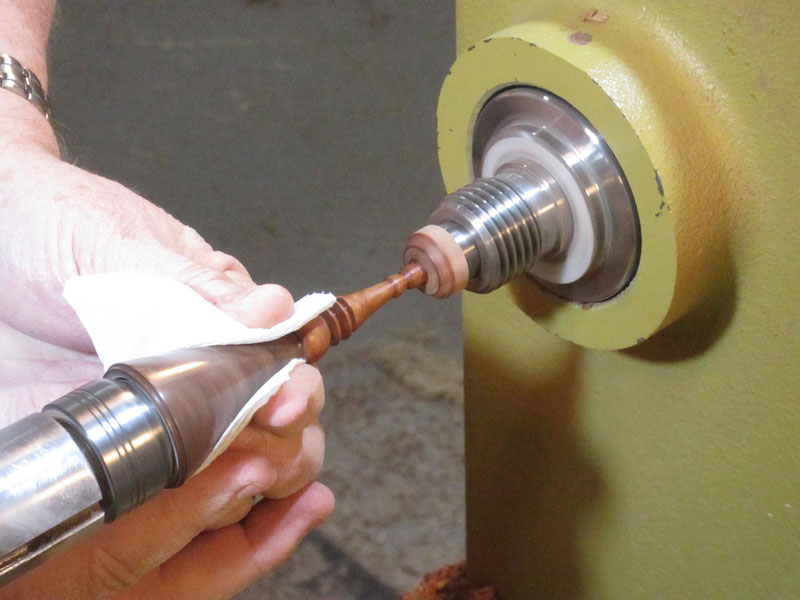
And I use
Friction Polish
again.
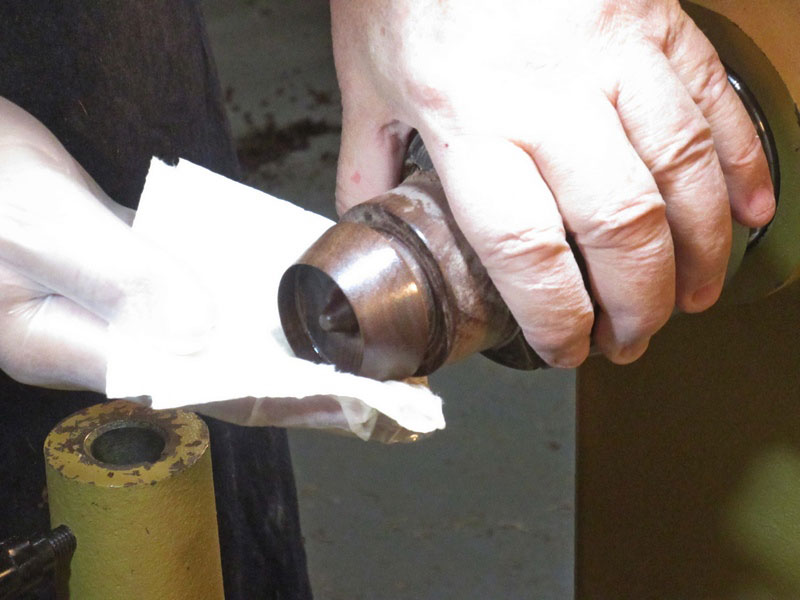
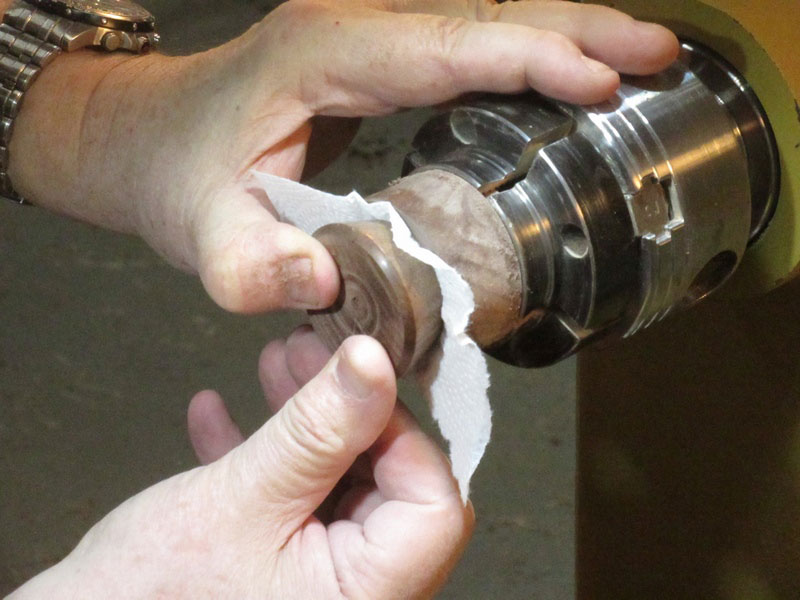
As with the bottom of the box, I put on a coat of
Renaissance Wax
for protection against handling. I polish it with a paper towel.
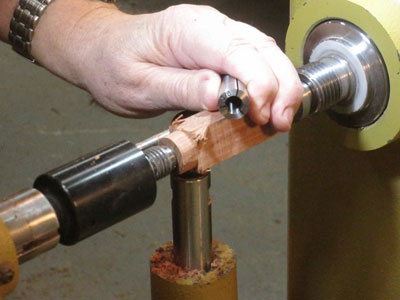
The final lathe operation is cutting the finial off at the top. I leave a slight bulb shape on the top, rather than a sharp point.
|
|
Figure 57 - Cutting the finial free of the blank
|
The cutoff tip is carefully hand-sanded down to 1000 grit, and then some
Friction Polish
is dabbed on.
|
|
Figure 58 - Sanding the cutoff end of the finial
|
|
|
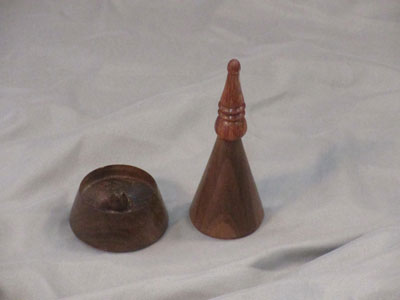
Figure 59 - The complete ring box, opened
|
|
|
Figure 60 - The complete ring box, closed
|
Although it has taken 60-some pictures to detail this project, I feel it is fairly simple and can be accomplished by any woodturner. It makes a nice gift for anyone who might wear a ring, which is to say, almost anyone.
Located in Castine, Highlands Woodturning gallery and shop offers woodturning classes and shop time, a gallery of woodturned art, custom woodturning for repairs, renovations, and architectural installations. You can email Temple at
temple@highlandswoodturning.com. Take a look at Temple's Website at
http://www.highlandswoodturning.com/.
Return to
The Highland Woodturner
front page
|