Hand Planes: Unlocking the Mystery
by J. Norman Reid
Delaplane, Virginia
Like many other woodworkers I decided early on I would be a "Normite" and bow to the superior
precision of power tools.
Hand tools
seemed just too imprecise and hard to master. But somewhere
along the way, I developed affection for hand planes and began to unlock the mysteries of their use.
Now, their secrets solved, they are a regular part of my woodworking practice. They can be for you
too.
Although a wide variety of
hand planes
are available on the new and used markets, most applications
involve what are known as "bench planes." The most practical of these, as denominated by the Stanley
numbering system, are numbers 3, 4, 4-1/2, 5, 6, 7 and 8. Together with a block plane, these make up
most of the planes you'll ever need. And you won't even need all these. At a minimum, you can do
perfectly well with one jointer plane (a #7, 7-1/2 or 8), one smoothing plane (a #3, 4 or 4-1/2) and
a block plane.
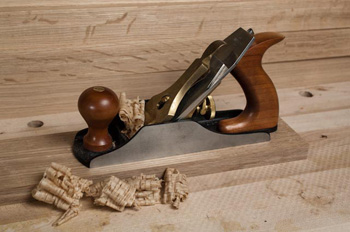
Three Essential Planes
Although it’s possible to build up a large stable of planes designated for specialized purposes, you
can do everything you need to do with just three essential planes—a block plane, a jointer and a
smoothing plane. My recommendations are a low-angle, adjustable mouth block plane like the
Lie-Nielsen
#60 ½
;
a
#7
,
#7 ½ low angle
or
#8 jointer
;
and a
#4
or
#4 ½ smoother
. Though you can
find restorable planes on the used market, you won’t go wrong by spending a little more for the best
quality, like Lie-Nielsen. Once you have these basic planes, you can fill in other, more
specialized planes as your needs require and your budget permits.
Bevel Down vs. Bevel Up Planes
Traditionally, hand plane blades were mounted in their bodies with the bevel facing down, toward the
wood. Recently, however, a number of planes have been introduced with the bevel facing up. Aside from some advantages in how the effective blade
angle can be changed by the angle at which the bevel is honed, the chief benefit of a bevel up plane
comes in setting it up for cutting. A bevel up plane has fewer parts, no chipbreaker or lateral
adjustment lever and is easier to set up. However, bevel down planes look more complicated than
they really are and they can be easily learned. Both types of planes work well. So, the choice is
yours.
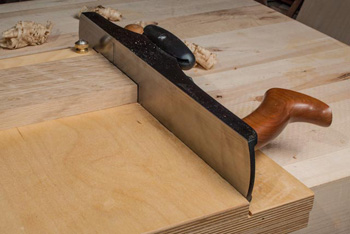
How They're Used
To plane rough boards smooth, start with the jointer. Its long bed rides over the board’s hills
and valleys and knocks them down as it goes. Continue planing until the board is dead flat. Once
you're there, switch to your smoothing plane and give it a few light passes to get everything nice
and, well, smooth. When any ridges left by the jointer are gone, you're done. If you are taking
your boards from a power planer, using a smoother is the only step you'll need to do.
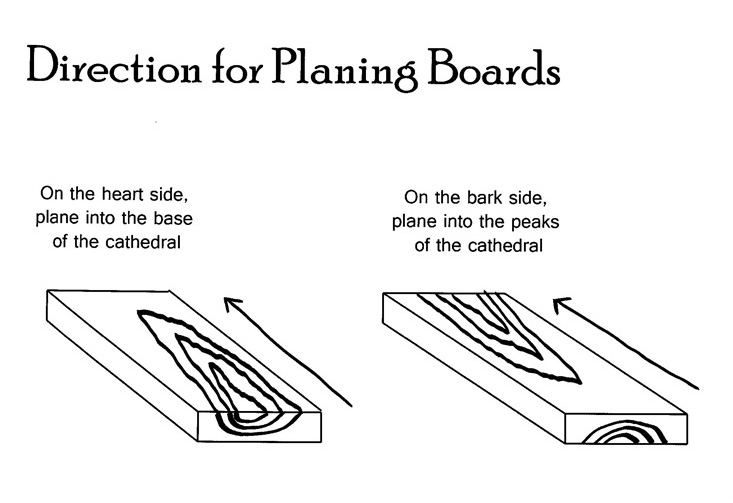
Reading Your Board

The direction you plane matters if you want to avoid tearout. You want to plane with the grain,
but on a rough board, how can you tell what that is? One method is to look at the edge of the board
to see which way the grain lies. You want to plane in the direction the grain is rising. The usual
analogy is to treat the board as you would the fur of cat--plane so the grain lies down. Another
method is to look at the end grain and identify the heart side of the board. It's the side toward
which the rings are bent. The outer side of the rings is the bark side. With the heart side facing
up, orient the board so the bottom or open side of the grain’s cathedral is facing you. Then plane
from the bottom of the cathedral toward its top. When you flip the board to the bark side, reverse
the board so you are planing into the peaks of the cathedral. This will ensure that you are always
planing in the right direction.
Flattening Uneven Boards
Unfortunately, rough boards don’t always come flat from the lumber yard. They may be cupped from
side to side, bowed from end-to-end or even twisted so adjacent corners are uneven. Check for these
conditions before you begin to flatten your board. Place cupped boards with the concave side down.
Then plane a valley down the middle of the convex side until it is even with the sides or a bit
lower. After that, plane the board diagonally until it is level on that side.
For boards that are bowed from one end to another, place the concave side facing down and, with
your jointer plane, make successive passes down the length of the board until you've achieved
flatness. You will get best results if you cut the board into shorter pieces before planing. This
reduces the amount of bowing that has to be removed. If the board is severely bowed, you may need to
start by planing crosswise to reduce the high spot to the level of the rest of the board before
planing along its length. Once you have one face flattened, turn the board over and work on the
ends, which will be thicker than the middle, to bring them down to the desired thickness.
Twisted boards present the biggest challenge. You may need to shim opposite corners so they will
be stable on your benchtop. Sight along winding sticks--perfectly flat sticks positioned at
different points on your board--to see where the high spots are. Mark these, then plane them down
until your winding sticks are in perfect alignment all along the length of your board.
Once you have one face flattened, plane the edges flat and perpendicular to the first face. This
is not as hard as it appears. Hold your plane as close to 90° as you can and take a few strokes.
Once the edge is smooth, test it with a square at several points. If one side of the edge is high,
center your plane over that side and take a couple more strokes. Repeat until the side is
square.

Final Thicknessing
With one face flat and the sides square to the face, use a marking gauge to scribe a line
indicating the thickness on all four edges. Then plane the board down to that line. If you have a
lot of material to remove, consider starting with a scrub plane, a narrow plane with a deeply curved
blade that excels at fast stock removal. Used Stanley scrub planes are widely available;
Lie-Nielsen
also manufactures one.
Planing the Ends
The final step is to plane the ends square to the rest of the board. Because you'll be cutting
end grain, extra care is needed. A low-angle block plane works well here. Work in from the leading
edge and plane to the center of the board, but avoid planing all the way across the board.
Otherwise, you risk tearout (spelching) at the trailing edge. You can aid cutting by moving the
plane with a circular motion, which slices the grain at an angle. Above all, keep your blade extra
sharp for the tough end grain. Best results are obtained by using a shooting board, which holds your
board against a stop and lets you take small shavings at exactly 90° to the rest of the board. You
can make your own shooting board.
That's all there is to it. By following these few rules and keeping your blades honed, you'll be
planing like a pro after only a couple of boards.
Click here to read more information about working with hand planes
Click here to find out more and purchase your own hand planes
J. Norman Reid is a woodworker specializing in 18th Century and Craftsman furniture. He
teaches hand planing in northern Virginia where he lives with his wife, four cats and a basement
woodshop full of tools in the foothills of the Blue Ridge Mountains.
He can be reached by email at
nreid@fcc.net
.
Return to
Wood News
front page