Roubo's Folding Bookstand
by Eduardo Acosta
Cordoba, Argentina
Click on any picture to see a larger version.
I saw the Roubo's folding bookstand (RFB) for the first time at a workshop with Roy Underhill in April 2002. Roy showed us the bookstand but he didn't teach us how to make it.
The next time I came across anything related to the RFB was in an article written by Roy, published in Popular Woodworking magazine in its February 2011 issue. In that article Roy translated the article "Planche 331, L'Art du Menuisier par André Jacob Roubo" originally written in French. I recently recalled reading Roy's piece, and intrigued by this unique book stand I started doing web searches to see what I could find about it. I found two videos about the RFB, one by Roy Underhill and another by Christopher Schwarz; both show how to make the Roubo's folding bookstand with similar techniques. Also, in his website, Roy has a free downloadable blueprint which is very useful for those who want to experiment with this challenging project.
Analyzing and following the procedures used by Roy and Christopher I concluded that the worst part of the job is the re-sawing of the board in the middle and then finishing both sides trying to remove the saw mark, either by hand (Roy) or with a band saw (Christopher). These steps are very difficult because there is no flat surface to work with, instead there is an area shaped like an "X" that is forty-five degrees on both sides. Moreover, these sides cannot be separated because of the hinge, which is one of the defining features of the stand.
As it can be seen in Roy's blueprint, the hinge area is the only portion of the bookstand that has the total thickness of the original board while the rest of the piece is half as thick after the re-sawing. As outlined in the blueprint, the hinge area is made first and then the board is carefully re-sawed on its center, starting from its top all the way down until the hinge area is reached. Then, a similar procedure is followed for the other side of the board. After that, both sides must be pried open, and as Roy says "think in France" and hope that the hinge works and both sides open and form the X-shaped stand. This can be done with a hand saw or with a band saw, but in both cases the result is a rough area that is difficult to sand and finish.
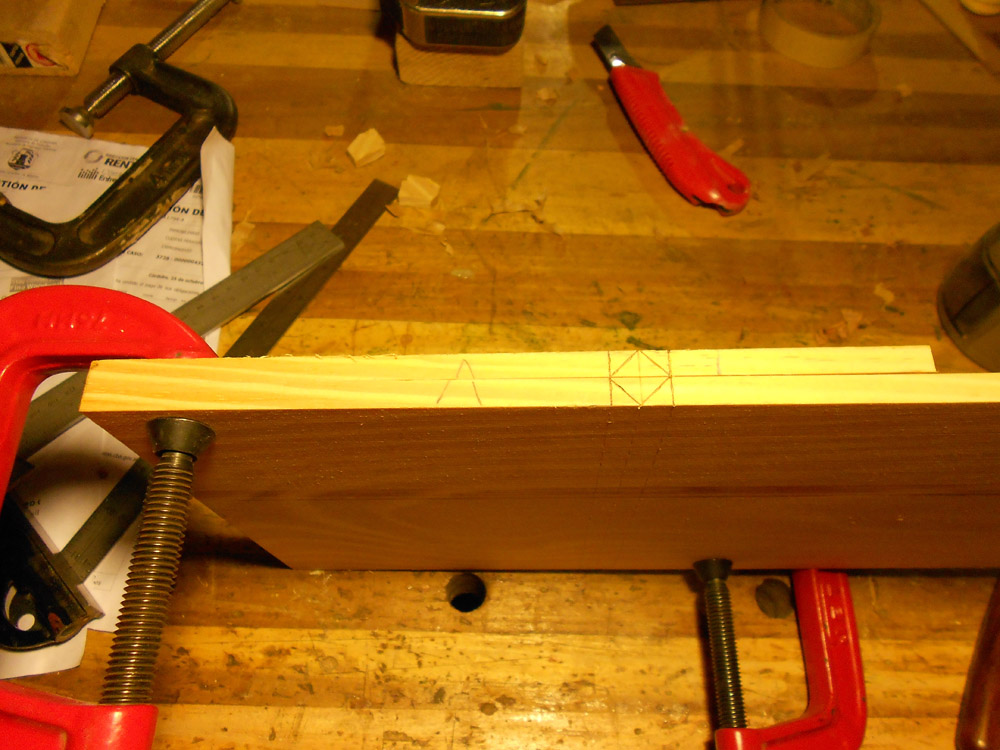
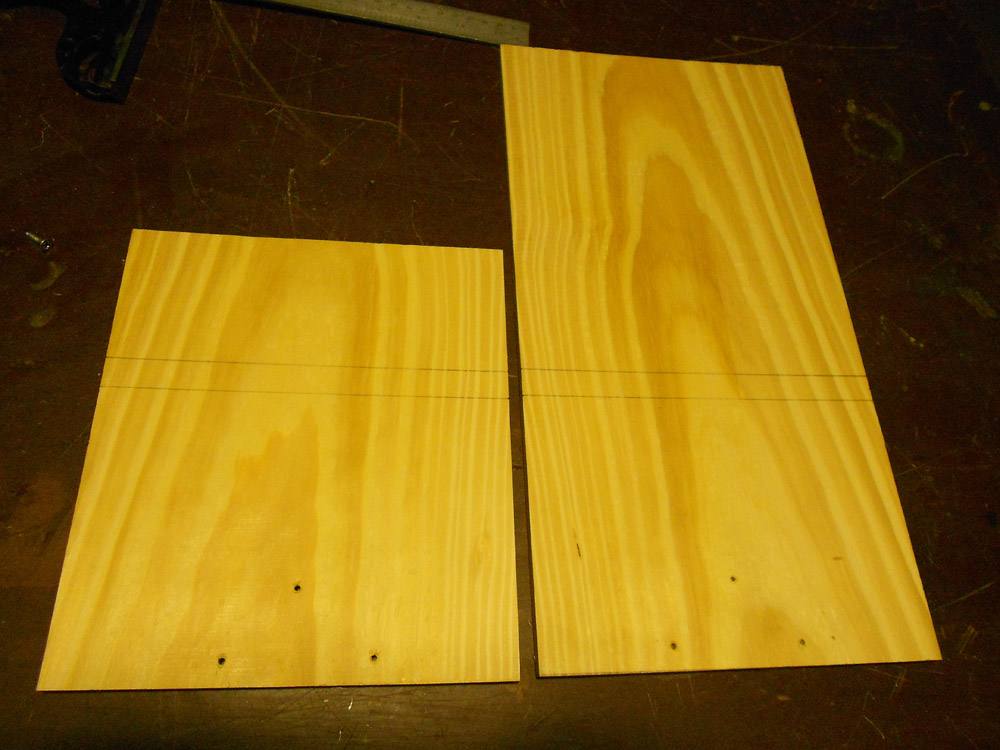
I experimented with different techniques in an effort to simplify the existing procedure. I started with a board 24-1/2" long by 7-3/4" wide by a little more than 7/8" thick. I re-sawed this board leaving each side 7/16" thick. After planning and sanding, I had two boards 3/8" thick, ready to be used and with all sides ready to be finished. I cut the boards trying to have material for two bookstands, so I cut one half 15" long (A) and 8-3/4" long (B), and the other half 8-3/4" long (A) and 15" long (B).
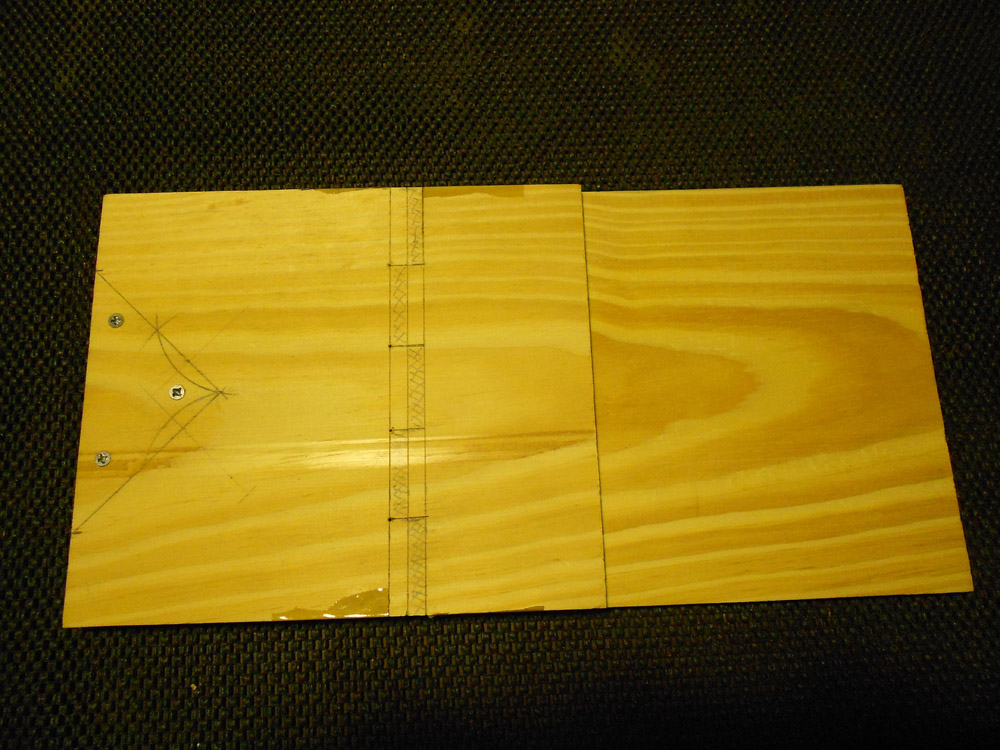
I started the first stand by putting together the "A" parts, joining them with three screws in the waist area and reinforcing them with clamps. I then started marking the hinge area, following Roy's plan, on all four sides.
After that I unclamped the boards and scribed the outer lines of the hinge area to the inside of the boards, so as to have a projection of the hinge area.
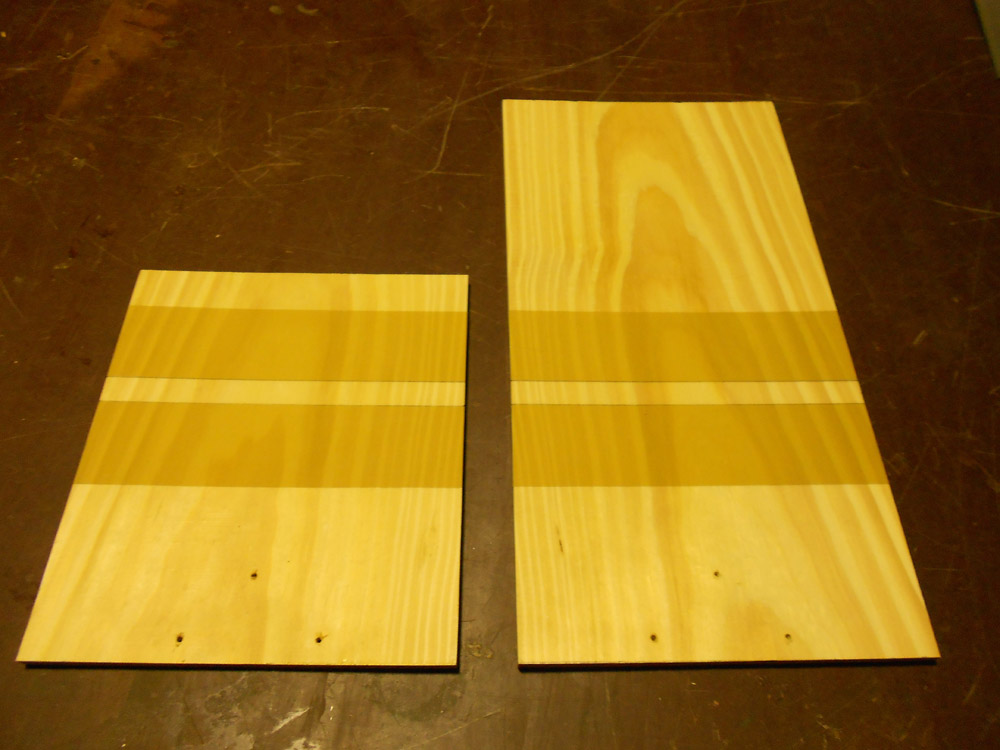
I masked the outer area of the hinges with tape on both half boards, leaving only the inner hinge area free of tape.
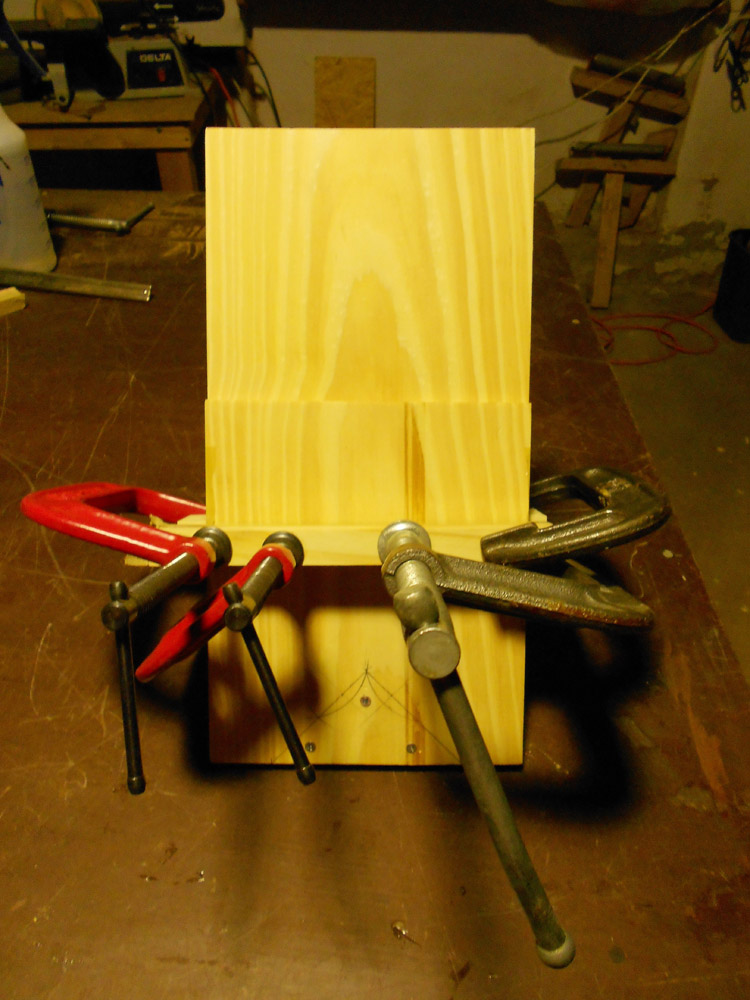
I spread glue on both exposed inner hinge areas and joined the halves carefully aligning the hinge area on both sides. I secured the boards with the screws in the waste area and I clamped then for 24 hours.
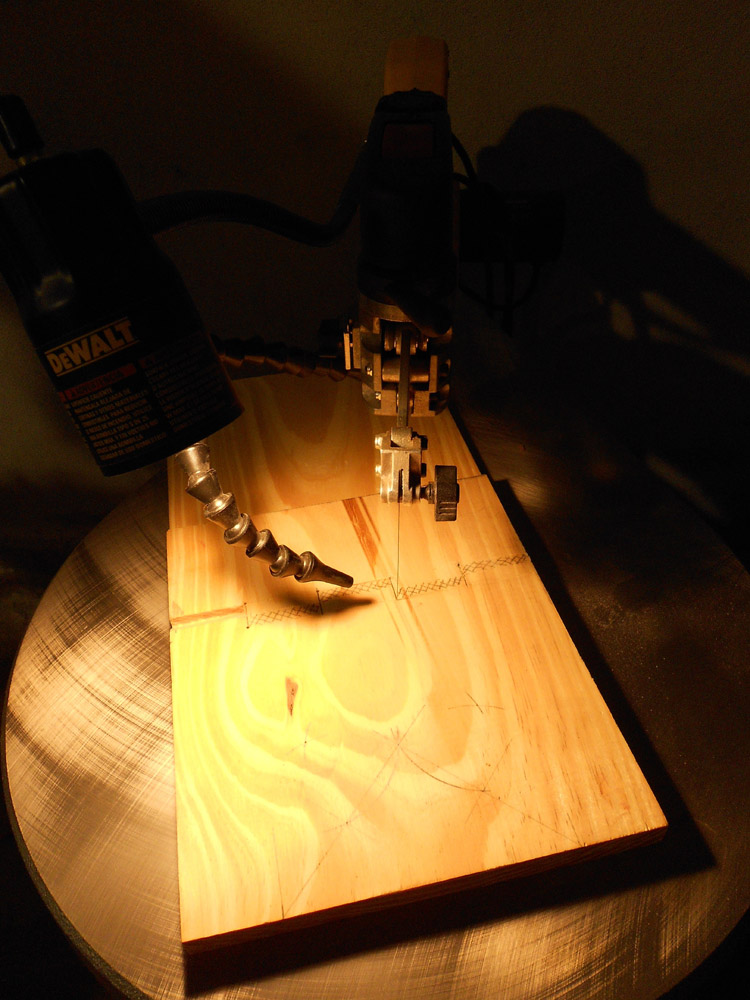
After unclamping the boards, I followed Roy's and Christopher's technique, dividing the hinge area in five segments and marking the area to be removed on both sides. After that I worked on each hinge segment: I made a small hole with a bench drill and cut each segment with the scroll saw.This deviates from Roy and Christopher's procedure, as they each made this cut by hand.
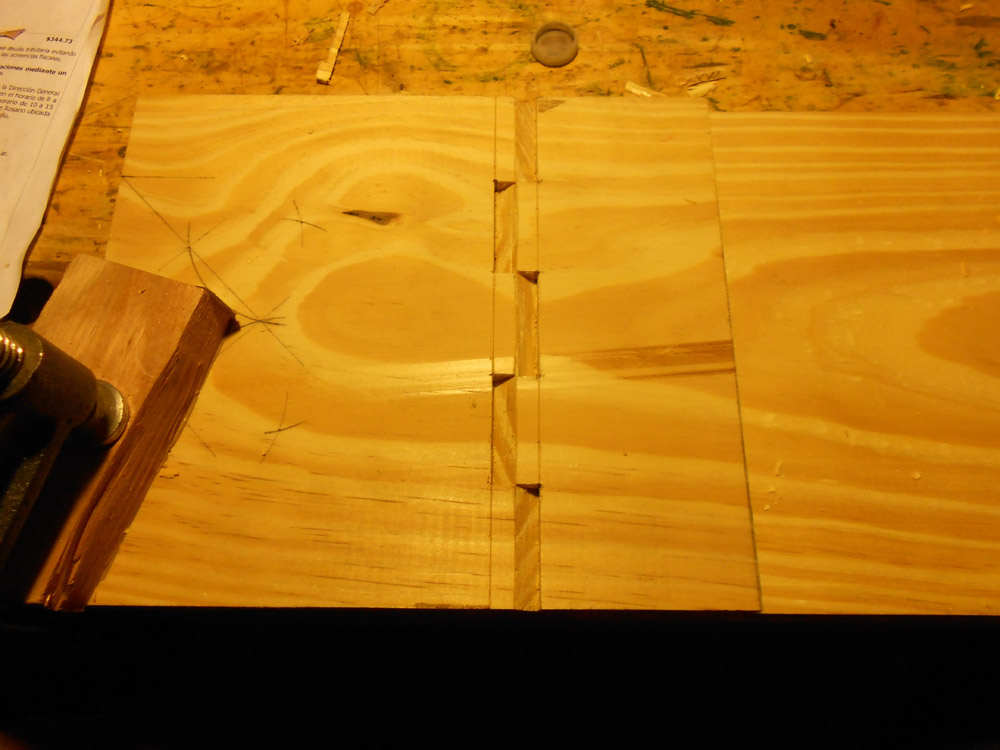
I followed Roy's instructions, "chiseling down the alternate segments, sloping down at 45 degrees from the center lines and vertically from the upper and lower lines, flipping the board over and chiseling the opposite segments".
I finished the chisel work, then I opened the stand as Roy said "thinking in France". I heard a crack and I thought that my technique had failed, but no, both sides opened without a hitch and the bookstand stood perfectly on the table.
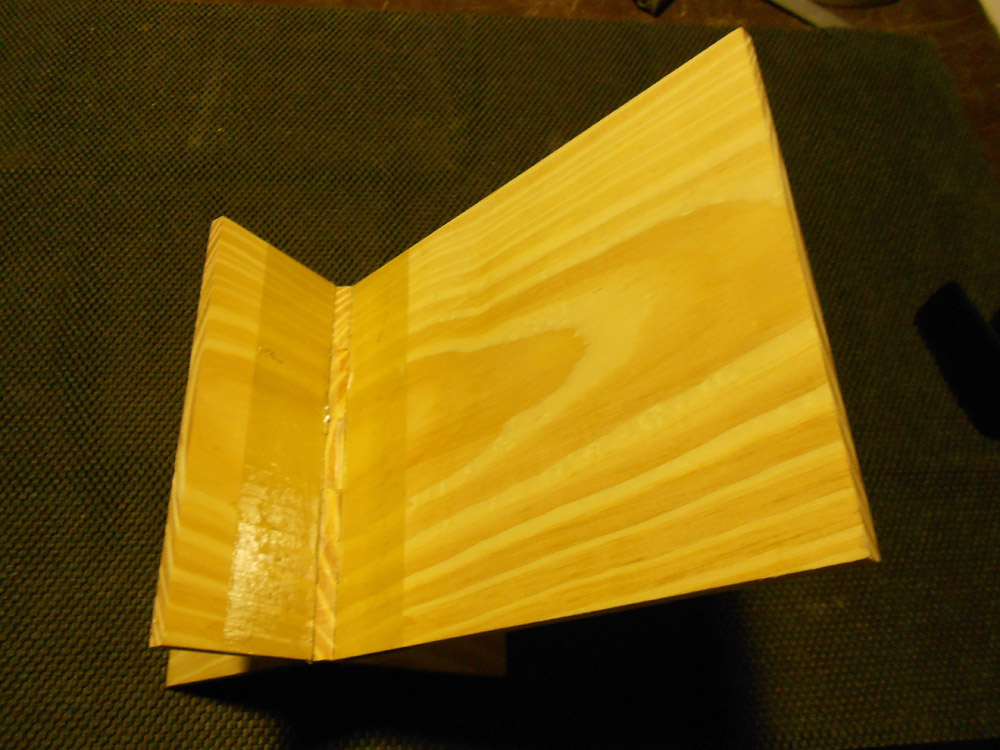
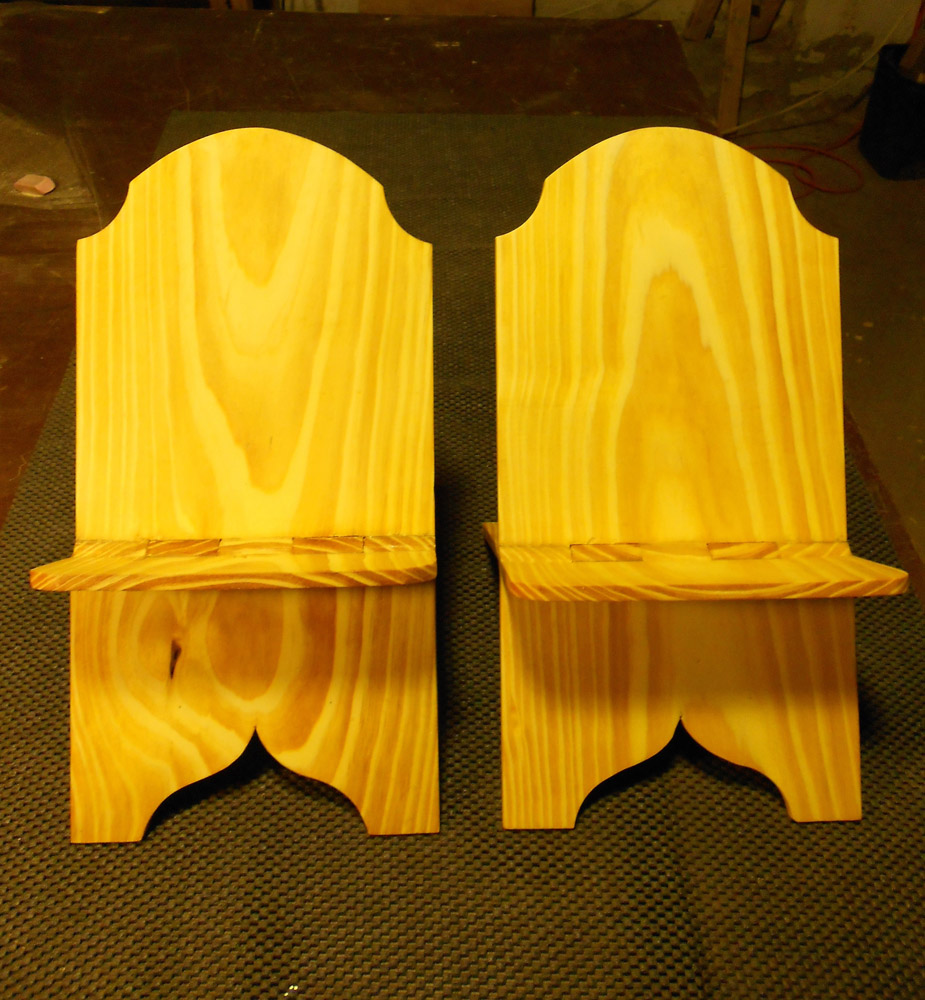
I removed the masking tape, cut the feet and head generally following Roy's plan, and then finished the stand with oil and lacquer. Voilà!
I followed the same steps with the other stand, and, as it can be seen, they are very similar and I made both easily and quickly.
You can email Eduardo at
eeacomart@gmail.com
.
Return to
Wood News
front page