Making a Marking Knife
by Rod Scott
Hayden, ID
Click on any picture to see a larger version.
A marking knife is handy for precision layout of joints. It makes sharper lines than a pencil and stays sharper much longer. Also, refining joint faces to a scribed line makes grain tear out and chipping almost non-existent. The following narrative will show my process for making this handy tool.
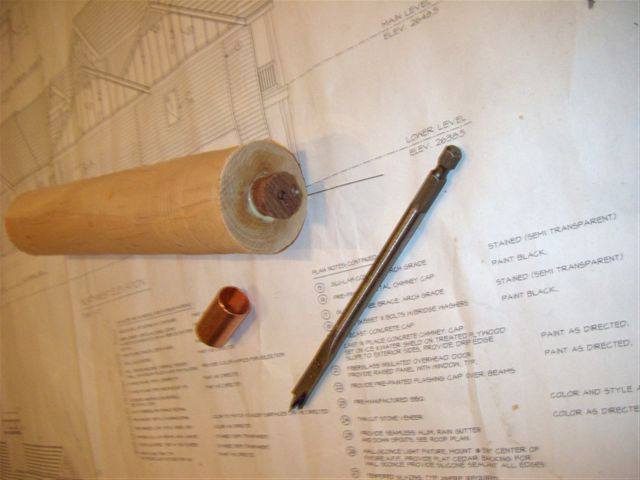
Three items are needed to make this knife; a 3/8 inch spade bit, about 8 inches of a dense hardwood, and a ½ inch copper pipe coupling.
For this particular project I choose a piece of Hawthorne and added a Rosewood round as a decorative accent. A lathe to turn the handle and a bench grinder to shape the knife are necessary tools. A drill press is handy for keeping the blade hole straight but drilling could be done by hand if care is taken.
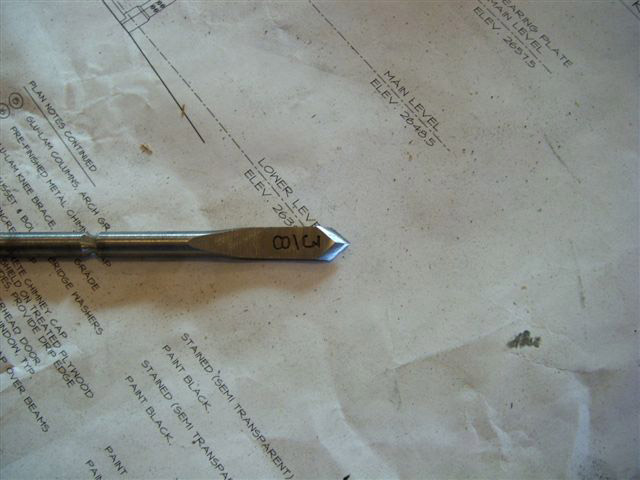
The first step is to grind the spade bit to a symmetric point. The point angle should be about 50 to 70 degrees. The exact angle is not important; however, take care to make both sides symmetric.
When the main shape is satisfactory, back grind the underside to about 20 degrees. Go slowly and dip it in water often to keep the steel hard. Next, cut the shaft off to a manageable length of about 3 inches. Hone the cutting edge like any other knife.
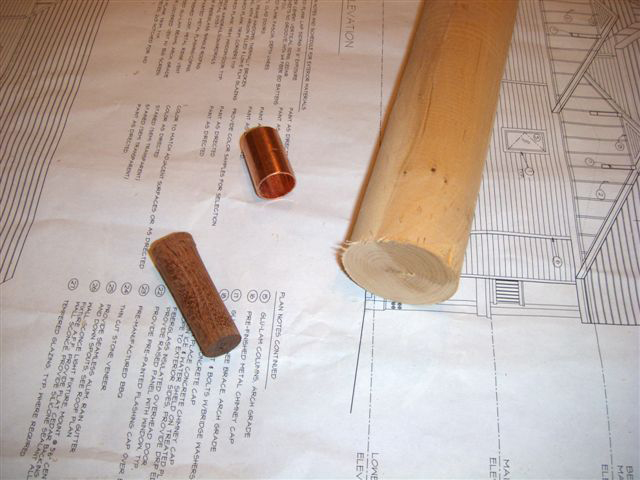
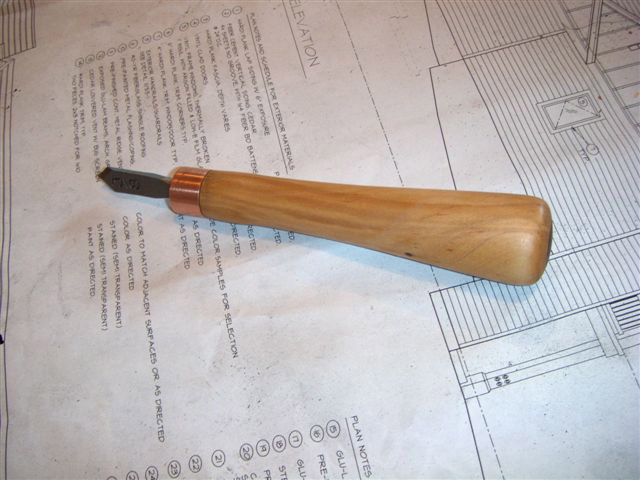
The handle can be made from any dense grained hardwood. The dark handle (below) is Rosewood.
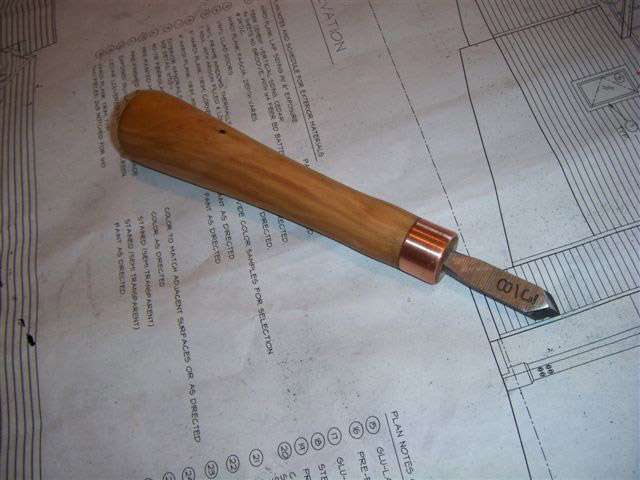
Ordinarily, I would cut a piece of wood about 8 inches long and 1 ½ inch square for the knife blank. For this project I used a piece of Hawthorne fire wood and rough turned it to about 2 inches in diameter. Next, cut both ends of the piece perpendicular to the center line and mark both centers. Drill one end to fit the diameter of the blade shaft. The other end I drilled for a ½ inch diameter contrasting Rosewood plug that is solely decorative. You can fashion wood plugs for both ends with slight tapers so they can be driven home.
Glue the decorative plug in its hole. Gently tap the other plug in dry. Trim both ends again and mark centers as close to the center of the plugs as possible. This will assure that the blade and decorative end plug will be symmetrical in the handle.
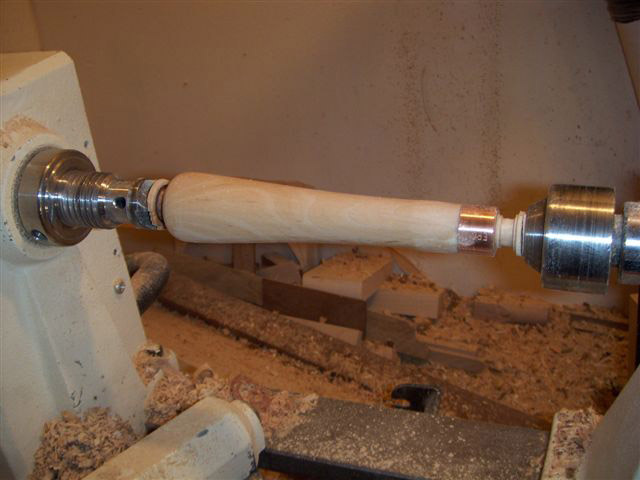
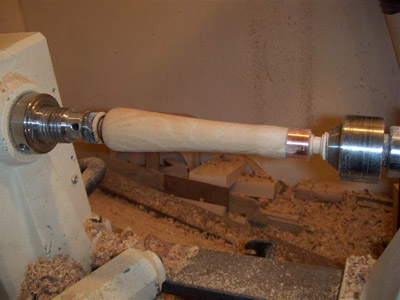
Set the handle between centers on a lathe and turn it to size. After you have turned the rough shape, you want to carefully size the blade end tenon to the coupling. I cut the coupling in half as this looks more proportioned. The coupling tenon must be slightly longer that the coupling to allow the handle to be re-centered after the coupling is installed. When the tenon is completed, apply a small amount of epoxy on the tenon and gently drive the coupling on tight.
|
Re-center the handle and finish it. I refine the shape, raise the grain with water, and then dry sand with 240, 360 and 400 grits. Polish the copper with the 400 grit. The finished end of the coupling is polished with a file and sandpaper. Next, apply a couple coats of tongue oil with the piece spinning. After the oil dries a bit, apply a coat of wax with 0000 steel wool, and burnish with a cotton cloth. Remove the handle from the lathe. Drill out the plug in the blade end, as the opposite end will still be square to the centerline. Now cut off the excess length of the turning and smooth both ends with files and sandpaper. Then oil and wax the ends.
The last step is to epoxy the blade in the hole.
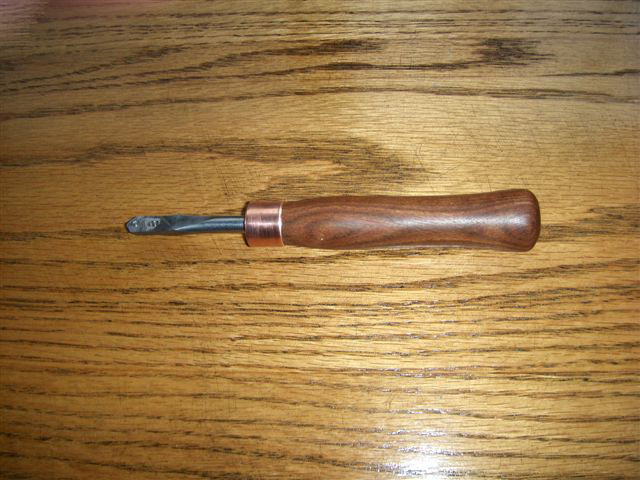
This marking knife is a handy tool. In addition, this process can be used to make other types of knives like the chip carving knife I intend to make next!
You can email Rod at
dyle.scott@yahoo.com
.
Return to
Wood News
front page