The "Wee Workshop"
A Small Space But a Great Shop
by Ray Whyte
British Columbia, Canada
Click on any picture to see a larger version.
A number of years ago, my wife Jacquie and I downsized to a small ranch style house when we became empty nesters. The house met all our needs, but unfortunately the garage was less than adequate for my work shop. I am an avid hobby woodworker as well as running a small design and build furniture shop. After years of planning efficient and innovative furniture projects for others, it was time to put the little grey cells to work and come up with a plan for my new shop. I could not add any space to the existing garage so this is the design I came up with.
|
|
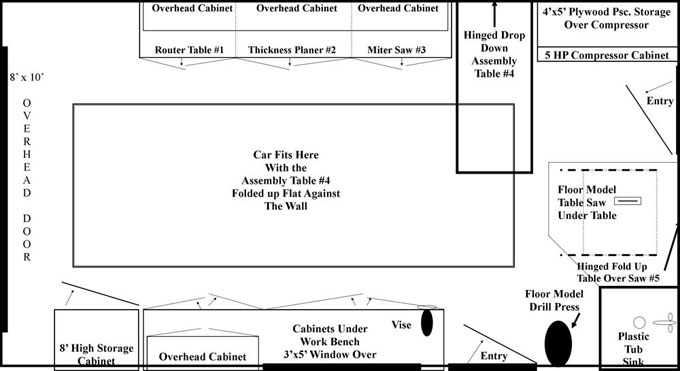
Floor Plan 12' x 24' single Car Garage
|
The space was a 12 foot wide by 24 foot long single car garage. I had to incorporate all my tools into a production shop as well as get the car in during the cold Canadian winter. The shop had to set up for full production with access to all of the majorpower tools in 15 minutes or less. I knew if it took longer than this setup time, I would be discouraged from even starting aproject.
Here is a list of all the tools that had to be ready to go in 15 minutes; 10 inch floor model table saw, 10 inch sliding compound miter saw, 24 inch long router table, 10 inch thickness planer, a floor model drill press and as much work bench space as I can get. If I had each of these tools individually set up on their own work stand on the shop floor it would pretty well eliminate all the floor space makeing production a challenge at best.
I cannot take credit for the idea that made the "Wee Workshop" a delight to work in, only credit for adapting the idea for my needs. While I was visiting my parents, I noticed my mom's old Singer sewing machine cabinet sitting neatly in the corner of theroom without a hint of what was hidden inside. Eureka, the light bulb went off illuminating my little grey cells and I instantly had the answer to my space problem. I had to make my own cabinet that would contain all the tools. I wanted each tool to fold away quickly so another tool could be accessed and when no tools are required, provide valuable bench space.

|

|
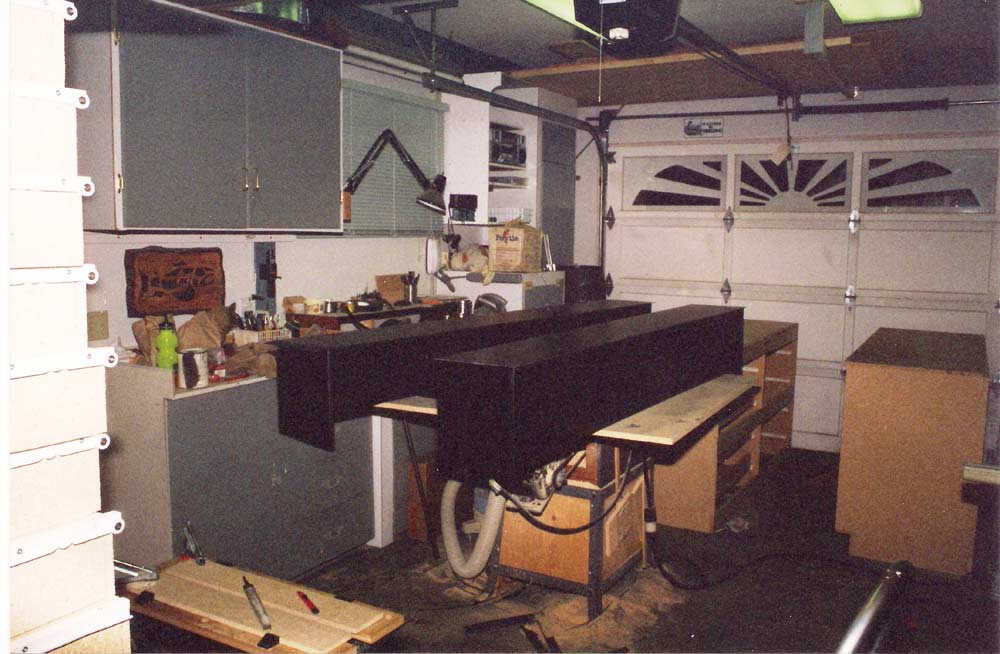
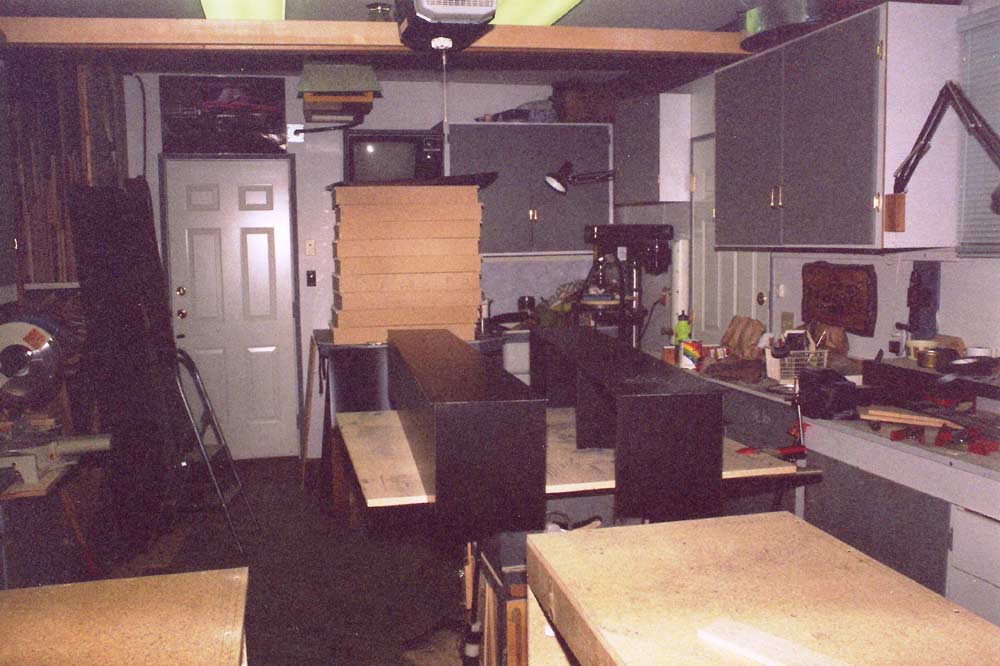
The shop was long and narrow (24'x12') but because my 3 major tools that normally take up a lot of floor space were built into 1 cabinet along one wall, it meant the centre of the shop was available for the table saw and assembly area. In these pictures I am building an entire video game stores cabinetry. In the back of the shop (right) you can see just a small fraction of the drawers I had to make.

|

|
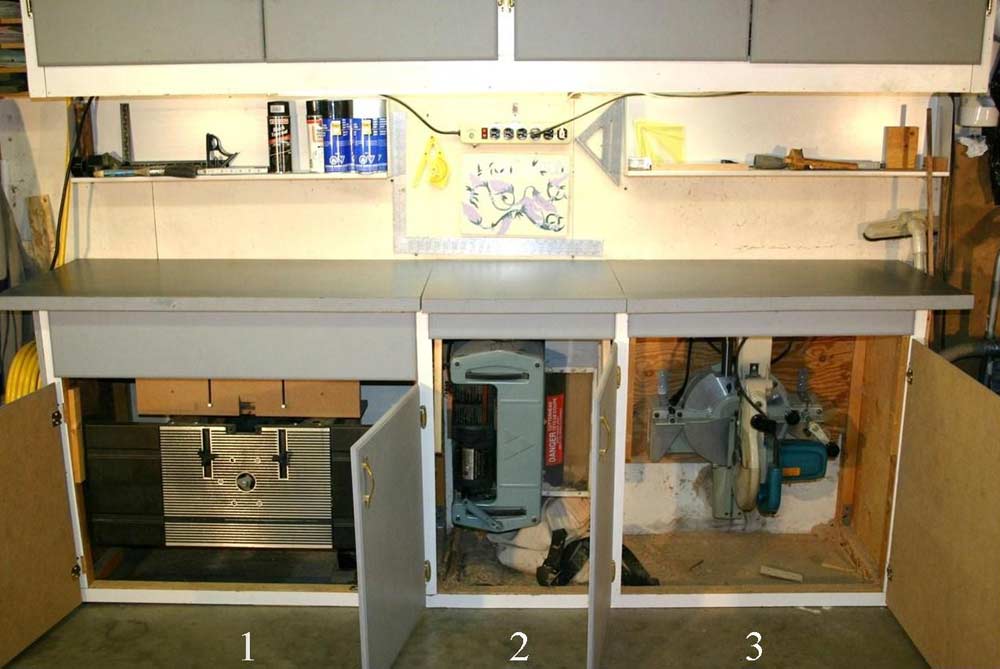
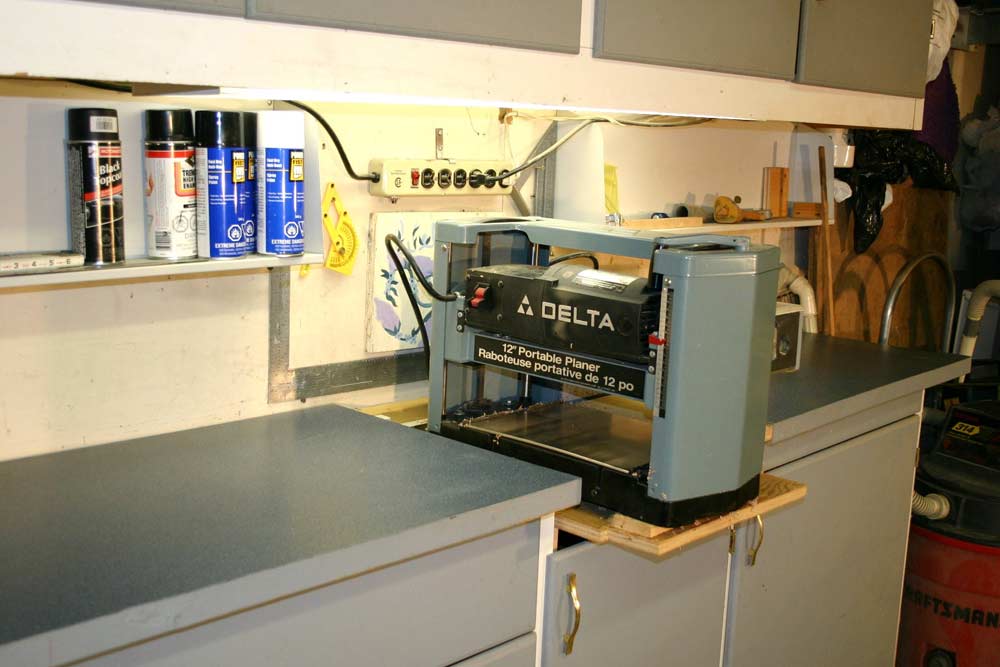
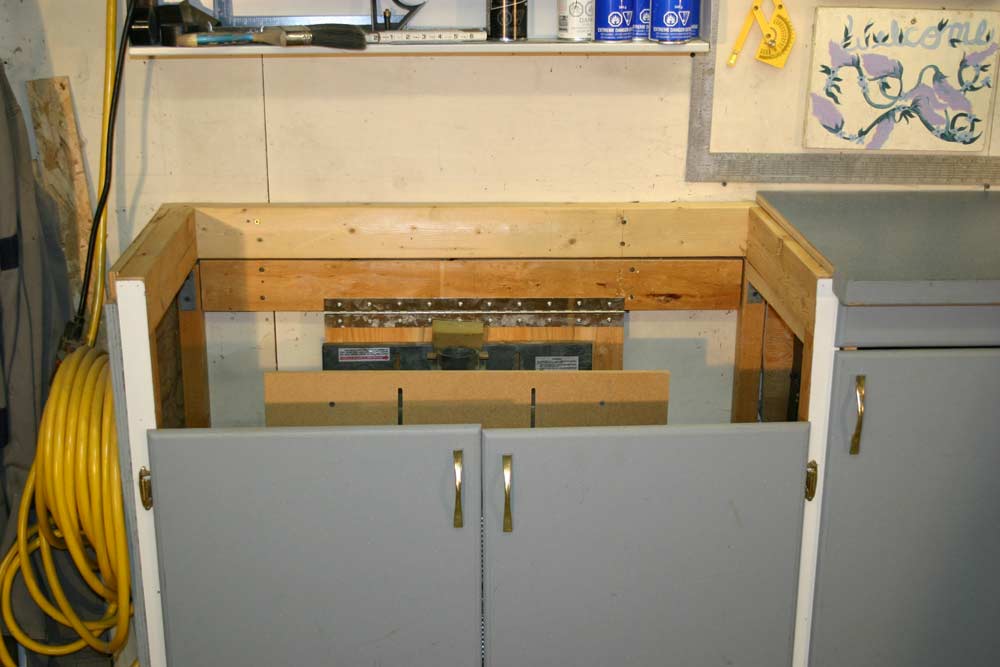
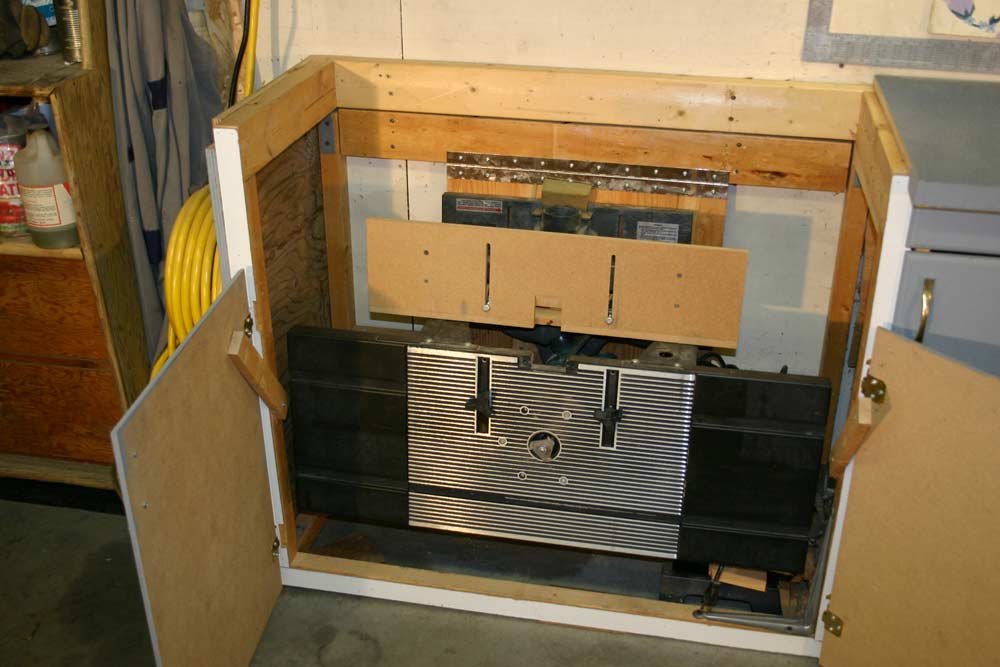
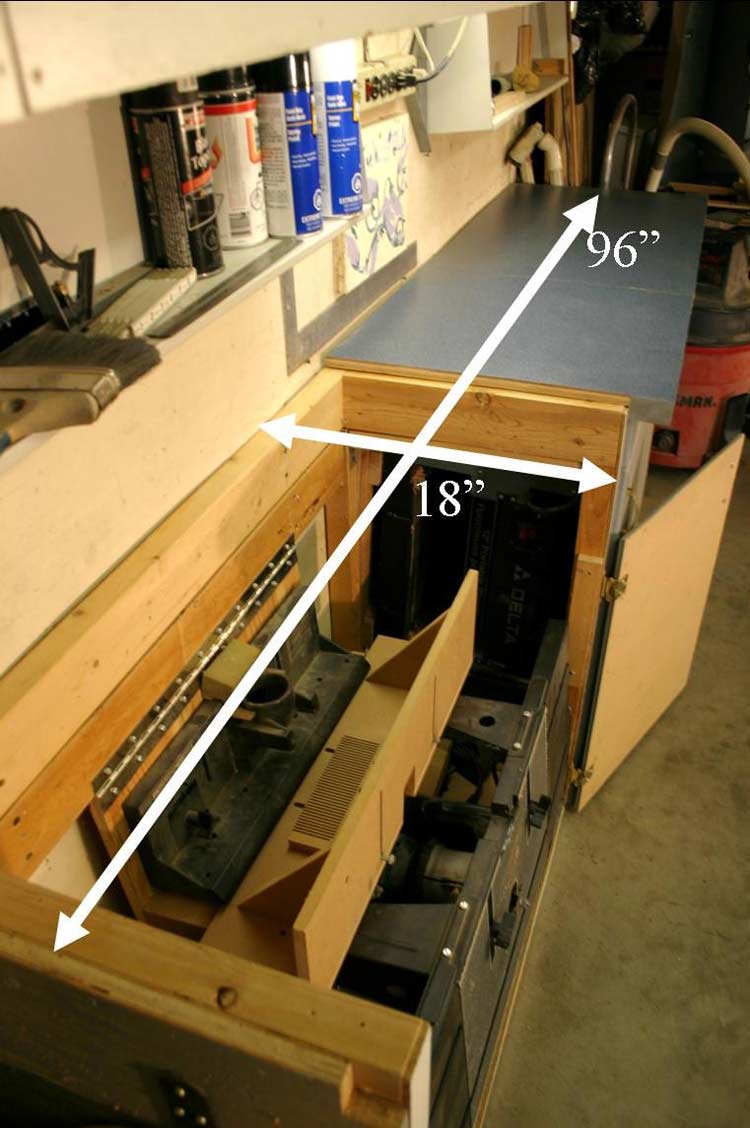
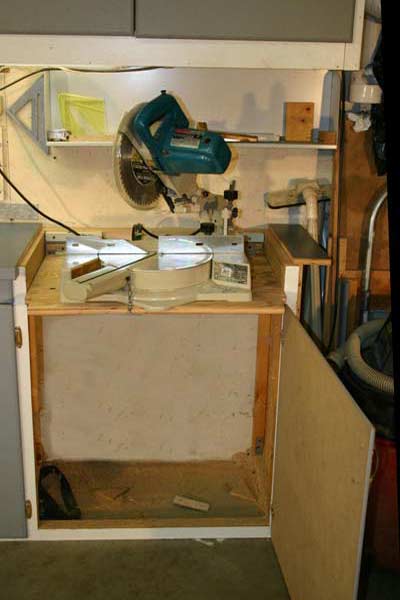
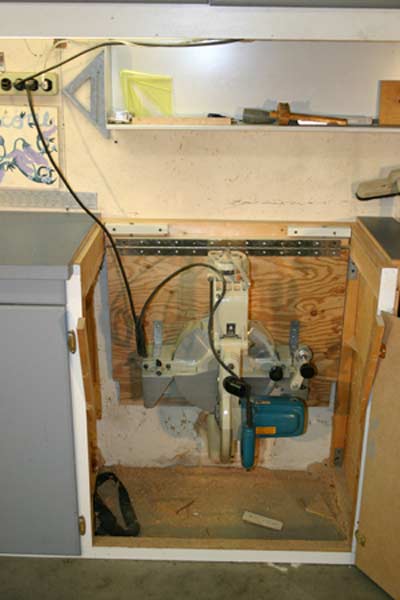
The numbers in the pictures and the floor plan represent some of the power tools in their cabinet. #1 a 24 inch long router table, #2 the 12 inch thickness planer, #3 the 10 inch sliding compound miter saw. Each of the tools is mounted to a plywood shelf that is attached to the inside back of the cabinet using a piano hinge. The height of the piano hinge was set so when the thickness planer and the miter saw were swung up into place for use, the bed of each of the tools was even with the top of the cabinet and served as a bench to support the material being cut. Each of the cabinets has a lift off top to allow the tool to be swung up for use. And the cabinet doors are the proper size so that when the tool is up for use the doors will swing shut under the tool to be out of the way.
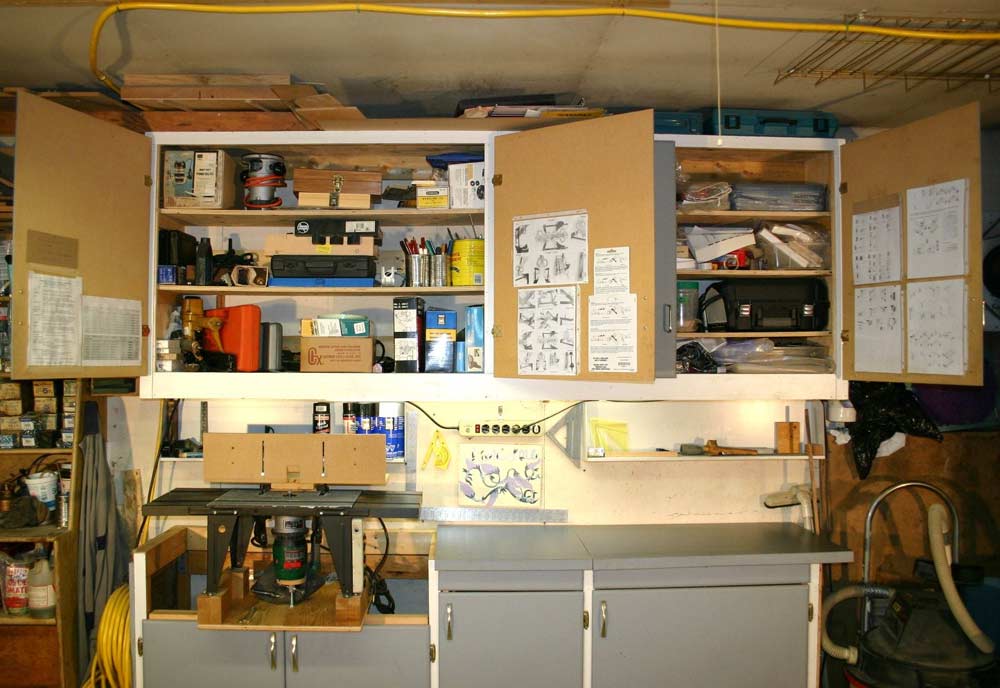
To maximize the space I built a full length overhead cabinet to contain tools and supplies. I installed fluorescent lighting to the underside of the cabinet and a couple of shelves under it for parts and tools. The inside of the doors are a great place to attach all of the shop charts and diagrams in plastic protective sleeves always ready for quick reference. I left the cabinet about 5 inches down from the ceiling, leaving space for another convenient storage shelf.
|
|

|
|
When the tools are not in use, the cabinet top above them becomes 20 inch wide by 8 foot long plastic laminated finished work surface. Three other flat work surfaces were built into the garage (see floor plan). I built a heavy duty work bench with a galvanized metal top and a mechanics vise under the only window in the shop. The other two tables were for project assembly. Table #4 dropped down from the wall on a piano hinge and a fold out table leg. Table #5 also dropped down from the wall and covered my table saw to protect the top. A plastic laundry tub sink was installed for convenience and the whole garage was lit with fluorescent lights.
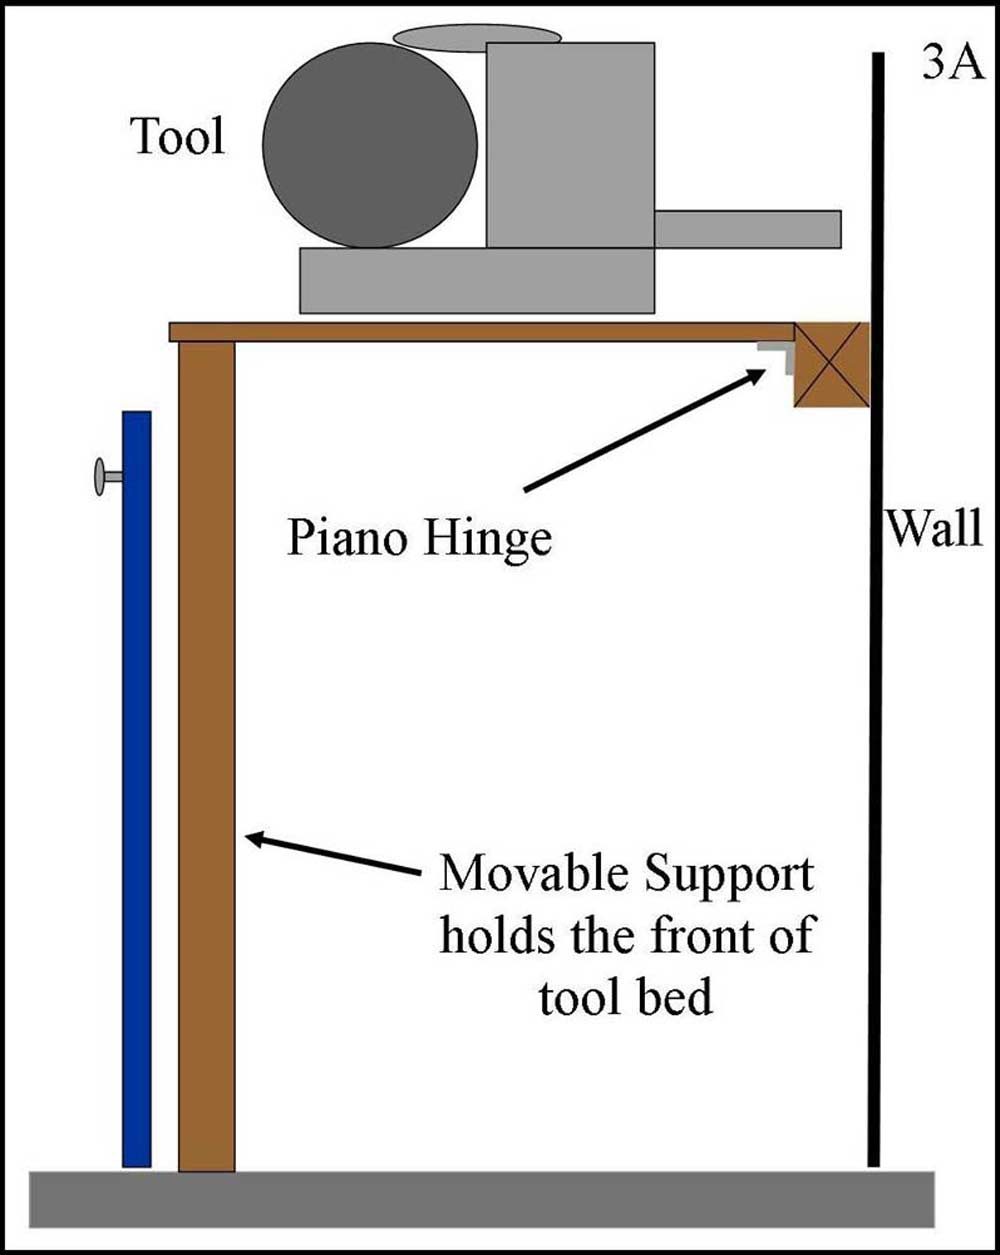
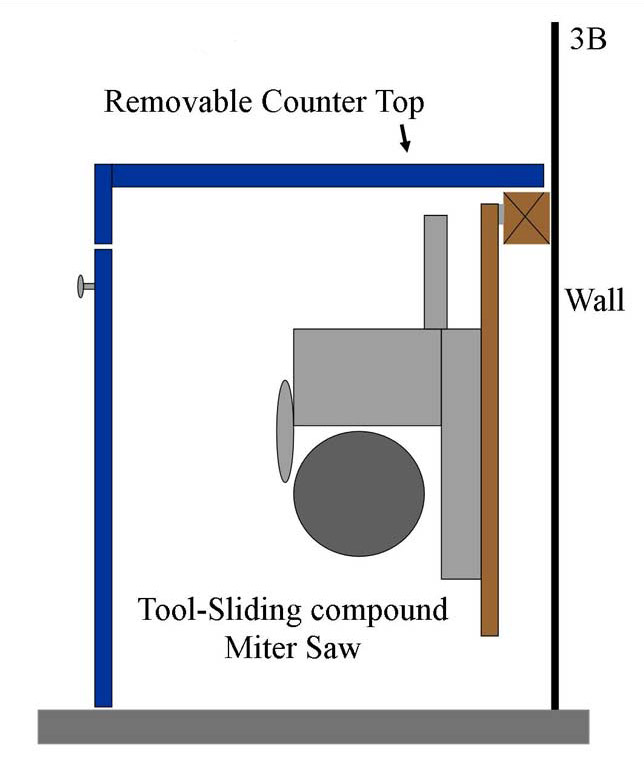
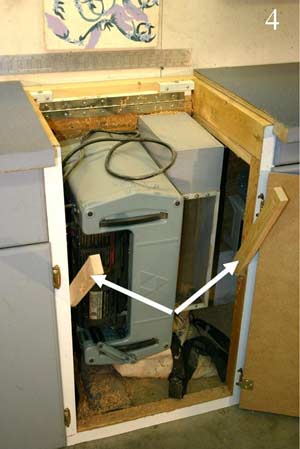
In the diagram 3A below, the top has been set aside and the tool is swung up into working position on its piano hinge attached to a 2x4 ledger fastened to the exterior wall. The front edge of the tool is supported by wooden legs that are attached to the cabinet sides with one screw so they can swing into place when needed, (see picture #4 arrows). In diagram 3B the tool is swung down for storage and the counter top is put back in place forming a work surface when the tool is not required. As I described earlier, there are 3 tools mounted in the same fashion and each can be in place for production or put away as fast as I can swing them up or down.
Side view of a tool in the working and storage position
When the planer is in use, you can see that the planer bed is even with the bench work surface making both in and out feed tables.
When the 10 inch miter saw is set up, the table to the left of the saw is used to support the board being cut.
The router table takes the longest setup; the fence has to be installed. It won't fit in the stored position when installed. It takes a whole minute and a half before it's ready to go.
As you can see, this setup can work in any small work space and can look good as well. The total floor space required is 20 inches wide by 96 inches long. But I caution you to select an appropriate location. I got the thumbs down when I told my wife it would bring a special decorator touch in the master bedroom. This was a bad idea, I don't enjoy the lumpy couch.
All of the tools are bolted to their plywood bases so they can be removed quickly if I need to. Sometimes I will get a project that is just too big for the shop, so I just remove the tool and take it outside or to another location.
We are now in a different house with a double garage but there was no way I was leaving
this setup behind. It was just too convenient. I removed all the tools, unscrewed the
cabinets from the wall and reinstalled them in my new workshop. Keep this in mind if you
build a similar work station, you may want to move it to another location. I am now
retired from my day job, living in British Columbia, Canada and enjoying my woodworking
shop every day of the week.
CLICK THE VIDEO ABOVE
for a walk-through of how three of the machines are stored and used.
If you have any questions, feel free to email me at
whyterj@shaw.ca
.
Additional links of interest:
If you would like to see my website and some of my woodworking projects,
CLICK HERE
MY BLOG, if you would like to read more about what I've been up to,
CLICK HERE
Return to
Wood News
front page