New Japanese Chisel, Does Hand-Made Equal Perfect?
by Lee Laird
Click on any picture to see a larger version.
I recently purchased a couple of fairly high-end Japanese chisels, for which I have to admit I've always had a soft spot. The chisels I chose were described as both razor-sharp and ready to go out of the package, so I just unboxed them and found them a home amongst my other tools until they were called into service. I picked one of the chisels up yesterday, really just to give it a better once-over than I had time for when they arrived. While I was taking it all in, something looked a little bit odd so I went into detective mode.
What initially caught my eye was the bevel looked like it might be slightly out of square with the chisel's body. I picked up my best square (just to be certain) and tested it. Sure enough, one corner was longer than the other. The error was probably not more than a couple degrees, which isn't much, but it could be enough to prevent the short corner from reaching all the way back into a 90-degree inside corner. Since I prefer to sharpen my chisels and irons with one of my honing guides, this error (even so slight) must be corrected in order to re-sharpen the first time. As some hand-made tools can be quite pricy, it's up to you to decide if the problem is significant enough to warrant replacement or if you'll just resolve it yourself. As my chisel's angle was off by such a small degree, I decided to resolve it myself rather than trying to contact the maker/seller to get a replacement.
|
Chisel in Kell guide after few strokes.
Shadow may prevent seeing it is out of square.
|
The ultimate resolution for this chisel is to re-shape via the removal of a relatively thin section of material, and then re-sharpen it. When put like that it sounds like its really not worth mentioning, but I'll continue and everyone can decide for themselves whether it would be a deal breaker for yourself or not.
For those that aren't familiar with Japanese chisels (and planes), the majority are made from two different metals. The cutting portion of the chisels are a steel that is extremely hard and would chip very easily if not for the other metal in the chisel. The second metal is either a softer steel, iron, or in some of the older or high end chisels, wrought iron. The two materials are forge welded together and the softer "back" helps absorb some of the shock that could cause damage to the hard steel if they were not combined. The softer steel/iron works very quickly on most types of sharpening stones, whereas the harder steel can be very, very slow to work. As a matter of fact, the makers remove some of the hard steel from the flat side, which is the hollow (or multiple hollows on some) in the hard steel. This is solely to allow the user to more rapidly hone this side of the tool, as it would otherwise take an amazingly long time (some makers have written it might be impossible).
I have a couple of different types of honing guides that I use fairly regularly and I find the Kell honing guide provides the best results on this chisel. Part of what went into this decision was the way the Kell honing guide holds the tool you're sharpening. The Kell honing guide has two reference bars that run between the two wheels, which have flat and square inside surfaces. I've had great results honing and maintaining a square-shaped cutting edge using this guide, as long as I did my part to verify the tool was in contact with both the bars and the wheels. The only time I've had a problem is when I didn't notice that the tool wasn't resting on the bars, which can end up with results not too dissimilar from the way my chisel arrived out of square. My other honing guides were less absolute, especially for narrow chisels that you intend to hone totally square and can require more effort in the setup phase to know for sure its right.
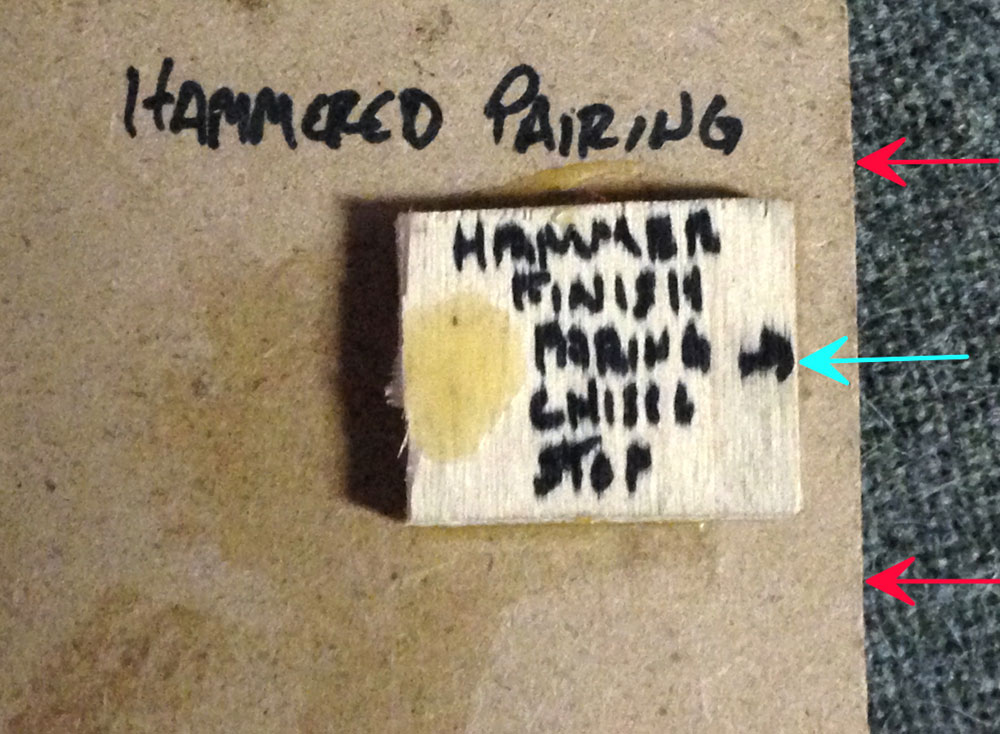
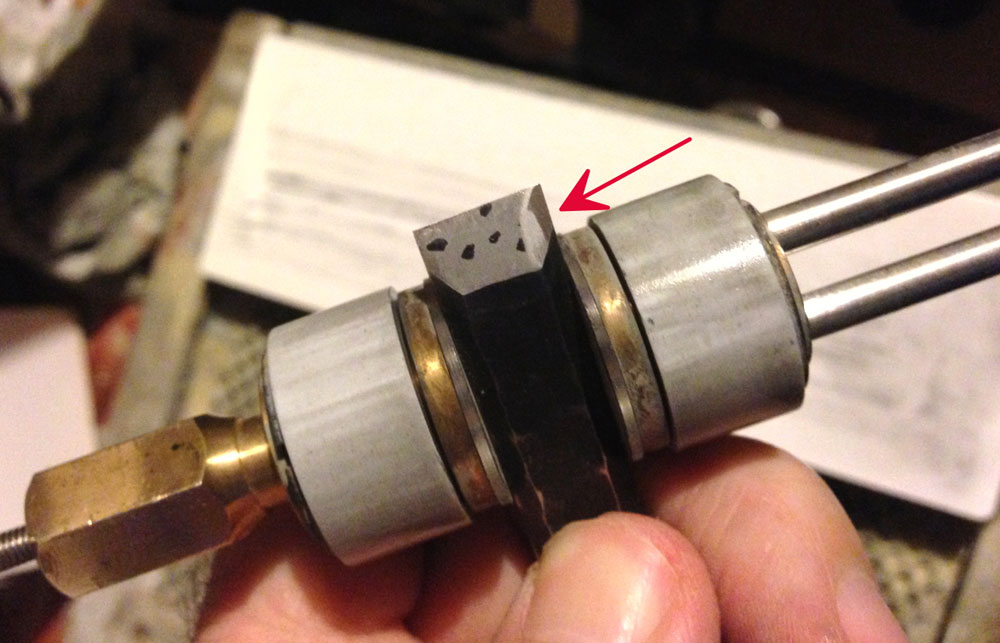
One other aspect of Japanese cutting tools (chisels/planes) is that traditionally, no micro bevel was used in the sharpening/honing process, and I also sharpen/hone mine in this way. With this, it can take a little more time to get the honing guide set so the correct amount of chisel is exposed to precisely match the existing bevel angle, as opposed to adjusting for a small micro-bevel that doesn't really matter much if it is 30, 31, or even 30.5 degrees. Any of these could work as well as the next. In order for each subsequent honing to be both quick and accurate I try to make sure I create a stop block for setting the chisel in the honing guide the first time I sharpen a new (or new to me) Japanese chisel/iron. During the first attempt to find the precise settings for the existing bevel, I like to use a black Sharpie and either place a few dots around on the bevel's face, or completely cover it. This rapidly gives feedback as to which area is touching the stone, even with just a single light pass. By keeping the pass very light, there is less chance you'll remove a lot of material in case the angle is slightly higher than the bevel. This would cause extra work to bring the rest of the bevel's face down to the same level.

|
Wheels of the guide touch at red arrows and chisel's cutting
edge touches at blue arrow. This creates a repeatable
angle on the chisel each time.
|
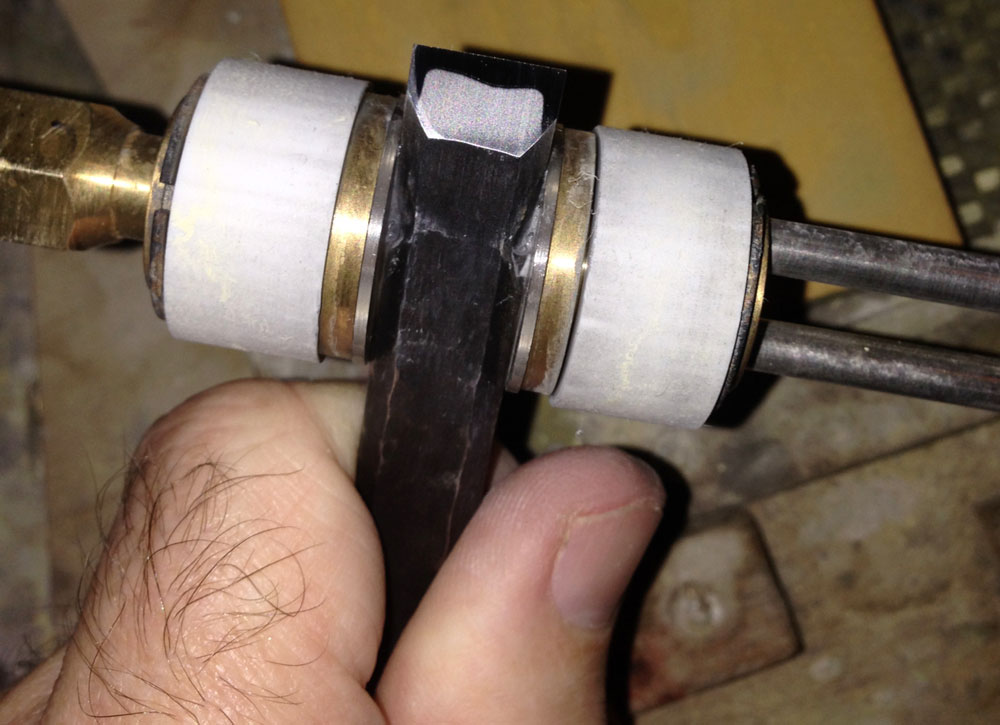
Since my chisel's error was reasonably small, I started out working on my Shapton 1000-grit Glass-Stone series, instead of starting with something more coarse. The first passes across the stone left just a super thin black line down the length of the stone, as the edge of the high side was the only part of the chisel touching. I tried to make sure I used as much of the stone as possible, and since it is almost impossible to use the outside edges due to the flanking wheels of this guide, I balanced the time spent in any given area and re-flattened the stone relatively often.
Even with this reasonably fast sharpening stone, it took more than an hour of continuous work to finally reach from corner to corner on the bevel. I noticed there is still a very small sliver of material on what was the low side of the chisel that hadn't quite touched the stone even though both corners were complete. Since that section of the chisel does absolutely nothing in the cut, there is no reason to continue on the 1000-grit stone at this point. That little sliver will disappear over the next couple of honing cycles with this chisel, without having to do any additional focused work.


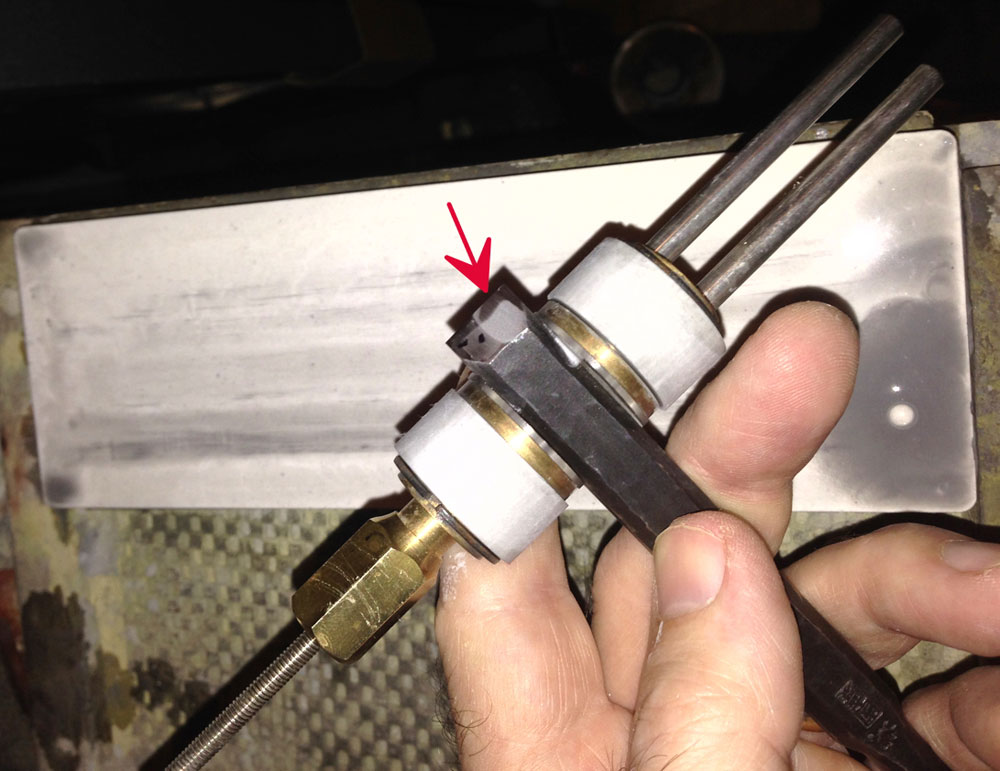
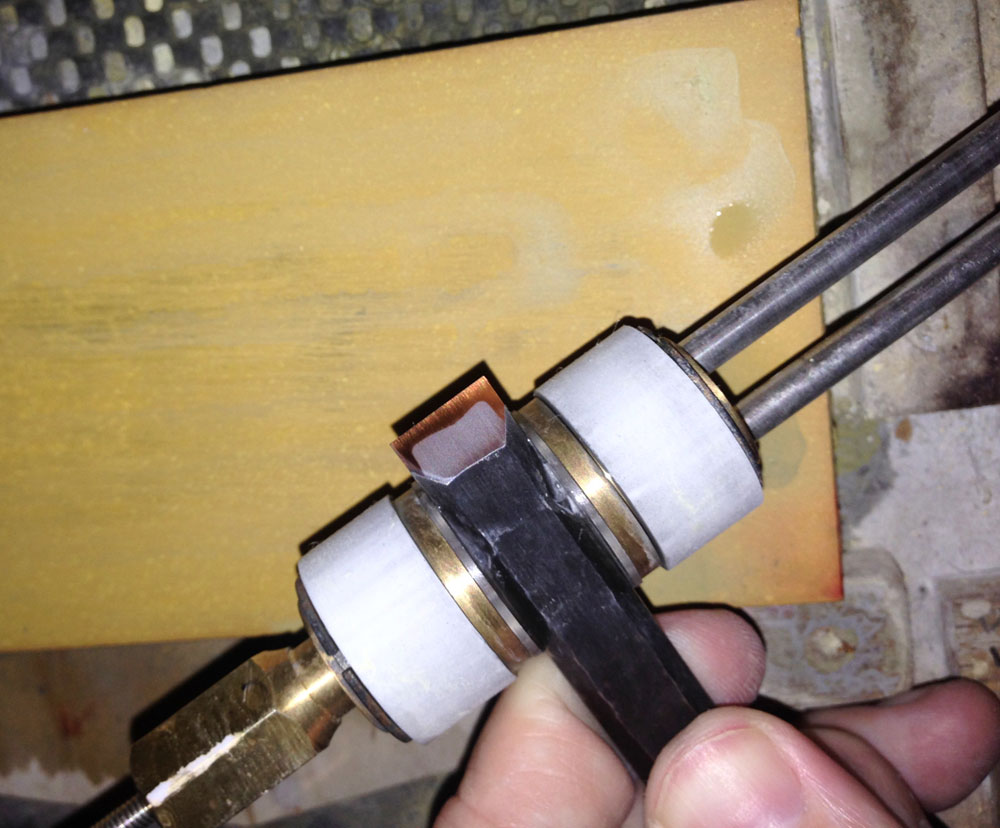
|
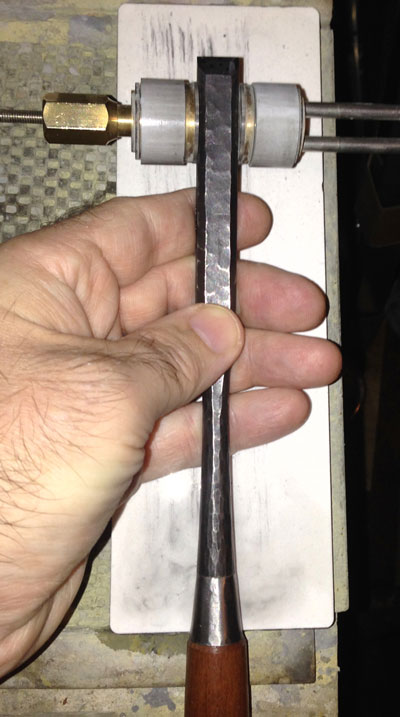
These two photos show the progress I've made on the 1000-grit stone,
with the red arrow pointing towards the section already worked.
|
With a burr running from corner to corner on the back of the chisel, I shifted to my Norton 4000-grit stone. As the 1000-grit did a good job of prepping the chisel, it only took a couple of minutes on the 4000-grit and then we were on to the 8000-grit stone. On most of my non-Japanese tools, I move directly from my 1000-grit stone to my 8000-grit stone, as the steel is a little less hard and this type of grit-jumping works fine. With the harder cutting edge steel on this chisel, the 4000-grit stone makes the time spent on the 8000-grit stone seemingly more efficient. When you see all of the scratches from the 1000-grit stone shift into 4000-grit scratches it is time for the 8000-grit stone.
I flipped over to the 8000-grit portion of my Norton combo stone to continue the work on the bevel. I spent another 5 minutes on this stone, working on the bevel. before shifting over to working the back of the chisel. Since I'd worked the bevel up through 8000 grit, the burr on the back that was initially substantial from the 1000-grit stone had thinned from both the 4000-grit and 8000-grit stones. Instead of starting on the back with my 1000-grit stone, or even my 4000-grit stone, I instead made a number of passes on my 8000-grit stone, especially as the chisel arrived with the back looking as if it was thoroughly honed. After making a few passes on the back, I checked to make sure I was seeing a consistent surface at the cutting edge, all the way across the chisel. If there was an area at the cutting edge that wasn't showing signs of the 8000-grit stone, I'd shift back to either the 4000-grit or 1000-grit stones to help accelerate the process. I'd also have started with my 1000-grit stone if the chisel's back wasn't already in great shape and I needed to do more than just remove the burr.


|
|
Chisel after some work on the 8000-grit stone and the bevel almost done.
|
So with some well spent time with my new chisel,
Kell Honing Guide
and some
Norton Waterstones
, I have a properly shaped chisel that will work nicely up into square corners for the foreseeable future, as well as a newly created stop to use with this chisel/guide combo that will hit the angle of this bevel perfectly every time. When I saw the slight discrepancy in this high-end chisel, I chose to remember it is a handmade tool and with that, understand that this small glitch is really no big deal. I expect the positives from years of future use with this tool will far outweigh any minor (perceived/real) inconvenience related to the time spent re-shaping the edge. And I think I forgot to mention that the newly sharpened/honed chisel both feels wonderful and cuts amazingly. Just remember, this minor correction is a one-time thing and issues like this are likely more prevalent in hand-made tools, but that special magic they contain will last for the life of the tool.
I hope you enjoyed this article. Please let me know if you have any questions or comments.
CLICK HERE for our Japanese Chisels Department
Lee Laird has enjoyed woodworking for over 20 years. He is retired from the U.S.P.S. and works for Lie-Nielsen Toolworks as a show staff member, demonstrating tools and training customers.
You can email him at
lee@lie-nielsen.com
.
or follow him on Twitter at
http://www.twitter.com/is9582
.
Return to
Wood News
front page