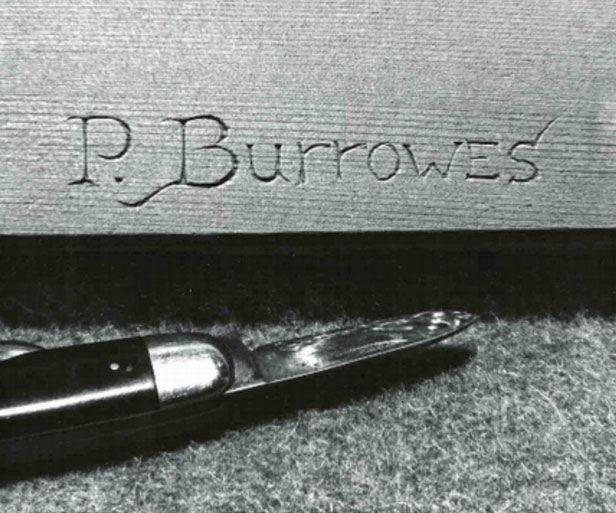
Here's My Woodcarving!
by Peter Burrowes
Click on any picture to see a larger version.
My dad started me off whittling. Very early on, he taught me how to sharpen woodworking tools to an extremely keen edge using an India stone. The idea was that if I wanted to use his tools, I had to keep them as sharp as he did, which was sharp enough to shave with.
Dad started when he was in scouts, after receiving an official Boy Scout knife for his birthday. When he was in the Navy toward the end of WWII, he whittled small animals and other things aboard the USS Prairie, and mailed them to his then fiancé, my mother. I started around the same age when my father brought home the recently published book
Whittling and Woodcarving
by E. J. Tangerman, still in print. In this book are some fantastic whittled chains.
These chains are carved almost entirely with a pen knife. The one above is a rare Robeson Shuredge Carpenter's Choice, given to me by my uncle when I was fourteen. He said: "Next time I see you, that'd better be sharp!"
The rules of whittling chains and similar novelties, as I learned them, are that everything must be carved from a single piece of wood. Only knives may be used, no power tools. It occasionally happens that a delicate part splits from the force of cutting. In this case, not another stroke may be made until the split is glued back together, lest any advantage be taken of the separation. There are no more than one or two of these in all the carvings here.
|
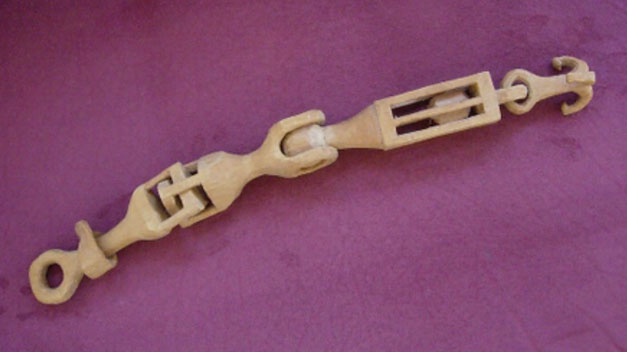
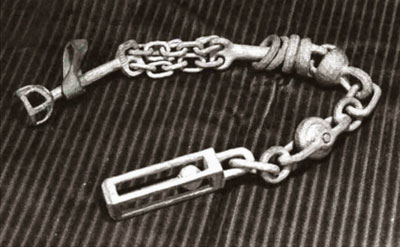
The chain above was done in 1970. I arrived early to start college, and had some extra time on my hands. I made this out of a spruce shade roller from my apartment, a little under 1" diameter, later replaced at the hardware store. I started at the ball-in-cage end, and proceeded to the wheel, followed by the tri-link basket joint. After three captive rings on a shaft, I started in on the triple chain. For this and the axles on the wheel, I made a knife (pictured below) by breaking off a painter's palette knife and sharpening it to a narrow point. After the captive Moebius band I made a ball and socket joint. This was pretty delicate, and it broke during a party, and a couple of pieces were lost, so there the chain ends. I was almost out of wood anyway.
|
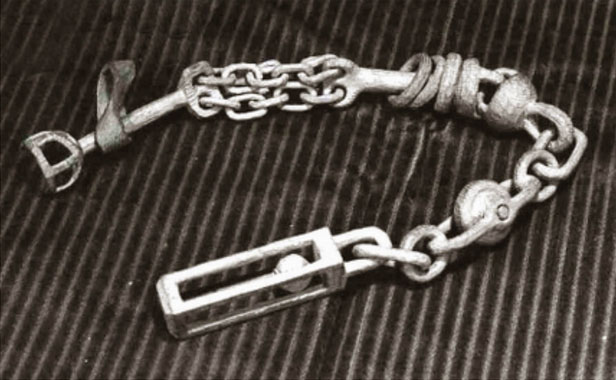
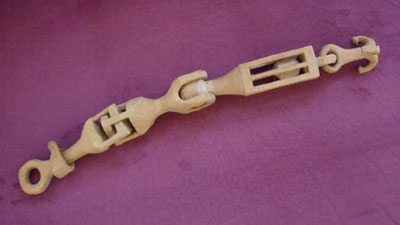
This next one is a fairly early chain, done sometime in my mid-teens. It's not the first, but it's the earliest survivor. I started on the tri-hook end. The cage has eight bars. As you can see, there is one major mistake: Before freeing the ball, all work to make it as round as possible must be complete before freeing the ball on the ends, because after it's free, it's pretty much impossible to hold on to it with sufficient grip to do any further carving.
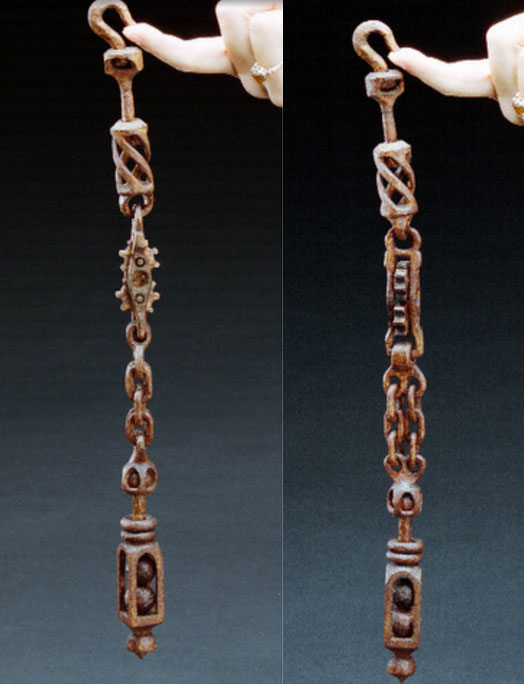
The chain below was carved over a period of about two and a half weeks. I started at the end with the double ball-in-cage, followed by two captive rings. Next is a swivel ball and socket joint, then a twin chain section, followed by the gears, which work. Above the spiral cage, a shaft connects to a block inside, which slides in a helical motion. Above that, the hook is connected with a conventional swivel joint.
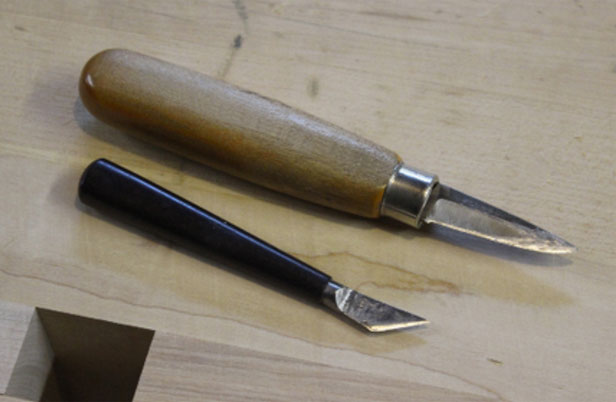
I was on vacation away from home, and didn't have my favorite whittling knives with me. I made the knife for this by grinding down one of his old files and re-tempering it with propane torch, jamming it into the old handle. The only other tool used was an X-Acto knife to separate the gear teeth and axles. The wood is mahogany.
These are my two favorite whittling knives, both of which I made, as described above:
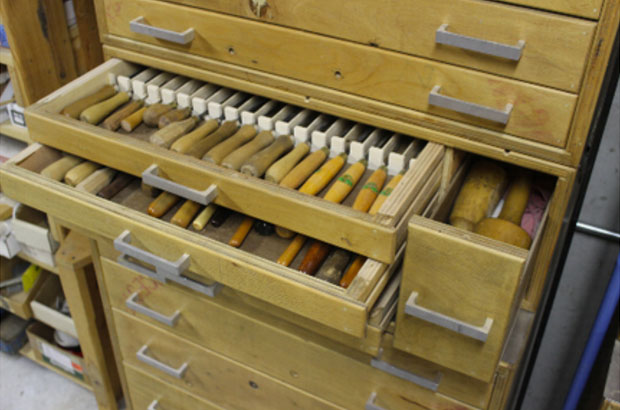
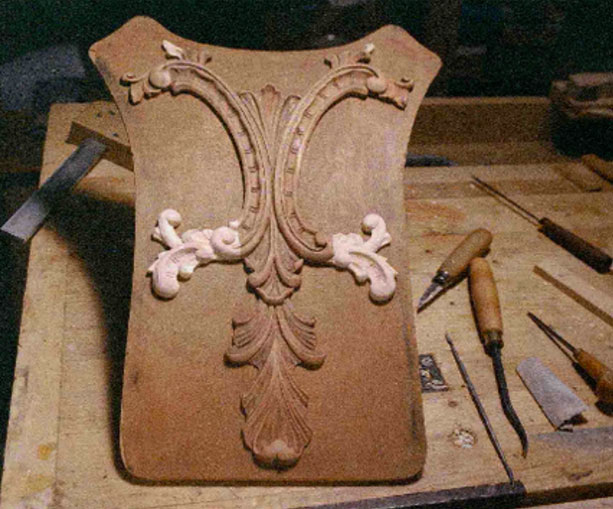
For my High School graduation present, my father gave me a set of ten professional carving chisels.
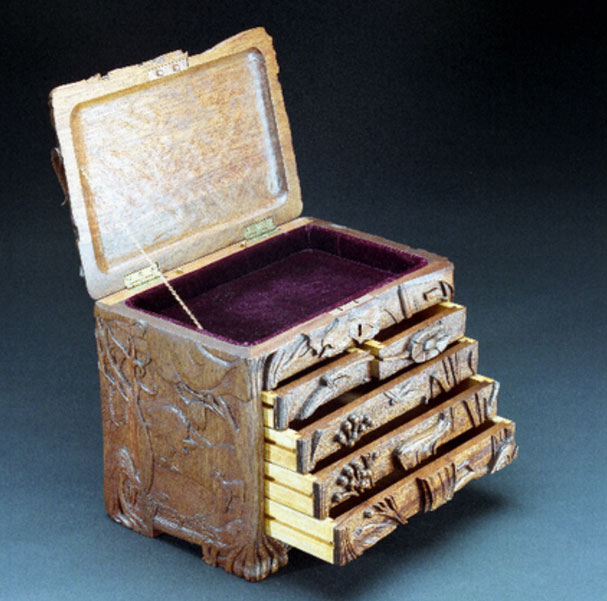
The chest below was carved largely with these, and more that I have added over the years. At the time I was living on very limited means, and had no space for a workshop anyway. The joinery for this was done out on the porch, with my skill-saw mounted upside down in a plywood box, and of course hand tools. The two brass nubs visible near the hinges when the lid is open, are the tips of a spring-loaded ladder soldered together with hooks which engage eyes on the backs of the drawers to lock the chest when the lid is closed. When the lid opens, this same mechanism starts a music box hidden in the bottom. The high relief features on the front form the pulls for the drawers. The wood is mahogany. There are more photos of this on my web site.
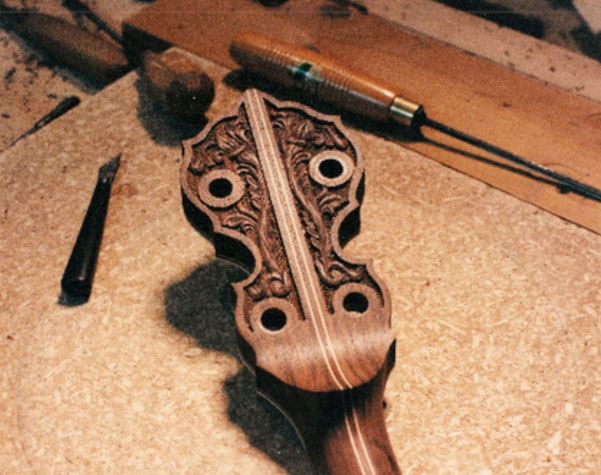
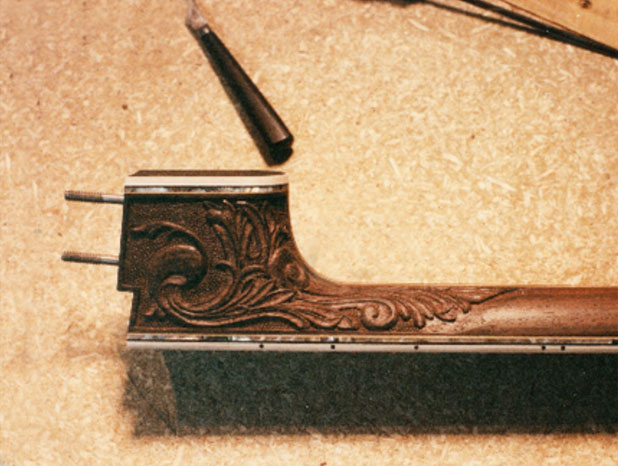
Below are some parts of Banjos I carved for OME Banjo in Boulder, Colorado:
Each set consisted of a Resonator, and the neck, carved on both the peg head and the heel. For information on these models, contact OME Banjo. The resonator above is walnut. The neck pictured below is Rosewood.
Below is a restoration of part of an antique headboard I did for a friend:
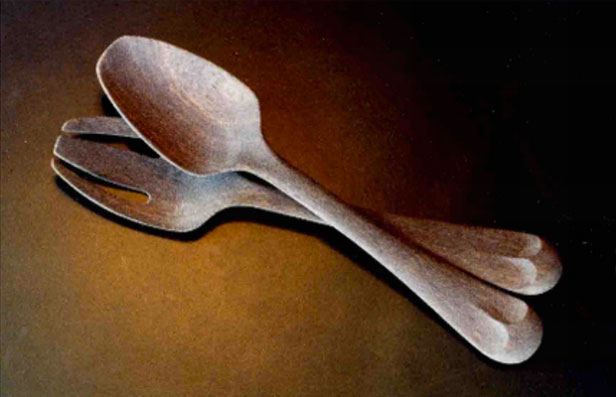
I've carved many cooking spoons and salad server sets. This set below is in mahogany:
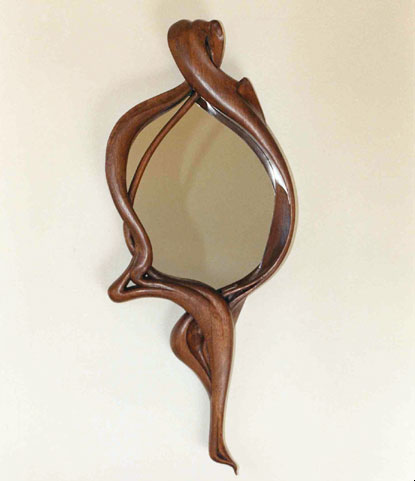
I've always had a penchant for building things out of salvaged materials. In my younger days, it was often for economy, but in more recent times it's been a matter of a challenge, and thinking about sustainable construction. Sometimes it's just for fun. In this case, a large new grinding machine arrived at work, delivered on a heavy wooden skid made entirely of mahogany timbers. Seniority was about to dictate who got to take the skid home for firewood, but I trumped them all with my proposal to make furniture out of it, and took the whole thing home.
This is glued up from timbers about 3" x 4", strategically dodging bolt holes in areas to be sawed off. I band-sawed the middle out before the final glue-up of the right and left halves. The whole frame is about 34" high. I put a hardwood spline in the back of the thin part that goes across the mirror in the upper left.
You can email Peter at
peter@iseethroughmyeyes.com
.
You can also visit his website at
http://www.iseethroughmyeyes.com/index.html
Would you like to see your carvings in this column? We invite you to
SEND US PHOTOS
of your
favorite woodcarving projects along with captions and a brief history of your woodcarving. (Email
photos at 800x600 resolution.) Receive a $50 store gift card if we show your carving work in a
future issue!
Return to
Wood News
front page