Project Ideas: Wine Glass Cabinet
by Forrest Bonner
It started with a request from my wife that we needed more
storage area for dishware. After 40 years in the same house
we have gradually accumulated too much 'stuff.'
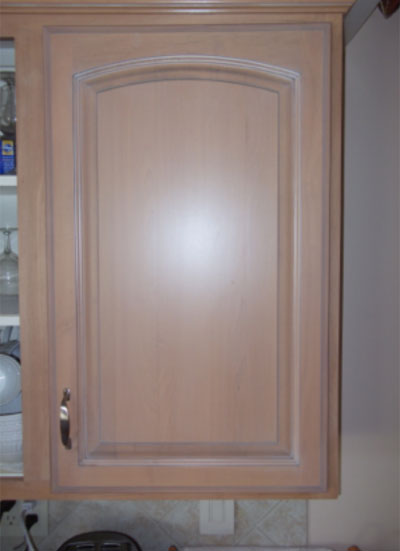
It was to hang on the wall next to our existing kitchen
cabinets so we thought it would be nice to match the style, if
not the color. I am not good at finishing so style, yes, color,
no, was agreed to. The wood is genuine mahogany dyed
with water-based dye and two coats of spray polyurethane.
This is the cabinet nearest to the proposed cabinet:
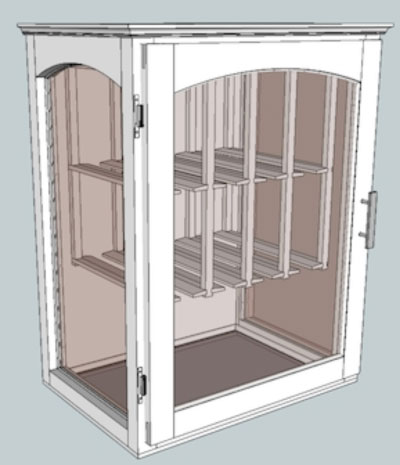
Using that door shape, I used SketchUp to design the
cabinet:
The biggest challenge was the spacing and length of the
hangers to accommodate as many glasses of different size
as possible. There turned out to be a larger spacing on the
right hand side for the glasses bigger around. Since the
cabinet is elevated, the door and both sides are glass as is
the bottom (instead of solid).
The design of the hangers mimics what I have seen in
restaurants, but they are 3-level instead of the usual 1-level.
I estimated the angle of the horizontal pieces by using a
protractor with the glasses to be hung. Came close, but the
glasses are not 'standardized' apparently.
This was the first cabinet that I have attempted, so it turned
out to be too complicated with 83 total pieces. I thought of
doing some simplification, but my joy is being in the shop,
not sitting at my computer: press on regardless!
The arch on the door and the arches on the 2 sides were
constructed based on width and height of the segmented
arch on the cabinet next door. I laid those out on a large
piece of plywood, drew straight lines from each end point
to the high point in the middle, then constructed lines
perpendicular to the center point of each of those 2 lines.
Where they met was used to draw the arch on blanks for the
door and sides. I bandsawed those 3 pieces taped together
and used an oscillating spindle sander to refine the shape. I
used a cutoff piece from the bandsaw and used a series of
sandpaper glued to it to finish sand to the final surface. The
pieces were separated and milled to mate the mating stiles.
The vertical hanger parts are attached to the 3⁄4 Baltic Birch
plywood top with 10-24 machine screws. I thought that
would give me more adjustability at assembly to make up
for any slight layout errors. That meant that I needed 10-24
threaded inserts in the vertical hangers.
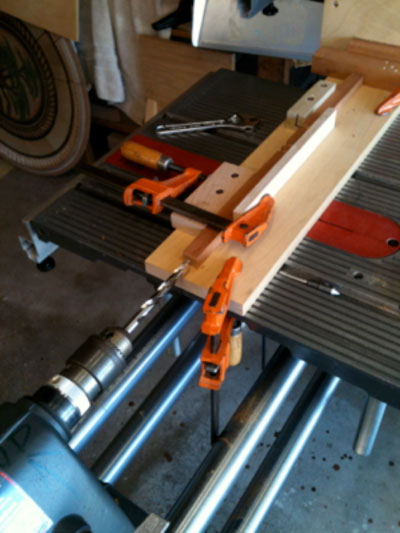
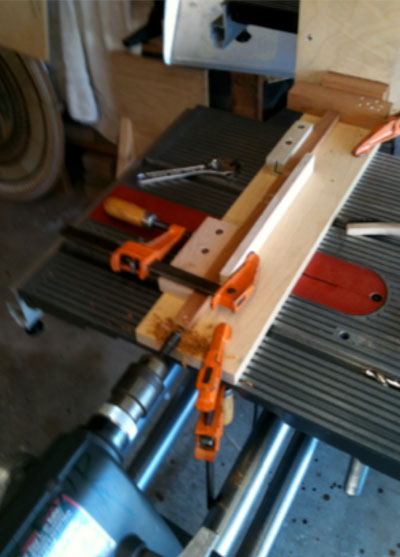
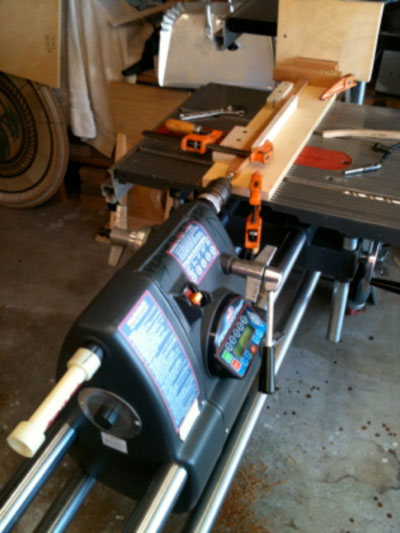
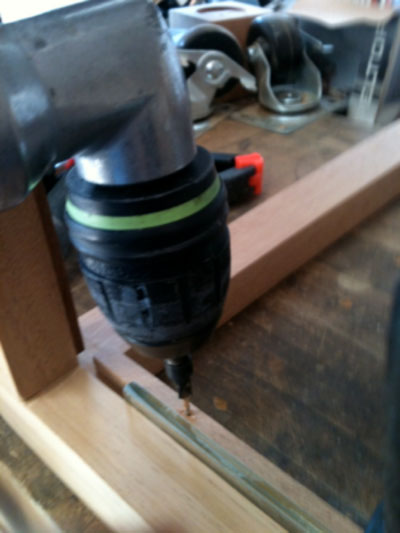
I built a jig to hold and locate the hangers and used my
ShopSmith in the horizontal boring mode to bore the holes:
Chamfer the holes to align the inserts for assembly:
And install the insert:
Each of the vertical hanger pieces required a dado around
3 sides to secure the horizontal pieces. That depended on
the pieces being absolutely square and identical which just
required precise milling.
I used a movable stop block to locate the dado position, and
every hanger (plus an extra) was milled before moving the
stop block:
The horizontal pieces were dadoed on each end in a similar
fashion.
I made a jig to hold the horizontal pieces to cut the
approximate 15 degree angle on each top side:
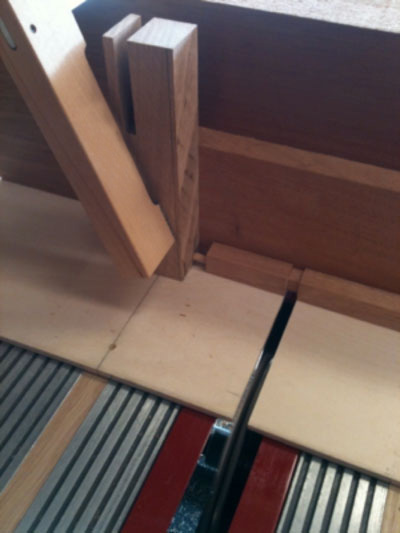
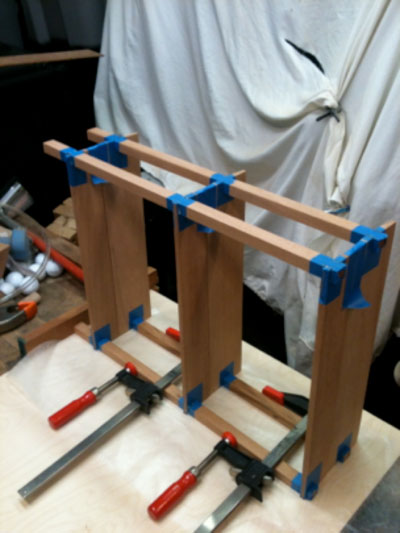
The rack was assembled one at a time by aligning the first with the second, and so forth, to assure they would align with their mate. The bottom vertical pieces were stopped at the end, held in place with clamps while the tops were taped together. Blue tape was used around each glue up to minimize cleanup afterwards:
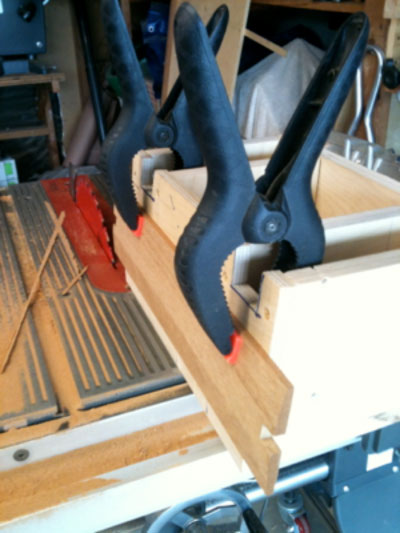
The 5 pieces were then assembled with clamps to hold locations while each end with the insert was marked to make a template for drilling the holes in the top:
Each piece was marked on the non-visible rear end to allow me to put them in the right location. Remember the spacings were not equal so I thought it best to assembly the rack in the same order I used to make the drilling template.
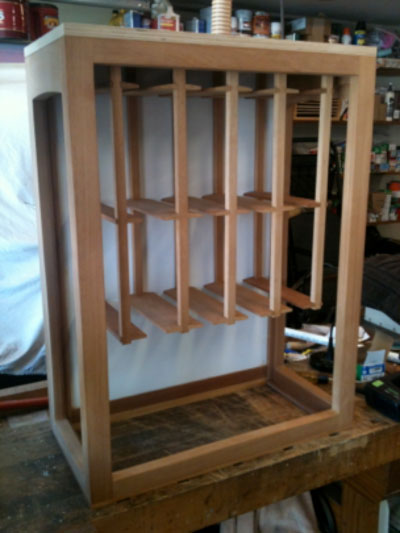
The rack was attached to the top and that assembly first put in the carcass and it fit!:
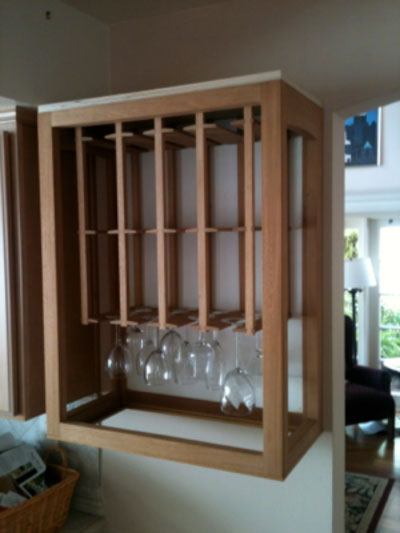
I then put the carcass on the wall French cleat and hung a couple of glasses to brag to my wife:
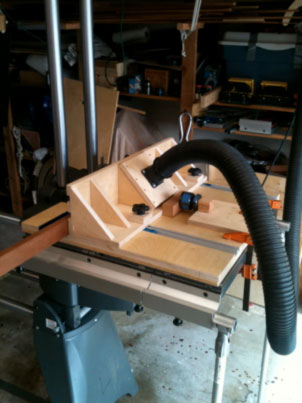
Next was the molding for around the top. I built a routing 'table' to allow me to use my ShopSmith in the under-the-table mode. (I have since had the 'duh' moment and turned the fence around.):
The black piece below the dust port is a two-piece threaded item that allows me to adjust the fence in 1/64 inch increments if needed.
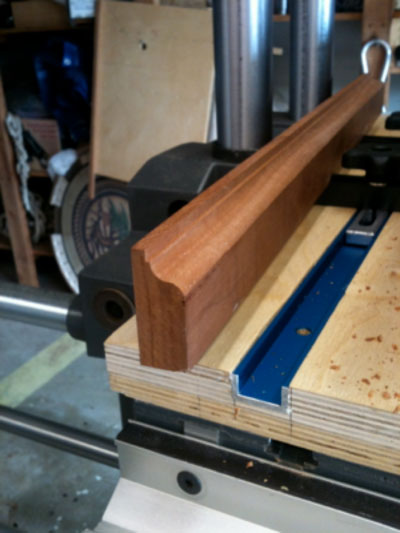
The molding turned out nice:
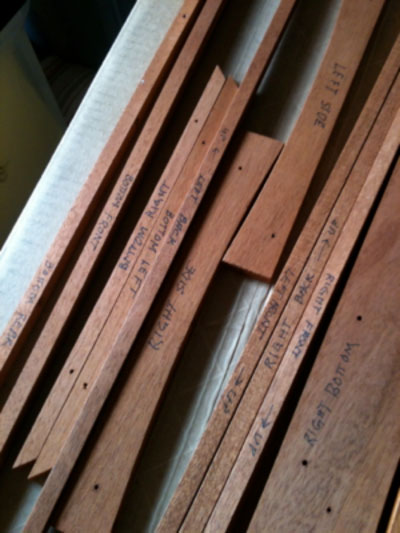
With so many pieces I thought it best to ID each on a non-visible surface:
I used ¼ inch square pieces to hold the glasses in place. #3 screws were used and each screw location was pre-drilled. I knew that I could not drill the holes with the glass installed, so I got narrow pieces of glass of the same thickness as the full sized pieces to locate the glass retainers:
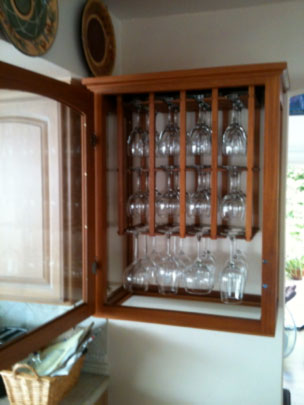
The door was pretty straight forward, and the total turned out pretty nice and holds 36 glasses:
Return to
Wood News
front page