Pay it Forward and The Fred West Commemorative Tool Chest
by Andrew Gore
Last month we featured a blog and video on the
Fred West Commemorative Tool Chest
built by Andrew Gore, which was a collaborative effort among several woodworkers. Below, Andrew shares his story of the build and explains how much of an influence Fred West was in the woodworking world.
Woodworking In America 2014 was a big event this year. Woodworkers and toolmakers alike came together in Winston Salem, NC to enjoy the craft that so many of us love. While good times are always had at this conference, the market place was missing one person this year - a huge personality that graced the woodworking world with kindness, generosity, and a love of tools that was illuminated anytime his infectious personality was present. That man was Fred West.
Fred West was in the very sense, the supreme patron of hand tool woodworking. His love of hand tools was unparalleled to most. He was a strong advocate for up and coming toolmakers and furniture builders, and he was a strong and vocal voice for the craft of woodworking.

|
|
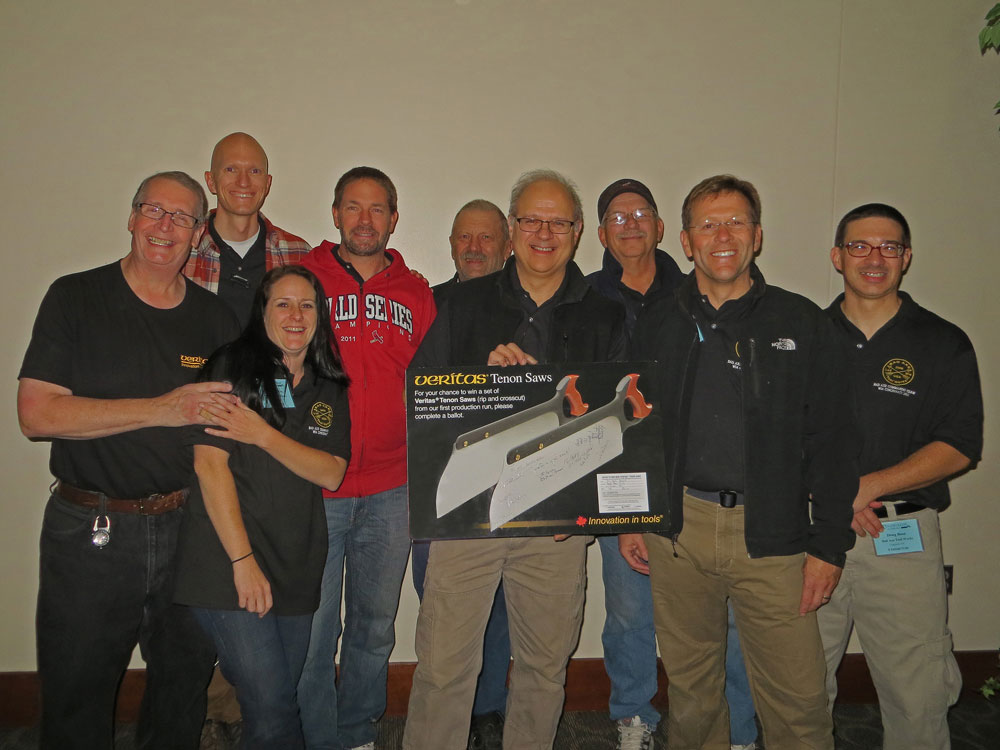
WIA 2013 Bad Axe Commando Team
That's Fred West standing on the far left
|
Fred West supported hand tool makers and furniture builders alike. He was always available to anyone who pursued endeavors down the road of woodworking. While he loved using hand tools, he would also just buy several tools from a maker and then give them away to up and coming woodworkers. The only requirement from Fred was that the tools were put to use. He was a firm believer that regardless of how beautiful the tools were, they needed to be used. Fred once told me, "Andrew, not using the tools is a disservice to the toolmaker". And that was Fred. A caring, generous, loyal friend. A man who supported the woodworking community to the fullest extent. And while he enjoyed working with hand tools, he loved the friendships he created through the woodworking community even more.
Fred West passed away January 11, 2014 after a hard fought battle with cancer.
Plane Maker, Saw Builder, and Furniture Maker Come Together
In the spring of 2014 I was contacted by Mark Harrell of Bad Axe Toolworks, and Scott Meek of Scott Meek Woodworks with an idea. The concept was simple. Create a custom tool chest and fill it full of the finest woodworking hand tools available in the market today. And then give it away to an unsuspecting woodworker at the Woodworking in America conference. All of it a pay it forward tribute to our friend, Fred West. I immediately agreed.
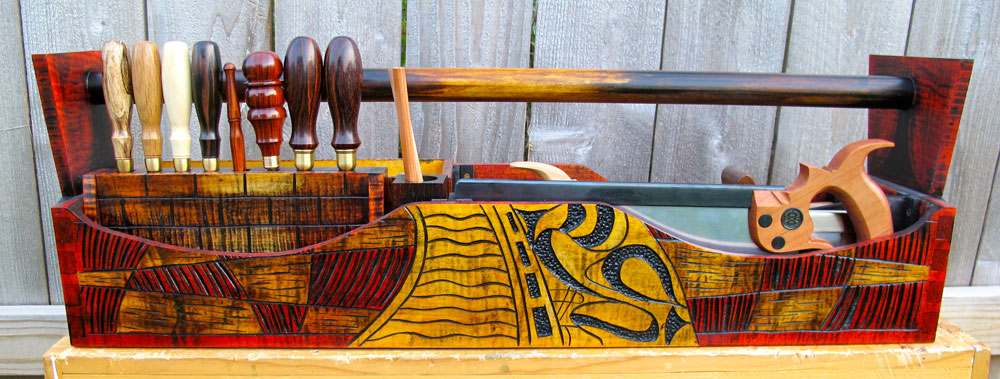
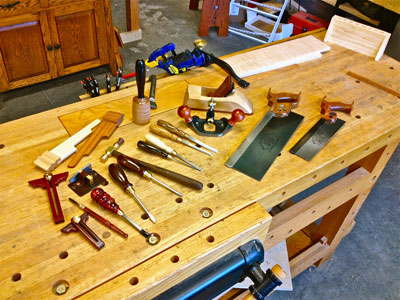
Over the next few months, many phone calls were made, emails were sent, and mock-ups were created. The design of the tool chest evolved. Voluntary participants to fill the chest were established. As the idea developed, I slowly started receiving the tools for the chest. Participants and contents of the Fred West Commemorative Tool Chest include:
|
|
Tools for inclusion in the tool chest as they arrived
|
-
Andrew Gore Woodwooks custom tool chest
-
Scott Meeks Woodworks smoothing plane
-
Bad Axe Toolworks dovetail and carcass saws
-
Sterling Toolworks saddle square and plane hammer
-
Blue Spruce round mallet and set of four dovetail chisels
-
Lee Valley Tools/Veritas router plane
-
Lie Nielsen Toolworks rabbet block plane
-
Hamilton Woodworks 4" and 6" marking gauges
-
Czeck Edge Hand Tools carbide marking knife and carbide birdcage awl
-
Elkhead Tools screw driver set
-
Randy Weber carving mallet
-
Knew Concepts coping saw
-
Vesper Tools 7" infilled sliding bevel
-
Cronkwright Woodshop Melancolia squares
-
Chris Schwartz signed copy of "Workbenches: From Design & Theory to Construction and Use"
-
Tom Fidgen signed copy of "The Unplugged Workshop: Hand-crafted projects for the Home and Workshop"
-
Shannon Rogers, free semester in The Hand Tool School
-
Popular Woodworking, 1-year subscription to Popular Woodworking Magazine and the 1995-2013 Popular Woodworking Magazine DVD
Once I got all the tools together, I began construction.
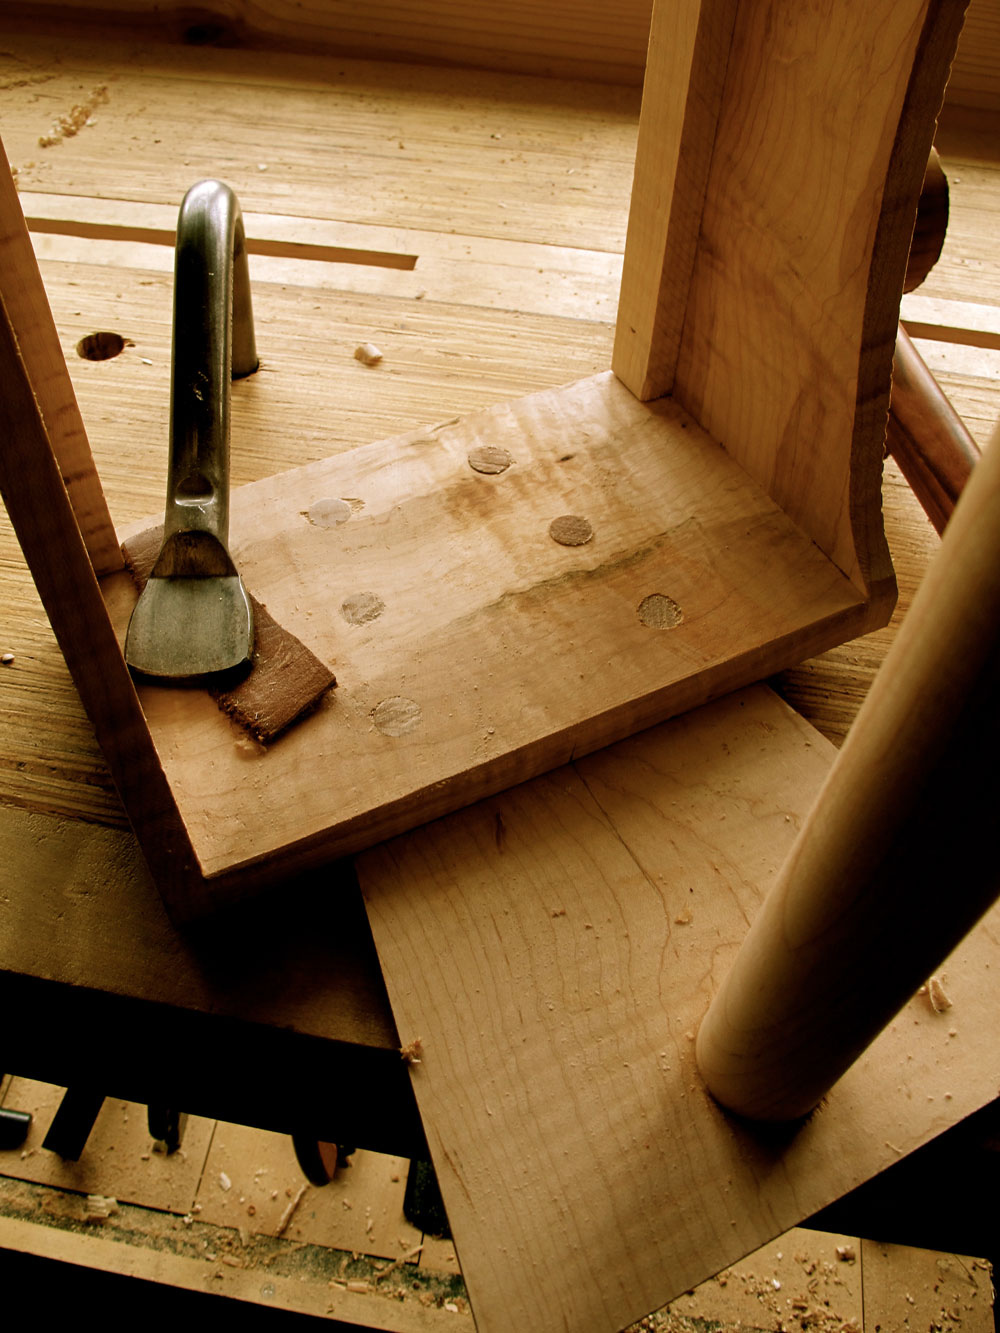
Tool Chest Construction
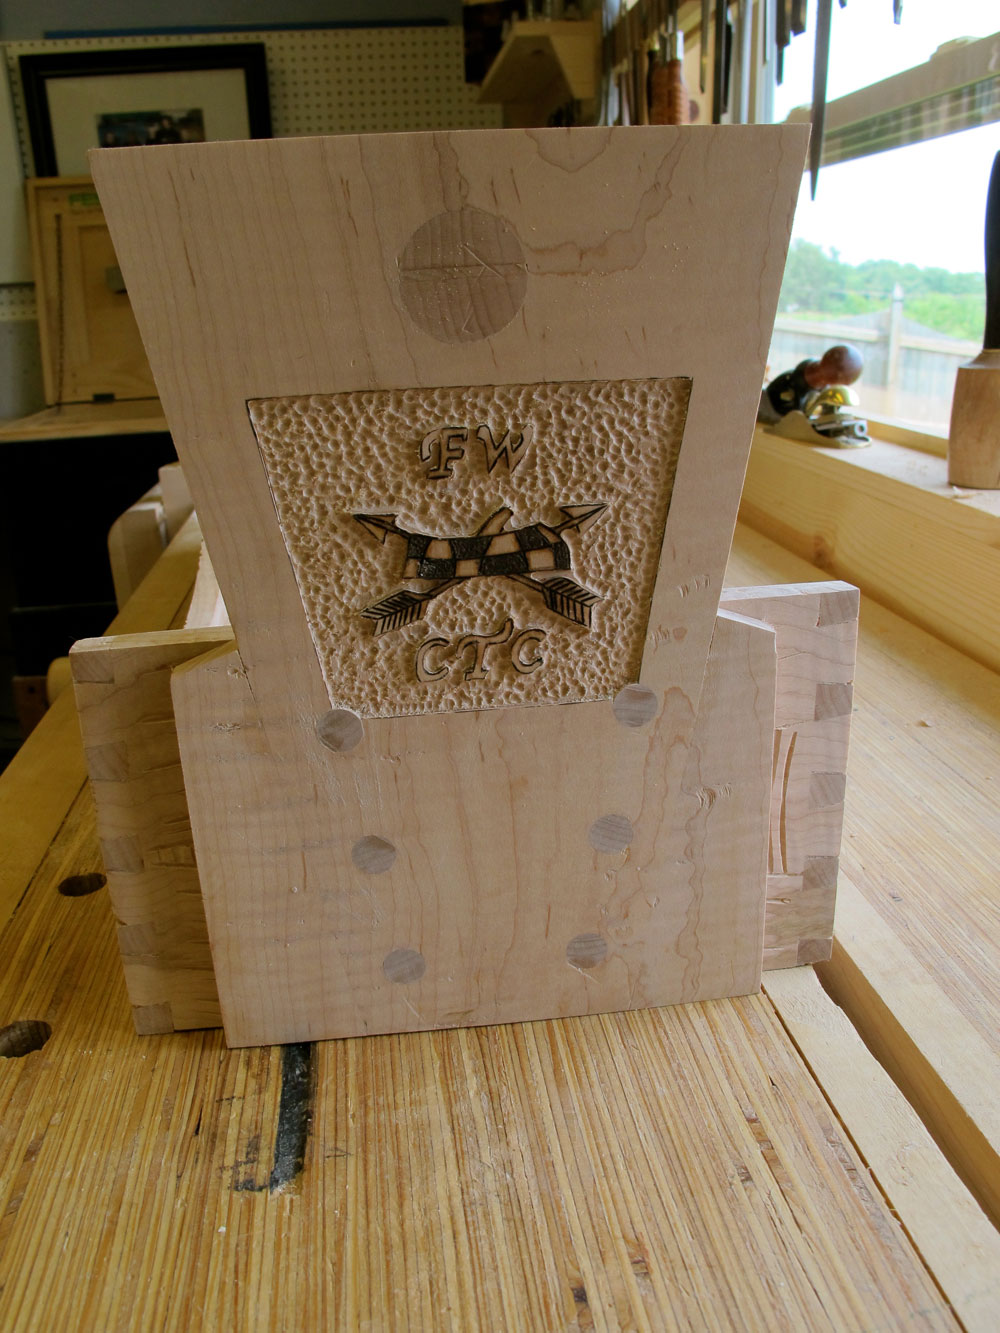
I wanted the construction of the tool chest to be straightforward. I utilized strong traditional joinery to ensure the chest was both robust and durable. I chose quilted maple for the wood because it is beautiful, and it finishes nicely. The carcass of the chest is joined with hand cut, through dovetails. In a lot of my work I enjoy playing with dovetail layout. But for this particular piece, the joint is functional and not showcased. Therefore I utilized a simple dovetail layout. Once the dovetails of the case were cut, I moved onto the next phase of the build. The aspect of woodworking that I look forward to and enjoy the most.
Exterior Relief Carving
Relief carving into wood is the aspect of woodworking that I really enjoy. As I progressed into my woodworking endeavors, so did my skill level. As my skill level improved, my desire to work outside of my comfort level grew. It's a natural progression that many experience when you build and create with your hands.
I was always impressed with the creativity brought on by architects, artists, sculptors, and woodcarvers. Their ability to think outside the box and their curiosity to explore the creative boundaries of craft, regardless of the medium was intriguing. A lot of crafts people follow traditional methods, but add their own spin to their work. At a certain point, I decided I would take a chance and try the same path.
In the middle of building traditional pieces of furniture, I began experimenting with different ways to enhance my work. I tried working with metal, inlay, and paint but was never happy with the results. I then stumbled on some material about carving.
|
|
Early experiment with simple relief carving
|
Carving in wood is nothing new. It can be traced back historically, and has been a popular way to enhance work. So while not new to history, it was new to me. And being new was what drew me to it.
I had learned through some of my initial experimenting and drawing that my eyes were drawn to repeating shapes, abstract patterns, and bold color. So with zero knowledge about woodcarving, but a desire to explore, I went to my local woodworking store and purchased my first carving tool - A simple "V" tool. Through limited research, I knew this tool was important. And it would become my primary way of creating the shallow relief patterns found in my work. Beyond the "V" tool, I would supplement with a small variety and sweeps of gouges.
Carving the relief pattern for the FWCTC
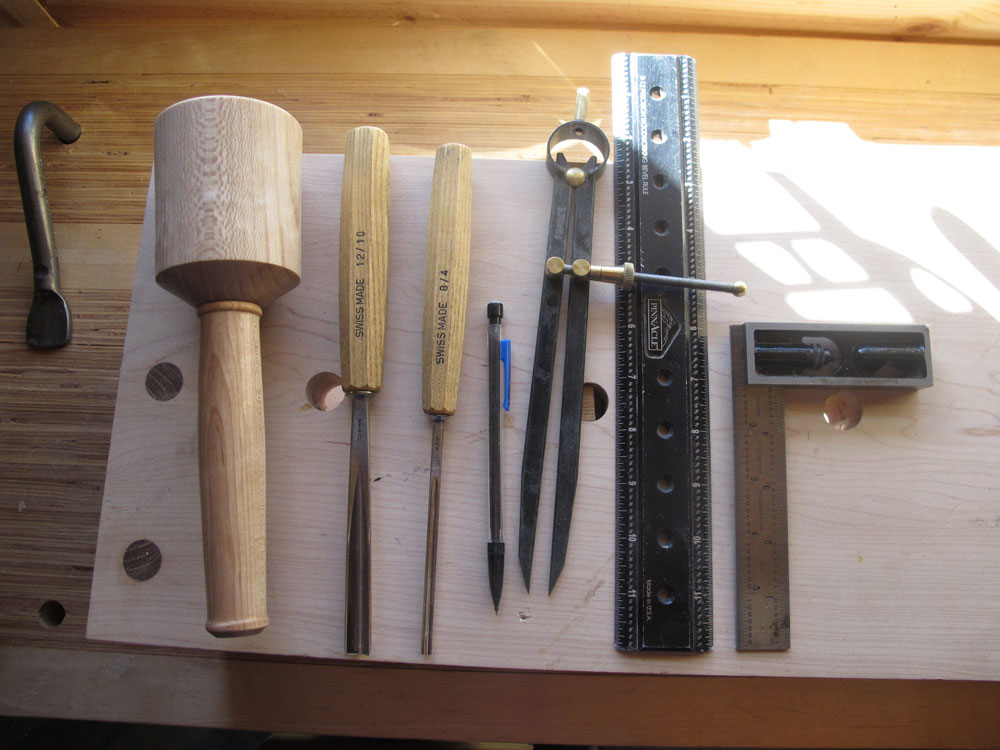
The carving for the chest is very simple and straightforward. The required tools are:
-
Bench
-
Carving mallet
-
12/10 "V" Tool
-
8/7 sweep gouge
-
Ruler
-
Basic layout tools
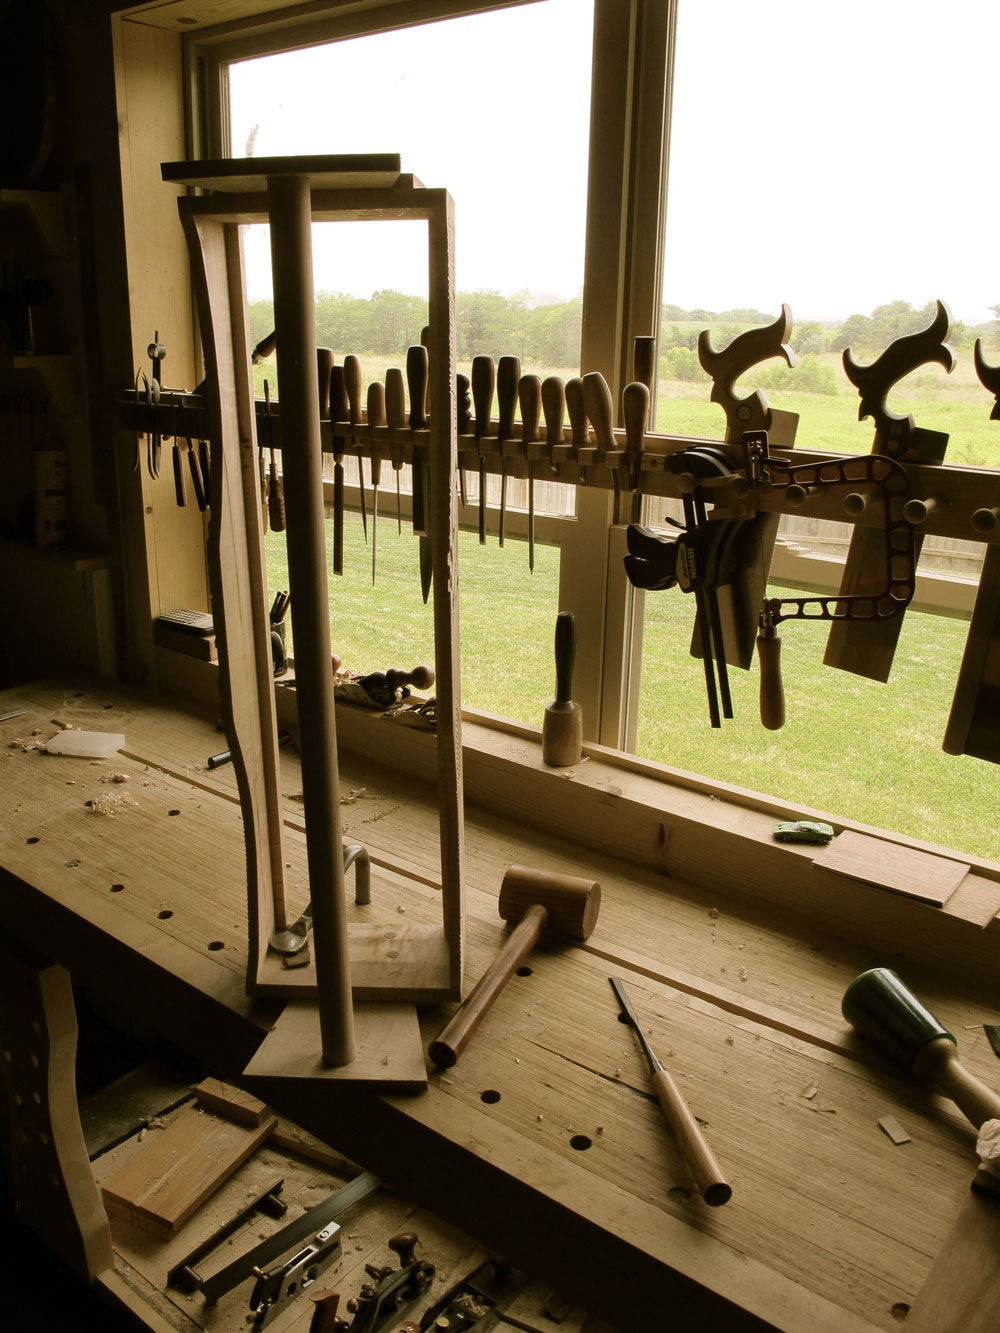
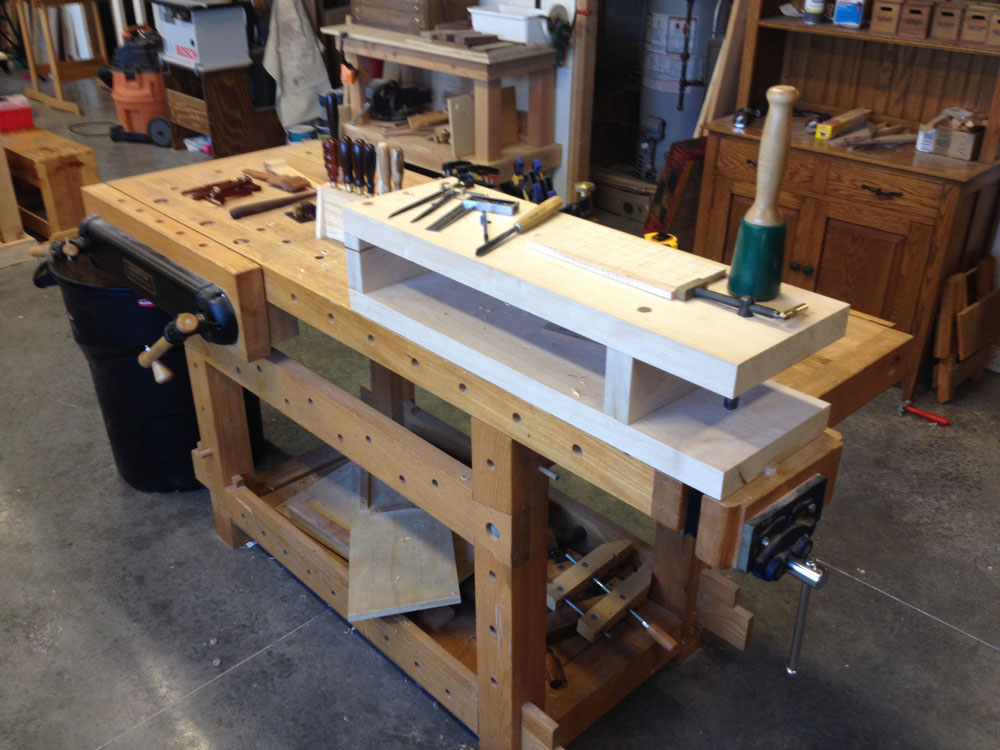
Carving Bench

|
|
Small, portable carving bench.
Here I'm carving the tool inserts for the chest.
|
Carving on your bench with the work low is killer on your back. A while back (no pun intended), I built a simple bench top carving bench out of 8/4 maple to raise the work to a more comfortable level. I tried to build this small bench with some basic bench-building principles in mind. With all the pounding it was going to endure, building it heavy and stout were at the top of the list. I also wanted it to be easy to move and store when not in use.
When in use, I hold the small bench in place between an end vise and a bench dog. If you lack a vise, it is easily held in place with clamps or holdfasts. I have strategically drilled 3/4" holes in the top to allow for a variety of bench accessories that I find useful to hold my work such as bench dogs, hold fasts and planing stops. There is also plenty of open space to hold work with clamps in a variety of ways.
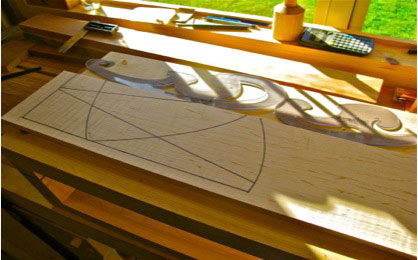
Layout

|
|
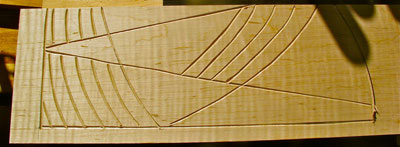
Initial layout lines for the carving pattern
|
When it comes to the layout of the patterns, I don't get caught up in exact measurements. I do what is appealing to my eye.
I make my initial layout lines using a ruler and French curves. This is the only time I use layout tools during the carving process. This gives me the basic, overall pattern that I'm trying to achieve. As for the placement of the lines, I don't make it complicated. I just place lines where I think they are visually appealing. Once the initial layout is achieved, I move onto the carving.
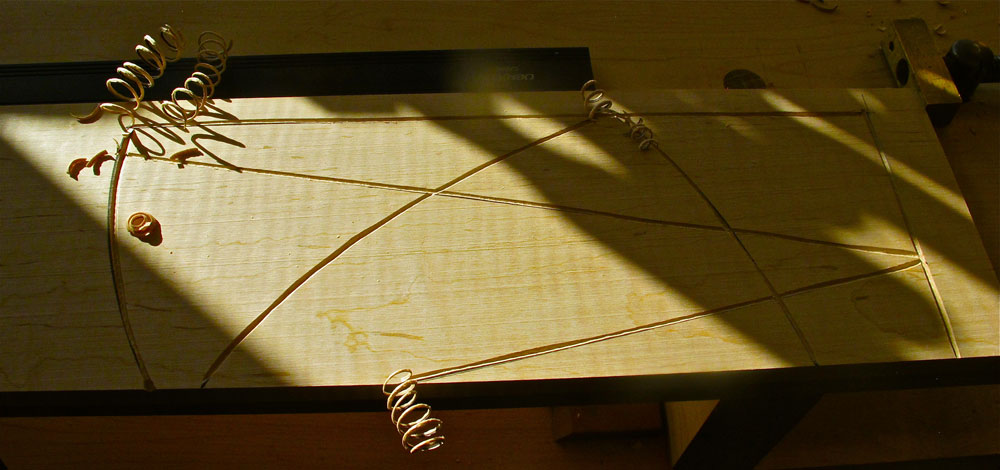
Relief Carving

|
|
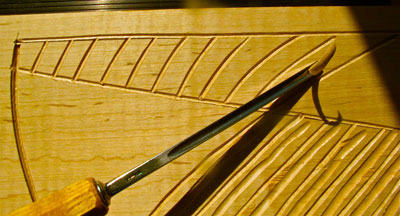
Carving the primary borders and layout lines
|
The carving is very simple. Utilizing a 12/10 "V" Tool, I begin by carving the primary borders and layout lines. There are lots of different brands of carving tools available. They have many shapes and handle sizes. I prefer using Pfeil carving tools. The steel is good, and they have longer handles that feel good in my hand. The most appealing feature to me is the octagonal handles. While these handles keep the tools from rolling around on your workbench, they are also comfortable to hold, and allow you to easily orient the tool on the wood when in use. In the end, the brand of tool is an individual choice. Find a tool that holds and edge well, has a handle that feels good to hold, and get to carving!
|
|
Carving progression. After the initial layout lines are carved.
I move onto carving the interior patterns
|
After the borders and primary layout lines are carved, I move on to carving the interior patterns. Here your imagination is your only limit. You can carve whatever types of patterns that you enjoy or see fit. My eyes are drawn to more simple, repeating patterns, and that is what I prefer to carve.
Here I'm utilizing the "V" tool to carve the curved lines. Again, I don't use layout tools during this part of the process. I like the small inconsistencies produced by eyeing these lines. Up close you can tell the lines were created using hand tools, and were not produced with a CNC machine. Too much precise layout looks too regimented and takes up unnecessary time to make.
Play with Pattern
|
|
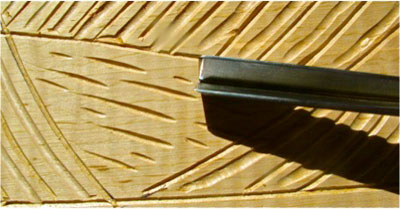
Increasing the complexity of the pattern with
shallow sweeping lines.
|
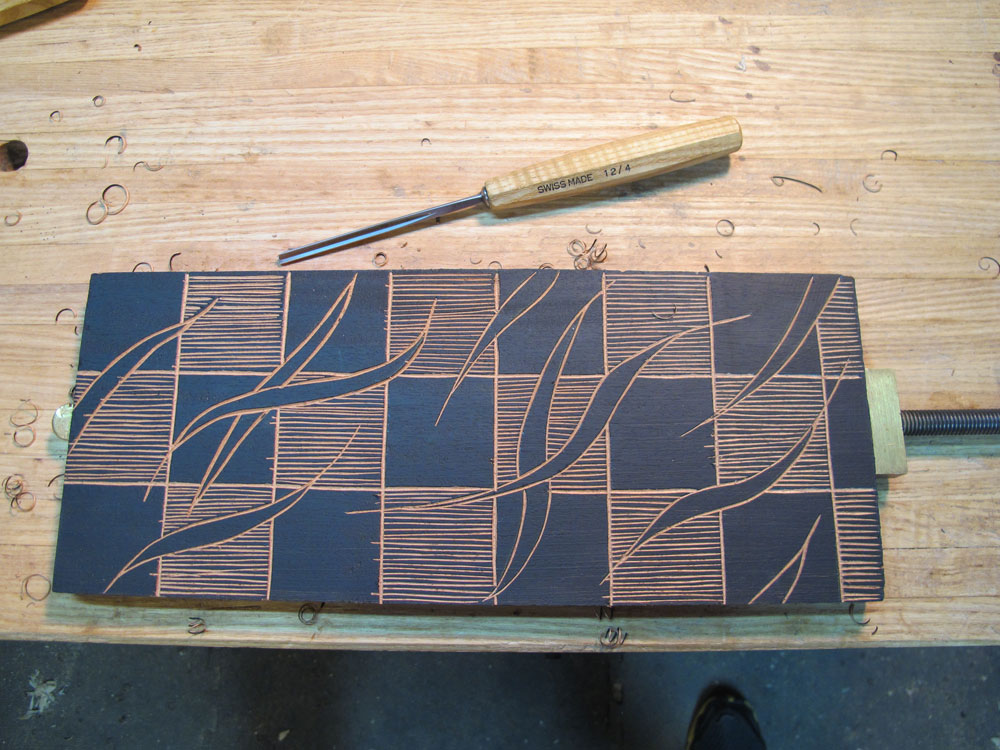
After the slightly curved vertical lines are cut, the next part is a play with pattern. You could simply leave the initial lines made with the "V" tool as your pattern. Here I take it one step further. Using an 8/7 gouge, I carve a shallow sweep between the curved, vertical lines. It adds one more level of carving for your eyes to explore once it is complete.
|
|
Completing the pattern with diagonal hash marks
|
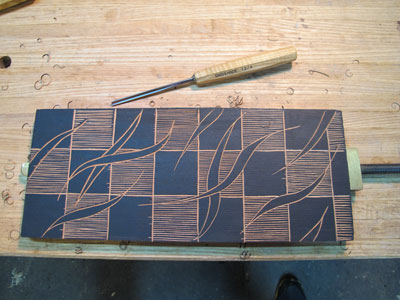
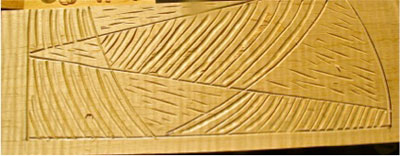
As I continue to increase the complexity of the relief carving, I move onto the diagonal hash marks. To carve the hash mark pattern, I return to the "V" tool. You can use a mallet for better control. Or for the really small marks, hand pressure is all you need. Here, I used both a mallet and hand pressure to quickly create this simple pattern, and this ultimately completes the repeating patterns for the outside of the chest.
|
|
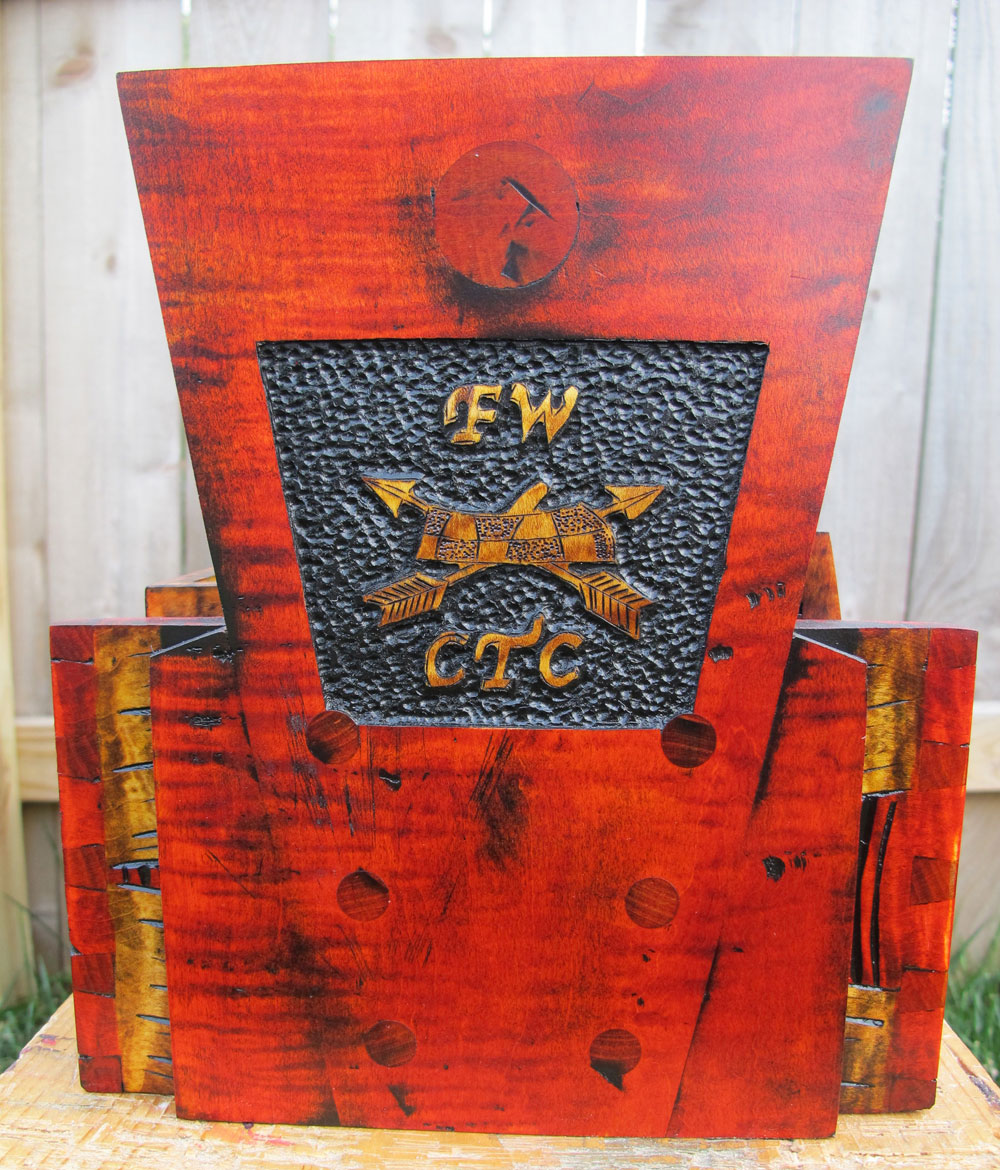
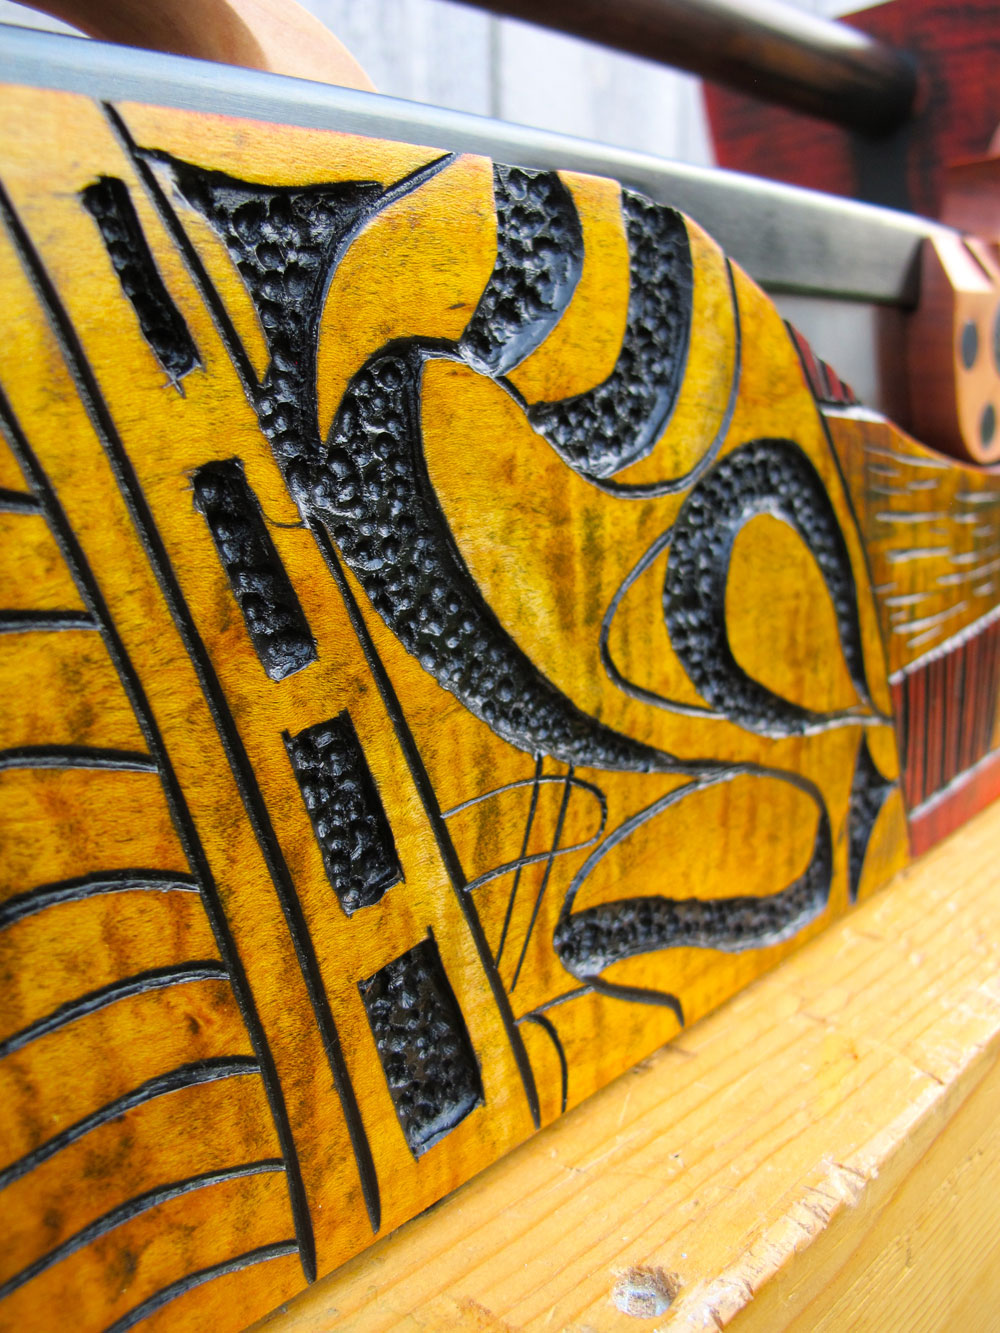
Finished carving pattern
|

|
|
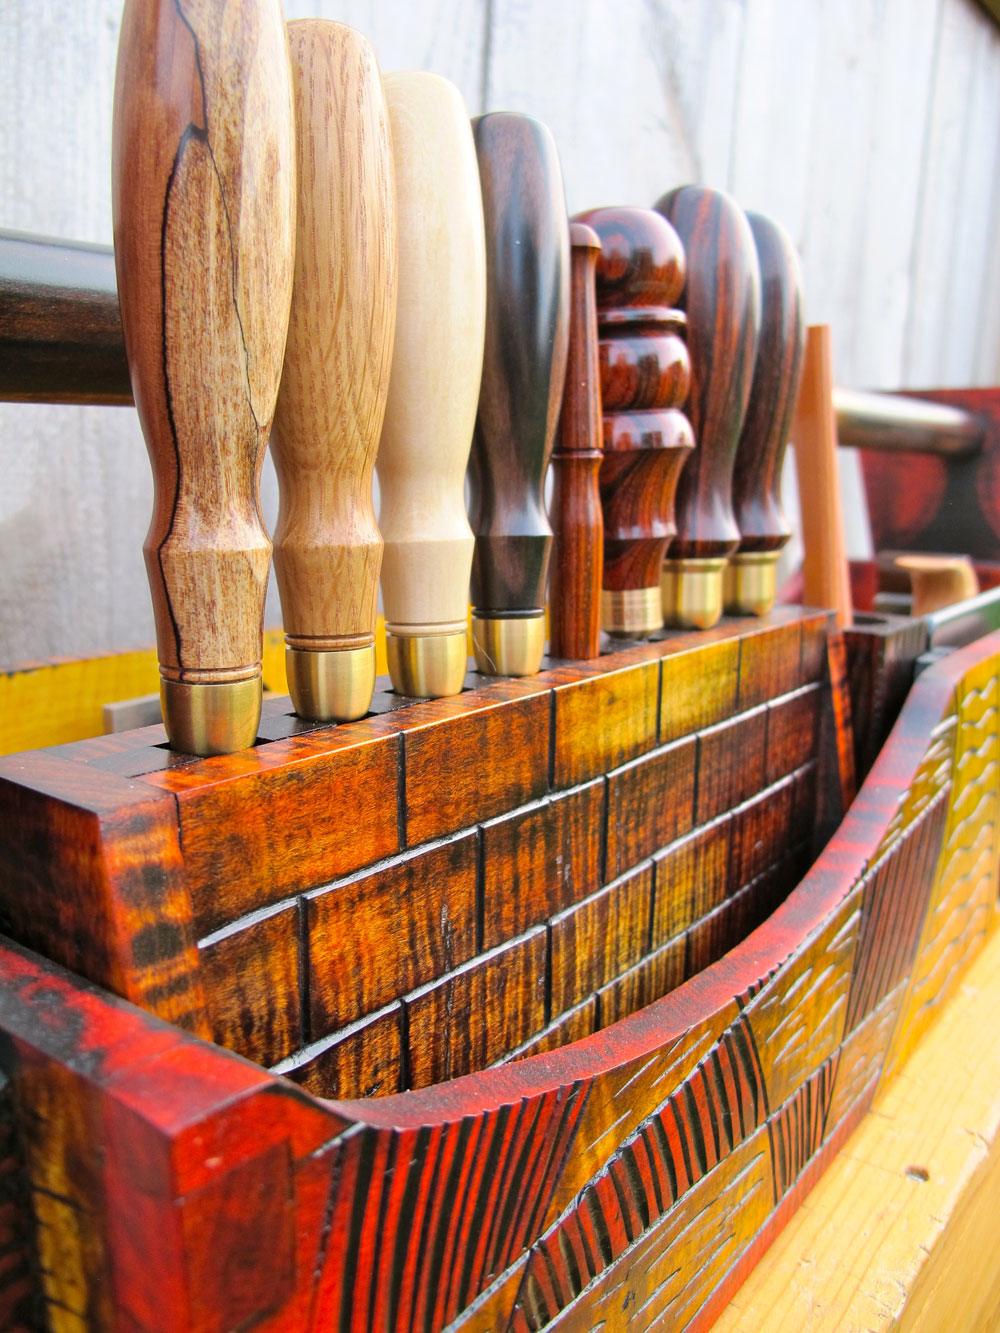
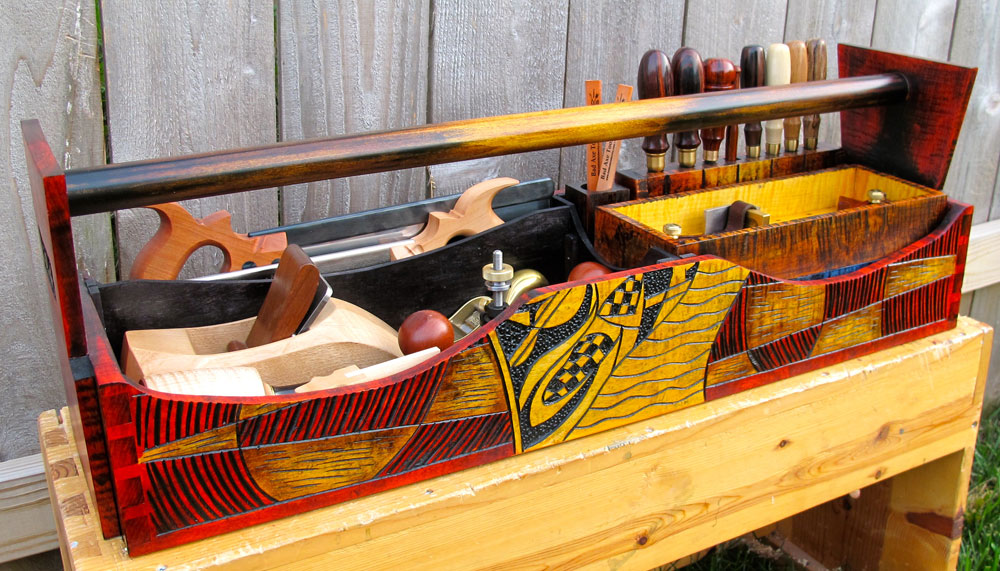
The completed tool chest
|
Once the carving is finished, I move onto completing the rest of the tool chest. This includes cutting the curved sides, case glue up, attaching the handle, fitting the bottom, and building the interior tool inserts. Completing the whole process is the addition of color and finish.
The Give Away
|
|
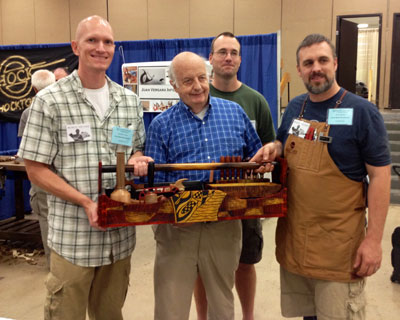
The winner, Carl Hein of Winston-Salem, North Carolina.
|
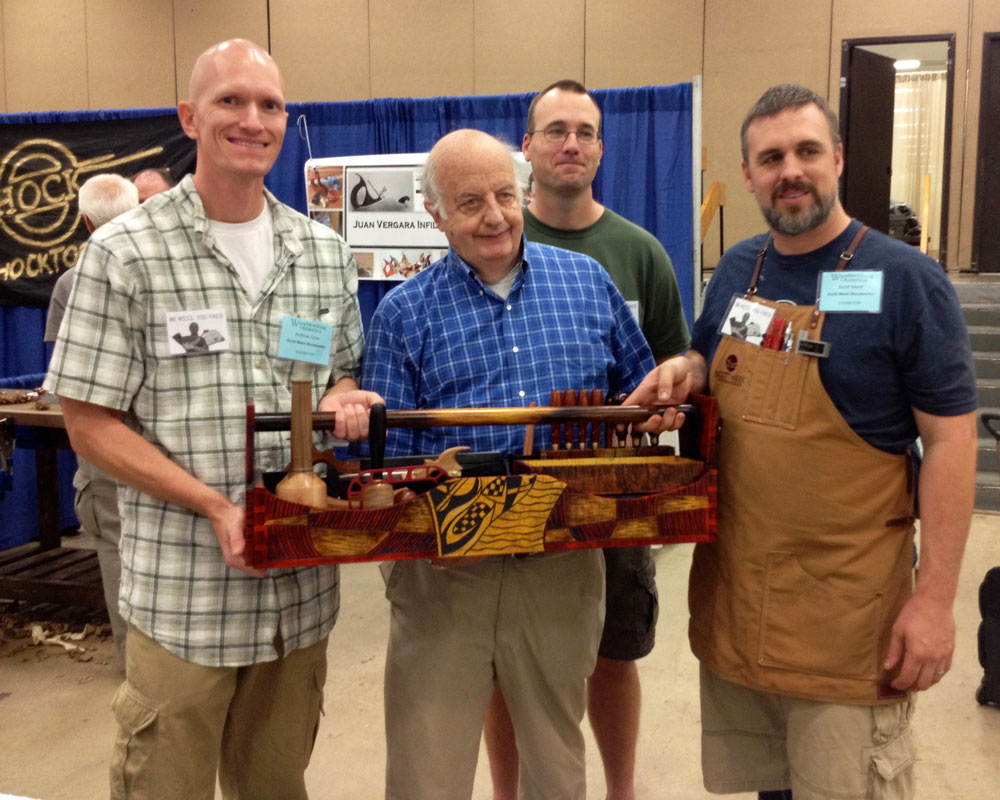
The first ever Fred West Commemorative Tool Chest give away was a huge success! As Saturday afternoon of WIA started winding down, and with hundreds of names in the mix, Fred's daughter was present to pull out the name. The lucky winner was Carl Hein of Winston-Salem, NC.
In the moments after giving the chest away, I couldn't help but think about our friend, and all the people and effort that went into making the tool chest a success. While Fred West is no longer with us physically, the Fred West Commemorative Tool Chest was a chance to keep his vibrant spirit and humble generosity at the forefront of our hearts and minds. A pay it forward tribute to honor of our dear friend. Flying back home from WIA, in the clouds over North Carolina, I could hear Fred telling us all "Well Done."
You can email Andrew at
gore@andrewgorewoodworks.com
. You can view his website at
http://andrewgorewoodworks.com/
Return to
Wood News
front page