Here's My Woodworking!
by Adrian Burleigh
Miami, FL
Click on any picture to see a larger version.
I am another one of those 60-something guys who has had his hands busy in woodworking most of his adult life.
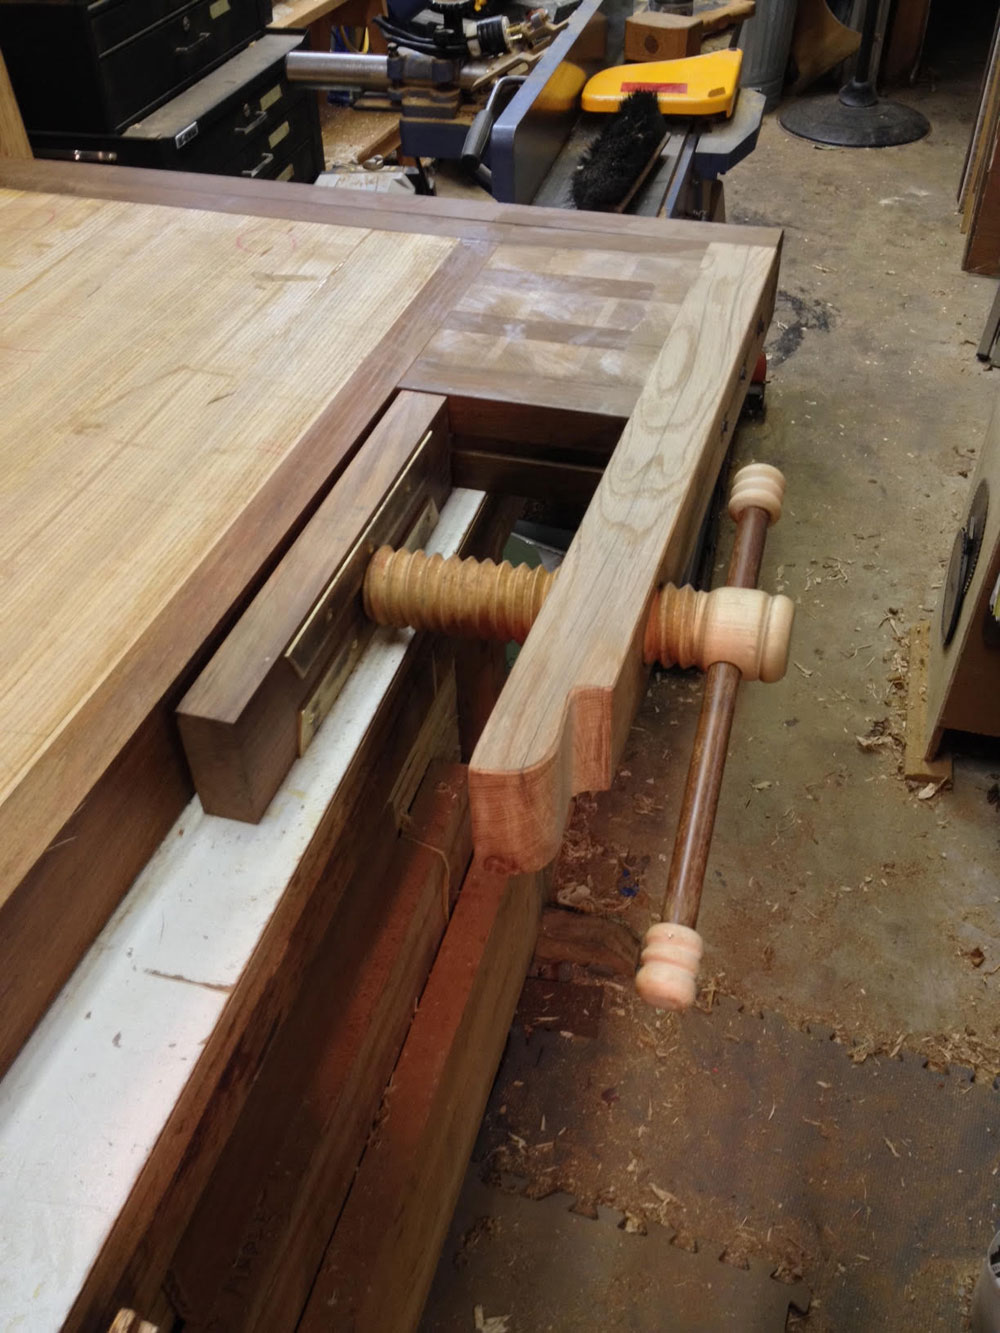
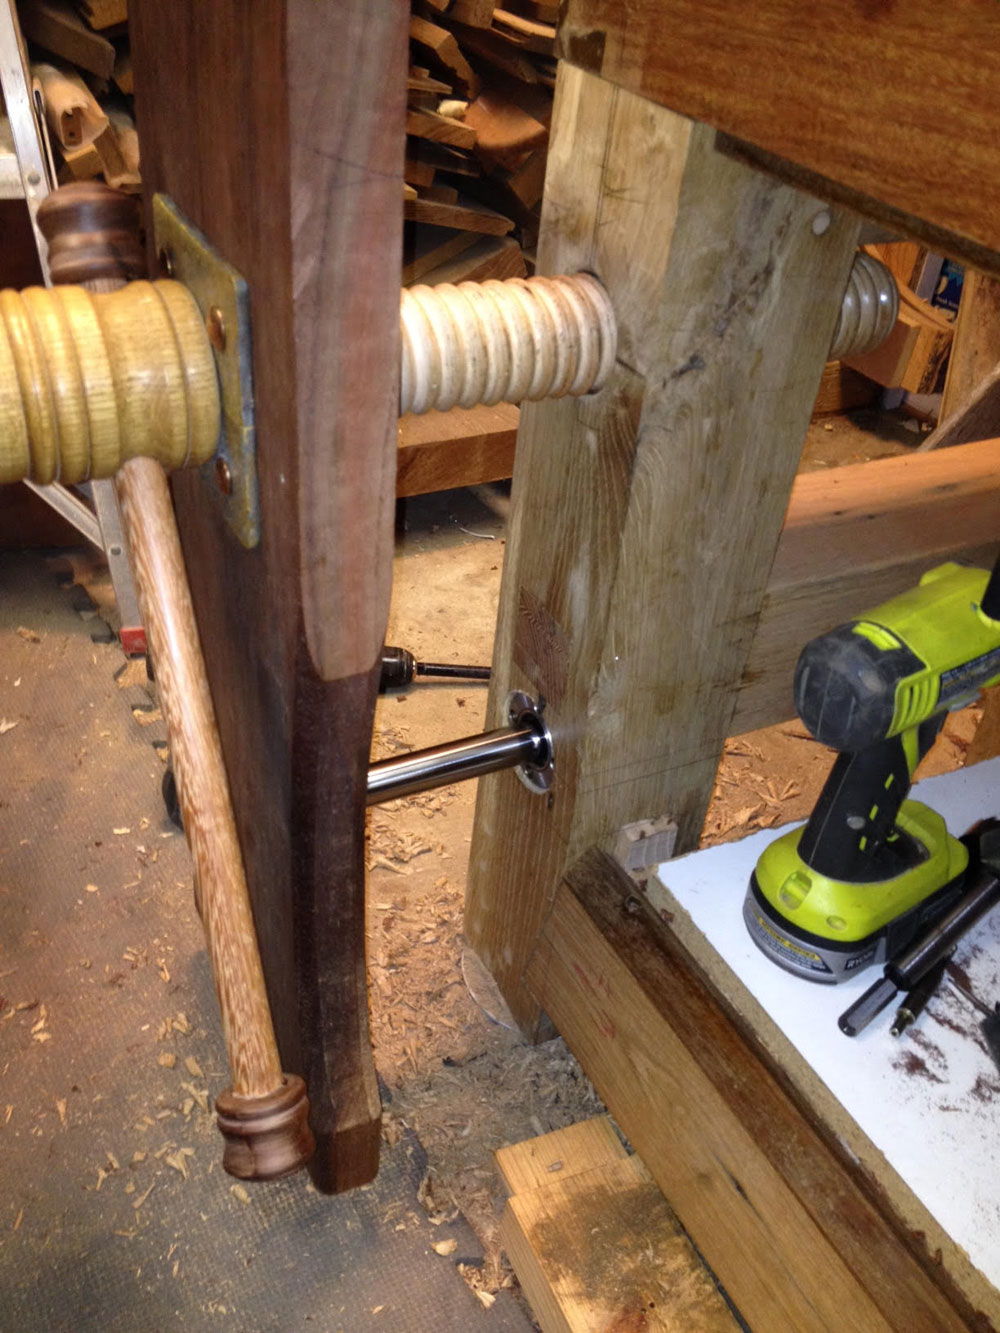
Woodworking is alive and well in sunny South Florida. I have been making use of 6" x 6" recycled oak timbers to build a Roubo style work bench with a homemade wood screw shoulder and leg vise.
I've also been busy making an assortment of essential hand woodworking tools: turning saws, 48" frame saws, panel gauges, and many other hard to find wooden tools to complement modern day woodworking in a small shop.
I use limited materials and space to create beautiful and interesting items for both woodworkers and lovers of the craft.
Below are some of the projects I have made and how I went about making them.
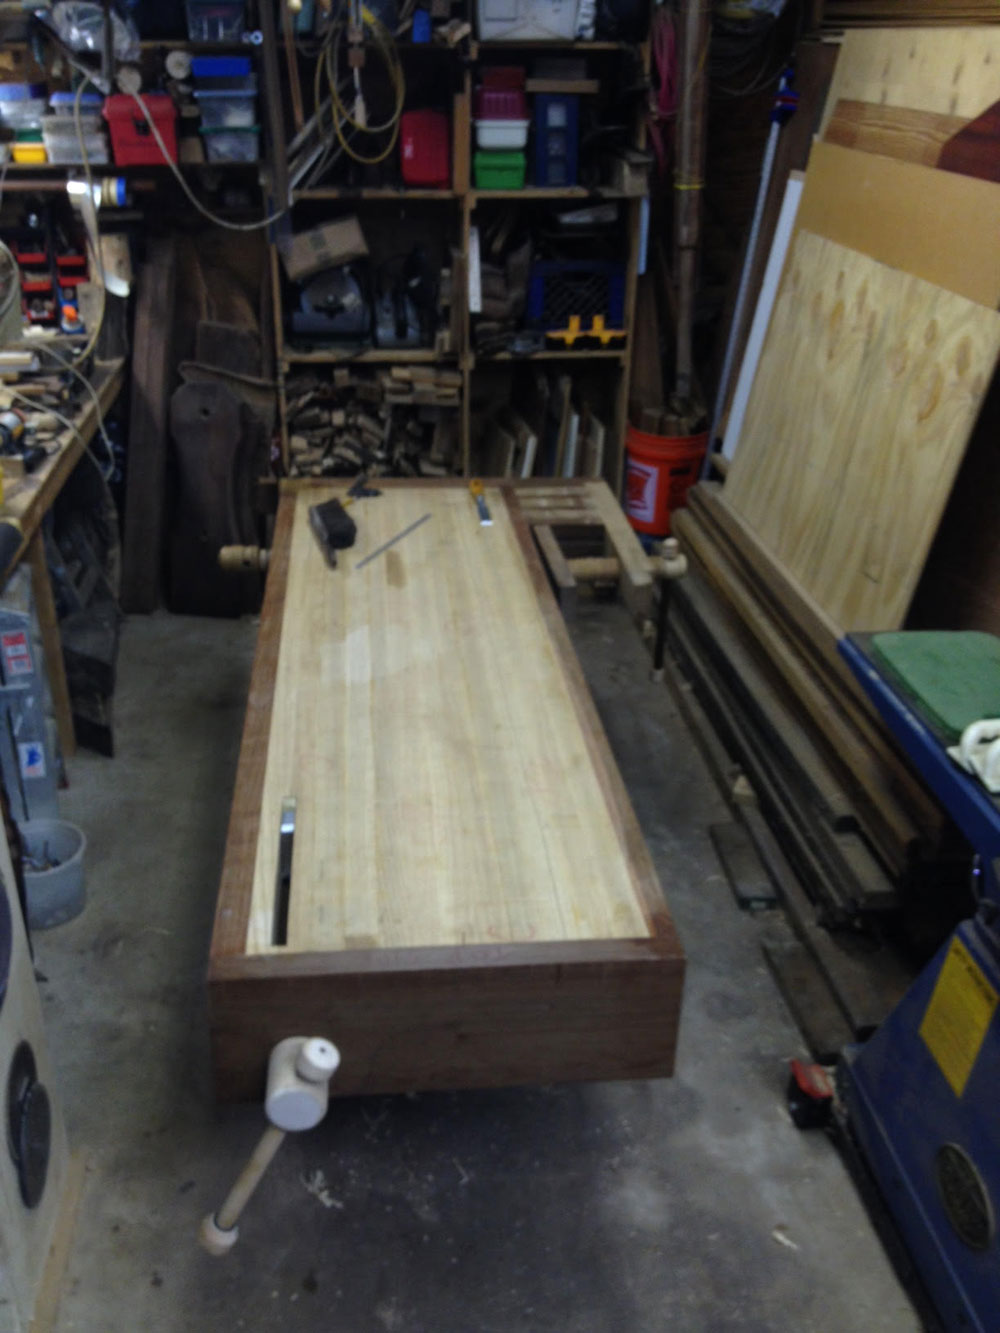
Recycled Oak Timber Work Bench (another "Roubo Hybrid")
The endeavor to turn my workshop into a better woodworking space actually began with my older
brother urging me to finally build "The Bench you always wished for". This bench was to become the
center for all my work, as my shop is very small, only 12' x 36'.
Throughout the past 40 years, I have worked on a wide manner of work surfaces and very few were truly well-made or designed benches.
I have used everything from milk crates, old doors on saw horses, kitchen counters, the tail gate of a
truck, and whatever else could assist in getting the job done.
Now in the later stage of my working life where my shop is smaller, things move a bit slower and me
somewhat wiser, I came to realize that I wanted and very much needed that "dream" bench.
I have always had this romantic notion of the traditional bench, simple, solid, hardwood, heavy, with
some good vises located where I wanted them. This was my dream: to make one from scratch. With the gentle coaxing from my brother, the "Roubo" logic, the guidance of Chris
Schwarz, along with some "daring to do it" of Roy Underhill, I began forming a bench plan.
I was always drawn to the pictures of benches of the old shops with well-worn but perfectly practical
wooden screw vises. So that is when I started looking around the magic genie of information: The
Internet and YouTube. I soon found what I was looking for: A self-made way to manufacture my very own wood screws. This
was one of the better challenges in my quest to build "The Bench."
Throughout my life I have always enjoyed reaching for the uncommon task that many see as too difficult
and time consuming when money can buy it easier and quicker. Besides, how many woodworkers out
there can actually say they made their wooden screws? Not very many. So the challenge began.
I have to give much credit to the many talented contributors on YouTube for the information out there
relevant to the projects I have worked on.
Special thanks to the YouTube Channel
MrCartersAccount
for an excellent presentation of how to make wooden screws and a tap
guide. I followed his instructions to the letter and achieved good results.
My 2 inch 2 tpi wood screws are made from solid pieces of 2-1/2 inch maple dowel rod. The matching
thread pattern is tapped directly into the 6x6 white oak bench leg and another into a 4x4 white oak
support arm of the adjacent shoulder vise.
My bench top is 27" wide by 72" long and 3.75" thick laminated 2" thick ash with a 2" thick Ipe
surrounding frame with large through dovetails at the corner joints. It's also got a floating breadboard joint at the
ends.
My bench base frame is all solid white oak which was salvaged from a pipeline construction site.
Special note: to those who are looking for large hardwood timbers, many pipeline contractors do not
recycle the shipping support cradles and cushions used in transporting and storing ductile iron piping. It
is also very important to scan all of the recycled wood timbers with a good metal detector before the milling
starts.
My oak timbers were somewhat green and had to be air dried for about a year before they were stable
enough to mill.
Even after a year I had significant shrinkage during the construction process.
All the pieces were rough cut to 1 inch net oversized 6 months after initial air drying.
The final trimming and joining was done over a period of 4 months after that.
Perfect for the weekend woodworker like myself who always has at least 4 projects ahead of the last 5 in
waiting.
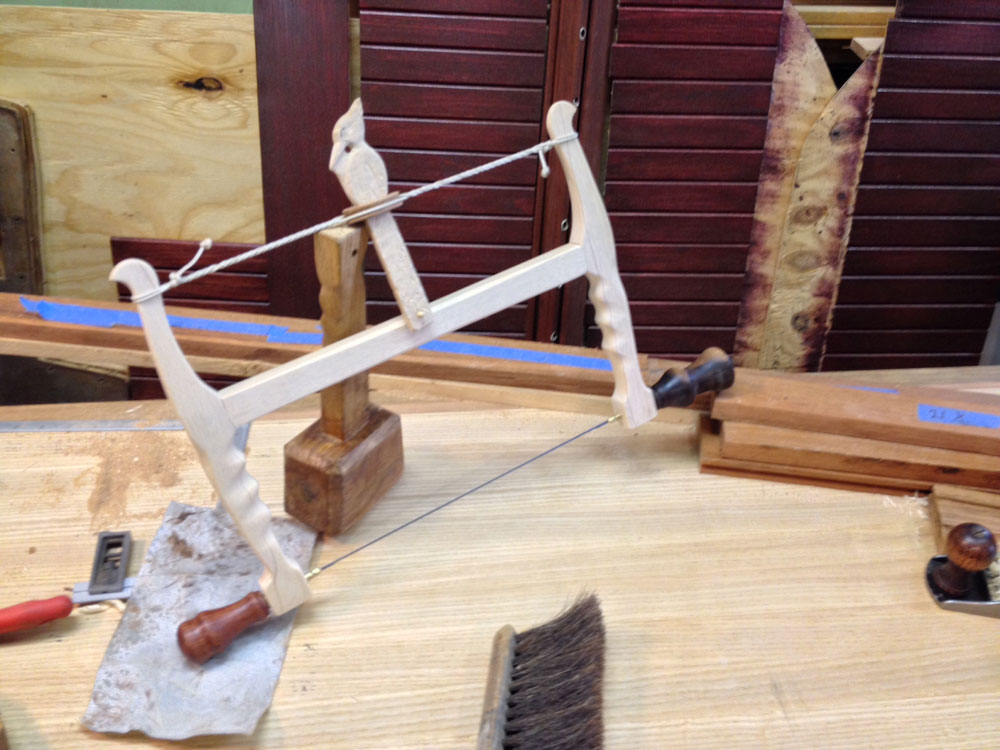
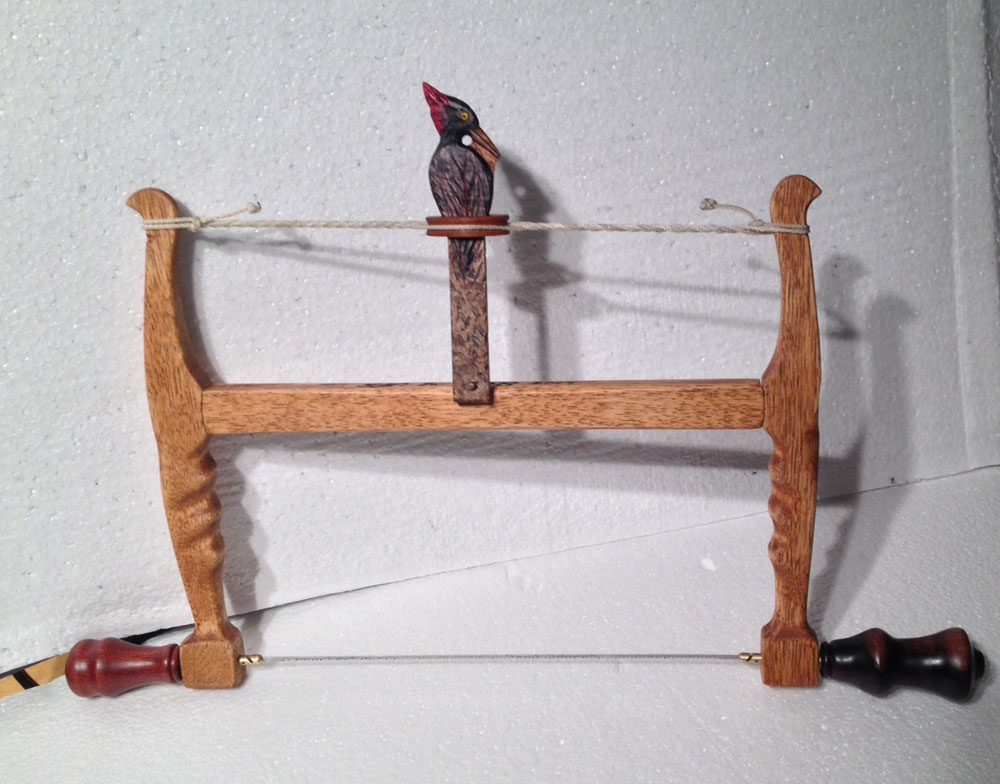
Turning Saw
This saw was a special birthday gift project for my oldest brother who had told me he would really like
to have a good old fashion turning saw. So as I was looking around at different designs for one, I
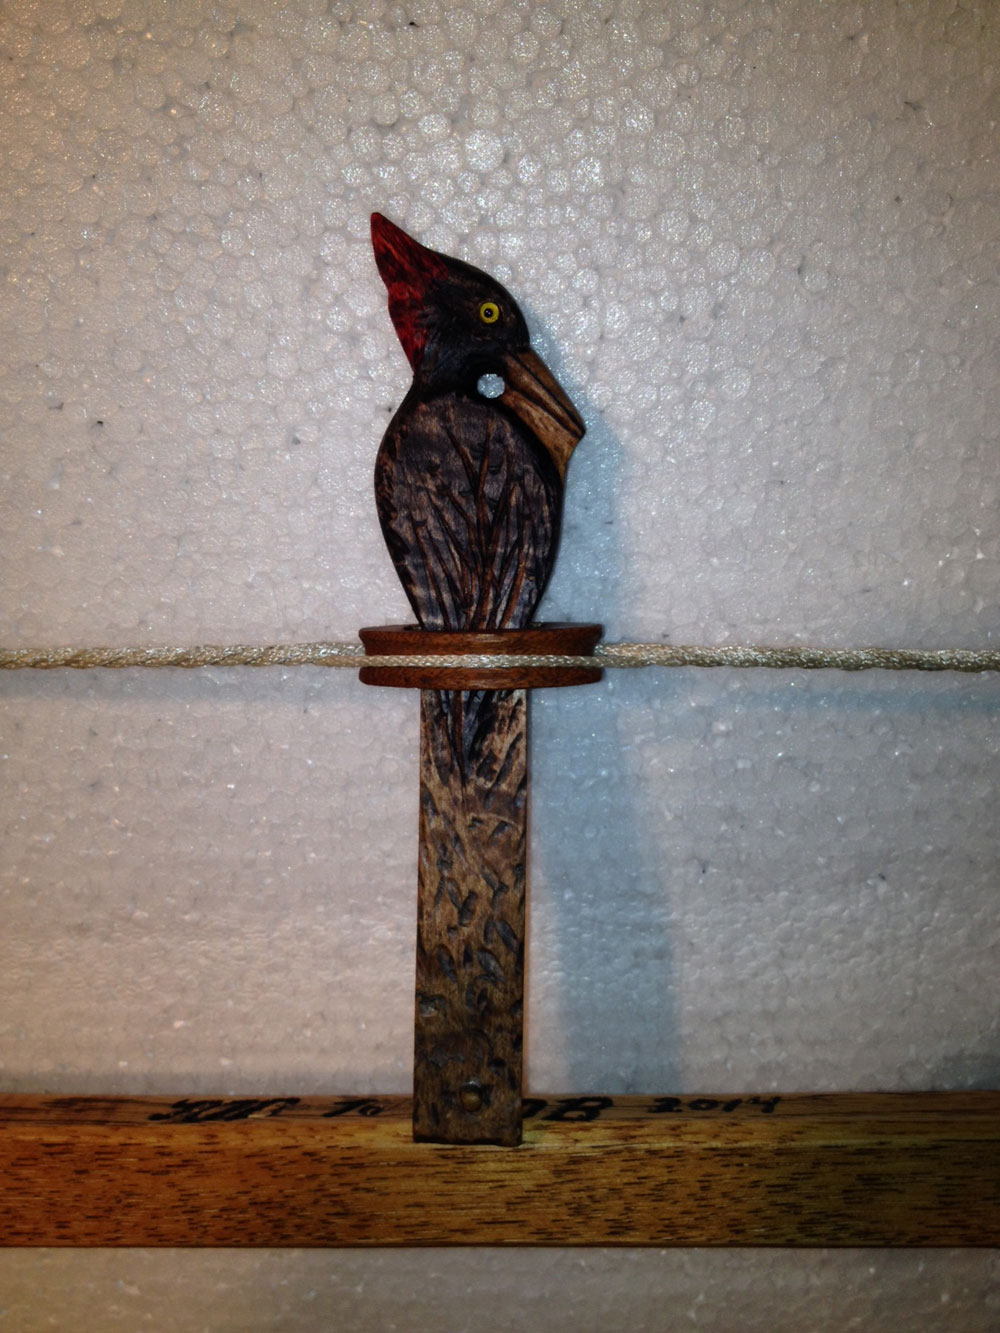
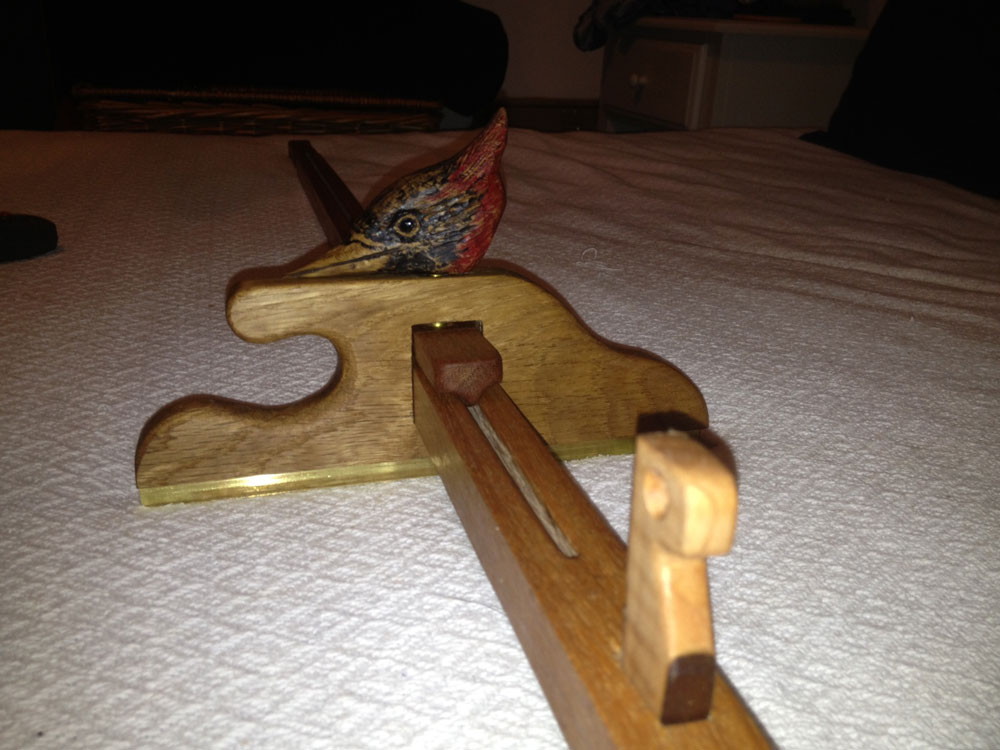
decided to have a little fun with it by fashioning a Woodpecker into the tensioning peg.
The frame is made of hickory. As I tested out the saw I found that it is often useful to grip the frame in
place of the knob handles to control a heavy cut or sharp turn. So I carved grip contours on both sides
depending on which hand is operating the control of the saw.
The brass blade holding rods are from Gramercy.
The primary handle was turned out of a piece of Seaside Mahoe stump. The smaller secondary handle was
turned from a piece of Granadillo, from a deck plank that was scrapped from an old heavy
equipment trailer. Many of the shipping containers and heavy equipment skids here are made of these
super dense tropical hardwoods because of their oily resin and high wearing capability. They are commonly
used in the Latin American truck freight and ship decking too.
The tensioning peg was carved out of a piece of birds eye figured maple so I assumed the wood was
appropriate for the design shape.
The thimble is carved out of a piece of Ipe.
The saw, like most of my pieces, is finished with 3 coats of a linseed oil and turpentine mixture.
Panel Gauge

|
|
A new type of Panel Gauge
|
My joinery has improved by relying on gauged cut lines rather than using only a pencil line to give me
the accuracy needed in closing up my joints.
I decided to make my own panel gauge long enough to handle sheet goods and wide panels as well as
carcass layout. Most of the ones for sale in the catalogs are somewhat shorter than what I wanted.
I believe this gauge is an original design with a sliding wedge on a split rail, which allows quick movement
and precise tensioning while maintaining the guide to lock down squarely on the rail. It is also made of
Ipe. The guide is white oak with brass lined rabbit. "Hey this might be my next carving exercise", a
"rabbit shaped" guide. I got to have fun playing with my tools!
Also the tensioning screw is capped off with my characteristic woodpecker head carved from a piece of
maple. He keeps a close watch on all the action. Just for the fun of it.
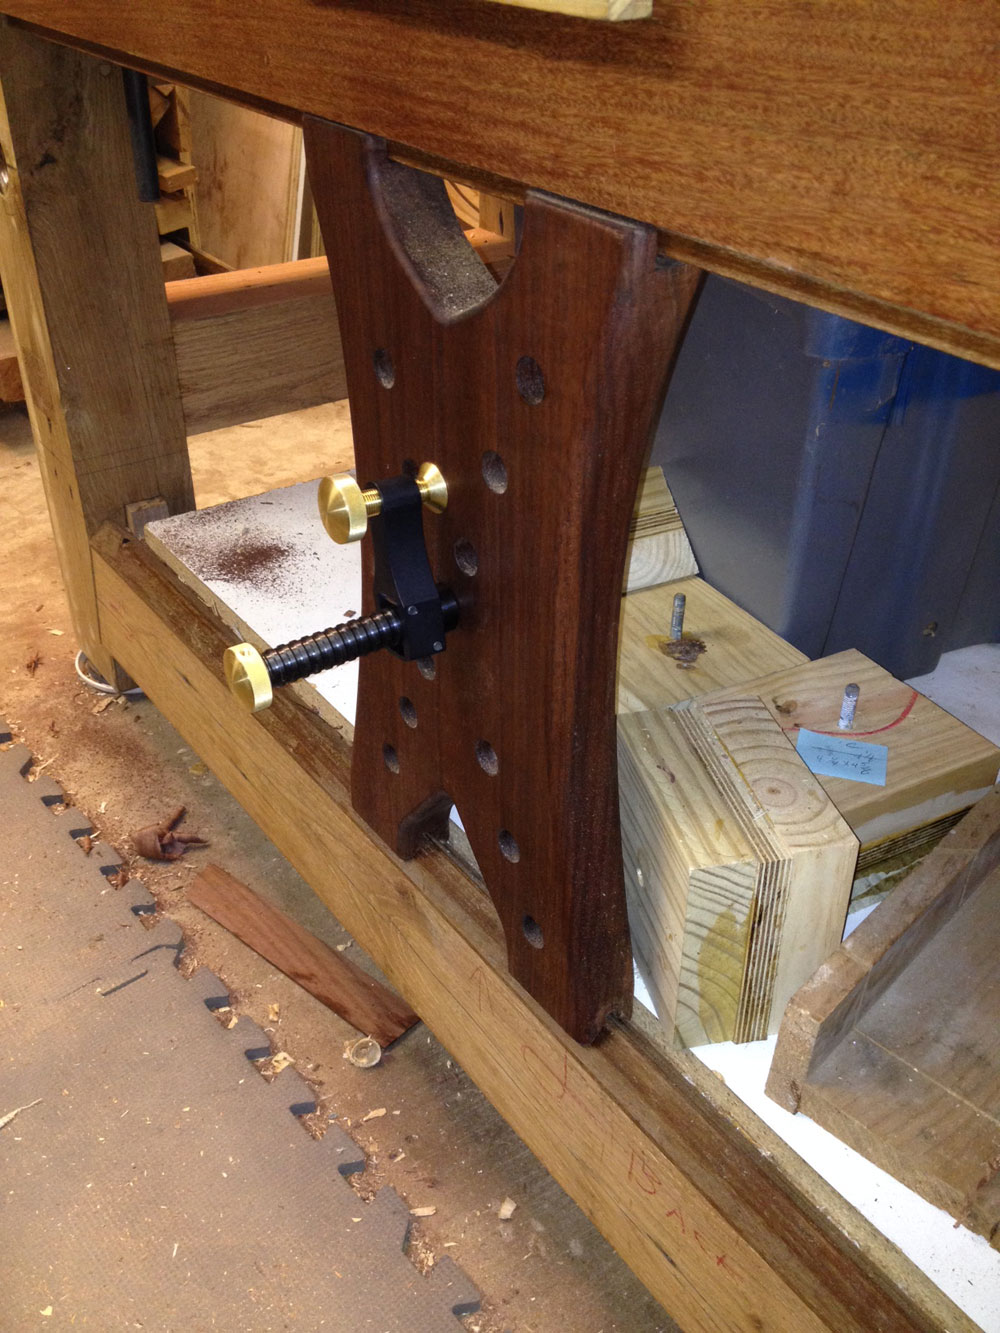
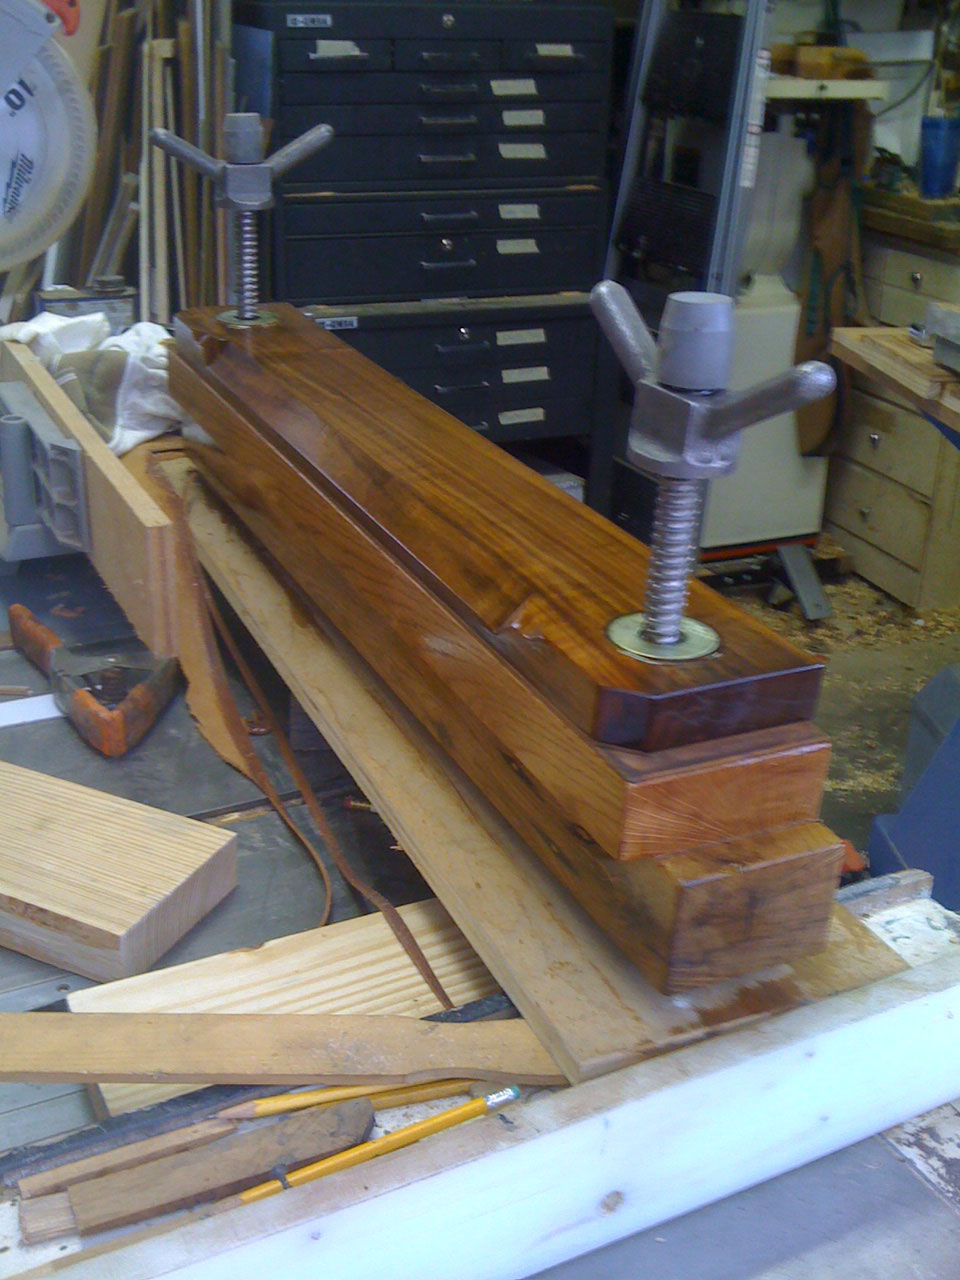
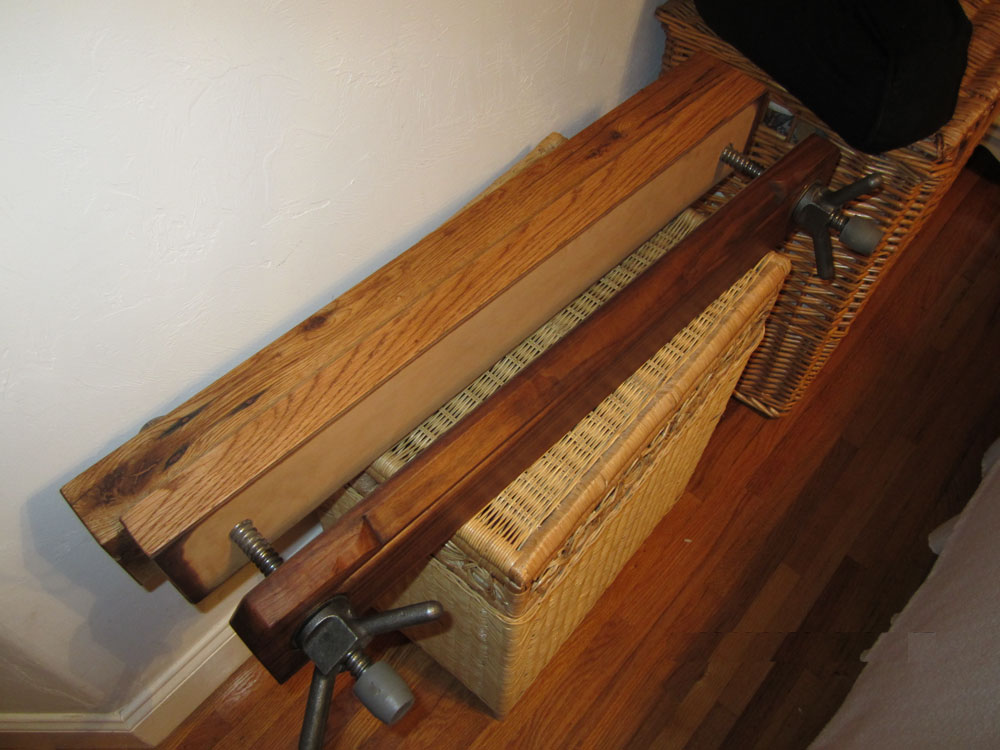
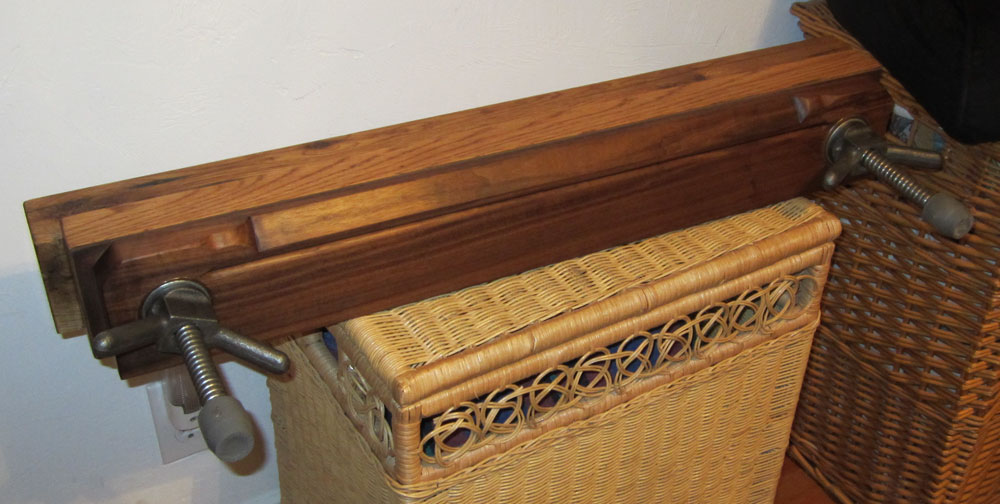
Moxon Vise
The ideal bench height for me is 30 inches based on the distance from my palm to the floor measured
according to the recommendations of one of my mentors, Chris Schwarz.
This is a good general working height for routine wood preparation, and for much of my work, but there
are times when a little extra height and wide stock clamping is necessary, and a moxon vise would be handy.
So this bench aid was next on my list after finishing my bench assembly.
My design is somewhat similar to many shown with a 24" spread between clamping rods.
The unique feature of mine is that I fabricated it from 5/8" 'coil threaded rod' from McMaster Carr.
This type of steel rod and mated wing nuts are widely used in the construction trade for heavy concrete
form work. It is a very tough coarse thread which is not affected by saw dust or debris caught in the speedy
action of working the wing nut in and out.
The base to this Moxon vise is a 4x4 recycled oak timber which was salvaged from ductile iron pipe
shipping cushion supports. These timbers are often used to support heavy cargo on truck beds. Note:
Most often these are discarded when off loaded with the cargo delivery or trashed after the items are
uncrated.
The vise chuck has a special history. It was a piece of salvaged floor board (2x6 black walnut) from an
old, turn of the century barn that was on my family's farm in Georgia. I had hung on to some of the boards
from it with the thought of someday I will make something special out of it. 50 years later. How time
does fly by.
CLICK HERE
to read Adrian's blog story on "Why did I need a 'Roubo Frame Saw'?".
Would you like to see your woodworking in this column? We invite you to
SEND US PHOTOS
of your favorite woodworking projects along with captions and a brief history of your woodworking.
(Email photos at 800x600 resolution.) Receive a $50 store gift card if we show your stuff in a future issue.
Return to
Wood News
front page