Economical Wood Choices for Boat Projects
by Bob Kinsman
Newport, RI
Click on any picture to see a larger version.
Those of us participating in woodworking as amateurs, hobbyists, or occasional handymen, typically have a list of projects that we would like to do, a list of projects that others would like us to do, and yet another list of projects that we simply must do. With so much to do in the shop, and so little of the structure that guides professionals, it is difficult to choose and complete projects with good economic inputs or results. Likewise, owning boats can be expensive on the best of days, and downright prohibitive when things go wrong. But with a bit of creativity, research, and adventure, an otherwise fiscally doomed shop project might produce good yield for the boat without stinging the wallet!
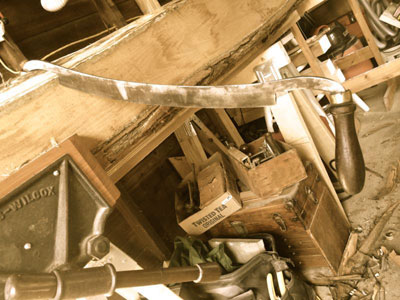
Last spring our boat, a generic 1986 J24 racing sloop, went into the shop. I dread the boat shop! A serious amount of cosmetic repair beyond my skill set has to be required before I'll submit my wallet to this sort of torture, and even then I won't do it willingly. This time it required the removal of the original teak toe rails on part of the boat. Removal of these strips of wood around the edge of the boat is a project I wouldn't pay minimum wage to complete, much less boat shop rates. Liberal amounts of 30-year-old 3M 5200 structural adhesive guarantee that toe rails will be reduced to glue-covered teak splinters. Which begs the question; where will I get a new wood toe rail to replace the one I just destroyed?
I started with the manufacturer: "Call for a quote for teak toe rails." Pass. They also offer "PVC Toe Rails," which are a bit more than a glorified bent PVC pipe bolted to the rail. PVC wrapped around the edge of the boat is quite a bit less tasteful, durable, or traditional than wood. The use of teak, the original material, could justify an article in environmental responsibility, and the raw material commands upwards of $30 per board foot for clear material. Considering the 9-foot length required for the longest toe rail, just the raw material is prohibitive. Other tropical hardwood choices are of equally dubious environmental consequences, and often just as expensive. From a bit over $400.00 for a full boat kit of PVC, to well over $1,000.00 retail for custom milled teak, I knew I would have to DIY my replacement.
|
Enter black locust. This legume, often derided online as difficult to work, sells at a fraction of the cost of teak and other popular "boat" woods. A boat wood in its own right, used by shipwrights extensively before the proliferation of iron, steel and fiberglass in boat building, black locust is hard, wear resistant, rot resistant, and proven in the marine environment. What's not to like? It's REALLY heavy, and finding clear, straight stock can require a serious amount of pile diving at the local lumberyard. It also has tannin in the fresh sawn lumber and dust that will turn your hands black, and sawing dust that will require the use of a full facemask respirator. Local purveyor of rough sawn and unusual timbers, Newport Nautical Timbers in Bristol, RI, helped me estimate my material needs and made the search for the right plank educational.

|
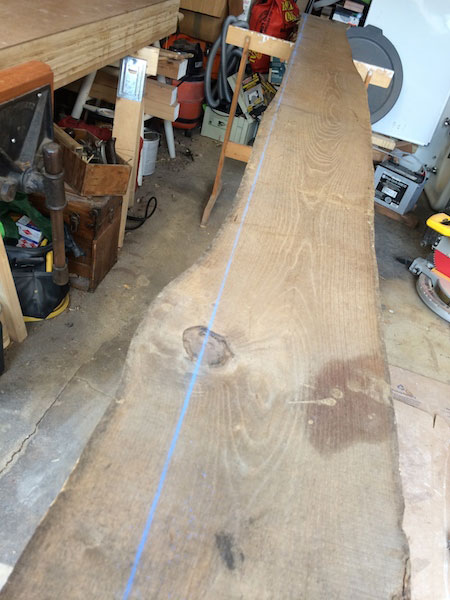
$45.00 later I had an impossibly heavy 8/4 plank of black locust back to my shop for preparation. The rough lumber is a dull yellow gray from the air-dried stack, with a coarse furry bark that a drawknife made quick work of. Then I used a chalk line and strong circular saw to start a square edge closely aligned with the straightest bit of grain, while minimizing losses along the live edge. My plank had thin sapwood, and a little variation to the live edge that had to be cut away to get into the area of the plank that would yield clear and uniform toe rails.
A safety note on black locust: this stuff is toxic, and a few web searches can yield a wealth of information. Noted rot resistance in direct burial, black locust is the original pressure treated fence post, landscape timber and railroad tie. It also has known toxicity to animals and livestock in wilted leaves, new shoots and inner bark, as well as some seriously bright yellow sawing dust. This isn't a species you want to bring into your shop without personal eye, ear, and respiratory protection. I was sure to use a full-face respirator from 3M any time I was milling or cleaning up after milling, in an attempt to minimize my levels of acute exposure. On another note, my equipment, techniques, and setups do not reflect optimum dust collection or best table saw practices. Readers should comply with and use the manual and the safety features of their own tools to avoid death or dismemberment.
|
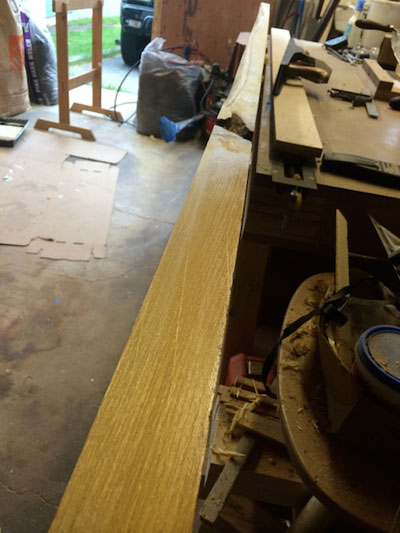
Back to the work, a jack plane and no. 7 jointer finished what the circular saw started in cleaning up and squaring a working edge for the table saw. Because of the weight and length of the plank I didn't trust my 6" Jet jointer to generate a clean edge, so the only way to get it done was by hand! A sawhorse provided additional support of the long heavy plank off the end of my six foot bench. The clean edge revealed a golden yellow color of the fresh cut lumber, with a close, tight grain structure.
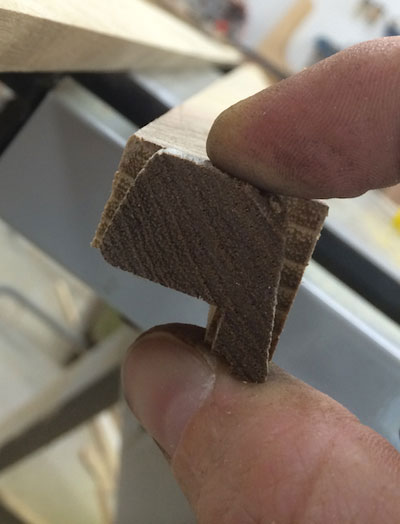
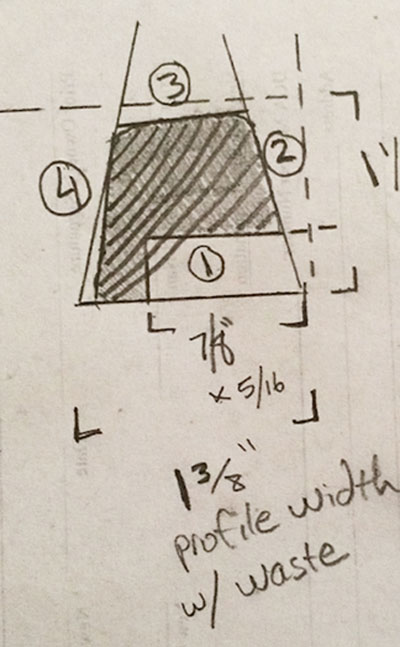
So with a straight edge and a flat plank, away to the graph paper I went. With a plank this heavy, and a desired finish profile that could fit within a 1"x 1.5" rectangle, the table saw could cause a lot of damage and waste quickly without a planned series of cuts. Each toe rail has a cross section like a flat-topped pyramid, with a rabbit in the wider base. I kept some of the broken teak toe rail, and cut out a few cross sections to use as a reference model. This time spent considering the target shape, determining the angles, and taking measurements was invaluable for the end result.
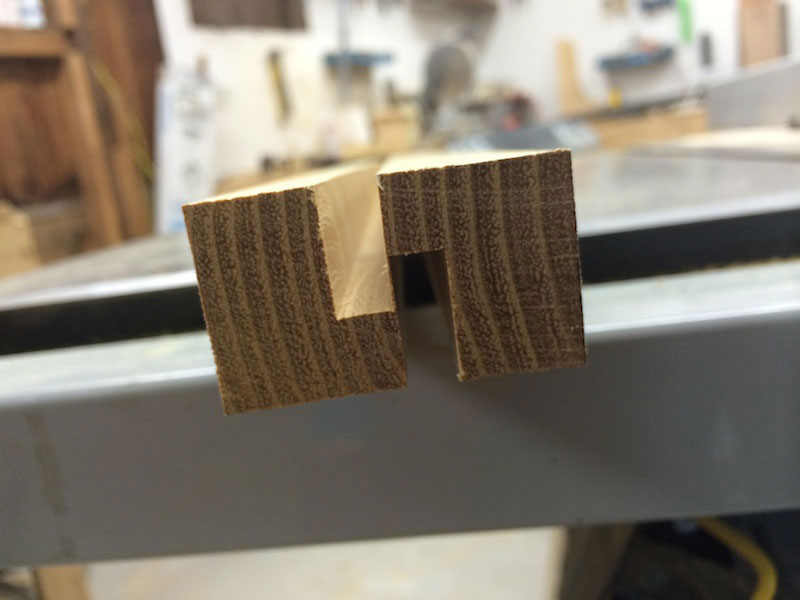
Economics of material use, including my time, dictates that I'm not going to straighten and square this beastly chunk of wood to cut a single strip toe rail. I also wanted to minimize my adjustments to the table saw between each cut, including dado blade setups. By first ripping oversized strips, then milling offset dadoes from opposite sides of each strip, I was going to be looking at an entire boat of toe rails from my single plank. This initial planning also allowed me to rip the larger plank down a bit, so had a slightly lighter, rectangular rough plank to work with on the table saw.
|
|

|
After ripping the blanks and cutting grooves in each strip, I could peel the two sections apart and clean up the inside edges with a small block plane. I was careful here because with this wood the splinters are STRONG and hurt! These first few milling steps yielded 7 full-length toe rail blanks and an extra shorter length, which is more than enough for the whole boat. Each oversized, blocky blank was then cut with the two side angles before easing the top edges with a moderate round over on the router table. Because all of these parts are the same, I was able to minimize my tool setup efforts and make all of my cuts uniform in the least amount of time.
With relatively clean toe rails, my table saw work was finished. A bit of sanding took down any rough surfaces and tool marks. The sanding gave me a sense for how durable black locust is. This stuff burns up sand paper quickly, so I have no doubt it will hold up for years under hard use on the boat!
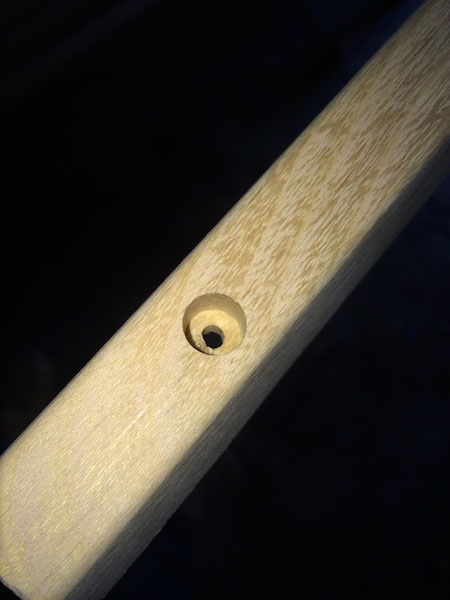
Preparing the new rails for installation took me on a new adventure with another machine shop tool, the drill press. If you have a large number of counter-bored holes to drill in a series of parts, drilling by hand can't compete! After a bit of math and layout, I started with a forstner bit sized to match my tapered plug cutter. The depth stop ensured consistency and a fence allowed me to slide the toe rails along the drill bit from mark to mark efficiently. After all the counter bores were cut, a simple bit change allowed me to drill the clearance holes centered using the same setup. This close up shows the blonde/yellow color of the freshly sanded rails, as well as the cross-linked grain structure.

|
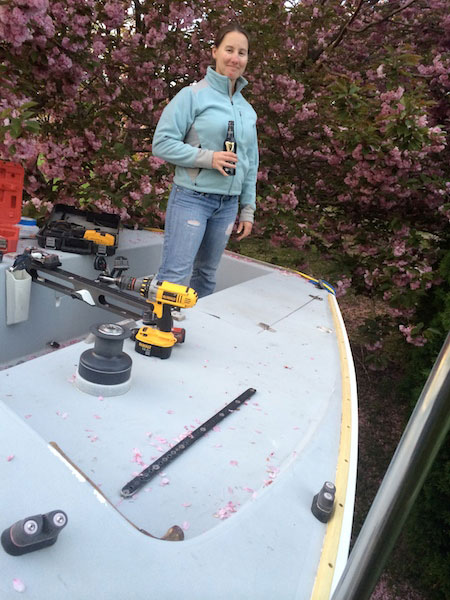
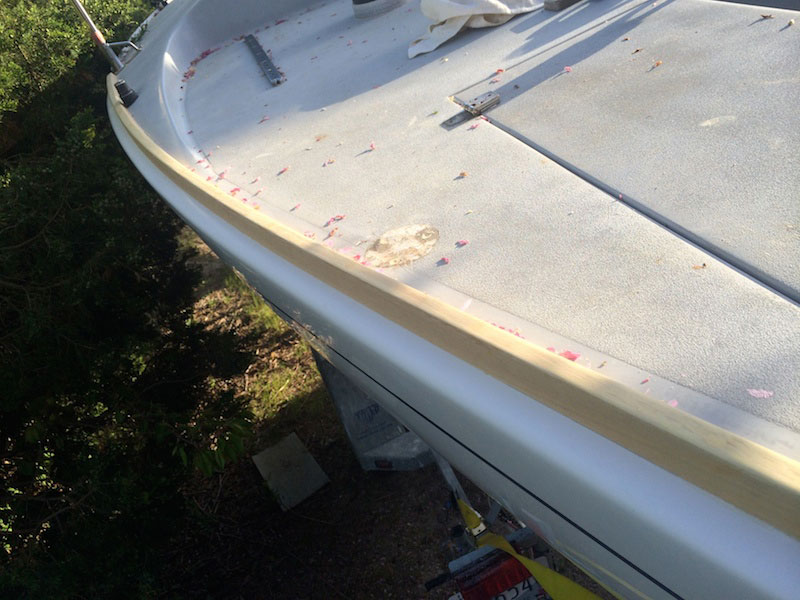
Installation of toe rails steps a little outside the realm of woodworking, but allows me an opportunity to thank my wife, who graciously supported the time and effort needed for the project. She also assisted with the installation of the new toe rails, which required at least a 3rd hand. Here you can see that the finished rails are flexible enough to be bent to the curved edge of the boat, and held in place by round head stainless machine screws tapped into the fiberglass before bungs are added.
After bungs were glued in, a finish sanding yielded an excellent result. With my experience now over a season later, this bright yellow quickly oxidizes to a medium red brown, not unlike fresh teak, and untreated will gray to match teak very closely. When cleaned and oiled, the new rail is a gorgeous red and trumps any product I could afford to buy.

|
|
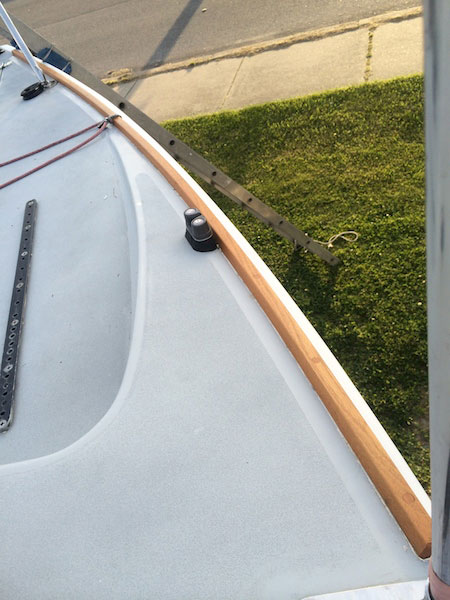
The same rail, weathered a few months, cleaned and oiled.
|
When you go into your shop, or go sailing on your boat, we can all appreciate when it makes more sense to pay a professional for professional results. But with access to a reasonable suite of standard shop tools, we can (on occasion) make good on opportunities to avoid being the consumer, explore a new material, and develop our skill set. Sometimes we'll even find a bit of pride in the results!
If you have any questions or comments, feel free to email me at
bob.kinsman@gmail.com
Return to
Wood News
front page