Repurposing a Hock Spokeshave Blade
by Lee Laird
Click on any picture to see a larger version.
During my musical instrument builds, I've had a couple of recurring problematic areas where I'd wished I had a tool that was better suited to handle the issue. Those that don't know me might misunderstand and believe the main issue is that I just don't have enough tools to handle the work. Sheepishly I must admit I'm a bit of a tool nut, and those that know me would likely be rolling on the floor laughing at any suggestion that I have too few tools. I've been amassing tools for more than 30 years and I have tools for just about anything, but even with the volume I own there are situations that call for something out of the norm.
The problem areas which I've referenced above are really few in the grand scheme of making instruments, but don't really lend themselves to most of my tools. The small curved area, at the base of the headstock on the instruments, where the headstock blends back into the neck is a good example. Actually, any area on the instruments where there is a fairly tight concave radius, as in the example I mentioned, can be an issue.
These problematic areas are much tighter than any of my planes can handle, which led me to trying to find a spokeshave that might work. I own almost 10 different styles of spokeshaves of differing sizes, and just under half of those have radiused soles to handle some level of concave curves. None of my spokeshaves were really even close to handling the problem areas, including my curved sole version from Lie-Nielsen, and even some very small shaves where I've modified their sole specifically in hopes of making them work in the required curves.
With the lack of success with the spokeshaves, it felt like the only way I'd be able to handle these curves would be to either use a scraper, small rasps/files, or sandpaper on a dowel or other radiused scaffolding. None of these are terrible solutions, but I truly wanted to find a tool that I could use to make a controlled cut of the fibers, providing the best feel on these areas. (I realize the scraper does this on some level, but it doesn't leave the surface I would prefer).
Having just purchased a
Galbert Drawsharp, I have found the ease at which it produces such a super sharp drawknife. This has really opened my eyes to a different potential solution for these small areas. While working on a side project the other day, I was using my wooden-bodied spokeshave and it was starting to feel like it was ready for a hone. When I took the shave apart, a little light bulb must have shown over my head since I felt like I may just have found a solution.
After taking the spokeshave apart I was looking at the Hock blade and realized how much similarity there is between the blade and a drawknife. Sure, this style blade has two threaded posts sticking out of it at right angles to its face that attach it to a wooden frame, but the basic concept of the blade is ultimately the same. I just received a birthday gift from my mother, who had ordered me one of the
Large Hock Tools blades
for a wooden spokeshave body, which I planned to use in this project. Rather than making another spokeshave body I intended to make two handles to ultimately convert the intended use of this blade.
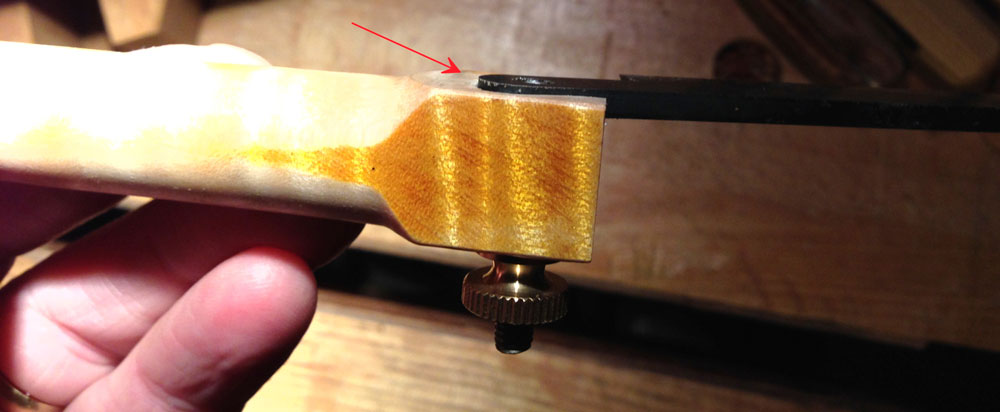
I found a decent sized blank of curly maple that I had earlier used to test some dye colors when I was preparing to finish the Les Paul guitar I built. The blank was of an adequate size that I could cut into two handles. The maple was around 10" long or so, and just a bit under an inch square in thickness. After cutting it into my two handle pieces I started the layout process, beginning by drilling a hole through the blanks towards the ends. I drilled these two holes so they were just large enough for the threaded posts that attach to the blade. I attached the blade to the handles, cinching up the two thumbnuts enough so the blade and handles weren't able to spin freely. While the thumbnuts felt as if they could easily provide enough grip to keep the handles and blade together, and even use the tool in the manner, I decided against using it like this. Instead, I wanted to find a handle orientation that felt comfortable to me, and then remove the wood where the ends of the blade would sit so the blade was held down flush (or at least close to flush) in its pocket. After finding the handle angle that felt good, snugging the thumbnuts down tight made it much easier to hold the blade and handles so they didn't move, while I carefully scored a line around each end of the blade. Using my
Glen-Drake Tite-Mark Marking Gauge, I set it to the thickness of the blade, locked it down, and then used it to make a mark on the end of the blanks. This was my target depth for the wood evacuation. Speaking of the marking gauge, this tool is just so easy to dial in a perfectly matching dimension from a target piece.
|
|
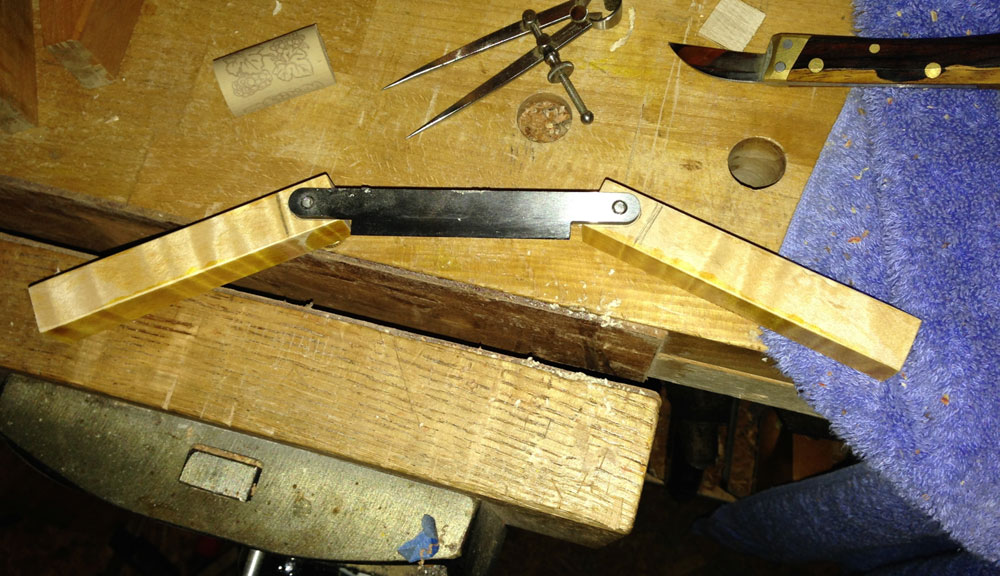
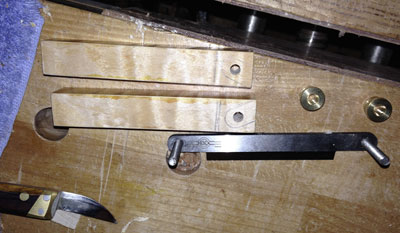
The handles are still in square form. I've marked around
the blade and drawn my "stop-cutting" line for turning
|

|
|
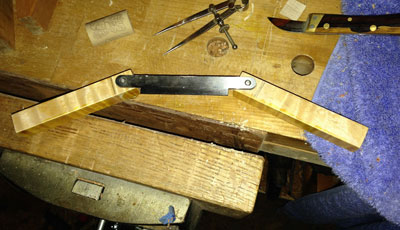
drawknife flipped over to see the
thumbnuts doing their job
|
|
|
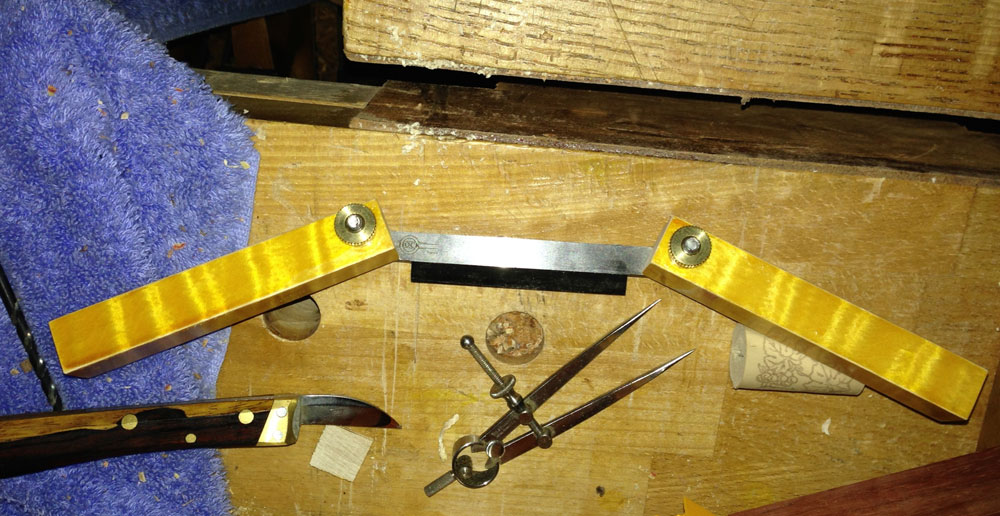
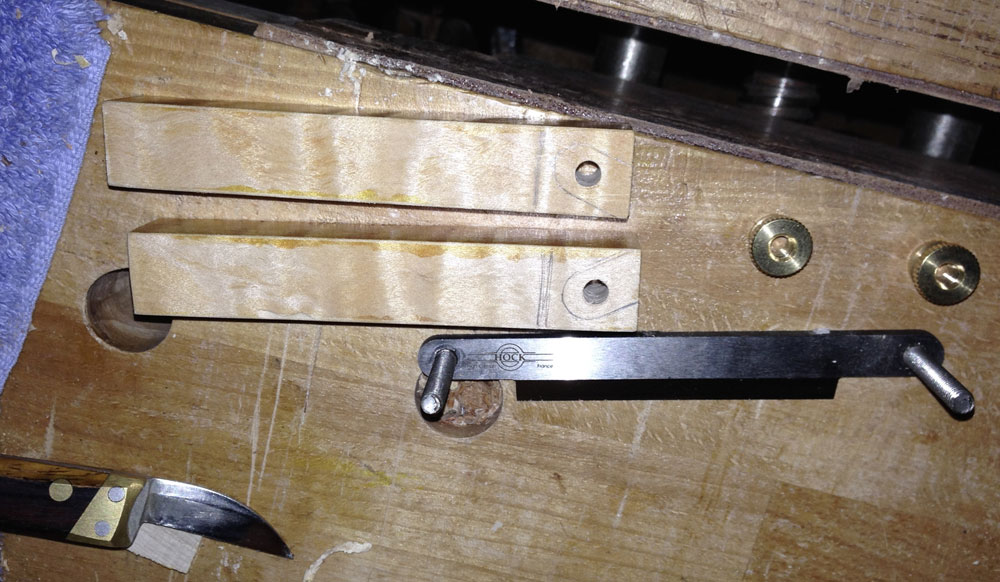
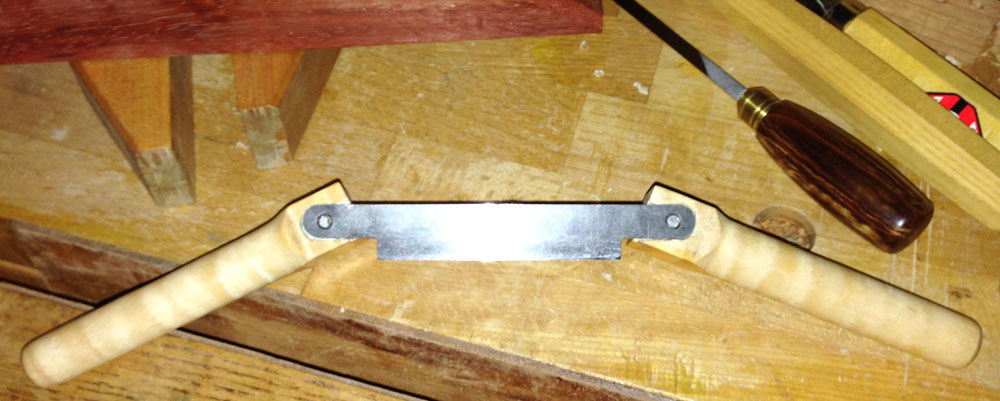
The parts for the drawknife are laid on my bench
|
When all of the layout was complete, it was on to the lathe since I wanted to turn the handles so they are mostly cylindrical. Some may prefer to leave the handles in block form, while creating the recess for the blade, but I'll explain later why this wasn't important to me. Before starting the lathe I marked a line across the blank a little less than 1/4" away from my earlier layout lines so I could see where to stop using my turning tools. I wanted the section of the handle where the blade attaches to stay in its square form.

|
|
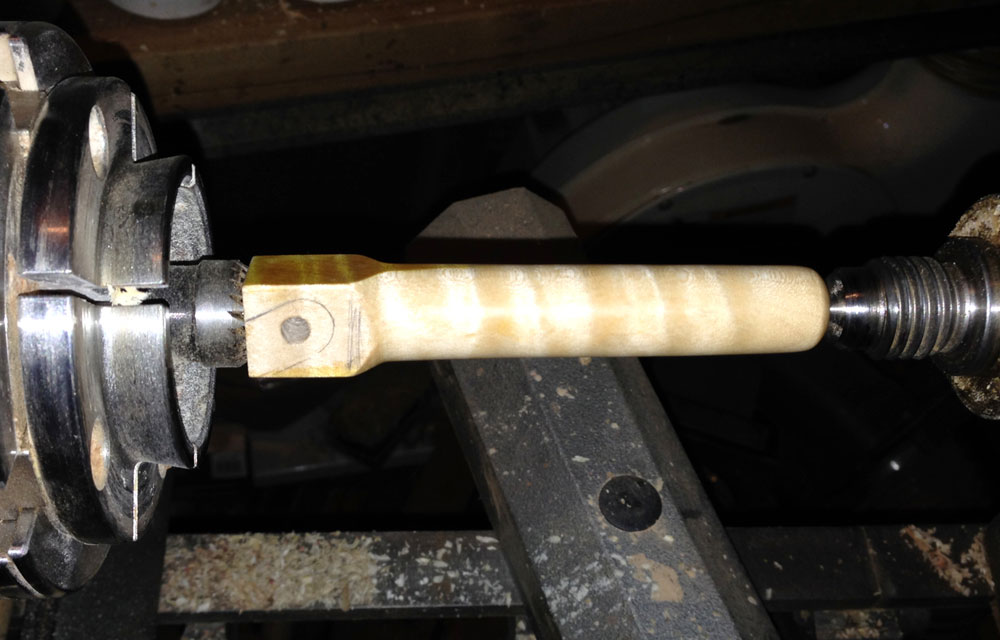
Handle on the lathe, turned to shape, showing the layout
|
During my turning, I slightly strayed from my original planned stopping mark. I had lightly turned all of the corners off with my roughing gouge, knowing it wouldn't get close to my central layout area. So in a few minutes I had both of the handles turned to shape.
I sanded to 800 grit, applied a couple of coats of Danish Oil and then applied some fine wax. The wax application is something I prefer to do while it is still on the lathe, so I can burnish the surface when removing the dry wax. It leaves a wonderful surface.
That's all for the lathe and it is back to evacuating some wood.
Instead of clamping each handle to the bench, which is what I might have thought about doing if I was removing the wood from the recesses while the handles were still in a square form, I instead clamped each one into my front vise. I have leather lining on both the moving jaw and its mate, which holds the wood very securely while also preventing any marring of my work. When clamping the turned handles, the vise was really only gripping the end that was still in square form, but even that was sufficient as I didn't need to apply huge pressure to the handle. I again used my marking knife to retrace the lines I had earlier laid out. I did this to deepen the lines so the fibers would easily release when I pared up to the line with my chisel.

|
|
Turned handle in the front vise, while deepening lines
|
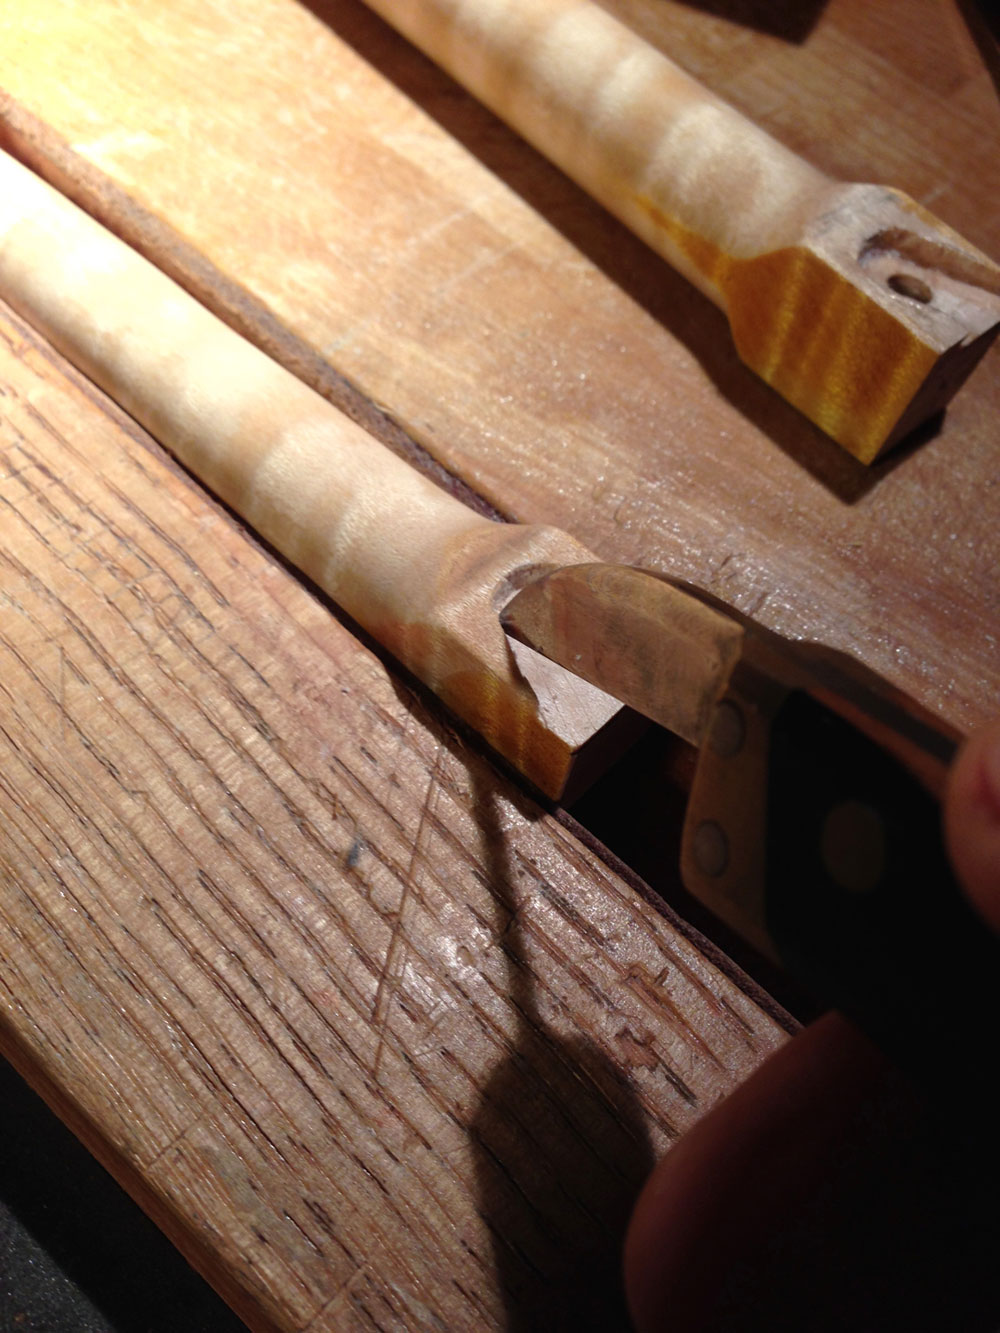
After a few passes with the knife, I used my small dovetail chisel from Czeck Edge Hand Tools to remove a small angled section against my lines, just on the waste side. This lessened the chance I would accidentally chisel outside my line. From here it was mainly a matter of gradually lowering the background, where the end of the blade would sit, and keeping it level for the best support.
|
|
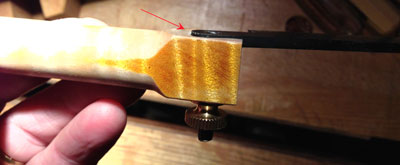
Blade seated in handles, but not yet at full depth
|

|
|
Background lowered, but again deepening the lines around
the perimeter to bring it down to full depth
|

|
|
Paring out waste wood from the background
|
When I got close to my depth mark I re-installed the blade and applied some pressure with the thumbnuts. I looked for space between the blade and the handle, which would indicate at least one section was still higher than the rest of the background. If I couldn't tell from what I was seeing, it is easy to apply some marker to the backside of the blade and then seat it with some pressure. Remove the blade and see if all of the background has ink on it. If it isn't fully covered, but there is ink in a couple of areas, then those are the high sections. Remove only the inked area leaving the other sections of wood alone, and repeat until the blade transfers ink to all of the background. On a small project like this, it's likely you would only need a couple of passes with the ink to have your background level.

|
|
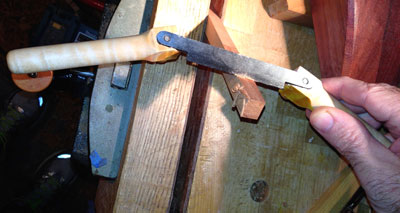
Final drawknife
|
After working both handles so they equally fit their end of the blade it was time to give the new drawknife a try. I had a small section of mahogany that was a cut-off from an earlier guitar build that I held in my face vise. The new drawknife worked great. With a smaller tool like this, my main interest was its ability to take a light controlled cut and work inside a small radius, as I have other tools in the kit that can hog off wood when that's necessary.
|
|
Testing the new drawknife on some scrap mahogany.
Working great!
|
Even with me "re-purposing" this blade, there is no reason why it couldn't also have its own wooden spokeshave body, as it only takes a moment to remove from the handles or body and reinstall in the other. Along with this you could also have a couple of different sets of handles, which you could swap depending on how much room you had to work, or if you just wanted to change your grip or feel.
The
Hock blade
was extremely sharp directly out of the packaging, and with a very light hone it cuts like a dream. You won't be disappointed using this blade in either the intended spokeshave or as a light drawknife.
I hope you enjoyed reading this article. Please let me know if you have any comments or questions. Until next time…
Lee Laird has enjoyed woodworking for over 20 years. He is retired from the U.S.P.S. and
works for
Lie-Nielsen Toolworks as a show staff member, demonstrating tools and training customers.
You
can email him at
lee@lie-nielsen.com.
Return to the
March 2015 Highland Woodturner
front page
Return to the
February 2015 Wood News
front page