Designing and Making a Bench
by Rod Scott
Hayden, ID
Click on any picture to see a larger version.
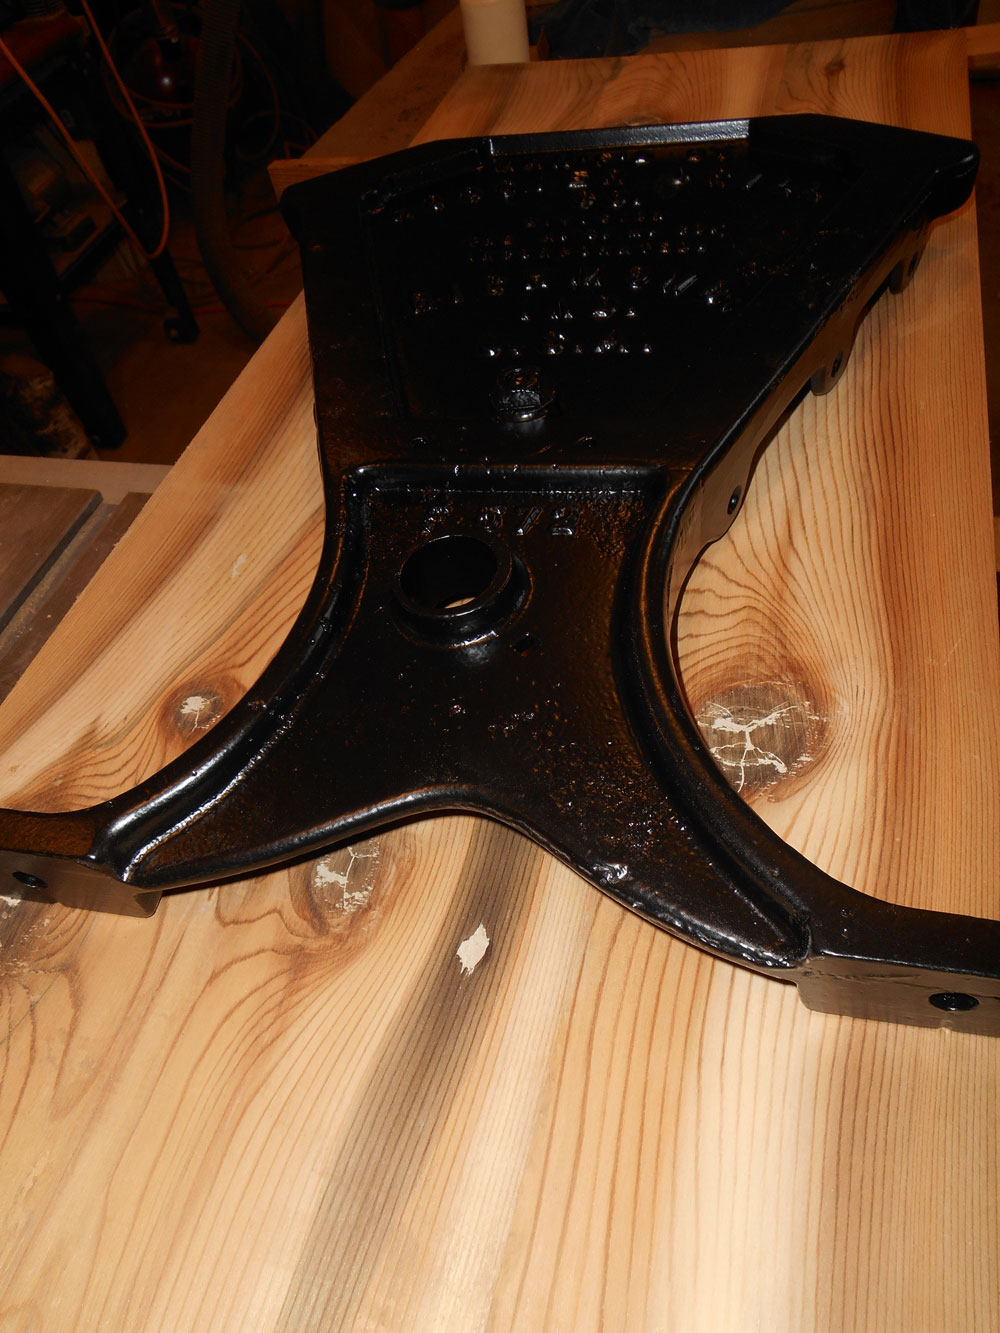
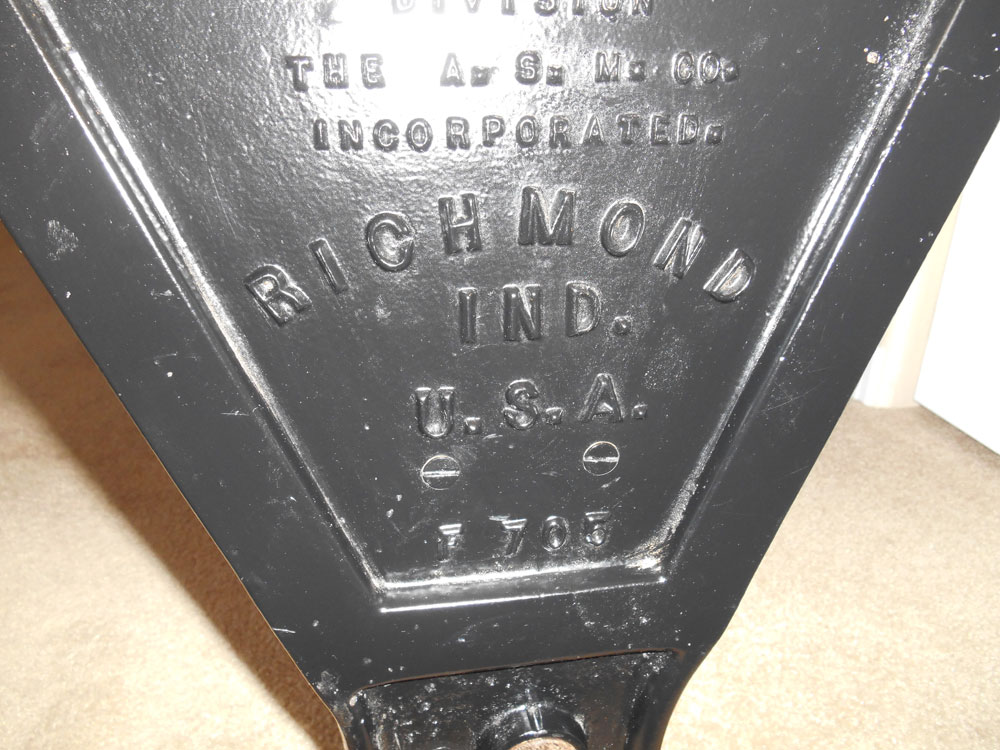
Last year one of my nephews purchased a rural property in Northern Idaho and built a home for his family. The property had been a homestead dating back to the early 20th century. Among other things, it contained an old barn and several antique pieces of farm machinery. One of these pieces was a seed drill made mostly of wood, but which contained two cast iron end pieces. Ironically, the drill had been manufactured in Richmond, Indiana, near where his wife grew up. He asked me, as a surprise for her, to make a bench using these castings as legs.
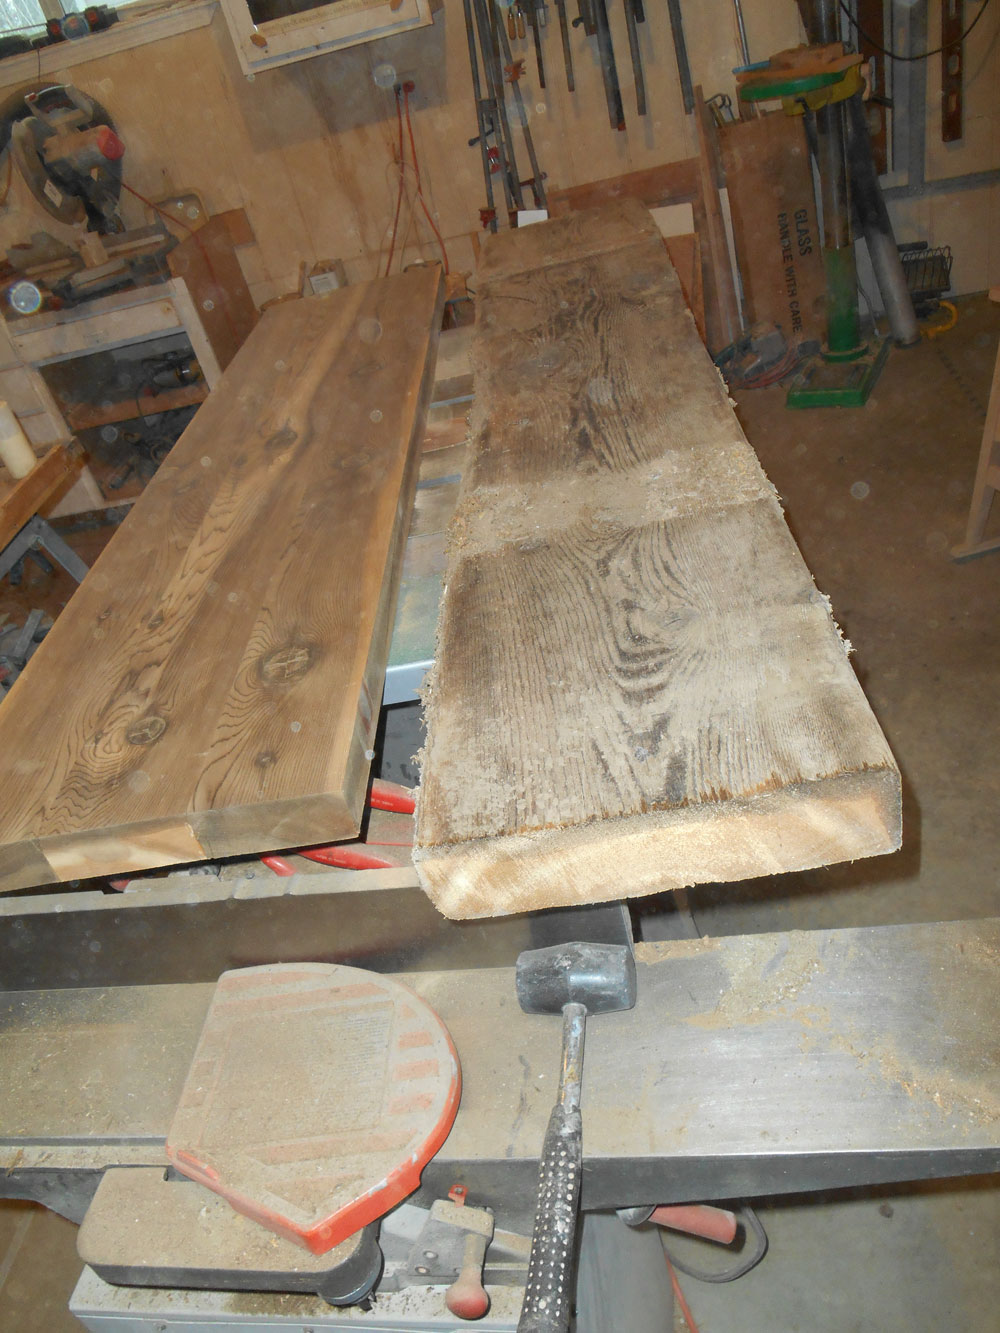
Our first design challenge was choosing the material to use for the top and stretchers. We decided to use barn planks that were available on the property. These planks were 3 by 12, rough sawn and weathered. I could not identify the species immediately but speculated they were either white or ponderosa pine as these are predominate species for the area. He brought me three pieces of a single plank that were 60+ inches in length.
Because my jointer could not handle 12 inch planks, my first milling process was to rip the planks into 6 inch widths. During this process I discovered the wood was actually Western cedar. The plank had survived approximately 100 years since being milled and we estimated the tree it came from was at least 100 years old when it was felled.
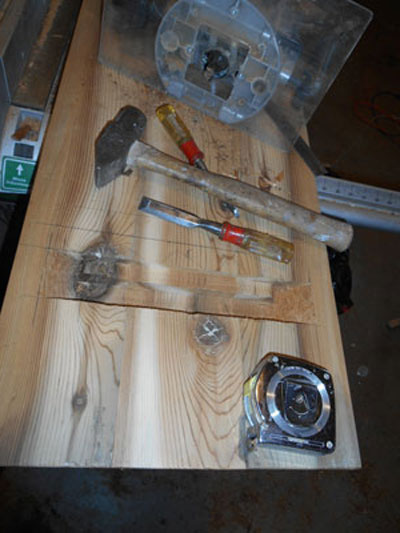
I then went through the typical process of jointing one face and one edge of the nine pieces that resulted. The three most figured pieces were chosen for the top and planed to approximately 1-7/8 inch thick. These three pieces were glued together to form the top. Three additional pieces, the stretcher and two knee braces were milled. Our next design challenge was to decide which surface of the top to use as the "show" face. Because the plank had lain on the ground through many years of weather, one surface showed a distinct black stained color while the other was a typical red cedar color. We agreed to use the blackened surface for its character and to preserve its history.
|
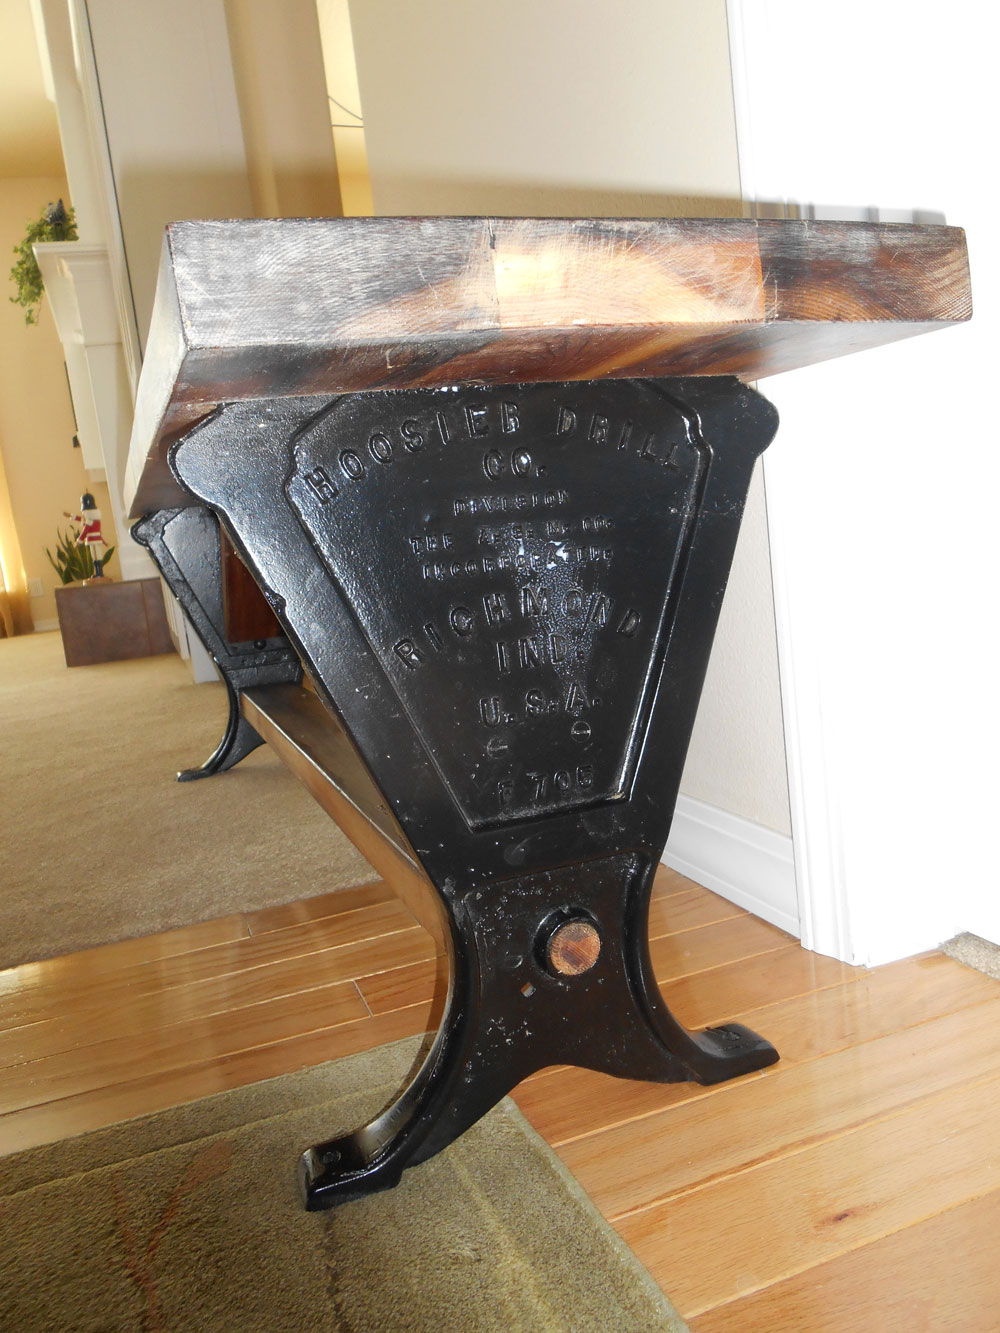
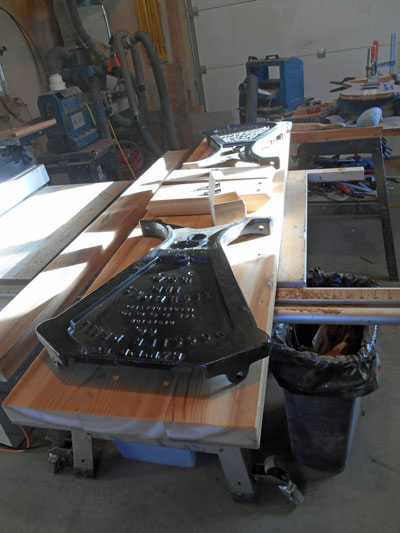
While I was milling the wood parts, the castings were delivered to a powder coater for sand blasting and painting. The castings and screw fasteners were coated with a matte black finish. When the coated pieces were returned I faced two design problems: how to mount the stretcher and how to install the knee braces for maximum stability. I chose to mount the stretcher using two existing holes in the cast iron. I drilled a 1 ½ inch hole in both ends of the stretcher and turned a wood 1-1/2 inch dowel that would extend through the casting and into the stretcher. Finally, a hole was drilled in the casting to allow a mounting screw that would keep the stretcher from rotating in the casting holes. After the knee brace pieces were cut to the correct length and angle, I added shallow mortises to the underside of the top to contain them. This reduced the shear on the screws that attach them to the top. The other ends were attached with screws through holes drilled in the castings.
|
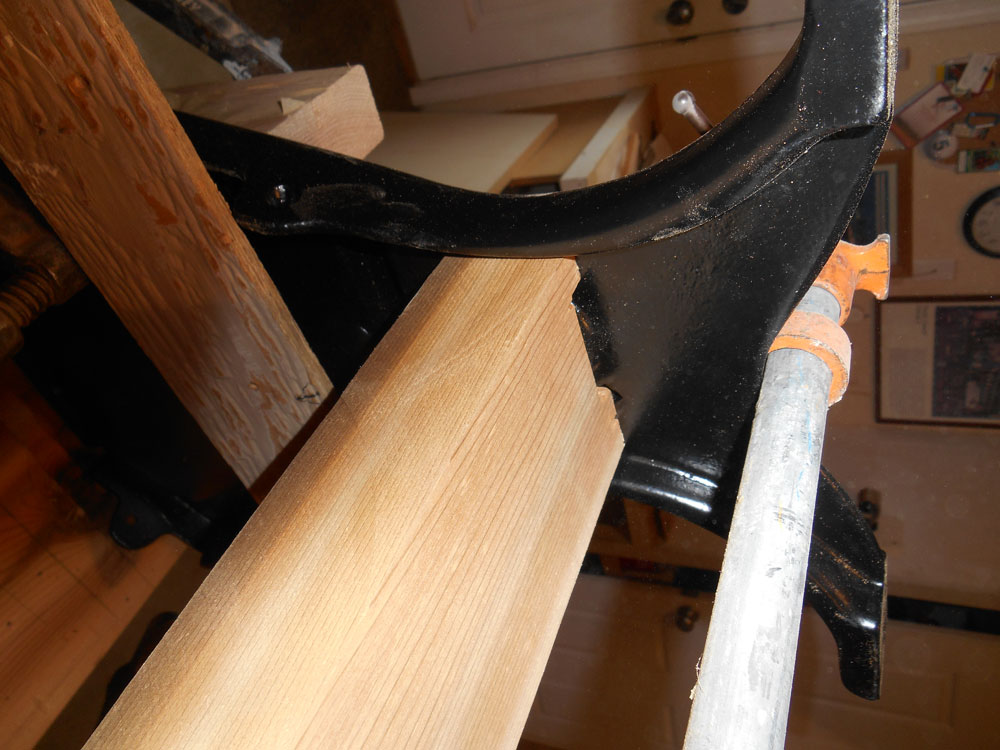
Attaching the top caused another design problem. The castings were tall enough that combined with the thickness of the top the bench would have been too high. As a solution, I cut mortises in the underside of the top to contain the castings and provide a mounting surface. The mounting screws were inserted through the castings at an angle into the top.
All the mounting screws were 2 inch #14 wood screws and as they were power-coated, great care had to be taken to avoid marring their finish. Because the stretcher, with its extensions, was longer than the space between the castings, the castings had to be loosely fitted and the stretcher installed prior to tightening all the fasteners. When all the parts were completely attached, I discovered the bench did not sit flat on a floor surface. To correct this I used a belt sander with carbide paper to ground the feet flat and in a single plane with each other.

|
Finally, we needed a proper finish for the wood parts. We chose an oil and wax finish as it would be more appropriate than a more formal sprayed on lacquer. Two coats of
tung oil
were applied and polished with #0000 steel wool. The oil gave the cedar a more golden color and brought out the black stains. After the oil dried, two coats of paste wax were applied and polished with steel wool. Finally, felt patches were glued to the bottom of the feet to protect floor surfaces.
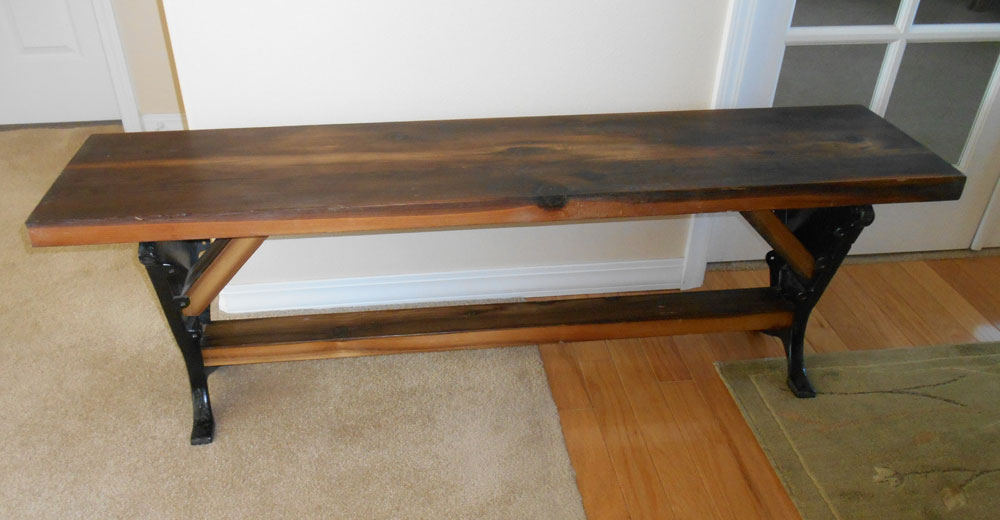
The finished bench will provide a statement piece for the new house and become a conversation item for future years. Not many homes have a piece of furniture made from a 100 year old antique cast iron casting and a 100+ year old wood plank salvaged from the home site. Welcome home!
You can email Rod at
dyle.scott@yahoo.com
.
Return to
Wood News
front page