by Steven D. Johnson
Racine, Wisconsin
(Page 2 of 2)
Previous Page
1
2
Construction of the 5S Shop Wall Cabinets (Part 1)
The 5S Compliant Shop Cabinet design can be easily built any width, height, or (most importantly) depth needed in your shop.
The videos
go through all the steps in detail and the following instructions include tips, formulas, and adjustments you can make for the cabinets to fit your needs perfectly.
Some things will be the same no matter what size cabinets you make. Hardwood stock for the face frame, inside infrastructure pieces, shelves, and other trim should be 3/4" thick stock. Mill it yourself or buy it in the store. The widest pieces will be 2-1/2". This allows you to purchase S4S (surfaced 4 sides) 1 X 6 stock (actually 3/4" X 5-1/2") and get two pieces from every board.
The plywood sides (parts A & B) and top and bottom pieces (parts C & D) will be "nominal" 3/4" stock, which means it really will measure something like 11/16" to 23/32" thick. We will adjust for those variations as we go along. We will also use 1/4" (nominal) plywood for the back. The same thing applies here… it is not really 1/4" but something less… sometimes markedly less.
As far as wood types, whatever suits your fancy or shop decor. In plywood, you should be able to find birch, maple, and oak faced so-called furniture-grade plywood almost anywhere. At a specialty retailer or lumberyard you might be able to find cherry or other species. Or go all-out and get Baltic birch plywood. As far as the hardwood infrastructure and face frame parts, use what you have or can get easily. Poplar is relatively inexpensive and looks pretty good with birch plywood. Lower grades of maple (like I used) are fairly inexpensive right now. Oak is always a good choice. Again, just pick what looks good with the plywood you will be using.
Blum 33 compact hinges are used throughout. The plastic for the door fronts can be bought locally and cut to size, or you can order the panels precut to exact size like I did. Hardware is up to your imagination… make something yourself to show off your skills or buy something… just remember to keep the lines relatively simple so that the handles and knobs are easy to clean. If you are a true "5S Fanatic" you may opt for low profile hardware to save space, or do what I did and go "sans hardware."
The wall cabinets are designed to be hung on French cleats, but you could adapt them to other mounting systems or simply screw them to the wall. I recommend the French cleat system, however, so that your cabinets can be easily moved as your shop arrangement and needs change… this is a key component of 5S. I generally use oak for the wall part of the French cleat system, simply because 1 X 4 (3/4" X 3-1/2") stock is readily available, it is fairly easy to find straight-grained stock, and it is plenty strong to hold a heavy cabinet. Since in this design the French cleat shows in the back of the cabinet, you may want to use stock that matches what you are using throughout the rest of the cabinet. Just remember to buy (or make) some 3/4" X 3-1/2" stock for the wall pieces.
Determine the outside height and width of the cabinet you wish to build. Then use the method described in
last month's article
to determine the interior depth. The interior depth plus 1-1/2" will equal the overall depth of the cabinet (from the wall to the outside face of the door). Using 3/4" stock, here are the formulas that you will need:
-
The length of side pieces A & B will equal the overall height of the cabinet.
-
The length of top and bottom pieces C & D will equal the overall width of the cabinet box minus 1".
-
Width of pieces A, B, C, & D will equal the overall cabinet depth, measured from the wall to the front face of the door, minus 1-1/2". Or, to make it super simple, the width of these pieces will be equal to the interior depth of the cabinet you are shooting for.
-
The length of the upper and lower infrastructure support pieces will be equal to the cabinet box width.
Start your project by cutting 3/4" hardwood stock to 2-1/2" wide. Some of this will get cut down to a smaller size later for the face frames. You may want to do a little sorting now and save the best looking pieces for this.

|
|
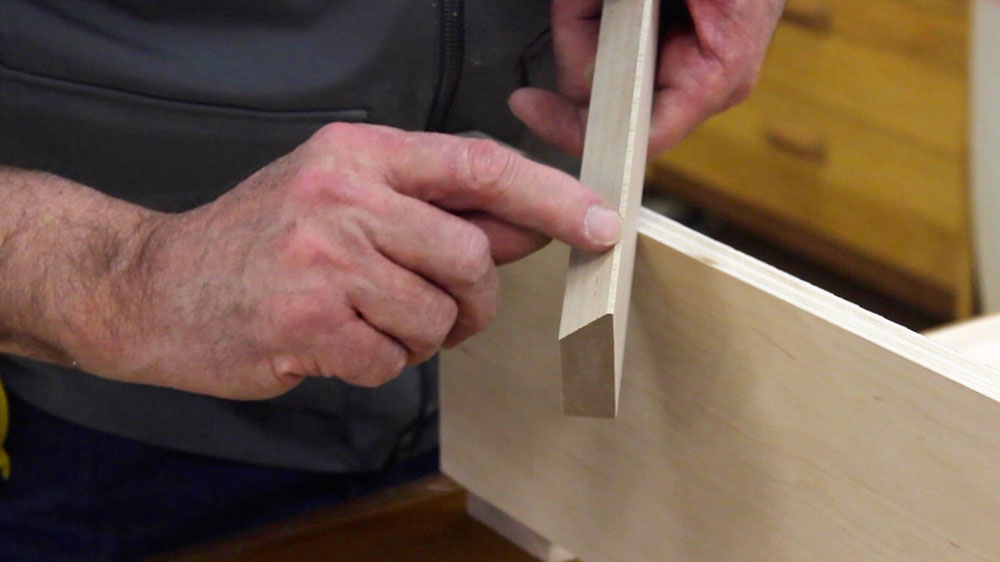
Figure 12 - Cut off "most" of the corner and leave a 1/8" flat
|
Next, cut the wall part of the French cleat from some 3-1/2" wide stock. Cut a 45-degree angle in such a way that you are cutting off a small triangular piece and leaving a small (1/8" wide) flat on the point of the 45
(see the video for details)
. Hint: When you have this 45-degree cut "just right" the board will still measure 3-1/2" wide.
Mount this French cleat to the wall. Be sure to use a level and make sure the mounting screws are going straight into studs. Mount the French cleats at any height you like, but I generally find that if the bottom of the board is at 69 inches, the height of the cabinets will be "about right."
While the table saw is set to make 45-degree cuts, cut enough of your 2-1/2" wide X 3/4" thick stock to make the upper French cleat infrastructure support pieces for all the cabinets you will be building. Hint: When you have this 45-degree cut "just right" the board will still measure 2-1/2" wide.
Set the table saw back to a perfect 90-degree angle and cut the plywood sides, tops, and bottoms to size. Either at the table saw or miter saw cut all the pieces, including the infrastructure support pieces, to length. Mock up each cabinet and label the parts. Make sure to orient the best faces of the plywood correctly. What is the correct orientation? When the cabinet is open, the top of the bottom piece (D) will show, as will the bottom of the top piece (C). The inside faces of both side pieces (A & B) will also show. Don't worry too much about the outside plywood faces on the cabinet sides. Adjoining cabinets will conceal these surfaces and any cabinet on the end of a run can get a decorative face added later.
With all the parts labeled (chalk, please) it is time to cut the notches in pieces A & B. Both notches start at roughly 3/4" from the end of the board. I say "roughly" because the distance is determined by the thickness of the plywood you are using. In other words, if your plywood is 23/32" thick, that's where the notch starts. The upper notch is 6-1/4" long. The lower notch matches the width of the lower infrastructure support piece, or 2-1/2".
I used a dado stack in the table saw to cut the notches. A handheld router, a router table, band saw, jigsaw, or handsaw will also work.
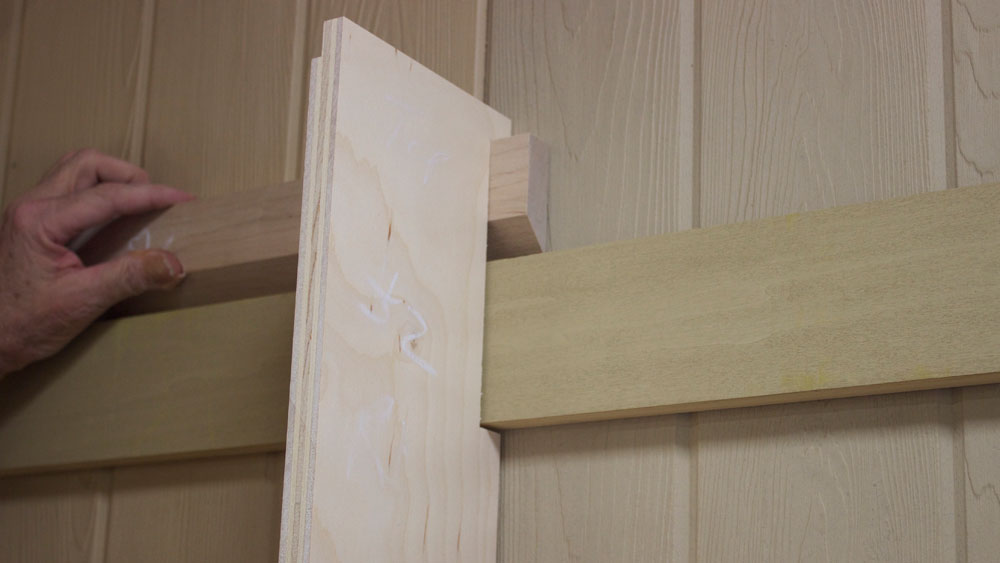
To double check your progress, hold a side piece with the top infrastructure support piece in position at the top of the notch and try to slip the side piece over the French cleat you attached to the wall earlier… there should be just enough space in the notch to lift the assembly up and over the angled piece on the wall and drop it into place.

|
|
Figure 13 - Check to make sure that a side piece and the
French cleat infrastructure support piece will fit over the
wall cleat
|
|
|
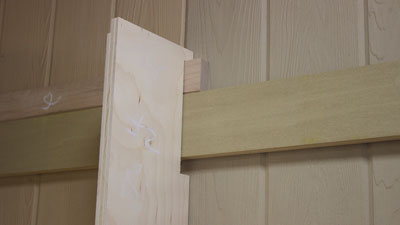
Figure 14 - It should look like this
|
Rabbets need to be cut in the tops and bottom of side pieces A & B. The width of these rabbets should match the thickness of the plywood. The depth must be set so that 1/2" of plywood remains. This is very important. You are not making a 1/4" deep rabbet, but something a little less that leaves 1/2" of plywood.
After those rabbets are cut there are three more steps before glue-up. The first is to cut a groove in both side pieces to accept the 1/4" (nominal) plywood back. This groove must be flush with the front face of the lower infrastructure support piece and should be cut 1/4" deep. The video shows some tricks for accomplishing this.
After those grooves are completed cut the 1/4" plywood backs to size. The video shows how to determine the size. The width of the back pieces should be 1-1/16" narrower than the overall width of the cabinet box. For example, if you make a 20" wide cabinet box, the back will be 18-15/16" wide. The height of the back will be equal to the distance between the bottom of the top notch and the top of the bottom notch.
You will probably want to go ahead and make the shelf pin holes in the side pieces. It is much easier (and more accurate) to do it now than after the cabinet is assembled. In the next video in the series I use the new
Woodpeckers Shelf Pin Drilling Jig
.
CLICK HERE
to watch the video!
Also in this video we make the face frames and start on the doors. We use a cope and stick bit set in the router table to make the door frames and provide the formulas for sizing everything up.
...
In next month's article we will wrap up the basic cabinet project and provide some additional tips and tricks for making the best shop cabinets ever! Then we will explore some options for the wall cabinets that will make them even more useful in your shop. Also next month a completely different kind of project for the Down To Earth Woodworker… it's pretty sharp! See you next month!
(Page 2 of 2)
Previous Page
1
2
Steven Johnson is retired from an almost 30-year career selling medical equipment and
supplies, and now enjoys improving his shop, his skills, and his designs on a full time basis
(although he says home improvement projects and furniture building have been hobbies for most of his
adult life).
Steven can be reached directly via email at
downtoearthwoodworks@me.com
.
Return to
Wood News
front page