by Steven D. Johnson
Racine, Wisconsin
(Page 4 of 4)
Previous Page
1
2
3
4
Construction of the 5S Shop Wall Cabinets (Part 2)
|
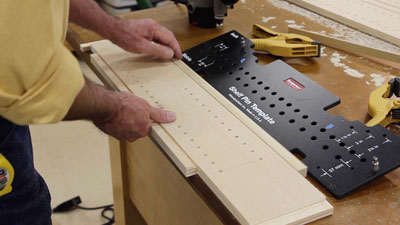
Figure 9 - The Woodpeckers Shelf Pin Template was easy
to work with and produced super clean, smooth holes
|
When the basic cabinet boxes are ready for glue-up is a great time to go ahead and make shelf pin holes in the sides. Doing it before the cabinets are assembled is easier and more accurate. You could set up a step-and-repeat system at your drill press or use a jig. A piece of pegboard works in a pinch.
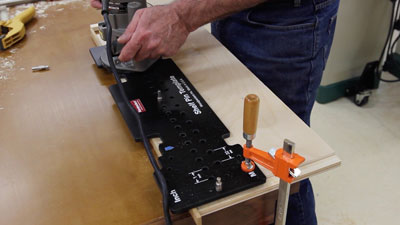
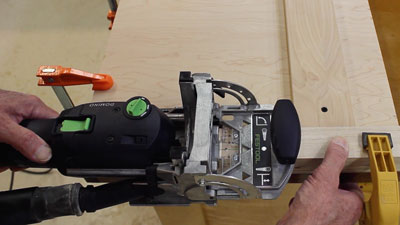
In order to get the cleanest, most splinter-free holes possible, I like to use a router with a down-shear bit, especially when working with plywood.
The Woodpeckers Shelf Pin Template
is an excellent, inexpensive but highly accurate, and ruggedly built option. The technique is covered in
Part 3 of the video series
and there is a separate
product tour of the Woodpeckers Shelf Pin Template
.
|
Figure 10 - A router with a down-shear bit is the
key to making perfect shelf pin holes
|
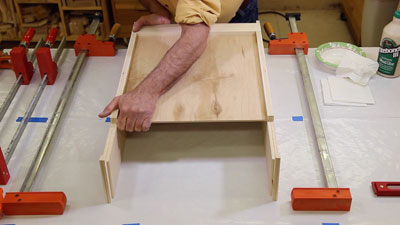
After the shelf pin holes are drilled the glue up is really straightforward. Apply glue in the groove in one of the side pieces and insert the back. Then glue the back into the groove in the other side piece. Glue the lower infrastructure support piece in place and slide the back down snug to that part… this will effectively square the cabinet.
|
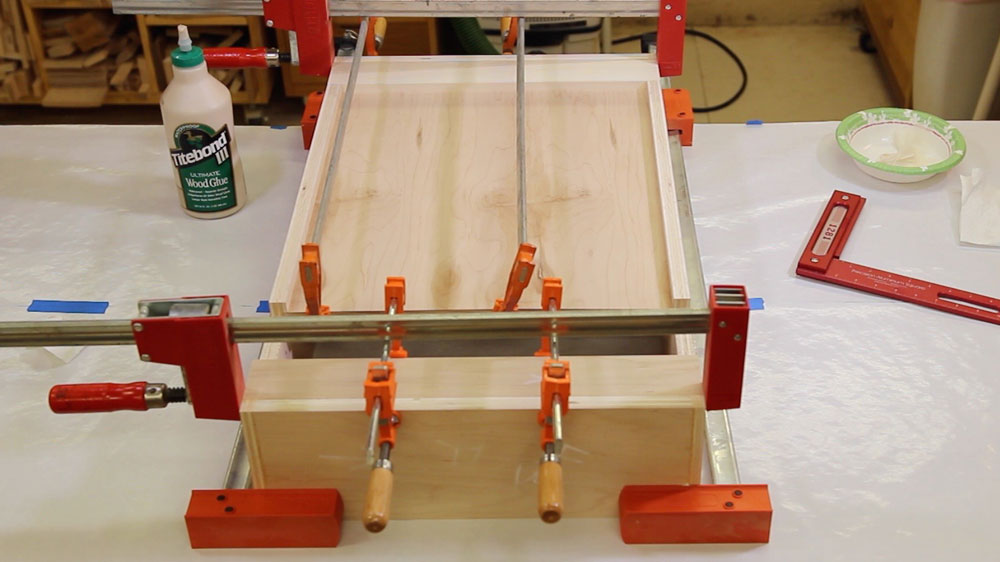
Figure 11 - While the glue is still slippery, push the back
flush to the lower infrastructure support piece to square up
the assembly
|
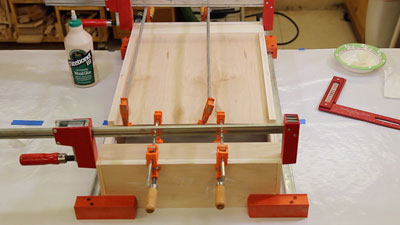
Next glue the bottom and top cabinet pieces into the rabbets and finally, the upper French cleat support piece. Check for square and clamp as needed to hold the assembly together until the glue sets.
Glue squeeze-out is annoying, and doubly so on plywood. Wait until the glue is well skimmed-over (kind of rubbery, but not fully dry) and scrape off with a sharpened putty knife, hand scraper, or dull chisel.
|
Figure 12 - Each cabinet box need only stay in the clamps
15 minutes or so
|
With the Titebond III glue I used, I was able to scrape off squeeze-out after about 15-20 minutes. Unfortunately, the open-grained face of the plywood absorbs enough of any squeeze-out to make cleanup a chore, so be careful (more about this in a minute).
While the cabinet boxes are curing is a good time to make the face frames. The face frame assemblies are 1/2" wider than the cabinet boxes and 1-1/2" longer than the top-to-bottom measurement of the carcases. Make them from 3/4" thick stock ripped to 1-3/4" wide.
|
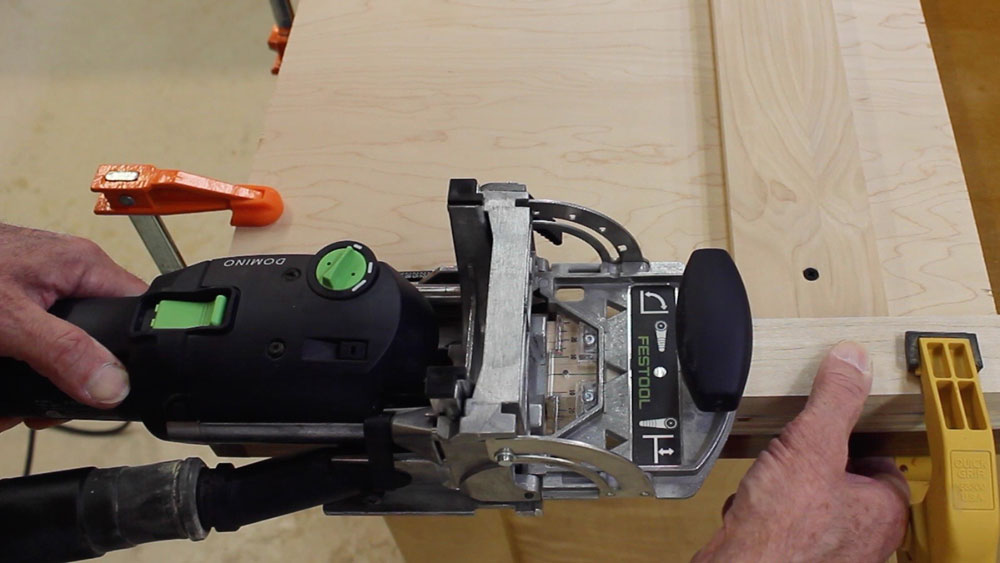
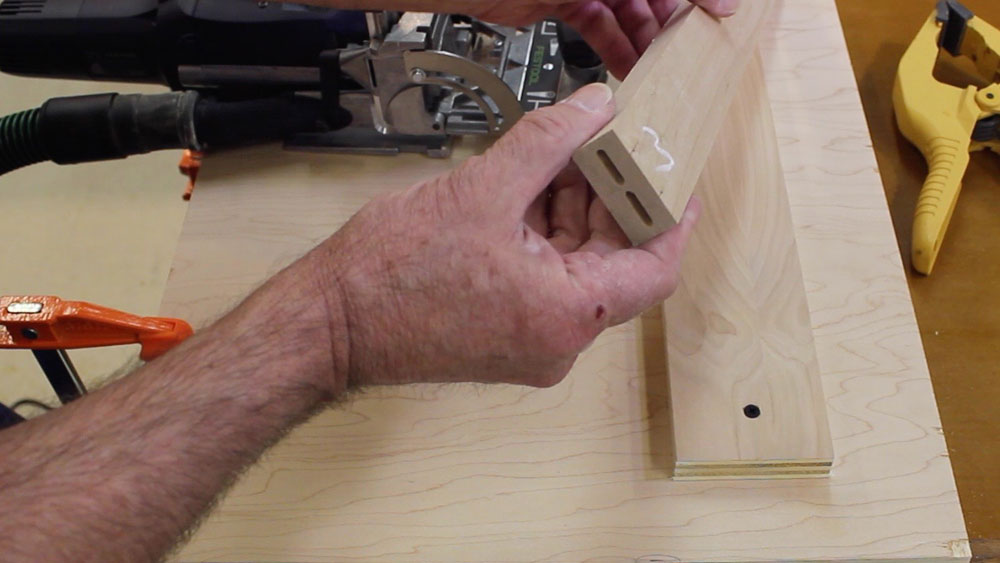
Figure 13 - A 5-minute jig assured the Dominos
were perfectly placed
|
I used Festool Dominos (4mm X 17mm X 20mm) to join the corners of the face frames. It is fast, easy, and strong. The video demonstrates the set-up I used to assure the Dominos were perfectly aligned. You could also use biscuits, dowels, or pocket screws to join rails to stiles. The key, of course, is to make sure the two pieces of wood forming the joint are absolutely flush on the "view" side of the joint.
After the joints are cut, glue up the face frames and set them aside to cure.
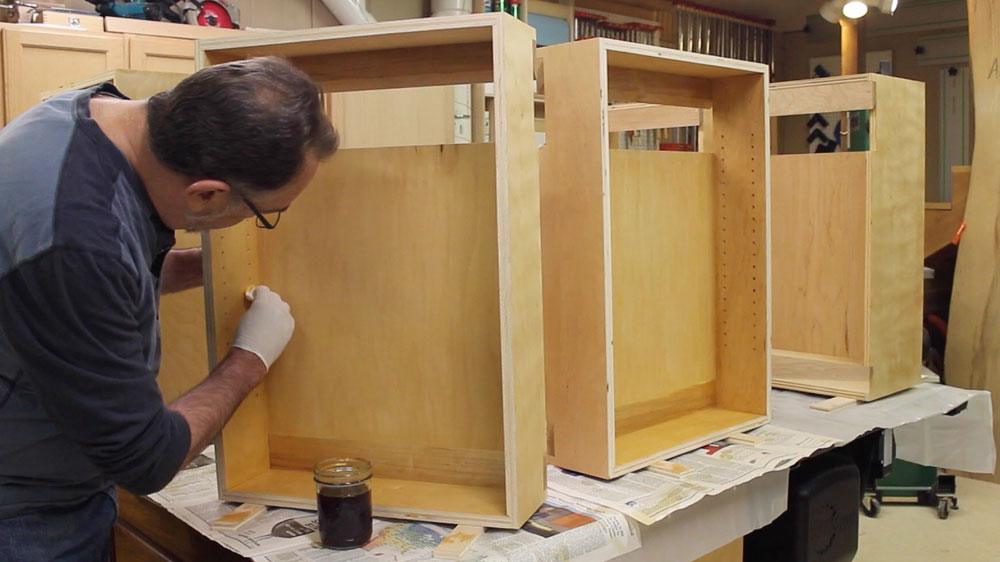
Before attaching the face frames to the cabinet boxes I decided to apply a few coats of shellac to the insides of the cabinets and this is where
Part 4 of the video series starts
. It is much easier to get into the corners of the cabinets to sand and finish without the face frames in the way.
I used shellac, since it is a good "primer" and "sealer" for almost any finish you wish to apply later. Shellac is also easy. I made up a color I like by mixing different "color" flakes. For this project 75% of the flakes were "beige" and 25% were "garnet."
I started with a 3 pound cut for the first coat, sanded lightly after it was dry with 150 grit paper, then applied a 2-1/2 pound cut coat, sanded with 220 grit, then applied a 2 pound cut. The cabinets will get a couple of top coats of something… but that is for later. Right now the shellac will make the glue squeeze-out easy to remove when I attach the face frames. You can actually see a demonstration of how easy the glue is to clean up from the shellac-finished surface in the video.
Part 4 of the video series
also covers the attachment of the face frames and the beginning of building the doors. Most importantly, the video introduces the "Shop Cabinet Configurator" that you can
download from the Highland Woodworking Library
. The "Configurator" allows you to enter the basic cabinet box size you want to build (height, width, depth) and all the parts dimensions, face frame dimensions, and door dimensions are calculated automatically. A real time-saver!
Whew… Just reading through this I realize how busy I've been! But we're not finished. In the mid-month video we will get the doors built and wrap up the basic cabinet build, but then we need to look at some nifty options. Would you like a drawer in your wall cabinet? Need a corner cabinet? Got ya' covered!
----
Next month we have one last segment to cover in the "Shop Commodity" series, then we are going to start on a quite different project that should be a ton of fun! I know, I know… spring is here, but you just gotta keep woodworking! See you next month!
(Page 4 of 4)
Previous Page
1
2
3
4
Steven Johnson is retired from an almost 30-year career selling medical equipment and
supplies, and now enjoys improving his shop, his skills, and his designs on a full time basis
(although he says home improvement projects and furniture building have been hobbies for most of his
adult life).
Steven can be reached directly via email at
downtoearthwoodworks@me.com
.
Return to
Wood News
front page