by Steven D. Johnson
Racine, Wisconsin
(Page 4 of 4)
Previous Page
1
2
3
4
Construction of the 5S Shop Wall Cabinets (Part III)
|
|
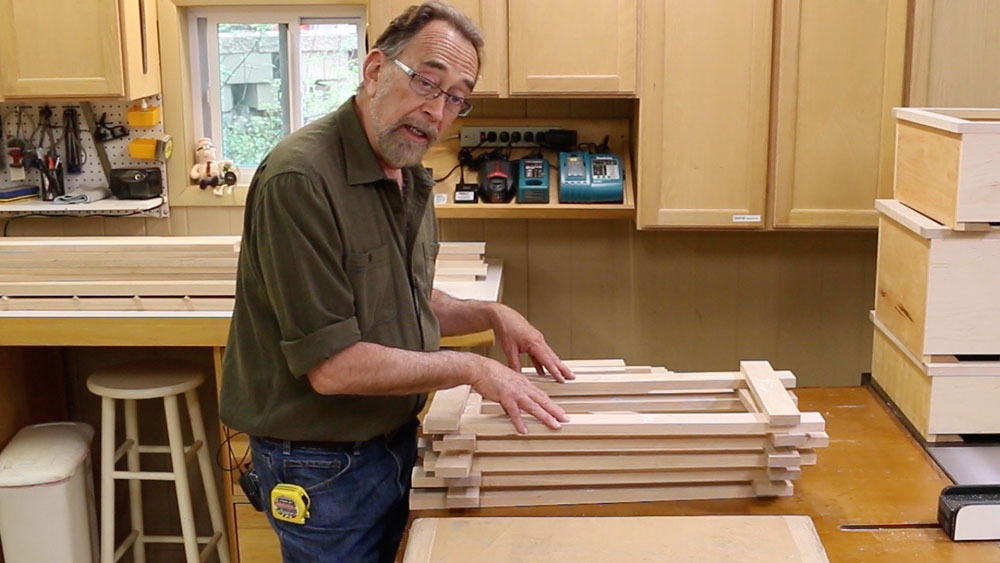
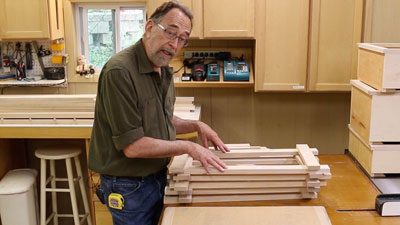
Figure 7 - Stack and label all door parts carefully
|
With the inside of the cabinets partially finished with shellac, the face frames attached, and the decorative side panels added, the last major piece of construction to tackle is the doors. 5S, as a workshop organization strategy, relies heavily on visual cues for organizing and maintaining a neat clean shop. Toward that end, the doors for the 5S Compliant Shop Cabinets are made with clear acrylic panels. You could use glass, but in my shop plastic is safer… probably in yours, too.

|
|
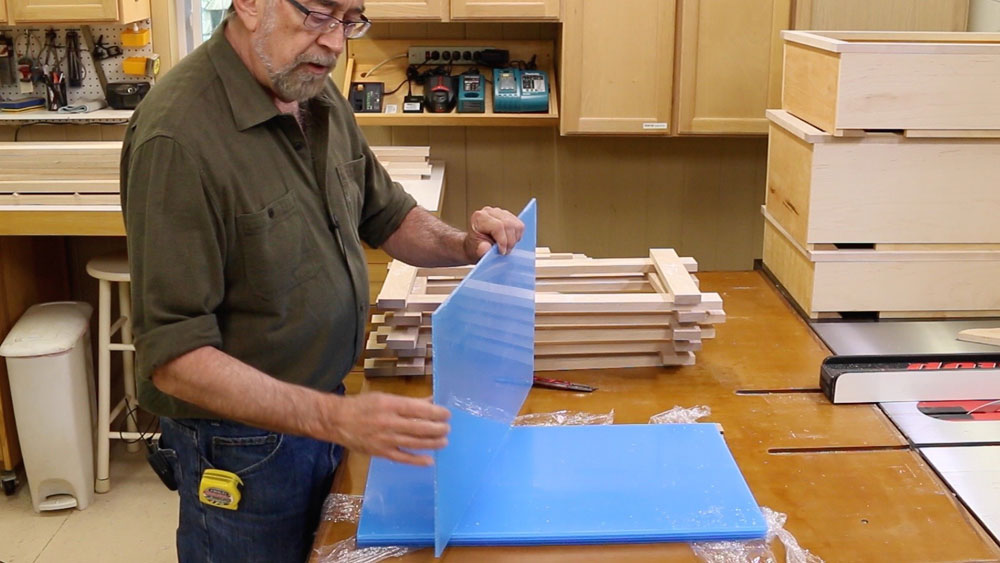
Figure 8 - 1/4" thick clear acrylic sheet used for door inserts
|
In
Part 5 of the video series
the process of selecting wood for the door rails and stiles, milling the lumber to size, cutting the joinery, and gluing up the doors is covered. I used a Freud cope and stick router bit set and details for setting up the bits and making the cuts are carefully explained. If you are new to making cope and stick doors, a few additional notes might be helpful.
First, make sure your door stock is flat and true, and most importantly, it must all be
exactly
the same thickness. The
Cabinet Configurator
provides the cut list for both rails and stiles. Make sure the ends of all pieces are perfectly square and that for each door size, each pair of rails and stiles are precisely matched in length.
Second, go ahead and either source cut-to-size clear, plastic panels or get large, plastic sheets for the doors and cut them to size. The size required for each panel is calculated automatically by the Cabinet Configurator. You will need this stock on hand in order to set the groove thickness on the cope and stick router bit set. If you cut the panels yourself, be precise.
|
|
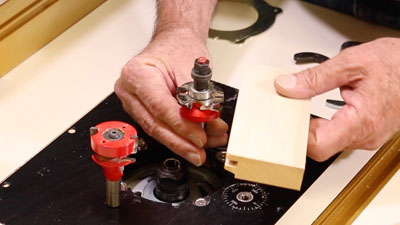
Figure 9 - The "sticking" bit cuts the long grain profile
|
Third, with cope and stick router bits in the router table, all cuts are made with the stock "face down." Be sure to carefully label each rail and stile part, especially noting which edge you want to be the "inside edge" of the door… the side that will receive the sticking cut.
Fourth, slow down the router motor (the bit set manufacturer provides suggested speeds) and feed the wood slowly to avoid burning and/or splintering. I used Maple, and unless you are using wood that is significantly harder, you should be able to make the coping and sticking cuts in one pass.
Get started by setting up the sticking cutter first and adjusting the thickness of the panel groove to match the thickness of your plastic panels. This involves disassembling the bit set and adding or subtracting shim washers as needed. Set the overall cutting height of the assembled cutter so that the appearance is pleasing. You should refer to the instructions included with the router bit set to provide a good starting point.
|
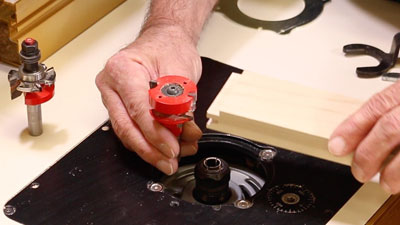
Figure 10 - The "coping" cutter makes the
end grain profiles
|
After the sticking cutter is set up and you have made a few test boards, remove the sticking cutter and set up the coping cutter. Match the stub tenon thickness to the panel groove thickness set up on the sticking cutter and match it to your test pieces. Adjust the height of the entire bit set carefully until rail and stile go together and the joint is perfectly flush, top and bottom.
|
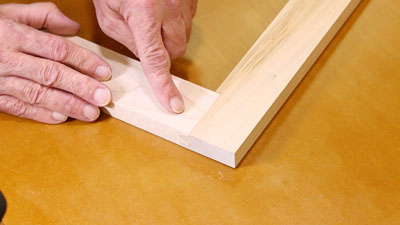
Figure 11 - The goal... a perfectly level junction between
rail and stile
|
As you can likely tell, and as mentioned in the video, I like cutting the end grain cope cuts first. It just seems more logical. By making the cope cuts first, any square scrap of wood can be used as a backer to prevent blowout and splintering of the end grain cuts, whereas if the sticking cut is made first, you will need a profiled backer board for half the cope cuts you make. That's way too much trouble.

|
|
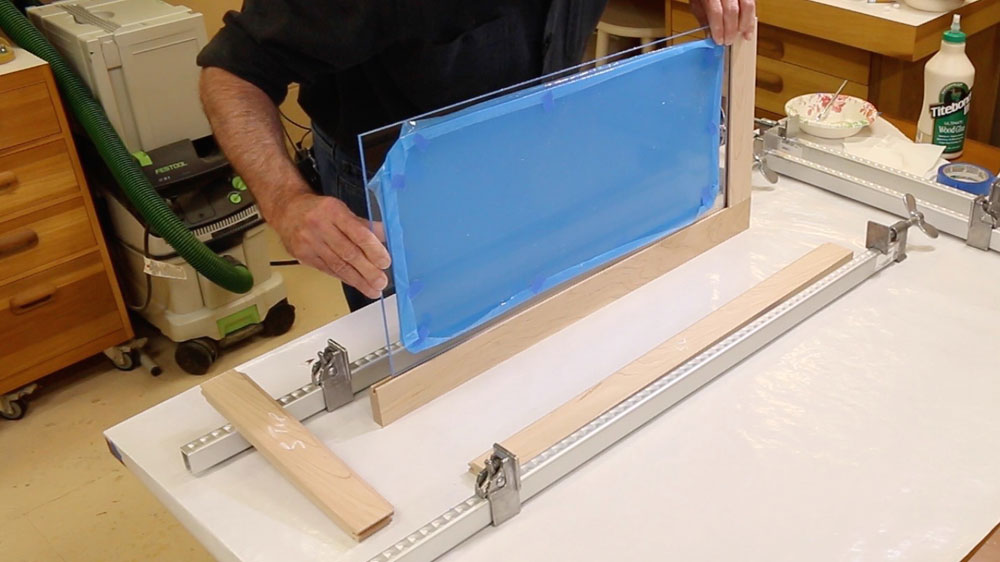
Figure 12 - Glue one rail to a stile, then add the plastic insert
|
After the cope cuts are made the sticking cutter is reinstalled in the router table, the bit height is adjusted to match the test boards made previously (and to match the rail cope cuts) and the long grain cuts can then be made quickly. Dry fit all the door components together, including the clear plastic panels, and make sure everything fits well and looks good.
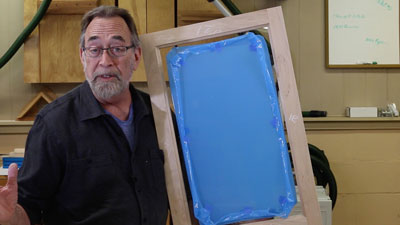
The clear plastic typically is supplied with a protective film attached. I left that film on and just peeled back enough from the edge so the panels would slide into the grooves in the doors. Later, when it is time to apply a finish, just mask the edges where the film was peeled back and the rest of the panel is already protected… a real time-saver.

|
Figure 13 - Only two clamps are necessary... the other two
clamps just hold the door up off the workbench and help
align the stiles to the rails
|
One comment I frequently get is that it appears I am a bit "stingy" with glue. True enough, I'm no fan of glue squeeze-out and I happen to think most people use way more glue than necessary. The glue joints in the corners of these doors is a minor exception to my general work habits… I put the glue on pretty heavily (by my standards). I always glue up doors "face up" so I can see and remove any squeeze-out. I did not apply any glue to the panels or in the panel grooves. It was not needed.
If the joints are well matched and cut with precision you will find that clamps are all but unnecessary during glue-up. The joint itself will assure that your assembly is square and the copious gluing surface will guarantee a strong joint. Any clamping should be done merely to keep parts from moving as the glue sets.
|
|
Figure 14 - The finished door, ready for... uhh... finishing
|
As soon as the glue has set up (15-20 minutes in my shop using
Titebond III
), flip the doors over and remove any glue squeeze-out from the backside of the joints. I actually waited a little longer and used a card scraper when the glue was at what I call the "stiff rubbery" stage of drying.
After all the doors are complete, a little light hand sanding is all that is needed to prepare for finishing. I spent maybe two to three minutes on each door.
In Part 6, the final installment in the video series coming out in a couple of weeks, the hinge cup holes are drilled, hinges attached, and the doors and cabinets get their final coats of finish. We also make the adjustable interior shelves.
This video and column series has covered the basic construction of the cabinets. There are possible variations and additions that I intend to cover in a couple of supplemental videos down the road, i.e. cabinet drawers, corner cabinet variations, interior lighting, fixed panel cubbyholes, etc. Stay tuned!
----
Next month we may get to see some progress on the knife handles and a "back-burner" project finally gets finished. And this old Down to Earth Woodworker is going to turn back to carpentry for a long-awaited (procrastinated) remodeling project. See you next month!
(Page 4 of 4)
Previous Page
1
2
3
4
Steven Johnson is retired from an almost 30-year career selling medical equipment and
supplies, and now enjoys improving his shop, his skills, and his designs on a full time basis
(although he says home improvement projects and furniture building have been hobbies for most of his
adult life).
Steven can be reached directly via email at
downtoearthwoodworks@me.com
.
Return to
Wood News
front page