Women in Woodworking
Andrea Ramsay- Handtool Woodworker
by Anne Briggs Bohnett
Click on any picture to see a larger version.
Andrea's Story...
In November of 2014, Andrea Ramsay decided to leave her fast paced, high stress job in the tech industry behind and trade her Bluetooth and her laptop for quiet, fulfilling days spent using her hands creating lasting and meaningful work. “Coming from working in the technology industry, I started woodwork 7 years ago because I needed a tangible outcome as a result of my labor. There is something so fulfilling in creating a physical object with your hands- whether it’s a piece of furniture or a piece of art,” Andrea says.
“I got into technology because I’ve always liked fixing things. I like troubleshooting. When I got started, I was punching wires. I had a tool belt. That was fun. But if you are good at talking to people, and good at technology, pretty soon you no longer get to touch anything.” Because she was moved out of the hands-on, troubleshooting, problem solving side of things, Andrea soon lost the passion she once felt working in technology. “There are very few occupations where we allow ourselves to focus on just one thing for a long time, especially in the technology industry. It’s all about how many things you can multi-task at the same time, how fast you can get things done. It’s all about quantity, not quality. I did love the people side of my job though, building a team, building community. That's why I’ve so loved being on Instagram as a woodworker-- it’s been awesome meeting people virtually, and in person as a result of the community there.”
So seven years ago, with fond memories of her first hand tool, a buck knife she was allowed to carry to clean fish on family backpacking trips, she started looking for old tools at Estate Sales. “That knife was the coolest thing I’d ever had, and doing woodwork brought me back to that.” She was surprised and a little frustrated by just how many of the sellers assumed she was buying the tools to use for decorations, instead of to restore and use. And thus began many of the funny aspects of being a woman in a male dominated craft. “When I’m working at my bench at Pratt (a community shop here in Seattle), people coming through the shop just stop and stare-all the time. They don’t engage, they just stare. When I was in school, people were constantly giving unsolicited advice assuming I had no prior knowledge or experience. I noticed it happening to other the other women in the school as well. BUT, generally speaking, once people realize I’m serious about woodworking and that I’m actually going to use the tools I’m buying, a huge opportunity for conversation opens up, because people get REALLY interested. In those instances, being a woman becomes a huge advantage, because people get really excited, are very welcoming, and really want to help me along in my woodworking journey in whatever ways they can.”
After six years of power tool dominated woodwork done in her spare time, Andrea finally made the plunge- big time. She left her job and enrolled in the Port Townsend School of Woodworking’s three-month handtool intensive course. “Using power tools, I’d made a lot of projects, but I’d never learned about wood, because with power, you overcome, you don’t work the wood the way you do with handtools. Handtool woodwork is the one thing I can do where I can get into a flow. I don’t get distracted, I don’t have to get up and check Facebook every half-hour.”
Andrea had a great experience at the Port Townsend School of Woodworking, one that set her on a very positive trajectory with regard to her woodwork. She loved that there were so many like-minded individuals in one place at the school- with very different backgrounds and very different goals, but all choosing to sacrifice time and money to pursue a deeper learning of their craft for a season of time. She learned a lot about handtool woodwork and came away with some great advice for those interested in pursuing it themselves: “Don’t tie yourself to your work and the successes or failures therein. Most of the pro’s have been doing what they are doing for decades, repeating the same tasks over and over—and the best woodworkers are those that can fix their mistakes. You’re not going to be good the first day, and even after your 200th and 2000th day, be humble and admit your mistakes.”
Even though she mentioned several times that she doesn’t have a concrete plan yet as far as her future “career” goes, at the end of our interview I couldn’t help but ask Andrea “So… you left your job, you love woodwork… is this what you’re gonna do?” “Yeah,” she says, “Yeah. This is what I’m gonna do.”
First Projects…

|
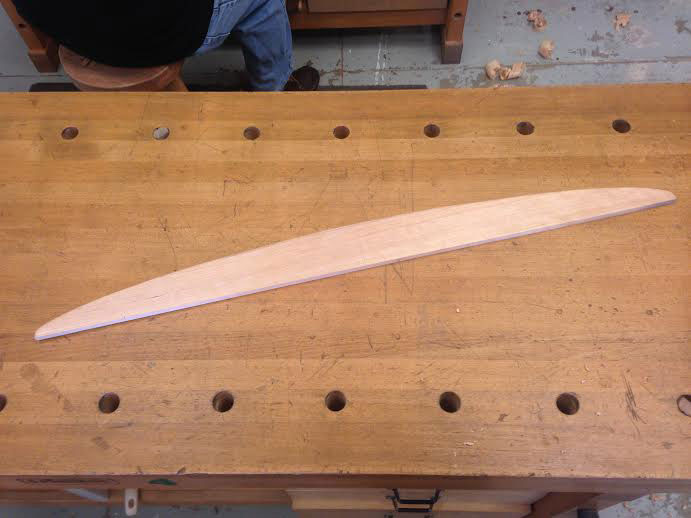
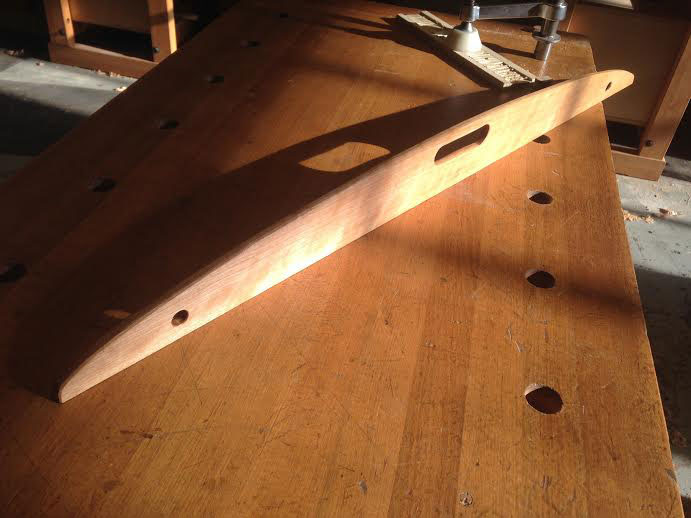
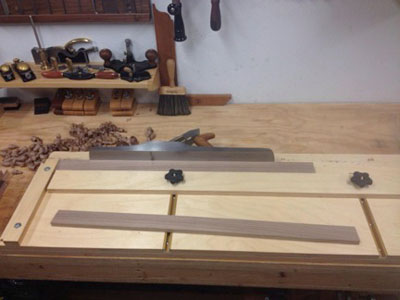
I asked Andrea what she thought would be a good “first” project for those interested in handtool woodwork. She suggested a straight edge, one of the first projects they did at the Port Townsend School. “The project lets you focus on getting one edge straight with a jack plane. I spent forever on this part, learning how to not lean the plane to one side or the other and learning to use a small square to get the edge at 90 degrees to the side. I was so excited when I produced consistent shavings. The next tool to learn more about was the spokeshave to form the curve. This is such a fun tool and you can make any curve you want really, so choose something that is pleasing to your eye. This project also allowed for my first use of a brace to drive the holes at each of the handle and the holes to hang the tool.” For a far more in-depth explanation of the process, Jim Tolpin has a great article on straight edges in his book “The New Traditional Woodworker.” A free tutorial written by Chris Schwarz can also be found in the Lee Valley Newsletter archives.
When working with power tools, there is generally a lot more room to force your wood to do what it needs to do. Using power tools, you can often coerce a cupped or twisted board into place. When just starting out with handtools, it is best to eliminate every possible variable so you are better able to troubleshoot when things go wrong. Using square and true lumber is a must, and a straight edge will help you get there.
Though straight edges can be made virtually of any spare scrap in your shop to make a quick and dirty version of this tool, you will have the best luck using a piece of clear-grained, quarter sawn tropical hardwood at least ¾” thick, 3” tall, and 30” long. If you don’t know what quartersawn or hardwood, or tropical means, go to your local lumberyard, tell them what you’re making, and ask for the cheapest price they have that fits the bill. Buy it and put it in your shop for a couple of weeks while you practice your turning skills. It is best to use a piece of wood that has been sitting in your shop for several months or years to ensure it’s well acclimated, thus minimizing the risk of a lot of wood movement after you’ve made your straight edge. So, if you’ve been holding on to one special piece, looking for the perfect project for three years, this is the time to use it. You’ll get to look at it and use it every day in your shop.
|
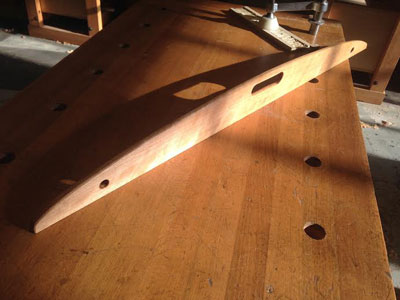
Cutting a curve along the length of the top of the straight edge will expose more end grain to the elements and help stabilize the wood. It’s design can be as fancy or as simple as you want, the curve cut with a bandsaw, fret saw, hand saw, or whatever you’d like to use, and then fancied even further with rasps, spokeshaves, sandpaper… You can cut in a handle and add finish if you like, this is a shop-made tool and every facet of the design, aside from the bottom being true along it’s length is totally arbitrary.
Plane the two wide faces of your board square and true (do your best) and then plane the bottom edge along it’s length with your longest plane until you get a full- width shaving. When you’re confident it’s true along it’s length, you can test it by laying it on your bench, a scrap piece of wood, or a piece of drafting paper, drawing a line along the bottom edge, then flipping your straight edge180 degrees and drawing a second line over your first. Any inconsistencies will be magnified two fold, and the bottom of your straight edge adjusted with the plane and tested again until the two lines match perfectly.
Using your straight edge…
Once you’ve got a straight edge, there are three simple tests each board needs to pass using the straight edge to be declared “square and true.” The
first
is along it’s length. The key here is having a straight edge longer than the piece of wood you’re working, so let’s start with small boards and work our way up. The great thing about making your own straight edge is that you can always easily make a longer one if yours is too short. Lay the straight edge along the length of the board and check for high or low spots. If you need a closer look, tilt the straight edge away from you, one corner still making contact along the length of your board, and look for light shining under the edge. Light indicates low or high spots. Slide the straight edge back and forth on your piece lengthwise to determine there are no high or low spots along the length. Mark high and low spots with your pencil, and make a few passes with your plane directly over the high spots or around the low spots. Re-check the board after every few passes with the plane. At first, this process is incredibly tedious, but it will soon become second nature.
The
second
test is diagonally both ways. Test from one edge to the opposite edge, then flip your straight edge around, basically checking an x shape across your board. The
third
is square across. As you did in step one, slide the straight edge along the length of the whole board. Once you’ve determined the whole board is square and true it is ready to use.
Truing Your Straight Edge…
Even quartersawn, straight-grained wood of a relatively stable species can still "move" over time due to changes in atmospheric conditions, so some "tuning" is likely to be occasionally necessary. The most important part of your straightedge to keep accurate is, as you might have guessed, the bottom that comes into contact with your wood. To get a truly square edge on the bottom of your straightedge, you will need to joint it on occasion.
|
|
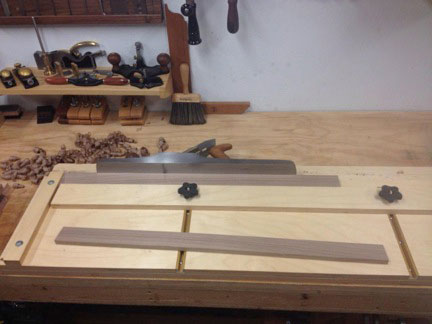
Photo used with permission from Walke-Moore Tools
|
Aaron Moore of Walke-Moore tools taught me that the best way to do so is to shoot it square. In a perfect world, your straight edge would be perfectly flat on both faces and the faces on your vise would also be perfectly square and there would be no play in the lateral movement of your vise. You could cinch the straightedge bottom up in the vise, make a few passes with a plane, and it would be ready for work. However, it is more than likely that one or more of the aforementioned components will be slightly off, thus introducing twist when cinching the straight edge in the vise. When the edge is jointed with that forced twist the jointed edge will no longer be square when removed from the vise. It is best to shoot the edge square with the straightedge in it's natural state, along the grain. The long-grain shooting board is another article in and of itself, but thankfully Aaron has already written it. To find out how to make your own long grain shooting board, read the whole article
here
.
Once trued, test for a straight edge by drawing a pencil line along it’s length on your bench, on a scrap of wood, or on a piece of drafting paper. Flip your straightedge 180 degrees and draw a second line. If your lines match, your edge is square.
Anne Briggs Bohnett is a 26 year old woodworker out of Seattle, Washington. She and her husband Adam own and operate a small farm aimed at teaching youngsters about animal husbandry, traditional woodwork, and it's also where their food comes from! Anne has been seriously pursuing woodwork with a focus on handtool use for three years and is passionate about the preservation of traditional methods and skills and building community.
Anne can be reached directly via email at
briggs.anne@gmail.com
and you can check out her website at
www.anneofalltrades.com
.
Return to
Wood News
front page