Working with Reclaimed Wood
by Thomas D. Garcia
Riverside, CA
Click on any picture to see a larger version.
I have been working with wood since 1970. As a kid, at the age of 12 years old, I looked for any reason to fire up my Father's 3 horse power table saw. The sound of the winding motor as it started was exhilarating. I had several lawn mowing jobs at that time that helped me earn some spare change for my peace sign leather wallet. I used some of that money to purchase screws and stain. To cut down on the expense, I would typically try to reclaim usable lumber every chance I got. Luckily for me, we lived across the street from a cabinet shop. At the end of each day when the cabinet shop closed down for the evening, I would walk across the street and pick out some nice pieces of wood from the scrap bin that was kept outside by the huge roll-up door. I would find Oak, Walnut and pieces of Maple, enough to make several boxes, shelves and picture frames. I can still remember the smell of some Sassafras that I had found once, mmmm. I learned early on that these projects would put some more cash in my pocket to fund my fun days. A 15 cent hot dog and coke at a 10 cent matinee movie was worth working for. Now those were some great times.
Now moving through time, to the year 2013, I had a medical condition and had to retire early from a public utility company. It took me a little more than two years to recover. I have now graduated from watering the lawn to the art of woodworking again. I still have one thing in common with the days of old, I still use reclaimed lumber.
Making a Reclaimed Wood Project
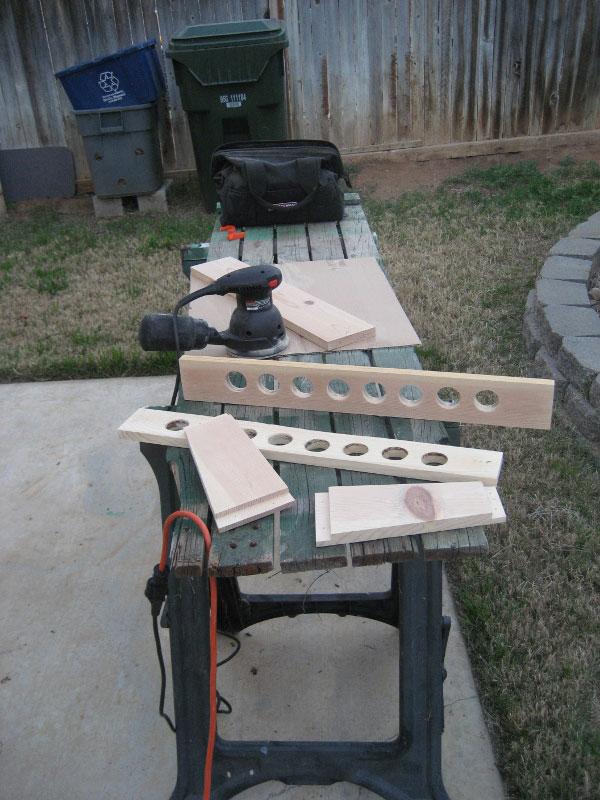
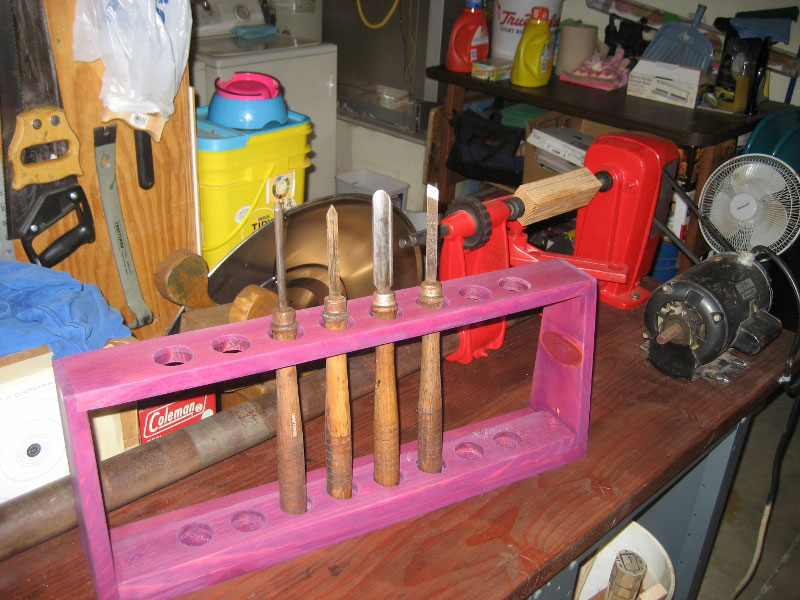
I needed a stand for my woodturning tools. 1) It had to be moveable and easy to store and 2) I needed it to be a color so it would stand out when I had my turning gear on.
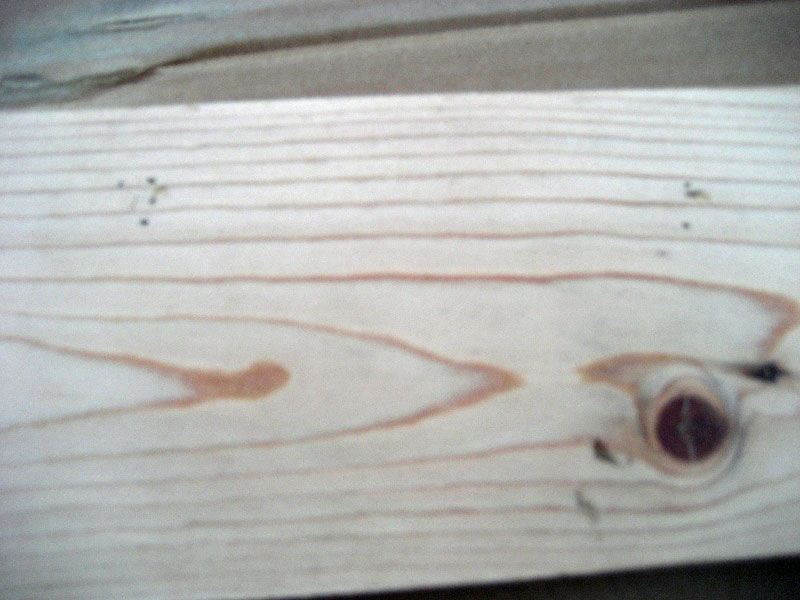
The lumber on the left came from a shipping crate that I purchased from a valve shop for $5.00. It was sitting in the back lot next to several other empty crates, so I asked the manager if he was going to get rid of them and as luck would have it, he was selling them. There is a lot of great wood out there to reclaim. Don't be afraid to use it.
As you can see (on the right) the nail holes that were left behind were remnants from its past life. They can now be blended in using a wood filling mixture that I have used for years. My Father showed me how to create this concoction. A lot of wood fillers in the early 1970's would not take stains well, unless you were lucky enough to find wood filler that was tinted to the type of wood that you were using.
I have found this wood filling mixture to be strong, very sandable, and it takes a variety of stains very well. All of the ingredients are very easy to find and most do-it-yourselfers already have this stuff in the cupboards of their garage.
Making the Wood Filler
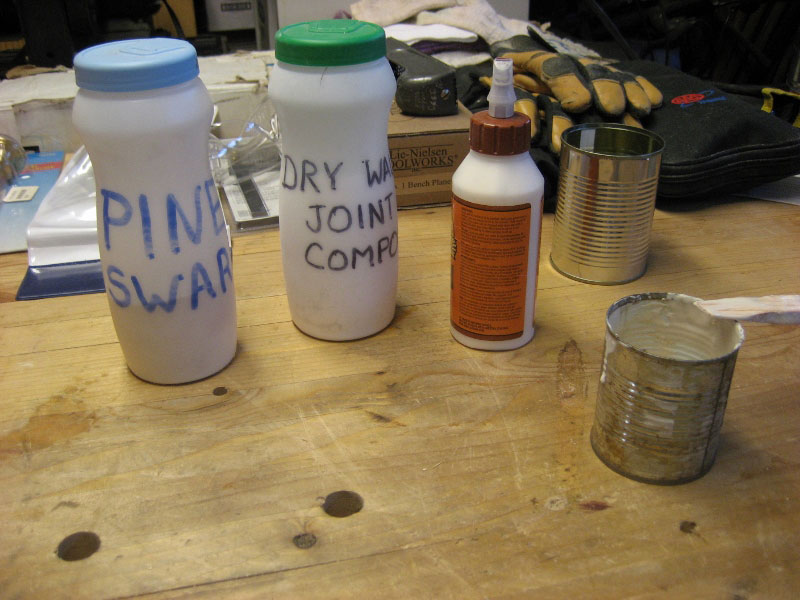
First things first, I not only reclaim wood, but tin cans, and plastic containers as well. This old tomato sauce can is now a woodworker's tool.
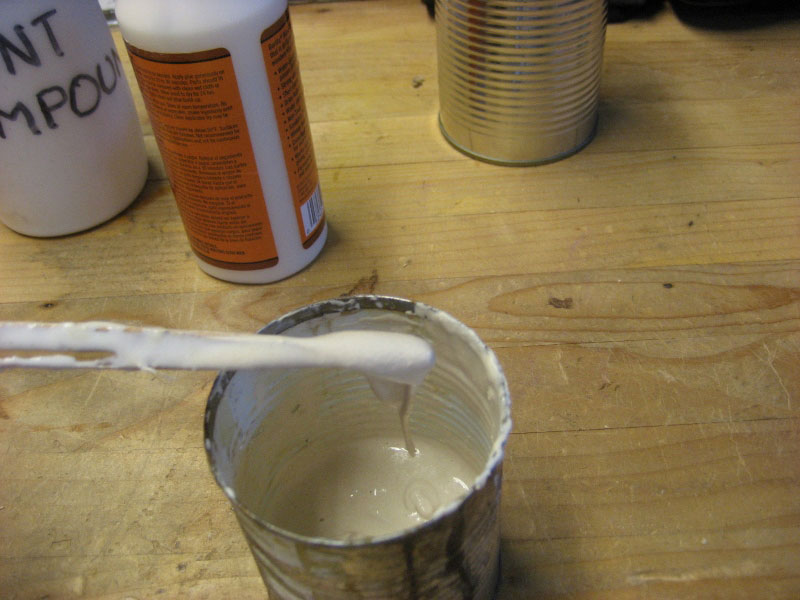
First, I place a palm of pine swarf (saw dust) in the tin can. Then I'll add a palm of drywall joint compound. I'll mix it real well. At this point I'll add a dab of white glue. Then it must be mixed completely.
I mix this concoction until it has the consistency of pancake batter (right). Remember you can add more glue to make it watery or swarf to thicken it. After it's completely mixed, I'll work this mixture into all the holes, nooks and crannies that need filling.
Remember to always save your saw dust. It could be Pine, Oak, or whatever wood you feel like. Use Oak swarf on Oak boards and Pine swarf on Pine boards. Keep it to the species at hand. I use reclaimed coffee creamer bottles to store my swarf because they have a little lift up flap on the lid that is very handy when mixing your wood filler. I used a black permanent chisel tip marker to label each bottle.
Tinting the Wood Filler
I have used acrylic paints to tint the wood filler as needed to fill large gaps around wood knots. The wood filler helps the knot from falling out only if the knot is not that broken up. When you add some tint, such as acrylic paint, it just takes a little longer to dry.
First, I take a damp rag and moisten around the area to be filled. Then I match the color of the knot by mixing white paint with a Brick Red paint. Sometimes I have to add a dab of Straw Yellow paint to level out the tint.
Below is my purple stained woodturning tool stand. The wood filler soaked into the stain well. On the end grain, I had to use a technique called Sizing, where you mix a 50/50 concoction of water and white glue, and then use a small brush to apply it. Let it dry real good, so when you add the stain won't absorb too much. This will help maintain an even amount of color. If you look close around the knot on the right side of the project you can see the color change.
Did I mention that I like to reclaim stuff?
I guess you could call me "The Reclaimed Woodworker."
Hi, my name is Thomas Garcia, I am 57 years old. I am also married to a fantastic wife. We have two grown children whom are kept very busy with their own daily routines. I also have two small dogs that like to help me with some of my woodworking projects. They help with clean-up by carrying off small pieces of wood cut-offs. You can email me at
AKATOMAS@aol.com
.
Return to
Wood News
front page