by Steven D. Johnson
Racine, Wisconsin
This month:
•
A Woodworker's Remodeling Project
•
A Remodeler's Woodworking Project
•
Aisle Engineering
•
A Few Answers… Please!
A Woodworker's Remodeling Project
Click on any picture to see a larger version.
A while back I posed a series of questions relative to "remodeling versus woodworking." Now I have most of the answers. A woodworker can do a credible, albeit slow, job of remodeling, and a carpenter can do a credible, sometimes outstanding, job of woodworking. Most of the skills needed are complimentary, if not downright wholly interchangeable. Throughout my recent remodeling project I learned a lot of things, remembered a few forgotten nuggets, and discovered a few new tricks. Since most woodworkers attack remodeling jobs with some regularity, I think it is appropriate for a woodworking newsletter to delve into this a bit deeper. The bonus is that this project will follow a dual track. These articles will cover the remodeling, and a new series of videos will cover the woodworking… a custom "L" shaped vanity I built for the bathroom. Let's get started…
The Background:

|
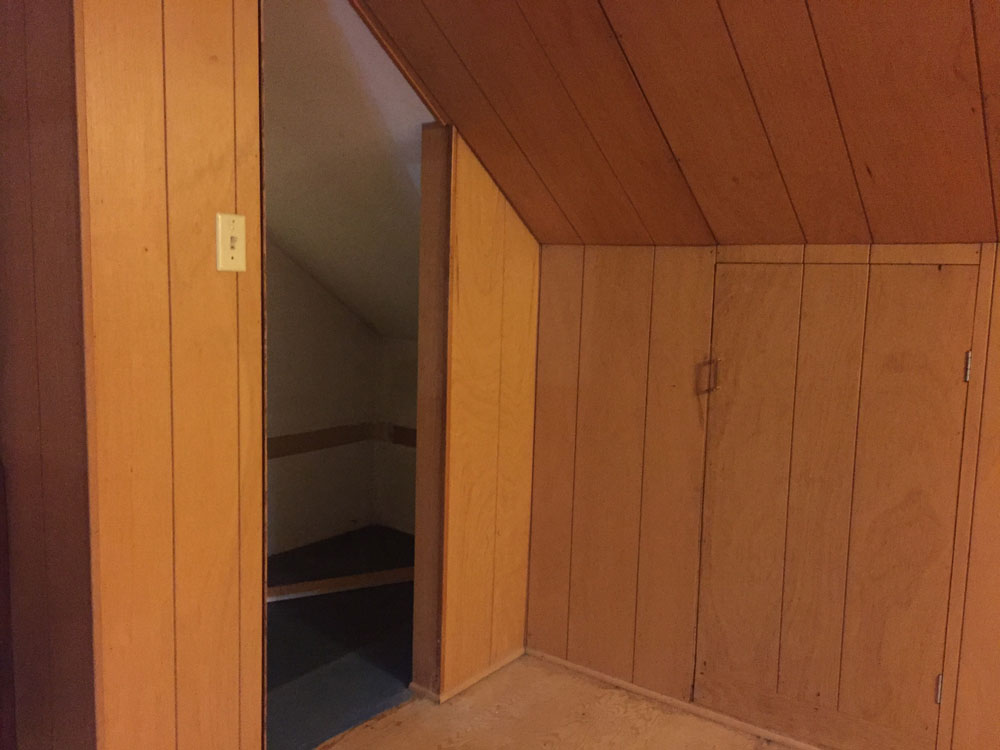
Figure 1 - You thought I was exaggerating, right? Was this
a closet for "munchkins?" Note the mismatched, poorly
installed paneling, missing trim, and raw plywood floors.
No telling where the little access door on the knee wall goes...
|
Upstairs in my tiny house there are two tiny bedrooms and an even tinier bath. One bedroom was remodeled a couple of years ago… gutted to the studs, new wiring, new insulation, new drywall, wood floors, trim, and even a built-in cabinet… I just had to do some woodworking! Well, by all accounts, it came out pretty well.
The other bedroom served "as is" as my office. I called it "office" because "study" sounded too fancy, and because a desk and my computer were there. The rest of the space was filled with woodworking magazines, books, instruction manuals, files, receipts, tax records, assorted memorabilia, miscellaneous furniture that simply did not fit anywhere else in the house, a 12' X 14' area rug, two roll-around clothing racks (full), three large boxes full of CDs, a portable space heater, and assorted other junk. Clearing out the room took the better part of three weeks.

|
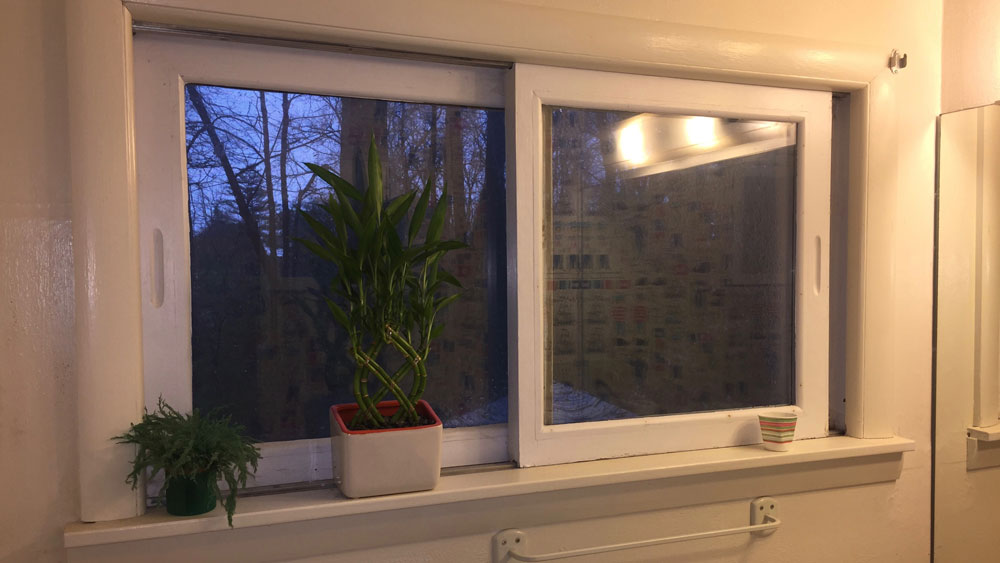
Figure 2 - The homemade window won't
open or close... it's stuck right there!
|
Once the room was cleared I remembered just how "unfinished" and bad the space was. The former owner had never covered the floors… just raw plywood. The walls were covered with cheap dark prefinished plywood paneling… part of the ceiling, too. A weird small space in the southwest corner of the room must have served as a closet at one time. The wiring is 60's era cloth-covered two-wire cable, some of it running on the outside of walls, some of it hidden by the hideous paneling and terminated in non-grounded outlets. The window on the east side has a terrific view, but it leaks (a little water and a lot of wind) and the window on the north side of the room (from which I can see my workshop) will not open. There is no duct from the central air conditioning system in the room, thus it is frigidly cold in the winter and stiflingly hot in the summer.
The bathroom is situated slap-dab between the previously remodeled bedroom and the unfinished office space. It is somewhere slightly beyond awful. I'm almost hesitant to describe it because you will think I am exaggerating. On the floor are clumsily installed 12" square vinyl peel-and-stick tiles. Those tiles are laid over 8" X 8" tiles, which anyone will tell you… 99% of the time the size alone indicates "asbestos." When many flooring installers see 8" X 8" tiles they immediately refuse the job.
The shower is a cramped 30" X 30" square affair with one corner clipped off to accommodate a door that doesn't fit properly. The shower pan doesn't leak, but the regulator does. The walls are made of tile laid over standard sheetrock. The grout lines are failing and there are obvious signs of water degradation behind the tile. The shower door leaks. And like most houses built at the time, when the average human was apparently shorter than today, the shower nozzle comes out of the wall at about neck height.
The bath vanity is a homemade affair, painted plywood with a laminate-covered top. Particularly endearing is the strip of laminate glued to the wallpaper on one side and posing as a backsplash. There is no external vent in the bath, powered or passive. Years of high humidity have had a pronounced impact on walls and ceiling. The wallpaper on two of the walls was probably cute 50 years ago, but today is hideous. There are two light switches, and until I open the walls I have no idea what they control… or were supposed to control… right now they seem to do nothing. The bathroom is not a pure rectangle… there is a section of one corner that is obscured by an angled wall. At first I thought it might have been a chase for plumbing and electrical, but it is not… there is nothing inside… just wasted space.
The single electrical outlet by the sink is not GFI (how that got past the inspector when I was buying the house I will never know). There is a sliding window that is stuck open about one inch. It appears to be a homemade window and has non-insulated glass. As a temporary stopgap measure, I made and installed a screen a couple of years ago to keep the bugs out. In the winter I stuffed towels in the opening to keep out the frigid air.
Remodeling inside an occupied house is always a hassle. Inside a "too small" house with a spouse and two very pampered cats is even worse. So, first things first…
Step 1 – Clean Out The Space!
Never, ever, try to remodel around "stuff." It doesn't work. Everything has to be removed so there is space to work. The first couple of days clearing out what had served as office space were not too bad. Two freestanding racks of clothes were meticulously sorted. A lot of the clothes went to the Goodwill Donation Center. What were left found a home in the basement inside a large walk in closet I built a couple of years ago.
A large cabinet was moved into the remodeled upstairs bedroom, along with a table that would serve as an uncomfortable temporary desk during the project. The computer equipment, printer, and a few key files were moved, too. The spare bedroom was soon grossly overcrowded, but I was still able to write, edit videos, and pay bills.
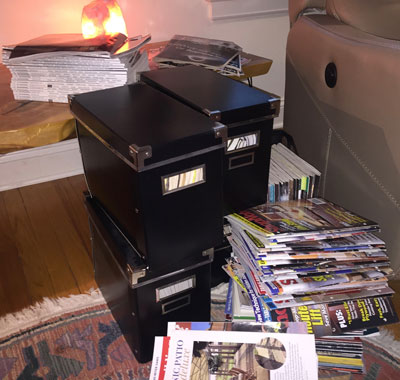
|
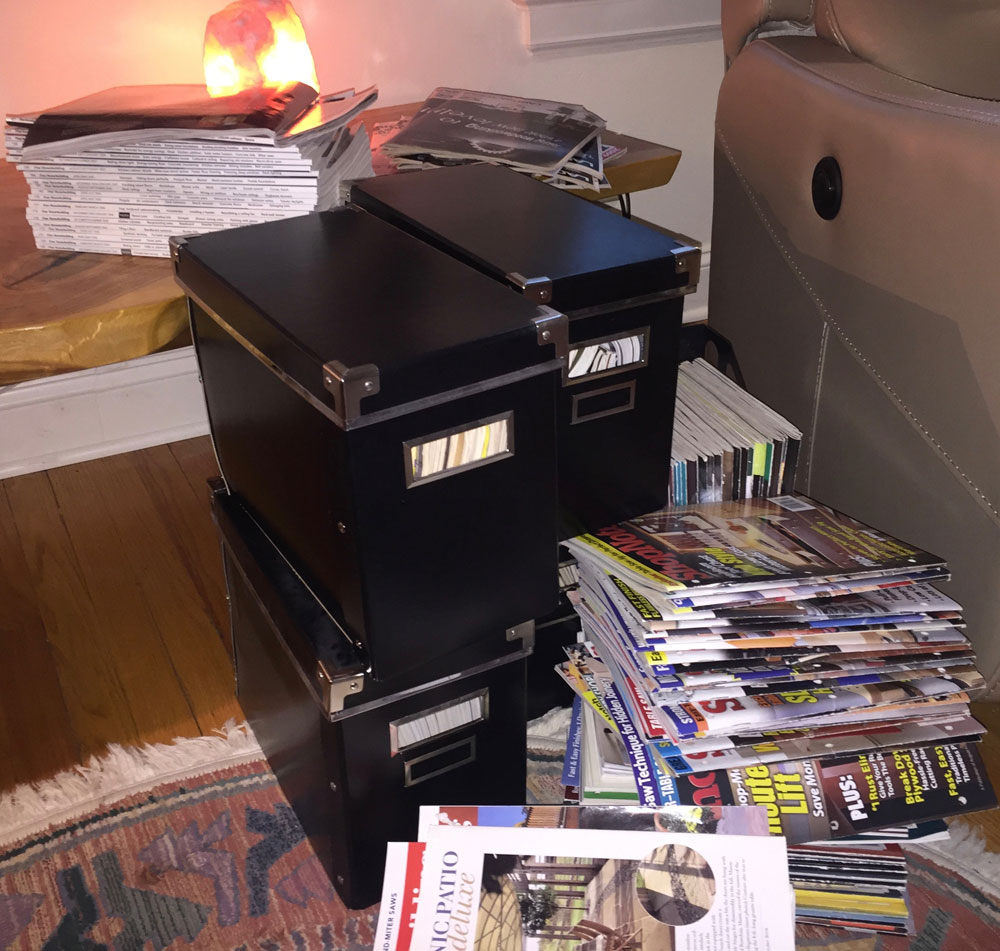
Figure 3 - About halfway through perusing my collection
of woodworking magazines...
|
At that point, clearing out the room got decidedly more difficult. A four-foot wide, six foot tall shelving unit was completely filled with well-organized stacks of woodworking magazines going back to 2002… the last time I cleared out my woodworking magazine collection. After much hand wringing and anguish over the thought of throwing away my precious magazine collection (again!), I decided to take a more pragmatic and compromising approach. I moved all the magazines downstairs within proximity of my easy chair. For weeks, instead of watching television or reading, I paged through the magazines, one by one.
When I stumbled on something I wanted to keep, I used a razor knife, cut the appropriate pages from the magazine, and slipped those pages into plastic sheet protectors that went into a three-ring binder. Several hundred pounds and dozens of cubic feet of magazines went to the recycling facility, and the "keeper" articles now occupy only a single three ring binder. For what it's worth, the articles I kept seemed to fall into one of three categories: (1) a furniture design I like, (2) a procedure or jig I would like to try, or (3) an article that contains valuable information that I might not remember or that I would like to delve into more deeply.
Bottom line, the space and weight reduction ratio of sorting and keeping only articles of interest and not full magazines seems to be around 100 to 1. I should have done that a long time ago.
There was simply no space left anywhere in the house for my desk, two filing cabinets, a chair, a bench, a footstool, bookcase, and other small furniture odds and ends that had been stuffed into the room. I gave up trying to squeeze any more "stuff" into the basement and rented an off-site storage facility on a short-term 3-month contract. I did negotiate a small discount for paying in advance.
By the way, completely cleaning out and vacating a space does have fringe benefits. In addition to all the magazines that went to the recycling facility, I also managed to sort and discard a lot of things that I otherwise might have put off. On "trash day" that first week of the project there were 5 large contractor bags full of stuff in addition to my usual household trash. I'm sure my garbage collection guy was thrilled. I will have to give him a bigger gift this Christmas.
Step 2 – Prepare for Demolition!
Before starting any demolition, a few preparatory steps are critical.
First, always make sure you know exactly which circuit breaker(s) impact the space. A little testing and labeling goes a long ways. An easy way to test circuit breakers in the basement and determine which outlets they control from two floors away is with a very loud radio.
Plug the radio into an outlet, crank up the volume, and with luck you can hear when you get the right breaker that cuts the power. Of course it is important in a house that was built with no apparent logic applied to wiring runs to make sure that every outlet in a room is indeed "off" when the identified breaker is off. It is also important to know what else in the house might be "off" when that breaker is off. Cutting the lights in one room could also turn off the refrigerator!
To be super-safe, use a proximity circuit tester to check for live wires even after shutting off the power. Strange things can happen, and you don't want to be on the shocking end of one of those strange things.
Second, before starting demolition, it is important to plan ahead for the disposal of materials. When I remodeled the other room upstairs I built a garbage slide connected to one of the windows. Everything was dumped out the window and slid to the ground below where I could easily move it to the rented dumpster. Unfortunately there was no place where a garbage slide would work on the other side of the house, so everything had to be carried down the stairs and out the front door… a hassle, but there really wasn't much choice. And since I spent money on a temporary off-site storage facility, I couldn't really afford to rent a dumpster. All the demolition material was loaded into my truck and whenever it was full I made a trip to the dump. The dump charges only a nominal fee per truckload, so in the end my extra exertions and hassle saved well over $500.
Third, before starting to tear out the walls, plan for temporary lighting. Up here in the far northern reaches of the country daylight is scarce most times of year and in the fall and winter there are precious few daylight hours. With the power off, work lights depend on long extension cords or battery power. I wound up using both.
The fourth and last preparatory step before demolition was figuring out how to keep the construction dust and debris out of the rest of the house, keep my curious kitties out of the work space, keep them from running out the door while I was schlepping out garbage or bringing in materials, and keep my spouse from kibitzing during the project (she has a frustrating tendency to "suggest" design changes mid-project). I call this step "workplace isolation."
Step 3 – Isolate The Workspace
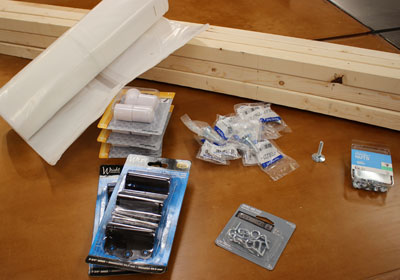
|
Figure 4 - Here is what you will need to build a temporary
access door.
|
A lot of contractors use sheets of plastic to seal off work areas. Whether taped to openings or stretched on specially made spring-loaded poles, the idea and net result is pretty much the same… it works pretty well to contain dust, but ingress and egress is difficult. I've tried zipper systems, overlapping layers of plastic, and even curtain-type systems, and each system takes time to get through and reseal.
Because we live in this house, and I needed frequent access to my computer and files, a dust separation barrier that would allow faster easier "in and out" movement would be preferable. So I built two temporary doors that were installed at convenient and logical points. Dust and dirt stays in, pets stay out, and access is convenient. Here's how to do it…
Temporary Isolation - Remodeling Access Door
To build the Remodeling Access Door, use cheap 2 X 2s from the big box store. The large "bunk" of 2 X 2s is made up of individually banded "bundles" of 9 sticks. Even if you don't think you will need 9 sticks, buy the whole banded bundle, otherwise they may turn to unworkable spaghetti by the time you get home with them. The banding keeps the 2 X 2s semi-straight. I had to build two Remodeling Access Doors, so I bought three bundles of 2 X 2s… there will be some totally unusable pieces, so don't be surprised!
|
Figure 5 - A board like this is unusable...
toss it, don't even try!
|

|
Figure 6 - Square the "factory" ends of the 2 X 2s before
cutting to length.
|
You will also need some 1/4"-20 elevator bolts and some threaded pronged inserts to match. Get a couple of packs of plastic chair tips that will fit over the large end of the elevator bolts. Some 6 mil or thicker plastic will cover the door and frame. Use a staple gun to attach the plastic with 1/4" staples. I used a 15 gauge angled finish nailer with 2-1/2" long nails to build the door and frame. Last, but not least, get some spring-loaded self-closing screen door hinges (I used 3 per door) and a screw hook and eye bolt to latch the door closed.
Measure the width and height of the space/opening where the temporary access door will be placed. If there is trim or baseboard protruding more than 3/4" into the space, allowances for that will need to be made during the construction of the door. Otherwise, don't worry about it.
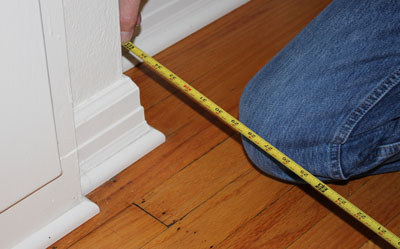
|
Figure 7 - Measure the opening carefully. If trim extends
more than 3/4", allowances will have to be made.
|
Start by making a little construction sketch. Here are the general guidelines:
-
Make the width of the doorframe ~1-1/2" narrower than the opening
-
Make the height of the doorframe ~3/4" less than the height of the opening
-
Plan for double vertical door frame members on the hinge side of the door
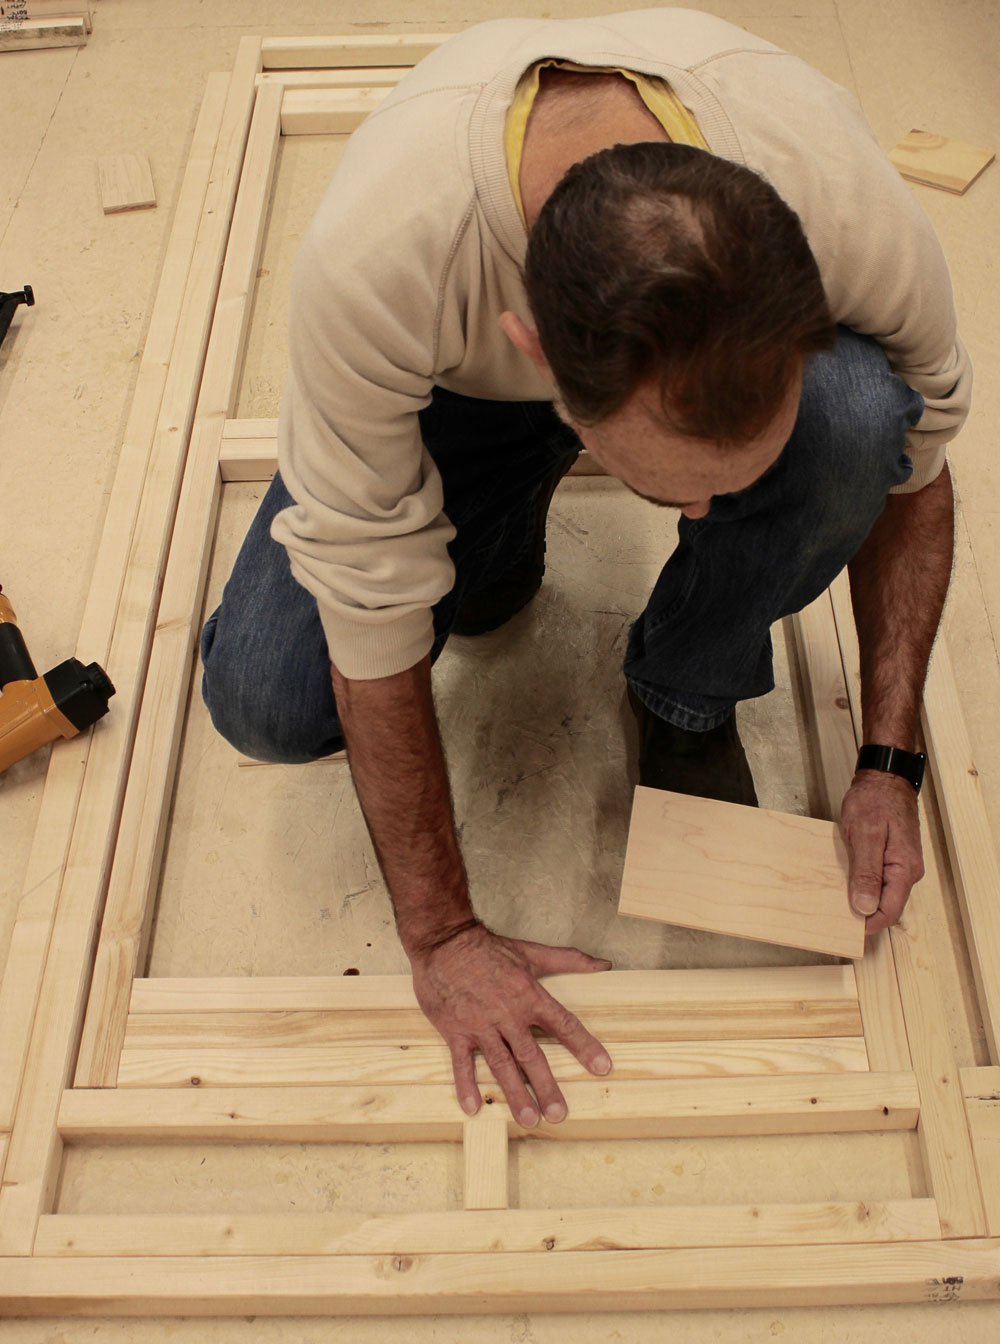
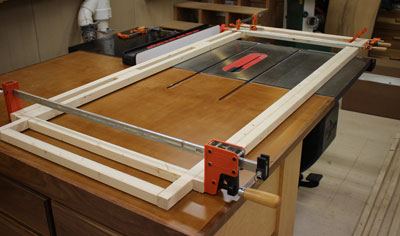
First cut the side vertical members of the doorframe to length. Make the horizontal pieces next, measuring and cutting as you go. You can do this on top of a work surface or on the floor. Use clamps to hold things together temporarily as you continue to measure, cut, and dry-fit the pieces.
After all the pieces are cut, assembly can start. I spread mine out on the floor so I would be able to take pictures more easily… if you have a workbench large enough, assemble it there… it is definitely easier on the back! You will want to assemble the door from the inside-out, meaning start by nailing together the innermost frame pieces first so that there is no need for toe-nailing. Use a framing square and get the assembly as square as possible.
|
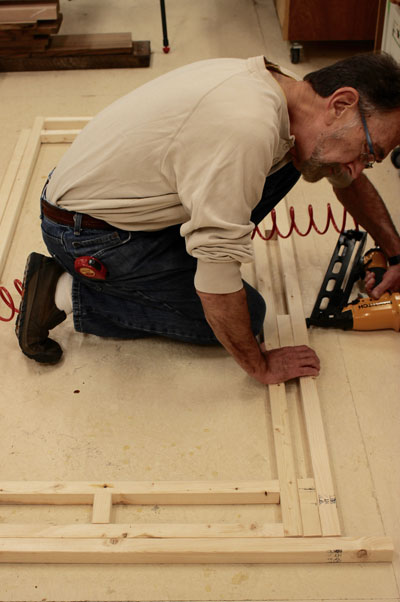
Figure 8 - Mock assemble the door frame, measure and cut
the pieces as you go... note the two outside
vertical pieces are cut short to accommodate the
baseboard trim.
|

|
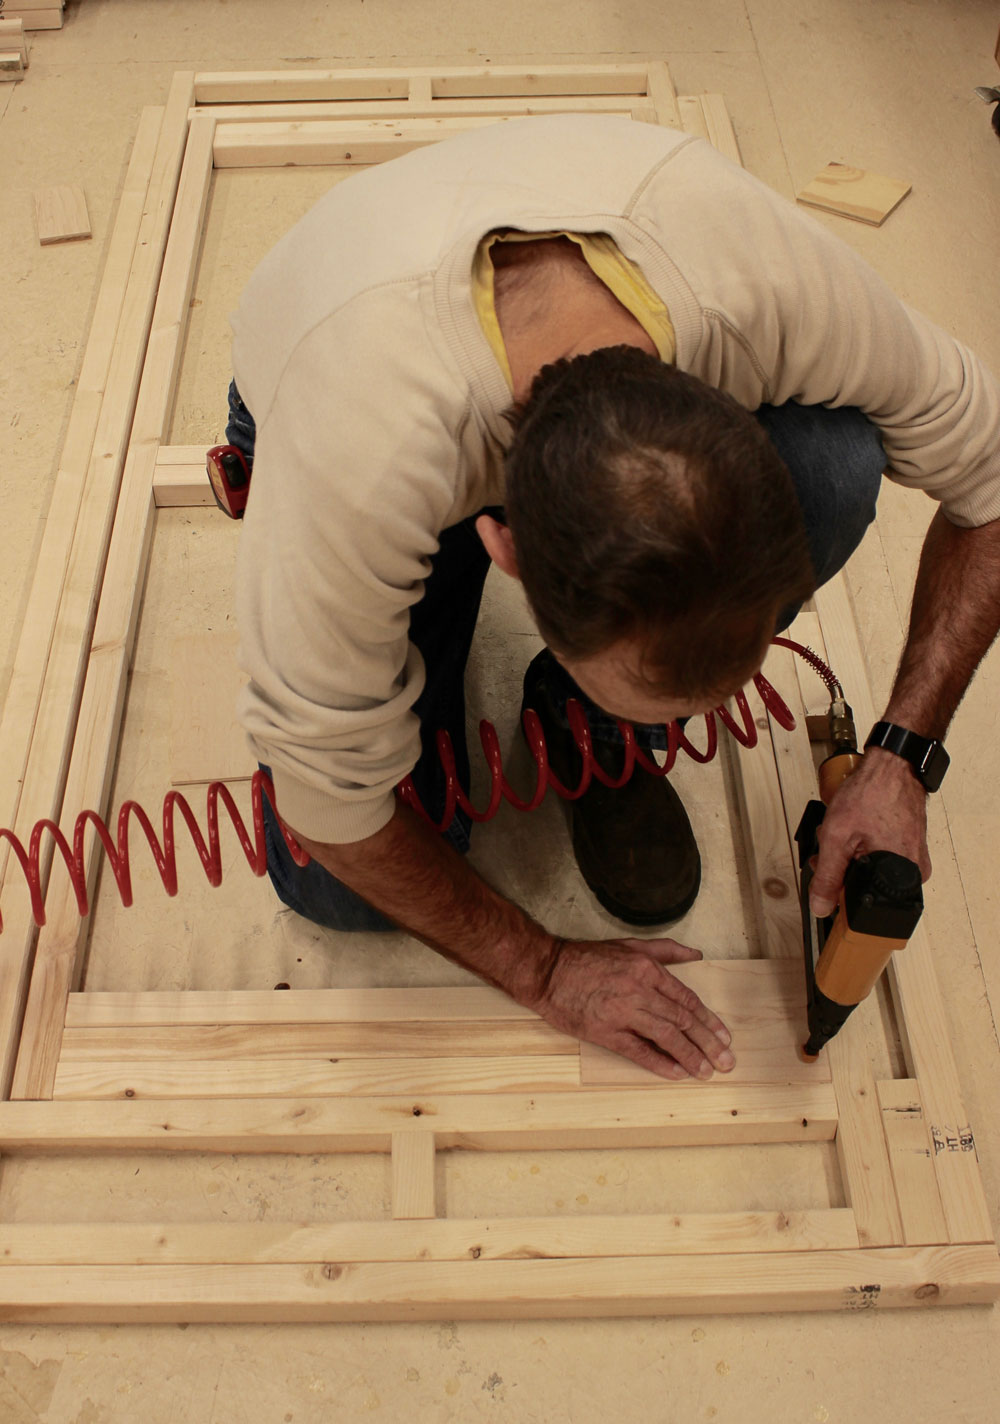
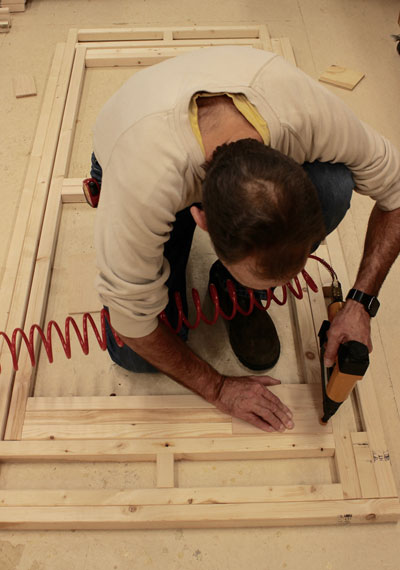
Figure 9 - Assemble from the inside out, squaring and
nailing as you go.
|
After the doorframe is assembled, measure the width and height of the opening. Subtract 1/2" from both the top-to-bottom and side-to-side measurements and the result is the size you want to build the door. Cut the pieces and lay them on the floor inside the frame, just like they will be assembled. Here is a little trick…
Before nailing anything together, pull the door pieces flush with one side of the opening and flush with either the bottom or top… in other words, mock up the door flush with one corner of the doorframe. If the doorframe opening is not perfectly square, this will cause the door to be made "out-of-square" to exactly match the doorframe.
|
|
Figure 10 - Nailing through a side piece into a spacer block.
|

|
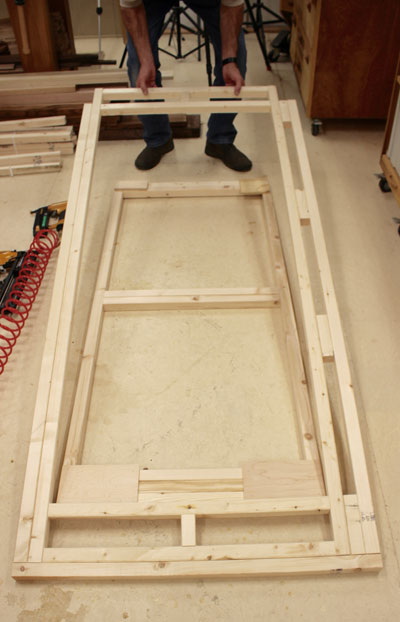
Figure 11 - Temporary gussets hold the door corners
together until they can be nailed.
|
Once the pieces are lined up perfectly, you really can't nail the door together because the doorframe is in the way, so here is another little trick. Grab 4 pieces of scrap 1/4" plywood and tack them onto all four corners of the door as temporary gussets. These gussets will hold the door pieces in position while you lift off the doorframe. Then you can nail everything together easily. Pop the gussets off, add a couple of center braces and one diagonal brace to limit door sagging and the door is finished.
|
Figure 12 - Tack the gussets into place with
short finishing nails.
|
|
|
Figure 13 - Lift off the frame and nail the door together.
|
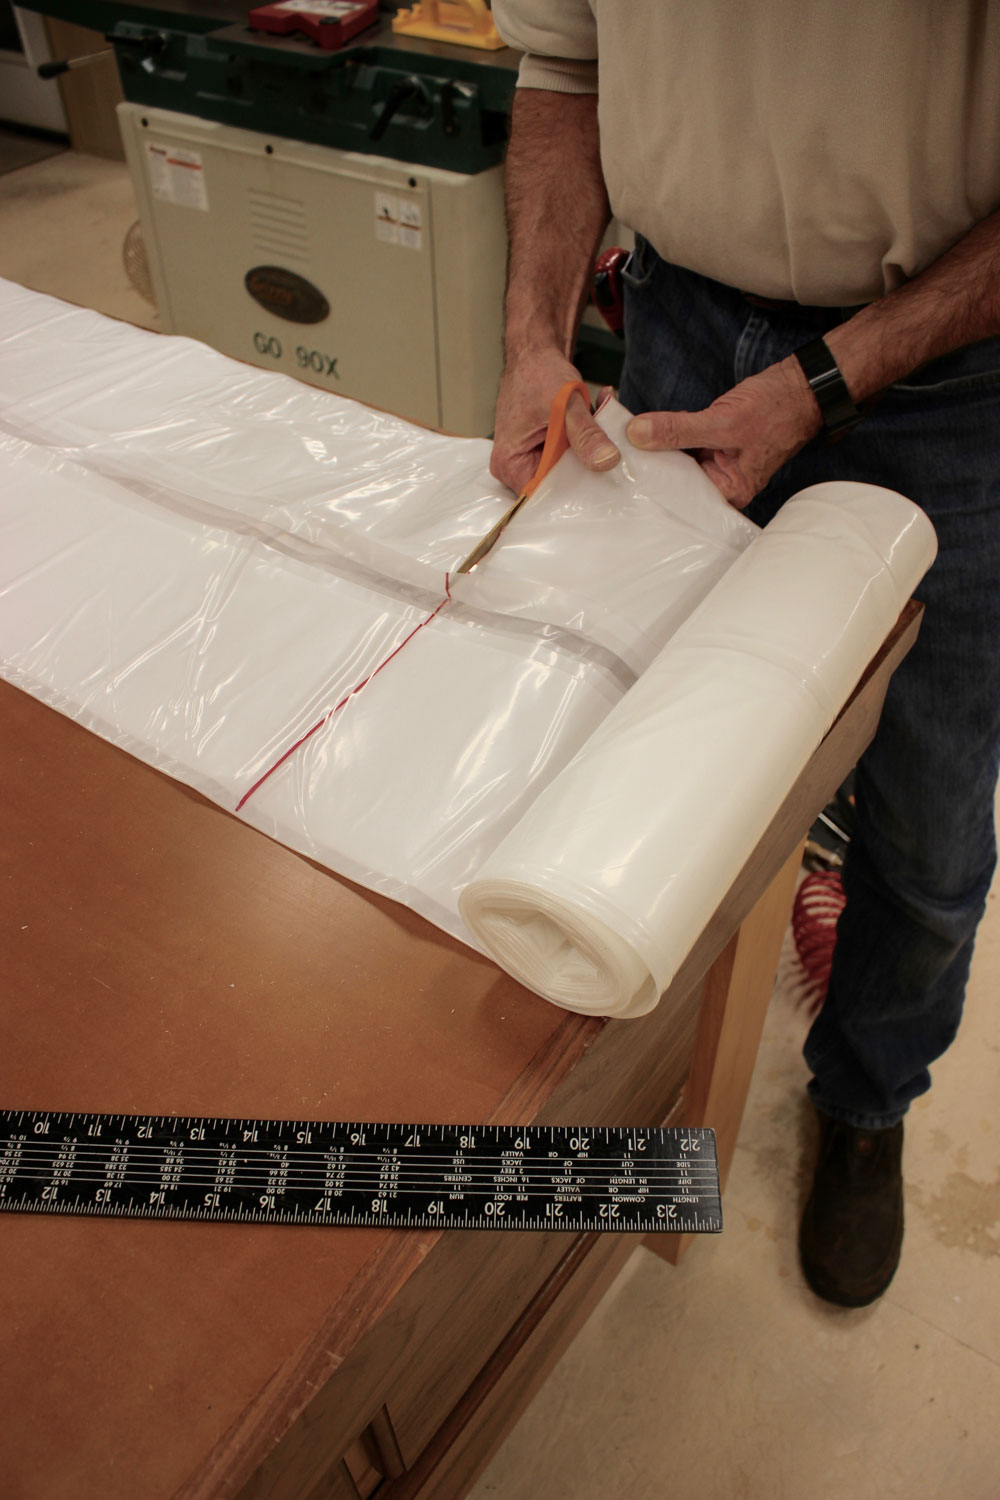
Using some scrap stock as shims, position the door inside the opening with an equal amount of space on all four sides. Use enough shims that the door will not move. The 6 mil plastic I used comes on a roll 10' X 25'. Unroll an amount equal to the width of the doorframe plus 6-inches, make a square mark, and cut the roll with a pair of scissors. You will wind up with a piece of plastic 10' long by the width you cut.

|
|
Figure 14 - Cut the plastic before unfolding... it is easier!
|
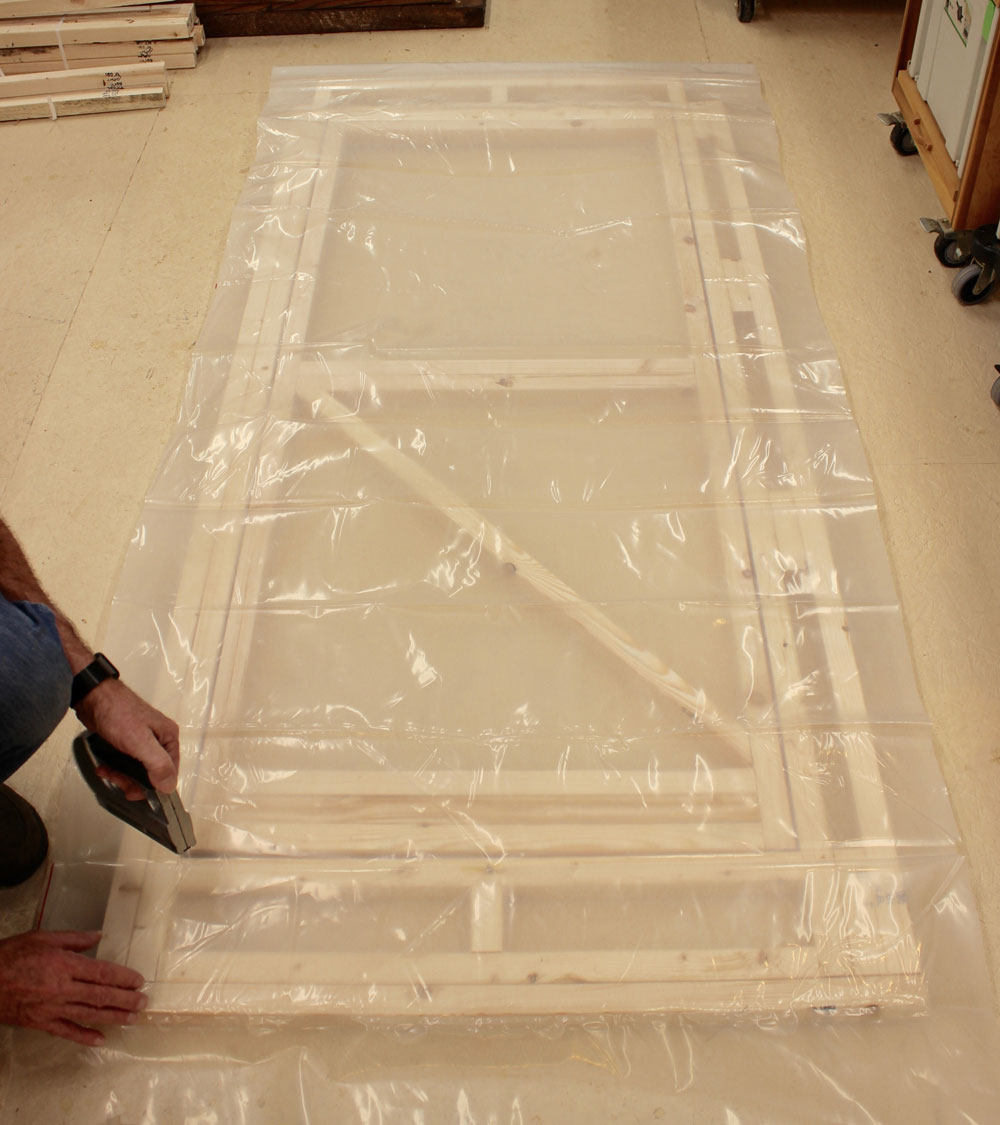
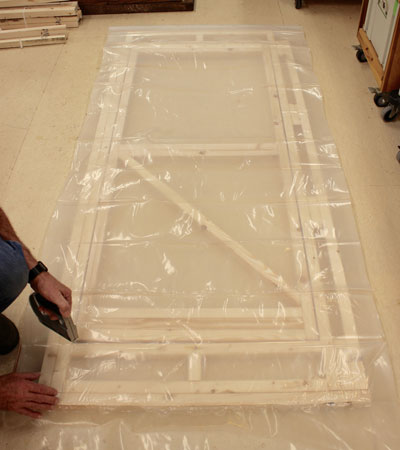
Unfold the plastic and place it over the entire assembly. Center the plastic so there is about 3-inches of overhang on both sides. Use staples to attach the plastic to the doorframe, the door, everywhere… use plenty of staples, this is no place to be stingy.
|
Figure 15 - Position the plastic so there is about 3 inches
of overhang on both sides and staple it...
lot's of staples!
|
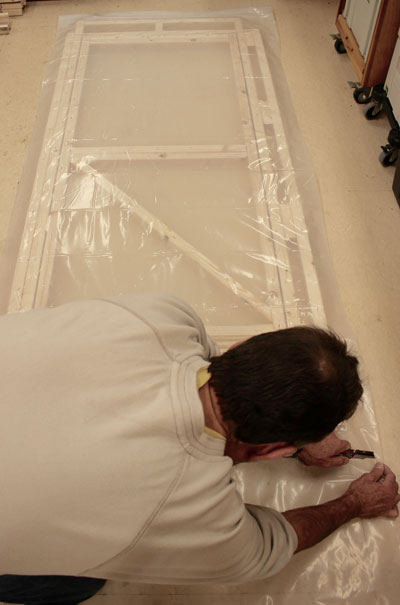
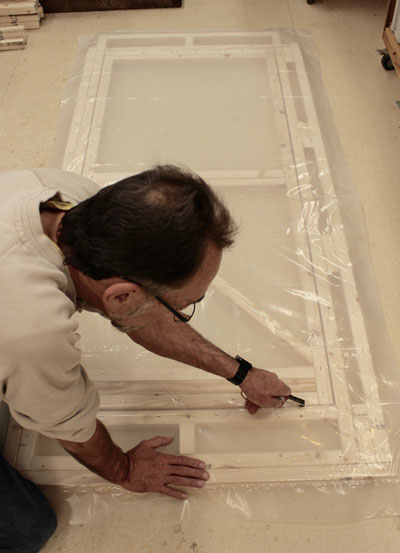
After the plastic is attached, trim off the excess top and bottom leaving the same 3-inches of overhang. Now (and only now), temporarily place the hinges approximately where they will be mounted, and then cut the plastic on the other three door sides. The plastic running between the doorframe and the door on the hinge side does not get cut!
|
Figure 16 - Trim the plastic, top and bottom, also leaving
about 3 inches of overhang.
|
|
Figure 17 - Cut the plastic between door and doorframe on
three sides... leave the hinge side uncut.
|
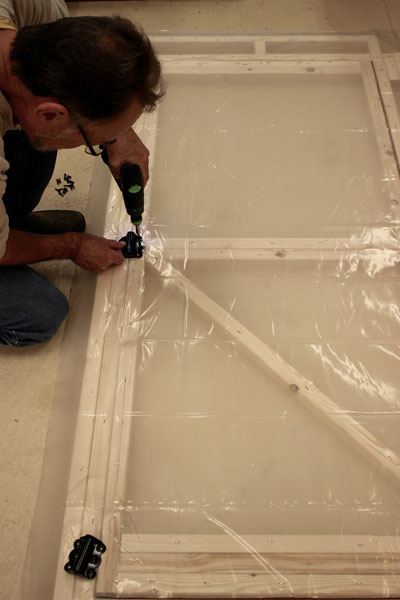
Remember those spacers? Remove them out now and gently pull the door up tight and flush to the hinge side of the doorframe. This will cause a little buckling and "looseness" in the plastic, exactly what is needed to allow the door to swing freely. Attach the hinges starting in the middle. After the hinges are attached, attach a scrap piece of plywood as a "door jamb" or "stop" – I keep calling it a "strike plate" which isn't exactly correct either. It keeps the door from swinging past a fully closed position. I glued a small piece of scrap to the top of the "strike plate" to use as a handle. I'm not really that cheap, I just forgot to buy a screen door handle and didn't want to make another trip to the store. The self-closing spring-loaded hinges are enough to keep the door closed, but I added a screen door hook just to be safe.
|
Figure 18 - Pull the door tight to the frame and attach the
hinges starting in the middle.
|

|
Figure 19 - A scrap of plywood stops the door flush with
the frame when shut.
|
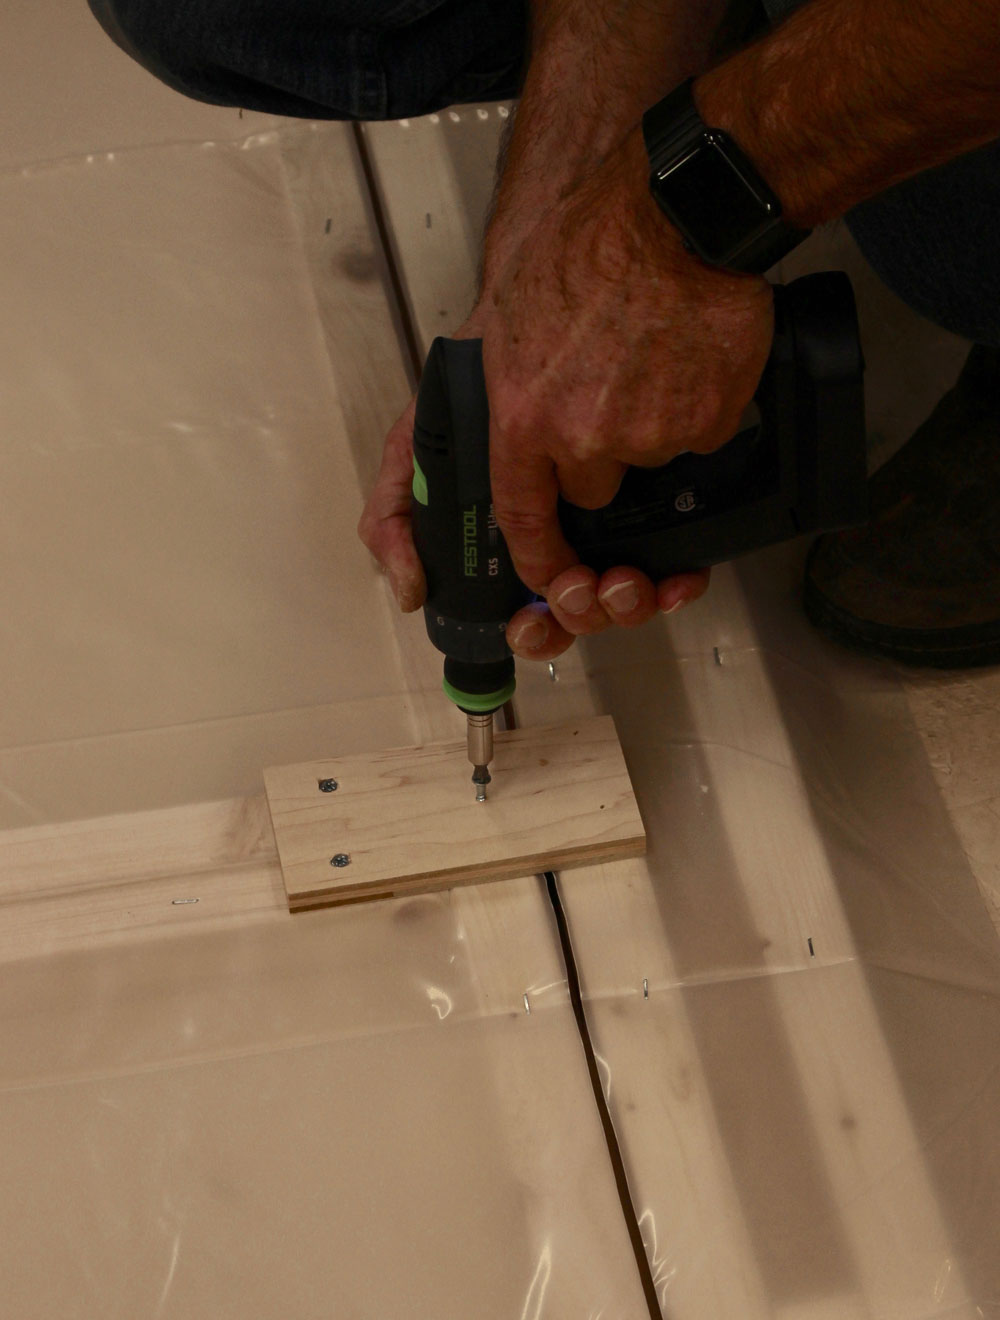
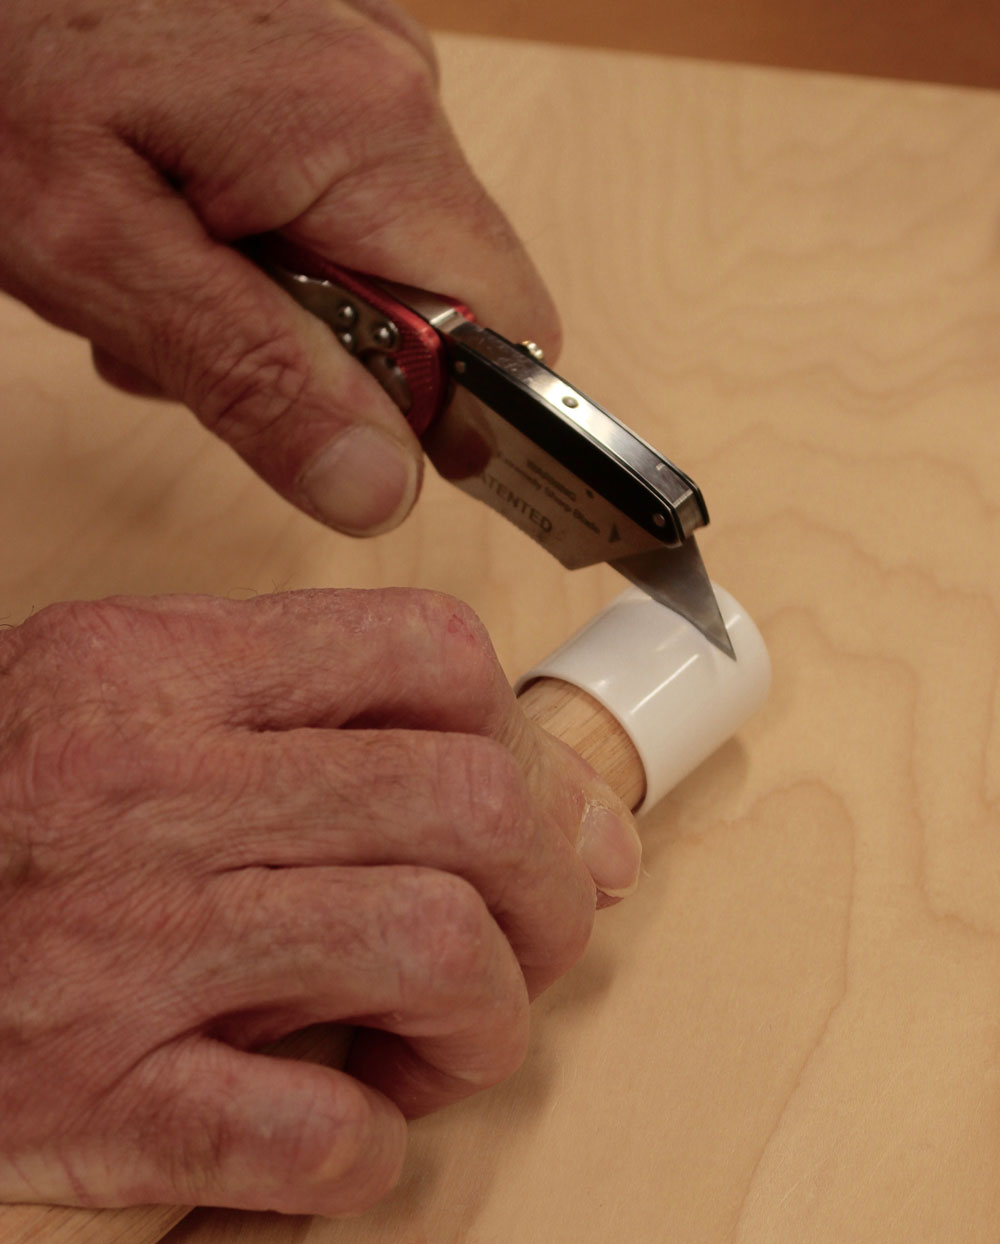
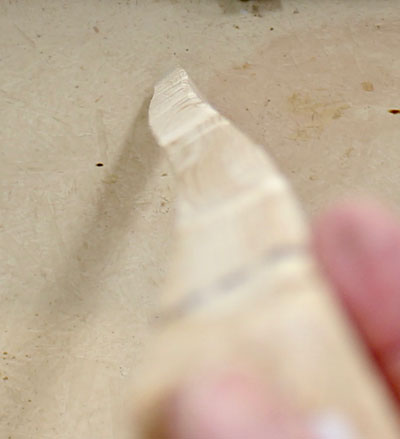
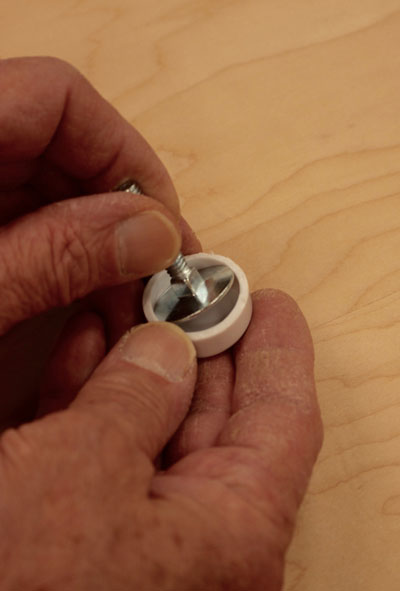
Perhaps while taking a well-deserved coffee break, take a few minutes and cut off the bottom one-half inch or so of six of the chair tips. An easy way to do it is to slip the chair tip over a dowel and use a sharp knife. Slip the shortened chair tips over the elevator bolts to form the basis of the mounting and wall tension adjustment system. To install these in the door, locate and drill 5/16" holes in both sides of the doorframe and in the top. Pound in the threaded pronged inserts. Thread the elevator bolts with the cut-off chair tips into the threaded inserts and the temporary access door is complete and ready to install.

|
Figure 20 - Cut off the bottom 1/2" or so of the chair tip
and...
|
|
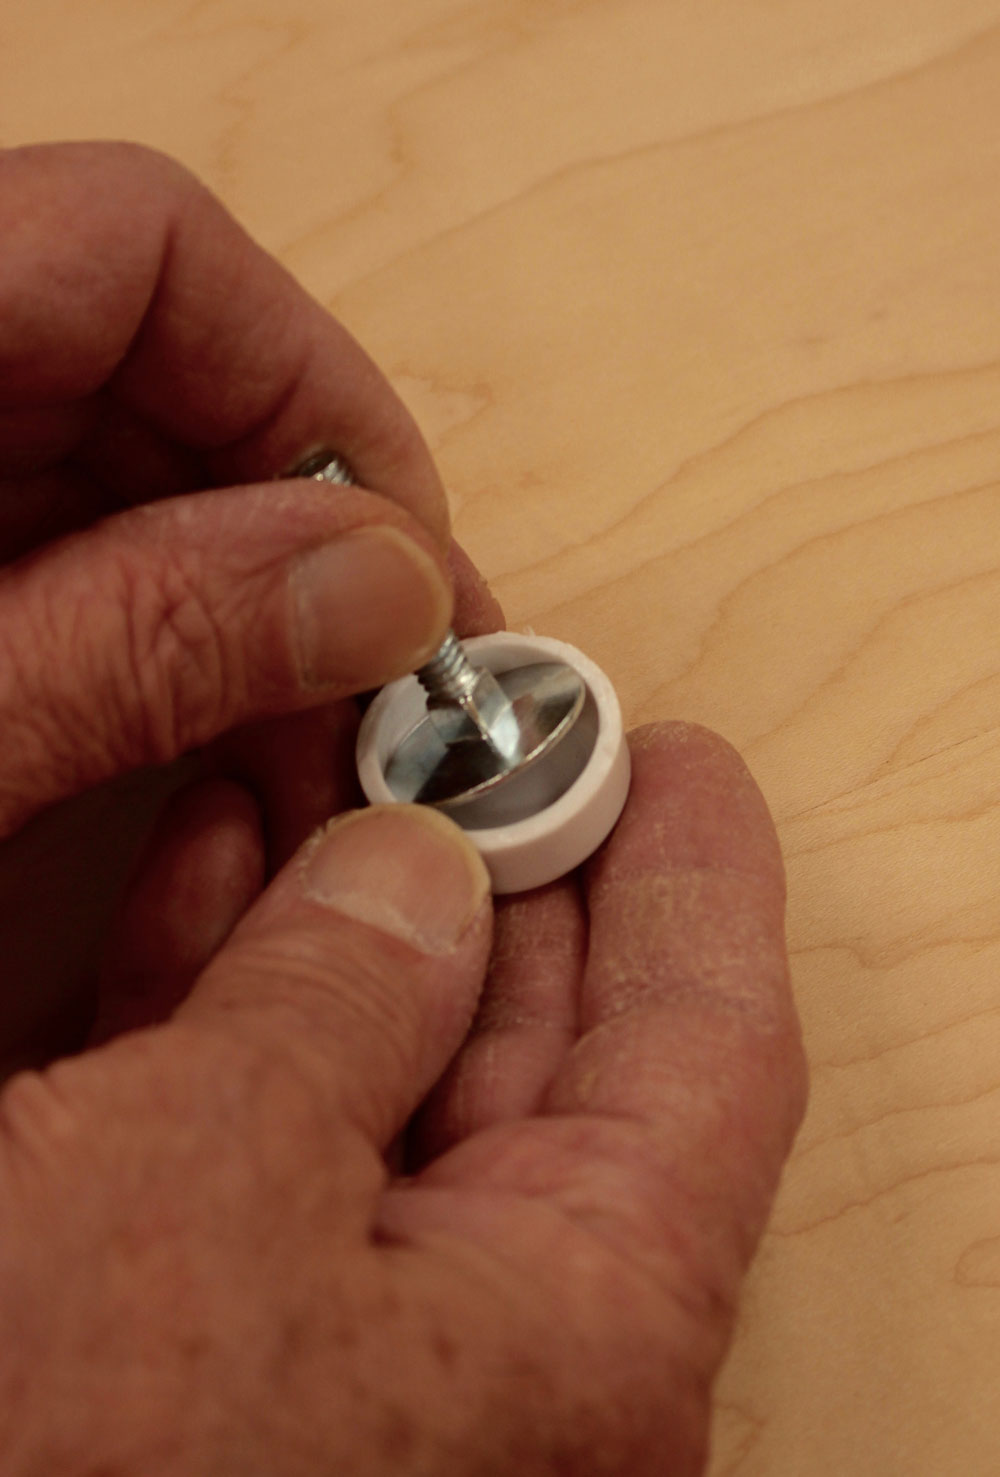
|
Figure 21 - ...place it over the elevator bolt.
|

|
Figure 22 - Drill a 5/16 hole 1" deep for each
threaded insert.
|

|
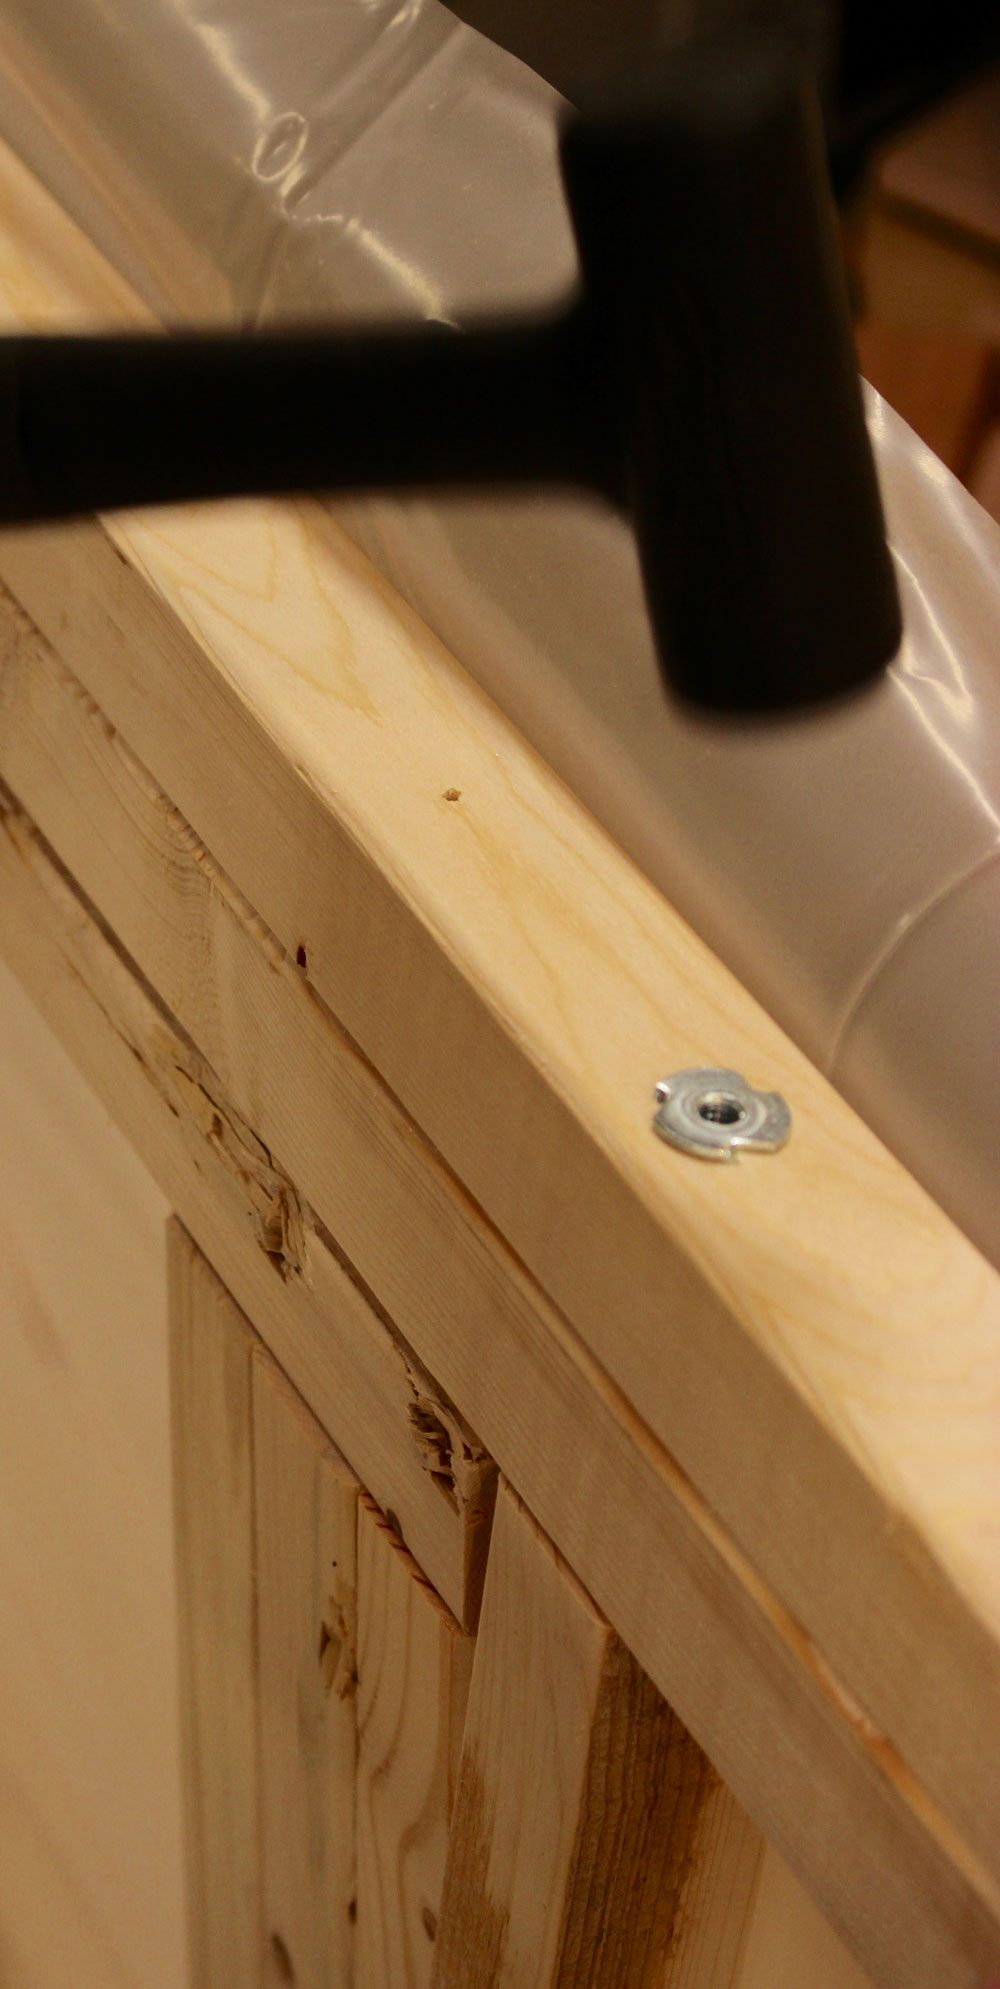
|
Figure 23 - Pound in the insert, no glue needed.
|
|
|
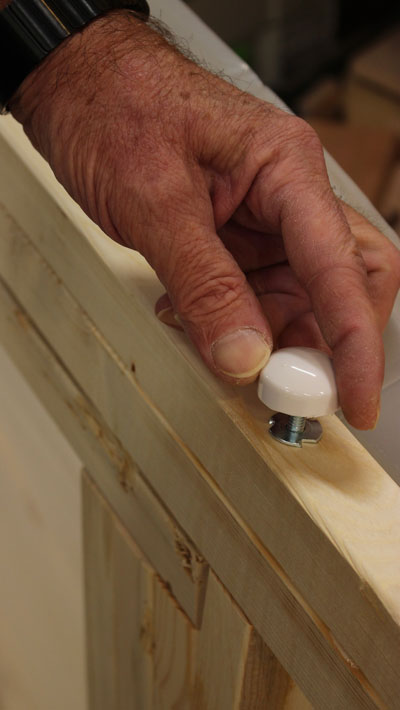
Figure 24 - "Tensioners" hold the temporary door in place.
|
Put something thin and soft on the floor… I like to use that non-slip stuff that goes under throw rugs… and place the doorframe and door assembly into the opening. Tighten the elevator bolts against the wall or opening and ceiling. The 3" overlap left on the plastic can be taped to the walls with painter's tape for a true seal, or they can just be left lying against the wall… the 6 mil plastic is thick enough that it will stay against the wall by itself.
A Remodeling Access Door allows "hands free" access, is self-closing, and provides an excellent dust and dirt separation barrier between your project and the rest of the house. Mine took less than two hours to build and install and beats a plastic curtain, hands down. Try it out!
Step 4 – Demolition!
Finally, the fun part! Next month some tips and tricks that make any demolition go a little more smoothly and the post-demo cleanup easier.
(Page 1 of 4)
1
2
3
4
Next Page
Return to
Wood News
front page