A Beginner's Approach to Making a Workbench
by Max Pierson
San Francisco, CA
Click on any picture to see a larger version.
CLICK HERE
for a downloadable plan of this workbench.
I'm a beginning woodworker. Like you, I want to make things, beautiful and functional things
that will last. And like a lot of beginners, one of the first big projects I tackled was a workbench,
because everything is easier when you have a sturdy horizontal surface to work on. In the
ensuing years, I've used that workbench for dozens of projects and improved my woodworking
skills considerably. I'm publishing the plans for this bench for your downloading enjoyment, so
this article is more intended as a collection of helpful tips and lessons learned than a
step-by-step.
But let's pause for a second and talk about money. Maybe you're Scrooge McDuck swimming
in your ocean of coins and this isn't an issue for you but for me, I have a limited budget that I
can devote to this hobby, and at times I've felt a little paralyzed about where best to spend it--
there's a large amount of advice out there relative to my limited experience and it's easy to get
stuck in a loop of reading and shopping rather than making and doing. So my advice to you on
this point is to buy a set of basics (saw, chisels, No. 4 plane, square, whetstone, clamp) and just
get started. Don't psych yourself out thinking that you need to buy the absolute best set of
chisels except that you don't have the money for the best set of chisels so you'll have to wait
for next month, because that's exactly how to never get started. Buy the set of chisels you can
afford today.
|
The best way to improve your dovetail technique
is to cut dovetails.
|
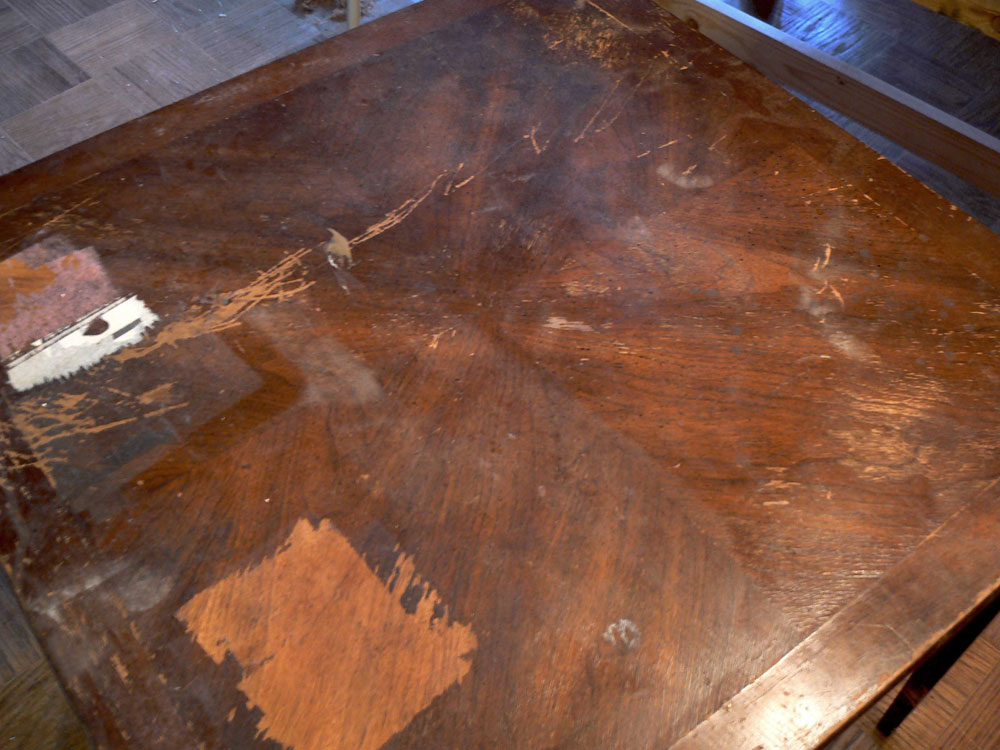
OUR STORY BEGINS.So I used to live in Los Angeles in this comically tiny studio apartment. There, I
did all my projects on a 3' x 3' table, which was also my only table. I ate out a lot. Here it is in
the middle of an electronics project.

|
|
The bachelor years.
|
Over time this table, which was never exactly heirloom quality to begin with, became so
covered with assorted gobs of solder/paint/glue, burn marks (both thermal and chemical), and
power tool 'Oops' events, as to be only an article of furniture by virtue of its horizontality.
Eventually, I took a new job in Portland, and suddenly my furniture was swimming in all the
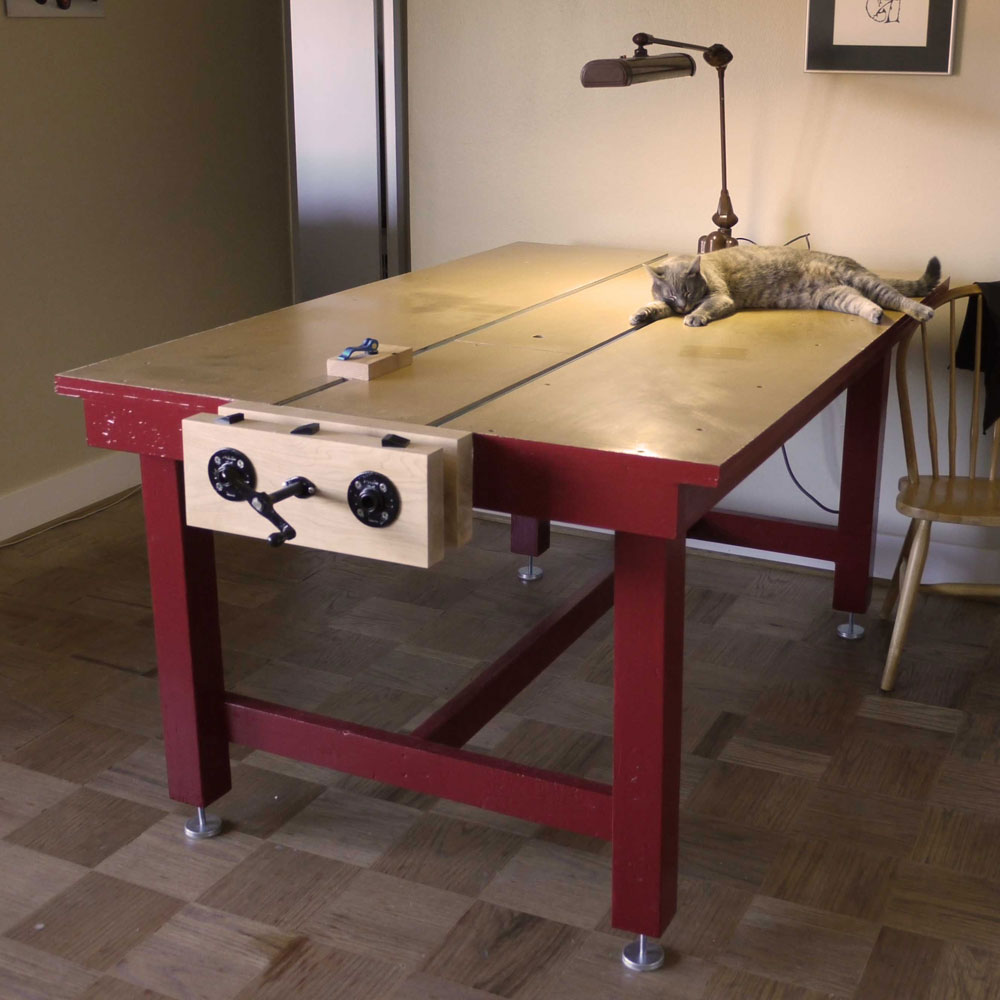
space that my new apartment afforded. I decided that I wanted a proper workbench, with
room for cat storage and a soldering iron. Something sturdy enough that it wouldn't jump
around when I used power tools, with storage for all the little necessaries like sharpies...
The plans for this bench are downloadable
, although you can and should customize it for your
needs. The top is a frame of 2x4 with a layer of 3/4" plywood and a layer of 3/4" MDF on top of
that. The base is yellow pine 2x4 and 4x4 assembled with a mortise-and-tenon construction.
The top and base are structurally independent of each other so that I can detach them and
move them separately, which is important for an apartment dweller.
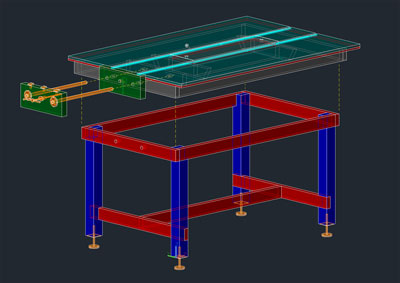
|
Isometric showing how the base and top can be
separated for transit.
|
If you're wondering, the feet are McMaster part #62805K42, at $5 each, which are large and
stable and have soft, non-marking pads. However you go about it, make sure you have a way to
correct for non-level floors, because fun fact about floors: most of them aren't very level!
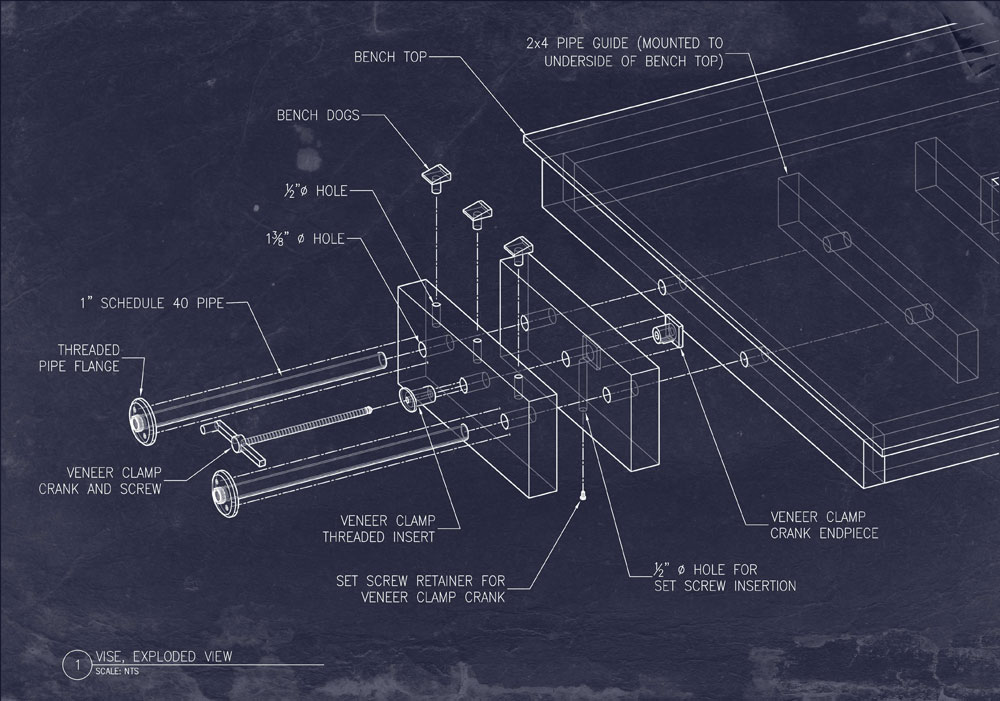
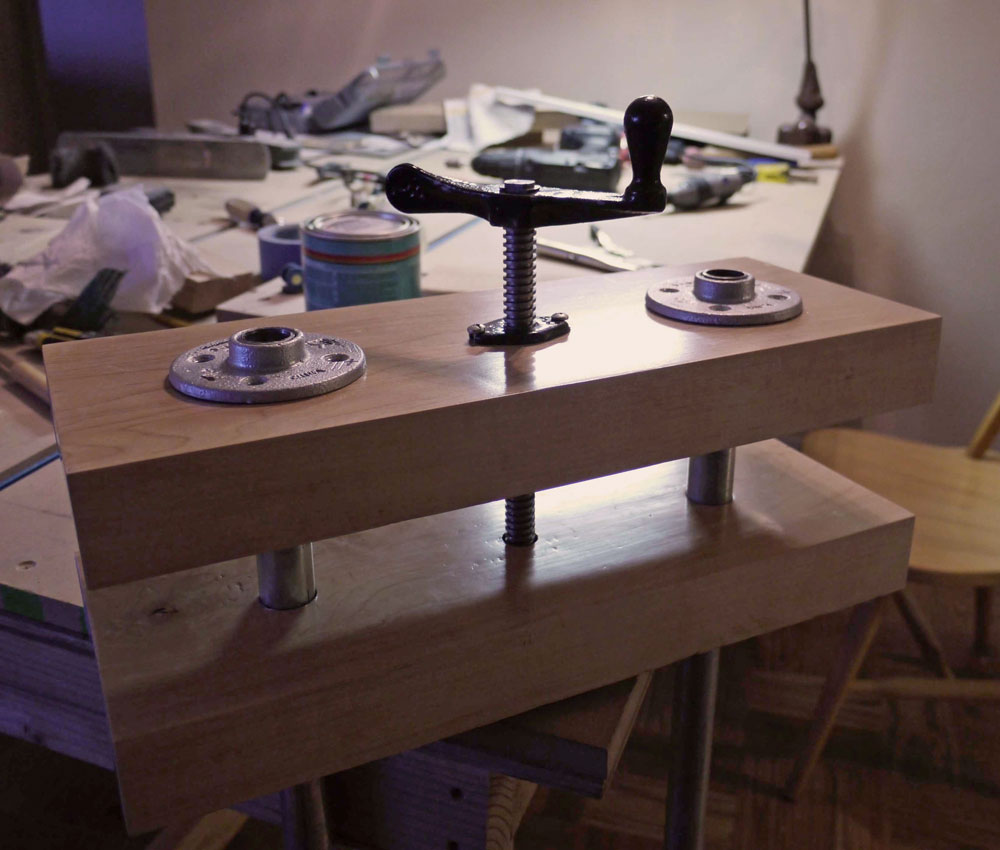
As we know, woodworking vises are expensive. This is an area where you won't regret
spending money if you've got it, but I didn't at the time. I made one from a veneer clamp
($15), plus two pieces of pipe and threaded flanges ($25). The vise material itself should be soft
to avoid marking up the workpiece, and inexpensive because it's going to take a beating. Pine,
MDF, or plywood all work great. It has a lot more backlash than a high-end woodworking vise,
but I've been using it for five years now and haven't felt the need to upgrade
|
Block with quick-release cam in upper right. I haven't
used this as much as I thought I would,
mainly because
I tend to forget that I have it.
|
Since it's not a quick-release model, I built the quick-release into the bench side by insetting
some metal track with quick-release cams. The tracks tend to fill up with debris, but when I
need it it's really handy.
|
Quick-access cavity with square, diamond stone,
marking gauge, oil rag can...
|
One feature that I would definitely recommend is incorporating quick-access storage into your
design. In mine, I have a cavity in the top that's 24" long, 8" wide, and 5" deep. I made a cover
for it but I rarely use it. I keep my sharpening supplies, carpenters square, pencils, bottle
opener, the things that you're going to need in any work session. I planned on adding cabinets
and shelves below the bench to add some additional tools and material storage later, and I'm
now doing this-- leaving yourself room to add things later is a good way to get essential
functionality now while not compromising yourself down the road.
Okay, now let's talk about what I learned from making this workbench. In general, it's been
very functional for all of my projects (I do electronics and art stuff in addition to woodworking).
Firstly, I'm really glad that I went the cheap route on materials, because it allowed me to
experiment with what I need from a workspace and improve my skills without making a huge
investment. What follows is some observations about what I wish I had done differently:
-
Size: I originally made the bench 48" wide because I had a large enough space that I
could walk around all sides of the bench. But really, 30" of depth is plenty-- the
additional space tends to just get cluttered. I had designed the frame to fit through a
30" doorframe, but when it wouldn't fit into my San Francisco apartment with it's 29"
doorframes I took the 'opportunity' to cut the width down some. Similarly, I built mine
to 6' length, but I can't think of a time when a 5' length wouldn't have been adequate.
-
Height: I'm 5'-11" and a comfortable workspace height for me is 38". There are some
recommendations out there for lower heights, but I want to be able to work without
bending over and keep my spine straight. Also, get yourself a nice cushion mat to stand
on so you don't end up with plantar fasciitis, like me.
-
I thought having the vise centered to the end of the bench would give me more
flexibility, but I was wrong about that. If you can't have the vise run full width of the
end of the bench, put it at the corner. Maybe that should have been obvious because
it's the design of every single workbench you see.
-
Really consider whether you want to spend a lot of time and money on a nice hardwood
top, because after five years of heavy use mine looks like the surface of the moon. I
work with chemicals and solvents a lot so I might be an extreme case, but plywood is
inexpensive and easily replaceable.
-
Leave yourself room to add storage. The number of tools you own will not decrease.
And that's it! Hope this was helpful and good luck in your projects!
CLICK HERE
for a downloadable plan of this workbench.
Max would be happy to answer any questions by email at
maxpierson@gmail.com
. You can also visit his website at
www.maxpierson.me
Return to
Wood News
front page