by Steven D. Johnson
Racine, Wisconsin
(Page 4 of 5)
Previous Page
1
2
3
4
5
Next Page
The Twist and Turns Of Wood
Click on any picture to see a larger version.
As we planned and prepared for taking a fork in the road to a new life, I lost a lot of valuable woodworking and remodeling time, but I'm back in the saddle again, working hard and making things. The bathroom remodeling and dual vanity cabinet projects are both moving along and the
video released this week
shows the completion of the large vanity cabinet, ready for making doors and drawers. In the mid-month video, coming in about two weeks (be on the lookout), I am taking a little detour from the project itself, and exploring the (literal) twists and turns of rough cut lumber.
For some the process of converting big, dirty, crooked, knotty lumber into project-ready beautiful boards is tedious and boring. Not to me. Like driving around, taking new directions and unmarked roads, I look forward to the hidden beauty and mystery locked inside every timber.
The process of turning a rough, crooked, twisted, cupped, cracked, or otherwise less-than-perfect piece of wood into usable, stable, beautiful lumber has been documented countless times, but the actual in-practice process is as personal and different as each individual board.
The soon-to-be-released video documents the steps for rendering three very rough air-dried, highly seasoned, and dirty walnut slabs into lumber stable enough to form the core of doors that will have to survive in the humid environment of a bathroom without warping. Each of the boards was unique, and with each there were subtleties in the milling operation necessary to achieve maximum yield and maximum stability. The video covers the process in detail, but if you are new to milling rough cut lumber, or simply want to compare my process to your own, here are the general steps I follow:
1. Visual Inspection
Some woodworkers skip over this first important step and grab boards, fire up the jointer, and start flattening the face of a board. A thorough visual inspection beforehand, however, can save a lot of time later.
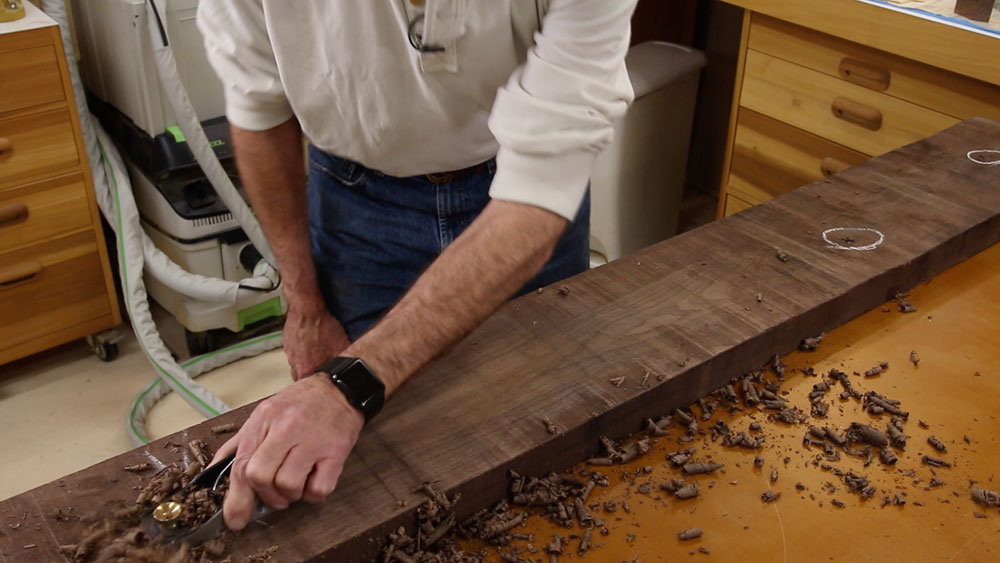
Inspect the board for visible defects. Knots, missing chunks, cracks and "punky" areas are pretty easy to see. Take a look at grain patterns and visualize from where in the log the board was cut. If the grain is obscured by dirt, discoloration, or age, use a block plane to scrape away the surface layer.

|
Figure 6 - Use a block plane to scrape off the surface
and make grain more visible

|
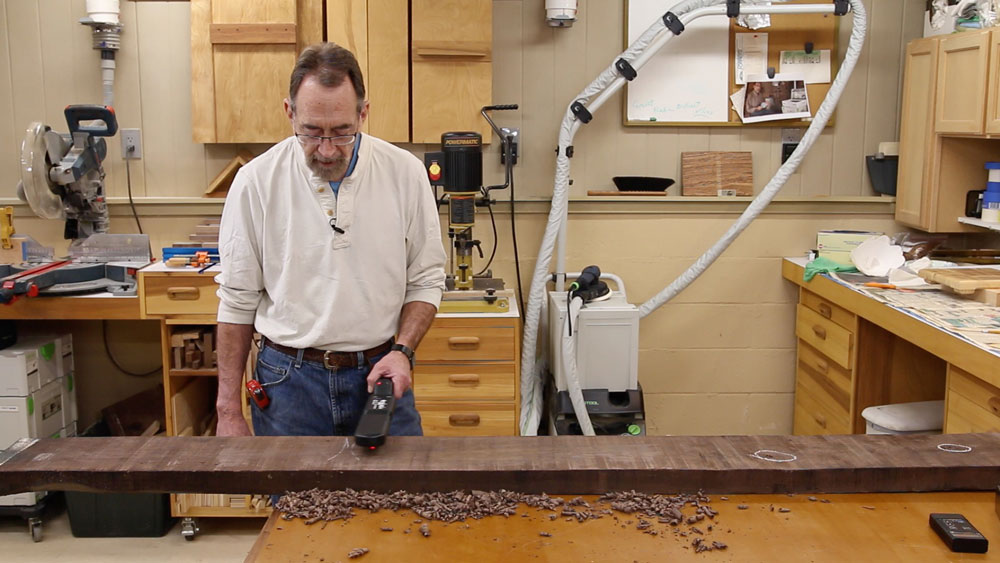
Next, inspect for invisible defects. A high-quality metal detector is a tool that will pay for itself many times over. Find just one saw blade-wrecking bit of barbed wire, a nail, or a bullet and the blade you save pays for the metal detector.

|
|
Figure 7 - A metal detector is essential if you mill lumber

|
Using chalk, note on the surface of the board the crook, cup, twist or bow in the board, and decide now which face will be the first to be jointed, and which edge will be made straight. You can change your mind later, but make a general milling plan now.
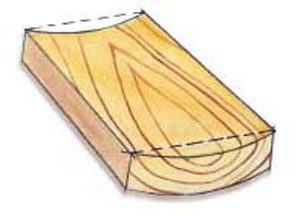
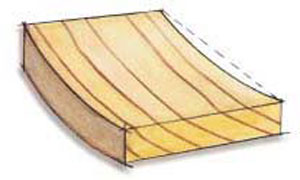
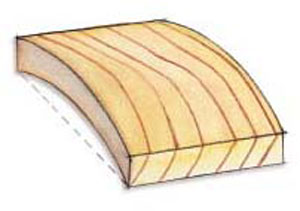
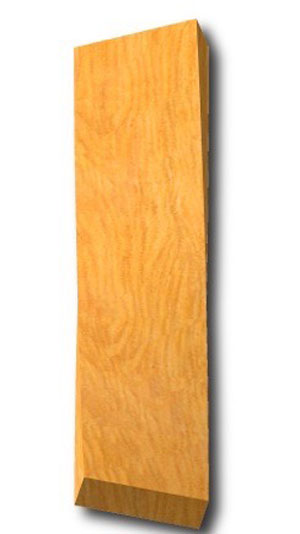
It is helpful to learn the common nomenclature for warped lumber. "Cup" refers to a board that has curved across its face, and is one of the more common "defects" in wood. "Bow" refers to a curve along the length of a board relative to its face side. "Crook" is a curve along the edge of a board, and "Twist" indicates a board that has done what its name implies. Lay a board's face on a flat table, and if two diagonally opposite corners are touching the table and the board rocks, it is "twisted." Using chalk, write the primary "defect" right on each piece of wood. Note that I used the word "primary" referring to defects. Many boards will exhibit multiple defects. I've seen boards that were bowed, crooked, cupped, and twisted. Just note the most egregious of the defects.
|
|
Figure 8 - A "Cupped" board

|
|
|
Figure 9 - A "Bowed" board

|
|
|
Figure 10 - A "Crook" --- sometimes also called a "Spring"

|
|
Figure 11 - "Twist" is awful! This is obviously an
exaggerated drawing, but I've seen boards this bad!

|
The visual inspection is not finished, yet. Next try to get a rough idea of where your project parts might be taken from each board. Now is not the time to be overly frugal. Many a woodworking project has been spoiled by trying to use a piece of wood that should have never been used or at least never used where it was. Again, you can, and very well may, change your mind later, but it is good to sketch out the parts on the lumber now. Sketch them a little oversize. This pre-visualization and planning will also assure you don't get three-fourths of the way through milling your lumber only to find out you don't have enough. You really only want to go through the milling steps once.
Last, take a few moisture content readings, preferably in areas you cleaned up with the block plane. A high-end pinless meter like the
Lignomat D
I use is preferable. If the moisture content is not within a couple of points of the Equilibrium Moisture Content (EMC) in your geographic locale (typically 6% - 7%) then stop right now and get some different boards. Using wood with moisture content outside the EMC is inviting disappointment on any furniture piece.
2. Prep For Milling

|
|
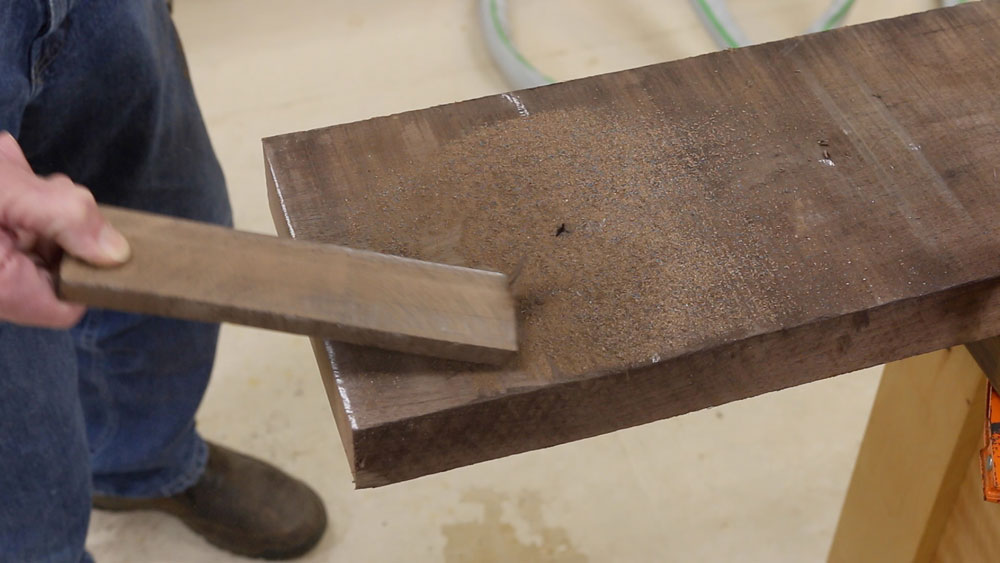
Figure 12 - Checking for "Checking"

|
We're still not ready to turn on the jointer. The ends of the boards are not useful. I don't need to mince words here… the ends never are any good. Cut off a bit of each end of each board. Tap each cutoff against a solid surface, and if the cutoff piece breaks, there is a "Check" in the board. Cut a little more off, and test again. Continue to cut the end of the board until the cutoff piece is solid and doesn't break when rapped against a table or another piece of wood.
These end cuts, by the way, need not be perfectly square or straight. The objective is to get to clean wood where the grain direction can be seen easily. Removing the ends of boards also lessens any "Crook" a board might have and can speed up the jointing process. I generally use a jigsaw to cut off the nasty ends of rough cut lumber because it is quick and safer than using the miter saw.
3. To The Jointer

|
|
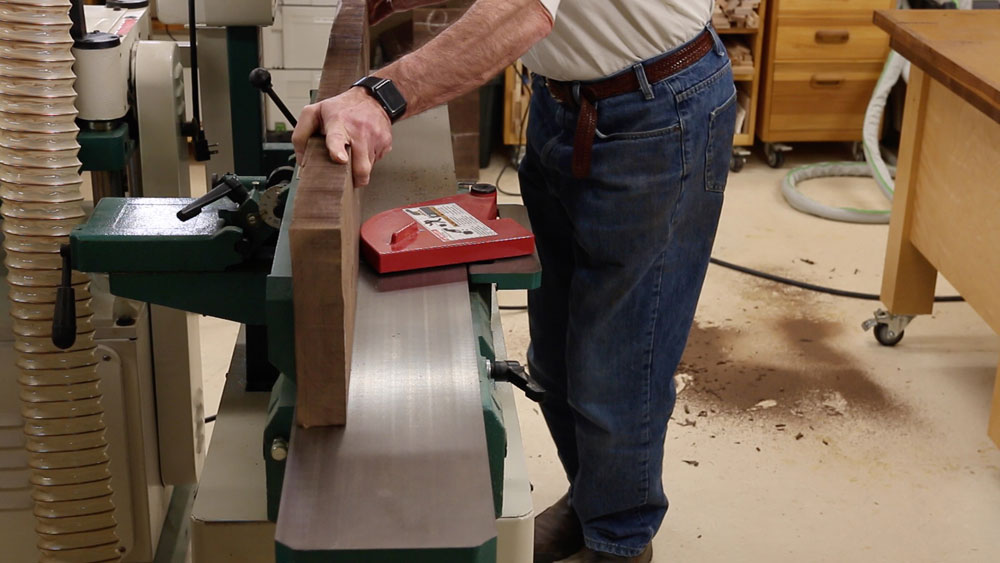
Figure 13 - Face first or edge first? It depends...

|
Generally accepted practice is to mill one face of each board first. I don't always do that, however. Since I have already determined, through the visual inspection, which edge of the board will be jointed, I sometimes "rough joint" one edge first. This "rough jointed" edge, of course, will not be perfectly square, since there is no square face on the board to reference to the jointer fence, but from a freshly jointed edge I can see the grain pattern clearly and best determine the feed direction when face jointing the board. This helps lessen tear-out in hard or tricky-grained woods. Whether you do it first or second, joint one face perfectly flat.
4. And Now The Waiting
If you are in a hurry to start on a project, you are inviting trouble. It is at this point in the milling process that impatience invites disaster. After milling one face perfectly flat, set the boards aside, milled face up, and wait. Wait a day at least, preferably a couple of days. With just this little bit of milling, you will have exposed fresh clean wood to the air, released some internal wood tensions, and disrupted the board's "steady-state" existence. After a few days, almost invariably, the face you perfectly flattened will not be perfectly flat, and you will need to make another pass (or two) through the jointer before proceeding.
5. To The Planer
With one relaxed and flat face, the planer is next. Set the height to barely "skip plane" the thickest board in your stack. Gradually increase the cut and plane each board to somewhere well north of the final thickness your project calls for. Just get the boards close. A good rule of thumb: as soon as the planer is making a clean full cut all the way across and the full length of the board, stop. Even if you are still a long ways from the finished thickness you want, stop! Stack and sticker the boards and wait… and wait… and wait.
If the boards I am milling are going into door frames, drawer sides, or any other critical locations, I may let partially milled lumber sit for several weeks before taking any additional steps. Wait as long as you can. You do have multiple projects underway in your shop, right? Other things you can work on?
6. Final Milling
After waiting as long as is practical, I prepare to finish milling lumber to the final size I need with yet another visual inspection. This is the time to determine whether the original plan for where parts would come out of each board is still valid or if changes need to be made. This is also the time to see if any movement has occurred in the boards. Have any twisted, bowed, or cupped?
If there has been movement in a board, it must be made square again. This is also the time to joint one edge perfectly square to the face. If you have the extra thickness to spare, leave your boards a little over-thick, just in case. If you own or have access to a drum sander, you can stack and sticker the boards, wait a couple of days, then run them through the drum sander. The boards should now be ready to use. Pay attention to grain direction, pick carefully, cut to size, and build your project confident that you have given the wood every conceivable chance of staying flat and straight for the life of the project you are building.
(Page 4 of 5)
Previous Page
1
2
3
4
5
Next Page
Return to
Wood News
front page