by Steven D. Johnson
Racine, Wisconsin
(Page 2 of 4)
Previous Page
1
2
3
4
Next Page
Cheese Plate
Click on any picture to see a larger version.
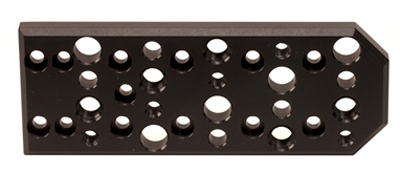
If you start making videos, one of the accessories you will likely run across is call a cheese plate. Essentially it is a metal plate with a gazillion tapped and threaded holes that will allow you to mount almost anything to almost anything. What I want to show you, though, is a real cheese plate… you know, for cutting, serving, and snacking on cheese. I do live in Wisconsin after all…
|
Figure 9 - Camera equipment cheese plate...
NOT what I'm talking about! It was just a segue
|
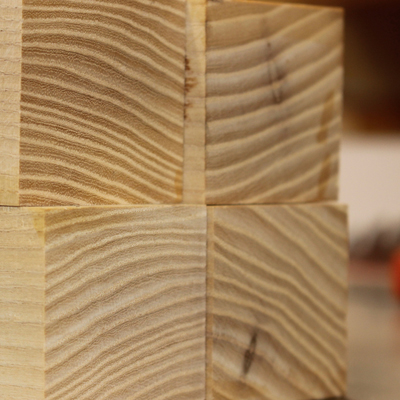
I sometimes get accused of being wasteful with wood. Cutting a single 2" wide by 12" long piece from a board 4 times as wide and three times as long does, at first glance, appear wasteful. But if that little section of a much larger board contains the perfect piece for a project, that's the piece I'm going for. It doesn't necessarily mean all that surrounding wood will go to waste.
A while back I built a couple of squat tables with extremely fat-at-the-top, thin-at-the-bottom tapered legs. The leg blanks needed to be close to 6" square at the tops. The only way to get the size and look I wanted for the legs was to glue up blanks. I used 4 pieces to make each blank, and made a total of 9 leg blanks… one spare in case I screwed up.
After the leg stock glue-ups were fully dry, I jointed and planed the blanks until they were perfectly square. One end of each leg blank was trimmed square, then the other end was cut to bring the leg blanks to their finished length. It turns out that for each leg blank I cut off about an inch-and-a-half. So I wound up with 9 little squares each made up of 4 pieces of wood. I didn't think much about those scraps, but they did have very interesting grain patterns when viewed from the end.
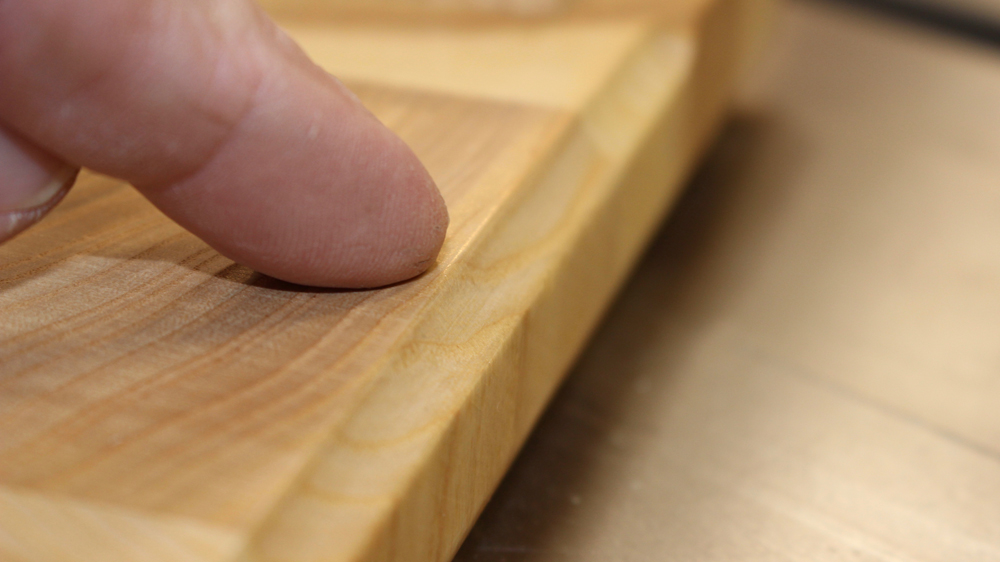
|
Figure 10 - After the leg stock was glued-up, the
ends were a little uneven... no problem, they were
going to get cut off anyway!
|
As I mentioned, wood never goes to waste in the Down To Earth Woodworking shop. Those interesting squares kept taunting and teasing me… they were just too "interesting" to throw away.

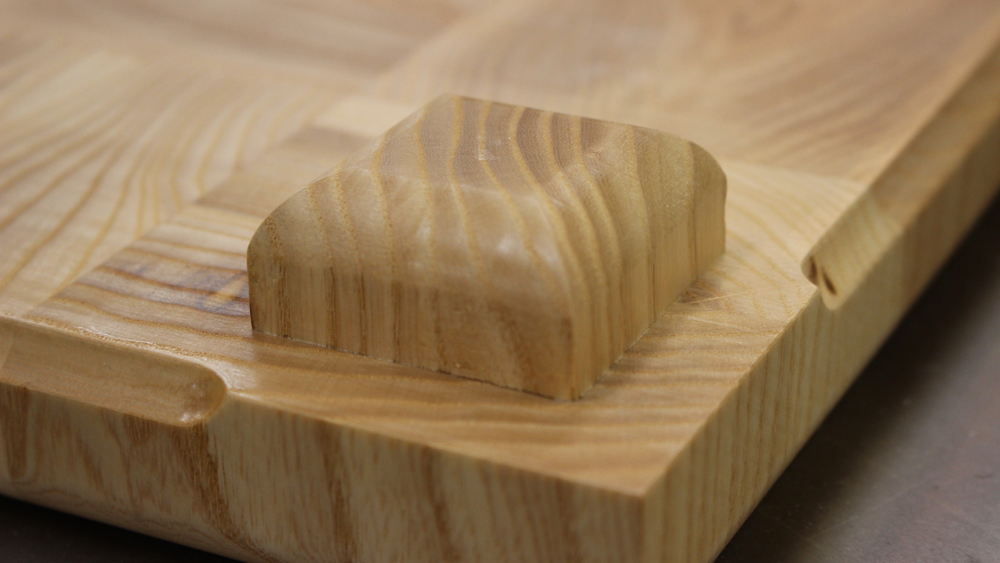
|
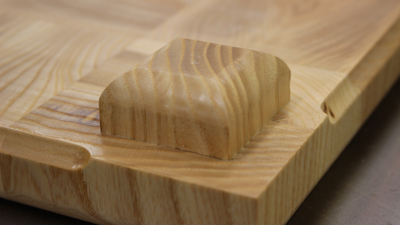
Figure 11 - A cove bit in the router table mills a
comfortable finger recess
|
The first thought I had was to plane them all to the exact same thickness, then mill a round depression into one face of each, finish them with some kind of polyurethane, and make drink coasters. Then one evening, sitting in a local pub, the server placed a slickly printed paper coaster on the table and served my drink. I looked at what I could no longer see… the covered coaster. I picked up my glass, picked up the coaster and thought, "That was a lot of money spent on marketing and printing for something that gets hidden by a glass!" Why would I want to take those very interesting wood squares, spend a lot of time applying a nice finish, then cover them with a beverage?
I pulled the squares out of a box of scrap wood (again) and tried to think of how I might use them… I pushed them around on my workbench like shuffling dominos (the game kind, not the Festool kind), arranging them into different shapes. Finally, the light bulb came on! Arranged in a square, they looked like a pretty interesting, but way too small, cutting board. But the size would be just right for a little serving board.
|
Figure 12 - More scrap pieces fashioned into
little bun feet
|
First the edges were glued together into a 3 X 3 pattern of 9 pieces. After the glue was dry, I had to figure out how to get all the cut-offs to the same thickness, level and smooth. The planer was not an option. There is just no way I could get a piece like that through the planer without a noisy semi-disaster likely involving kick-back and elevated adrenaline. Ultimately, I clamped the assembly to my workbench and went after it with a belt sander. That got the glued-up piece to a semi-consistent thickness. The drum sander then produced a consistent thickness and semi-smooth surface.
I used a roundover bit all around the top edge then used a cove bit to mill finger recesses on the bottom side edges. A nice little scrap of Ash gave me the idea for the feet. To make them I rounded over all four sides of one end of the square piece of wood, then at the band saw cut off about 1". This gave me one "foot." I then repeated the process of rounding over the edges, and cut off another 1" "foot." In just a few minutes I had four feet cut, shaped, and glued in place.
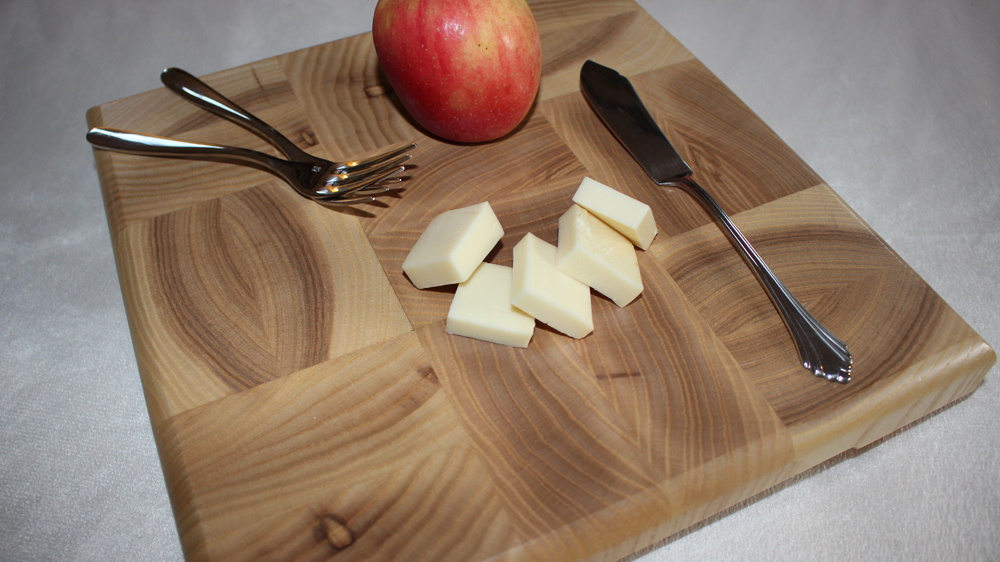
|
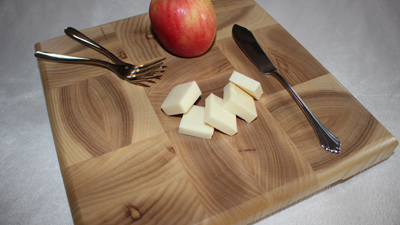
Figure 13 - A pretty little cheese plate from scrap wood.
Hey Jim, are you reading this???
|
Sanding a piece like this was a bit of a challenge since the grain runs in many directions. The
Festool ETS EC 150/3
with finer grits than I might normally have used turned out to be the perfect answer. The finer grits and small orbital pattern of the sander left a virtually invisible scratch pattern.
I applied a few coats of shellac with a drop or two of dark walnut TransTint dye mixed in just to seal the grain, add some color, and "pop" the grain. Later, I applied a polyurethane/oil finish. Remember, this is a "serving" board, not a "cutting" board.
This little "spare time" project reminded me, once again, no piece of wood is too small not to save!
(Page 2 of 4)
Previous Page
1
2
3
4
Next Page
Return to
Wood News
front page